For all of you who aren't unwilling to get down and dirty (and preferably have your ride out of warranty), here's how to spend (not) a bomb, have a good fun afternoon with the car, and do a DIY.
I tell you, if you do a DIY, you know that if anything goes wrong with THIS, I KNOW how to fix it.
So, ladies and gentlemen, and children of all ages, this is how to install drop-in projectors in your car.
(Full Thanks to BHPian Sameer for providing moral support, physical support and cameraman functionality!!)
Some background first.
I connected with a Mr. Rocky, working in VW south ext, via a quikr listing to install projectors.
This fellow was so customer centric, he asked the headlights to be dropped at the showroom, and then after a promised delivery of later in the day, told me it will take 2 days.
After some polite ruckus, he arrived with the lamps sealed and projectors installed at 11-12 in the night.
Spliced wires, left the ballast hanging(one of which failed in 3 days), used cello-tape and stopped answering calls.
Lamps started shaking in a week, and the cutoff rotated full 360 degs over time, corona controllers(the choke?like in home tube lights?) went one by one.
The lamps themselves were top notch quality, but the installation was disappointing, to say the least.
And then the killer. I went to a local installer and asked him to fix it up, and he told me that these are usually installed in bikes....

went home, and ordered a set off of DX, which I had been eying for some time.
these shipped without ballasts, but with 6k hids installed.
And then we waited, and waited, and waited, until after about 1.5-2 months later:


Step zero:

Step one:
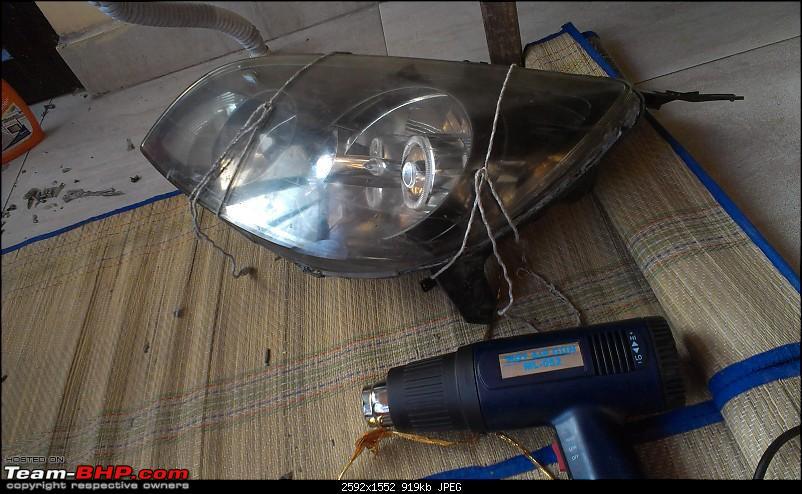
Open up the headlamps.
Grab a hot air gun(I got it off of ebay for 600 bucks, and it worked quite well. Blow on a corner of the headlamp to start off.
Once one separation occurs, its just a matter a gentle blowing on the edges and some tugging on the two parts, ie, the rear backing and the front clear lens.
keep a blade handy, and use it carefully.
Once separated, heat the remaining silicone sealant with the air gun and prise away.
On flat surfaces, you can use the blade to remove the sealant.
Oh,the box had some sealant in it, which I didn't like the look of, so I went and got a couple of tubes of Anabond.
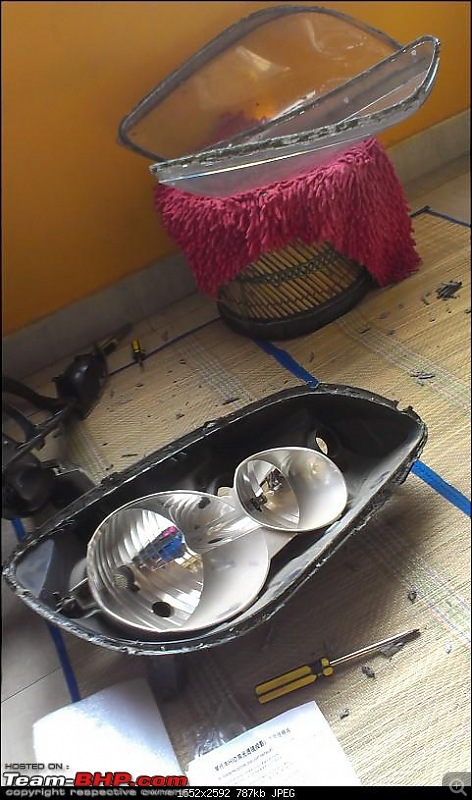
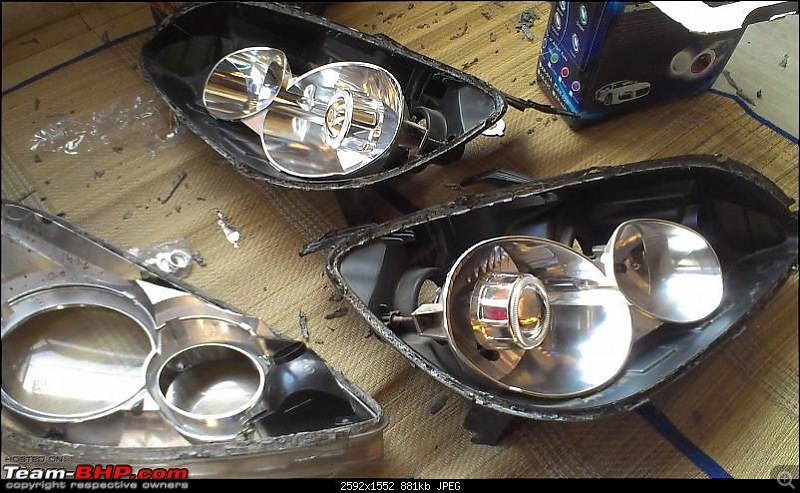
The projectors installed were also drop in ones. There was no cutting involved to install them.
The rear has a metal tube that screws on against the back of the headlamp, like so:

This one weighed about 300-400 g, which might be why it was knocking around so bad.
I have to say, its made quite beautifully.
The new one, is smaller, and only weighs about 200g, and also screwed in much tighter.


The projectors rear attaching tube has an aligning notch, which aligns to a set of adapters that came in the box, and are screwed in to the back of the headlight, ensuring you start clearing approaching aircraft for landing.
Mine, and presumably all headlight have a channel in the black part, where you pour in the sealant, and insert the edges of the clear bit.
Once you do, tie it up REAL tight for about 2 hours.
I left it for about 1 only, but just in case, I removed the strings post putting them on.

The projectors from DX had an interesting piece of equipment.
A splitter. Apparently this allows you to use one ballast for lamps.
Fantastic.
Maybe next time.
And finally, getting it on the car:


The coronas were a shock.
uh huh huh, what??????
But frankly, i was too tired and too happy with having everything work without even ONE hitch, that i didn't care.
I'll read up and see hot to fix them.
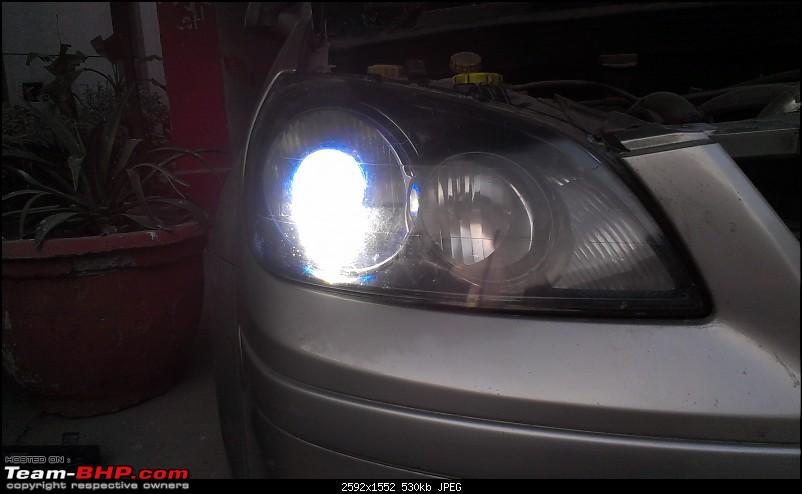
Here's the low beam:
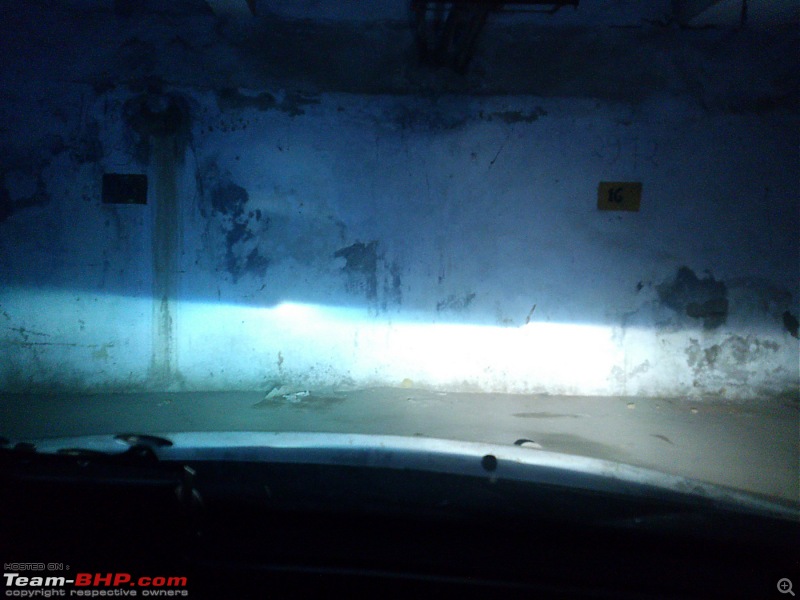
Cut off is approximately at 2-2.5 feet.
The lamps themselves needed to be twisted by about 1-2 degrees to align the edges parallel to the ground(About 5 seconds of work.)
Here's the high beam:
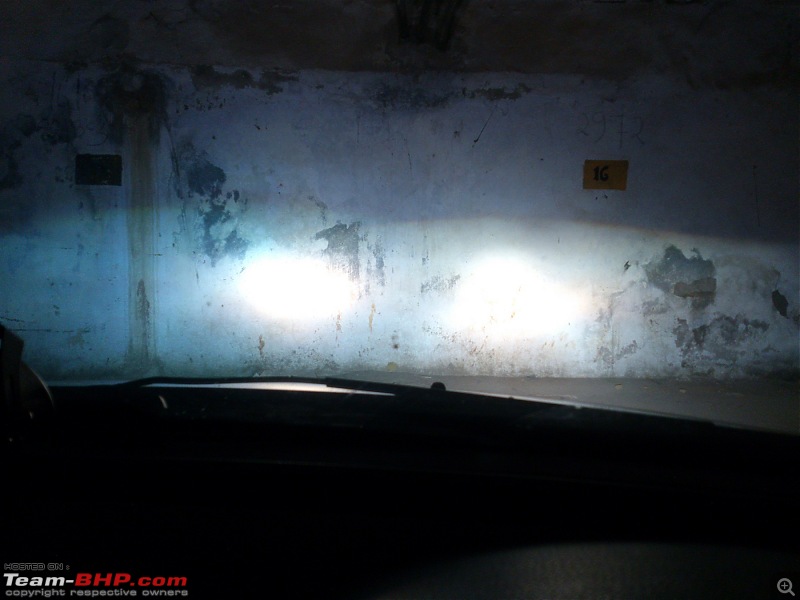
Cut off , at about 30 feet is about the height of a Ritz's roof.
The high beam is also connected to the regular high beam halogens, so woe be it to anyone who is coming on with high on!!
Costs, you ask.
Anabond: 40 bucks a tube
Projectors: 5700 bucks
Ballast : About 3k for the pair
Hot air gun : 600 bucks(?)
That's it.
The priceless bit was the satisfaction of a DIY.
Go on, Just do it already.
And there is NOTHING that you can mess up which cannot be fixed here.
(Some random pictures which lost context while typing, and weren't mentioned.)


 24th December 2012, 17:26


 (6)
Thanks
(6)
Thanks