Team-BHP
(
https://www.team-bhp.com/forum/)
That running thought:
I have always loved the neatly illuminated pair of lights on the corner of bumpers of many cars while driving at night or in rains, mostly on cars which comes equipped with these as OE fitment. In certain cases their color & illumination intensity looked like Rear fog lamps and in some cases they resembled the functionality of Tail lamps.
Apart from how it adds in terms of making your vehicle more visible along with the tail lamps, personally I felt it does look classy on certain cars and when your cars shade in on the darker side, it looks even better. Can this be done to my Ertiga was the question I had in mind every time I tailed such a car ahead of me at night on the highway.
Bumper reflectors made things easy:
The Ertiga has a pair of bumper reflectors integrated to the Bumper on both sides of the Rear fog lamp. When driving at nights, these two (if you have a habit of keeping these clean from dust and much) reflect pretty well from a distance. Same is the case with Ritz, Old Dzire, SX4, Figo, Duster etc. So, Instead of a whacky or a painful mod, the idea of illuminating the Bumper reflectors started running inside my head.
Will the reflectors do the Job?
Even before I started to remove the OE Reflectors off the bumper, I went ahead to my usual MASS to enquire about the part and the price attached to it. When I learnt that they cost mere 82 INR each, I simply asked them to place the order. Mind you, till here I wasnt even sure if my DIY will execute as I had no idea about the quality of reflectors or how they are constructed and whether they will help me install lights inside it.
The Reflectors:
They arrived in few days after placing the order and I collected them.Unboxed them and found out that-
- The Red cap of the reflector is hollow enough to accommodate a typical LED Strip inside
- The Red cap was rigidly held to the base by an adhesive and was not an easy one to split it open
The Reflectors cost me 82/- each  Few Photos that show the make and quality of the reflector
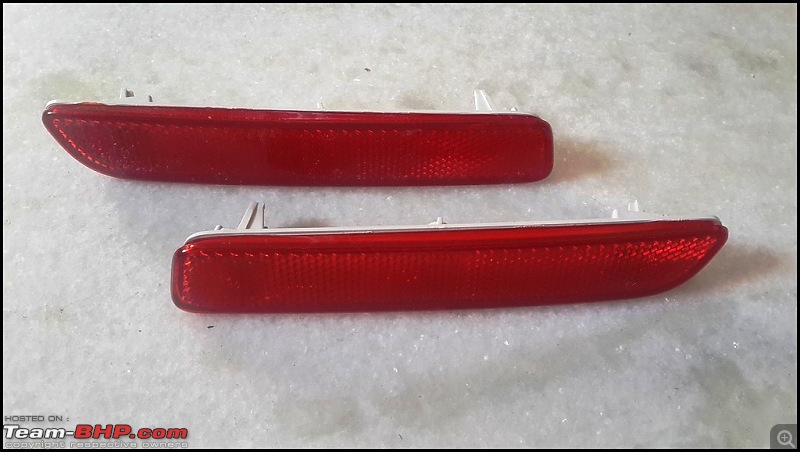
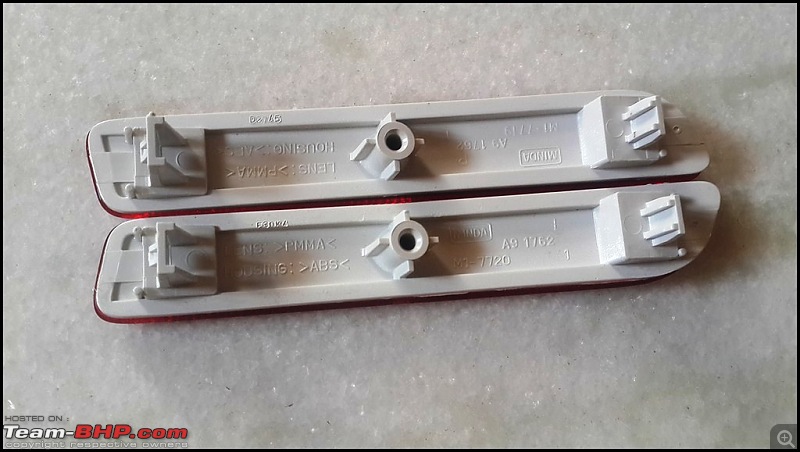 This is what will give you an indication about how hollow the lens is to accommodate the LED strips:
So, everything seems to fall in place and my DIY will progress now!
The active players for this DIY:- Reflector Lens Housing (Purchased from MGP outlet/Dealer)
- Single Color LED Strip, Warm White (Bought fromEbay)
- Automotive Wiring (Had lot of stock at home)
- T-Tap Connectors (Ebay)
The Support Staff- Araldite Klear Epoxy Adhesive – To Bond the Reflector lens with the base
- Pencil Tip Soldering Gun with Flux and Leads – For Wiring the LED strips
- Machinist File – To slice open the Reflector lens
- Rachet Tool with sockets – For Removing the Rear bumper
- Phillips/Star Screw driver – For Removing the Rear Tail Lamp Assembly
- Insulation Tape – For covering any joints or connectors
- Heat Shrink Tubing – For insulating any joints
- Wire sleeve – For insulating the Wires that come out of the LED Strip
- Wire Stripper – For the overall wiring
- Stationary Cutter/Knife
- Digital Multimeter – To ascertain the right wires to use for the DIY from Tail lamp assembly
- Safety Pin – For temporarily piercing into the OE wires to assess voltages (for Multimeter contacts)
- General Purpose Silicone Sealant – For sealing any gaps and covering soldering spots
Get on with the Job now: - Split open the Reflector Lens
- Test the LED strip(s) inside the Lens to evaluate the brightness, color and illumination
- Paste the LEDs inside the Lens
- Solder the LED strips, Take out the wires
- Paste and seal the Lens cap with the base
- Remove the Tail Lamp housing (L & R)
- Remove all the Bulbs from each housing – Brake/Tail, Indicator and Reverse
- Remove the Bumper
- Remove the OE Reflector Lens
- Replace them with new Reflectors with LEDs
- Confirm the Wires from the Tail Lamp Cluster to be used for powering the LEDs
- Fix the Bumper First
- Wire both the Reflectors using T-Tap Connectors
- Fix the Tail Lamp Assembly (L & R)
- Test the final results
1. Split open the Reflector Lens:
The Reflector lens consisted of 2 parts sealed with a tough adhesive that it was not an easy job to split them up. A dremel would have been an amazingly perfect tool here for the job that I otherwise managed to accomplish using typical machine file and sand paper.
After a lot of filing the corners and using sand paper to remove rough edges, I finally managed to split open both the reflector lens as below: 
2. Test the LED strip(s) inside the Lens to evaluate the brightness, color and illumination:
The LED that I had ordered was warm white as I was really not sure on whether Red would end up being too dull when placed behind the reflector lens. Evaluating how it would illuminate the reflector was the elementary task here even before attempting the next steps. Looking at the width and Length of the Reflector lens, I was an easy guess that I could place 2 rows of LED strips (6 LEDs each) and power it up.
The result was indeed satisfactory when I tested it inside my house by directly connecting the 2 wires from the LED strip to the Battery Terminals. 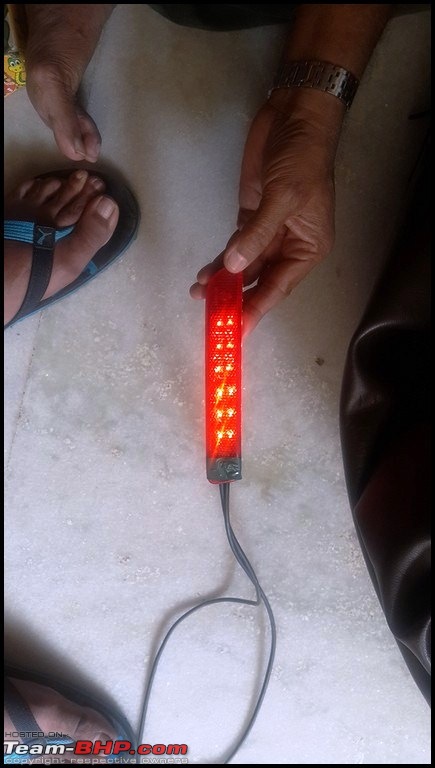
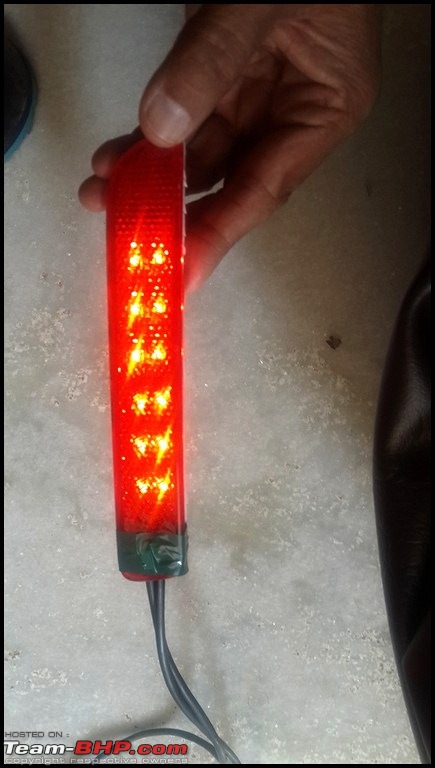
By now, I was sure that 2 rows were better than one and the DIY shall progress.
3.Paste the LEDs inside the Lens:
It was time to make sure that both the Lens were ready with LED strips inside and wired properly and ready to fit onto the bumper.
The set up is ready for this job now: 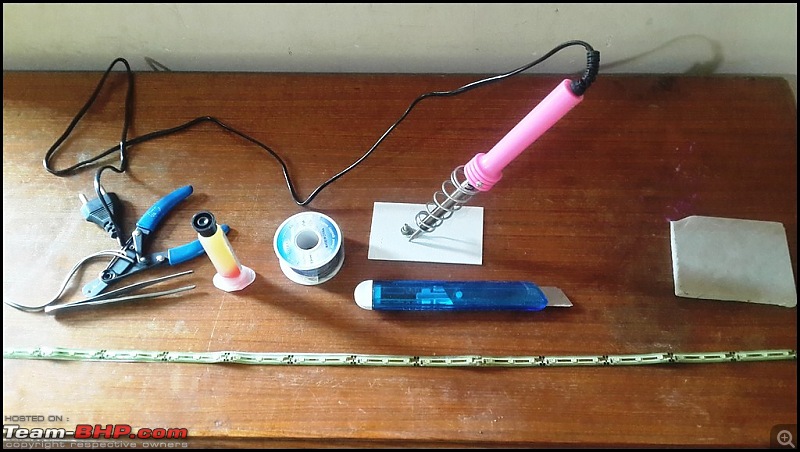
Cut the LED strip into 4 pieces, 6 LEDs in each piece (Cutting indicator was after every 3 LEDs)
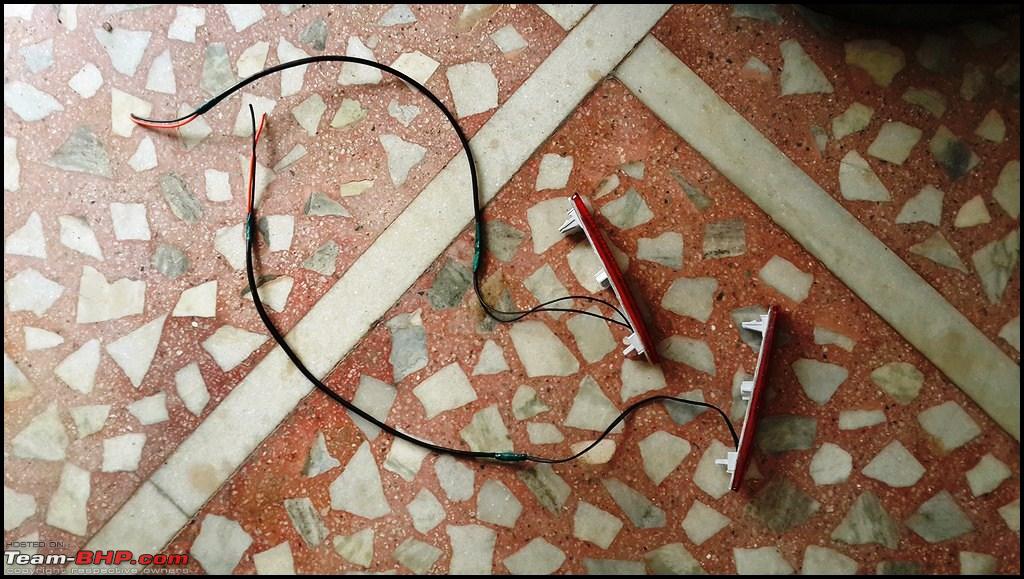
4. Solder the LED strips, Take out the wires:
After cleaning the inner surface of the lens, pasted 2 rows keeping in mind the symmetry of LEDs and soldered the 2 rows for continuity and sealed the soldered area with the Silicon Sealant
Needed a hole in each lens to take the wires out originating from the LED Strips and the Pencil Tip Soldering Iron came in handy without the need for any drilling in this cramped area. I and
Gannu_1 kept discussing this and thanks to him, the Soldering gun idea worked in under 10 seconds for each making hole good enough to pass the wires out.
5. Paste and seal the Lens cap with the base: Used Araldite Klear to bond the 2 pieces of the Lens 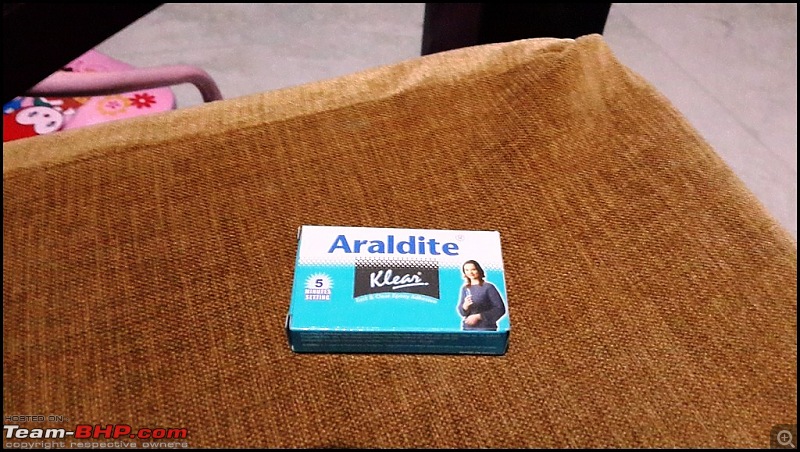 The adhesive dried within 5 minutes as promised on the box and the cloth clips helped a lot here.
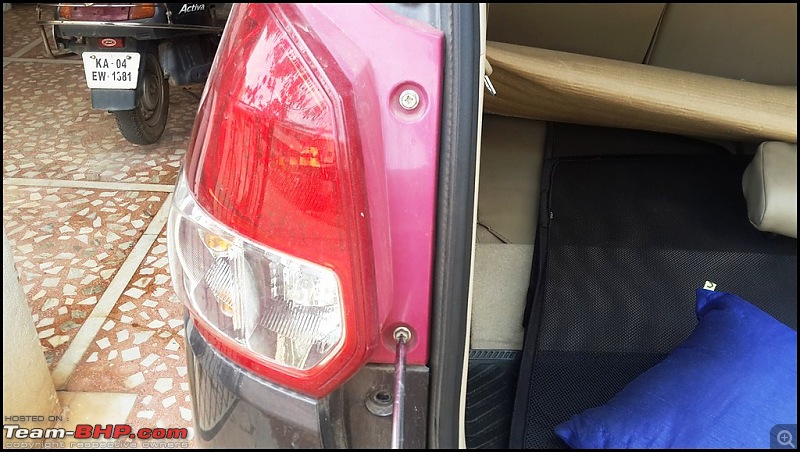
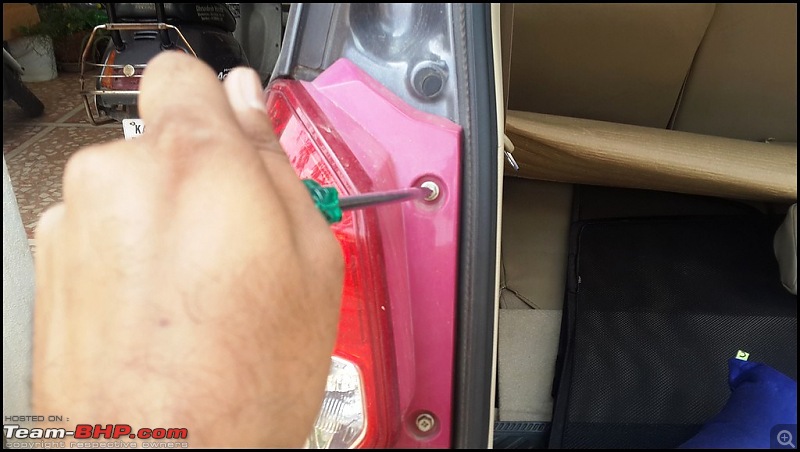
6. Remove the Tail Lamp housing (L & R):
This was an easy one. After opening the boot door, there are only 2 Hexagonal Head bolts that one can also loosen with a Phillips screw driver or a Socket Spanner. After this, by holding the Tail lamp assembly you only need to apply some force and pull it towards you standing behind your car and the assembly comes out.
These are the bolts to remove to take out the tail lamp cluster (Both sides)
7.Remove all the Bulbs from each housing – Brake/Tail, Indicator and Reverse:
Twist each of the 3 holders in Anti-clockwise fashion and remove the bulbs from each (Brake/Tail, Indicator & Reverse) and keep those bulbs safe.

Repeat the above steps for both the Tail Lamp assemblies.
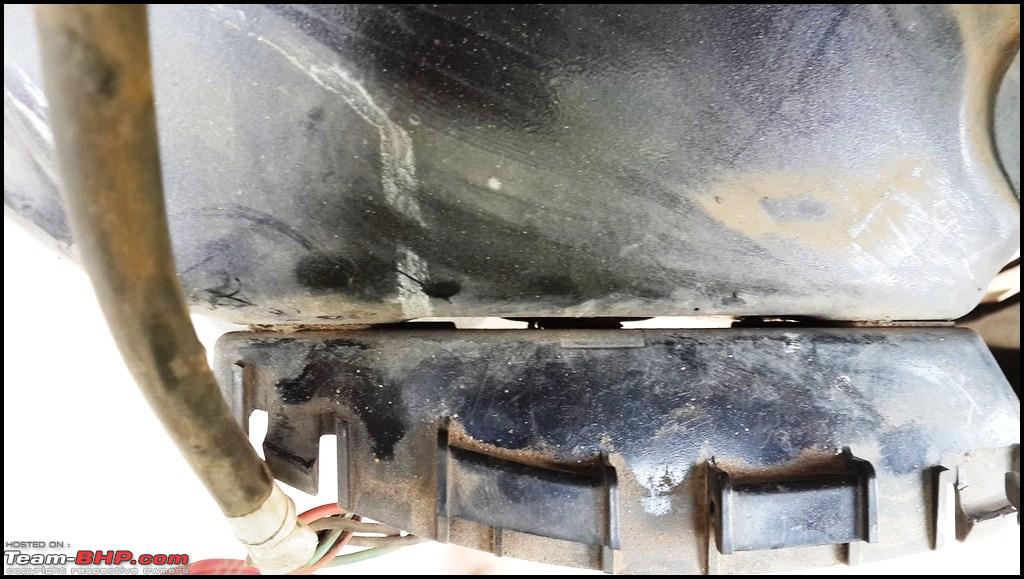
This was really not an easy one for the reason that a few Push Pin Bumper clips were at some odd locations to remove from, especially when the car was parked on ground and not on a ramp.
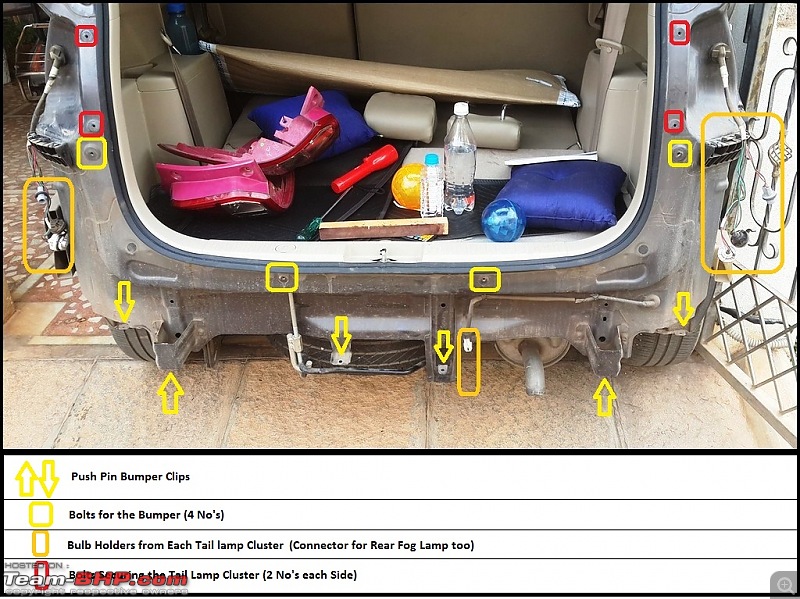
The above picture would give you pictorial idea on what was done to remove the rear bumper.
The Bumper was carefully rested on the seats of the Activa and the Aviator so that I could now access and remove the OE reflectors from it.
As you can see below, the Reflector lens is not only held by the clips on both the ends but also has a screw that secures it firmly to the bumper.
Removed the screw and carefully pushed out the reflector and pulled it out on the other side.
The OE reflectors are now out of the bumper to make way for the new ones with LED
10. Replace them with new Reflectors with LEDs The new LED Reflectors are almost ready
They will be placed exactly where the old Reflectors were in the converse order of removal.
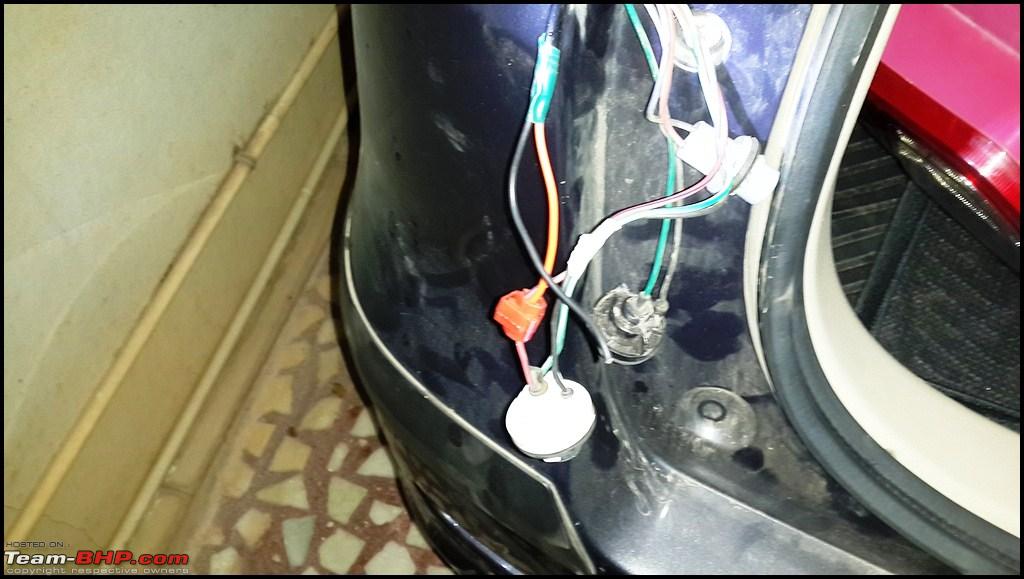
11. Confirm the Wires from the Tail Lamp Cluster to be used for powering the LEDs
Since the idea to power up these LED Reflectors was in parallel with Tail Lamp, I had to ensure the right pair of wires are used from the Tail Lamp
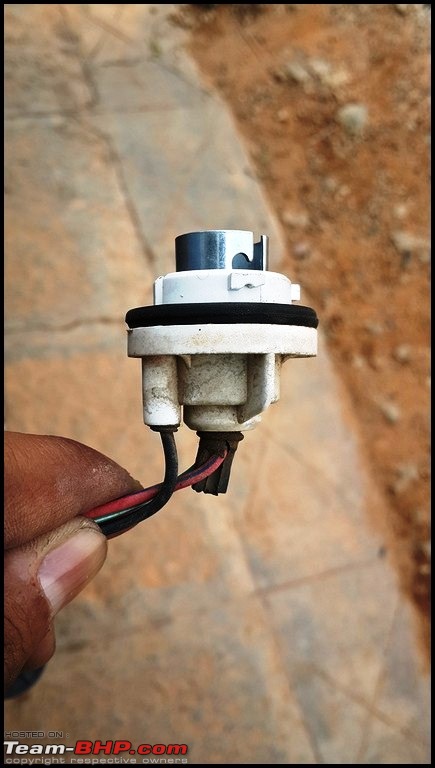
Red with Blue stripe – 12V;Black Ground
The bumper was fitted back in place ensuring I didn’t miss any of the Push-Pin clips. Fixing the bumper exactly the way it came from Factory requires good sync between 2 folks holding the bumper on both sides while the 3rd one (myself) was quickly bending down and fixing the Push-pins. Luckily, My Dad and my cousin were available for this task which otherwise needs 3 people so that you don’t let the bumper hang around on one side while trying to adjust it on the other.
Thread moved to the Modifications and Accessories section.
Thanks for the detailed instructions and for sharing this!
That is one beautiful little mod, looks great and will serve the purpose of enhancing visibility to others especially during rains.
IMO a subtle and thoughtful modification that most owners should do who have reflector strips on their bumpers.
Serves two purposes :
1) Looks great at night and
2) Safer as visibility increases.
This is much better than having to drive with Fog lamps ON at night as I see many here (in Hyderabad) do it. Another advantage is it doesn't dazzle at the eyes of the person at the rear.
A look at the investment in this DIY which is close to Nil, beats me why manufacturers don't do such 'useful MODS from factory rather than sticker jobs as face-lift etc.
A day well spent for Parag in such DIY's. Hats-off sirjee!
Fantastic DIY mod with a detailed step-by-step procedure mentioned. I am sure many will benefit from this thread. Thanks for the effort!
I probably might never perform such mods on my own, hence I get even more impressed when I read such DIY threads. stupid:
Hey Parag
This is very useful.
I have always been impressed with cars that have very good taillights (and headlamps) as that is the only way other motorists can view your own car in the dark. In fact with that need in mind I have been looking for a LED contraption I have seen in many Swifts in the fog lamp area. The rear LED in the bumper certainly looks very good, looks like OEM and works the piece. You certainly have good hands when you do your DIY as was the case with the armrest as well.
Great work and thanks for sharing it
Cheers
Rajain
Looks like a great mod Parag.
And it's done very professionally with careful planning and execution. Congrats on your success!
Superb Parag! Looks very tidy and OE. If one doesn't know this car well and sees the tail lights, he wouldn't be able to make out as a mod.
At first when you told me what you were about to do, I thought it was just some 30 min work. Only this thread makes me realize the amount of work behind the scenes.
There adds another thread to the Ertiga "To Do's" list!
Quote:
Originally Posted by paragsachania
(Post 3694311)
I have always loved the neatly illuminated pair of lights on the corner of bumpers of many cars while driving at night or in rains, mostly on cars which comes equipped with these as OE fitment. In certain cases their color & illumination intensity looked like Rear fog lamps and in some cases they resembled the functionality of Tail lamps.
Apart from how it adds in terms of making your vehicle more visible along with the tail lamps, personally I felt it does look classy on certain cars and when your cars shade in on the darker side, it looks even better. Can this be done to my Ertiga was the question I had in mind every time I tailed such a car ahead of me at night on the highway.
|
+1. Had always liked the look of those cars with sleek illuminated bumper lights(OEM).
Night shots of your car looks sweet!
Was even checking out some Indonesian sites for the same along with the front chrome grill sometime back, though have no experience with any.
Site:1 Site: 2 AliBaba: AliExpress:
The photo with the bumper removed :Shockked: I thought its just a pull/push type and easy to remove from outside. Maruti has secured it so well that I don't even dare to do this myself.
Quote:
Originally Posted by paragsachania
(Post 3694354)
13. Wire both the Reflectors using T-Tap Connectors
This was the last stage of the wiring task. I had earlier ordered a set of T-Tap connectors for this job and they made things really easy for wiring without having to slice, cut or twist any of the wires.
|
Must thank you for putting up this thread. :)
Many of us perform routine maintainence on the car- The maximum I've done yet is cleaning the air filter assemblies; and an oil change; not to mention installing of a cabin air filter. (As @ audioholic shall tell you!)
As such; I believe; MSIL car's are extremely well suited to such DIY efforts; parts are available, in a flash, at that. How @ Gannu_1 imports indivisual parts for his Polo; which doubtless cost a fair bit; experiments on them, and installs 'em is something I'm very much in awe of.
Particularly when he.....
.cut his headlamp reflectors- precisely, in order to install those projectors. That; was a
proper D-I-Y.
Even I did think of installing such LED's behind the reflectors once; but I thought that the reflector design wouldn't be compatiable. Assumed that the reflectors were just a plain plastic strip; clipped onto the bumper.
Now I see; 'tis not the case. There is a hollow space behind 'em.
Expect a couple of DIY's from my end as well. But then.....WHERE IS THE TIME?
Again; thanks for sharing!
OT :
Quote:
Originally Posted by ganesc
(Post 3694833)
There adds another thread to the Ertiga "To Do's" list!
The photo with the bumper removed :Shockked: I thought its just a pull/push type and easy to remove from outside. Maruti has secured it so well that I don't even dare to do this myself.
|
I presume that you have a Mercedes 190;aka the
Fintail Mercedes? Pics please! :D
Ingenious - adding LEDs into a passive reflector; nice weekend occupation too.
Few points:
1. Might be a good idea to include a low rated fuse, preferably close to the tap as possible. These are aftermarket LEDs and you don't want to fry the car electrics just because one of them developed a short. Sure, there are fuses upstream in the electrical system, but you don't really know what other electrics might get disabled if one of those fuses had to give in.
2. Do the LEDs generate any heat if they stay on for a long time? Or do the strips come with heatsinks to handle that
3. Red LEDs would have looked better that warm white. That of course is entirely subjective...
Good luck!
| All times are GMT +5.5. The time now is 10:34. | |