One of the biggest weaknesses of the Honda Brio is its meek sounding horn. Although I use the horn sparingly when driving in the city, on the past few highway drives to Ooty and Mysore, I found the stock horn woefully inadequate as numb-skulled imbecile drivers on the highway, stray cattle and jay walking villagers all seemed least bothered by the Brio's puny 'peep-peeep'. With a few more highway drives coming up, I decided it was time was a horn upgrade.
I have a pair of Roots Windtone horns working flawlessly on my Alto since the past 5+ years and so decided against the similar setup for the Brio. A little research online and I decided to go in for a Hella Sharp Tone dual horn setup. Ordered the horns and hella horn relay with wiring harness on June 29 and they were delivered to me on Friday (July 3) - just in time for this DIY over the weekend.
 The Box
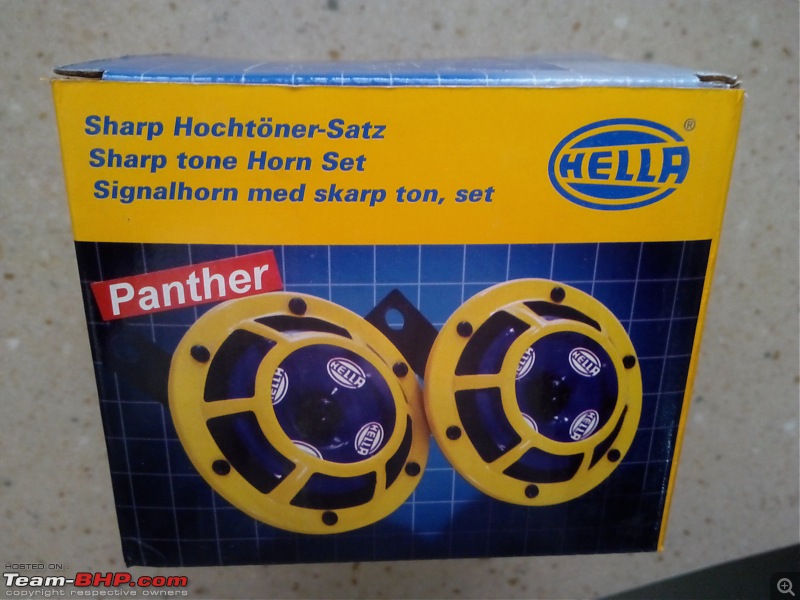
 Referential Size
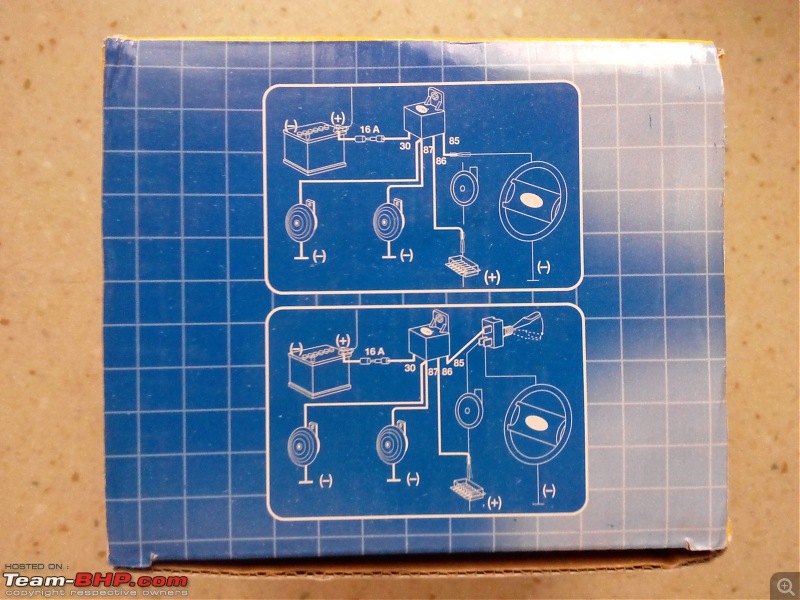
 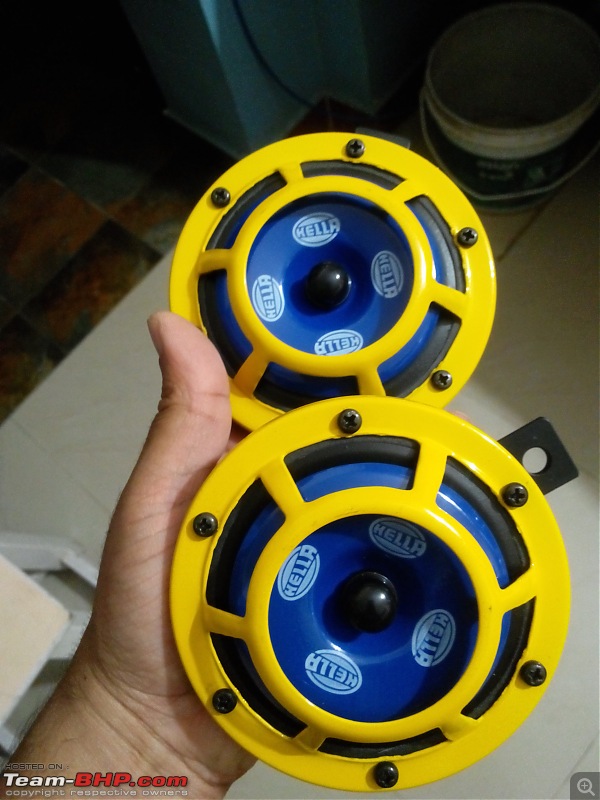 Hella Horn Relay and Wiring Harness
 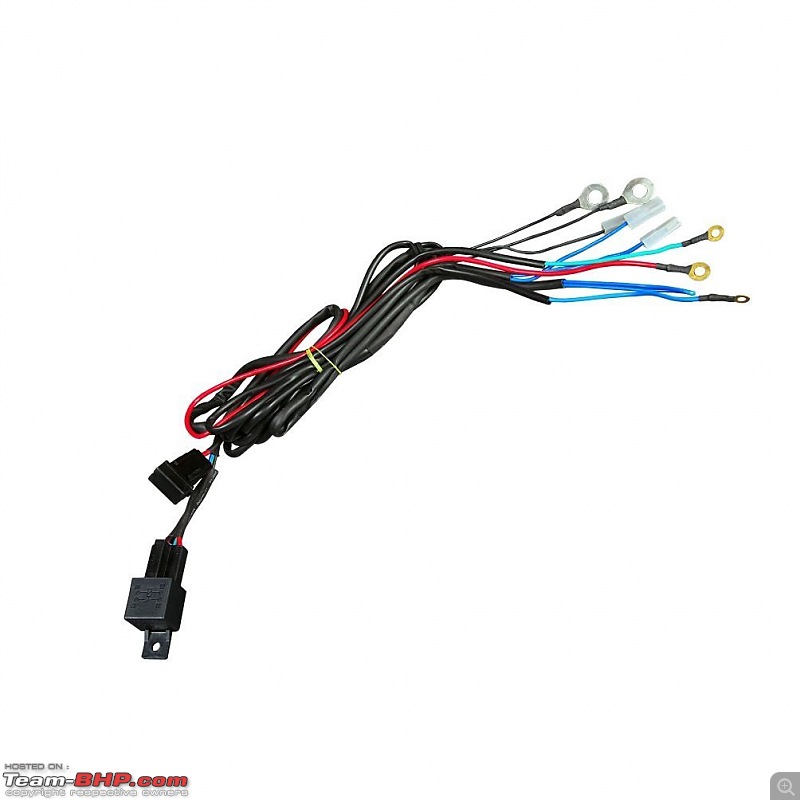 The Connectors Needed
 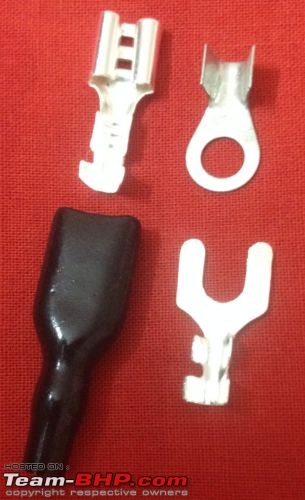 Tools Needed
- Hella Sharp Tone Horns - check Amazon/eBay for best deals
- Hella Horn Relay with Wiring Harness - check Amazon/eBay for best deals
- Flathead screwdrivers
- 12 mm spanner
- 10 mm spanner
- A roll of insulation tape
- Heat shrink tubing
- Solder gun
- 5 Female, 1 Spade Type and 2 Ring Type connectors
- A pair of pliers
- Wire cutter and stripper
- WD-40
Time Taken for this DIY: Approximately 2 hours
Step 1: Disconnect the negative terminal from the battery. This is the most IMPORTANT step before attempting any DIY on the car.
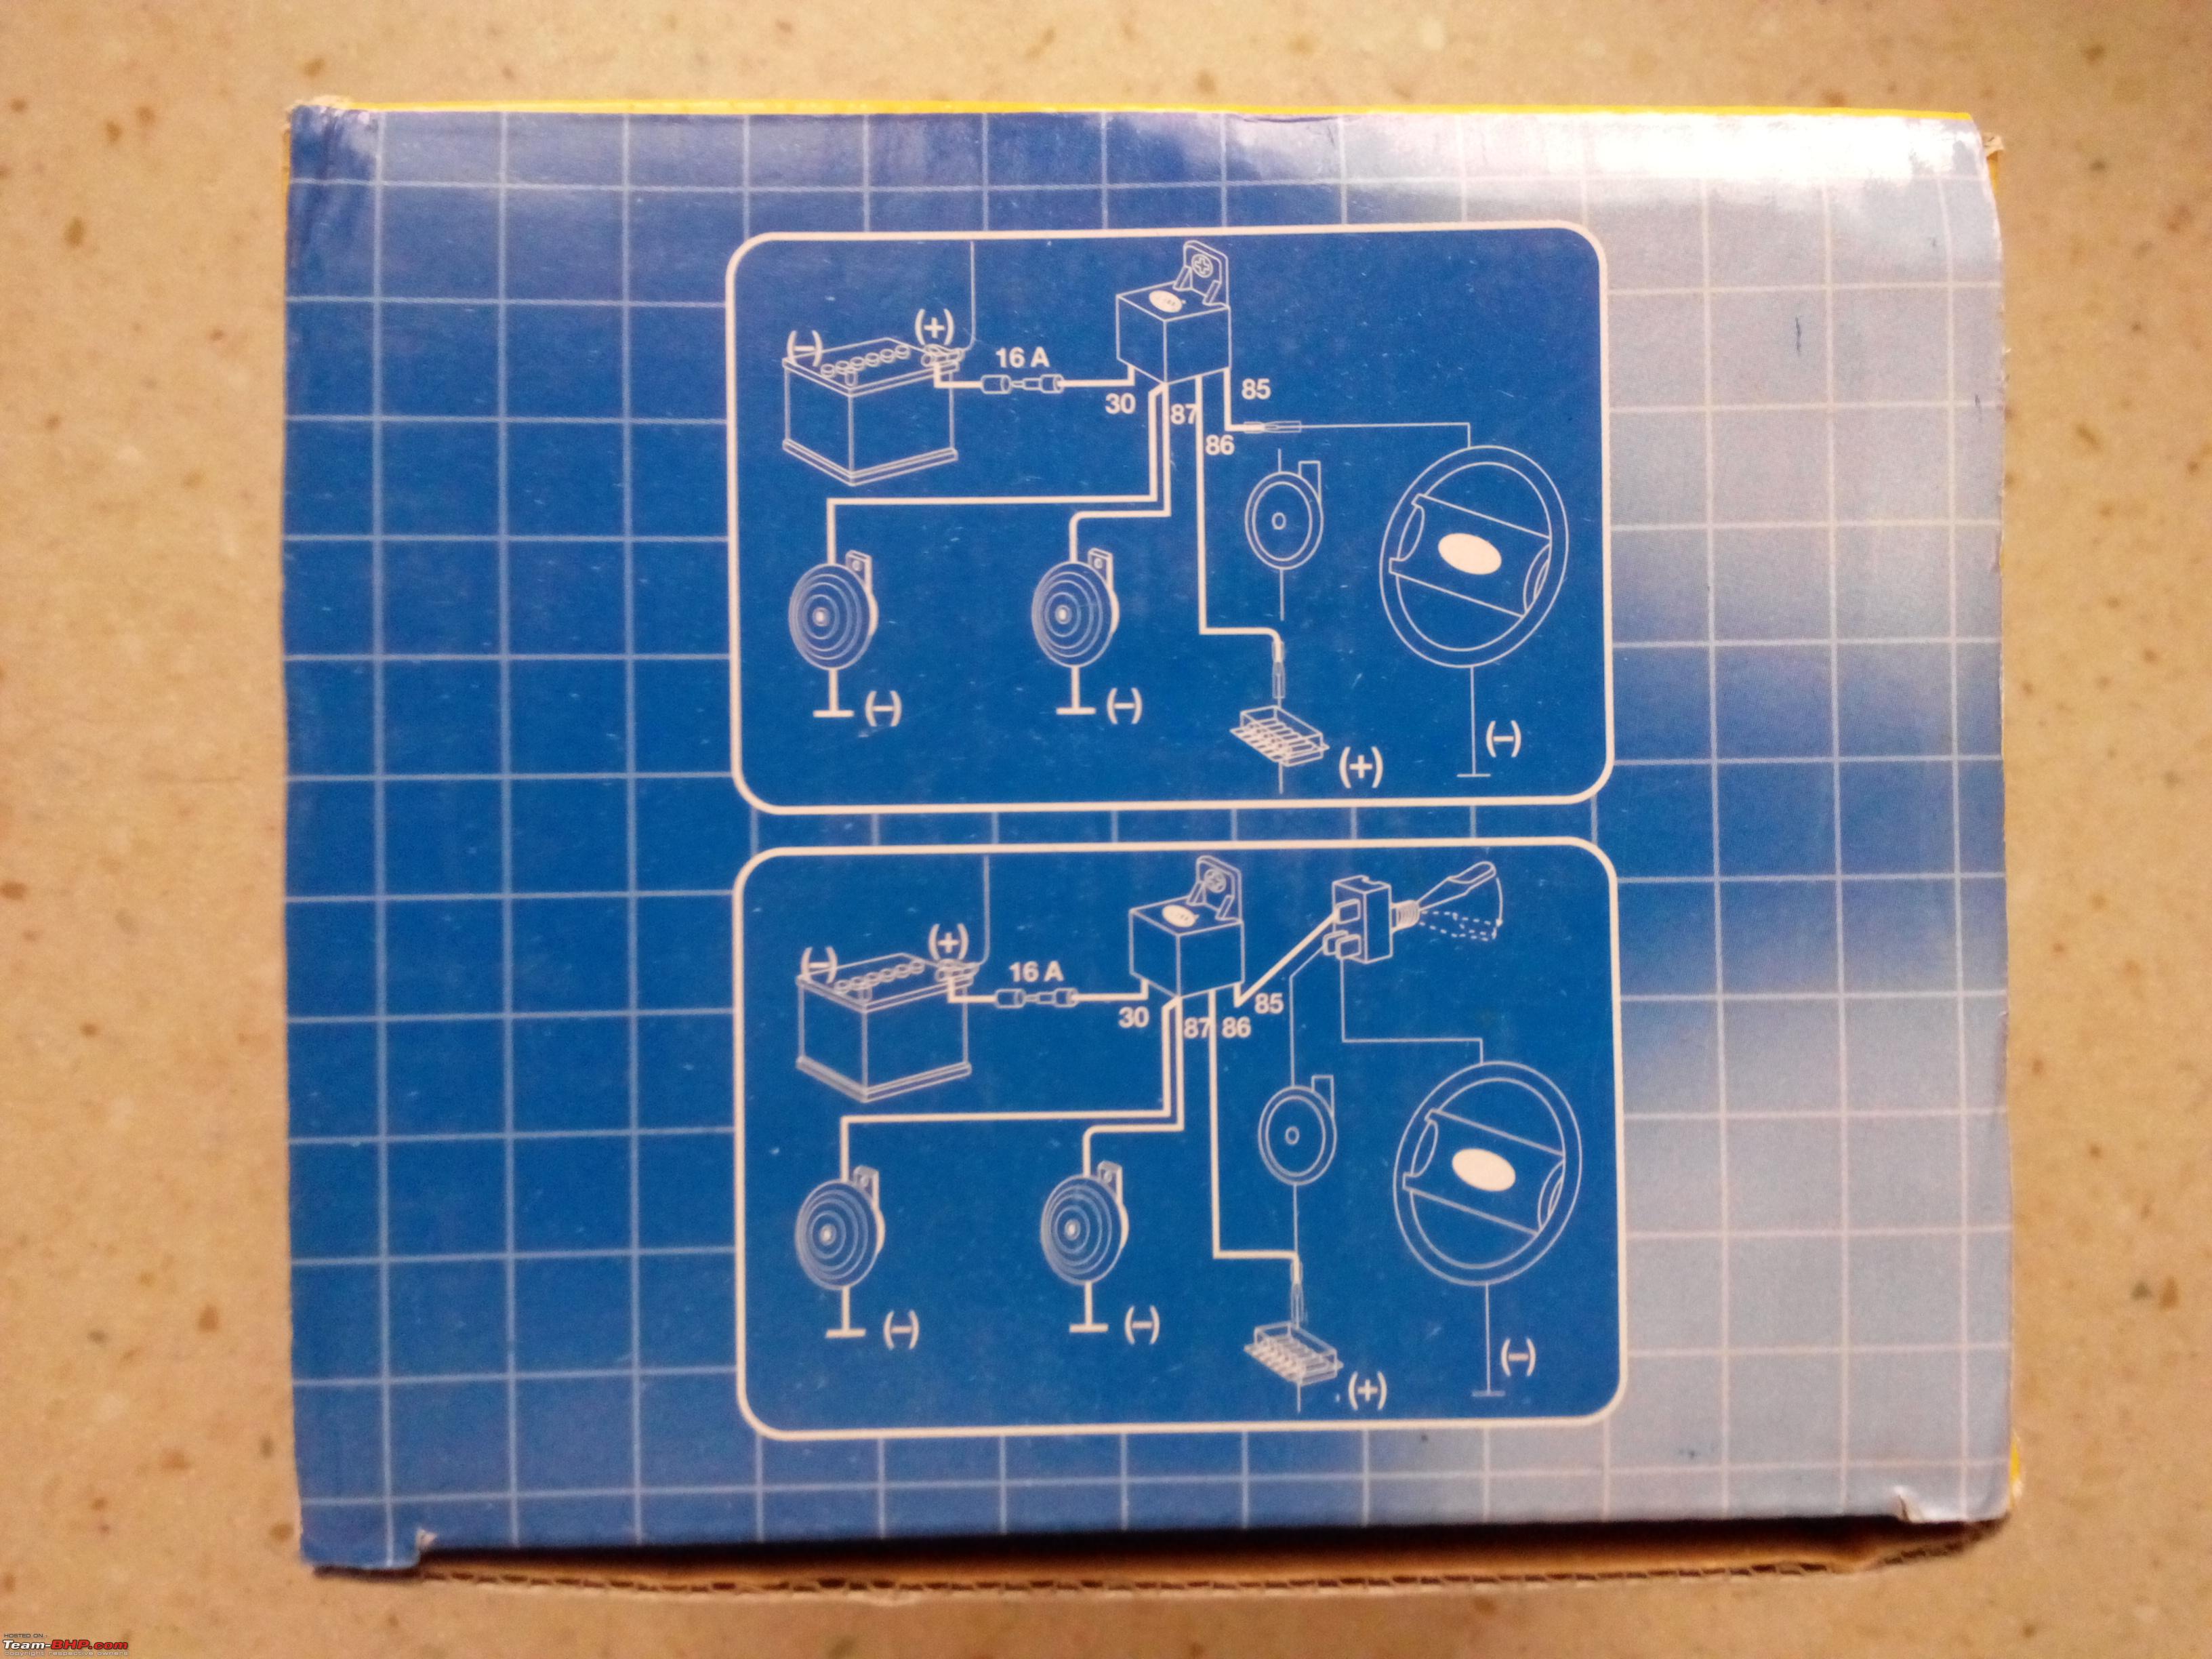
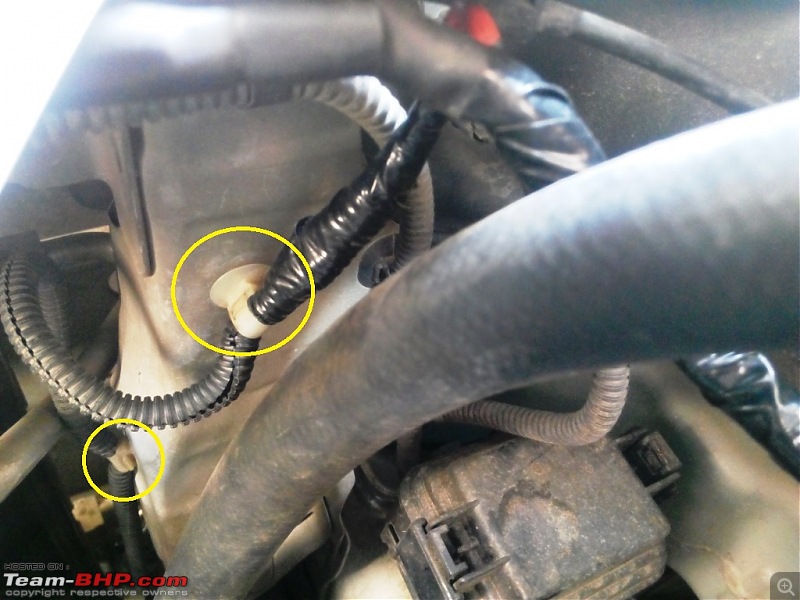
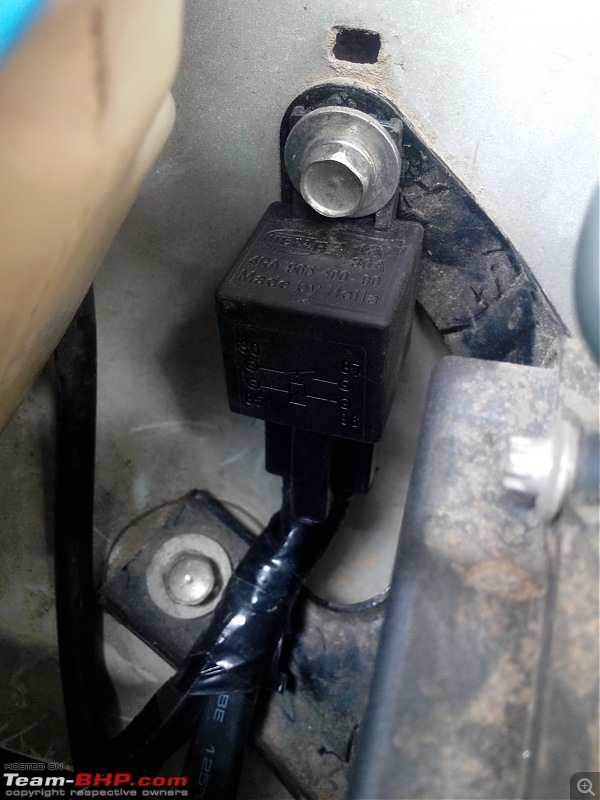
Step 2: The Hella horn relay and wiring harness that I ordered had only two female connectors to plug into the horns and also the 5 inch ground leads had ring type connectors and not spade connectors necessitating some modification. I needed to cut the ends of, crimp-on the right connectors and use heat shrink tubing to cover it up and then roll on some insulation tape.
Although the connectors I have had rubber insulators, my experience has been that these turn brittle in a matter of months and break thanks to the thermal variations every day as the horn mounted in the engine bay. It is better to use heat shrink and insulation tape since they withstands thermal variations far better. The harness comes with its own 30 amp fuse neatly integrated in a plastic casing so the car's fuse will stay safe should something go wrong.
Step 3: Disconnect the stock horn from the car.
The stock horn in the Brio sits low and in front of the a/c condensor. If you are attempting this DIY a few years after buying the car, you will notice that the press-fit connector would have gotten stuck and the nut behind the horn will be hard to budge too. Spraying some WD-40 on these parts and letting them soak for a while makes your job of disconnecting and unbolting them much easier. Use a small 10 mm spanner to turn the bolt counterclockwise to remove it.
Step 4: Unhook the plastic press-fit clamps and reroute the stock horn wire upwards towards the right headlamp. Honda has given a few spare holes on the chassis and cross member so you will easily find a place to push in clamps in a new location.

 Step 5:
 The press-fit connector to the OEM horn is a single positive (+ve) trigger wire that leads from the horn button. This connector needs to be cut. Yes, although I didn't want to cut the connector, there was no way to get a male pin small enough to push into the existing connector.
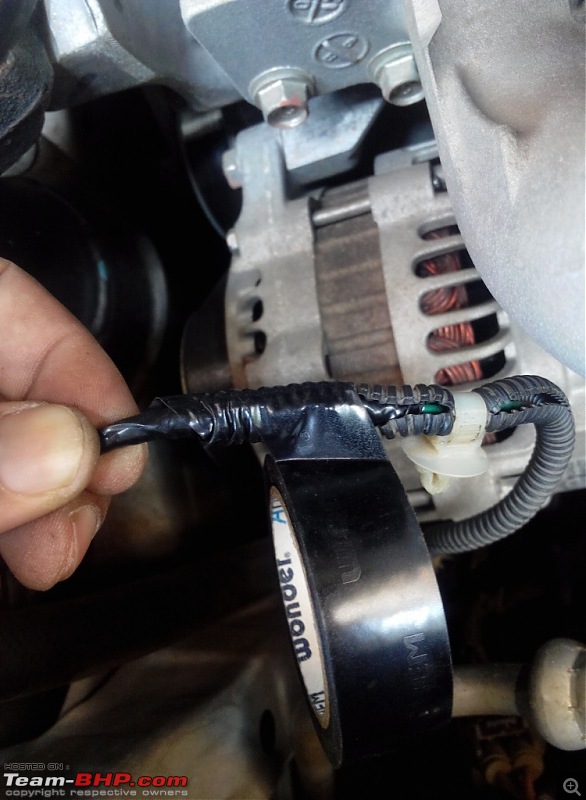
After cutting the wire of the connector, I crimped a female connector to it and crimped another male connector to the lead from the Hella horn relay and press fit those together. I then ran heat shrink tubing over the joint and fused them for a water-tight seal. After that I rolled on some insulation tape and neatly tucked it into the protective piping for a clean fit.
Warning: Be careful when wielding a solder gun in the tight confines of the engine bay when using the heat shrink tubing since one wrong move and you'll touch the rubber a/c hoses which can get damaged.
Unfortunately, I was so focused on getting the job done right, I missed clicking any photos of the work-in-progress and hence the photo here is of the finished work. I hope my description is enough to anyone who wants to attempt this DIY.
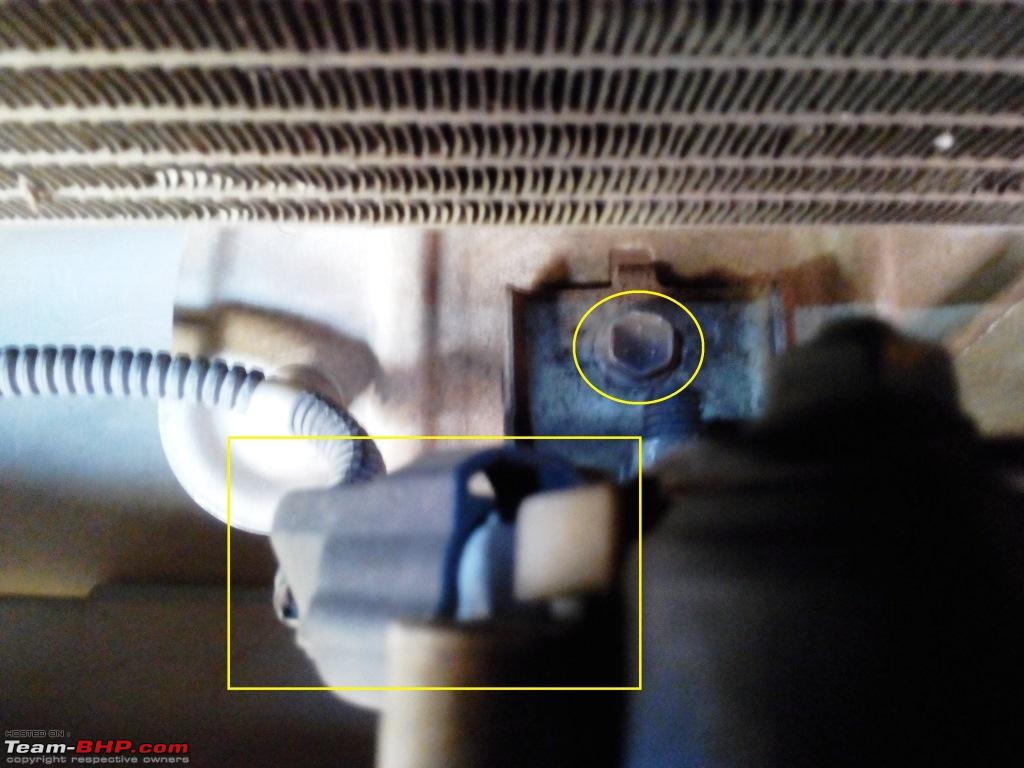
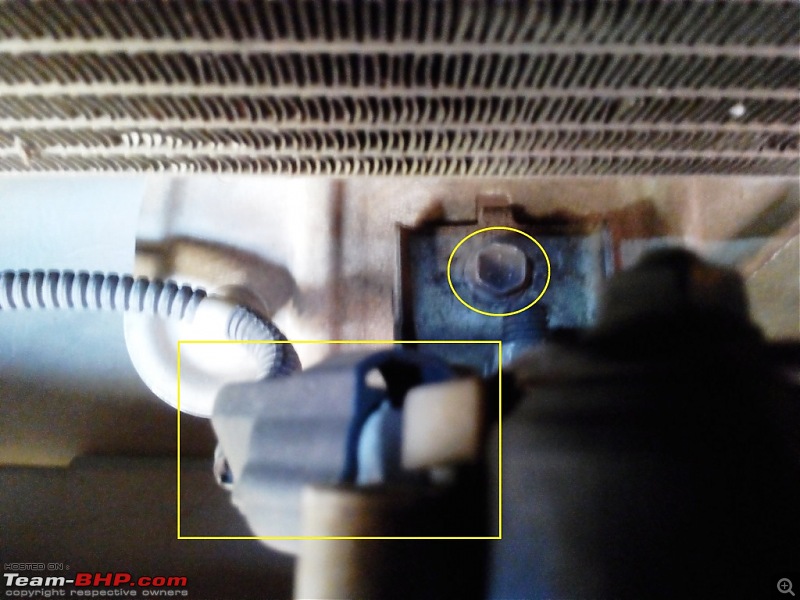
Step 6: Using a 10 mm spanner, loosen and remove the bolt that holds one side of the ABS pump located near the nozzle of the windscreen washer reservoir. Run the bolt through the hole in the head of the relay and plug in the wiring harness. Replace the bolt and tighten for a neat fit.
 Step 7:
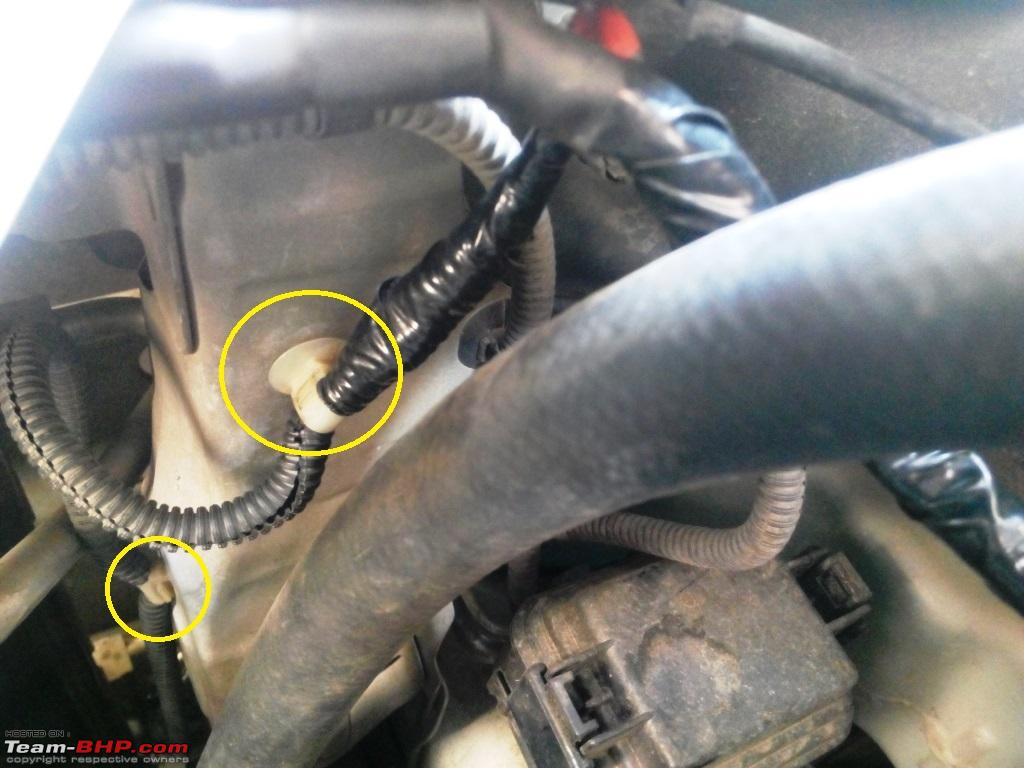
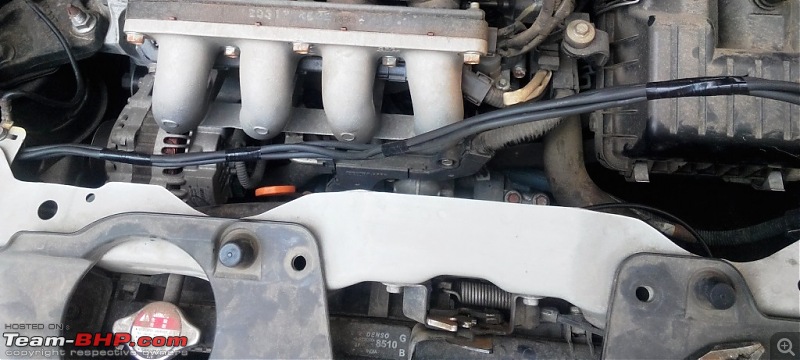
 Run the wiring harness neatly across the front bonnet apron and using zip ties, lock them into place while guiding the wires through towards the left headlamp cluster.
 Step 8:
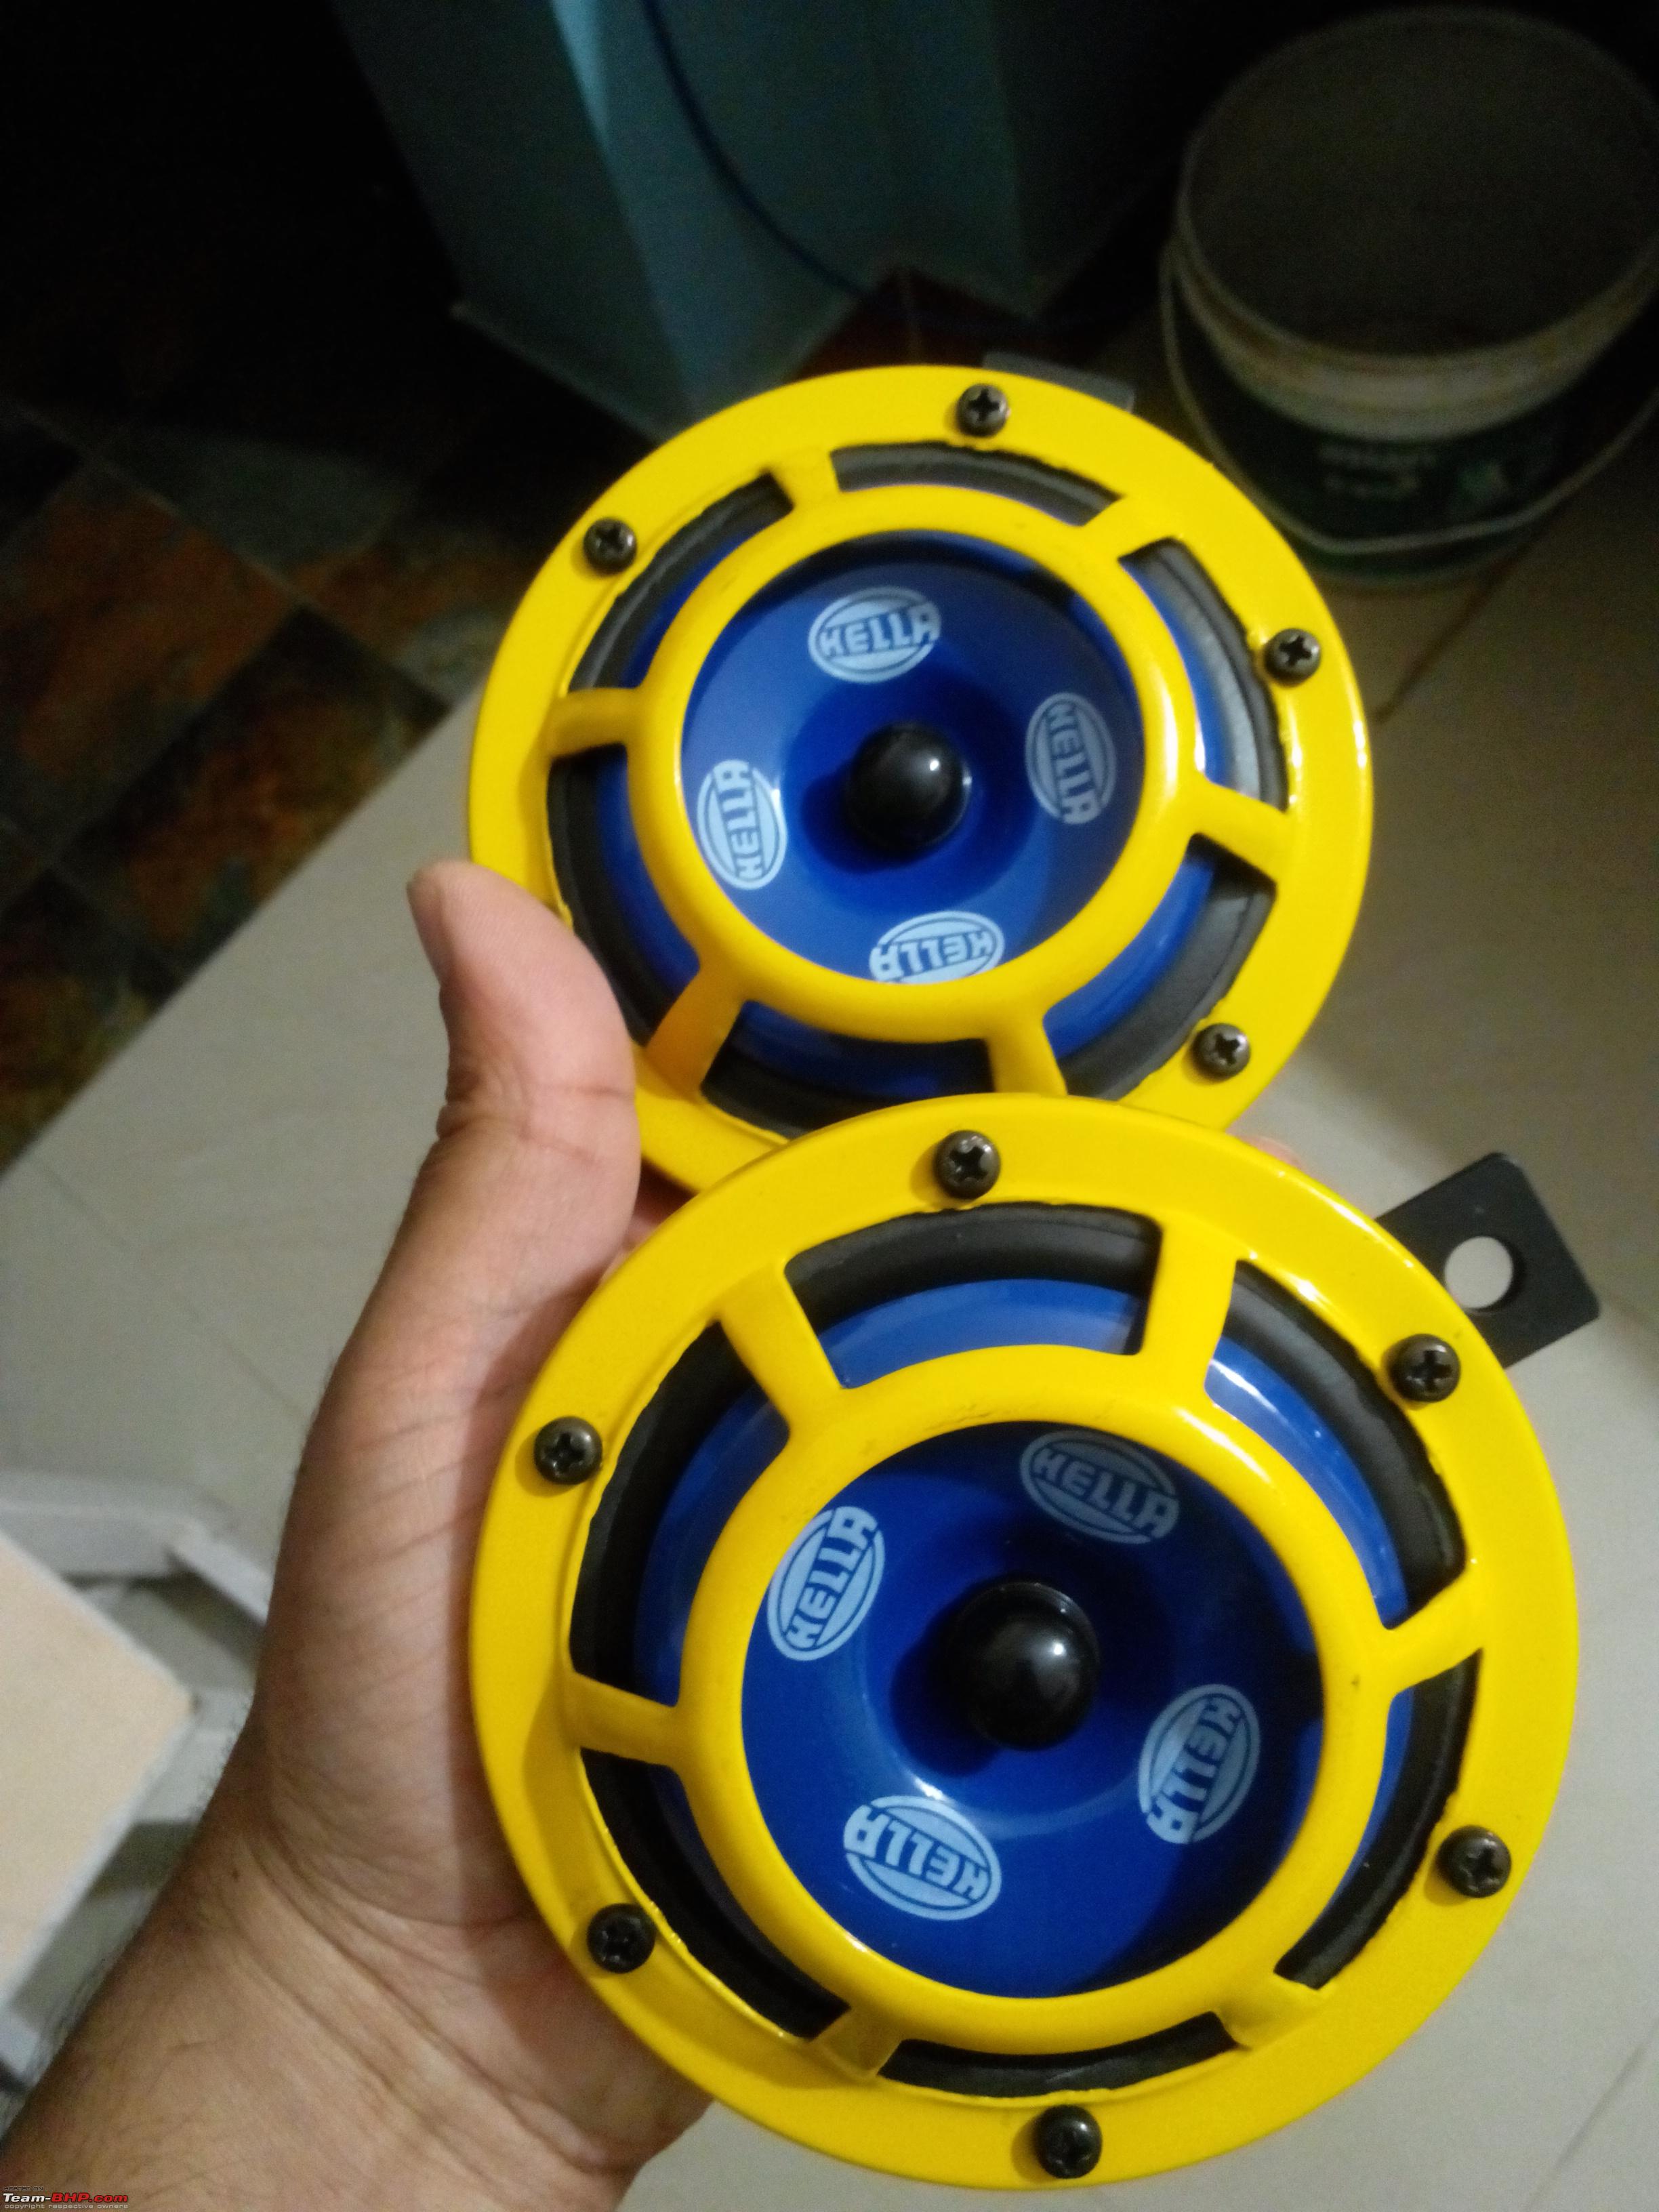
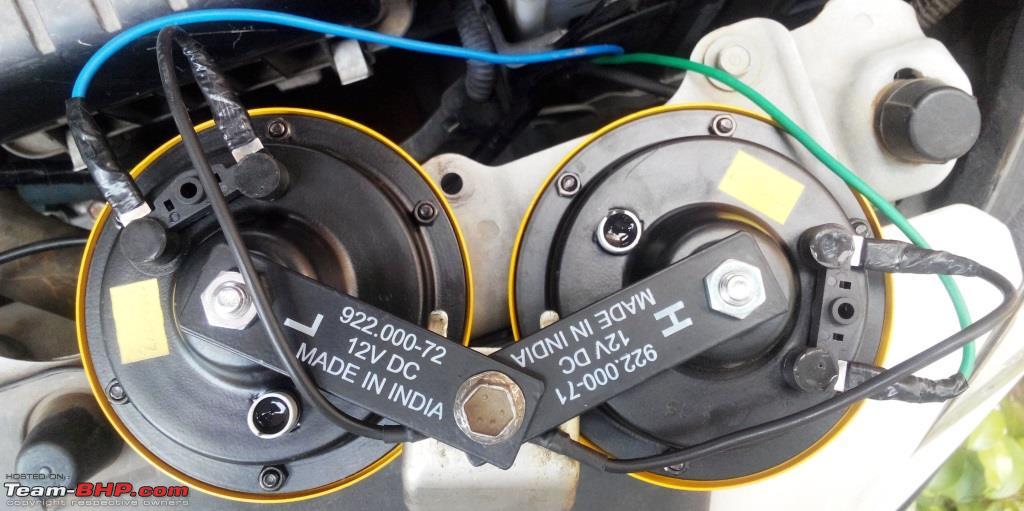
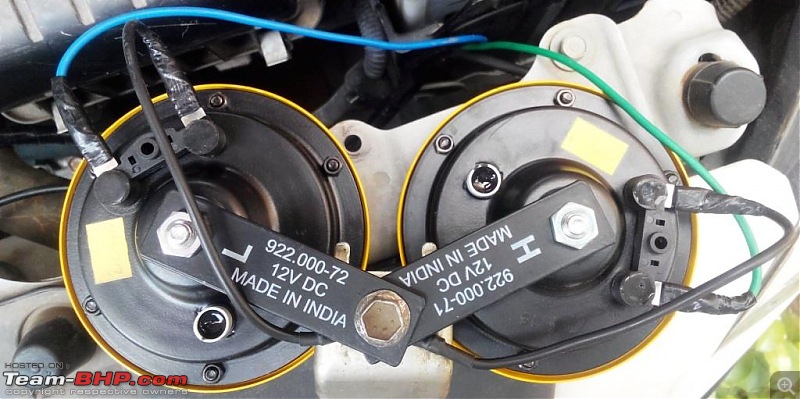
 Mount the Hella horns on the clamp which earlier housed the OEM horn using the original 12 mm bolt.

Make sure to connect to the negative terminal on both horns and run the ring connectors through the bolt that will hold the horns in place. Before make the bolt tight, make sure there is adequate space between the horns so they don't touch since the vibrations will distort the sound of the horn.
Step 9: Push the female connectors (green and blue wires from the wiring harness) onto the positive terminals of both horn. Connect the negative terminal of the battery and press the horn pad on the steering wheel to check if the horns are working before fitting the horns back. This is to ensure the horn works and the connections are right so you don't have to unbolt everything once you've fitted it.
 Step 9:
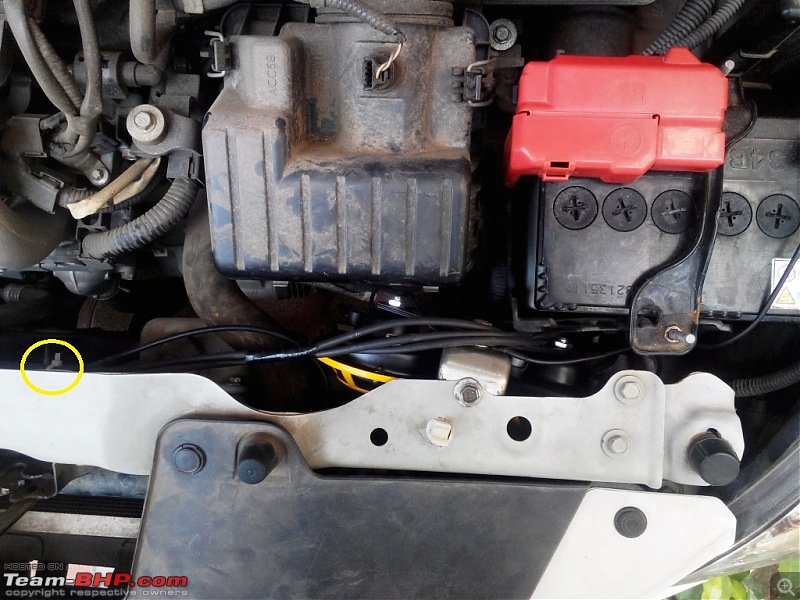
 There are some pre-drilled holes on the front apron which can be used to fit the old clamp of the OEM horn. Again, use the same 10 mm bolt provided and fit a new nut at the bottom which will hold the horns in place. Ease the horns past the battery case and air filter casing - this is a fiddly job and will test the dexterity of your fingers so be patient while you attempt trying to thread the nut to the bolt.
 Step 10:
 Before tightening the nuts, make sure the horns don't touch any metal part of the front apron to ensure there are no vibrations and jarring noises when the horn is used. Notice the zip tie used to secure the wires from the harness in place.
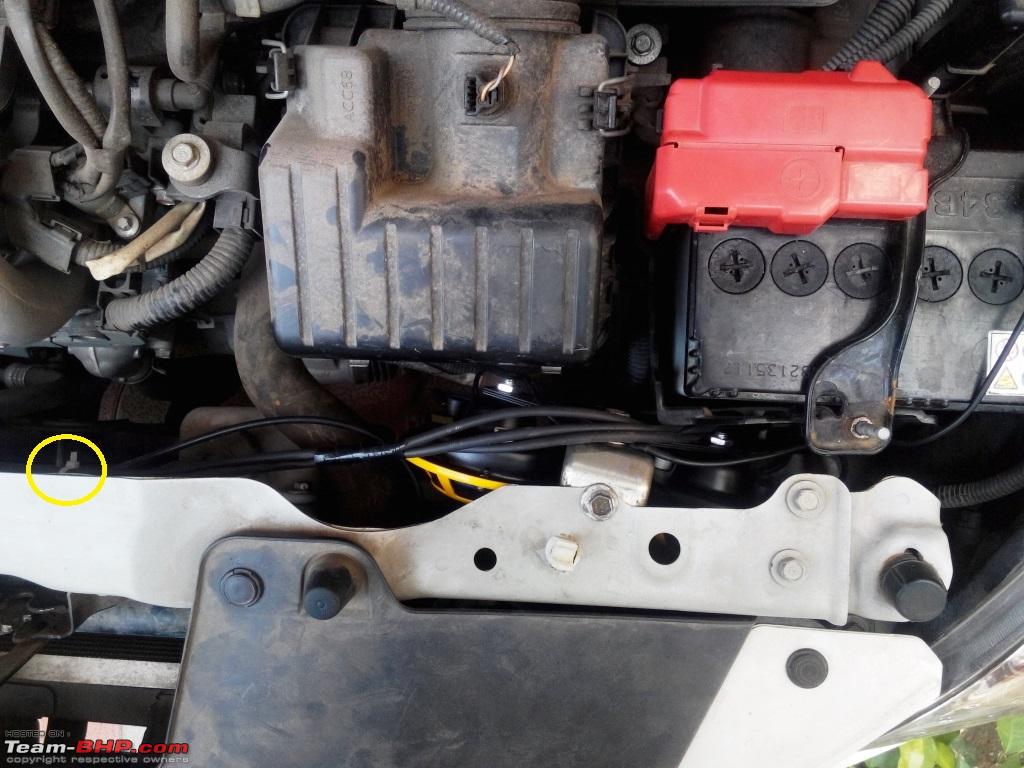
From the outside this is where the horns are positioned
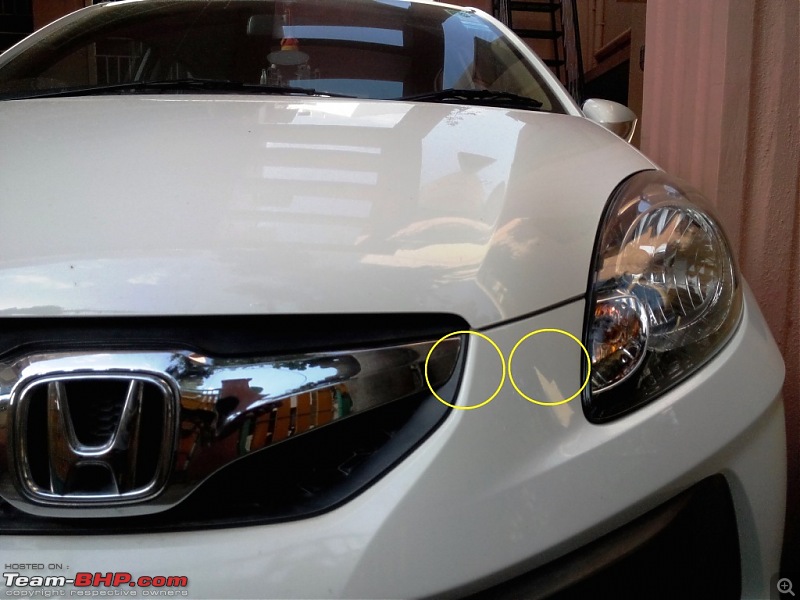
This is a nice place to mount the new Hella horns since they are shielded by the left headlamp cluster and bumper from any water spray. I have read reviews about these horns being sensitive to water splashes and so in this setup they are protected well.
Incidentally, Hella positions the Sharp Tone horns as being suitable for off-road driving offering the ultimate performance yet, it is best to play it safe when a few customer reviews have mentioned them being averse to water splashes.
 Performance:
 The Hella Sharp Tone horns are a notch below the Hella Super Tone horns (red grills) and have a tone closer to an OEM horn only being much louder and clearer in tone. The horns are 118 decibels loud and are sure to wake up a jaywalking fool from his reverie when used on the highway.
Although, I have installed these horns, I will exercise restraint when using them within the city and urge all others (those who have powerful horns installed in their vehicles) owners to do so as well to curb the honking menace.


 5th July 2015, 21:17

 (26)
Thanks
(26)
Thanks