Team-BHP
(
https://www.team-bhp.com/forum/)
Dear BHPians!
This is something I always longed for. The rear wiper (wash/wipe) always made look Zen a smarter hatchback (not that Zen is not a smart car without it :D) & I always had an inner itch to somehow add the rear wash wipe system on my '02 Zen Lx so that I can satisfy my thirst.
Well, I know it is late but better late than never. The Zen will be turning 14 next month, and it is a perfect gift for the occasion. So, lets get the hands dirty!
First, the parts for the purpose. Zen is now definitely not a car for which you just go to the ASC and buy the parts off the shelf. Although, the car sold exceedingly well in its hay days but time has now taken its toll and parts are not readily available, and here we are talking about parts associated with the rear wiper which aren't fast moving items. Hence, with help of Maruti encyclopedia Leoshashi who had the entire parts catalog, we identified all the parts required for the purpose. Ladies & gentlemen, for your information, BHPian Leoshashi has now become a reason for a spike in my spends on cars and my diminished savings. :D
So, order was placed with MASS for the following components:
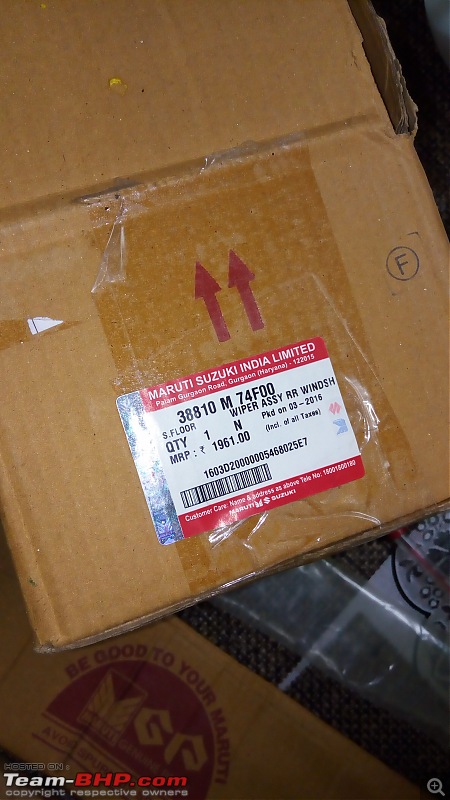
1. Rear Wiper Motor Assembly: Rs. 1961/-


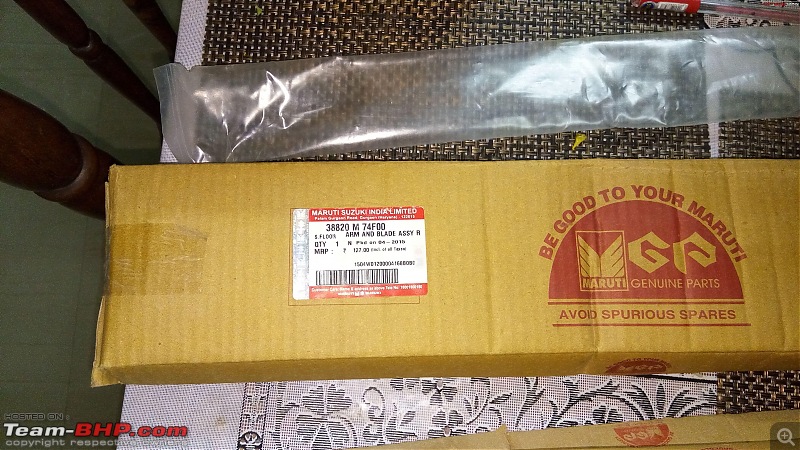
2. Rear Wiper Blade & Arm Assembly: Rs. 127/-
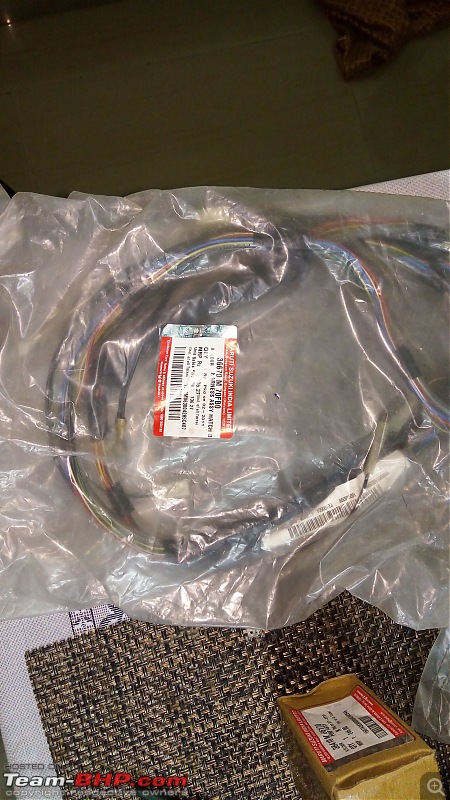
3. Wiring Harness: Rs. 736/-
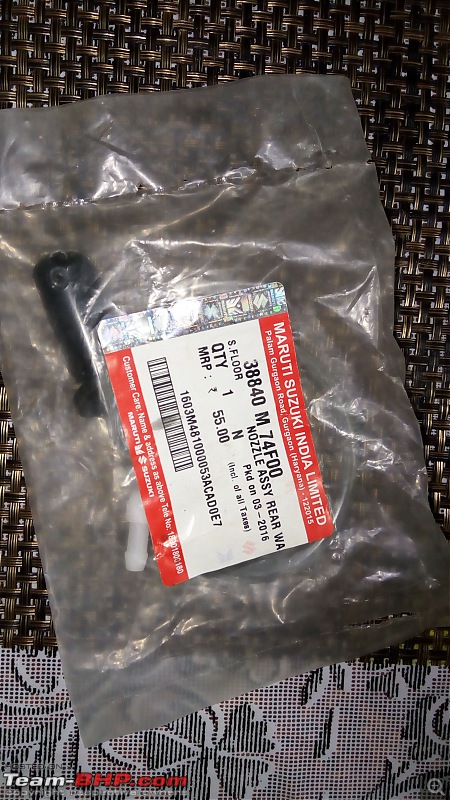
4. Wash Nozzle: Rs. 55/-
5. Wash water hose: Rs. 25/-

6. Washer Tank (with support for 2 pumps) - Rs. 250/-
7. Water pump for rear wash: Rs. 246/-

8. Rear wiper Pivot Cap: Rs. 7/-

9. Wash Wipe Dashboard Switch: Rs. 269/-
Total cost of spares = Rs. 3676/-
The Job:
When we started planning for the project, I checked the inside of the hatch and it looked like brackets for mounting the wiper motor were in place.
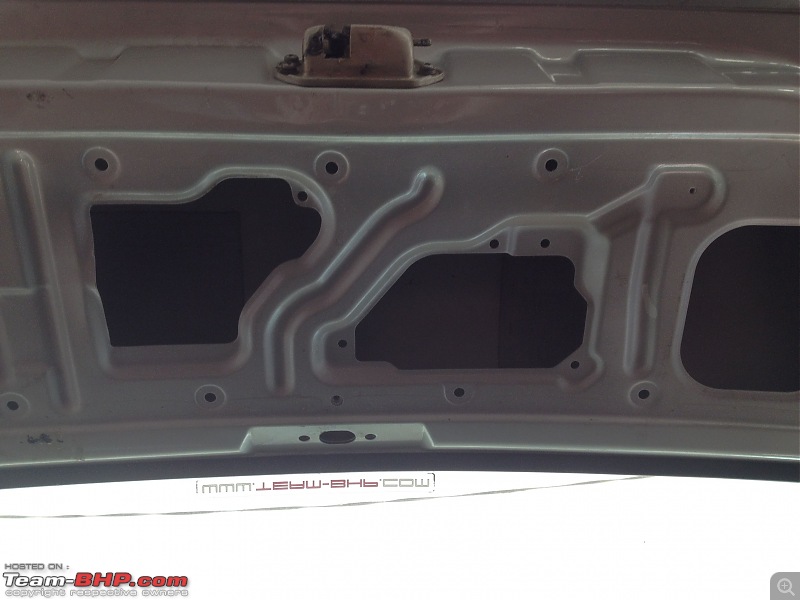 Inner side of the Hatch with mounting points for wiper motor.
But when the motor arrived, I was in for a shock. This is because Maruti changed the wiper motor design in the later years. My car's hatch had mounting points as per the older design while the motor that arrived was of the newer design. More on this with chronology.
Parts arrived within 10 days of placing the order and I decided to give it a shot by myself. The first trick was to drill the hole for the wiper spindle. This had to be at the perfect place and for accuracy, I would have loved to get measurements from a factory setting; but sadly, there was no other Zen (with a wash-wipe system) in my society and even at the time we visited the MASS for picking up the parts. Hence, I could not get original measurements.
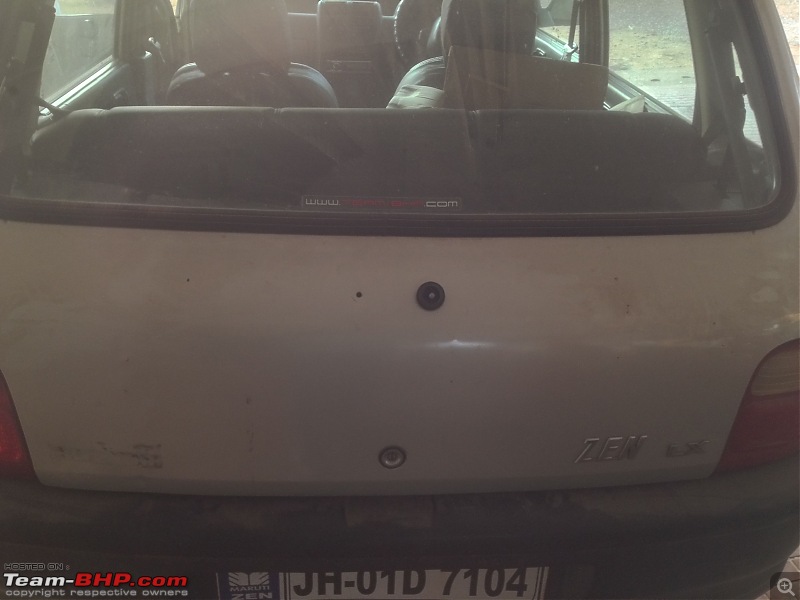
A wrong placement of drill bit at work, a process which cannot be undone, could have well ended in a disaster with two cheese holes on my car's hatch serving absolutely nothing, but I think I had taken so many 'visual measurements' along these years of all the Zens with rear wipers on the road that I ended up almost perfectly I guess. (Even if I am little off-target, I am still okay with it) Things were made difficult when I found out that the brackets that I had on the inside of the hatch were not matching with the mounting points of the wiper motor. If the mounting points would have matched, then the placement of the hole would have been factory spec but that wasn't to be. I decided to take the gamble head on and trust my instincts on this one. With the driller in my shaking hands, I drilled the hole a little right from the key-lock point on the hatch as a reference:
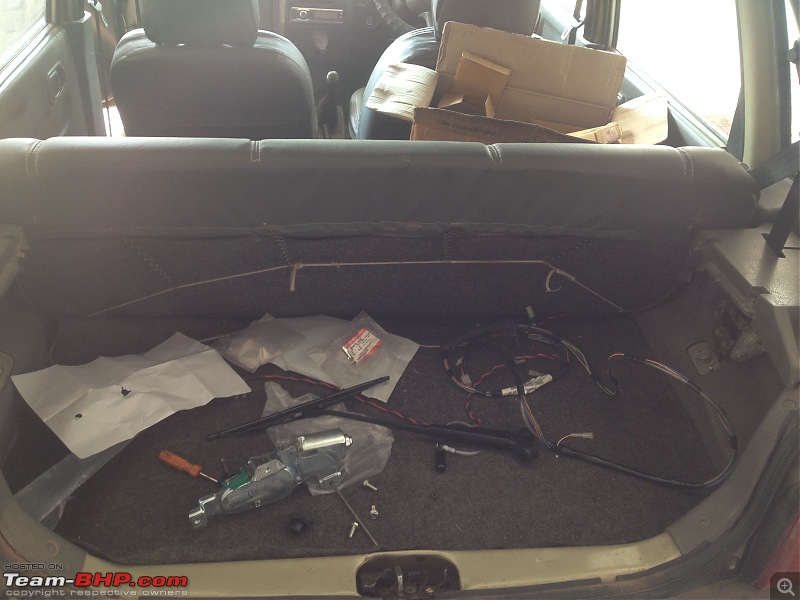

After making the hole, the last thing I would have wanted would be fixing the motor with the sweep in the wrong direction. I checked the motor's sweep direction by hooking it up directly to the battery and ascertained the direction in which the motor would be mounted. I had to repeatedly put the motor in place and mark points on the inner hatch to drill new holes to mount the motor. After a few tries, a few extra holes and with some modification (read bending the mounting plates of the motor), I bolted the wiper motor on the hatch with the correct amount of the otherwise long spindle peeping out of the newly made hole on the hatch.
Placed the rubber pivot cap working as a grommet and a tool to prevent water from seeping inside the hatch in the hole.
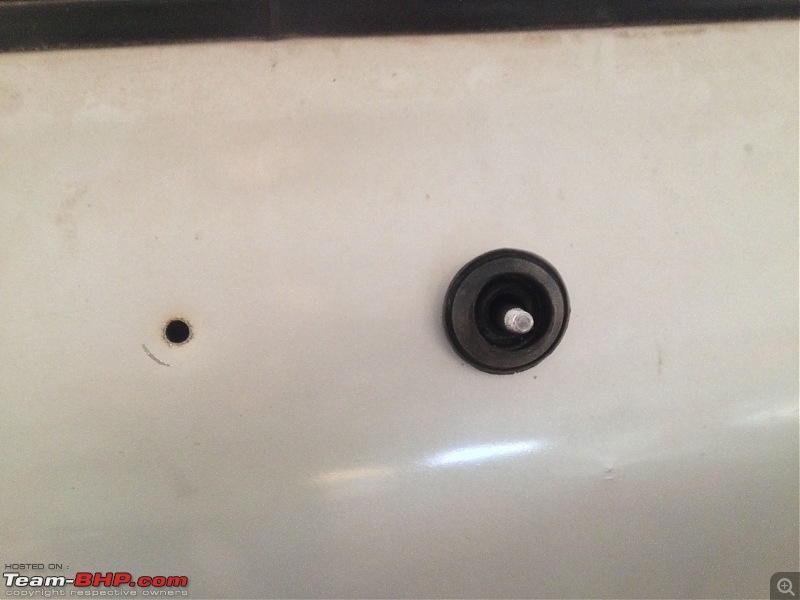
Next step was to make another hole for the washer nozzle. Started drilling with a smaller drill bit so that I don't end up with a bigger than needed hole on the hatch. After a few tries, I got the perfect clean drill with the nozzle sitting flush to the curvy hatch. Point to note is that the washer nozzle is placed slightly left from the center (reference is the hatch's key-lock). And this position is NOT symmetric to the wiper pivot on the right. Means that the distance of the washer nozzle on the left from the center is less than the distance of the wiper pivot on right from the center.
Source: My observation.

These steps look easy on paper but if you love your car, then I must say that it will one of the toughest decisions in life -
where to drill that hole! In fact, two of them. Plus, a drill machine and your beloved car seldom make a pleasant combination. Thankfully, it ended up fine for me. For anyone trying this on their cars as DIY, I would strongly suggest getting measurements from a factory fitted system.
After mounting both the wiper motor and washer nozzle, I fixed the rear wiper arm on the spindle and loaded it with the wiper blade. Now, the moment...it was time for a 'sweep test'.

This felt like a result time after your papers. With the heart thumping much higher than the factory specification rate of 72 BPM, I hooked the motor to the battery by a long wire. Time to test it. Time to check if you have nailed it or junked it.
ONE.....TWO.......
And SWEEEETTT LOOONGGGG SWEEEEEEEPPP! This was the moment. It was achieved! The sweep was perfect at the first go. Absolutely no change in any settings whatsoever required! Not only I was happy, but also relieved that I have not messed things up.

*Please pardon the dirty car! It was anyway due for the service.
The next set of actions included wiring the wiper motor by using the original wiring harness procured through the switch. Now, the motor has two positive points and one negative/ ground (input through body). One positive point is permanently fed with positive line so as to enable the auto-return feature on the motor. Another positive line is fed through the switch, so that the motor can be turned on/ off at your will & requirement. This OE wiring harness has the provision for rear high mount internal stop lamp too; which was also added during my recent restoration. (separate thread)
The washer tank with support for 2 washer pumps sits in place of the old tank and the rear nozzle is lined up with the long hose procured. This hose connects the the rear nozzle to the output of the washer pump fitted to the washer tank under the front fender. I am extremely sorry for not putting up pictures of these steps due to lack of hands.
Also, you can see the dent on the LHS of the hatch. It was gifted to me when my car was parked at a relative's house. When the car went for the repair job to MASS, then they finished the wiper motor mounting in a cleaner manner. My job was little crude if you would have taken off the pads of hatch and peeped inside. MASS, with their welding torch made OE like mounting points for the new design motor.
Final pic after the entire job done, and hatch dent repaired & repainted: 
Thanks!
Thread moved from the Assembly Line. Thanks for sharing.
The car seems to have had a neat makeover apart from the rear wash wipe. Please do elaborate on the whole process.
Saket Bhai,
That is a fantastic install and very important during rainy season when needed. Clean pictures with fine observation posted by you is a pleasure to read.
Do add check valves (non-return valves or one-way valves) for the rear washer pipe. This will negate the delay in water spray when the washer stalk is pulled. This prevents the wipers from sweeping the windshield dry that could scratch the glass too. Life of the blades too could increase as the cleaning efficiency is increased with water spraying at the same time the sweep starts.
Here's the information you'd need. I have added them in my Swift.
DIY - Check Valve
Also if possible how about rear defogger addition? I know it is costly but worthy addition. What say?
Leoshashi is an encyclopedia for anything related to M800 and Maruti themselves so he is the best point of contact! I trouble him a lot staying in Hyderabad so I can understand his plight with you staying so close-by. :D (Just kidding).
This is exactly what I wanted to do for my Celerio VXi (ZXi AMT was not available then). The A.S.S. refused to do it saying the entire wiring harness will have to be changed.
Brilliant addition! A hatchback without rear wiper looks so incomplete. :)
It will be great if you can add pictures of the control switch, wiring and plumbing to make this thread complete.
The parting shot looks fabulous!! Complete with the Vxi badging!
Had thought about adding a rear wiper for my Santro Xing awhile ago. The A$S was very unhelpful then - they suggested changing the whole rear hatch!! So shelved the plan indefinitely.
Quote:
Originally Posted by crdi
(Post 4119341)
The car seems to have had a neat makeover apart from the rear wash wipe. Please do elaborate on the whole process.
|
Thank you! Yes, the car has gone through a facelift! The related thread will be live soon.
Quote:
Originally Posted by a4anurag
(Post 4119351)
Saket Bhai,
That is a fantastic install and very important during rainy season when needed. Clean pictures with fine observation posted by you is a pleasure to read.
Do add check valves (non-return valves or one-way valves) for the rear washer pipe. This will negate the delay in water spray when the washer stalk is pulled. This prevents the wipers from sweeping the windshield dry that could scratch the glass too. Life of the blades too could increase as the cleaning efficiency is increased with water spraying at the same time the sweep starts.
Also if possible how about rear defogger addition? I know it is costly but worthy addition. What say?
|
Thank you so much Anurag Bhai! Your check valve idea is going to be integrated soon. That will be a very important addition to the system.
Regarding the defogger, the rear windshield will need replacement. Its something I have definitely planned for in coming months.
Quote:
Originally Posted by pedrolourenco
(Post 4119355)
This is exactly what I wanted to do for my Celerio VXi (ZXi AMT was not available then). The A.S.S. refused to do it saying the entire wiring harness will have to be changed.
|
Actually, banking on ASC for such modifications is almost useless. The ASC will seldom indulge in such mods.
Quote:
Originally Posted by deetjohn
(Post 4119375)
Brilliant addition! A hatchback without rear wiper looks so incomplete. :)
It will be great if you can add pictures of the control switch, wiring and plumbing to make this thread complete.
|
Thanks! Certainly hatchbacks look smart with a rear wiper. I will post more pictures of the install soon.
Quote:
Originally Posted by Geo_Ipe
(Post 4119534)
The parting shot looks fabulous!! Complete with the Vxi badging!
|
Haha...so you noticed! Please refer to the restoration thread coming up soon. Thanks!
Quote:
Originally Posted by Geo_Ipe
(Post 4119534)
Had thought about adding a rear wiper for my Santro Xing awhile ago. The A$S was very unhelpful then - they suggested changing the whole rear hatch!! So shelved the plan indefinitely.
|
As said earlier, ASCs mostly will not be interested in such jobs. I believe even car manufacturers advise them to stay away from even smallest of modifications.
Regards,
Saket.
Quote:
Originally Posted by saket77
(Post 4119585)
Actually, banking on ASC for such modifications is almost useless. The ASC will seldom indulge in such mods.
|
The only reason I asked them is because I did not know which parts to replace and the part numbers. For the ASC it would be simpler to figure out what needs to be replaced.
Quote:
Originally Posted by saket77
(Post 4095216)
First, the parts for the purpose. Zen is now definitely not a car for which you just go to the ASC and buy the parts off the shelf. Although, the car sold exceedingly well in its hay days but time has now taken its toll and parts are not readily available, and here we are talking about parts associated with the rear wiper which aren't fast moving items.
|
This was the biggest challenge, as product planning was more important than execution. A minor miscalculation with regard to spares, and the whole plan could have gone down the drain. I am happy we pulled it off with relative ease.
Quote:
Ladies & gentlemen, for your information, BHPian Leoshashi has now become a reason for a spike in my spends on cars and my diminished savings.
|
I am glad someone actually spoke his heart out, and not the usual complements which I get!!
Quote:
Originally Posted by a4anurag
(Post 4119351)
Also if possible how about rear defogger addition? I know it is costly but worthy addition. What say?
|
Defogger is certainly in the pipeline. It will cost him around 3k for the entire installation(yet more expenses :D)
Quote:
I trouble him a lot staying in Hyderabad so I can understand his plight with you staying so close-by. (Just kidding).
|
If you call that
trouble, you
trouble me daily, more than anyone has ever done in their whole life. :uncontrol
Regards,
Shashi
Quote:
Originally Posted by Leoshashi
(Post 4121408)
This was the biggest challenge, as product planning was more important than execution. A minor miscalculation with regard to spares, and the whole plan could have gone down the drain. I am happy we pulled it off with relative ease.
|
Exactly. And I'm thankful to you that you took the pains of finding entire list of parts needed from the catalogue.
Quote:
I am glad someone actually spoke his heart out, and not the usual complements which I get!!
|
:D I'm utmost serious with this one!
Quote:
Defogger is certainly in the pipeline. It will cost him around 3k for the entire installation(yet more expenses :D)
|
Certainly in the pipeline, and a worthy upgrade.
Quote:
You trouble me daily more than anyone has ever done in their whole life. :uncontrol
|
Anurag, you have some serious local competition here!
Quote:
Originally Posted by Leoshashi
(Post 4121408)
Defogger is certainly in the pipeline. It will cost him around 3k for the entire installation(yet more expenses :D)
|
Quote:
Originally Posted by saket77
(Post 4121414)
Certainly in the pipeline, and a worthy upgrade.
|
I am sorry, total expense for the defogger won't cross 2k.
Glass with defogger-Rs. 1575
Wiring-Rs. 30 :uncontrol
Switch-Rs. 284
Regards,
Shashi
Great stuff Saket77 :)
Quick question to Saket and Shashi - Can something similar be done on a Ritz VDi?
Quote:
Originally Posted by Prodigy07
(Post 4121427)
Great stuff Saket77 :)
Quick question to Saket and Shashi - Can something similar be done on a Ritz VDi?
|
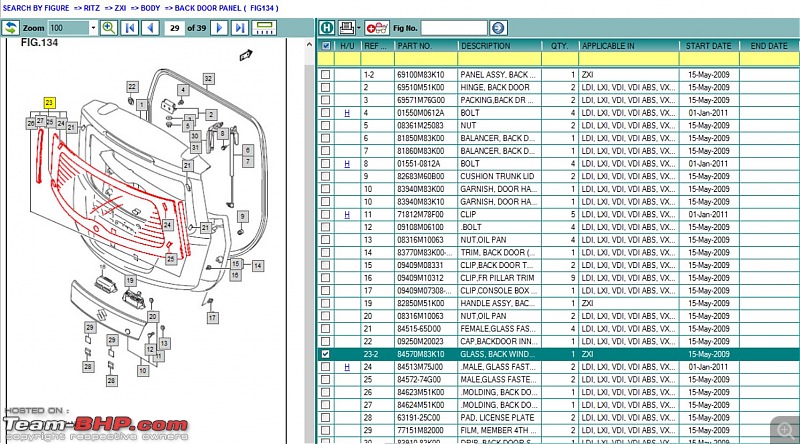
Yes it can be done, but it will require changing of rear glass too as its wiper is mounted over rear hatch glass. Added benefit-you gain defogger too. :)
Regards,
Shashi
^^Added advantage that you don't have to drill holes in the panel! It should be a straight forward fit.
Regards.
| All times are GMT +5.5. The time now is 07:38. | |


