This DIY is for those who want to change their ORVM LED indicators or for those who want to change from standard flashing LEDs to sweep/flow LEDs for Honda City VX / Jazz VX variant. I am not sure if it fits other Honda models as well.
Background:
As I was casually browsing the internet for aftermarket parts which can be added to my Honda City, I stumbled upon these sweeping type LED mirror indicators on
Aliexpress. Since my tail light had the sweeping type, I thought of changing the mirror ones as well.
The Kit.
 Installation Steps
1. Tools required
a. Flat and Star screwdriver.
b. The prying tool which comes with the kit.
c. Patience.
d. A set of pliers (just in case)
2. Install
To begin with, we need to pry open the mirror (glass only) from the housing without which you cannot access the tabs that allow the rear skull cap to be removed.
Insert the prying tool from below and use it as a lever to pull the mirror out. You will hear a sort of gear grinding noise. This is the plastic screws coming out which move the mirror front, back, left and right. Be careful as applying too much pressure can crack the mirror. Patience is essential in this process.
Here, I have unscrewed the motor, but it is not necessary.

After the mirror is out, check that the metal rings which hold the 4 white tabs for the screws (seen in the above 1st image) are in place. These rings hold the mirror screws firmly and cannot be bought separately if lost.
Mirror clips

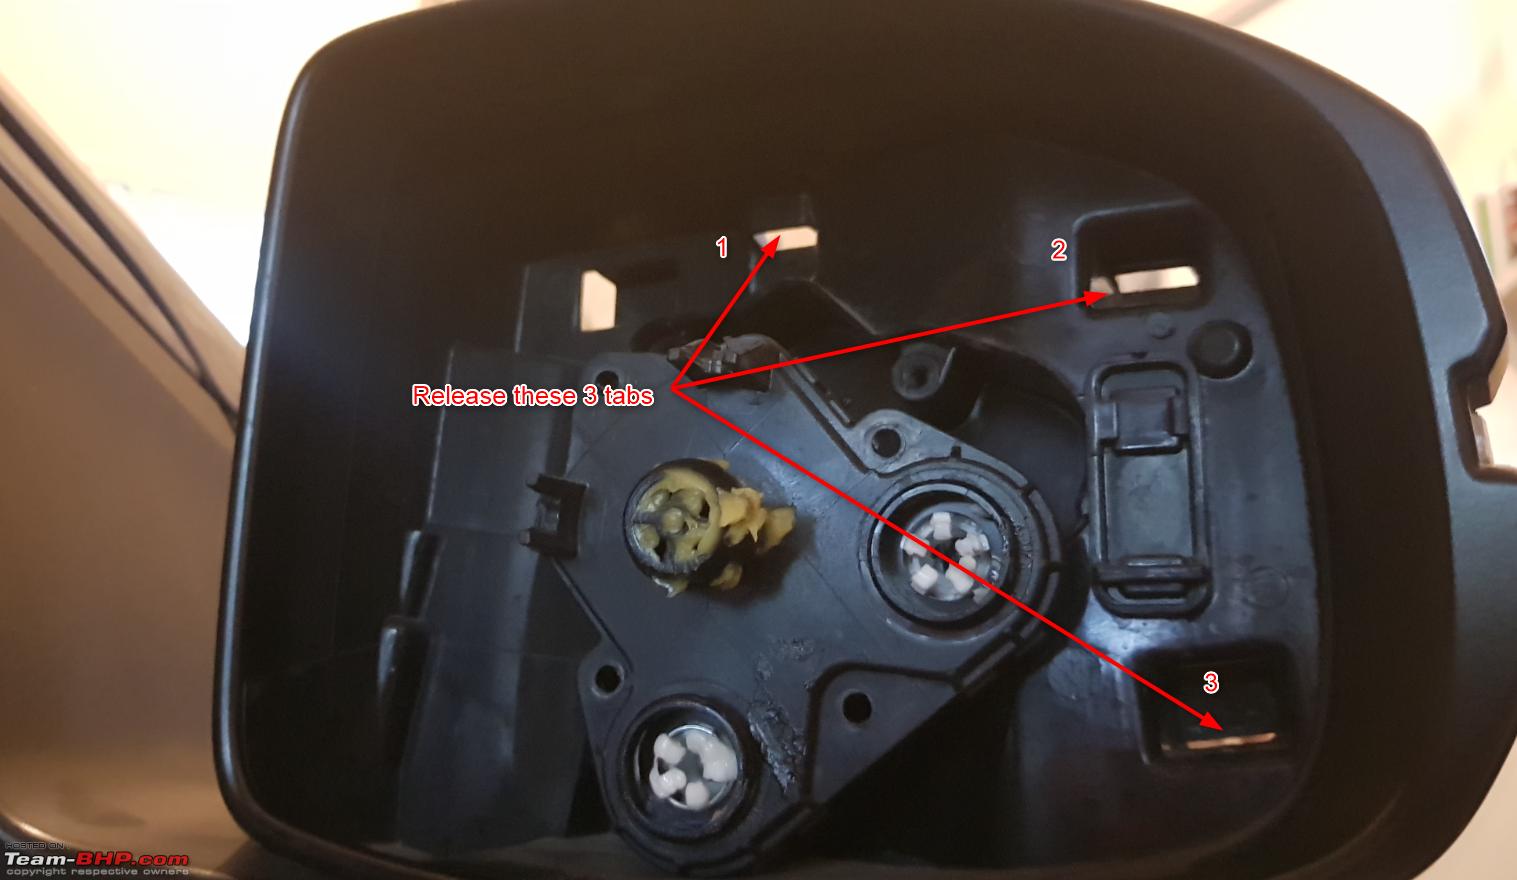
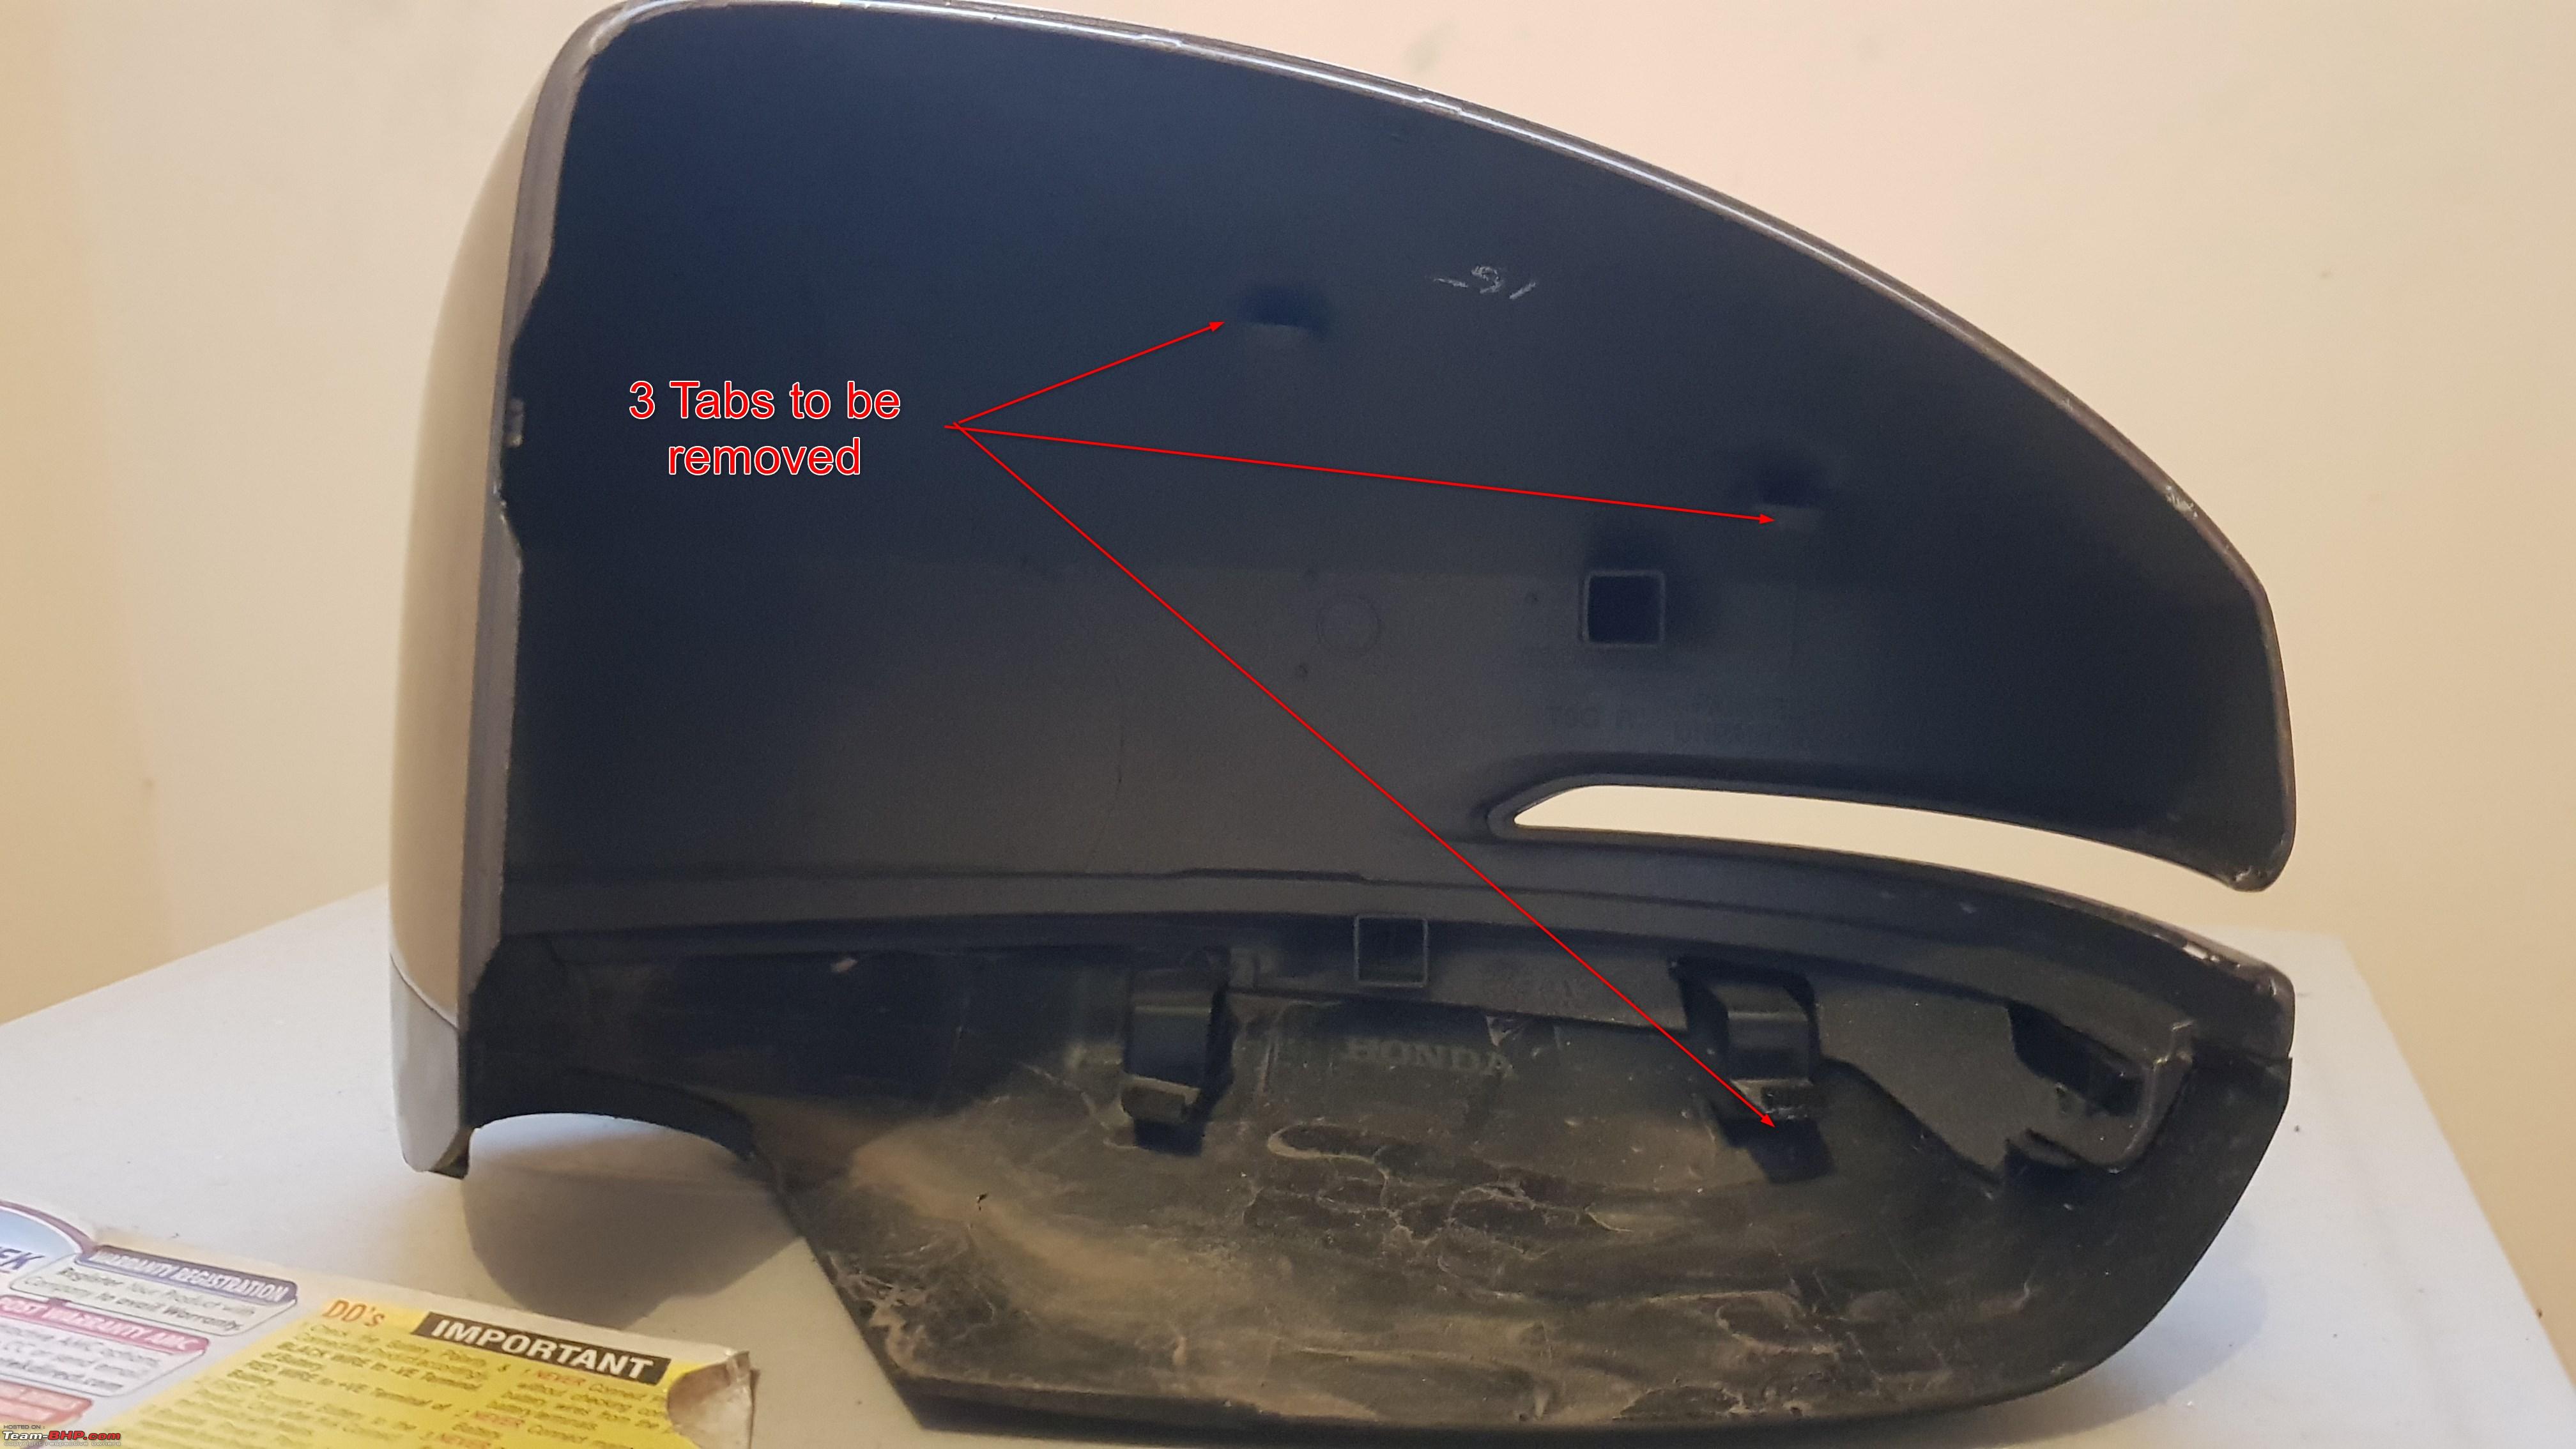
Once the mirror is removed, there will be 3 tabs which will be visible. These 3 tabs need to be pushed out using a star/flat screw driver. This releases the back skull cap of the mirror. Releasing them in an order (1,2 then 3) along with pulling the skull cap from the other side helped ease the process.

Removed Skull cap

Once the cap is removed, you can access the original LED indicator. Loosen the 2 screws with a star screw driver and unplug the existing connector. Be careful not to snap of any plastic tabs.

Replace the old indicator with the new one.

When installing the new one, care is to be taken to ensure that the tab near the right side screw is aligned properly before screwing it in place. I would suggest to install the indicator then plug the connector back in since the connector is having less wiring and can be tight to pull around.
Finally, test the indicator once before snapping back the skull cap in place. Again, when installing the mirror back onto the housing, ensure that the plastic screws are aligned with the holes and that the metal rings are in place before pushing it fully in. Once that is done, test the mirror for functionality.
Before: After:
Thank you. Hope it was a detailed explanation. If not, please ask me any question related to the same. Looking forward to feedback or comments.


 8th June 2019, 08:38

 (42)
Thanks
(42)
Thanks