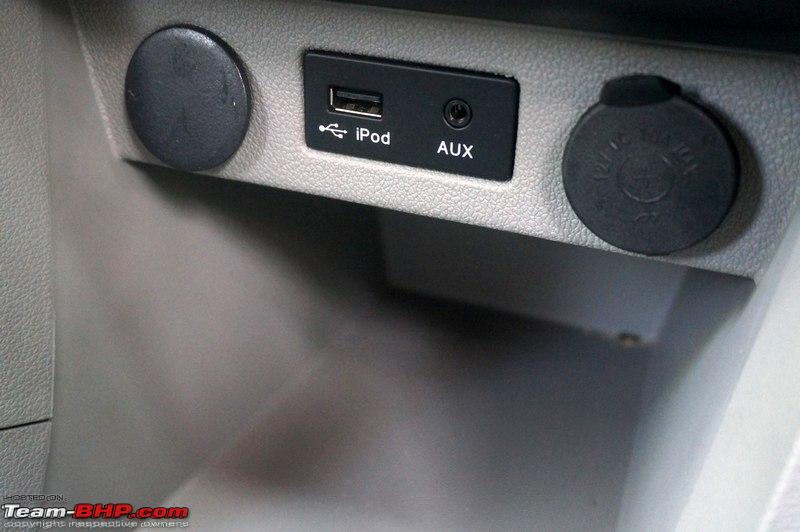
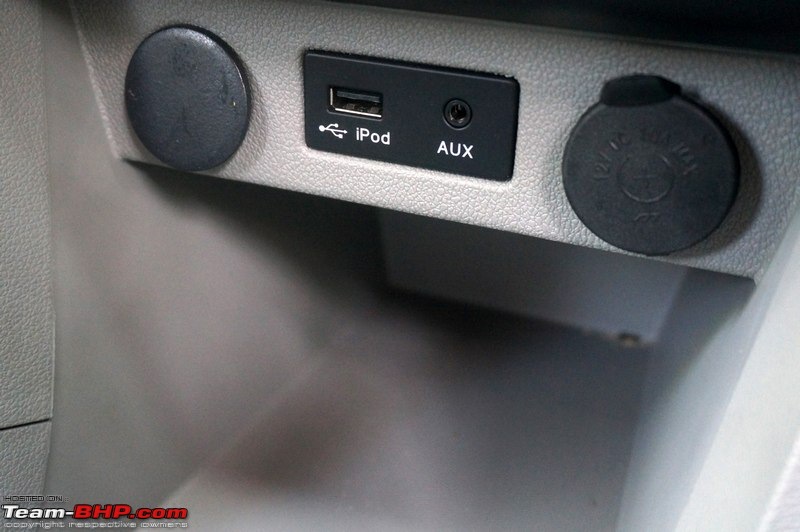
I wanted to add a 12V socket in the Hand brake console area of my Tiago for a long time. The 12V socket provided by Tata at the front is designed poorly. USB chargers installed in the socket do not fit snug and there is lot of play. The connection becomes loose when driven over bad roads. Tata provides a more premium looking and working 12V socket on it's premium models like Hexa, Nexon, Harrier. These are designed better and the USB chargers fit snug. Infact, the Tigor came with this socket until mid of 2018 after which they started coming with the same socket used in Tiago and other lower models. Below is the pic taken from official review of Tigor.

The ill designed 12v socket in Tiago. Pic taken from official review.
So, I wanted to replace the stock socket with the improved one and also add a socket to the rear of the handbrake so that the it is more convenient for the rear benchers to charge their devices.
 Tools required
1. Trim removal plastic pry sticks. Or a flat head screwdriver with tip wrapped in insulation tape.
2. 5mm diameter flexible plastic conduit, about 1.5meters. Available in any electrical shop. Get the smallest dia available.
3. 1sqmm wire in two colors. One for +12V and another for ground. About 1.5 meters of the wire is needed for the power from fuse box to the handbrake area. For ground, 15 cm length of wire . I used green color for +ve and black color for ground wire. Choose whichever you like.
4. Fuse Tap - Mini
5. 10mm T spanner or 1/4 drive socket set.
6. 4mm heat shrink tube
7. Insulation tape.
8. Spade terminal female( Ask for Horn terminal clips in any 2 wheeler spare outlet), 2 nos
9. Ring terminal with 10mm hole
10. Wire stripper.
Ordered 2 nos of the improved socket from Boodmo.
https://boodmo.com/catalog/part-542454200108-50576109/
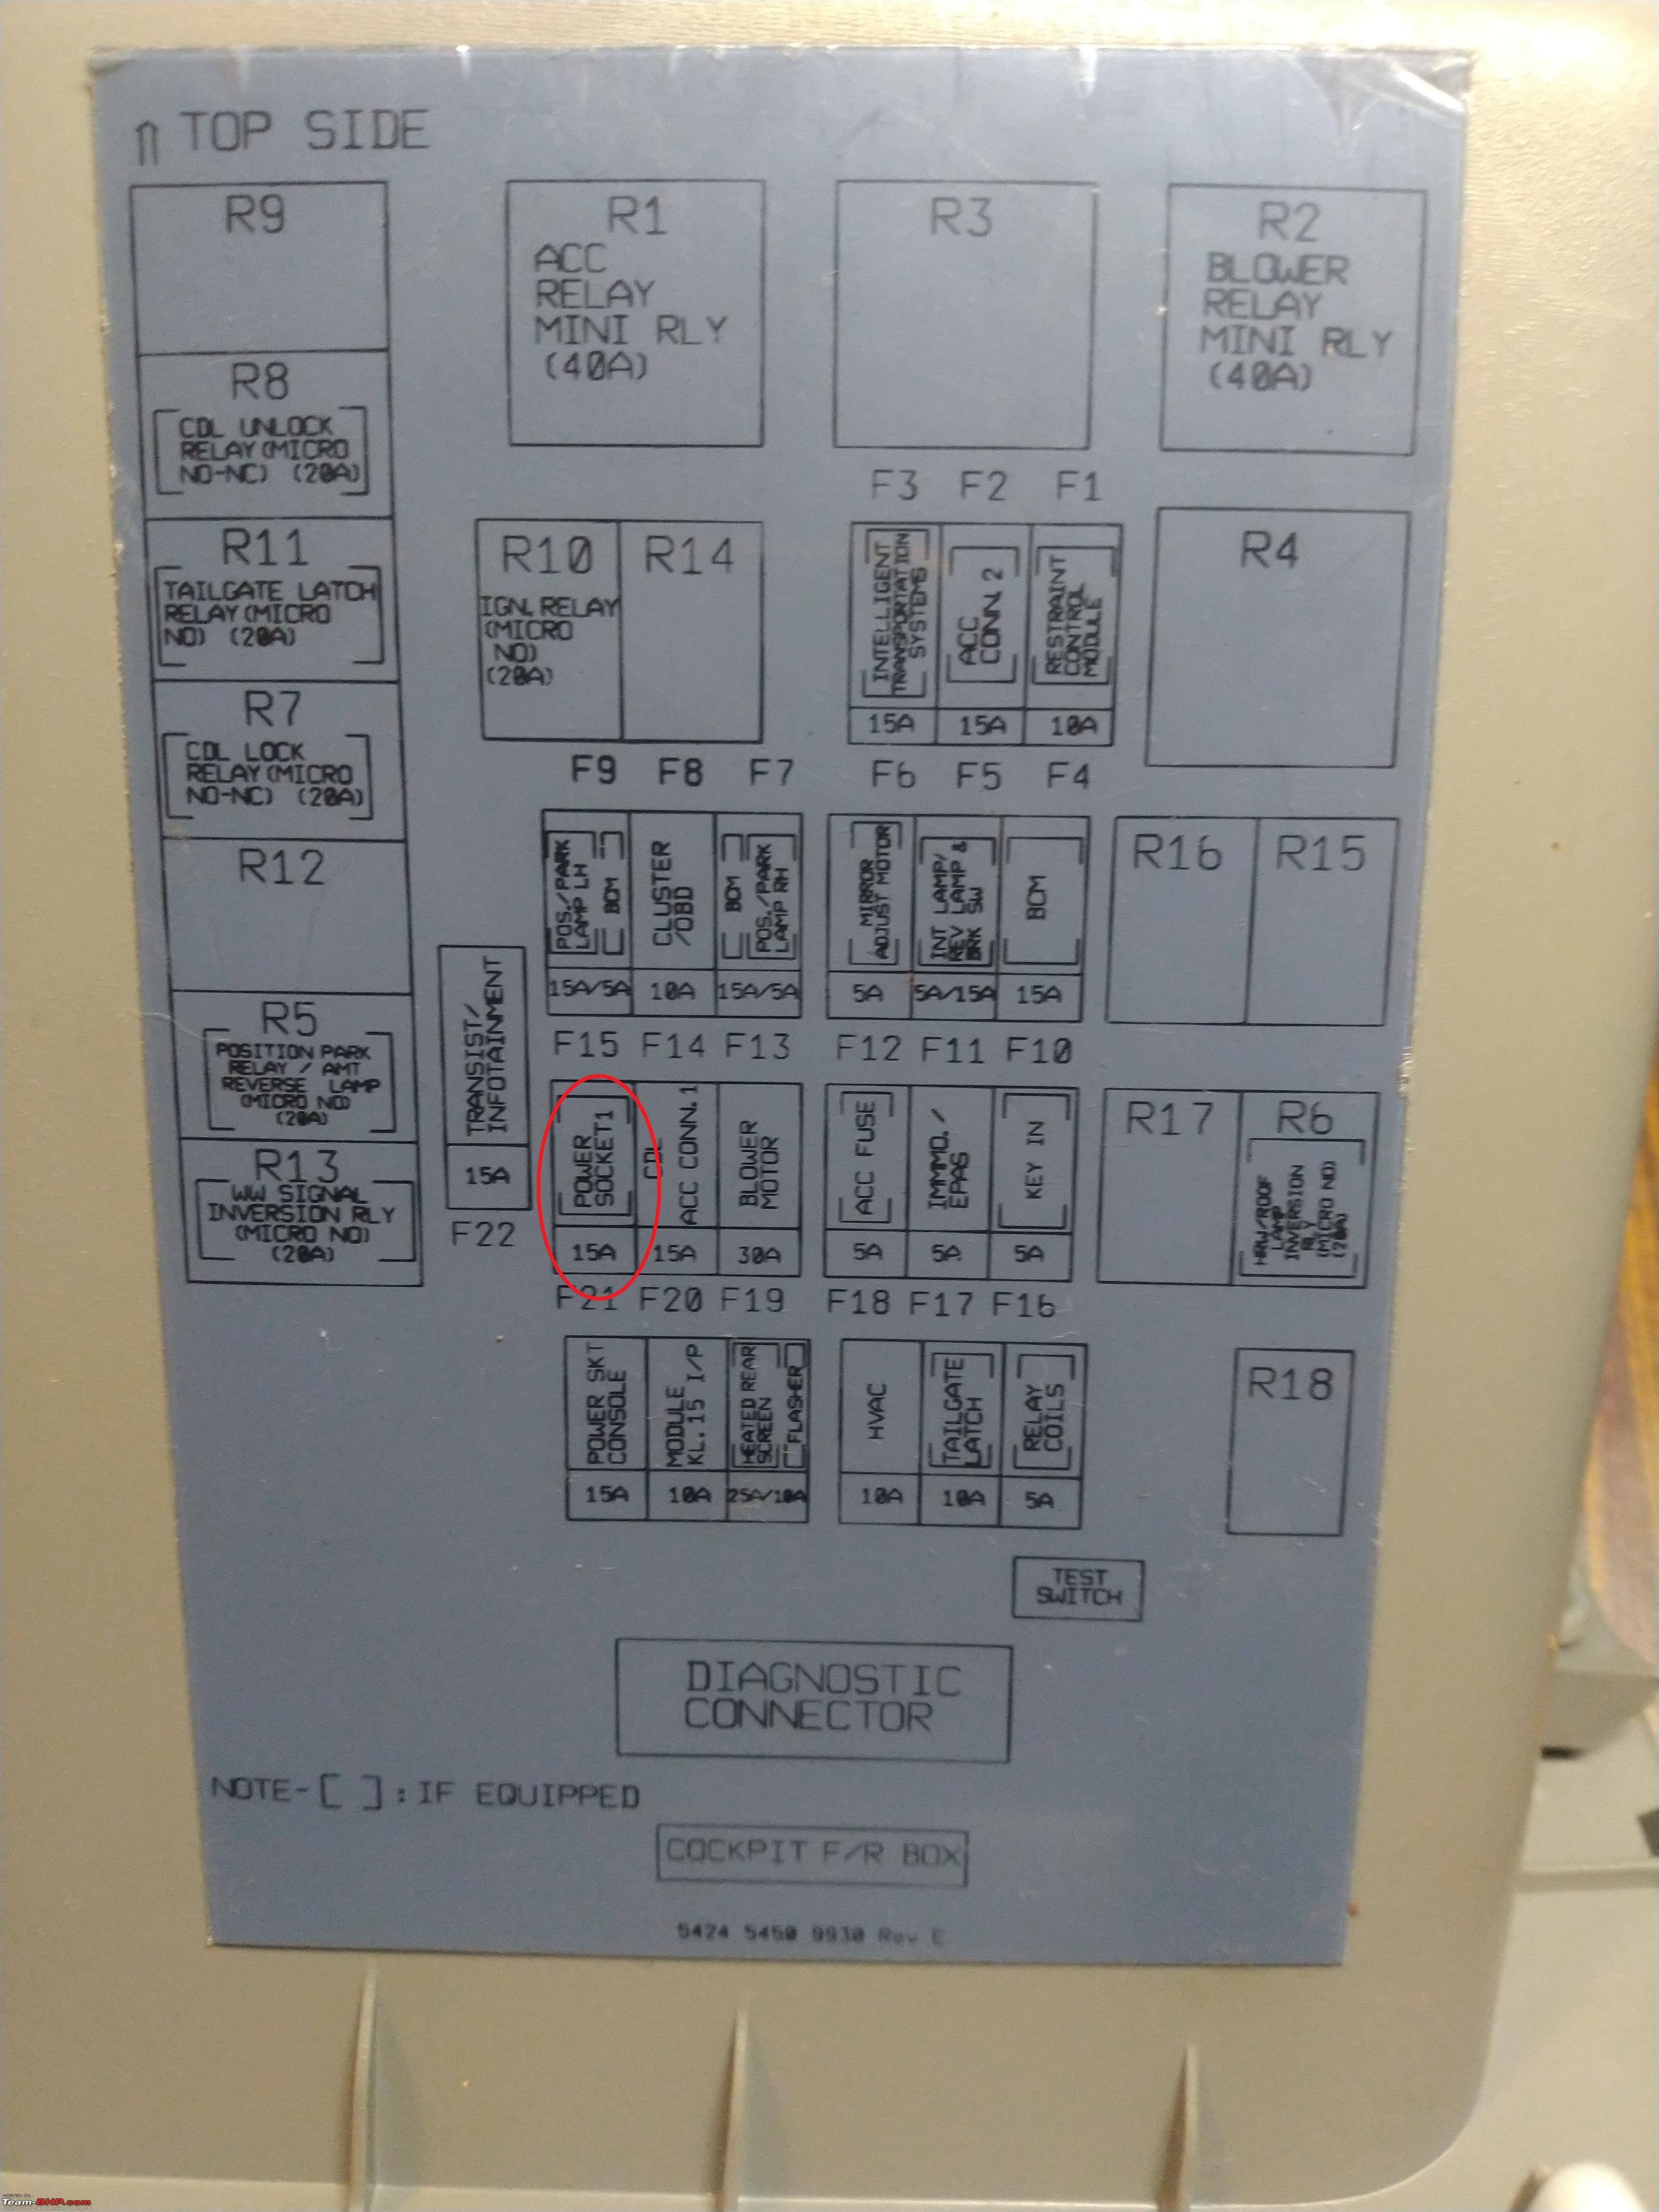
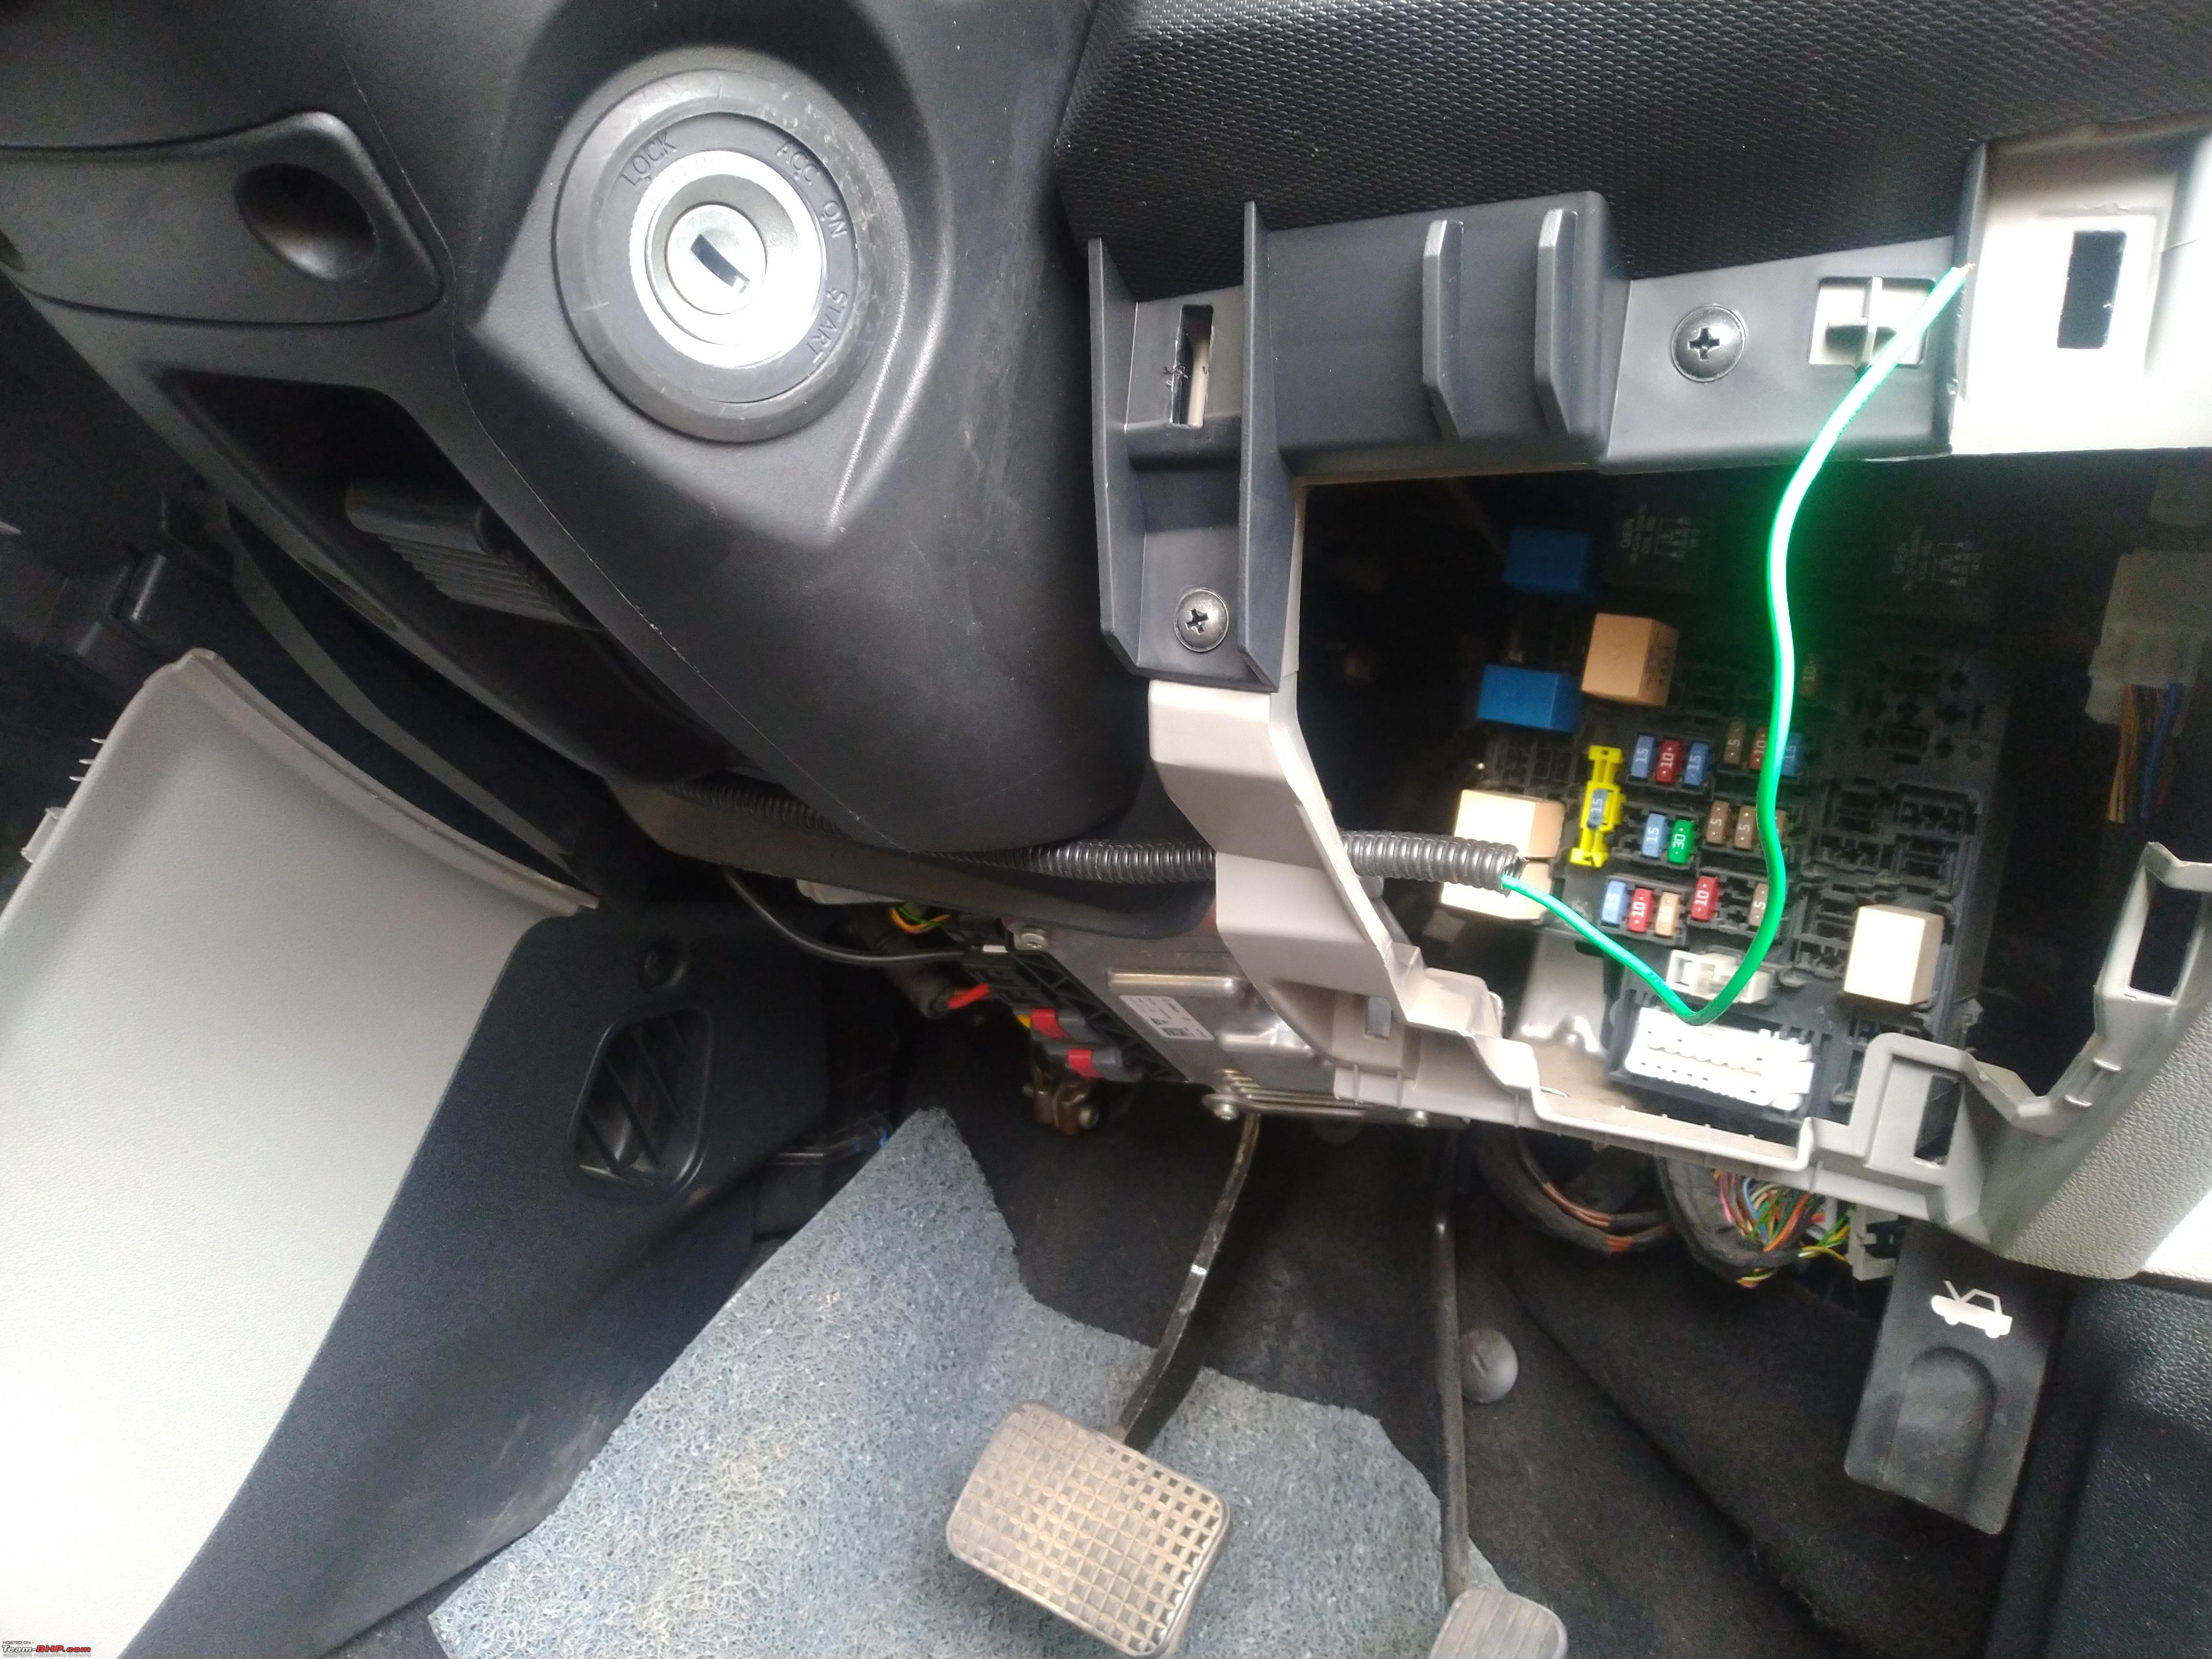
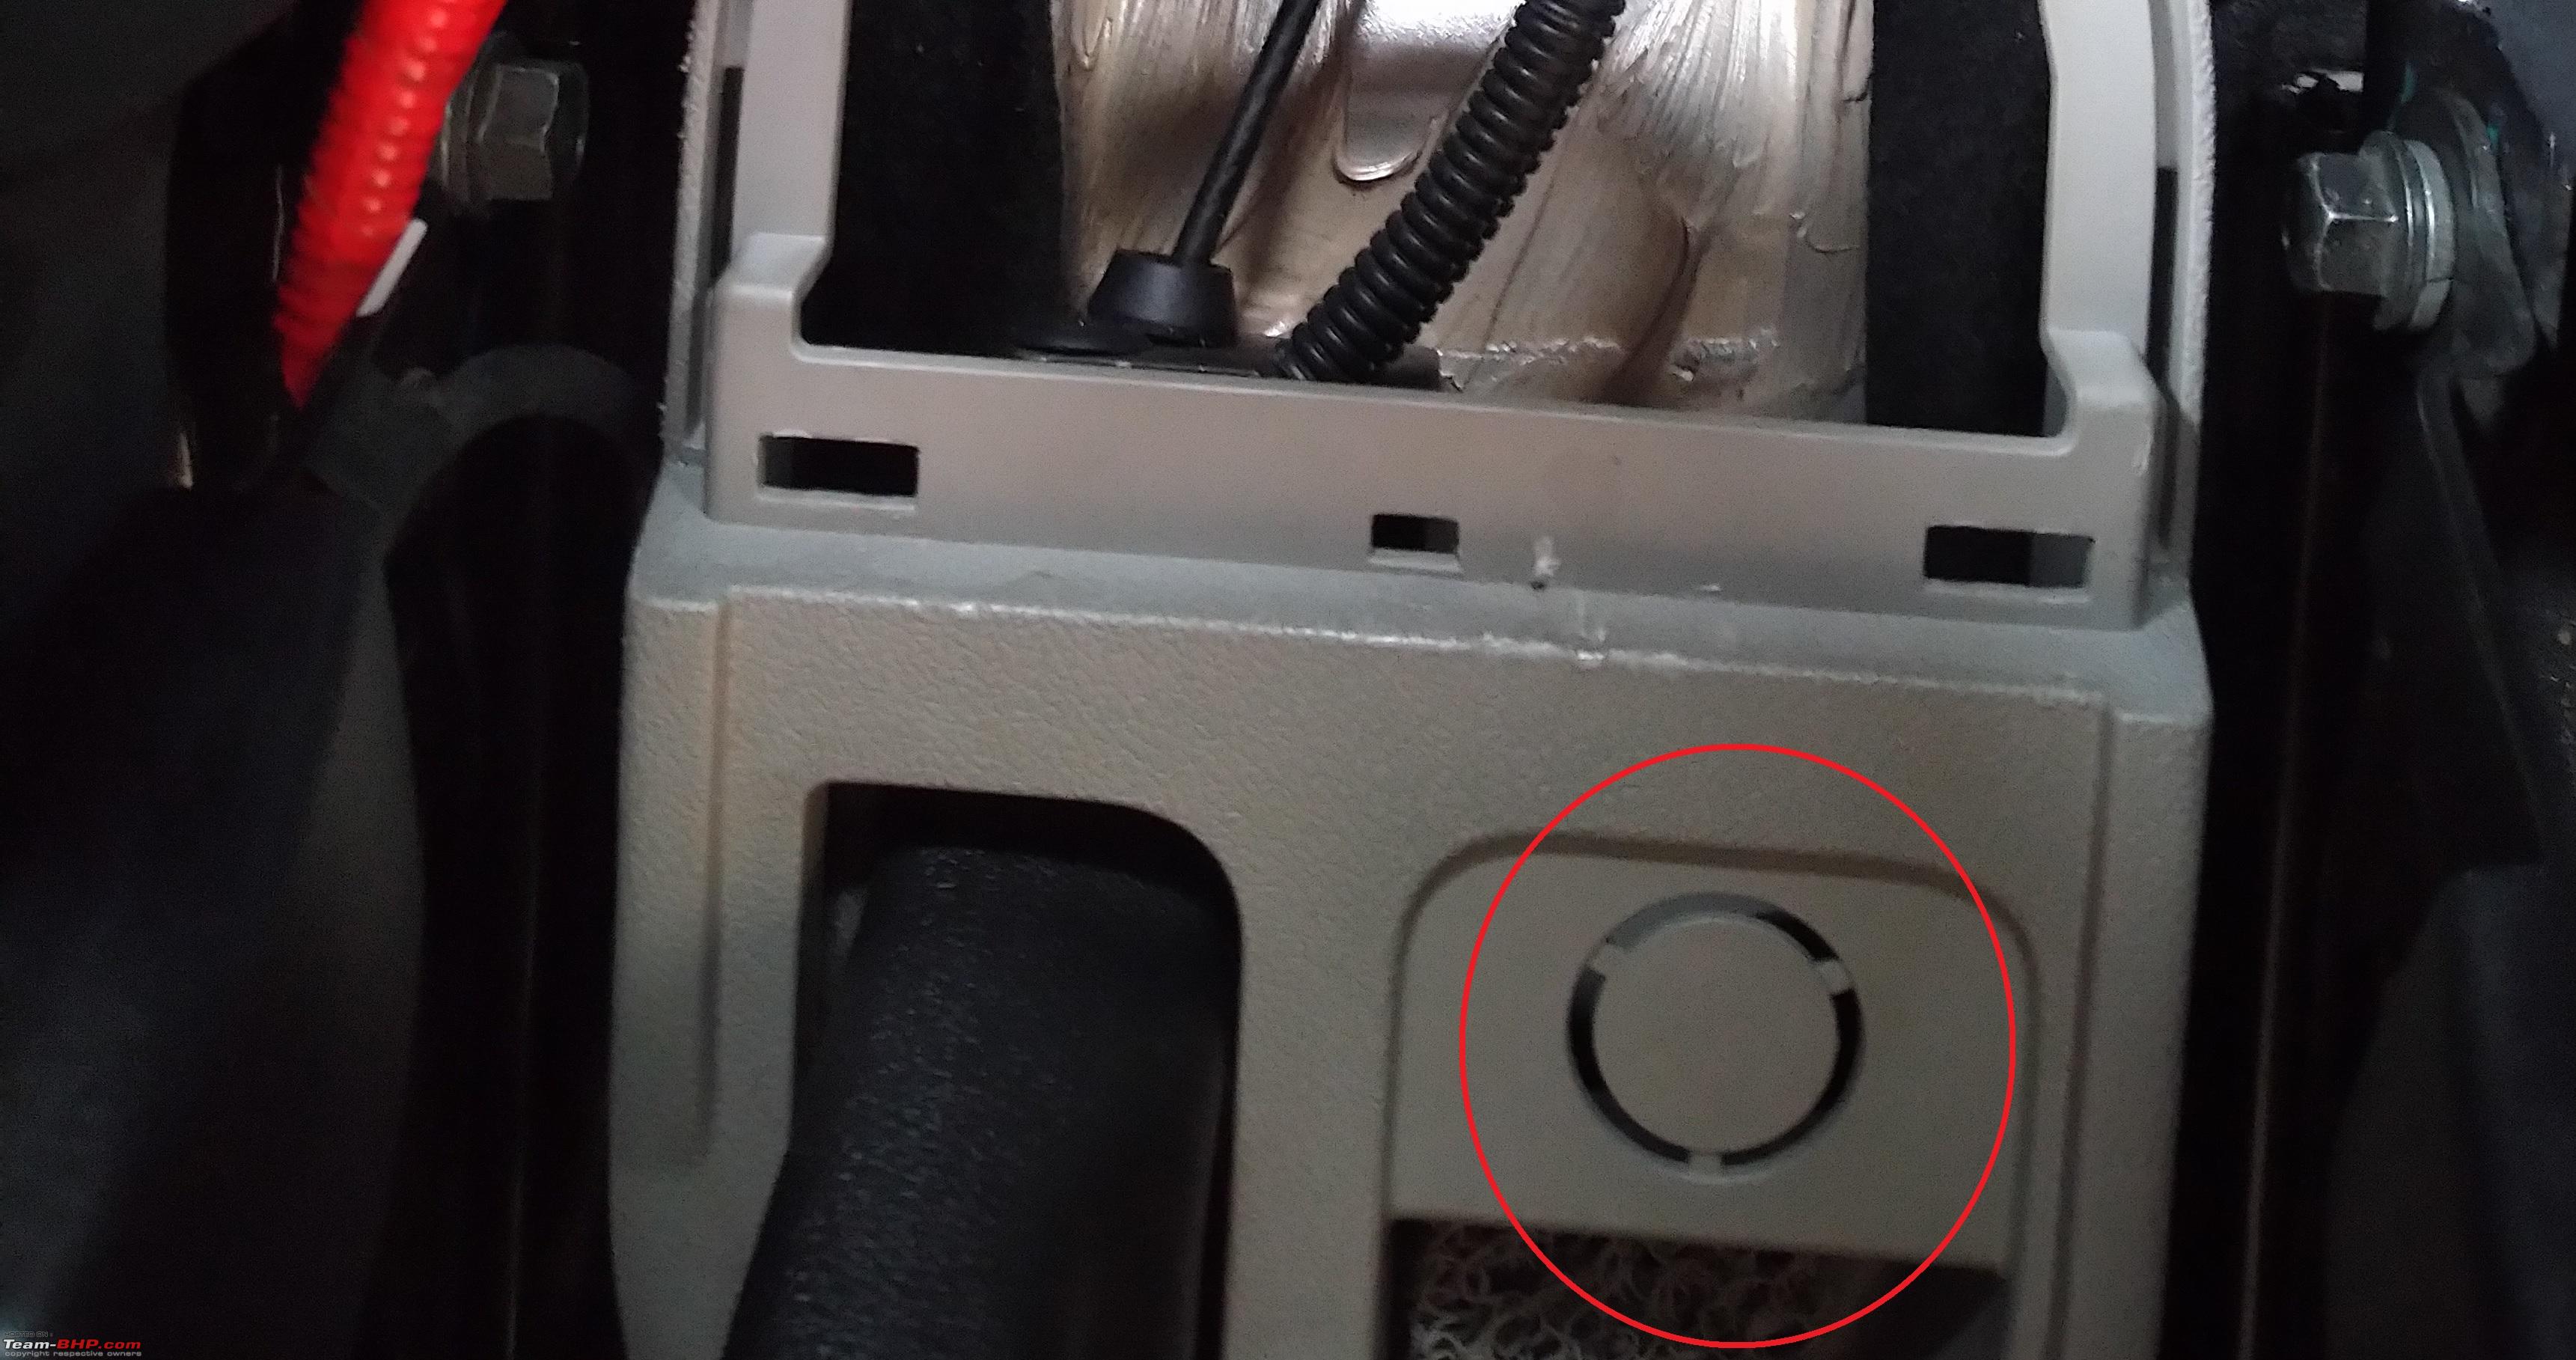
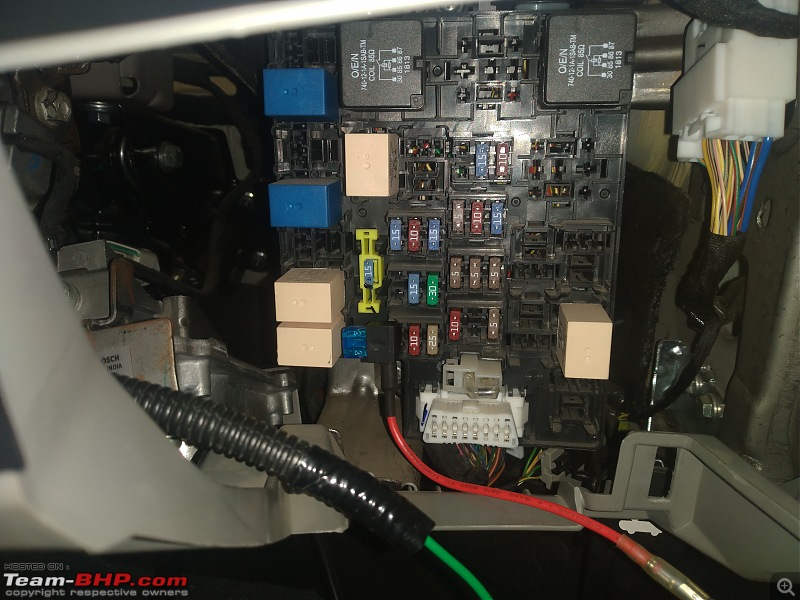
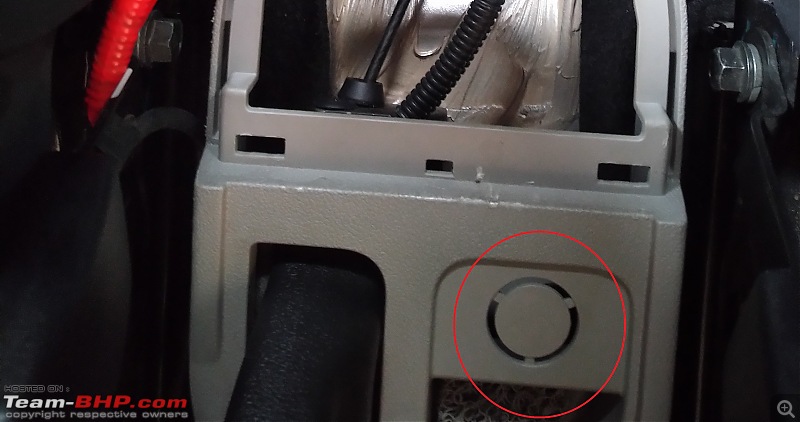
Now, the Tiago does not come with the wiring in place for the rear socket, unlike Tigor which got the wiring harness for the rear socket. I heard that Tigor's after a certain timeframe did not come with the harness as well. Here is a simple way to check if your Tigor has the harness. Remove the cover below the steering by holding it at the bottom with both hands and pulling outwards. The fuse box is behind the cover. In the fuse box, check if there is a fuse or a powered fuse slot in the slot marked by red circle in below pic. If yes, you need not read further, just pull the available pigtail connector to the rear of the handbrake and install the socket. The pigtail connector is available on the left side of the gear lever and you need do some hard work to pull that harness to the rear socket area

So I had to use a fuse tap and draw the wiring upto the handbrake area from the fuse box. I preferred to draw the wire through the flexible conduit since it will offer protection against pinching and rubbing.
Removing the useless 12V socket on the console(Optional)
Since I wanted to replace the front console socket as well with the better designed one, had to remove the existing socket. Take a nose plier and clamp the socket at 12 'O' Clock position and tug it outwards. Repeat the process by clamping at 3,6,9 'O' Clock position. Will take some effort but the socket will eventually pop out. Since the nose plier is used to clamp down on the edges they will be damaged. Anyway, I was installing a new one. Before removing the connector, tie it with a thread of good length and keep the thread outside. This will be useful when we fit back the trim panels. Because, during the removal of the trim panels, this connector will go behind and is difficult to retrieve from the small hole for the accessory socket .
Preparing the harness for routing
Start by drawing the +ve wire though the conduit. Since the conduit is corrugated, the wire may get stuck and may not go further upon pushing. So, wrap the tip of the wire with an insulation tape and then guide the wire though the conduit. It will go lot smoother. Leave around 10cm of the wire on either end of the conduit for connections. Once there is the required length of wire at either end of the conduit, tape the end of the conduit and the wire. This will ensure that the wire will not go back in when routing. It was a big pain in the back to get the wire out of the conduit once I had routed it.
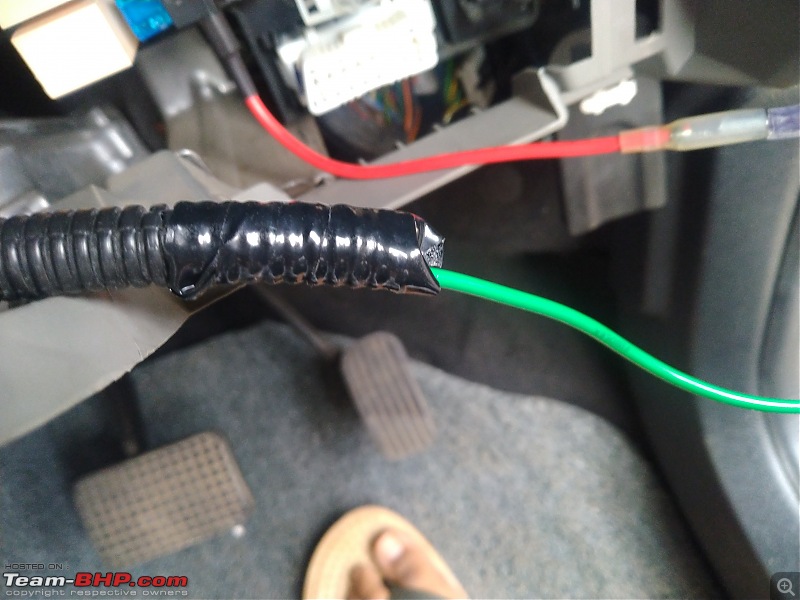
Strip about 1 cm of insulation on one end and crimp the horn terminal on one end of the wire and cover the crimp with heat shrink tube/insulated tape. Bend the crimped terminal onto the pipe and wrap the crimped terminal to the pipe with insulation tape. This will help when routing the wire from the fuse box to the hand brake area.
For the ground wire, strip and crimp the ring terminal on one end and horn terminal on the other end. Use heat shrink/ insulation tape over the crimped area.
Routing the wire wrapped in conduit from the fuse box to the handbrake area
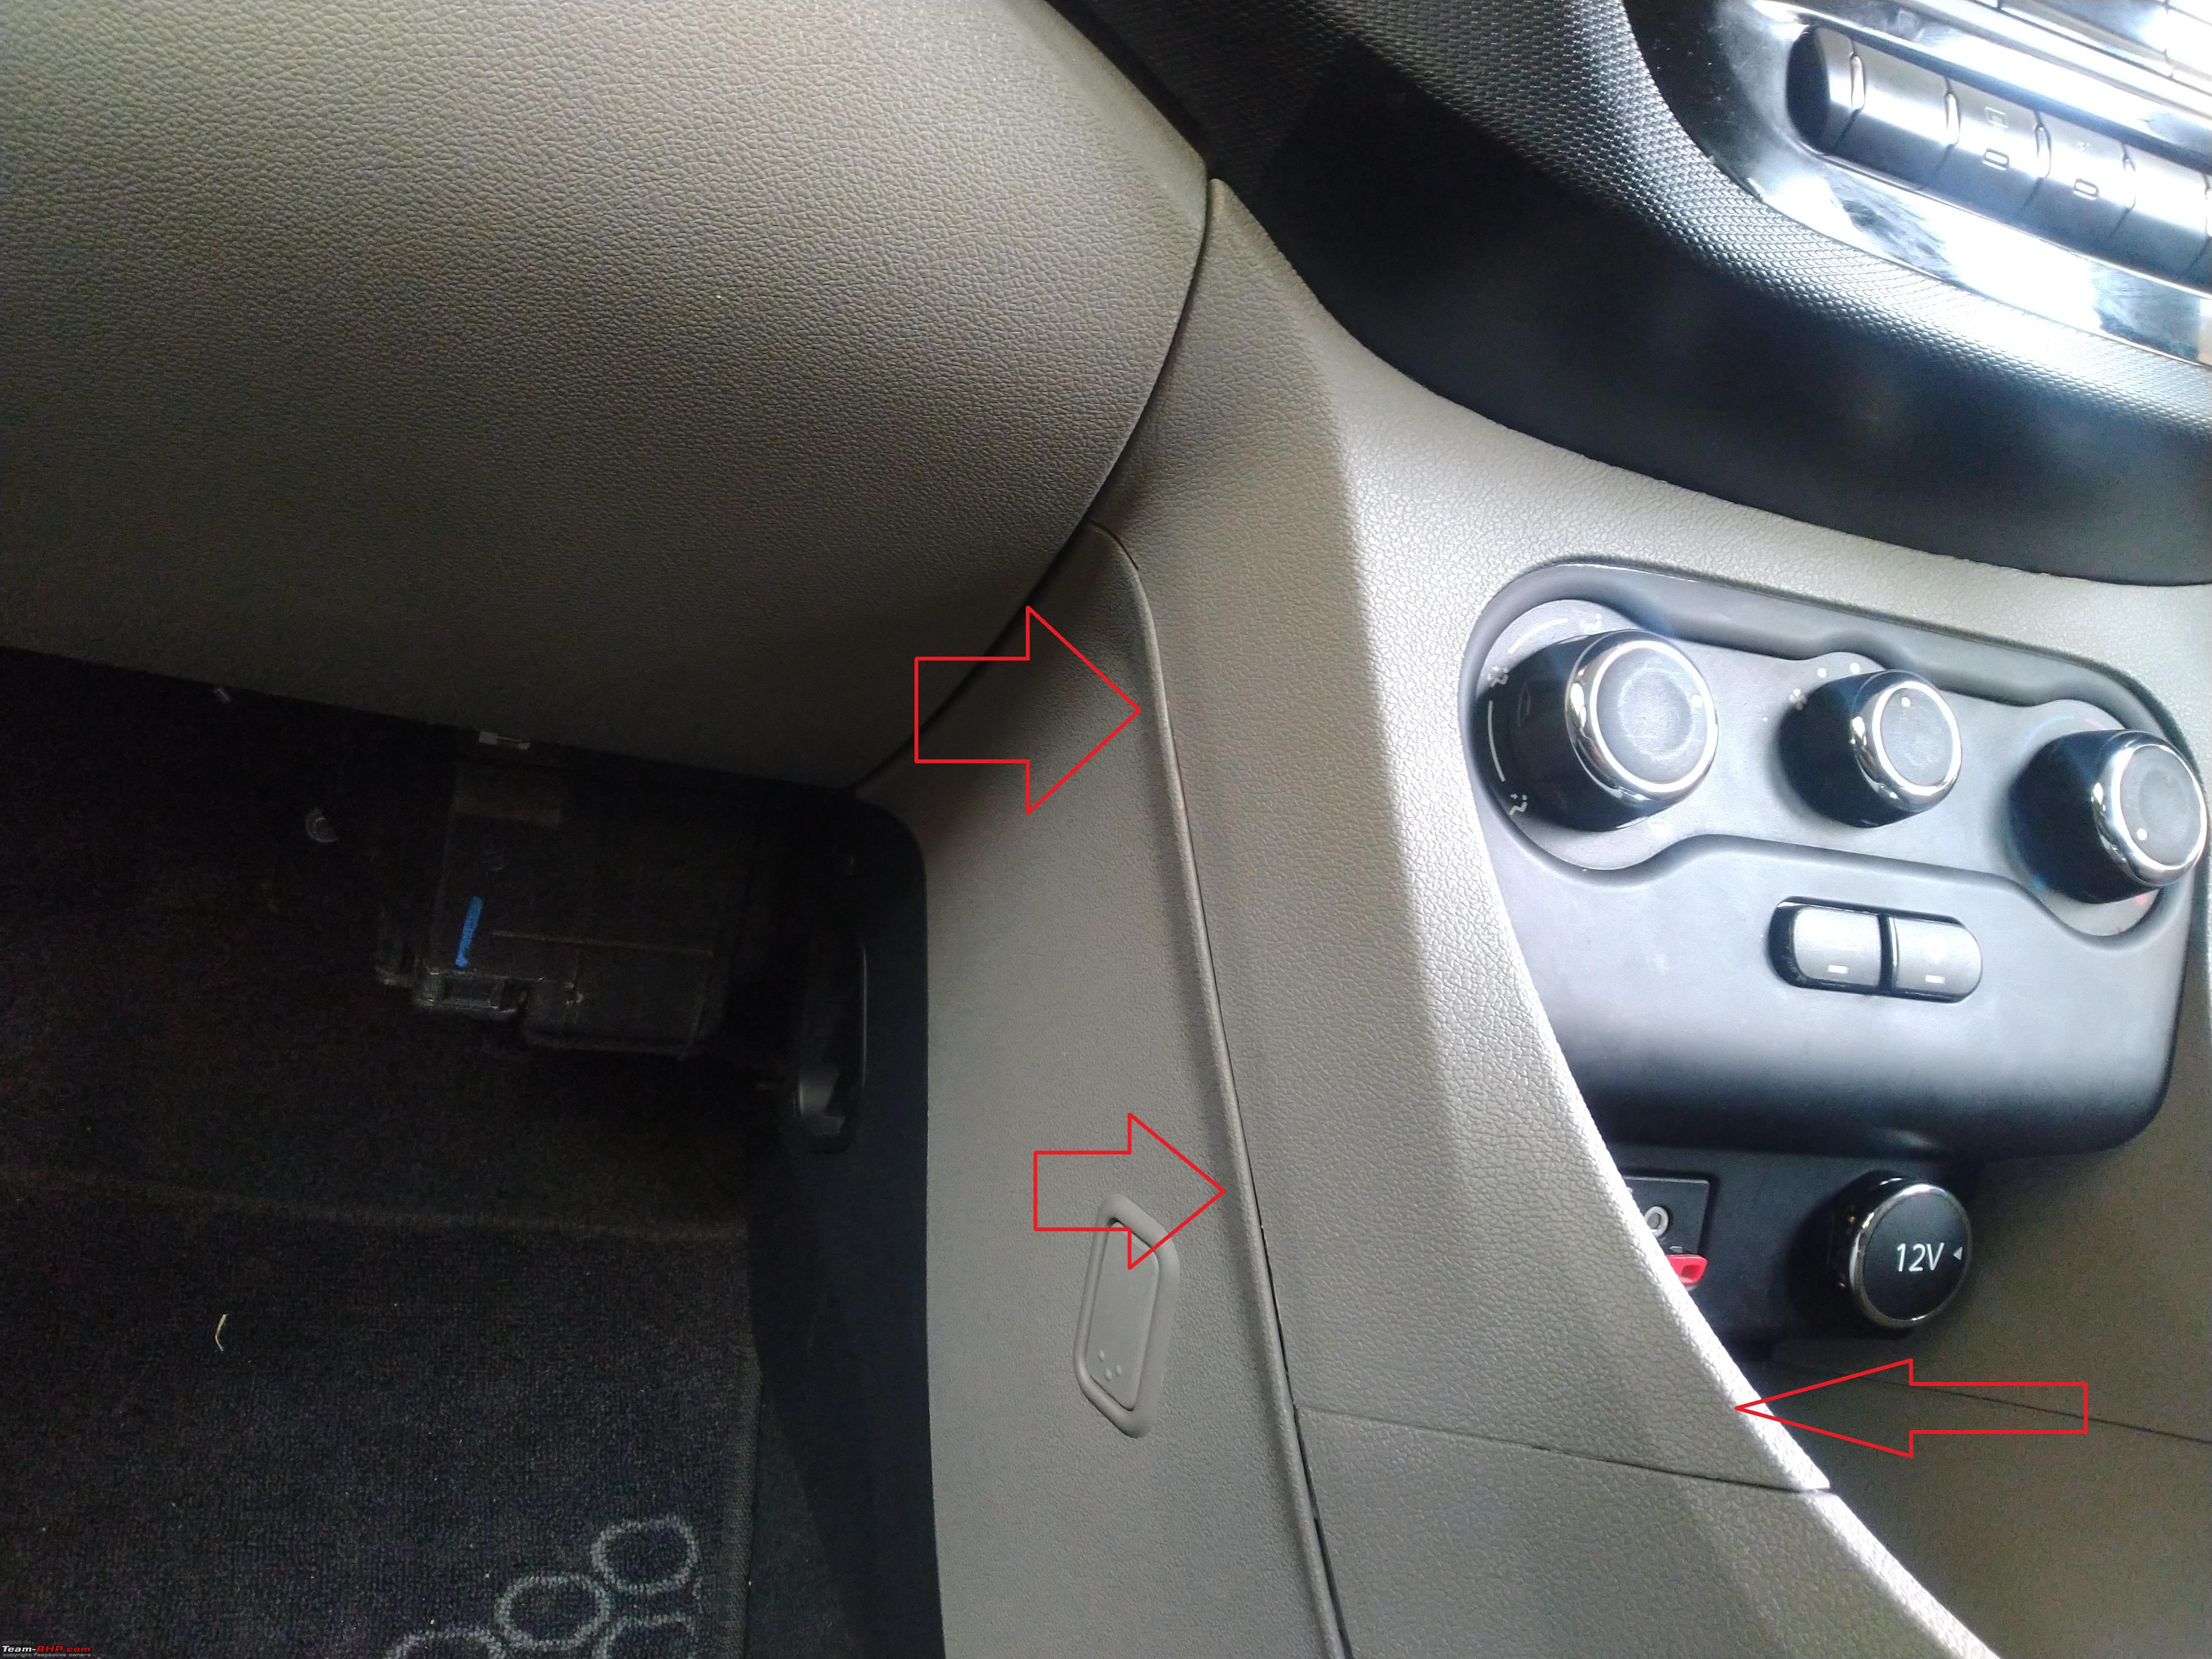
Now the plastic trim bits have to be removed. Start by pulling out the trapezium shaped bottle holder cover. There is a thin gap round this section. This can be removed by inserting the trim tool on the front or the back and pulling it up. It is pretty tight so will need some patience. Sitting on the rear bench helps with leverage.
Next loosen the AMT gear lever cover using similar method as above. It is lot easier. Loosen and pull it a bit upwards.

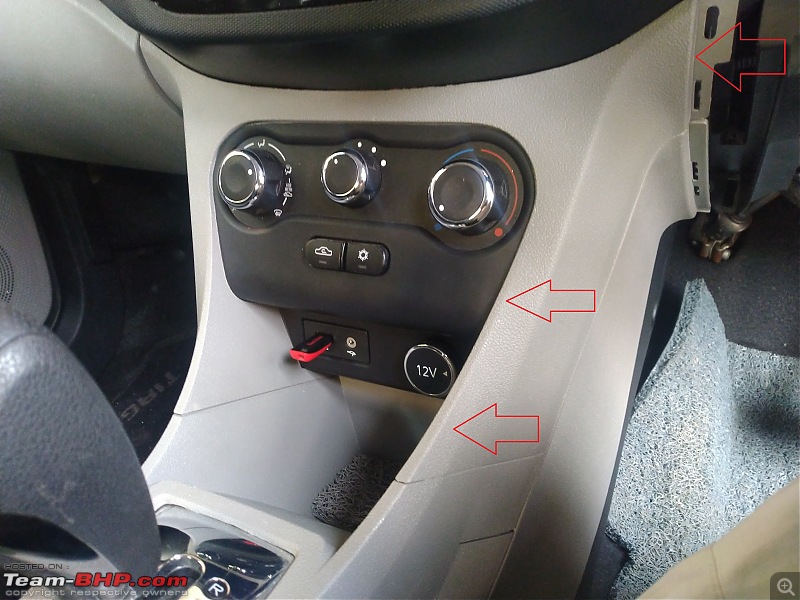
Next loosen the HVAC control panel. This can be pulled out by pulling on the gap created between the gear lever cover and the HVAC panel. No need to pull too hard or too outward. Just enough to put your fingers in the gap created.

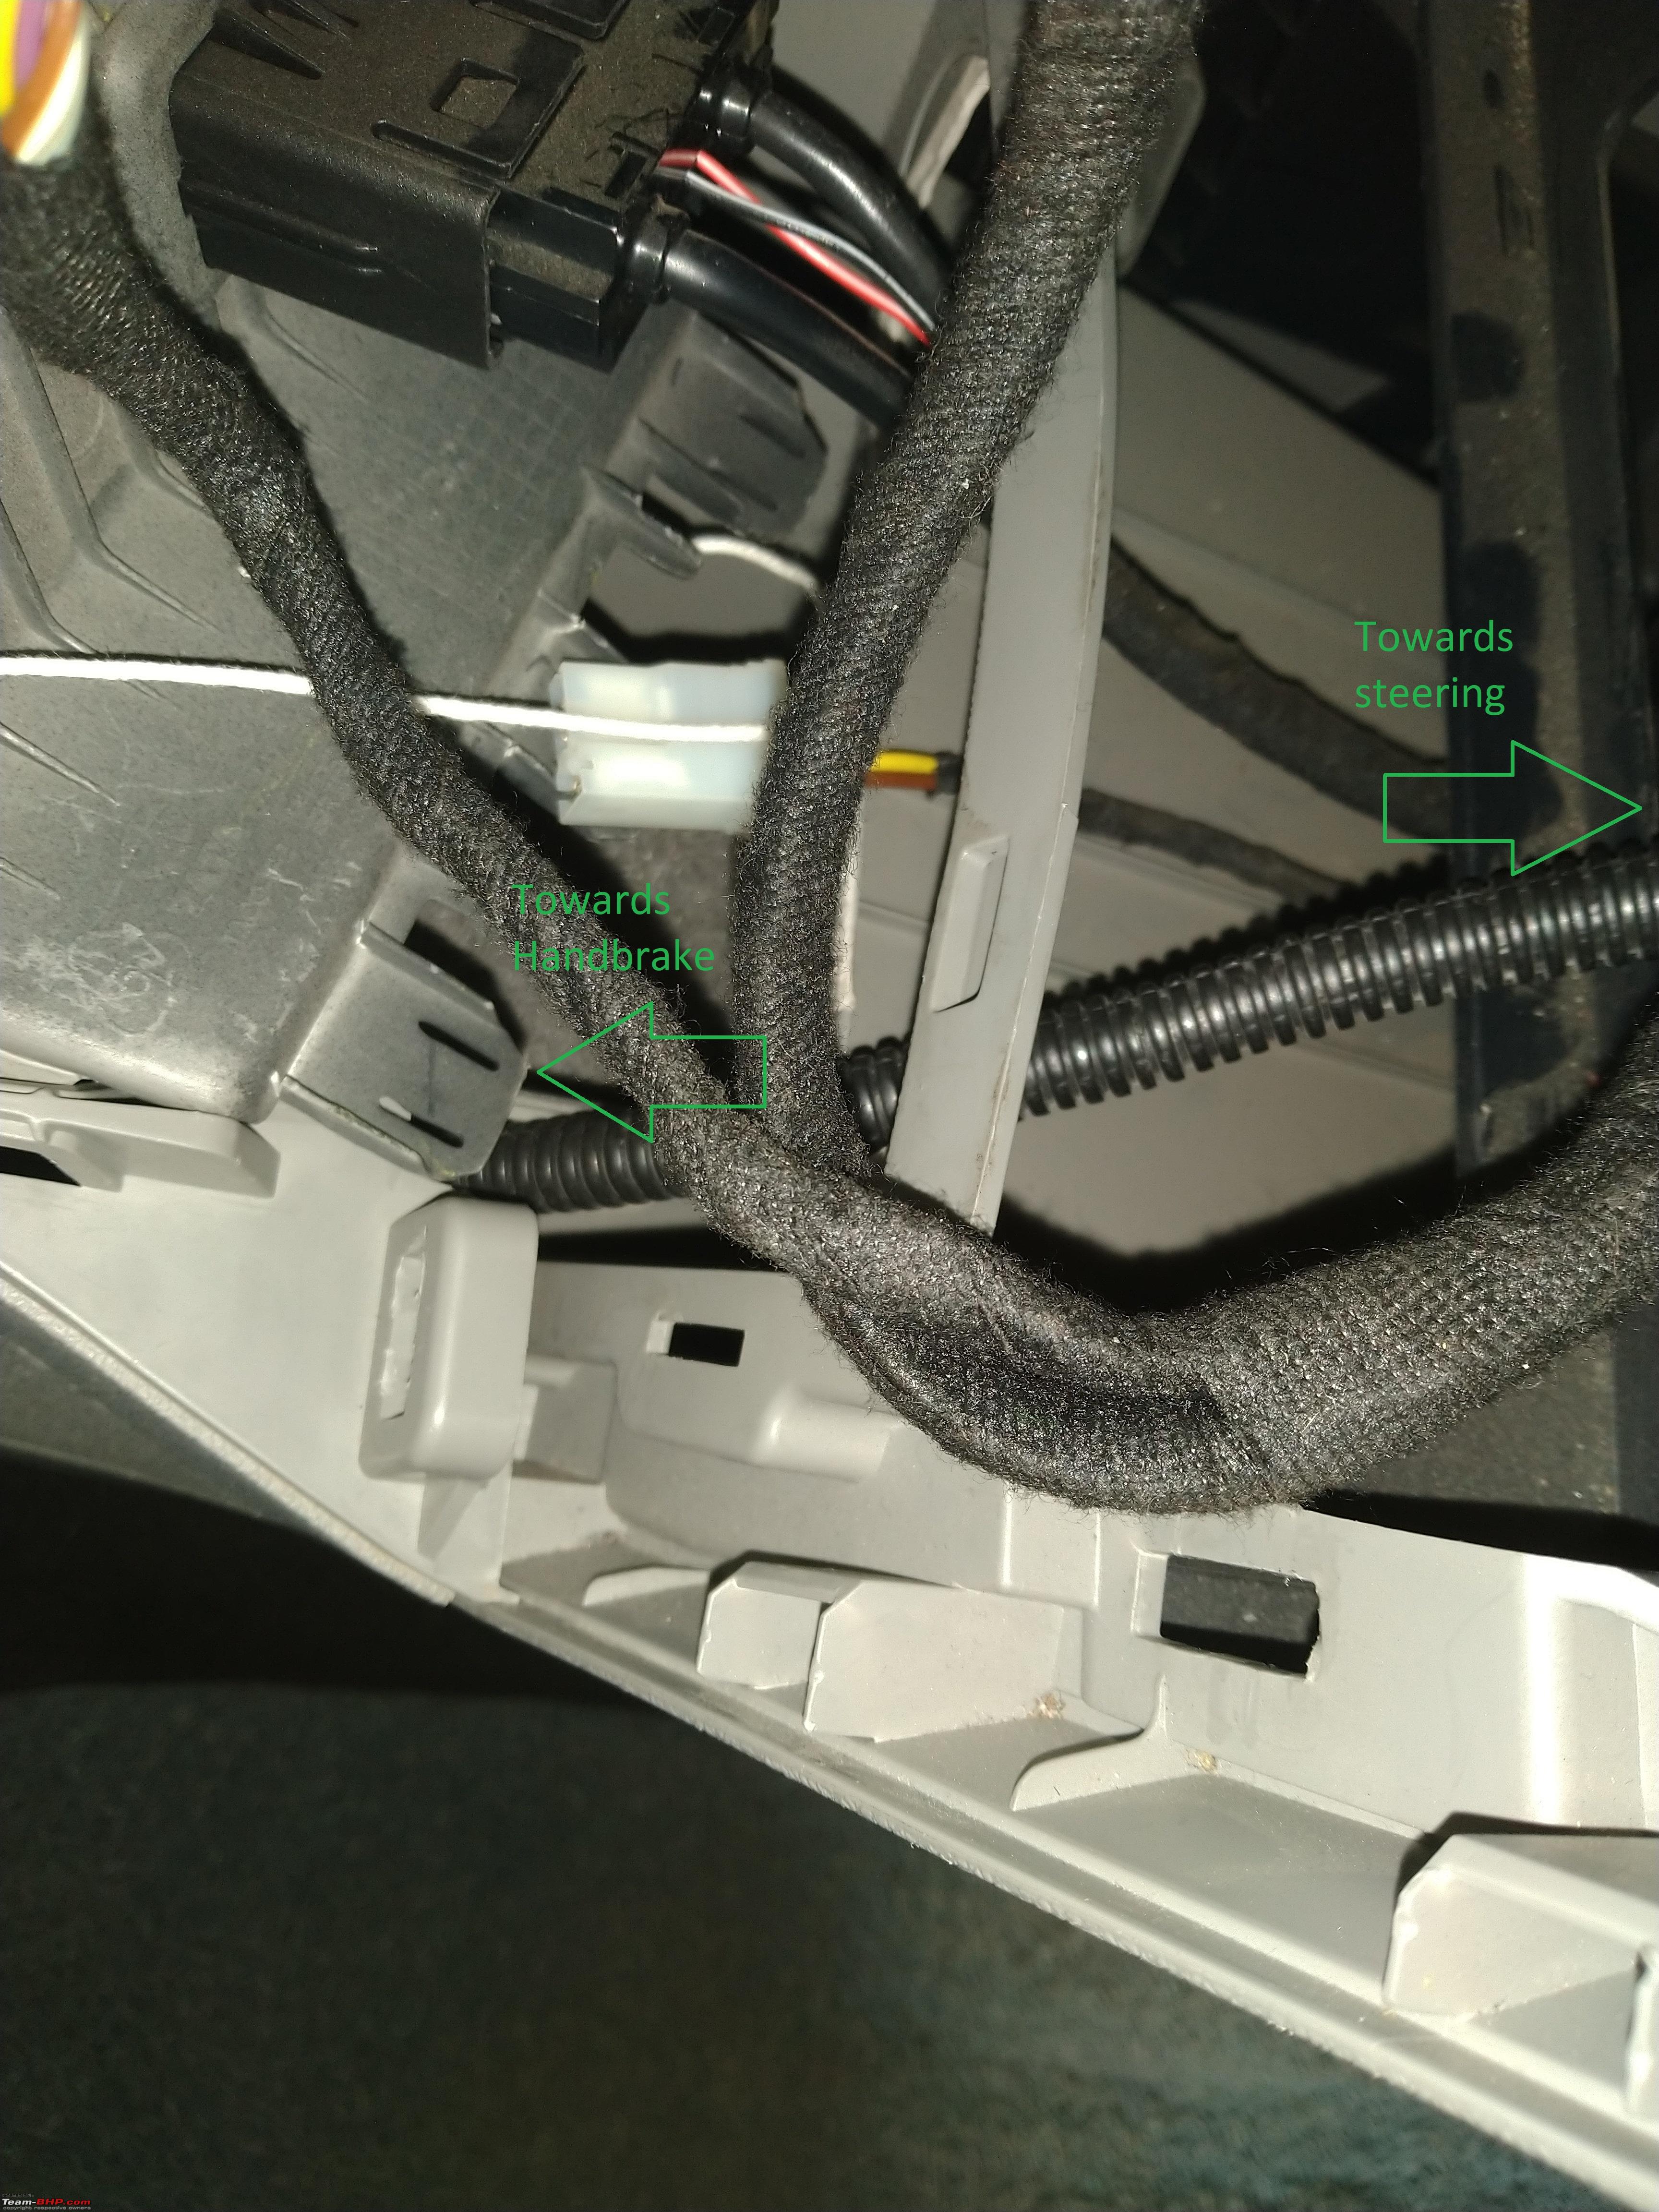
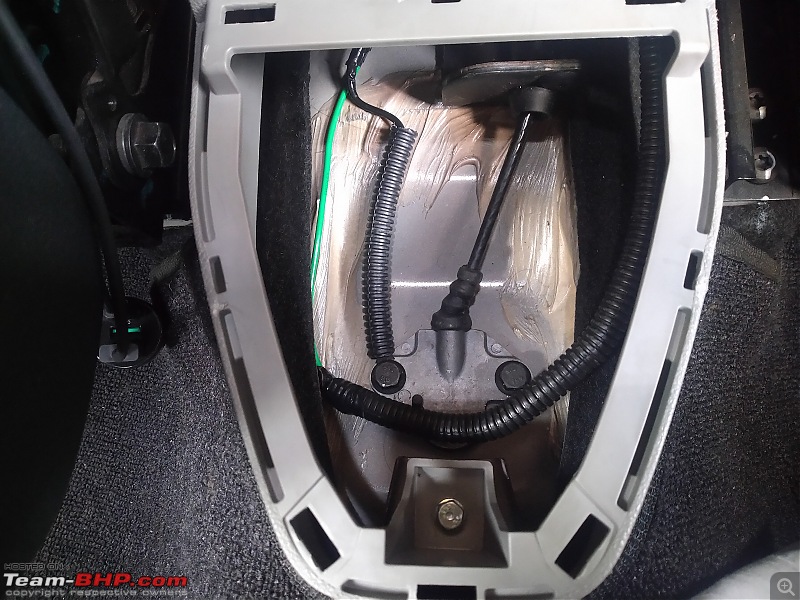
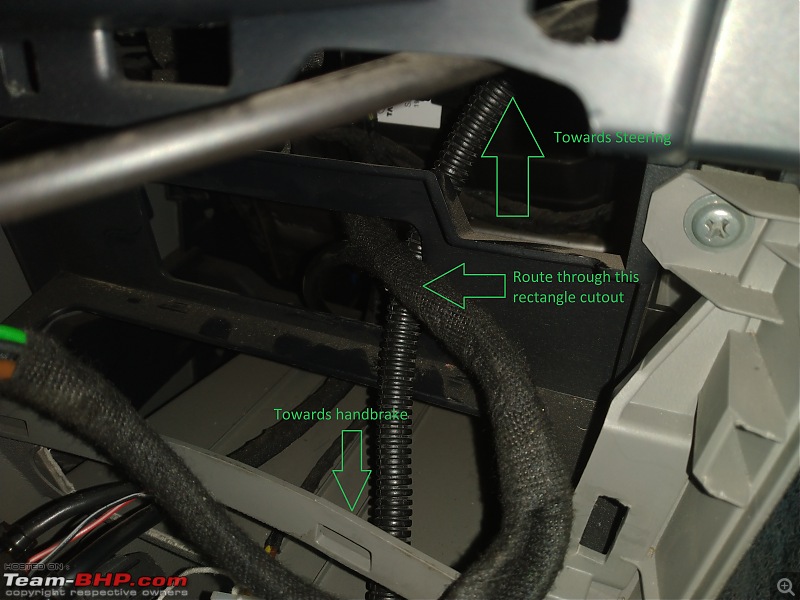
Insert the end of the conduit ,where the wire(with spade terminal )is bent and taped onto the conduit, from behind the HVAC panel. Once the conduit is visible in the gap of the AMT cover that was lifted earlier pull and route the conduit by pushing it towards the back of the handbrake. Once it reaches the back area of the handbrake pull the entire length of the conduit out leaving out just a small length on the other side, ie, the HVAC panel side.

Next route the other end of the conduit, containing the wire from ,behind the HVAC panel to under the steering column and to the fuse box.

Join the fuse tap to the end and insert the fuse tap into the fuse slot for the front console socket
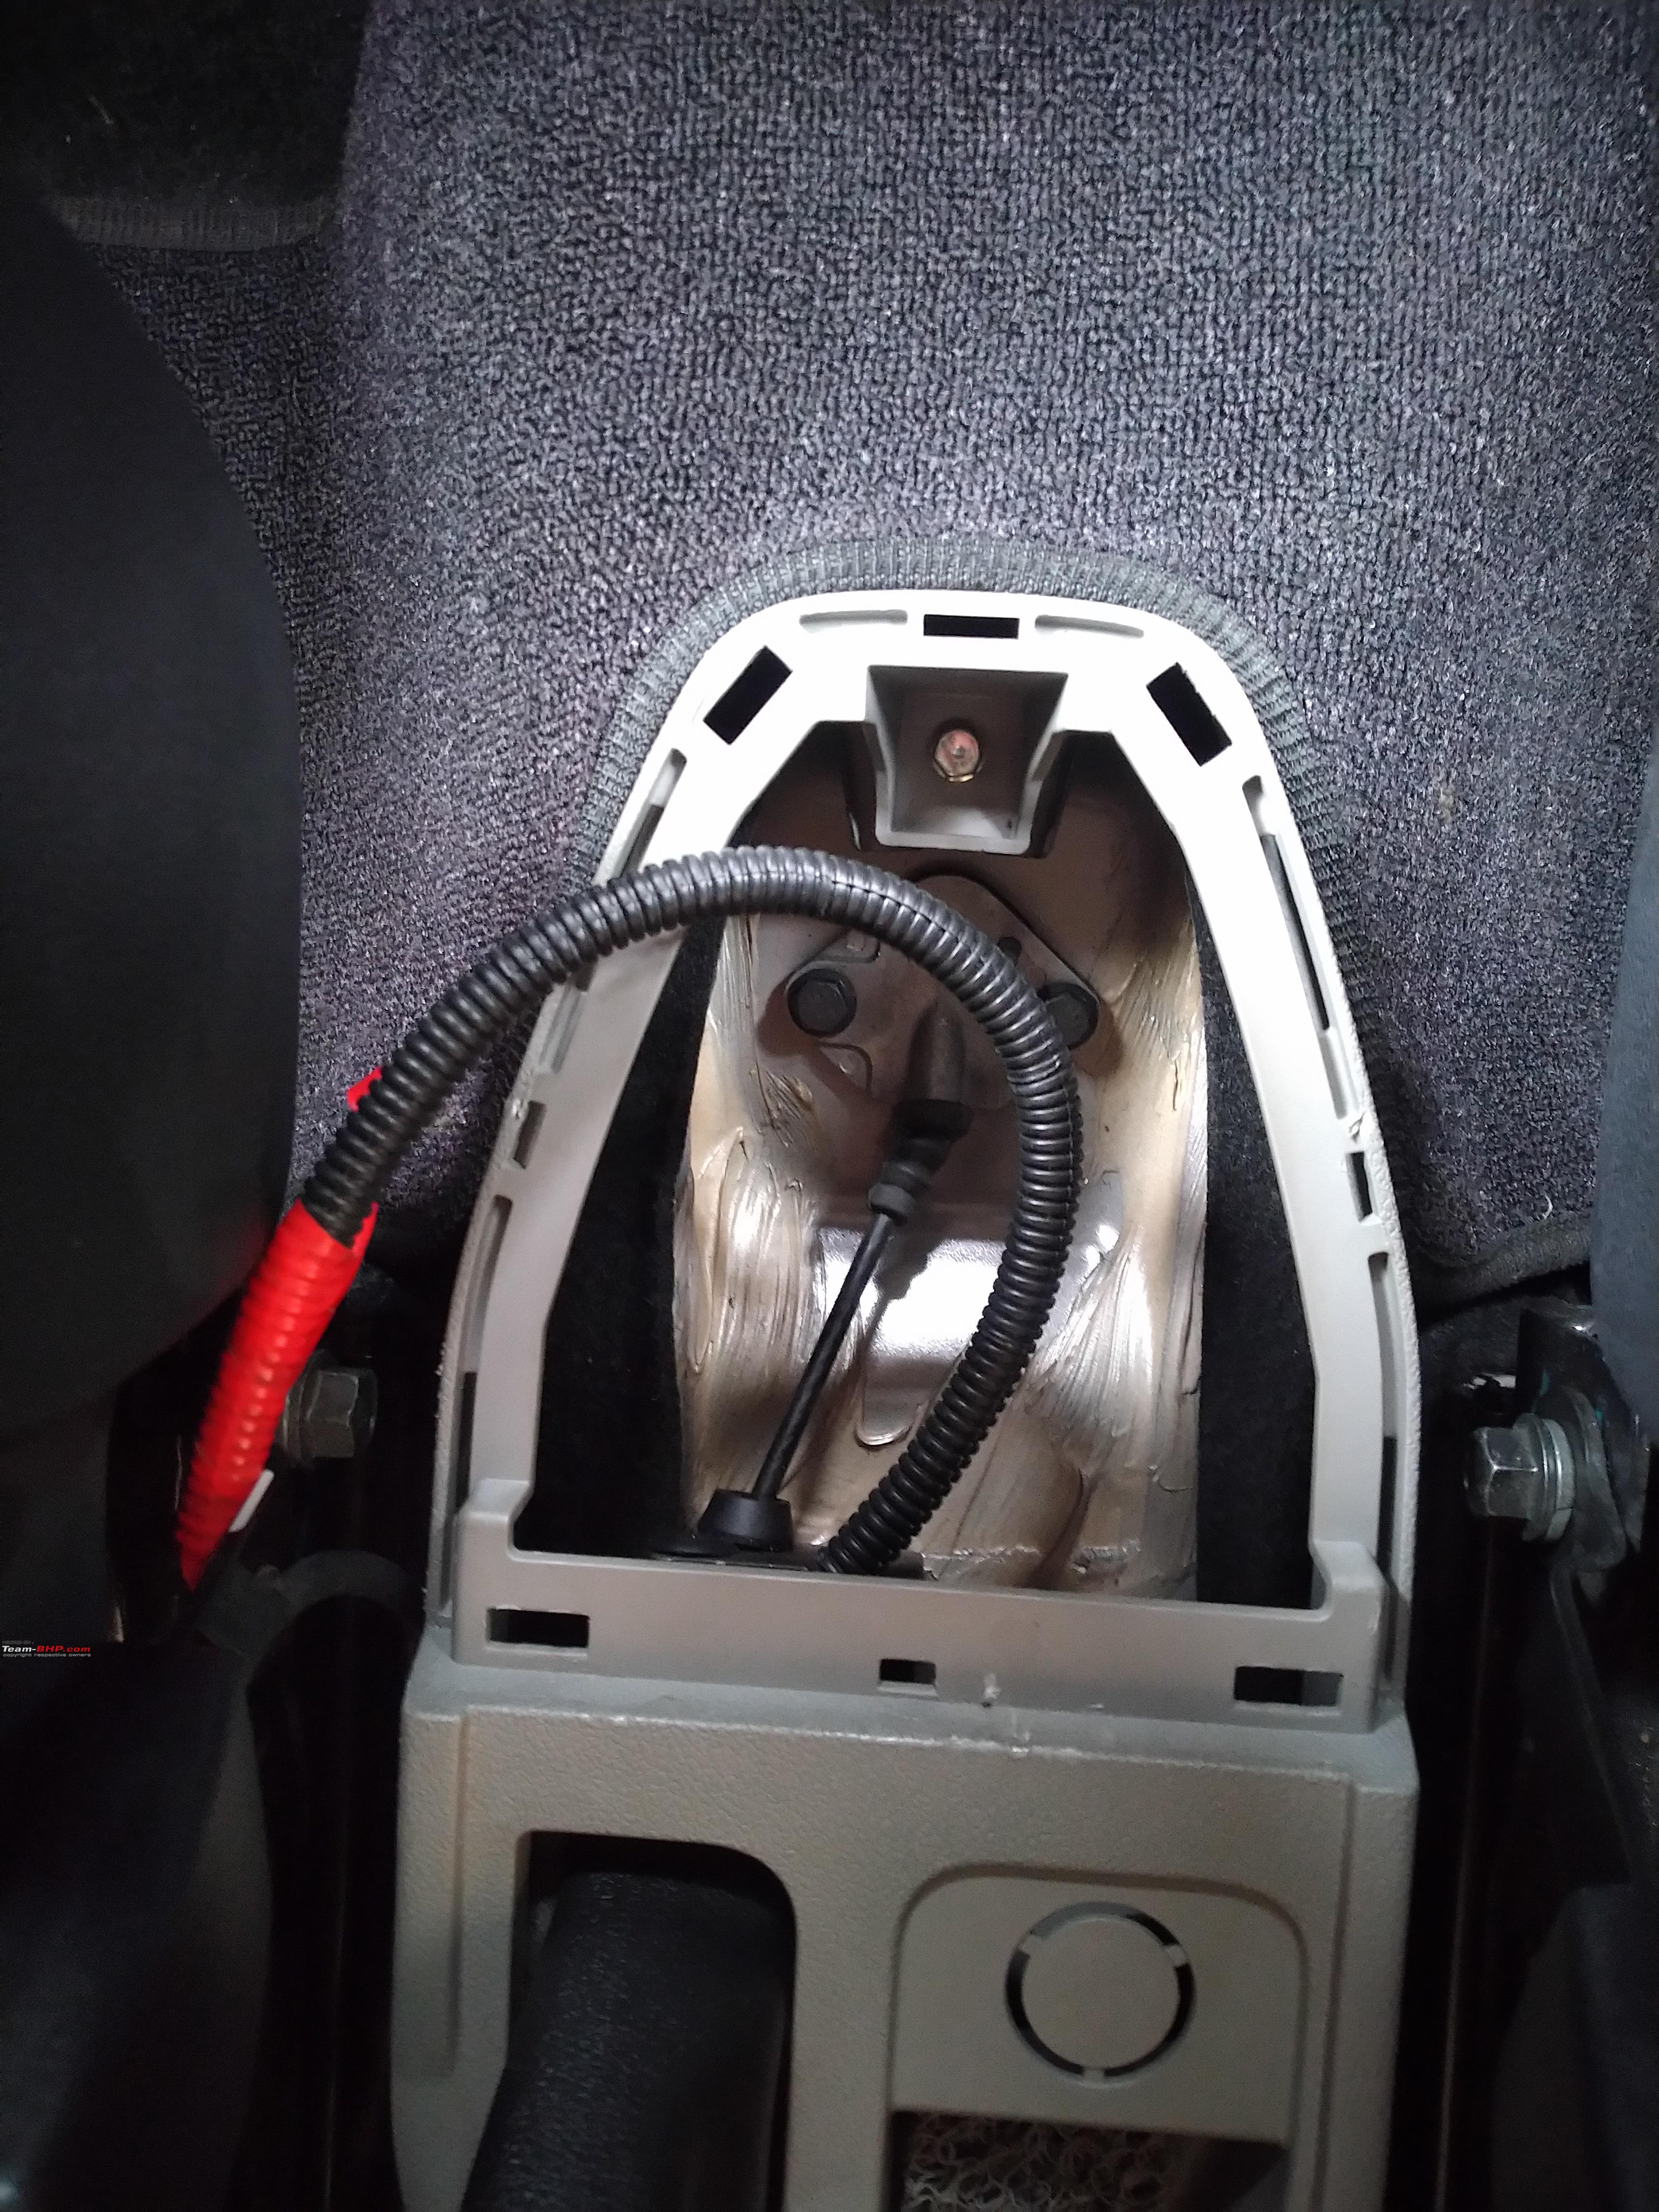
Use one of the two 10mm bolts present under the removed rear cover to clamp down the ring terminal of the ground wire.

Refix the loosened trim panels. The HVAC panel has three plastic protrusions at the bottom. Ensure that all these three go in before pushing the panel. I broke one of these protrusions because I did not observe it had got bent when I tried to push back this panel in. Could not see the plastic tab blocking the panel from sliding back in since there was poor lighting. Applied too much force and broke it. Be patient and careful. There are few plastic tabs on the either side of the panel. These have to be aligned with their slots before pushing back the panel. This will take some time. Ensure you have sufficient lighting in your work area when doing this part. Removing the panels is easy. Fitting back is bit difficult. Be patient.
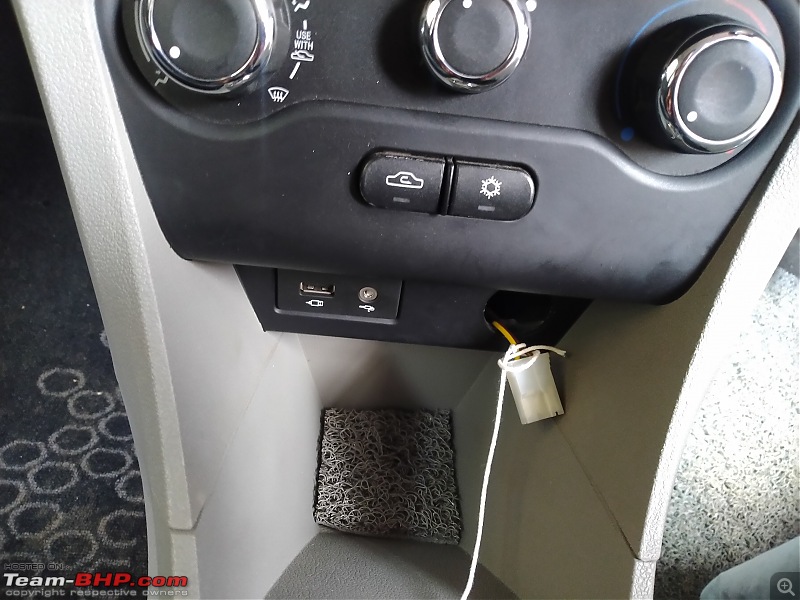
If you have removed the old 12v socket then the pigtail connector would have slid back through the hole when you are wrestling with the panels while putting them back. If you have tied them with a thread as described earlier , just pull the thread and the connector will come out of the hole. Plug the connector to a new 12V socket, align the socket in the hole and push it to lock in place.
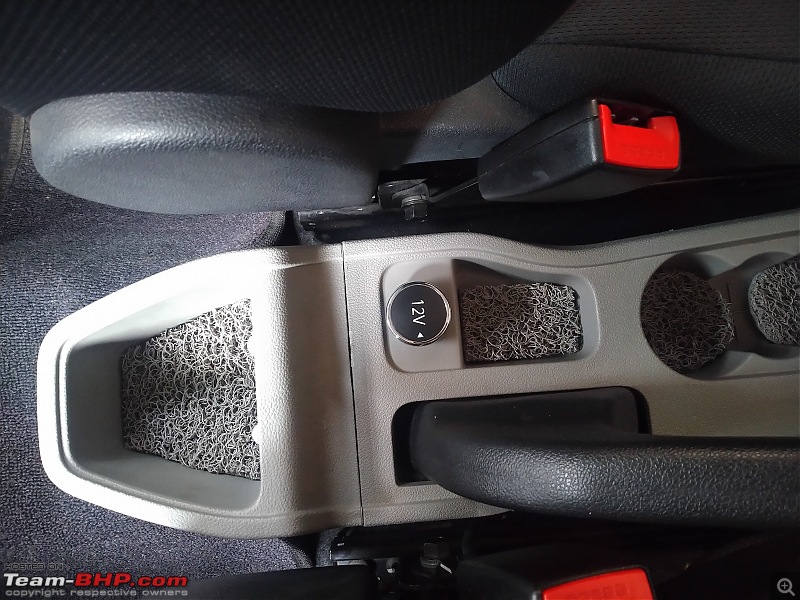
 Fixing the 12V socket at the rear
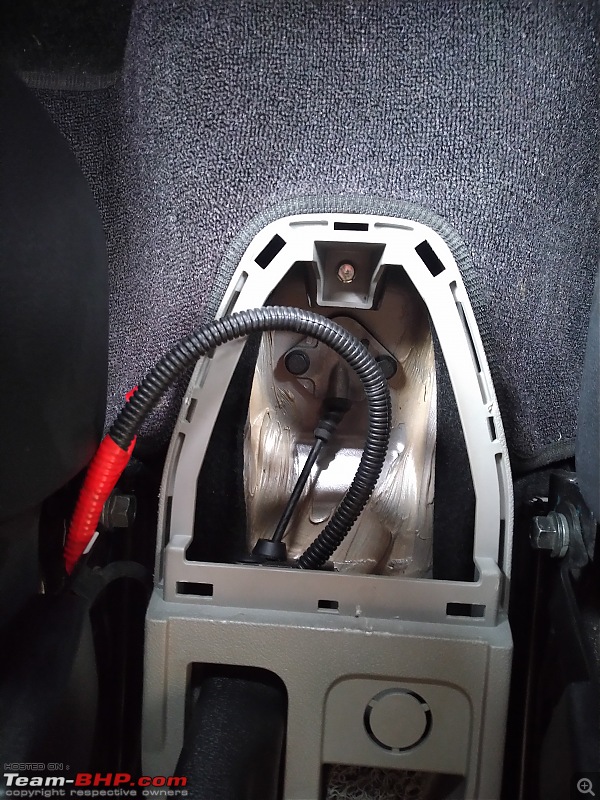
The 12v slot next to the handbrake is covered as shown in the pic. Using a flat head screwdriver, cut the tabs and remove the plastic piece.
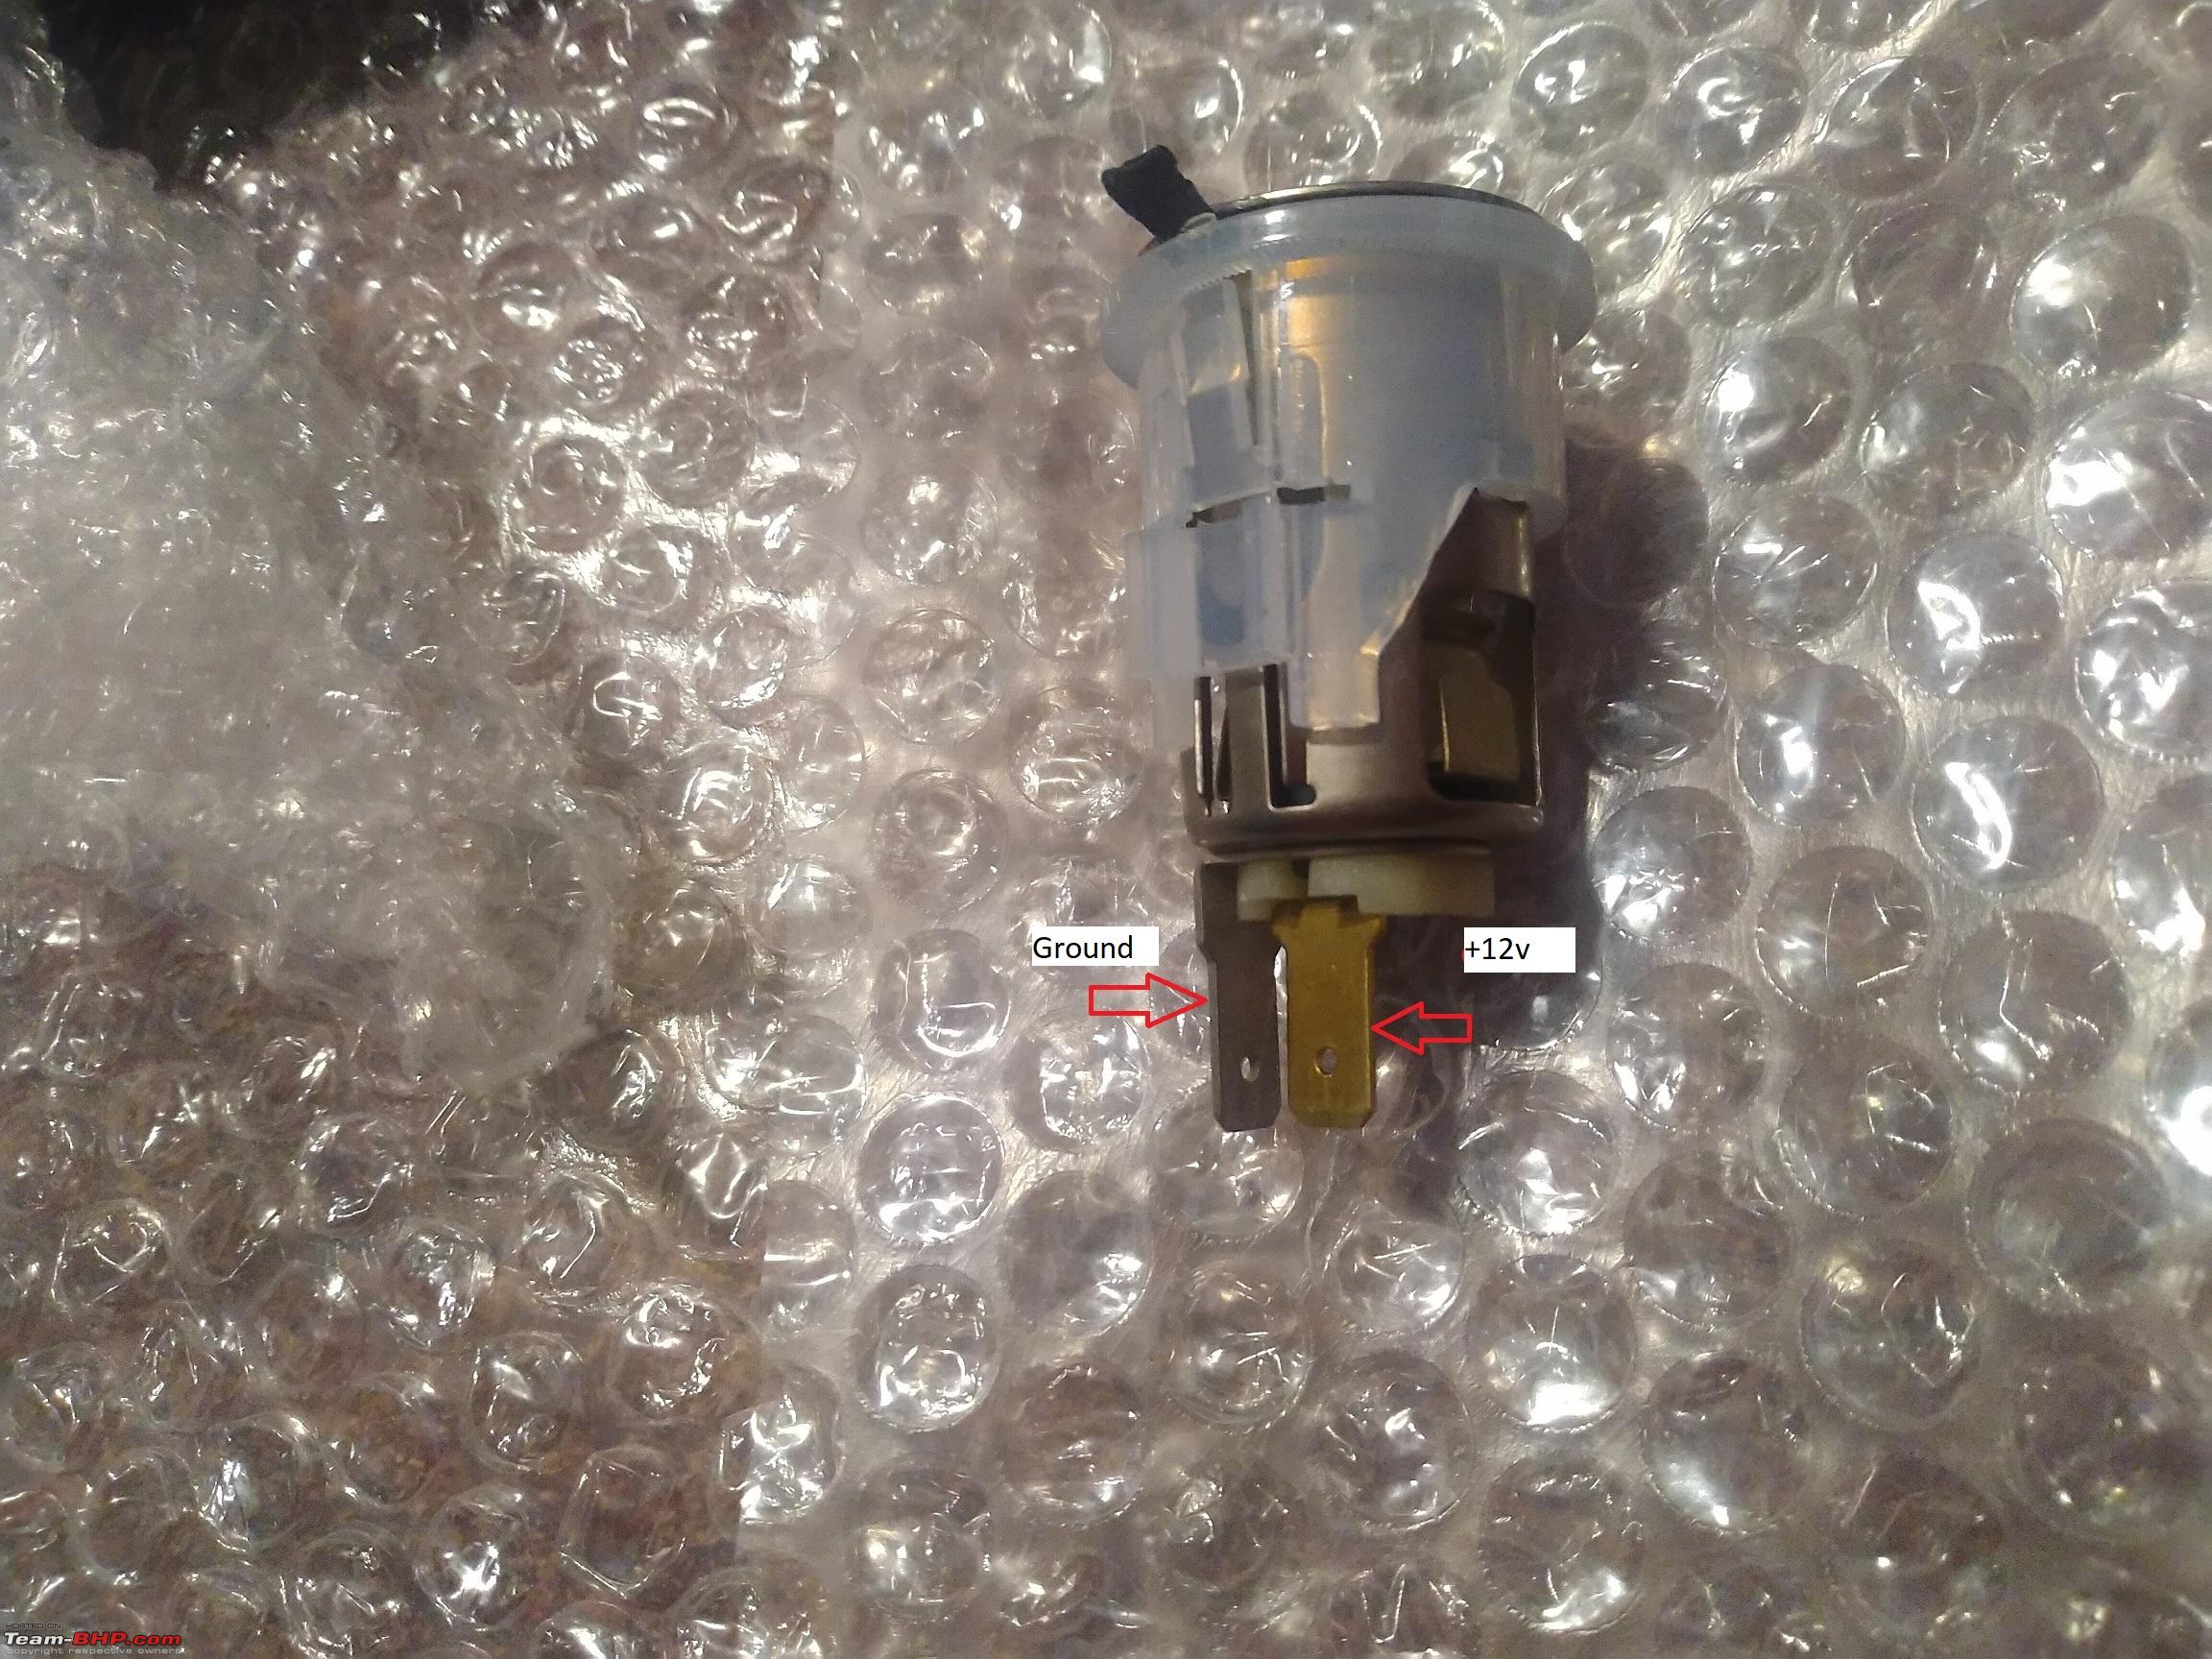
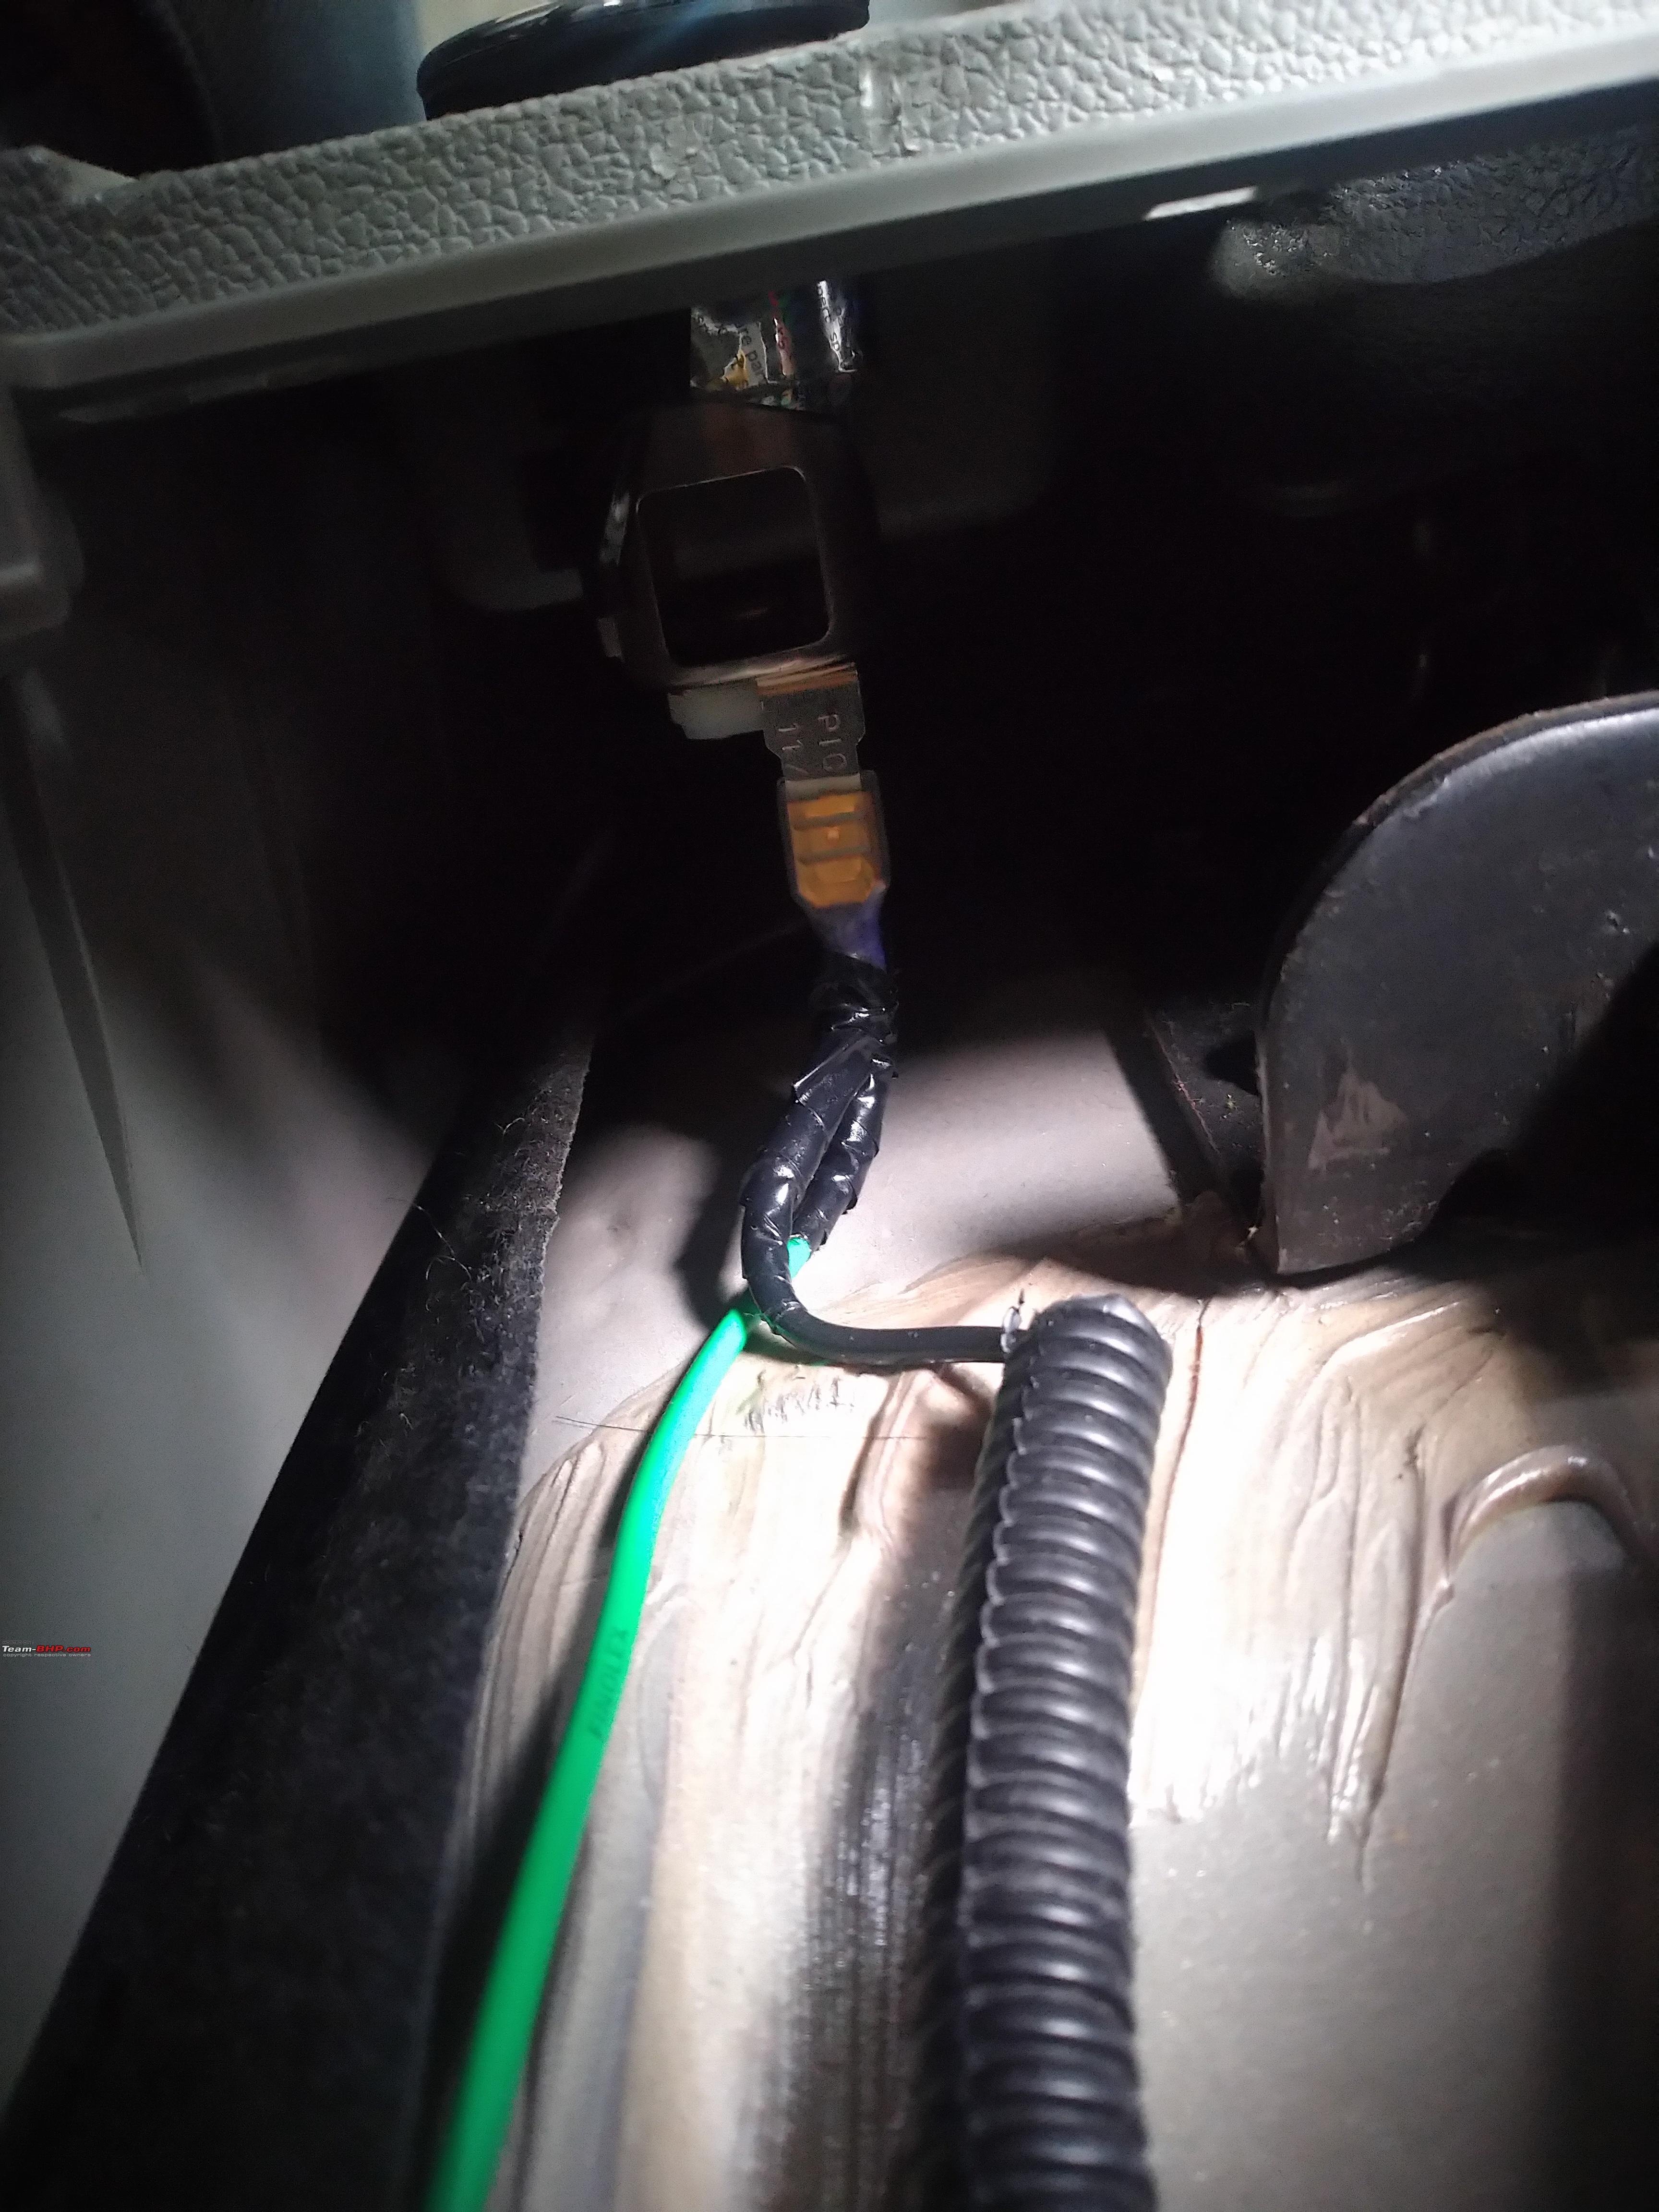
Pull the +12v and ground wire through this slot and attach them to the base of the 12V socket. The 12V pin on the socket is brass colored and in the center while the ground pin is steel colored and towards the side. Use this as a guide to do right connection.

With the wires attached to the base of the new socket, slide the socket in the slot. It will not go in so smooth and has to be tilted at different angles for it to go in. Once into the slot, rotate the socket and align the 12V written at the top whichever way you want. Slowly press the socket and it will lock into the slot.
This is how the connection will look under the cover. Verify that there is no pinching or twisting of the wires.


Put back the trapezium shape cover pressing it back in the slot. Take care that the corrugated pipe carrying the +12v wire from fuse box does not get pinched or crushed when putting the cover back
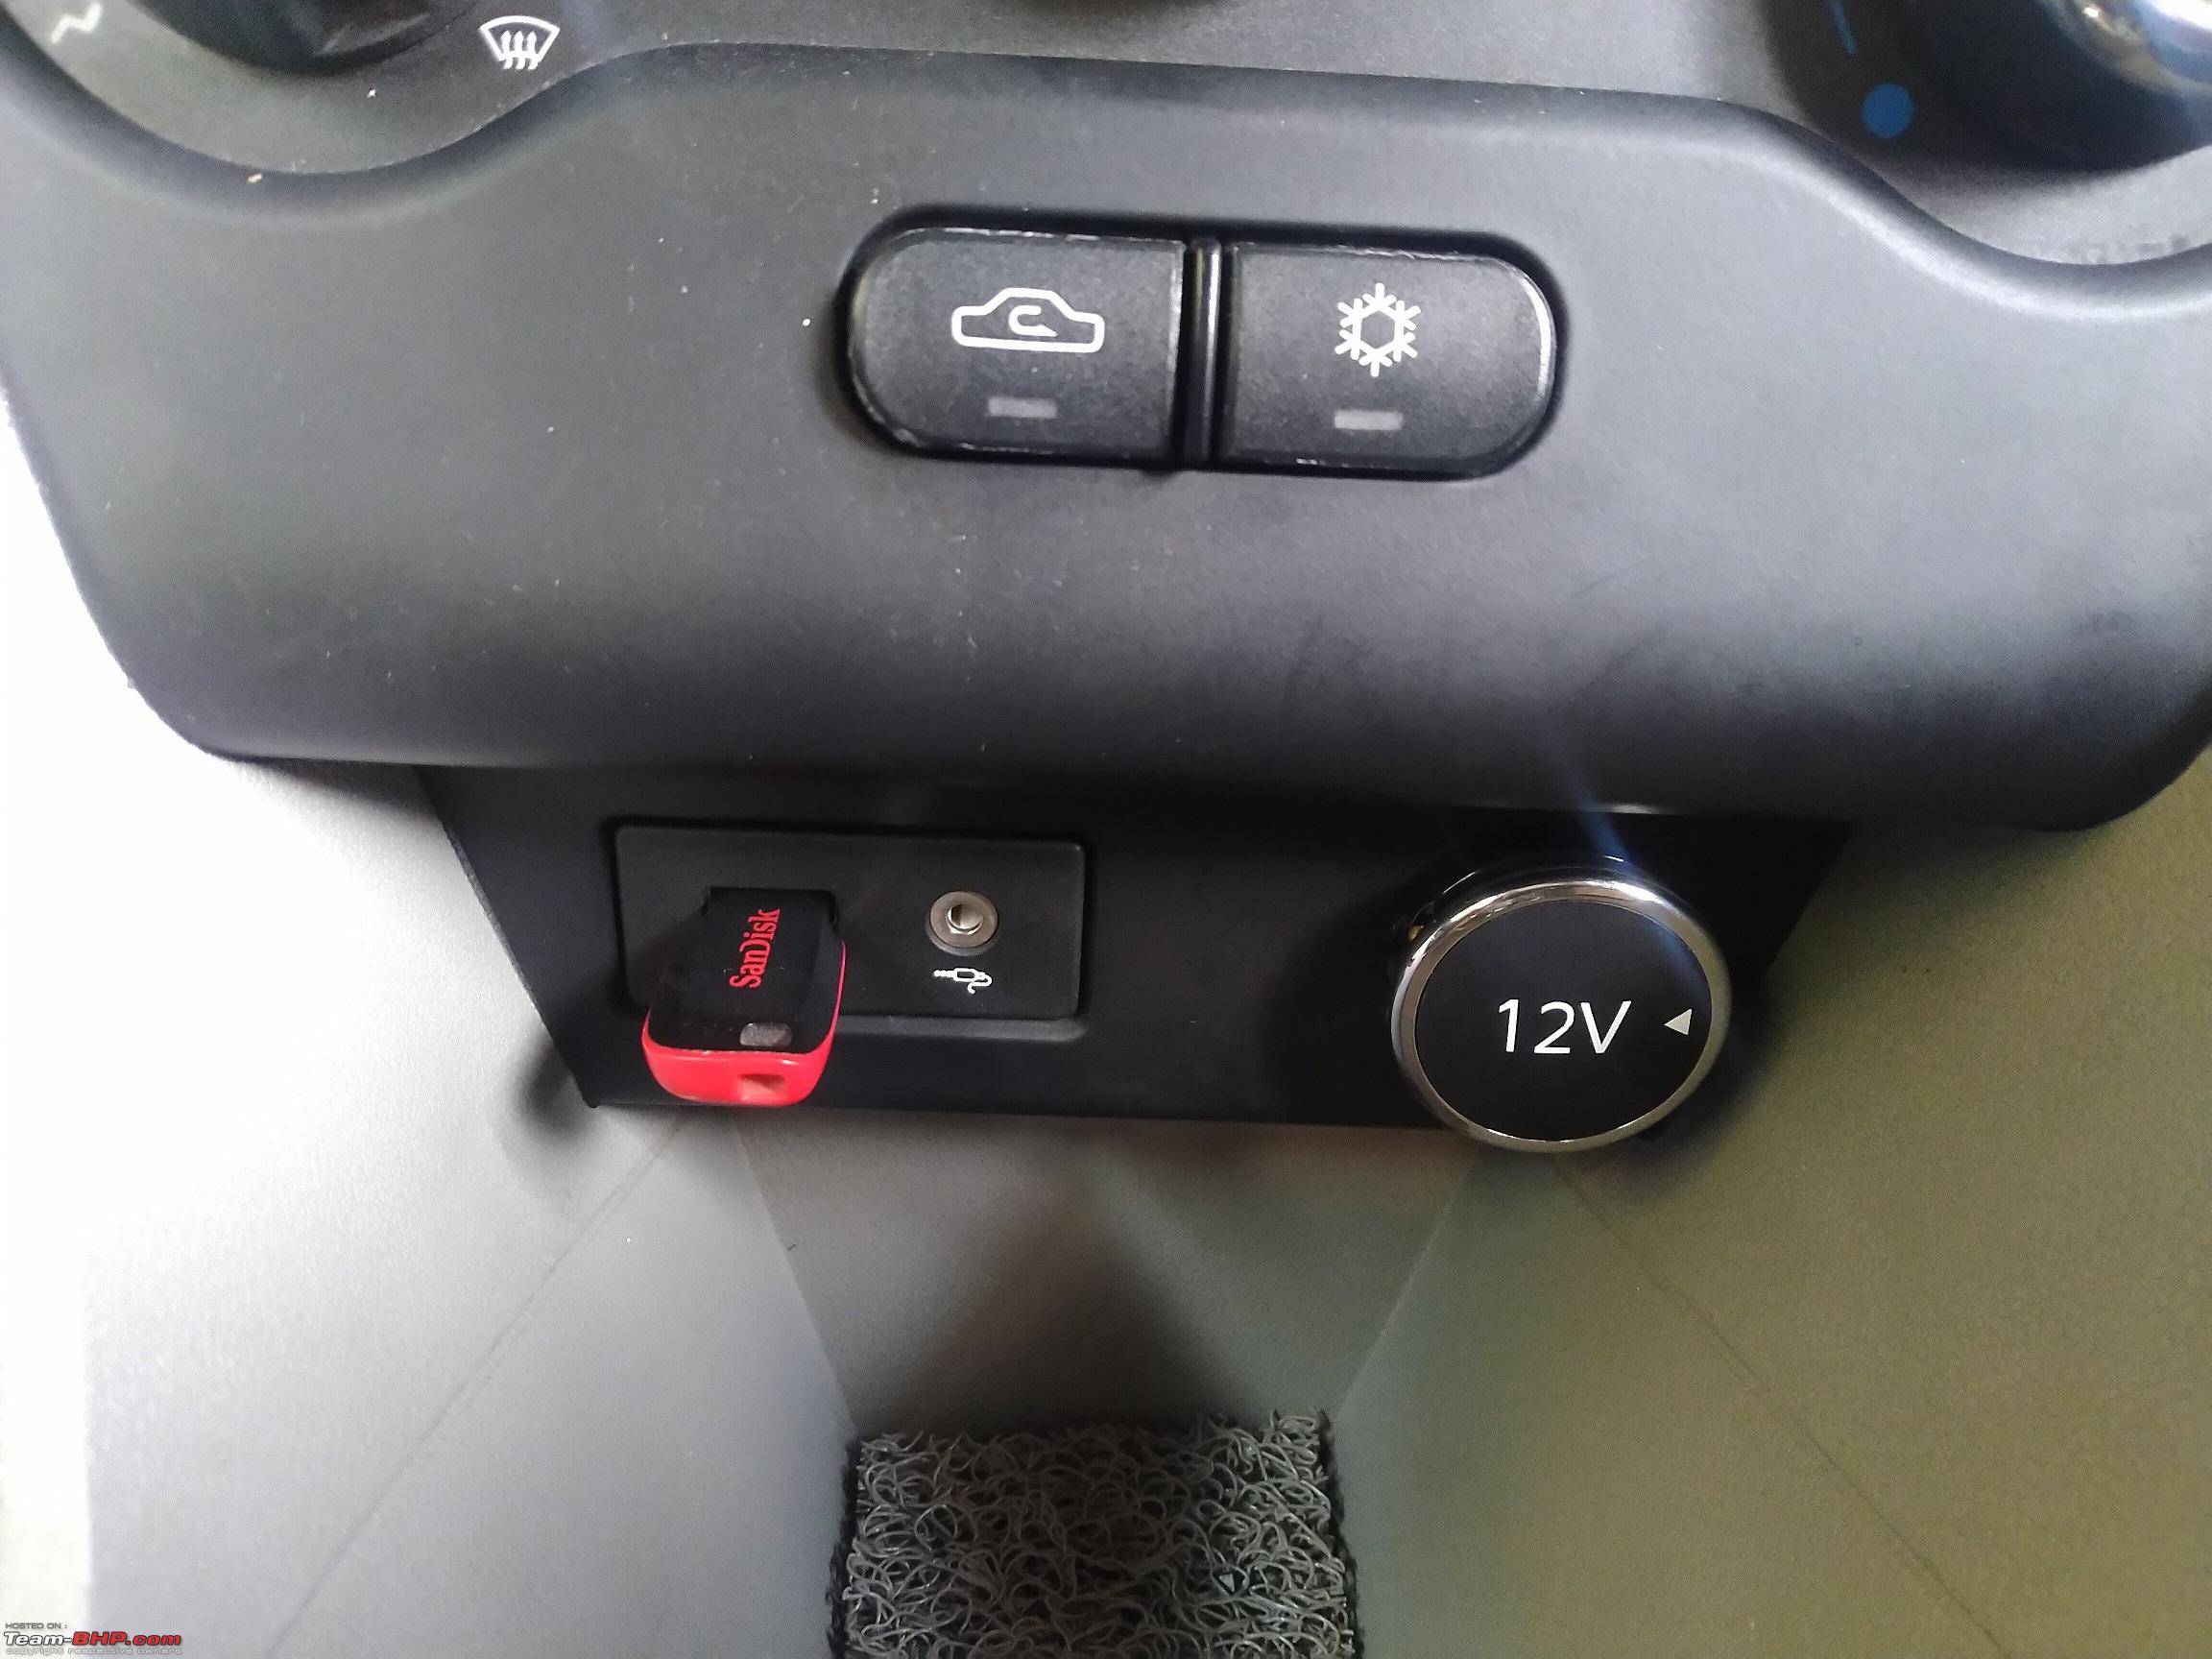
The end result 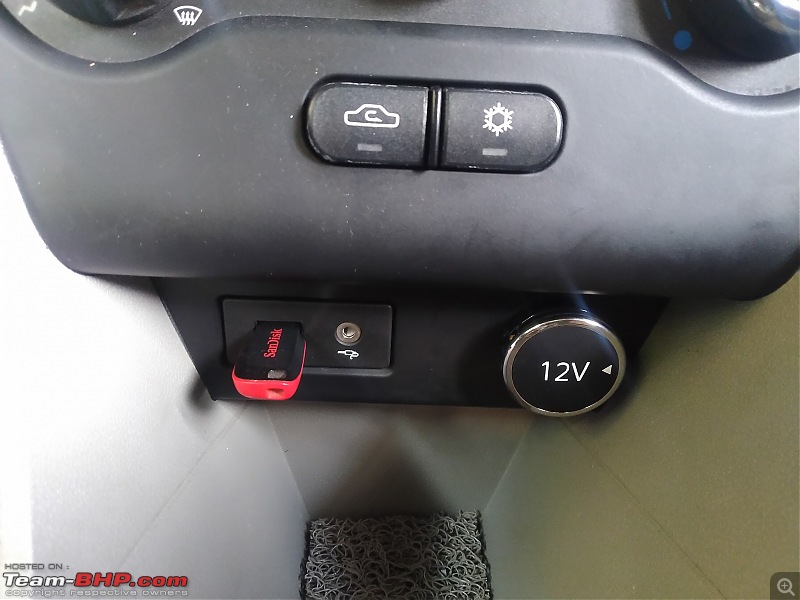


 29th August 2021, 20:30


 (35)
Thanks
(35)
Thanks