| |||||||

| Search Forums |
| Advanced Search |
| Go to Page... |
 |
| Search this Thread |  10,605 views |
 5th January 2023, 21:38
| #1 |
| Senior - BHPian | DIY: Car Rust Repair Happy New year guys. My 11 year old Verna started rusting few months back and one rust near the driver side rear passenger door was giving me an eye sore. So I thought I will fix it with a simple DIY tutorial as well. This is what we have to work on, 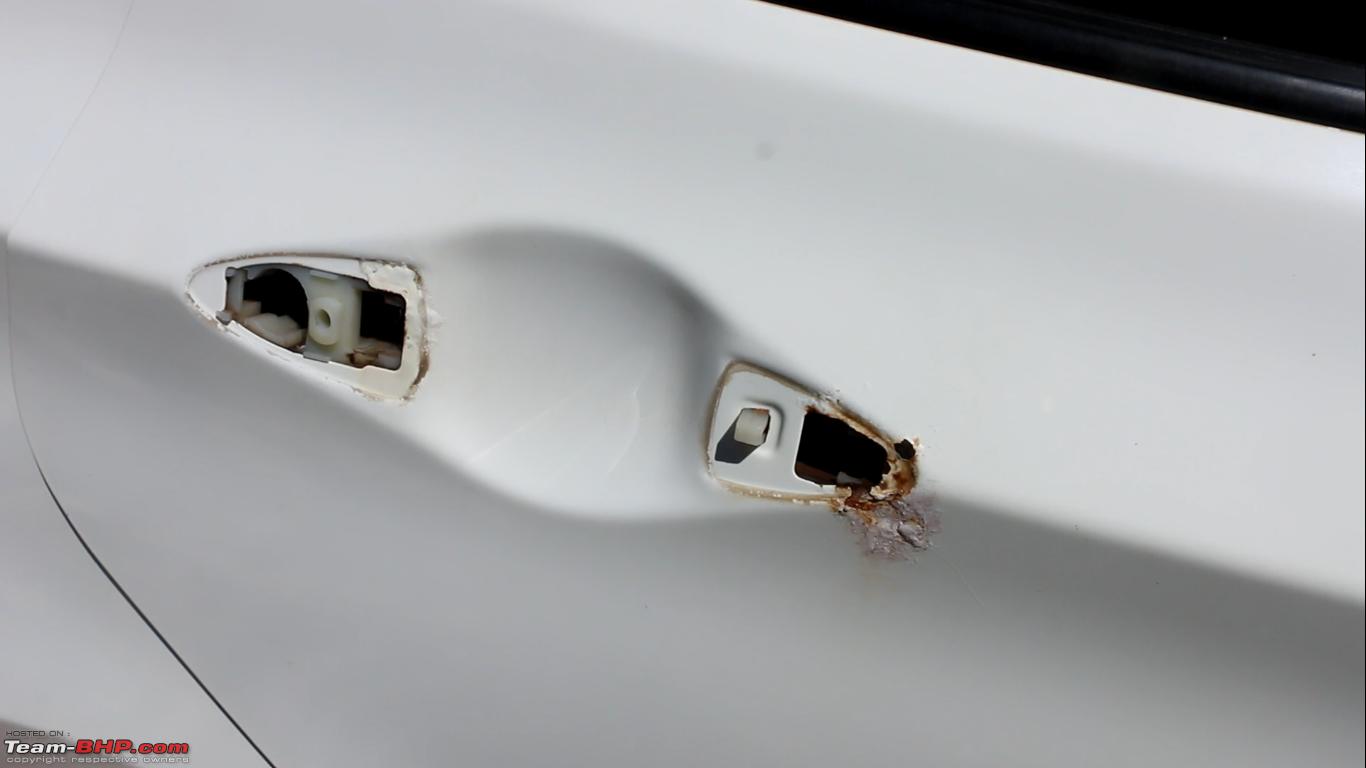 As usual those who want to watch the video tutorial can watch it here Things Required for this DIY 1) Akkai Body Filler 2) 80 Grit Sand Paper 3) 320 grit sand paper 4) Sanding block 5) Paint scrapper 6) NC grey putty or com paint filler. STEP 1 : Have the body panel of the working area thoroughly washed. Then sand the rusted area with 80 grit sand paper. Keep sanding it till every minute rust is removed. The below pic is an eg. of an incomplete work. The corners still have rust, so you need to sand it further.  If you sanded the body panel perfectly, it should look as below. 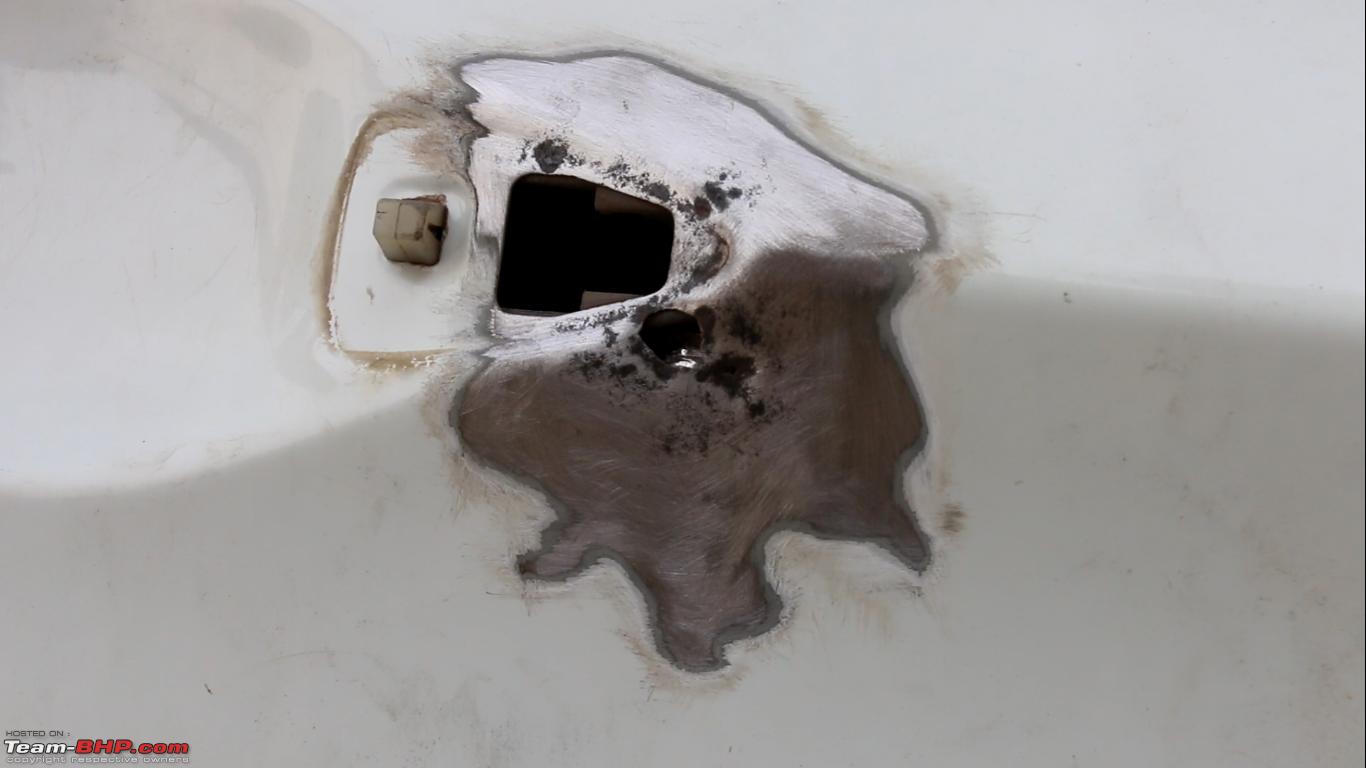 Wipe the area clean with Isopropyl Alcohol. STEP 2 : Mixing Body Filler with Hardener and applying on the work area. Open the body filler can and stir it thoroughly. Take a golf ball size amount of Filler and place it on a tile. Then just take a peas size drop of the hardener and mix it in such a way that you don't get air bubbles.  You have only 4 to 5 minutes before the mix becomes super hard. So apply it on the affected body panel quickly and make sure you don't get it on other parts of the body which don't need filling. If you do get it on other body panels, wipe it down immediately. Because, once it hardens, you can only get it out by sanding. Wait 20 mins for the filler to dry. STEP 3 : Sand down the body filler with the help of 80 grit sand paper. You can use a sanding block in this step to make the process faster.  You should sand the filler in such a way that when you run your fingers from the old paint to the repair area, it should be extremely smooth and align with the contours of the body. There shouldn't be any bumps or ridges. This is really tough to do and not as easy as it sounds. 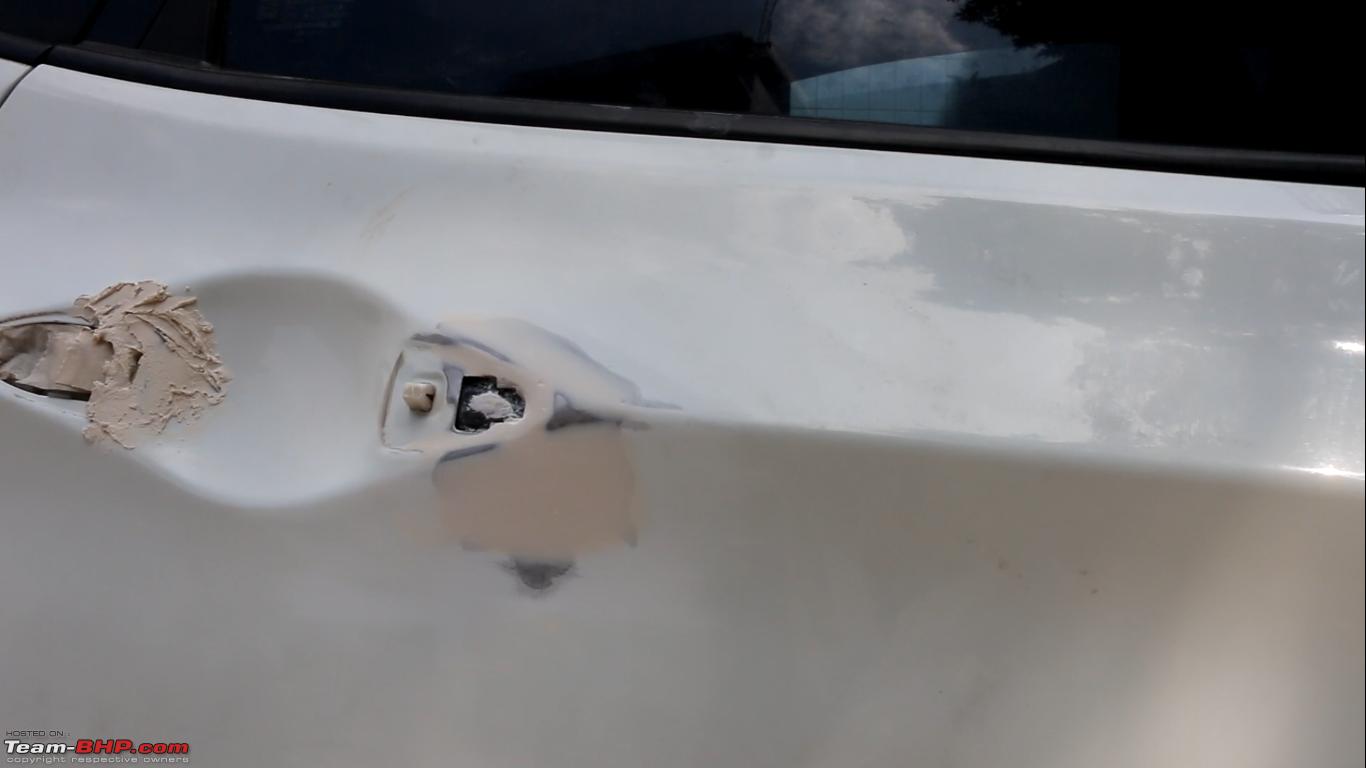 STEP 4 : There are some very tiny holes on the filler. This can be filled with the help of NC Grey putty. After it dries , you can sand it down with 320 grit sand paper.  STEP 5 : Painting stage. I tried to paint the body panel with Com-paints matching Aerosol paint. But it was just a disaster, as the spray can wasn't working and there is no way to get the paint exactly matched to the color of the body. I also did not have an air compressor at home. So I bought the color matched paint from an auto paint shop and took my car to my FNG for painting. Knowing that it was just my first attempt, my painter was actually impressed with the way I applied body filler to the door. Made me somewhat proud of myself. Anyways, theirs was just the usual step after this. They applied NC grey putty and wet sanded the area with 600 grit and then 1500 grit sand paper. 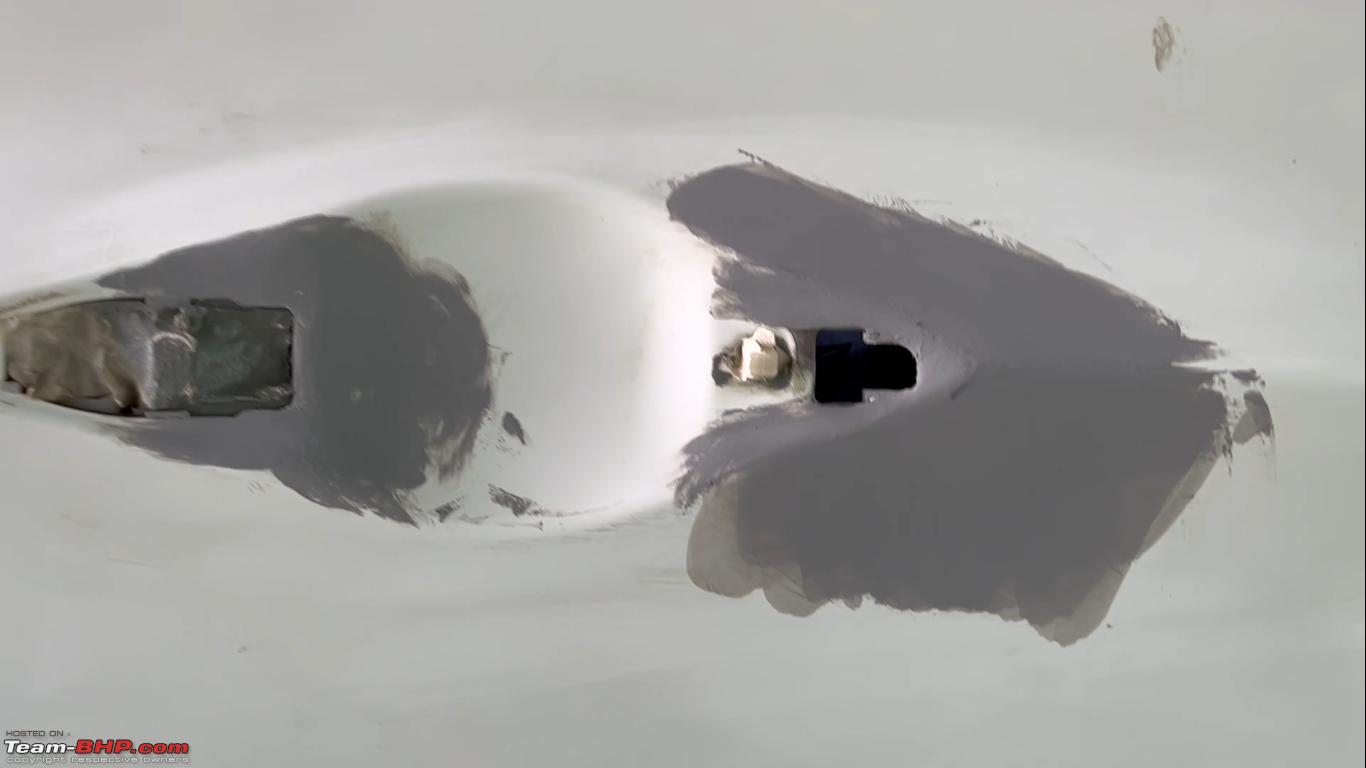  STEP 6 : Primer and Paint. They then applied 3 coats of Primer. Sanded it down with 1,500 grit sand paper and covered the whole car.    They then mixed the paint with the hardener and thinner and spray painted 3 coats of the new paint on my car.  and that's it. My door handle area went from this to this as below.  TIME TAKEN : 2 day's. I took one day for the rust removal and body filling process. Painting at the booth took one full day too because I had a lot of extra paint in hand. Each door needs just 100 ml paint but I had 500 ml. So I asked my painter to paint out other small scratches and rust repairs as well. COST : Labour - 2000 Rs Paint material - 1000 Rs Filler , Putty , sanding papers - 1000 Rs All in all I spent around 4,000 rs to remove rust and scratches from my car. Now although this is a cheap and quick fix which will make your car look excellent in the short term. In the long term the rust can come back again because we didn't treat the rust on the back side of the door. That would require even more work in terms of removing door panels and doing the entire process on the other side of the metal as well or you can just cut out the old rusted panels and weld in a new panel which is a more permanent and an expensive solution. I hope you guys enjoyed this DIY. |

|  (42)
Thanks (42)
Thanks
 |
| The following 42 BHPians Thank stanjohn123 for this useful post: | abhijith, aeroamit, aks_karthik, anra, aravindb_0711, AROO7, Ashtoncastelino, audioholic, bejoy, Benoit, bikertillidie, car-go, CarCraze, Chhanda Das, chinmaypillay, cule1899_bhp, dailydriver, deadlifts26, GForceEnjoyer, gischethans, govigov, GTO, iampulo, jkrkrish, kapilsharma80, keroo1099, lemedico, Murli, Ne0N, Omkar, parsh, sai_ace, shancz, SILVER-ARROW, sudanmohit, TorqMaster, vaasu, windrider, yogiii, ysjoy, Zinda, zurura023 |
| |
|
7th January 2023, 11:15
| #2 |
| BHPian Join Date: Mar 2022 Location: Pathanapuram
Posts: 81
Thanked: 162 Times
| Re: DIY: Car Rust Repair Congrats.Diy is real pleasure and pain combined. You were wise enough to entrust the painting with a professional. Verna is an amazing car but prone to rust thanks to their enough-for-India attitude. If you regularly wax and polish your car such imperfections can easily be noticed and taken care of not to mention the sense of accomplishment involved.Sticking 3M films in delicate areas like door parts and running board can help. |
|
| (1)
Thanks
|
| The following BHPian Thanks TopLiveCentre for this useful post: | Ne0N |
|