| |||||||

| Search Forums |
| Advanced Search |
| Go to Page... |
 |
| Search this Thread |  19,963 views |
 23rd November 2024, 12:00
| #1 |
| Senior - BHPian Join Date: May 2011 Location: Meerut, India
Posts: 3,574
Thanked: 9,351 Times
Infractions: 0/1 (5) | In-depth Guide | Solar Plant Setup on Rooftop and save 1 Lac+ Solar Plant Setup on my Rooftop - Off-grid (for now) - 3 KVA Start Date - 18-06-2024 ; Finish Date - 08-08-2024 (about 45 days) These posts details how you can setup your own solar plant yourself with just a little technical understanding of the basics. I was quoted minimum of 2.5Lacs (for the specifications of materials that I have used) and I have saved nearly 1 lac by doing it myself as the total cost of the plant was in the vicinity of Rs.1.5 Lacs. This is the story of me converting my 'dilapidated' rooftop into a lifelong solar plant. I took my own sweet time, at my own sweet pace, but completed it at my convenience. So my city, Meerut, is situated at a latitude of 28.984. For any Solar Plant in our region, we require it to be SOUTH Facing and tilted at the approximate latitude of your area i.e. 25~30 degrees in my case, so that it gets maximum solar energy throughout the year. This is the 1st principle. So this was was dilapidated rooftop, which was 30+ years old. Luckily I had some strong basic steel structure already installed, as it was previously supporting a cement roofing sheets structure. Luckily it was South Facing and at a 30 degrees angle. Exactly what I needed. So I decided to remove all the old sheets, and put up the Solar Plant here.  This is how it looks NOW completed, with 3450 watts capable 6 Solar Panels - 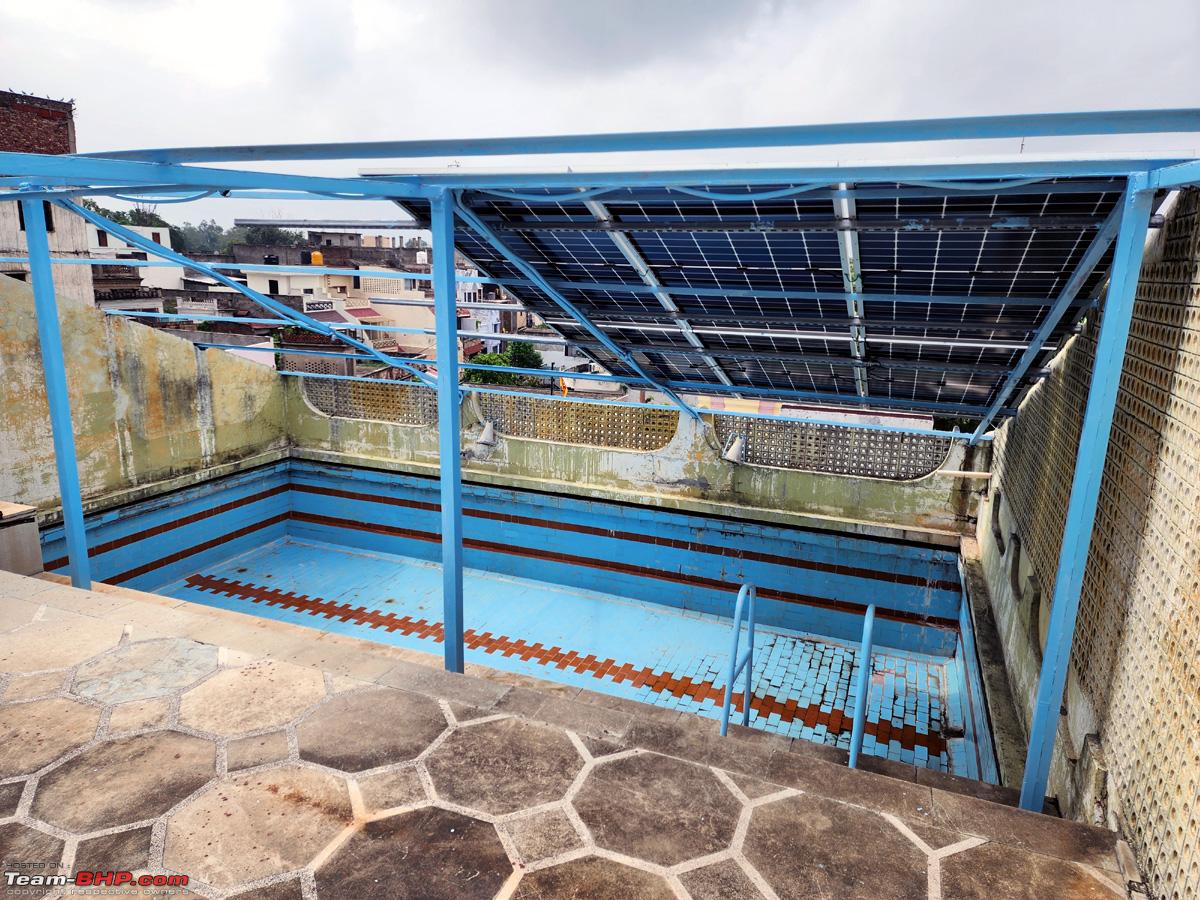 And this is my off-grid Solar PCU of 3000VA (2400 Watts) with 2x12V 200Ah Exide Solar Batteries with FULL 5 years warranty. 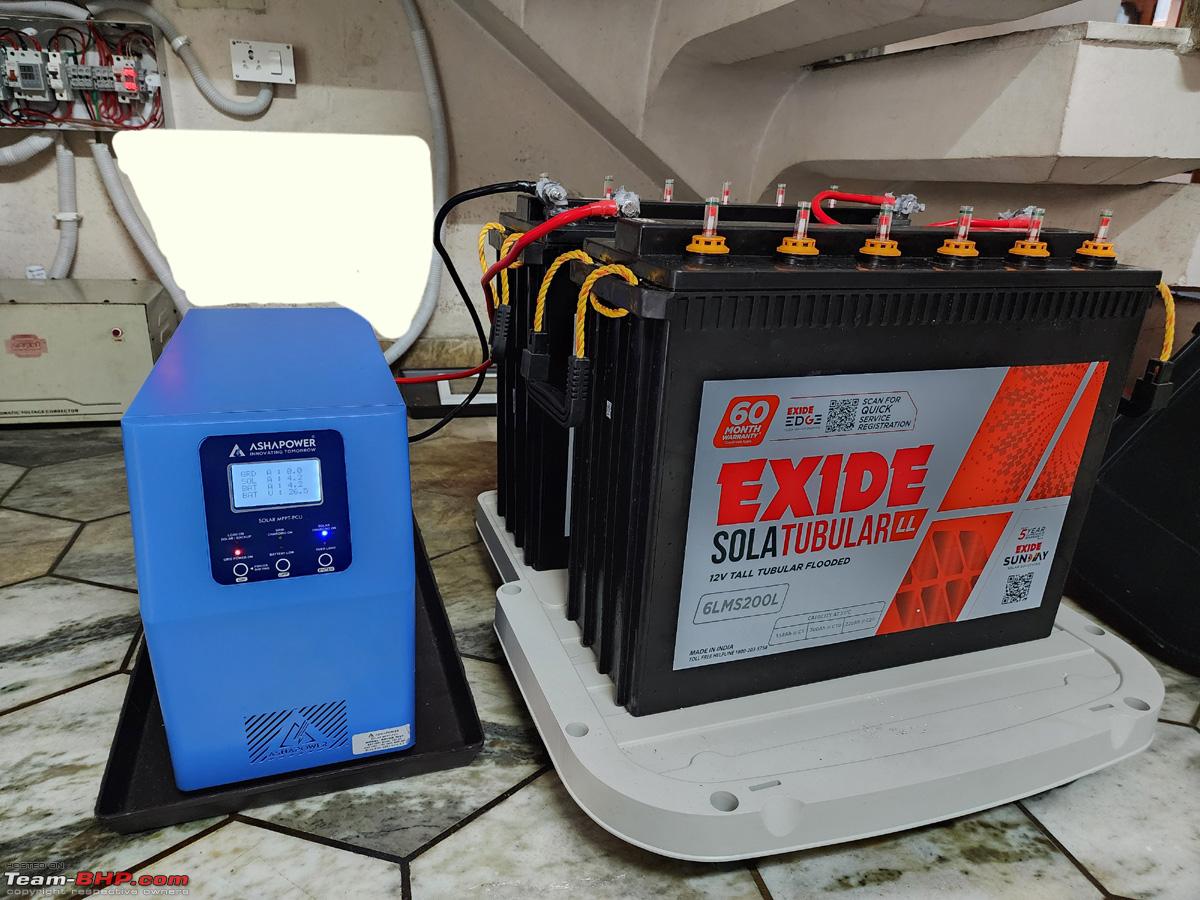 I was currently running my house on a very old 1500VA Microtek Inveter and that was sufficient for the Light load. But with the Solar System I also wanted to add all my Non-AC power load including 2 x 400L Refrigerators. So the first thing was to figure out my normal running total house load without the AC's. As is evident in this picture of the mains Ampere/Volt meters, that I have attached after our electric supply meter, the normal light load is about 650~700 watts and the maximum power load including 2 refrigerators etc. is about 850 watts, excluding the Air Conditioners. So the minimum total solar system needed to be capable of outputting 1550 watts.  So I started researching what all would be needed from my end to convert my existing MS structure into a structure capable of fixing the solar panels without issues. The main thing I came to find out, that is needed, is this Galvanised Iron U channel known as Perlin in their terminology, on which the solar panels can easily be tightened by Z Clamps and U clamps made of aluminium. This is how a Perlin is supposed to look like -  So the task starts, to convert this Cement Sheet structure into Solar Panel capable structure. I calculated that the total structure that I had was easily capable of taking 20 x Solar Panels. I needed to start off with just 6 and maybe add on 8~10 panels later as a On-Grid System. The basic structure, earthing etc. will all be shared.  Some initial calculations -   A rough design was made -  Culminating into a more legible Perlin Design for 8 panels (2 in reserve)  This is how 1 feet of Perlin looks in cross section. It should be minimum 2 to 3 mm in thickness -  And these were the U and Z clamps needed. All available also on Amazon.  I searched out local vendors for these items and luckily one of them agreed to supply me the required lengths of Perlin plus other important items like the DC specific Wire, a DC side Distribution Box (called DCDB in their terminology), clamps, MC4 connectors etc. -  A closeup of the DCDB box (more on this later) -  All these items costed me 19000 Rs. -  With full GST Bill -  Basic innards of this 3 into 1 (that I needed as per my plan, which you will see later) DCDB Box (cost about 2k). It basically contains DC Fuses and a DC Surge Protection Device with some connectors BUT was missing a DC MCB, which I was not comfortable with -  A closer look at the DC fuses -  Now a closer look into understanding the GI Perlin and how the Clamps are attached -  Side view -  Some dimensions -    And the Bolt/s with which it will attached to my existing MS structure at various points to make it last for the next 30 years -  A cross-sectional view. Notice the spring loaded bolts -  With added spring washers, to withstand the harshest of weather conditions -  I had to change the attachment bolts to these new SS ones from the GI ones of the required increased length for more durability and longevity -  Notice the Spring Washer that I added -  Some 2 into 1 and 3 into 1 MC4 connectors that I bought from Amazon, but never needed -   30 photos limit reached. Continued... Last edited by dkaile : 23rd November 2024 at 12:08. |

|  (48)
Thanks (48)
Thanks
|
| The following 48 BHPians Thank dkaile for this useful post: | 1.2GT3GT, aashishnb, ads11, AlphaKiloPapa, anivy, ashkamath, ashpalio, autonarr, brownkaiser, dailydriver, daretodream, denzdm, Derrida, digitalnirvana, drrajasaravanan, electric_eel, emperor_raizen, Full_Minchingu, graaja, GTO, GTX+, Harjot37, hmansari, InControl, Joseph Jos, keroo1099, krishnaprasadgg, lejhoom, MotoBlip, Mrs&Mr_Shenu, OffRoadFun, petrogeek, prajosh, Red Liner, rejeen, rkv_2401, sanjayrozario, Sen, snappysam, somspaple, spdfreak, SumoDriver, Theyota, Turbanator, vattyboy, Vikash Kumawat, Vikram9193, Voodooblaster |
|
23rd November 2024, 13:02
| #2 |
| Senior - BHPian Join Date: May 2011 Location: Meerut, India
Posts: 3,574
Thanked: 9,351 Times
Infractions: 0/1 (5) | re: In-depth Guide | Solar Plant Setup on Rooftop and save 1 Lac+ Cont... (2) Next Most Important decision was to finalise the type and make of the Solar Panels. I went with India's no. 1 - WAAREE, main reason, besides top notch specs, being that they were available online through Amazon, in the the smallest or largest set of quantities, and shipped directly to my doorstep through Blue Dart. I chose the latest technology ones known as N Type -TOPCON Panels of 575W each. These panels are Bi-facial, meaning they are capable of producing electricity from even their shaded side not facing the sun. Their VOC or peak voltage was 51V and capable upto 14A each i.e. they were capable of producing upwards of 700 watts is very peak conditions but their working volts was 42.6V x 13.5A i.e. = 575W that they are marked as. Their Bifacial production could go upto = 747 Watts as is evidently clear in the specification sheet -  Their Design Specifications and Dimensions -  This helped me in designing as to where to put up the perlins -  I decided to 1st start with 2 panels i.e. 1 KW system and if that worked out OK, then to add the balance 2 KW subsequently. So I ordered the 1st 2 panels from Amazon on 21-06-2024 (delivered on 01-07-2024), which costed me 26k (13000/- each) + the 5% Amazon Pay cashback, that I also received - 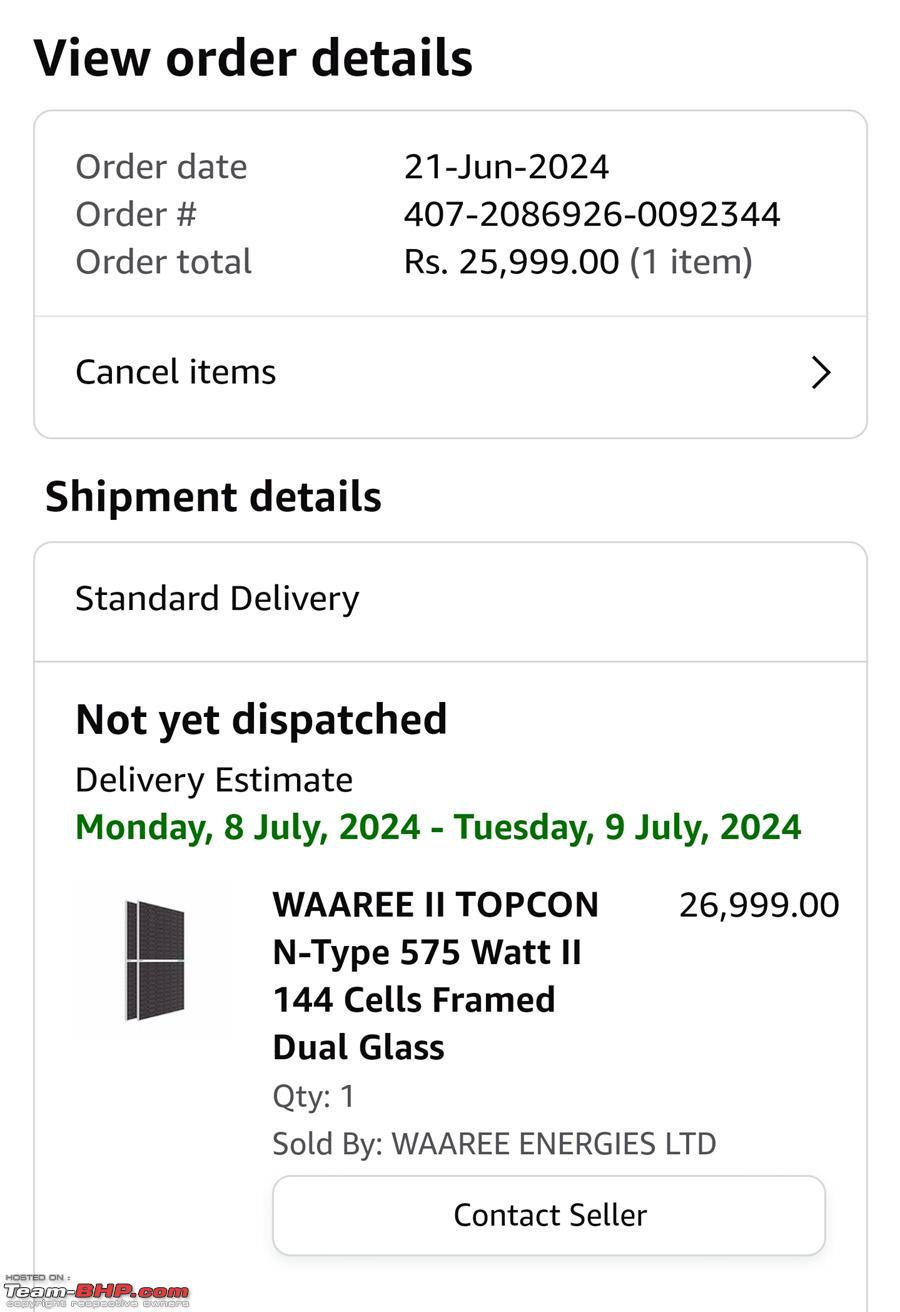 But the next 4 I purchased in Amazon sale on 20-07-2024 (delivered on 02-08-2024), which costed me 21650/- and 22499/- (in lots of 2). i.e. Total 6 panels costed me 70148/- (not counting the 5% cashback I received) i.e. approx 11.7k per panel.  Next jobs to tackle, till these panels get to me, was doing the earthing, fixing a Lightening Arrester (all available locally) and fixing the Perlins on my structure. The material was obtained from local electrical shops -  The Insulation 'Jugaad' that I made for the Lightening Arrester (very necessary). Also visible are the Earthing pits -  I have previously detailed as to how to go about doing Earthing in Your House in this separate topic here - https://www.team-bhp.com/forum/shift...-earthing.html (How to do New/Renew your House Electrical Earthing) Difference in AC and DC (Solar) Wiring. Note that the DC wires are Double Sheathed for Protection from the elements and to last the life of your solar plant and also Tin Coated over copper, for better conductivity and less losses of the DC current from the Solar Panels -  EARTHINGS - Earthing Compound for the 2x DC Earthings that I got done. 1 for the Solar Structure and a separate one with 10mm Copper Conductor Wire for the Lightening Arrester. The 1x AC side Earthing I had already done/renewed recently, i.e. Total 3 Earthings are needed - 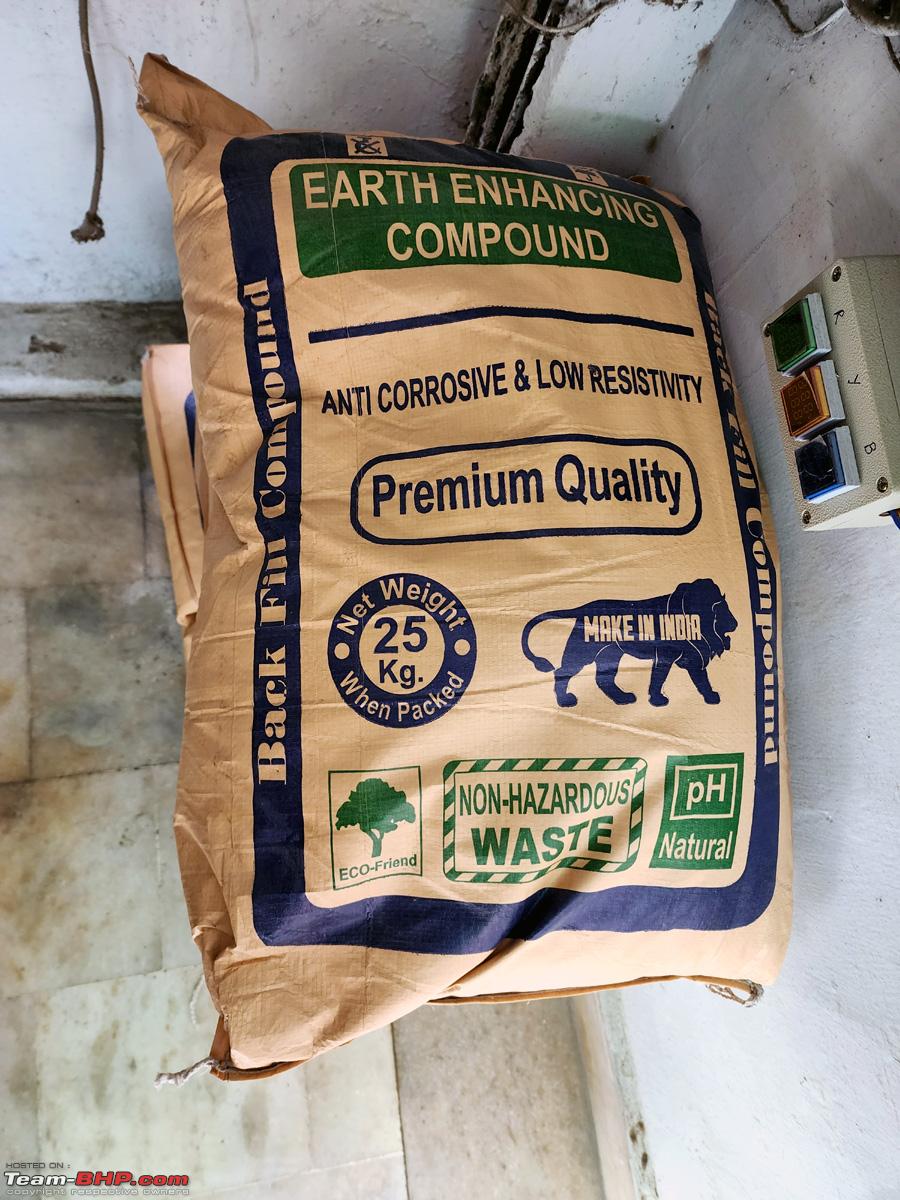 Earthing in Progress -  10~12 feet holes made -  Water and Earthing Compound Slurry being poured -  Slurry Mix -  Nearly done -  2 DC Earthing Pits ready for wiring. 10 feet apart as per required spcs -  Overnight rains sinks them a bit -  Ready for attaching the Earthing Wires/Conductors -  10mm in one pit (for lightening arrester) and 6mm copper wire in the other pit (for solar structure and panels) used. Both totally isolated from each other -  Wiring and Piping completed -  Both pits ready -  Wiring goes upto the top of 2nd floor where the Solar structure sits -  ----------- Attachment of Perlins to the existing MS structure starts. Notice the now Red Oxide coated 30 year old MS structure. I trained my local electrician to do this installation under my supervision. I also called a welder for few hours to drill hole in the existing MS structure to attach the SS bolts with which the Perlins will be tightened to it -  Hole drilled in MS structure and Perlin attached with SS bolts. I did not get the GI Perlin welded to the MS structure because that could lead to rusting in the future. This MS structure was still to be painted -  All the 4 lengths of Perlins needed are now attached -  Lightening Arrester also attached by drill bolts and fully insulated. The arrester should be placed a few feet away from the Solar Panels and also above it, so that it becomes the 1st strike point of Lightening, God Forbid. Notice the MS structure is now painted by 1st coat of Red Oxide before the main paint goes on -  Fully insulated feet -  6mm copper wire being used for earthing of the Solar Structure and Solar Panels -  Insulated properly -  ------------- Next most important decision was about which Solar Inverter or Solar PCU to be used. Though the branded ones like Microtek and Luminous were 'cheaper' as they were Aluminium transformer based, I went with the nearly double priced ones from Ashapower from South India. The why is clearly evident in this chart. I was also very impressed by the philosophy of it's MD in which he stated that if the Solar Panels last for 30 years, why should the Solar PCU also not last that long, by building it on quality components -  Some technical specs. It supports upto 3500 watts of Solar Panels and not 3000W as inadvertently circled and mentioned in it's manual -  30 photos limit reached. Continued... Last edited by dkaile : 23rd November 2024 at 13:09. |
|
| (32)
Thanks
|
| The following 32 BHPians Thank dkaile for this useful post: | 1.2GT3GT, aashishnb, ach1lles, AlphaKiloPapa, anivy, ashpalio, autonarr, daretodream, Derrida, digitalnirvana, drrajasaravanan, emperor_raizen, Full_Minchingu, gischethans, graaja, GTO, GTX+, Harjot37, hmansari, InControl, keroo1099, krishnaprasadgg, lejhoom, Mrs&Mr_Shenu, msdivy, premsky, sanjayrozario, Sen, SlowRider, somspaple, tikku.dk, vattyboy |
|
23rd November 2024, 13:50
| #3 |
| Senior - BHPian Join Date: May 2011 Location: Meerut, India
Posts: 3,574
Thanked: 9,351 Times
Infractions: 0/1 (5) | re: In-depth Guide | Solar Plant Setup on Rooftop and save 1 Lac+ Cont... (3) This 3KVA Solar PCU costed me 35k. Their main distributor in Lucknow was an Ex-Captain of the Merchant Navy and provided me excellent technical support throughout, for the structure and technicals -  Ordered on 21-06-2024 and arrives on 28-06-2024 directly from their factory in Kerala -  Very well built and compact unit -  Digital screen up front -  Connection points and fans at the back. Battery Leads were all 25mm unlike the 16mm ones on most units -  Also got a DC MCB for the DCDB box from Amazon -  Made my own custom 25mm Battery Cables (though I didn't need them all) -  With all SS Terminal Bolts -  Also got these connectors capable of upto 16mm cables for building my own AC side Distribution Box, commonly known as ACDB Box -  Supports upto 16mm AC/DC cables and these fit directly into standard MCB box din rails -  The MS and Perlin Structure was now painted and ready for the next 30 years -   The 1st 2 Solar Panels arrive on 01-07-2024 by Bluedart. Quite heavy at 32kg for each panel -  Both Panels and Solar Inverter ready for the 1st 1KVA installation - 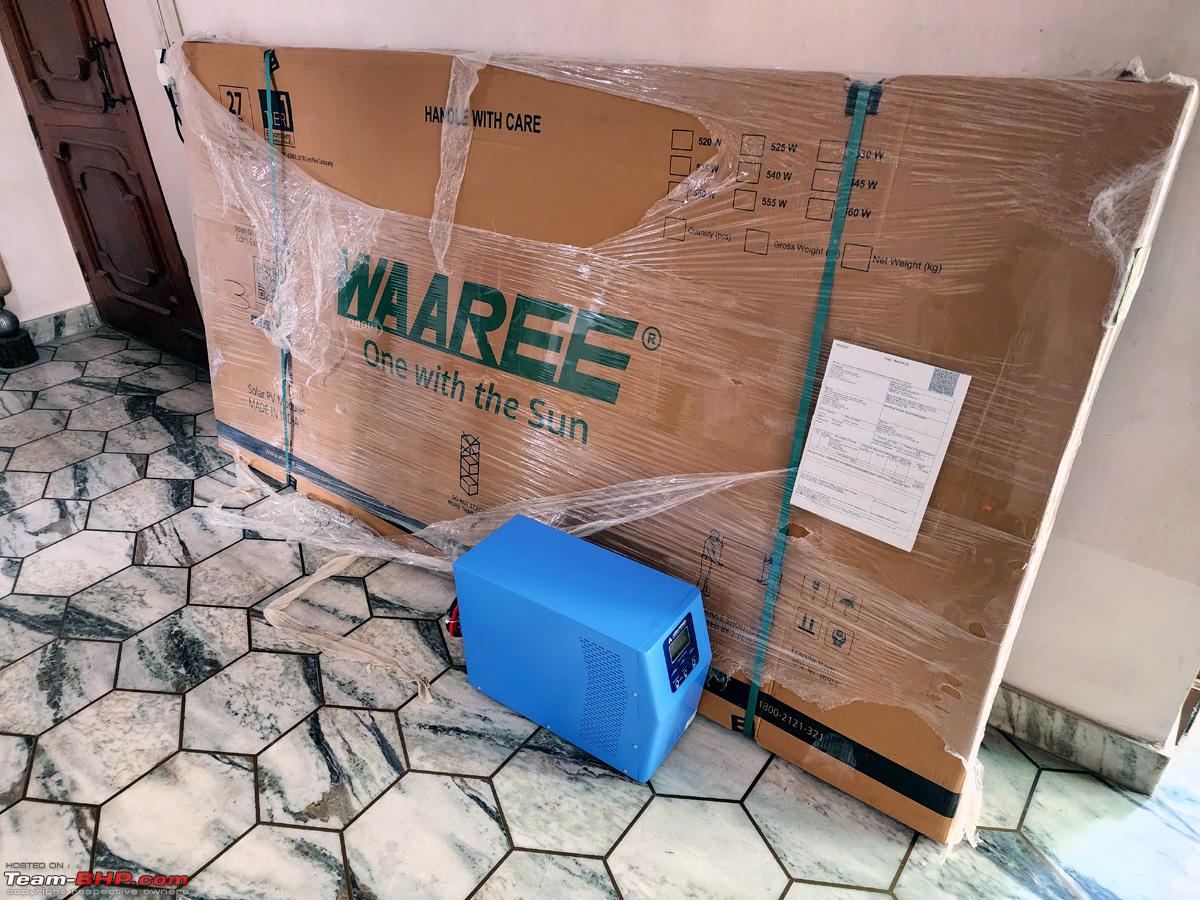 Fitted the DC MCB myself into the DCDB Box. Note - DC MCB is different from AC MCB, as it is designed to withstand much heavier spark, that is generated while cutting off DC current. So never use AC MCB on DC side! - 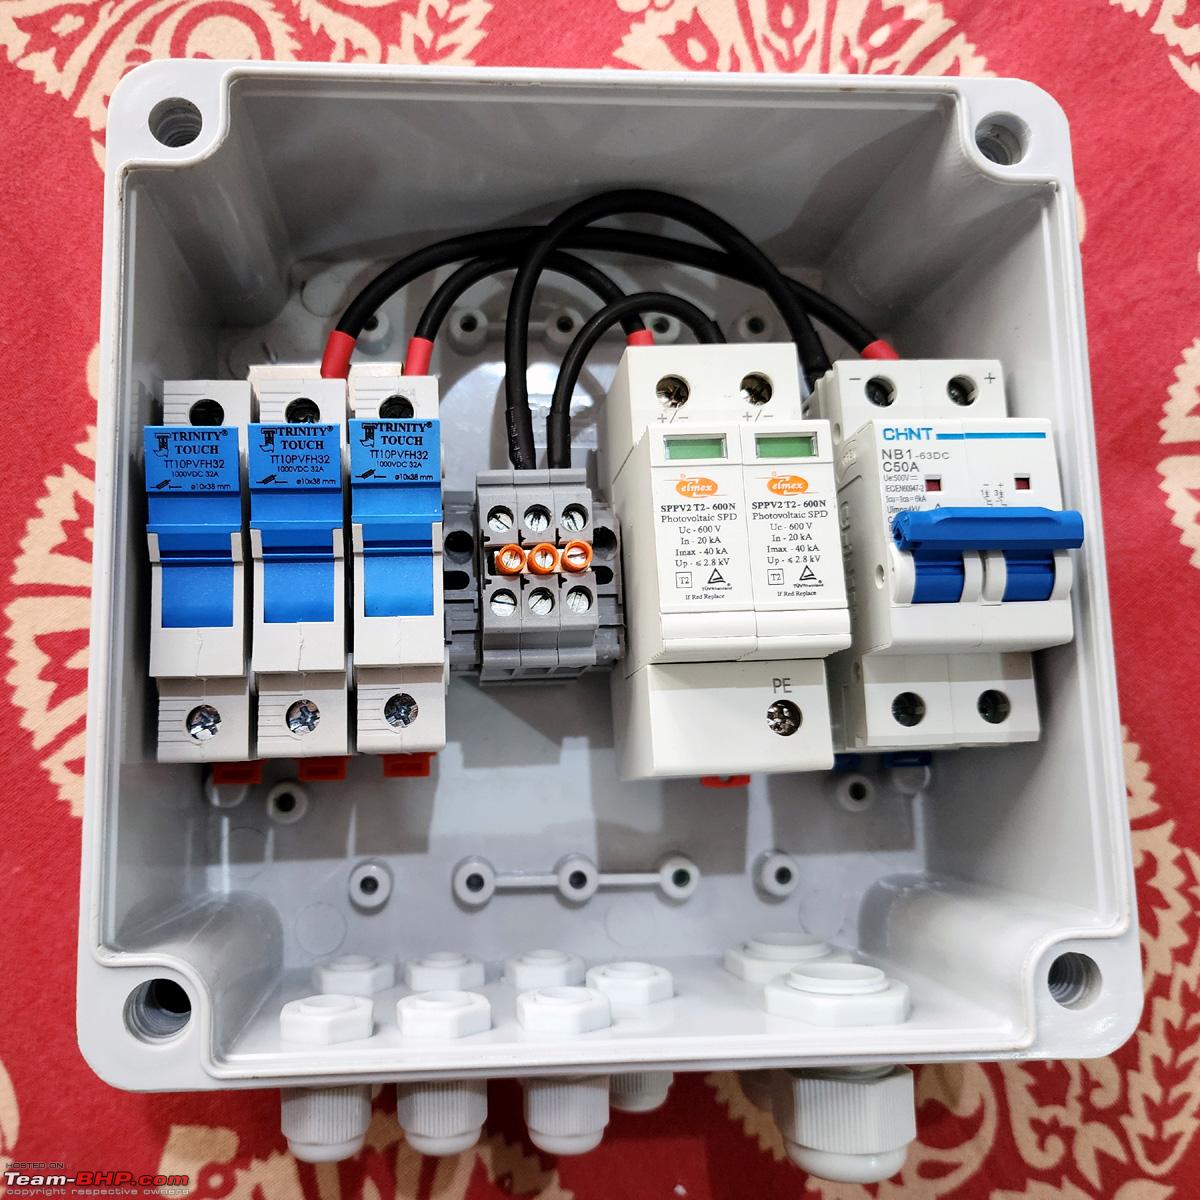 The 3 Parallel Circuits are shorted in the Box. I am using 2 panels in Series which makes their VOC double i.e. 51V x 2 = upto 102V (normally 95V) and Ampere remains the same. Then 3 such strings of 2 panels each, will be made in Parallel = Total 6 panels. The VOC of those 3 strings will remain the same i.e. = about 95V but their Amperage will add up i.e. 13.5A x 3 = 40.5A approx. So theoretical output of the system can be upto 95 x 40= 3800 Watts approximately. But real life figures are always lower. This is Principle no. 2 -  Solar Panels carefully taken to the rooftop by my electricians, ready to be attached -  They have MC4 connectors at both terminals. Luckily the length of the cables of these Waaree Panels was quite long, so I did not need to attach the 2 into 1 and 3 into 1 adapters, that I had shown earlier -  1st 2x panels attached to the structure -  GI and SS wire was further used to tighten these panels as a fail-safe besides the Z and U clamps, for extreme storm conditions -  Like this -  The Earthing wire was attached to specific Earth Points only, as mentioned in the installation sheet for the panels. As the rest of the structure is coated for longevity -  All wiring attached to the DCDB Box. I completed the wiring for all 3 strings even though I had attached only 1 string of 2 panels right now -  The DC voltage was tested from String 1 and found to be within range -  The DC Voltage was also tested at the final point near the Solar PCU, where it attaches, and found to be without losses, slight deviations not withstanding -  Preparations for ACDB box also started with this AC MCB type changeover for supplying input voltage to the PCU either directly or through a 5 KVA transformer (more on that later) -  A Voltage and Surge Protector was also added (from Amazon), to the AC input side to protect my Solar PCU investment. All these things are usually skipped by professional Solar installers -  The Voltage display and cut offs were tested by my Fluke Multimeter before installation and found to be accurate -  1 KVA System was now complete and ready for operation -   30 Photos limit reached. Continued... Last edited by dkaile : 23rd November 2024 at 13:52. |
|
| (31)
Thanks
|
| The following 31 BHPians Thank dkaile for this useful post: | 1.2GT3GT, aashishnb, ach1lles, AlphaKiloPapa, anivy, ashpalio, autonarr, brownkaiser, daretodream, Derrida, digitalnirvana, DiMaGo, drrajasaravanan, emperor_raizen, Full_Minchingu, graaja, GTO, GTX+, Harjot37, hmansari, keroo1099, krishnaprasadgg, Mrs&Mr_Shenu, prajosh, sanjayrozario, Sen, SlowRider, somspaple, tikku.dk, Vikash Kumawat, Voodooblaster |
|
23rd November 2024, 14:28
| #4 |
| Senior - BHPian Join Date: May 2011 Location: Meerut, India
Posts: 3,574
Thanked: 9,351 Times
Infractions: 0/1 (5) | re: In-depth Guide | Solar Plant Setup on Rooftop and save 1 Lac+ Cont...(4) A view of the 2 panels from the top -  All wiring connected to the Solar PCU. The symbols are self explanatory like any ordinary inverter. Only the 2 x 6mm DC wire coming from the Solar Panels are the difference. The AC Input and Output Neutral is common inside the PCU -  The ACDB Box that I created, with extra protections -  The Inverter Output is distributed into 3 - separate strings going to my Ground Floor, First Floor and Basement. You can customize as per your needs -  AC earthing being checked. Difference of just 1V between the neutral and earthing, which is acceptable -  Took this opportunity to also spruce up, paint and waterproof my terrace -    Got this Solar Panel Cleaning Rod from Amazon. It can be extended 3 times the length visible here. Solar Panel Cleaning is very necessary, every 6 months, to keep the system in peak performance. -  Next most important decision was to get new batteries. As this Inverter was replacing 2 x 1.5KVA inverters, I got rid of the 4 old batteries and got 21,000/- as refund for them. I went with Exide Solatubular 200Ah batteries with full 5 years warranty, no pro-rata thing here. As you will see from the technical specs, the 5 year warranty batteries were also heavier than the 3 year warranty batteries of the same Ah, by almost 10 kgs each!! I got these batteries for 17000 each i.e. Total 34,000 Less 21000 for the 4 old batteries = Net Paid 13,000/-. They are supposed to easily last 7~8 years and have excellent resale also. Hence did not go for any Lithium Ion stuff, which is mostly Chinese and not tested to it's 100% claimed lifespan, with no resale value (for now).   These charging parameters were needed to program the Solar PCU for optimal use -  Parameters entered in Solar PCU -  Fully System ready and functional -  With the 'Microtek' (lolz) Battery Cover attached -  I monitored the system for a few weeks with my home camera, as it sometimes used to trip stating overload. The culprit was one the refrigertaors -  It couldn't (and was not) be this new double door Panasonic -  It was this 30 year old LG. A capacitor was added to it's compressor, which solved the issue permanently -  My testing equipment which was able to identify the culprit overloader -  The Battery water was tested and TDS was found around 20, which was not acceptable. Will search for better source -  Took the opportunity to replace all "Baba Adaam ke Zamane ke Equipments" (lolz) in my main panel like this antique changeover -  With these new age L&T 63A MCB type changeovers (for my 2 electrical supply meters) and 3 Phase Voltage and Surge Protection Device, with complete monitoring added for Voltage and Ampere's being consumed and now SAVED!! -  Also replaced my 10 KVA (now not needed) Mains Transformers. They consumed 50W even in standby mode !! -  With these sleek yet functional 5 KVA one's from Microtek -  15A rating -  Correct display and well as stabilization -  As mentioned earlier, I also considered these UTL Lithium Batteries as my Solar PCU was fully compatible. But rejected for reasons mentioned earlier -  Also got this maintenance ladder from Amazon (lolz) -  Next 4 panels landed on 02-08-2024 -  Installation in progress -  30 Photos limit reached. Continued... Last edited by dkaile : 23rd November 2024 at 14:30. |
|
| (29)
Thanks
|
| The following 29 BHPians Thank dkaile for this useful post: | 1.2GT3GT, ach1lles, AlphaKiloPapa, anivy, ashpalio, autonarr, chaksjr, daretodream, Derrida, digitalnirvana, drrajasaravanan, emperor_raizen, gischethans, graaja, GTO, GTX+, Harjot37, keroo1099, krishnaprasadgg, MotoBlip, sanjayrozario, Sen, shyampsunder, SlowRider, somspaple, sukhbirST, tikku.dk, Vikash Kumawat, Voodooblaster |
|
23rd November 2024, 14:46
| #5 |
| Senior - BHPian Join Date: May 2011 Location: Meerut, India
Posts: 3,574
Thanked: 9,351 Times
Infractions: 0/1 (5) | re: In-depth Guide | Solar Plant Setup on Rooftop and save 1 Lac+ Cont... (5) Earthing Wires were made to connect the panel's earthing to each other -  Like this -  Fail Safe's attached -  Installation of the 6 panel's complete -  Top view -  My Electricity Bill for July 2024 = 9253 (before Solar Installation)  Electricity Bill for August 2024 = 4416 (after Solar Installation)  Though this difference is slightly more due to AC usage difference, I have (on average) started saving 2~3 k EVERY Month on electricity Bills. My house supply goes totally on Solar everyday from nearly 7~8am to 6~7pm. I don't even realise when it switches. Damn good investment when you consider that this will serve you for the next 30+ years. The Total (approx) Cost involved - 6 Panels = 70148 Ashapower PCU = 35000 Solar structure and wires from Nitashi = 19000 DC Earthing x 2 = 11000 Earthing Wiring and accessories = 10000 AC Earthing x 1 (already done) = 5500 Misc ACDB, Lightening Arrester etc. = 5000 Labour = 5000 2 x Batteries = 34000 (but net paid by me is 13000) Total approx. cost is 1.94L if everything is done from scratch. But the material quality that I used, will never be supplied by any contractor. Next project 5 KVA ON-GRID to be added to this existing system (Lolz). Cheers... |
|
| (93)
Thanks
|
| The following 93 BHPians Thank dkaile for this useful post: | 1.2GT3GT, ach1lles, AlphaKiloPapa, AlphaLamb, anandhsub, anivy, Ashdel, ashpalio, autonarr, batish, bikertillidie, BLACNWYTE, Blue Vitriol, blueberry, brownkaiser, catchjyoti, clickdilip, daretodream, Derrida, digitalnirvana, Doge, Doonite, drrajasaravanan, Eddy, emperor_raizen, Full_Minchingu, gischethans, GLAD73, graaja, GTO, GTX+, gurminder_81, Harjot37, Highh5, isotope729, iSubham, itspatra, JithinR, Joe-Ker, Joseph Jos, kapi, keroo1099, kisingb, krishnaprasadgg, late_enthusiast, lejhoom, Lobogris, lxskllr, Motard_Blr, MotoBlip, NavtejS, neo_the_one, NewUser123, NICHE, Night Raven, Nrulz, One, pandabear, peddagunda, pram_ind, PraNeel, PreludeSH, premsky, Raghuwire, Rahulk302, rd_maverick, Revotorqued, Rhinox~Cnu, RiderZone, rjtourer, RoverX, rroy92, s4ch, Safedriver2023, sainyamk95, Samarth 619, sanjayrozario, Saturn-V, Sedate, Sen, Sg01, Sharanam, Sherlock, SlowRider, somspaple, srini1785, sukhbirST, toiingg, varkey, Vernafied, vikas8890, Vikash Kumawat, Voodooblaster |
|
24th November 2024, 12:22
| #6 |
| BHPian Join Date: Feb 2009 Location: KL41-MH14-TN14
Posts: 99
Thanked: 55 Times
| Re: In-depth Guide | Solar Plant Setup on Rooftop and save 1 Lac+ @dkaile Wow, I wish i had seen this before i got my 3Kw solar plant. Thanks for this repository of knowledge.  Please do post the on grid journey as well, thats next on my list too now that i got an ev. I did 3 KW setup and running entire home except a few appliances like AC, Pump etc on the solar pcu by adding a switch to disconnect Mains from pcu completely. Thus the pcu allows the batteries to be drained to the max. some nights we need to switch on mains supply to PCU manually in case the usage was high at night and the PCU starts beeping. (im still using the 1.8 kva old miocrotek as backup, so the old inverter kicks in when the pcu bows out due to low batt.) My bills went down from 5-6k to below 1k Few questions for you: (would be very grateful if I can get some qualified opinion on this, I don't trust my electrician or the installer) Why did you coat steel structure with red oxide before paint? I have an epoxy coated steel structure on my roof that holds my water tank thats rusted and want to restore it. In my setup there is a pcu and the old microtek inverter charges from my pcu, is that a problem? how much power would that consume? If i were to remove my Old inverter, would i be able to add two more batteries to increase my storage? currently have 4*200VA Eastman brand battery with 10yr warranty (Pro rated), these batteries and everything else are 2 years old now, would adding batteries now help or harm. My PCU can take panels upto 5KW but right now i have only 3kw installed |

| (5)
Thanks
|
| The following 5 BHPians Thank Joe-Ker for this useful post: | digitalnirvana, dkaile, drrajasaravanan, Sen, snappysam |
|
24th November 2024, 13:02
| #7 | |
| Senior - BHPian Join Date: May 2011 Location: Meerut, India
Posts: 3,574
Thanked: 9,351 Times
Infractions: 0/1 (5) | Re: In-depth Guide | Solar Plant Setup on Rooftop and save 1 Lac+ Quote:
Red oxide protects MS from rusting and provides double protection along with the top enamel/epoxy paint that you do. Adding or removing batteries will depend on the specs of your PCU. At how many volts does it operate, etc.? A rough idea for a 5 KVA 48V system using 4x 12V batteries & 8 x 575W panels & a 6 KVA 72V system using 6x 12V batteries and similar 8 panels, built from scratch, would be something like as mentioned below -  On a 5/6 KVA system, you should be able to run 2 AC's also. Cheers... Last edited by dkaile : 24th November 2024 at 13:04. | |
|
| (17)
Thanks
|

| The following 17 BHPians Thank dkaile for this useful post: | ach1lles, AlphaKiloPapa, ashkamath, autonarr, aveekbhat, Derrida, digitalnirvana, efgritesh, emperor_raizen, Harjot37, kisingb, late_enthusiast, peddagunda, sanjayrozario, Sen, snappysam, SR-71 |
|
24th November 2024, 20:04
| #8 |
| BHPian Join Date: Jun 2021 Location: Noida
Posts: 303
Thanked: 624 Times
| Re: In-depth Guide | Solar Plant Setup on Rooftop and save 1 Lac+ Thanks for tips to save money and energy. Appreciate your hard work. |
|
| (1)
Thanks
|
| The following BHPian Thanks sukhbirST for this useful post: | dkaile |
|
24th November 2024, 20:19
| #9 |
| BHPian Join Date: May 2005 Location: Vasco-Goa
Posts: 955
Thanked: 3,572 Times
| Re: In-depth Guide | Solar Plant Setup on Rooftop and save 1 Lac+ Thanks for your detailed thread. Very much appreciated. I am thinking of installing a 4 KW (sanctioned load)solar system for my apartment in Mangalore, Karnataka. It's a small apartment complex with 16 houses (4 floor with 4 houses in each floor). Is this possible to get installed in apartments? I am thinking of calling and owner's meeting and put forward my request and permission from other owners to allow me to install the solar panels. Do you think it's possible? Our apartment roof is covered with the sheets and would they be able to take the weight of the solar panels? I am thinking of taking the services of a local electrical contractor and get it done. |
|
| (2)
Thanks
|
| The following 2 BHPians Thank ashkamath for this useful post: | dkaile, gauravanekar |
|
24th November 2024, 21:23
| #10 |
| BHPian Join Date: Aug 2023 Location: Bangalore
Posts: 70
Thanked: 442 Times
| Re: In-depth Guide | Solar Plant Setup on Rooftop and save 1 Lac+ Amazing guide for solar installation at home. Just one question. Is the solar panel cleaner required? Wouldn't the the occasional rain clean the panel. I thought those are for dry and dusty areas like deserts. Also wouldn't a cloth work? I am just curious. |
|
| (1)
Thanks
|
| The following BHPian Thanks itspatra for this useful post: | dkaile |
|
24th November 2024, 22:39
| #11 |
| BHPian Join Date: Sep 2019 Location: New Delhi
Posts: 134
Thanked: 304 Times
| Re: In-depth Guide | Solar Plant Setup on Rooftop and save 1 Lac+ Can someone suggest a vendor for rooftop solar system, I don’t have any expertise to do it myself. If someone knows some vendor in Delhi it would be helpful |
|
| ()
Thanks
|
| |
|
24th November 2024, 23:52
| #12 |
| BHPian Join Date: Dec 2016 Location: UP-14/15, TS-09
Posts: 545
Thanked: 1,529 Times
| Re: In-depth Guide | Solar Plant Setup on Rooftop and save 1 Lac+ Excellent and very detailed thread @dkaile. We recently added 1 more floor at our home (meerut only) and was contemplating whether to go for Solar Set Up or not. Your thread came in at the right time, straight away shared the link with my brother. Thank you for penning down! |
|
| (2)
Thanks
|
| The following 2 BHPians Thank Highh5 for this useful post: | digitalnirvana, dkaile |
|
25th November 2024, 00:40
| #13 |
| BHPian Join Date: Dec 2019 Location: Goa
Posts: 137
Thanked: 331 Times
| Re: In-depth Guide | Solar Plant Setup on Rooftop and save 1 Lac+ Excellent DIY project...Kudos for the patience, perseverance and technical know-how on how you did it. Last edited by wheeledwanderer : 25th November 2024 at 00:40. Reason: typo error |
|
| (1)
Thanks
|
| The following BHPian Thanks wheeledwanderer for this useful post: | dkaile |
|
25th November 2024, 12:53
| #14 | |
| BHPian Join Date: Jan 2020 Location: Pune
Posts: 76
Thanked: 140 Times
| Re: In-depth Guide | Solar Plant Setup on Rooftop and save 1 Lac+ Wow, I just want to be knowledgable enough someday to execute such projects with confidence. Thanks for sharing. Quote:
| |
|
| (1)
Thanks
|
| The following BHPian Thanks efgritesh for this useful post: | dkaile |
|
25th November 2024, 12:59
| #15 |
| BHPian Join Date: Aug 2014 Location: Mumbai
Posts: 290
Thanked: 652 Times
| Re: In-depth Guide | Solar Plant Setup on Rooftop and save 1 Lac+ Hi dkaile, excellent project. Can I ask you for some key pointers with regards to materials to use and why. This would be very useful for people who do not have the same level of expertise as you for a DIY but would want to get things done by an external vendor, and could then inform 'specifications' of these items, while negotiating. For e.g. 1. Which type of battery to use & why (longevity) - use ones with 5 years warranty instead of 2. Which type of PCU - copper instead of aluminum, as will last for 25 years. 3. DC MCB instead of AC MCB 4. What type of cables etc. |
|
| (1)
Thanks
|
| The following BHPian Thanks aashishnb for this useful post: | dkaile |
|