Team-BHP > Technical Stuff > DIY - Do it yourself
Register New Topics New Posts Top Thanked Team-BHP FAQ


Reply
  Search this Thread
143,492 views
Old 22nd December 2008, 14:58   #1
Newbie
 
Join Date: May 2007
Location: Bangalore
Posts: 18
Thanked: 7 Times
DIY - Step by Step Guide on Replacing Timing Belt in Camry

Heya Folks,

A couple of quick points on the replacement of timing belts. The key to the extent of damage that can be caused by non replacement of the timing belt is to know if you engine is an interference or non interference engine. Most modern engines fall under the non interference category, simply put even if the timing belt snaps the piston will not make contact with valves. With the interference engines, there will be significant damage to the engines.

The process of replacing the timing belt on your car for the expert DIY person, is relatively simple and can be quite a pleasurable 4 hours of getting to know your car upclose and personal.

I have a camry that has currently 423 000 kms and still running strong, key to keeping your vehicle running is regular preventive maintainance. If anyone is interested in learning more, let me know and i would be happy to put photographs up of the entire process.

Cheers,
Sanjeev
ssanjeev is offline  
Old 23rd December 2008, 00:24   #2
Senior - BHPian
 
Raccoon's Avatar
 
Join Date: Jan 2008
Location: Poona
Posts: 1,851
Thanked: 116 Times

Im sure most of us would be more than happy if you can put up such a guide...
Raccoon is offline  
Old 24th December 2008, 18:05   #3
Newbie
 
Join Date: May 2007
Location: Bangalore
Posts: 18
Thanked: 7 Times
Camry Timing Belt Replacement

Ok, to begin with, this is not a job for the faint hearted, and IMHO this is a job for a person with a fair bit of DIY experience. This job took me about 6 - 7 hours to complete. This is but an overview of the process but would be happy to give folks pointers if need be.

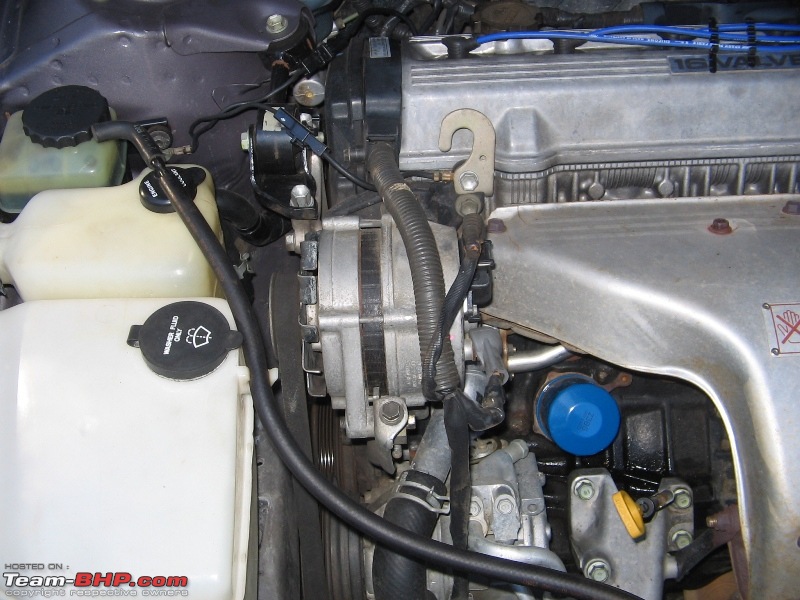
This is a Toyota Camry 2.2L DOHC, and as with most toyota's is a fairly complex and sophisticated engine. This picture shows locations of the critical components involved in this DIY operation.
DIY - Step by Step Guide on Replacing Timing Belt in Camry-overview-alternator-engine-upper-mount.jpg

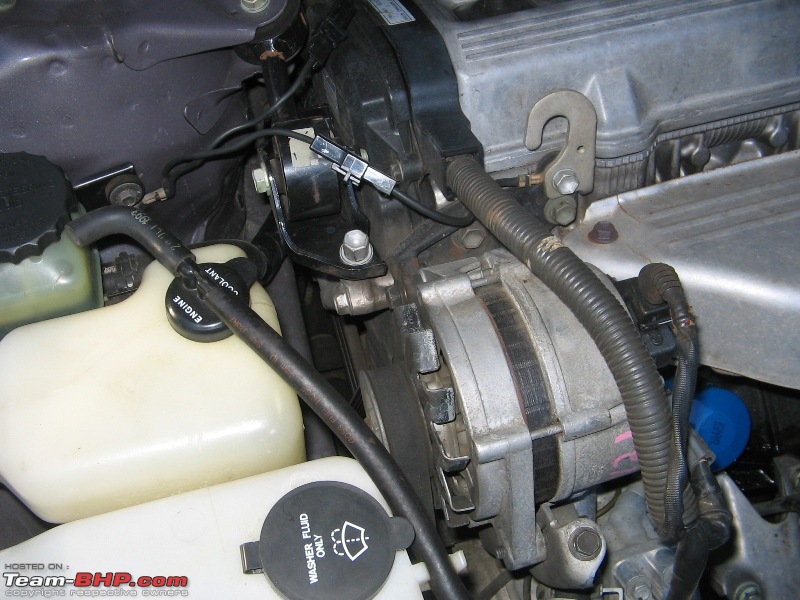
Coolant and washer tank removed.
DIY - Step by Step Guide on Replacing Timing Belt in Camry-coolant-washer-tank-removed.jpg

Closeup of alternator and the mount for it.
DIY - Step by Step Guide on Replacing Timing Belt in Camry-alternator-removal.jpg

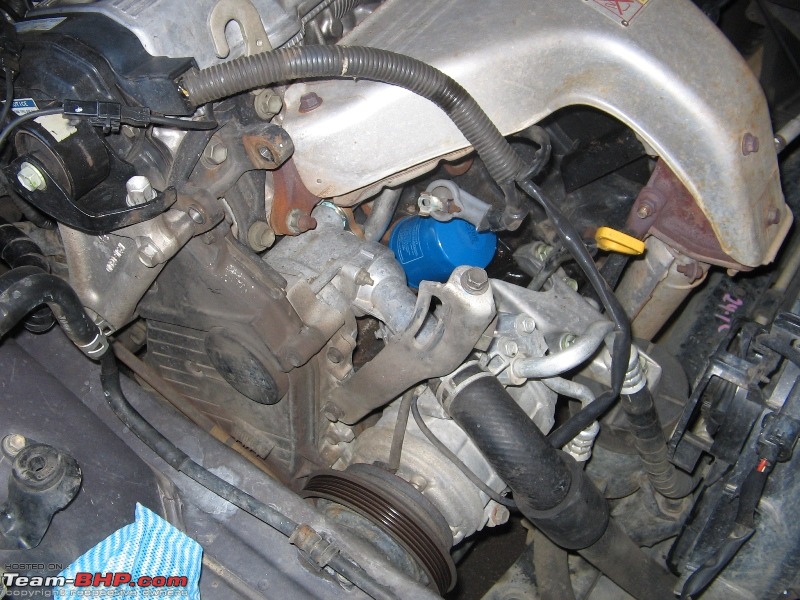
Alternator and supporting bracket have now been removed.
DIY - Step by Step Guide on Replacing Timing Belt in Camry-alternator-bracket-removed.jpg

The engine mount is probably the most challenging to remove considering that a DIY person seldom has a lift at home for the car to be raised or hydraulic tools for raising the engine.
DIY - Step by Step Guide on Replacing Timing Belt in Camry-mount-removal-different-view.jpg

Upper engine mount has been removed, but the attachment to the body of the engine is the most difficult, the two bolts in particular.
DIY - Step by Step Guide on Replacing Timing Belt in Camry-toughest-bolts.jpg

The mount fully removed, the timing belt case now visible.
Name:  Mount Removed.JPG
Views: 93094
Size:  287.6 KB

Upper half of timing belt case removed and the power steering pump that needs to be disengaged.
DIY - Step by Step Guide on Replacing Timing Belt in Camry-power-steering-pump.jpg

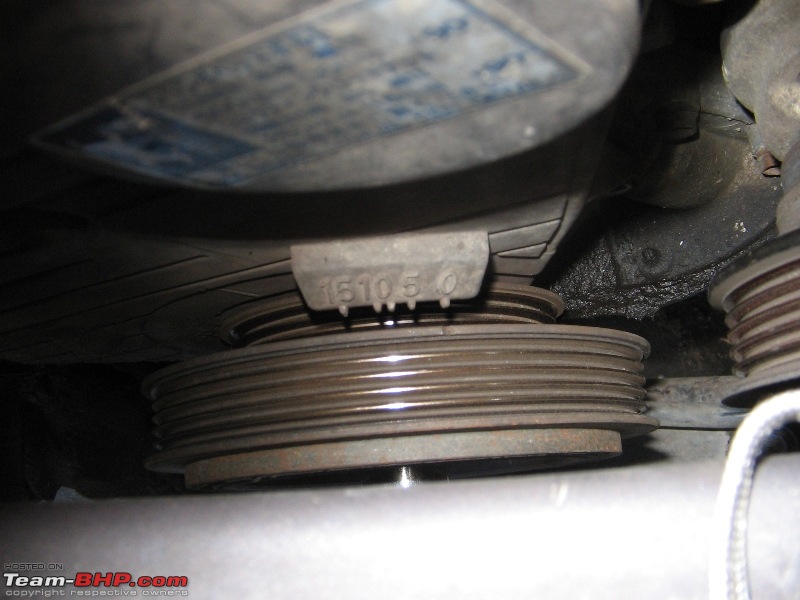
Crankshaft Harmonic Balancer - Key point to be noted is to not use a common gear puller but to use a harmonic balancer puller, the pulley comes out with ease. With a gear puller you stand a very high chance of damaging the pulley. Picture shows the harmonic balancer puller by STANLEY.
DIY - Step by Step Guide on Replacing Timing Belt in Camry-crankshaft-harmonic-balancer.jpg

Crankshaft alignment mark - Needs to be aligned to 0. At this position cylinder 1 is at TDC. Alignment is obtained by turning the crankshaft pulley in the clock wise direction.
DIY - Step by Step Guide on Replacing Timing Belt in Camry-crankshaft-alignment-mark.jpg

The next step is to ensure that the valve alignment is in sync with the crankshaft, simply put when Crankshaft is at 0, valve needs to align with the corresponding mark for its alignment. In this case the alignment mark is visible when looked at hard enough in the mirror.
DIY - Step by Step Guide on Replacing Timing Belt in Camry-valve-alignment-mark.jpg

Old belt replaced with a new one, the old one actually looked relatively new, however be warned that timing belts are notoriously well known for looking great today, but snap tommorrow.
DIY - Step by Step Guide on Replacing Timing Belt in Camry-new-belt-seated.jpg

All aligned and seated, closing up.
DIY - Step by Step Guide on Replacing Timing Belt in Camry-closing-up-after-alignment.jpg

Job completed.
DIY - Step by Step Guide on Replacing Timing Belt in Camry-job-completed.jpg
Attached Thumbnails
DIY - Step by Step Guide on Replacing Timing Belt in Camry-engine-mount-removal.jpg  

DIY - Step by Step Guide on Replacing Timing Belt in Camry-harmonic-balancer-puller.jpg  

DIY - Step by Step Guide on Replacing Timing Belt in Camry-top-cover-removed.jpg  

ssanjeev is offline   (3) Thanks
Old 24th December 2008, 18:21   #4
Team-BHP Support
 
Jaggu's Avatar
 
Join Date: May 2004
Location: Bangalore
Posts: 20,212
Thanked: 15,892 Times

Thats a pretty detailed DIY post, thanks for sharing. How much the engine has done till now?
Jaggu is offline  
Old 24th December 2008, 18:39   #5
Senior - BHPian
 
ImmortalZ's Avatar
 
Join Date: Jan 2008
Location: Trivandrum
Posts: 2,179
Thanked: 488 Times

Quote:
Originally Posted by Jaggu View Post
Thats a pretty detailed DIY post, thanks for sharing. How much the engine has done till now?
Umm, please don't send mod wrath my way, but, from his earlier post:

Quote:
Originally Posted by ssanjeev View Post

I have a camry that has currently 423 000 kms and still running strong, key to keeping your vehicle running is regular preventive maintainance. If anyone is interested in learning more, let me know and i would be happy to put photographs up of the entire process.

Cheers,
Sanjeev
ImmortalZ is offline  
Old 25th December 2008, 13:03   #6
Team-BHP Support
 
Jaggu's Avatar
 
Join Date: May 2004
Location: Bangalore
Posts: 20,212
Thanked: 15,892 Times

Quote:
Originally Posted by ImmortalZ View Post
Umm, please don't send mod wrath my way, but, from his earlier post:
Thanks ImmortalZ for pointing out, i somehow missed it.

ps: i will not send the wrath since its the Xmas season Merry Xmas to you.
Jaggu is offline  
Old 25th December 2008, 16:26   #7
Senior - BHPian
 
aaggoswami's Avatar
 
Join Date: May 2007
Location: Vadodara
Posts: 4,982
Thanked: 2,930 Times

After watching this, I am equally or rather more interested to know about the tool kits you have at home.
Nice guide.

PS : Please tell me more about the tools. I am serious on this. Any DIY job I pick up, I end up knowing that we dont have tools.

EDIT : Camry has done 4,23,000 kms! I am shocked to say the least. How many major overhauls till now ?
And some modern engines are also interference type. IIRC, Ford Fiesta is one of them.

Last edited by aaggoswami : 25th December 2008 at 16:29.
aaggoswami is offline  
Old 25th December 2008, 19:47   #8
Team-BHP Support
 
Rehaan's Avatar
 
Join Date: Feb 2004
Location: Bombay
Posts: 24,039
Thanked: 34,069 Times

Wow, 4,23,000 kms (That too in indian conditions) !!

Thanks for the great pictoral ssanjeev.

cya
R
Rehaan is offline  
Old 26th December 2008, 00:14   #9
BHPian
 
white_vdi's Avatar
 
Join Date: Sep 2008
Location: new delhi
Posts: 857
Thanked: 38 Times

dude that is one technical DIY!!! you rightly said its not for the faint-hearted. cant do this until you know all the parts well and also the engine bay thoroughly. a huge round of applause for this!
white_vdi is offline  
Old 26th December 2008, 09:54   #10
Senior - BHPian
 
phamilyman's Avatar
 
Join Date: Jul 2007
Location: Gurgaon
Posts: 5,968
Thanked: 4,641 Times

to hell with the post - 423000km on a Camry in India?

God level boss. how many years for that much - and your ownership experience?!
phamilyman is offline  
Old 26th December 2008, 16:34   #11
Newbie
 
Join Date: May 2007
Location: Bangalore
Posts: 18
Thanked: 7 Times

Hey guys.. Been busy with boxing day shopping, just to clarify a few points..
  • I am actually in Australia, though my home town is Bangalore.
  • There has been no overhauling of the engine done till date and this mileage has been covered in about 10 years.
  • My tool kit is fairly simple, I have a complete 3/8" socket set
  • Black & Decker Power tool kit for the smaller jobs
  • The usual set of screwdrivers and pliers etc.
  • Special Service Tools consist of Gear Puller, Harmonic Balancer Puller, & a simple Multimeter.
I have a 1.6L Ford Ikon back at home, and I love driving it everytime am back home. It rocks!!!

The Camry is a very hardy car, so far hasnt given me any trouble and is amazingly cheap to maintain. In terms of Fuel Efficiency it averages about 11 - 12 kms to the liter for me.

I was thinking of posting more DIY stuff as i was looking through this site but didnt find too much. Suggestions would be most welcome, if you want me to cover any particular part of the car.

Cheers,
Sanjeev
ssanjeev is offline  
Old 30th December 2008, 14:37   #12
BHPian
 
ilangop's Avatar
 
Join Date: Jul 2008
Location: Chennai
Posts: 992
Thanked: 903 Times

[quote=The engine mount is probably the most challenging to remove considering that a DIY person seldom has a lift at home for the car to be raised or hydraulic tools for raising the engine.
Attachment 82167

Great job buddy, but could you please throw some light on how the engine was supported while the top mount was removed? Any improvised technique??
ilangop is offline  
Old 2nd January 2009, 04:29   #13
Newbie
 
Join Date: May 2007
Location: Bangalore
Posts: 18
Thanked: 7 Times

[quote=ilangop;1110933]
Quote:
Originally Posted by The engine mount is probably the most challenging to remove considering that a DIY person seldom has a lift at home for the car to be raised or hydraulic tools for raising the engine.
[ATTACH
82167[/ATTACH]

Great job buddy, but could you please throw some light on how the engine was supported while the top mount was removed? Any improvised technique??
The upper engine mount is only to aid in stabilizing the engine and does not actually carry any of the engine weight, however to get to those difficult bolts the easiest way is to jack the engine up a wee bit, that by itself lifts the engine by 2 inches or so. Result is that you are able to access and remove those bolts.

Another mechanism is to use a brace by utilizing the hook thats mounted right next to the engine mount. I will post a picture of that if you are interested in seeing that.

Cheers,
Sanjeev
ssanjeev is offline  
Old 3rd January 2009, 16:32   #14
BHPian
 
ilangop's Avatar
 
Join Date: Jul 2008
Location: Chennai
Posts: 992
Thanked: 903 Times

Thank you Sanjeev. Now I understand how you would have done it
ilangop is offline  
Old 6th September 2009, 01:40   #15
Newbie
 
Join Date: Sep 2009
Location: Hawaiian Gardens
Posts: 1
Thanked: 0 Times
Timing belt job on 89 Camry 3sfe do-it -yourself tutorial

Inspired by the thread about timing belt change for 96 Camry, I decided to make similar post about this procedure for 89 Camry in which I would like to share my experience how to set the correct valve timing.
This post is written as a process instruction rather then narrative story and originaly published on Toyota Nation online forum.
Thanks for reading.
Toyota Forums :: Toyota Nation - Timing belt changing write up with some pictures
Doctor j is offline  
Reply

Most Viewed


Copyright ©2000 - 2024, Team-BHP.com
Proudly powered by E2E Networks