Team-BHP
(
https://www.team-bhp.com/forum/)
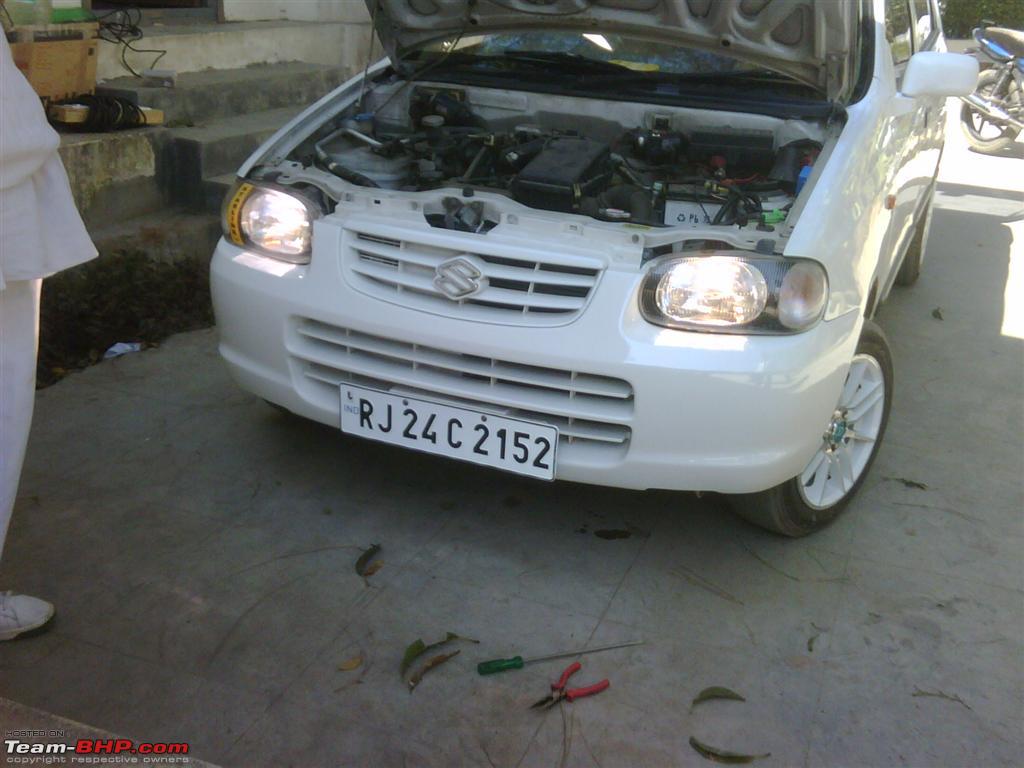
The Car (Bakra) : 2004 Alto Lxi owned by a 78 year old Ze German expatriate friend.
DIY Job : HID Install
Tools and Stuff required: Pliers, Soldering stuff (Iron, Paste, Wire etc), couple of cables, Insulation Tapes, Cable tie, HID kit, wiring Harness off-course, Wrench sets, couple of nuts and bolts etc etc.
Skill level:
1. Easy if you buy a brand new HID box packed, which normally comes with instruction written in plain language.
2. Very Hard if you want to save money and go out and buy 2nd hand battered used stuff from odd places like some classified on some Largest Automotive forum of some Asian Country. :)
How it began...
Well the fact is I am not much of a fan of HIDs. In hills where we live and during fogs it is unusable.
But this friend who is 78 years is a semi tech freak and heard about HID somewhere. Since he did not want to spent so much on an old car, we decided to look at ebay and our own classified. Luckily we found one at an unbelievable price, only later when i received it, i found that why the guy was selling it for dirt cheap. I don't blame him. As when i asked him if the bulb and ballast was in working order, he said yes. Darn I forgot to ask about the wiring loom. :Frustrati
When i checked it, the faulty part was the
Relay. I tried to split it open, only to find that it was completely molded with
plasticky stuff. Trying to remove it only erased all the parts number and a broken PCB.
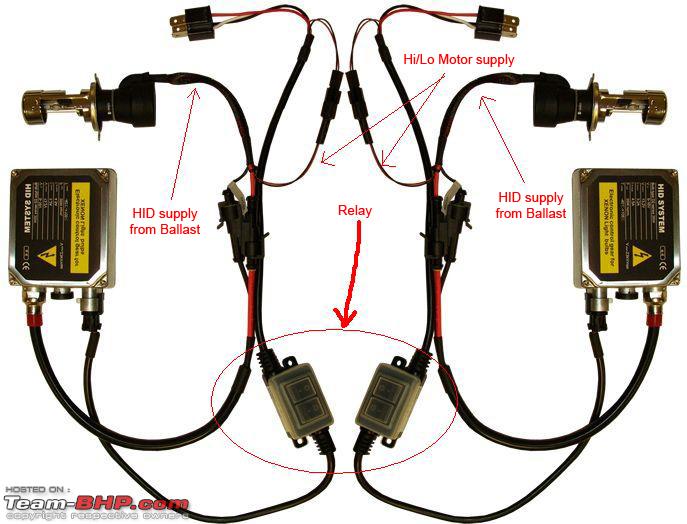
Now i was stuck with a pair of HID bulbs, ballast and messed up relay and cables. I decided to search on the internet for wiring diagram but to no avail. All i found was block diagrams of cables and HID ballast controller (relay) none of those were helpful because, none of them showed what was actually inside those controller, their pin configuration, just block diagrams after block diagrams.
The Final Solution (no, definitely not the Nazi thingy)
Unlike halogen H4 wiring which has a common terminal as ground and voltage flows through either of the filaments for High/Low beams the
Philips H4 High/Low HID, the bulb needs to be on all the time, The High Low is controlled by a electromagnet which pulls the bulb in and out. So there is no dual filament, but a single bulb and a magnet.
So if we wire it as a standard rule of thumb of Headlamp wiring, we end up lighting HID only in low beam mode and an activated magnet in high beam mode with the combo switch. Also no light (only magnetic click on) Flash/Pass mode.
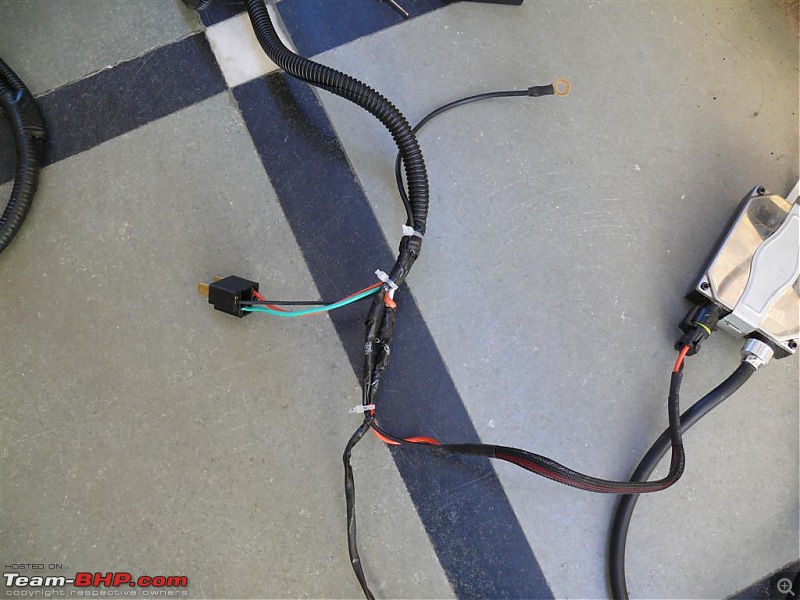
After a bit of thinking i decided upon following solution with a
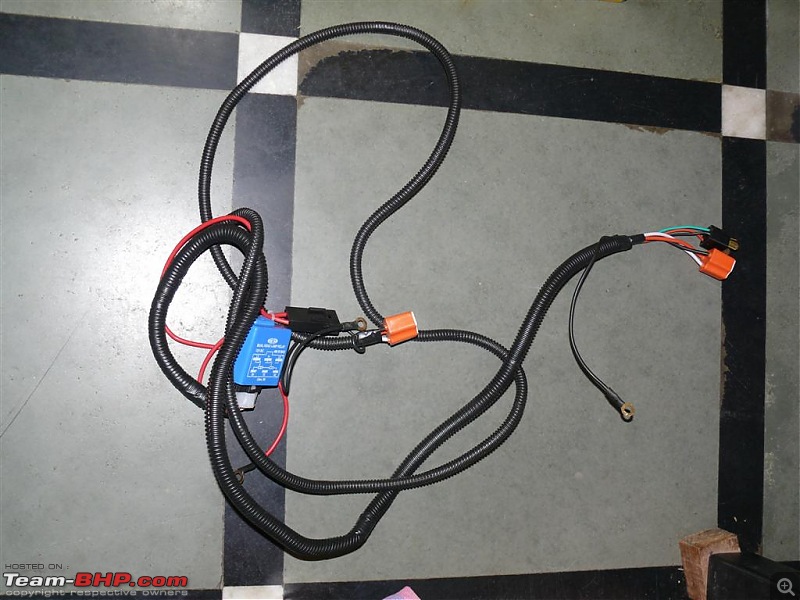
high current diode along with a standard readily available halogen wiring harness that cost me Rs.450/-.
The beauty of this solution is that, if he wants to switch to normal bulbs, it can be done in 10 minutes as I never messed up with original wiring.
Enjoy
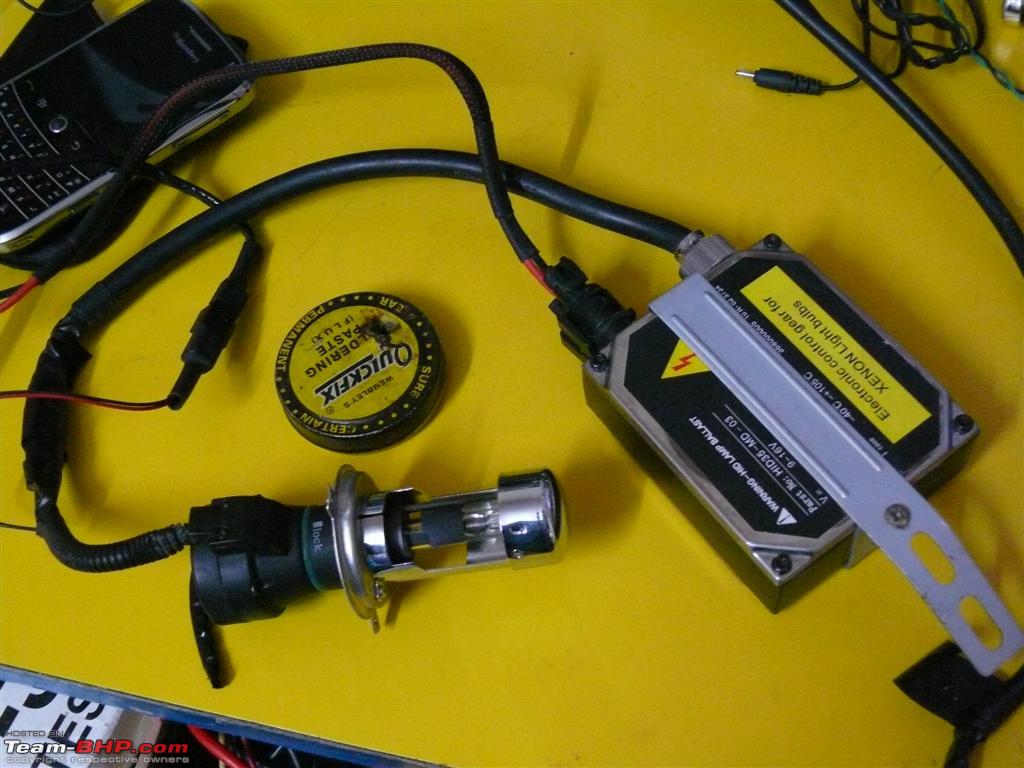
The used 2nd hand HID

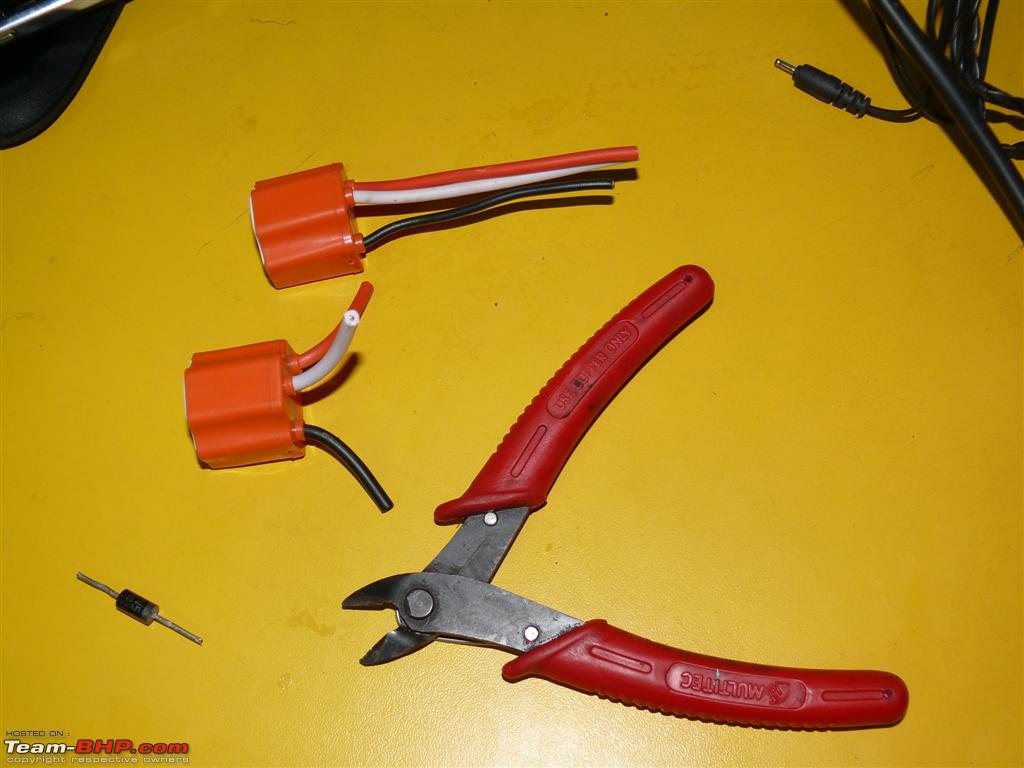
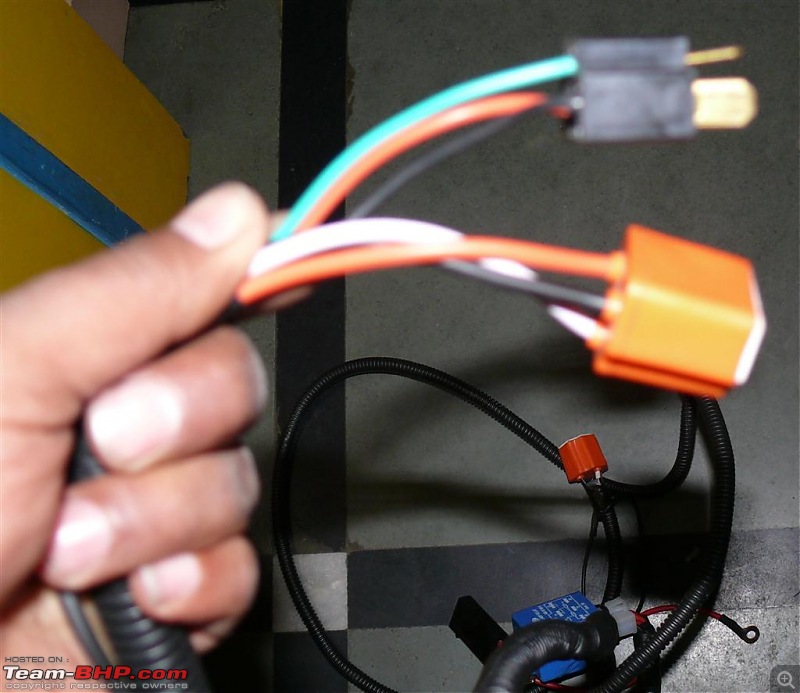
Standard headlight wiring loom, bought for Rs.450/-
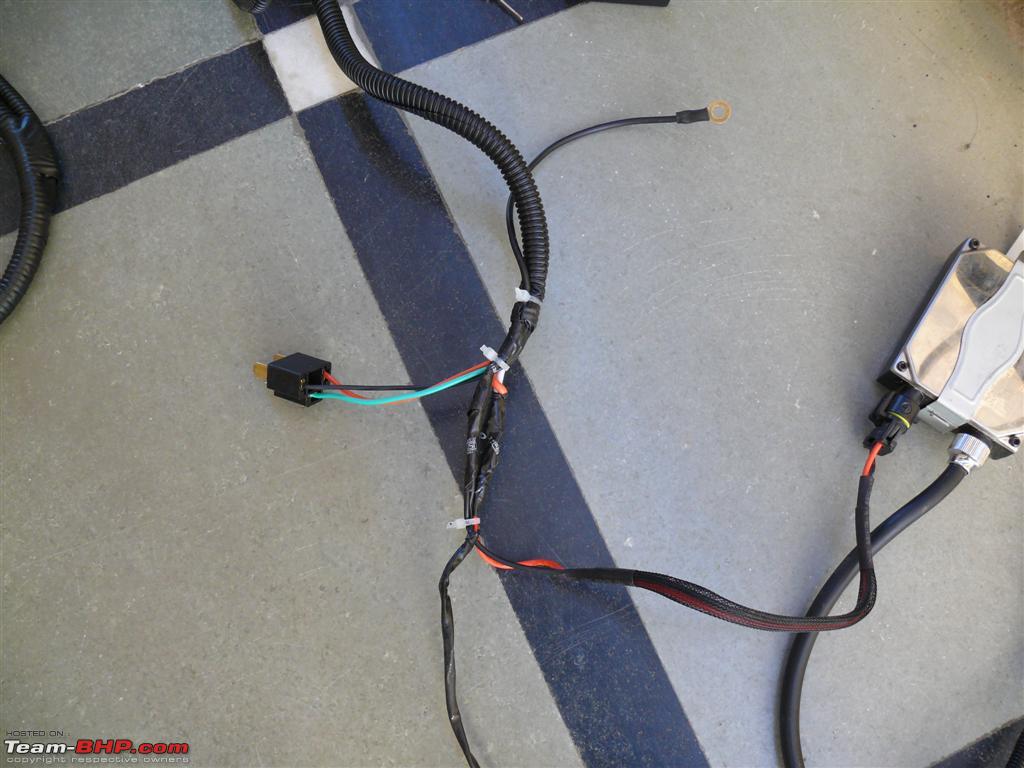
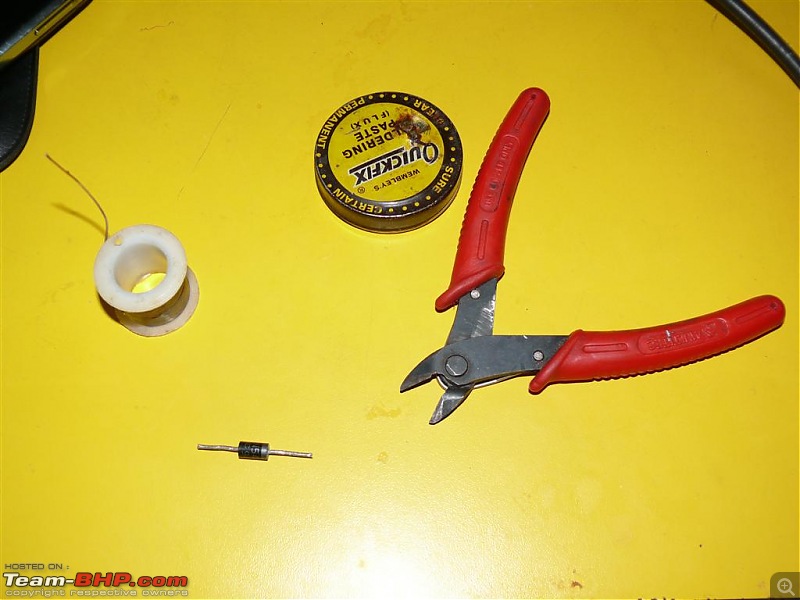
Chopped off connector and diode

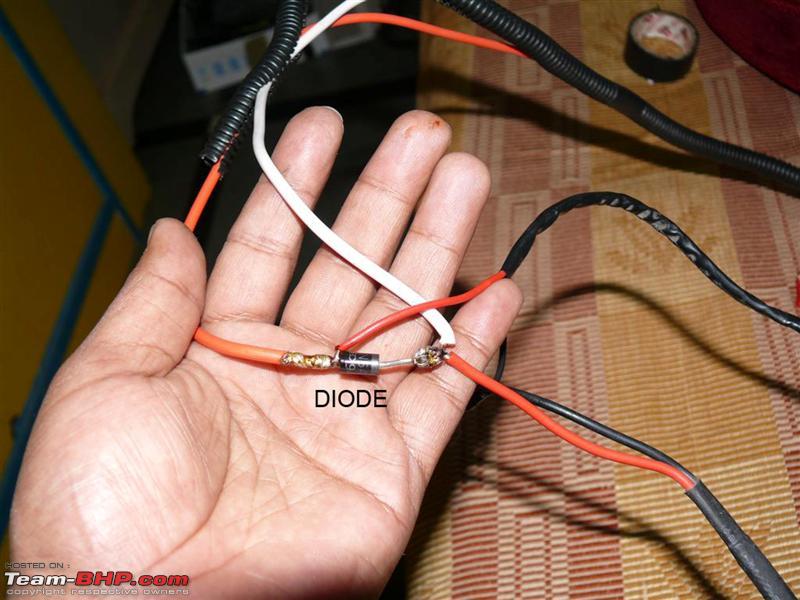
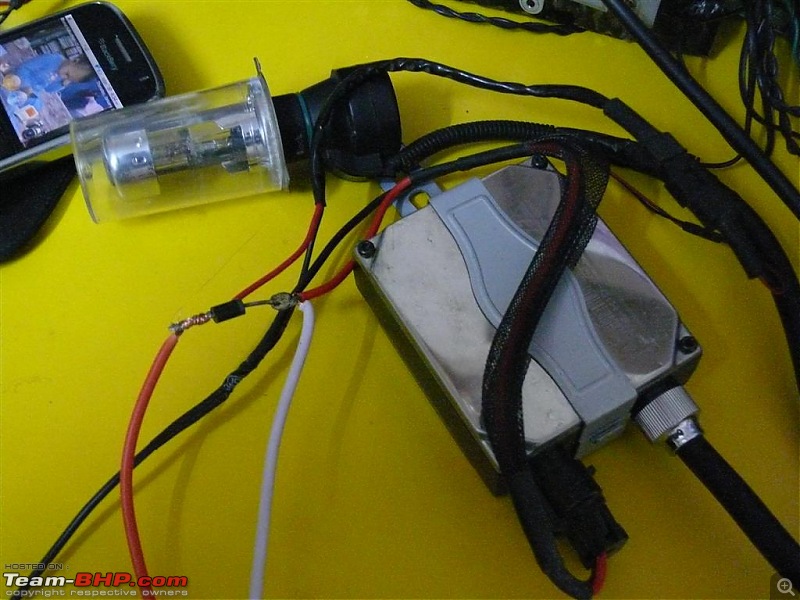
Soldered diode directly to the wiring. Bit messy here, but can be easily understood with the schematic posted in 2nd post.

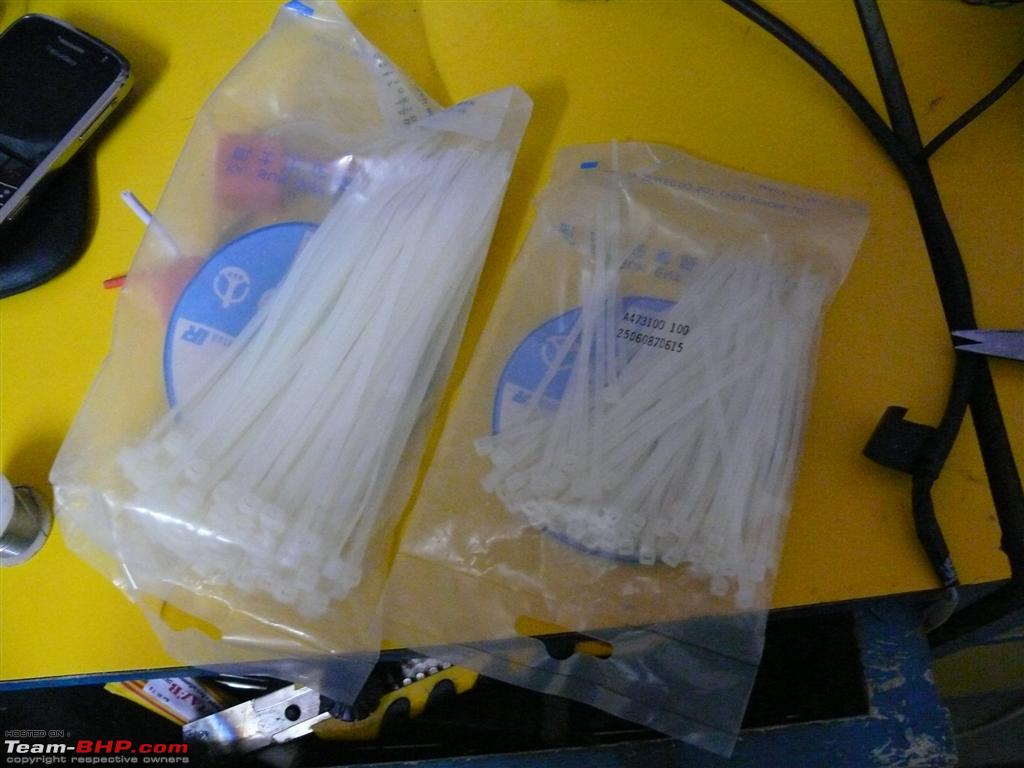
Cable Tie, Very cheap but very helpful, We use this extensively in out networking projects.

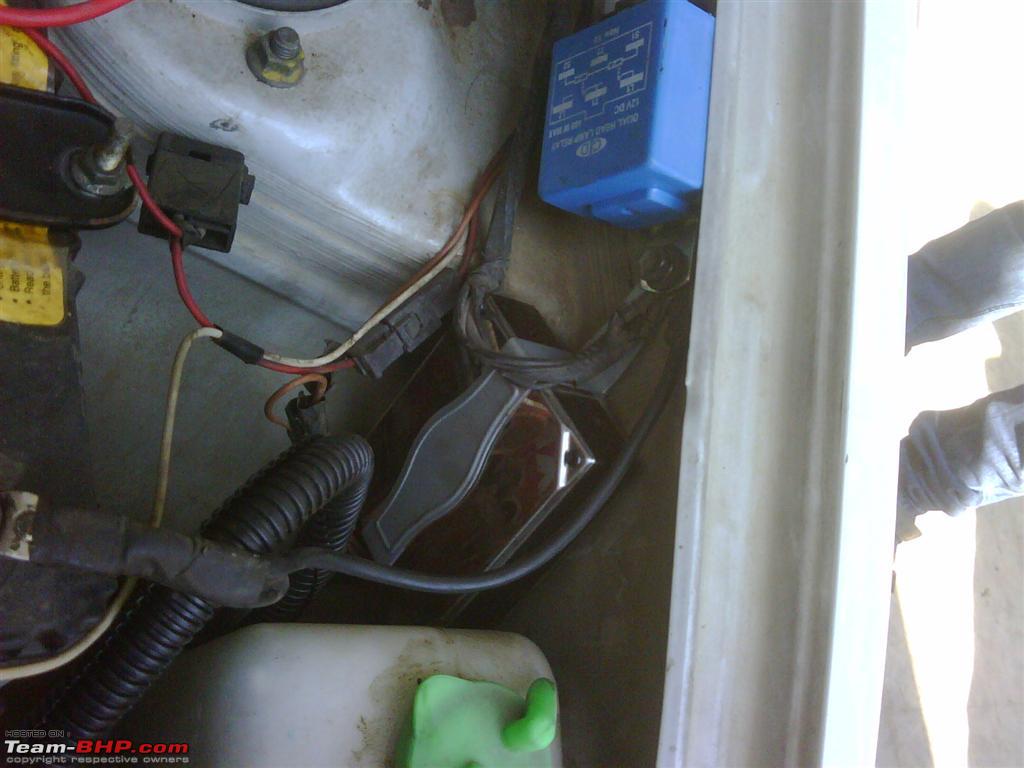
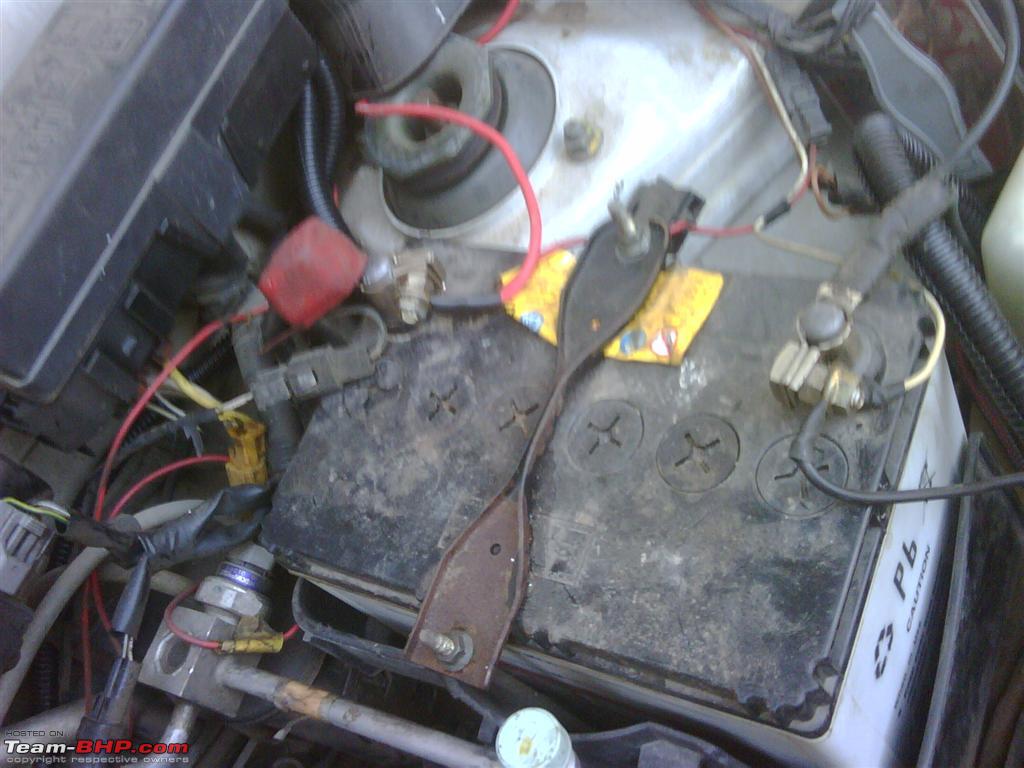
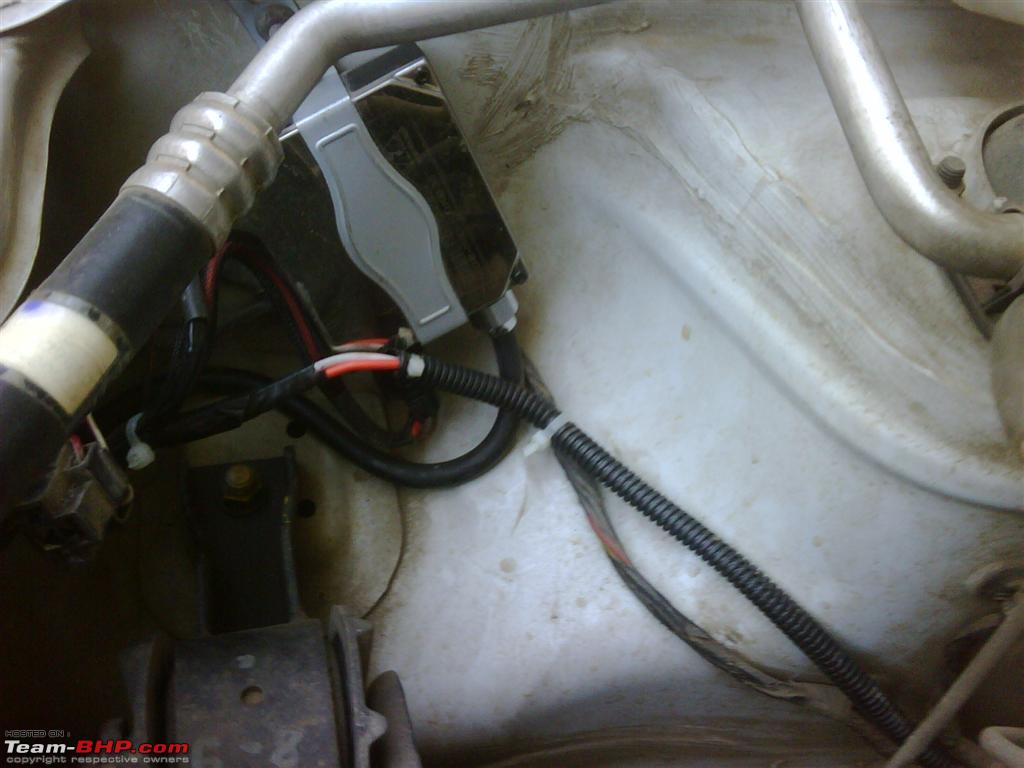
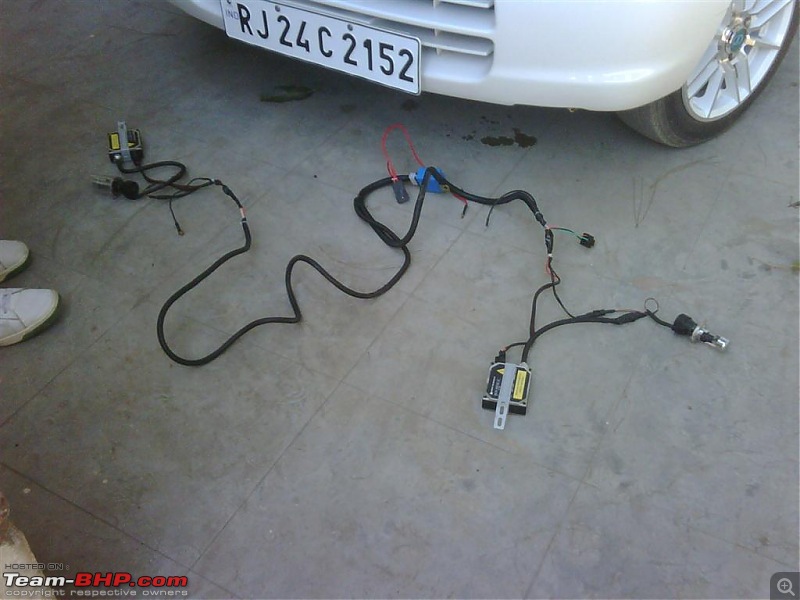
Final Wiring
Diode completely sealed off with insulation tapes.
Good Job!. This is just the info i was looking for. Some night pics would do justice to your work.
What type of bulb is it? Hope you didn't touch it with your bare hands.
I just got a 9006 HID bulb installed in the Civic. Low beam only 4300K.
@SirAlec - That's a commendable job done. :-) I do not see a projector anywhere.. Is this installed in the stock reflector? How is the light throw and focus?..
Nice job with the relay & wiring kit Kenden.
Quote:
Originally Posted by Mpower
(Post 2210035)
What type of bulb is it? Hope you didn't touch it with your bare hands.
I just got a 9006 HID bulb installed in the Civic. Low beam only 4300K.
|
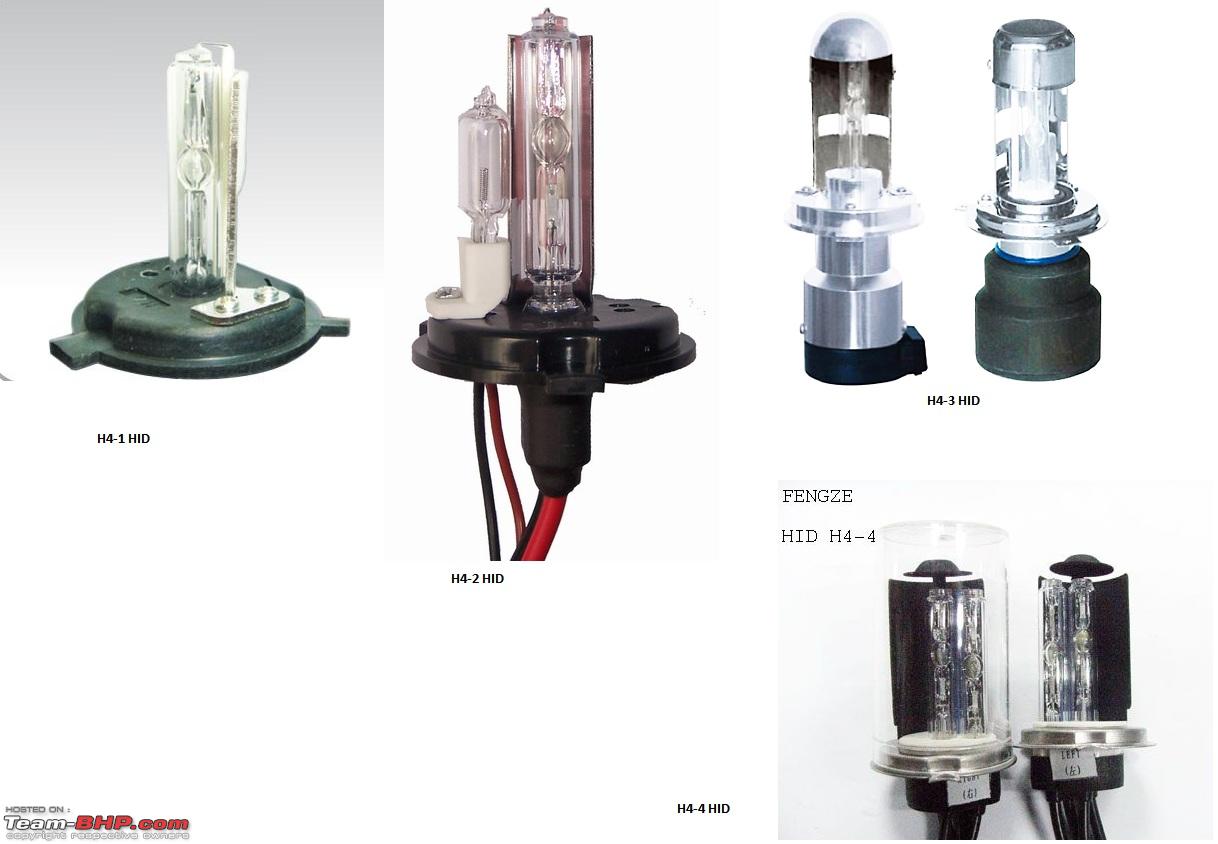
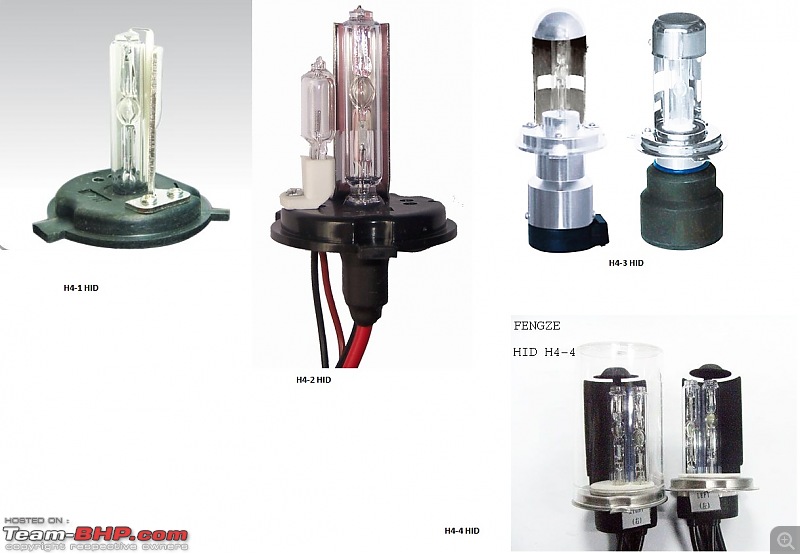
Thats H4 HID bulb is known as H4-3 HID, ie., HID Hi&Lo (moving capsule).
H4-4 is HID Hi&Lo accomplished by 2 HID capsules per bulb and 4 ballasts (sometimes 2 with a switching relay in between).
H4-2 is HID lo and halogen hi.
H4-1 is single beam H4 HID, usually low beam.
For anyone with bad HID relay wiring kit and don't want to go the DIY route can find new relay&wiring kit on ebay (china, HK, singapore sties) and they're cheap too. Under Rs1k with shipping.
Quote:
Originally Posted by Ripper
(Post 2210034)
Good Job!. This is just the info i was looking for. Some night pics would do justice to your work.
|
This install was for a friend, will ask him.
Quote:
Originally Posted by Mpower
(Post 2210035)
What type of bulb is it? Hope you didn't touch it with your bare hands.
I just got a 9006 HID bulb installed in the Civic. Low beam only 4300K.
|
Its original philips bulb, thats the reason we went for it.
No i didn't touch it. Its covered with that steel thingy. BTW what are the consequences.
Quote:
Originally Posted by Ford_madhan
(Post 2210036)
@SirAlec - That's a commendable job done. :-) I do not see a projector anywhere.. Is this installed in the stock reflector? How is the light throw and focus?..
|
Yup in the stock reflector.
Quote:
Originally Posted by Sankar
(Post 2210050)
Nice job with the relay & wiring kit Kenden.
Thats H4 HID bulb is known as H4-3 HID, ie., HID Hi&Lo (moving capsule).
H4-4 is HID Hi&Lo accomplished by 2 HID capsules per bulb and 4 ballasts (sometimes 2 with a switching relay in between).
H4-2 is HID lo and halogen hi.
H4-1 is single beam H4 HID, usually low beam.
For anyone with bad HID relay wiring kit and don't want to go the DIY route can find new relay&wiring kit on ebay (china, HK, singapore sties) and they're cheap too. Under Rs1k with shipping.
|
I don't trust those sites especially HK and Malaysia ones, had a bad experience previously.
Can we have some images of those bulbs you mentioned.
PS to Mods.
This time i left a blank white patch at the lower part of the schematics but surprisingly tbhp watermark never came up. lolz :)
I wonder why??
Quote:
Originally Posted by SirAlec
(Post 2210069)
This install was for a friend, will ask him.
Its original philips bulb, thats the reason we went for it.
No i didn't touch it. Its covered with that steel thingy. BTW what are the consequences.
Yup in the stock reflector.
I don't trust those sites especially HK and Malaysia ones, had a bad experience previously.
Can we have some images of those bulbs you mentioned.
PS to Mods.
This time i left a blank white patch at the lower part of the schematics but surprisingly tbhp watermark never came up. lolz :)
I wonder why??
|
WOW that's really grt stuff, im sure alot of people might have been looking for this DIY .
And regarding the TBHP watermark, thats due to size of the pics, so if you click on the individual pictures, it will open a new window and you will be able to see the watermarks.
Cheers.
Note from the Team-BHP Support Staff : Slang and SMS Language are STRICTLY prohibited on Team-BHP. Please type in full and proper English for the benefit of other community members.
e.g. Type 'Great' instead of 'grt', 'I am' instead of 'im'
Great DIY Kenden.
Whats the difference like with those old non clear headlights?
Any idea how they fare against the newer Alto's light?
Quote:
Originally Posted by SirAlec
(Post 2210069)
PS to Mods.
This time i left a blank white patch at the lower part of the schematics but surprisingly tbhp watermark never came up. lolz :)
I wonder why??
|
The water mark always shows, it doesnt show in post only when the image is big & it has a thmbnail, when you click on this thumbnail, the image which opens up will have the Team-Bhp water Mark :)
Quote:
Originally Posted by SirAlec
(Post 2210069)
Its original philips bulb, thats the reason we went for it.
No i didn't touch it. Its covered with that steel thingy. BTW what are the consequences.
|
Fingerprints or any kind of smear on the bulb, reduces the life apparently. The HID kit that I bought came with a pair of gloves for holding the bulb.
Quote:
Originally Posted by Sankar
(Post 2210050)
Thats H4 HID bulb is known as H4-3 HID, ie., HID Hi&Lo (moving capsule).
H4-4 is HID Hi&Lo accomplished by 2 HID capsules per bulb and 4 ballasts (sometimes 2 with a switching relay in between).
H4-2 is HID lo and halogen hi.
H4-1 is single beam H4 HID, usually low beam.
|
Cool. Thanks for the info.
@ SirAlec: Very neat job and thanks for the DIY write up.
Quote:
Originally Posted by Ford_madhan
(Post 2210036)
@SirAlec - That's a commendable job done. :-) I do not see a projector anywhere.. Is this installed in the stock reflector? How is the light throw and focus?..
|
Is there a projector kit available for the ALTOs?
Quote:
Originally Posted by SirAlec
(Post 2210069)
Can we have some images of those bulbs you mentioned.
|
Sure. I have attached the image here with this post.
Quote:
Originally Posted by Technocrat
(Post 2210132)
Great DIY Kenden.
Whats the difference like with those old non clear headlights?
Any idea how they fare against the newer Alto's light?
The water mark always shows, it doesnt show in post only when the image is big & it has a thmbnail, when you click on this thumbnail, the image which opens up will have the Team-Bhp water Mark :)
|
The clear class is always recommended. I think in IMHO this one disperses the light. Lets wait for a response from my friend.
Quote:
Originally Posted by Mpower
(Post 2210195)
Fingerprints or any kind of smear on the bulb, reduces the life apparently. The HID kit that I bought came with a pair of gloves for holding the bulb.
|
Thats news to me. Thanks for sharing
Quote:
Originally Posted by sabret00the
(Post 2210207)
@ SirAlec: Very neat job and thanks for the DIY write up.
Is there a projector kit available for the ALTOs?
|
I don't think it is, but any clear glass can be converted to projector, i have a some idea in my head. But time is what i don't have. I try these on holidays. EVen one bhpian had tried in his Gypsy. He is from HP or J&K. He is not that active I think.
Some point and ideas that i wanted to share are that you can split open the oem clear glass by heating it in microwave and rest is easy and depends upon skills only.
Quote:
Originally Posted by SirAlec
(Post 2210257)
Some point and ideas that i wanted to share are that you can split open the oem clear glass by heating it in microwave and rest is easy and depends upon skills only.
|
Please don't do it in the microwave because you will see sparks flying! And the desired result cannot be acheived.
The oven referred to when speaking about separating headlamp lens is the reguar oven. Or use heatgun to soften the glue.
Quote:
Originally Posted by Sankar
(Post 2210269)
Please don't do it in the microwave because you will see sparks flying! And the desired result cannot be acheived.
The oven referred to when speaking about separating headlamp lens is the regular oven. Or use heatgun to soften the glue.
|
haven't tried yet! But will do in the near future when i have a bit of time.
But the regular oven will not melt the plastic.?
I was thinking microwave dishes are also made of plastics and it acts on food only, and the microwave heat will act only on glue, but not on the plastic.
| All times are GMT +5.5. The time now is 15:30. | |