DIY for adding a second HDD to a laptop or replacing a P-ATA HDD in an old laptop with a new SATA HDD.
-------------------------------------------------------------------------
Hello all - the successful culmination of an ambitious cost-cutting project today is what made me decide to write this minor DIY.
Background.
(1) Sometimes we may want to install a larger HDD in an existing laptop but do not want to go through the pain of a Windows / App reinstall and fine-tuning. An external HDD is good but can be annoying to carry around, plus it blocks a valuable USB port. So the objective is to install another internal HDD.
(2) Some of us may be using old laptops (2004-07 era). I have a 2005 IBM Thinkpad R52 -- at one time ubiquitous in offices as a moderately fast workhorse. These old laptops are built to accept Hard Disk Drives with the older P-ATA (Parallel ATA) interface. Since 2007-08 all laptops are sold with S-ATA (Serial ATA) interface HDDs. It is impossible to buy a PATA internal HDD today (except used ones). How then can an old laptop that us other wise perfect for business or word processing salvageable if its PATA HDD crashes for some reason.
This page shows the differences between a PATA and a SATA laptop HDD.
Both the objectives above can be met with the method I am about to narrate provided the laptop has an internal "removable" CD-ROM/ DVD ROM drive. I was in the second boat when the PATA HDD of my Thinkpad failed in July so I will start from there. This walkthrough also applies to people with objective (1) except they need not obviously install an OS at Step IX below.
Process
Step I
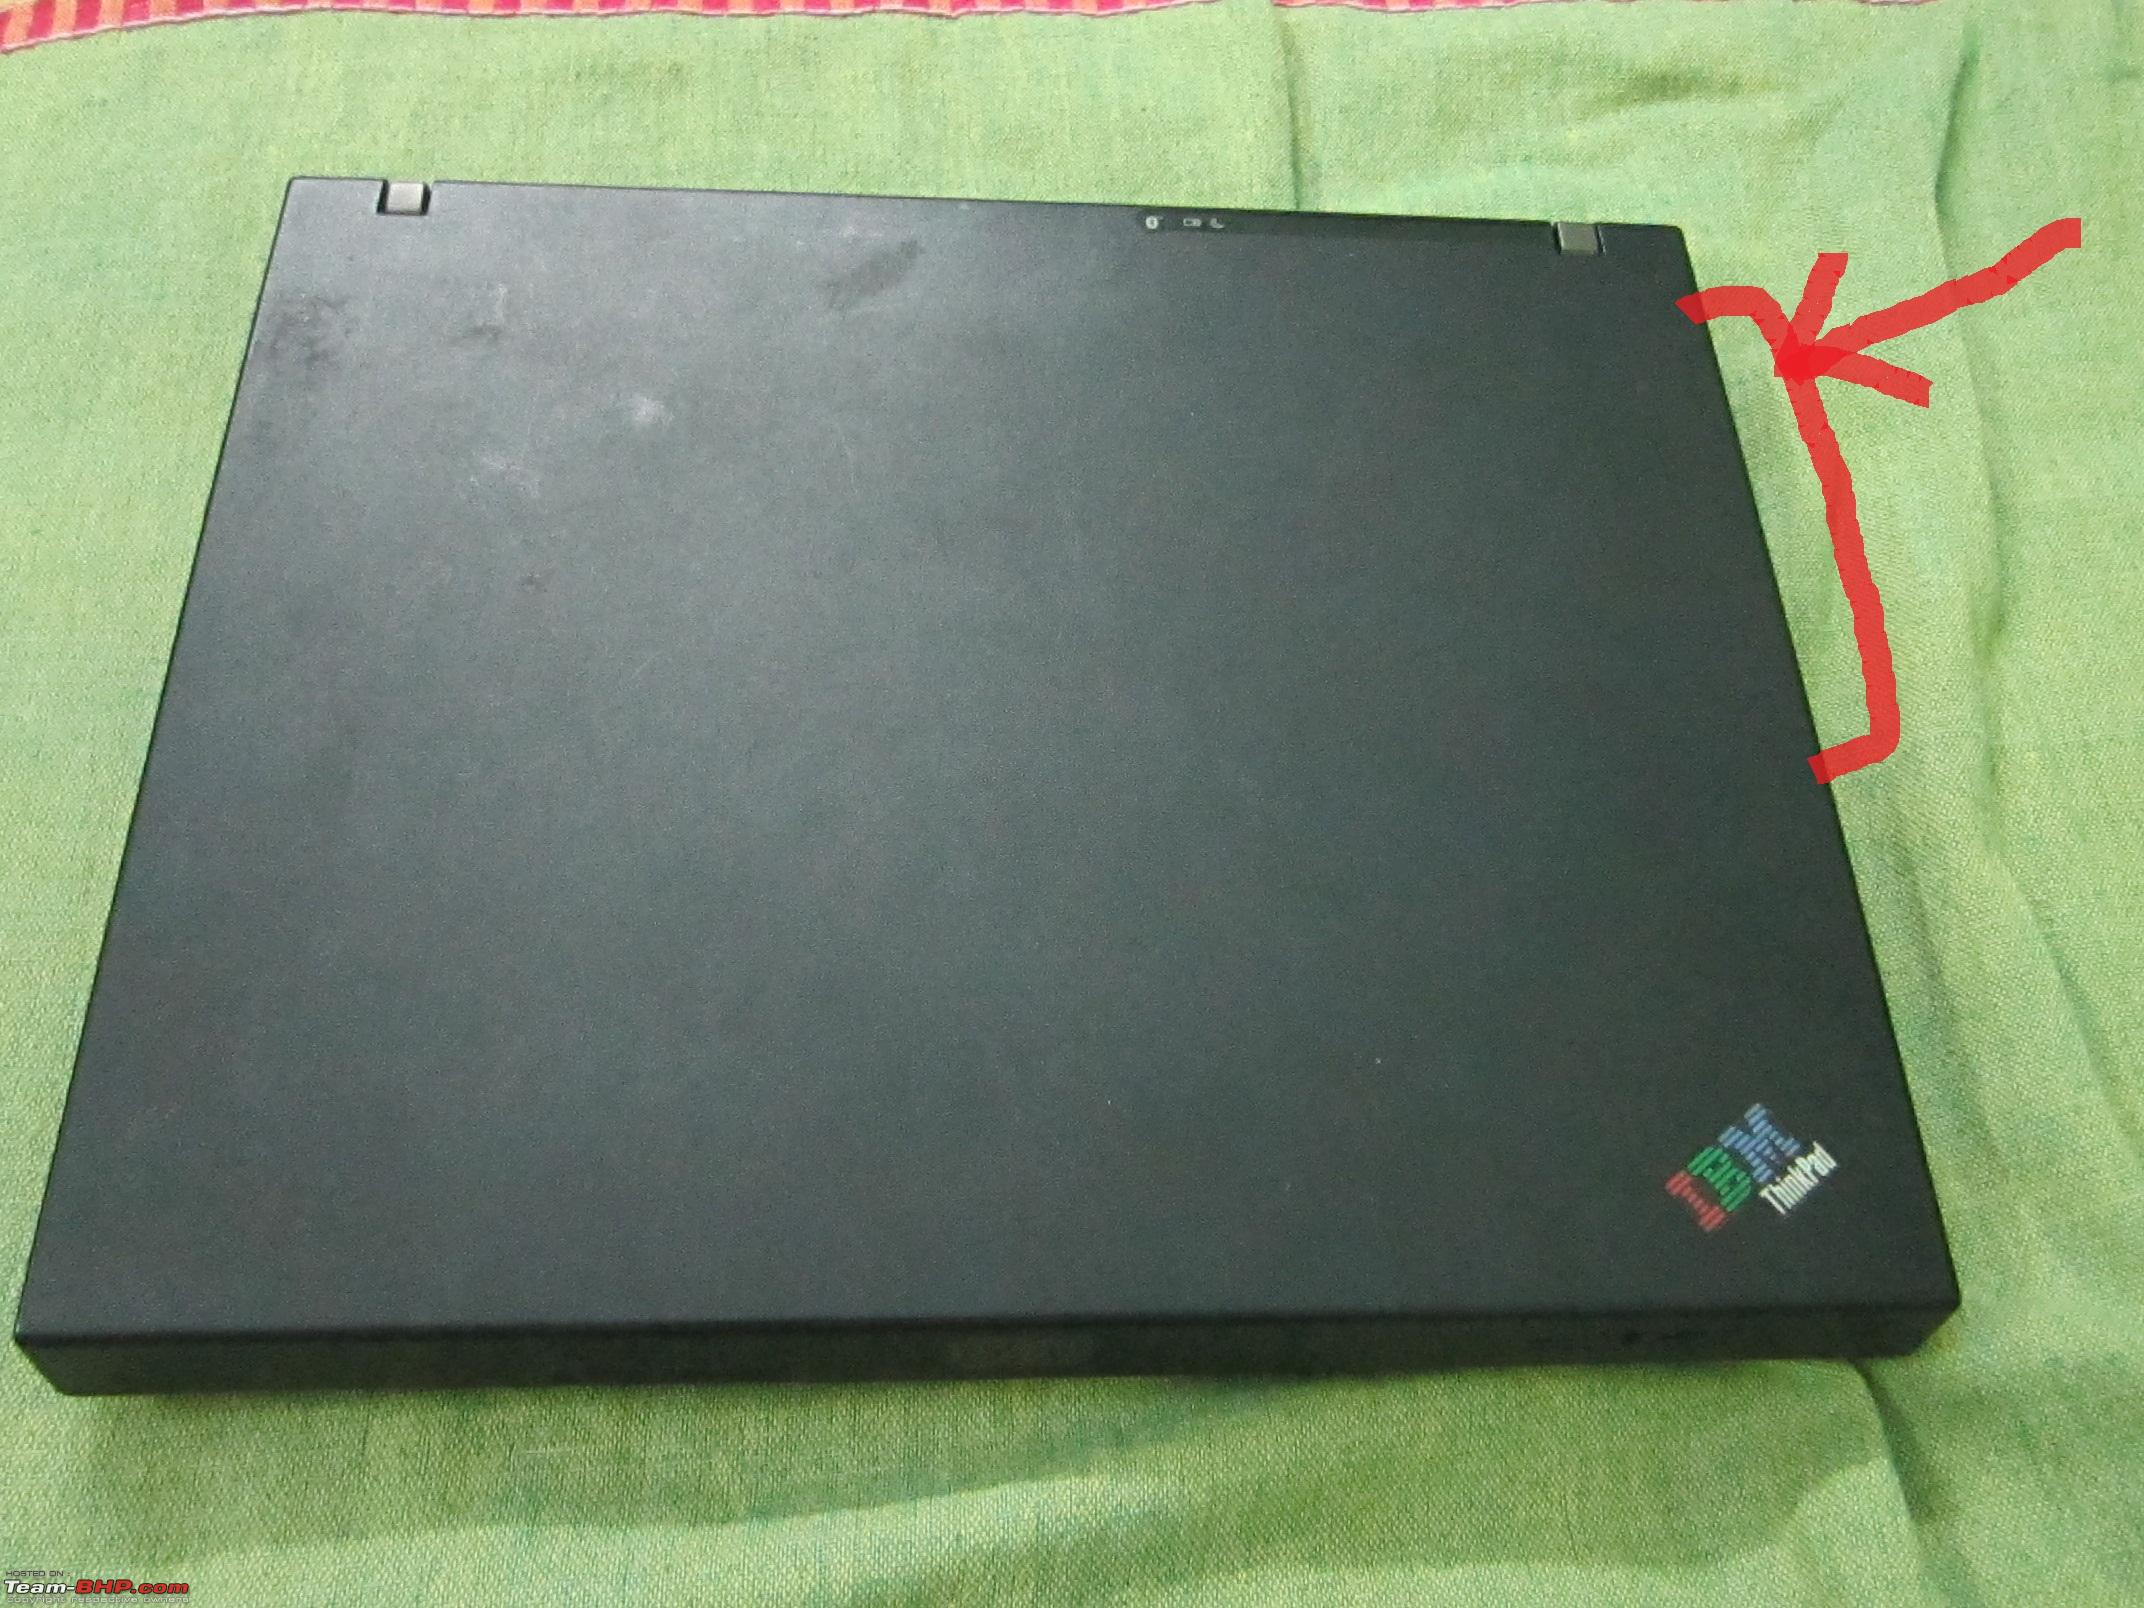
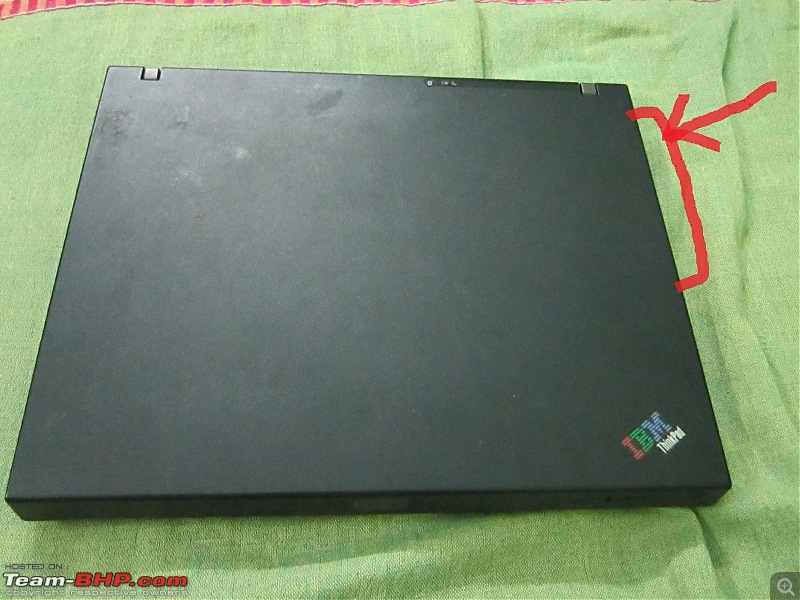
Locate the CD-ROM/ DVD ROM drive on your laptop. Typically it will be on the right hand side, away from you. On my Thinkpad, the DVD ROM drive is marked in red. Make a note of the bottom of the laptop where the DVD drive would have it's footprint - that will usually contain the bits needed for removal of the drive.
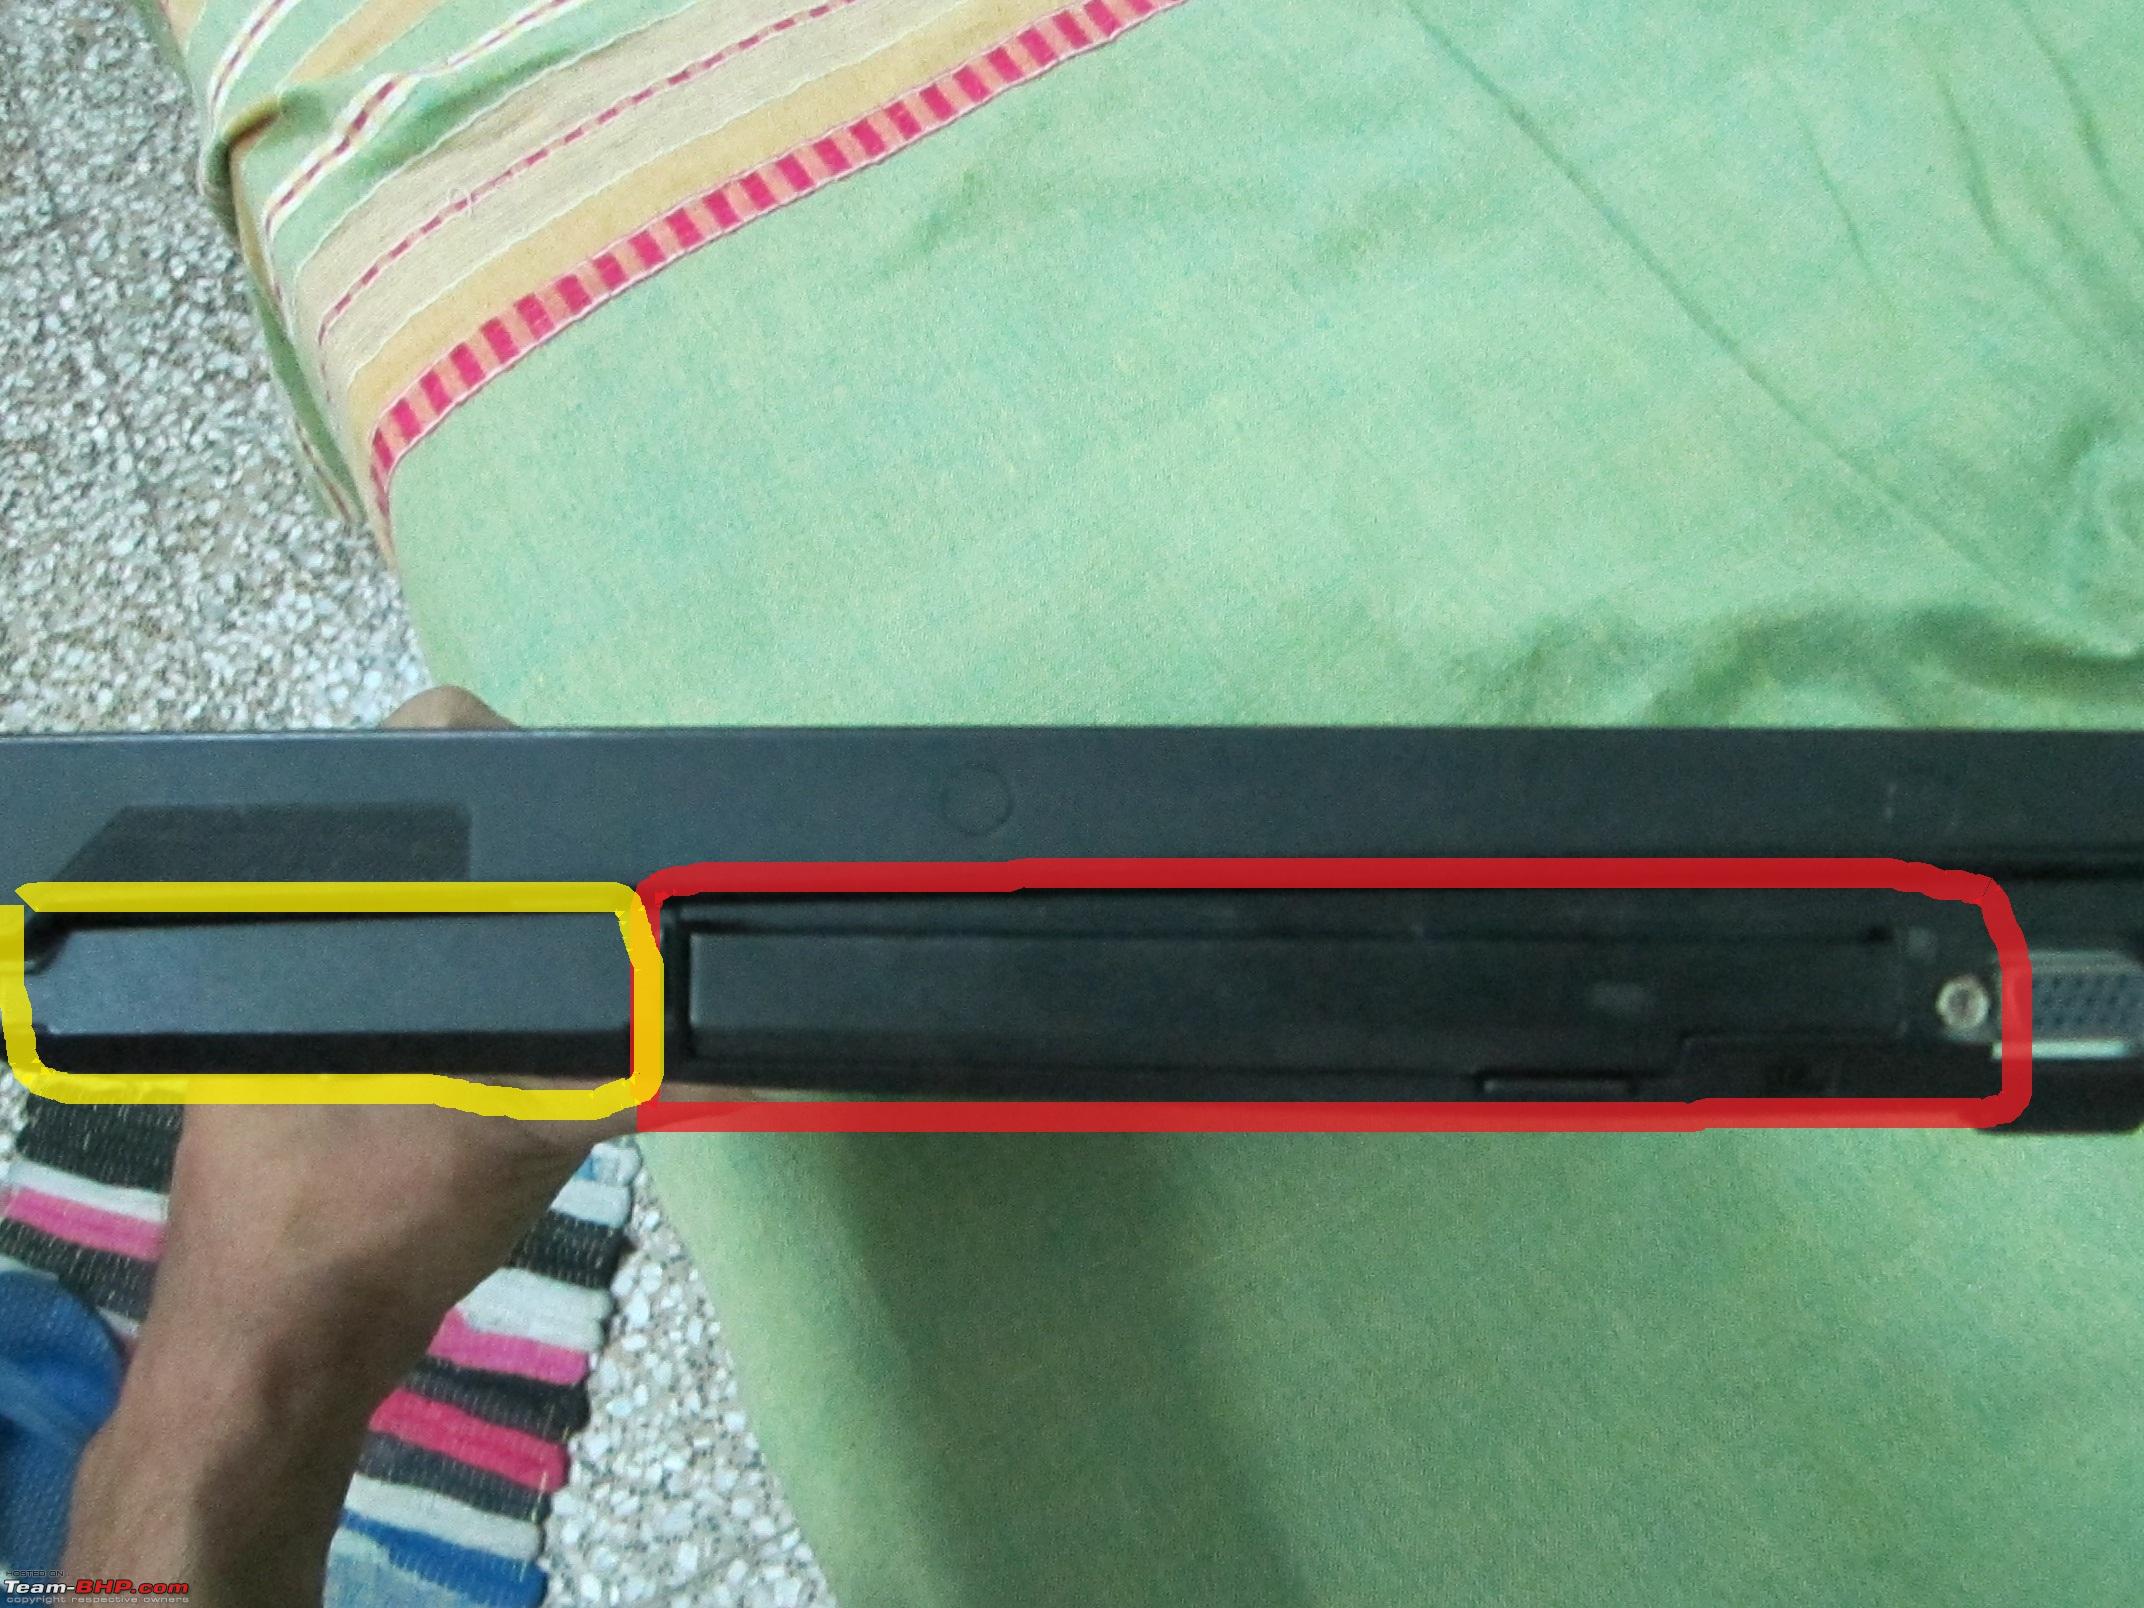
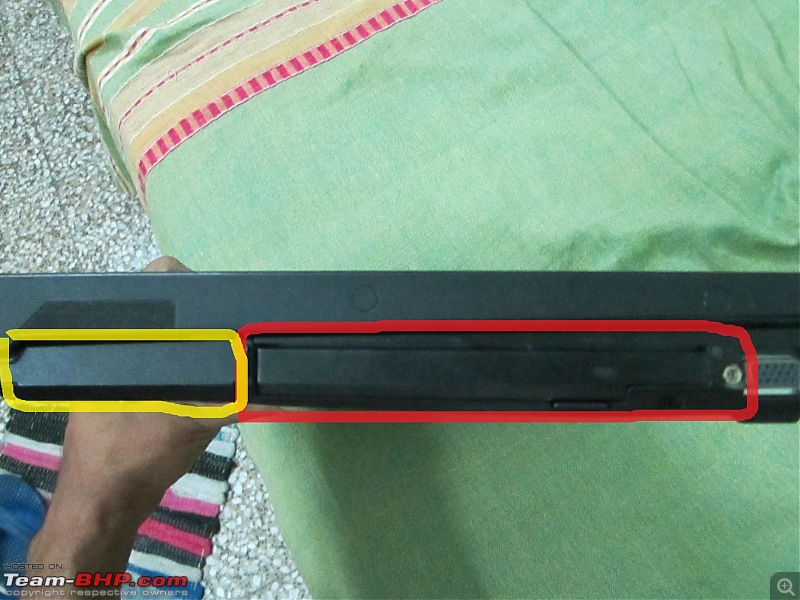
In this photo of my Thinkpad, the DVD ROM drive location is marked in red and the existing HDD location is in yellow.
Step II
Slide out the CD ROM / DVD ROM drive. There is usually a slider or a spring that is provided to aid. In some laptops there may be 2-3 screws that need to be opened. On my Thinkpad there was one screw that I had to remove from the bottom. That done, there was a push-pull type mechanism on the floor just below the DVD drive - similar to the way SD cards are inserted in some older digicams. Slide out the entire DVD drive - there may be some initial resistance - that is because the connectors between the drive and the laptop may be a bit stiff.
This is how the drive looks after removal.

Step III
Procure a 12.7mm SATA to PATA HDD 'caddy'. It's a plastic tray moulded in the exact same shape as the DVD drive and built to accommodate a 2.5 inch SATA HDD inside.
Here is an example of one from amazon - it is on sale for Rs 1,099. I bought one from AliExpress for USD 11 (Rs 690). The amazon one has an external
SATA connector whereas the one I bought has an external
PATA connector (to mate with the older PATA connector inside the laptop)
Step IV
Procure a 'modern' SATA 2.5 inch HDD. A 500 GB one is available for Rs 2,500 on amazon. I cannibalized a 160GB one from a more recent laptop of ours which has been junked due to a screen problem that is too costly to fix.
Step V
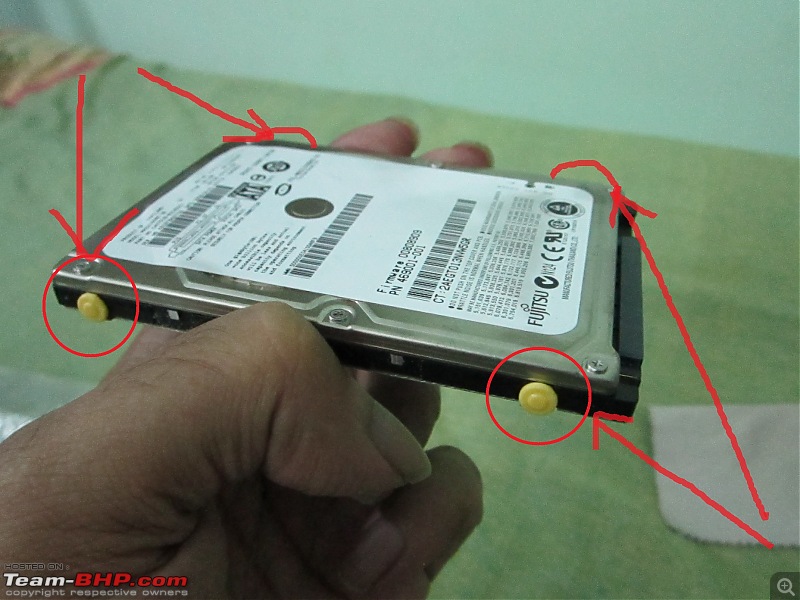
Insert the rubber dampners on the screw holes of the HDD. This protects the HDD from mechanical shock inside the caddy.
In this photo you can see the 2.5 inch HDD with the four yellow rubber dampners inserted (circled in red).
Step VI
Place the HDD inside the caddy and slide it into the SATA connector. It should be a smooth slide with no stiffness. Once in, gently place the plastic end clip so that the fit is smug. Here is what it looks like. The internal and external SATA / PATA interface locations are outlined in yellow.

Step VII
Insert the caddy (containing the HDD) into the DVD bay of the laptop as if it was the DVD ROM drive. At the end of the insertion will be a bit of resistance to be overcome -- that's the connectors locking into place.
Here is the caddy being inserted.

Step VIII
Screw the caddy into place / replace locking clips as appropriate (depending on the brand of the laptop)
Step IX
Switch on your laptop and you are good to go! Those who did this to get a second HDD will see the new HDD in 'My Computer' (Windows users).
Those who installed this to replace their existing PATA HDDs will (1) either physically remove the existing PATA HDD or (2) disable it from the BIOS. In these cases you should have a USB optical drive present to install your preferred OS onto your new drive. IF you cannibalise a HDD from another laptop (with OD installed) be mindful that the OS may not boot immediately (due to wrong driver software) and a system recovery / restore may be needed.
Note: Those who do this due to a crashed primary HDD need not physically remove that HDD from the laptop (nor is it desirable as it would weaken the supporting structure as well as leave an inviting gap for insects and lizards. If required you can disable the old HDD from the BIOS.
Overall pros:
-Cost effective: I saved myself Rs 20k on purchase of another laptop. Those looking for additional storage space can pay Rs (600 caddy + 2500 new 2.5 inch HDD) instead of 4000 external HDD
-Convenience: I have not had to compromise on the mobility of the laptop or sacrificed a USB port.
-Data recovery: After the OS is installed on the new HDD, you can access the old HDD (to the extent possible) and recover any data that is still intact. No need to call a technician for this.
Cons
- Little complicated process - but if a novice like me can do this, anyone can so not really a con.
- BIOS issues. On the internet there are some complaints of OS not booting properly off the second HDD.


 21st October 2014, 01:36