Team-BHP
(
https://www.team-bhp.com/forum/)
-
Motorbikes
(
https://www.team-bhp.com/forum/motorbikes/)
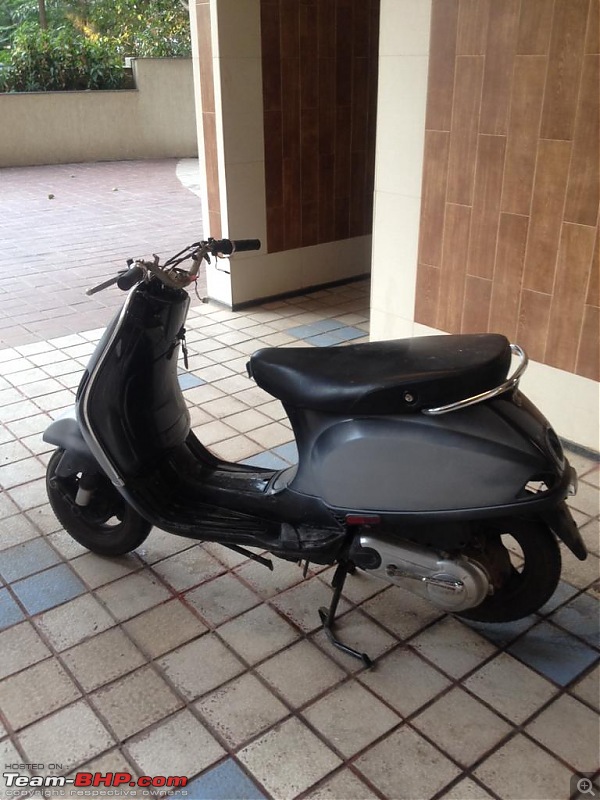
It was during the college vacations I had nothing to do,I came up with a brilliant idea of painting my Vespa. The scooter had lots of scratches and dents thanks to the college parking.
Step 1:
Planning how to do this,listing down required inventory and execution plan.
1.Bosny paint can FLAT BLACK 6nos-250X6=1500/-
2.Bosny paint can GLOSS RED 1nos(for the emblems)-250/-
3.Bosny primer can GREY 4nos-250X4=1000/-
4.Metal paste 0.5 kg-70/-
5.Metal blades to apply paste 2nos-15/-
6.Two 3"X 6" plywood (for sanding)-FOC
7.No.320 sand paper(for sanding paste) 3nos-20X3=60/-
8.No.1000 sand paper 3nos-40X3=120/-
9.No.2000 sand paper 4nos-40X4=160/-
10.Surgical gloves(hand protection) 10nos=60/-
11.Front number plate sticker =60/-
12.Labour-DIY=FOC
Total Cost=3295/-
Number of days -10
Number of hours worked per day 2-3
Step 2:
Execution,
Day 1-Preparation
1.Washed thoroughly removed all dirt with Pril and removed oxidation with sand paper
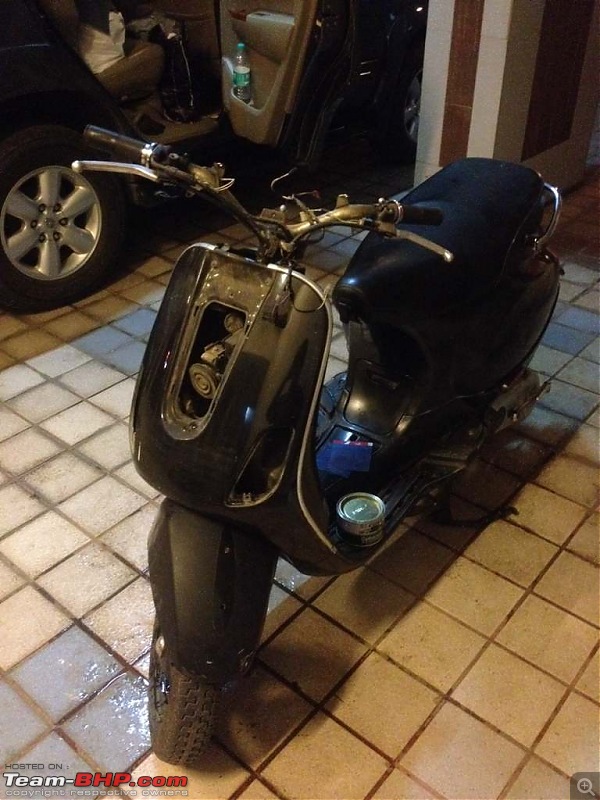
2.Removed as many parts i could which includes all the indicators,tail lamps,headlight assembly,emblems and front grill
3.One round of sanding done with No.1000 paper to cut the existing layer of clear coat
Day 2-
1.Applied metal paste on all dents and scratches,kept it to dry for a day
Day 3-
1.Sanded all the excess paste with No.320 paper kept flat on the plywood,The paper was kept flat on the ply wood for sanding was to avoid imperfections on the surface
2.Sanded again with No.1000 paper kept flat on plywood with water to smooth-en the rough surface
Day 4
1.Washed the surface again to remove all the dust and kept it to dry in the sun for 3 hours
2.Applied a coat of primer on the potential areas and kept it to dry for two hours
3.Observed the surface carefully to identify imperfections marked them with pencil
Day 5
1.Filled the imperfections with paste and kept it to dry for a day
Day 6
1.Sanded off the excess paste and washed the surface and kept it to dry in the sun for 3 hours
2.Applied a coat of primer on the whole scooter and kept it to dry for a day
Day 7
1.Sanded the whole scooter with No.2000 sand paper to smooth-en the layer of primer
2.Washed the surface with clean water and kept it to dry for a day
Day 8
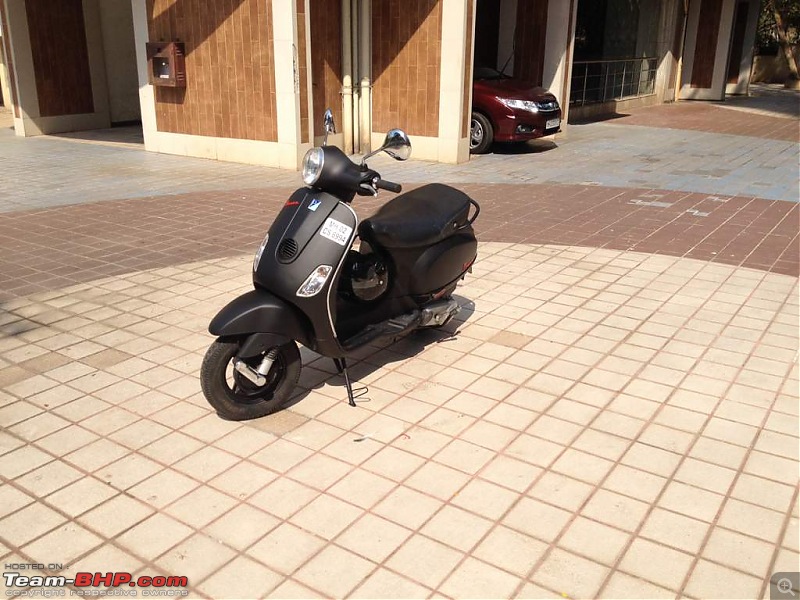
1.Applied first coat of matte black after 15 mins applied second coat
2.After 4 hours applied two coats of paint again
Day 9
1.Cleaned all the removed parts,painted the ones that had to be painted
2.Painted the Vespa emblems red
Day 10
1.Refitted all the parts
2.Washed the scooter,applied tyre polish
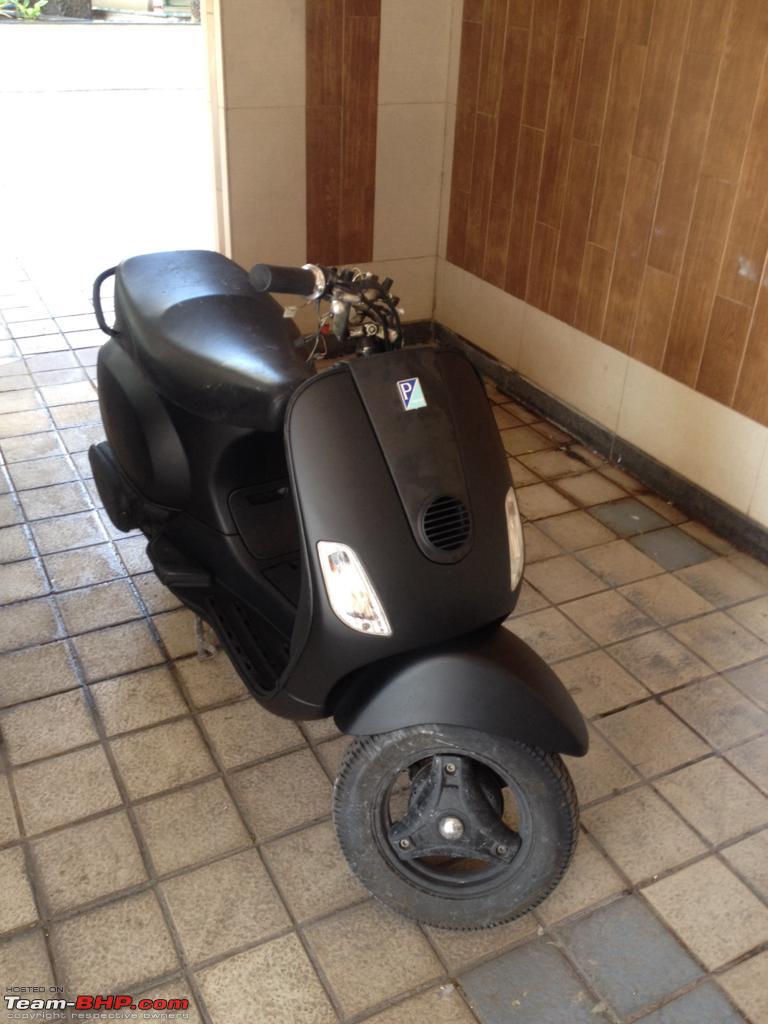
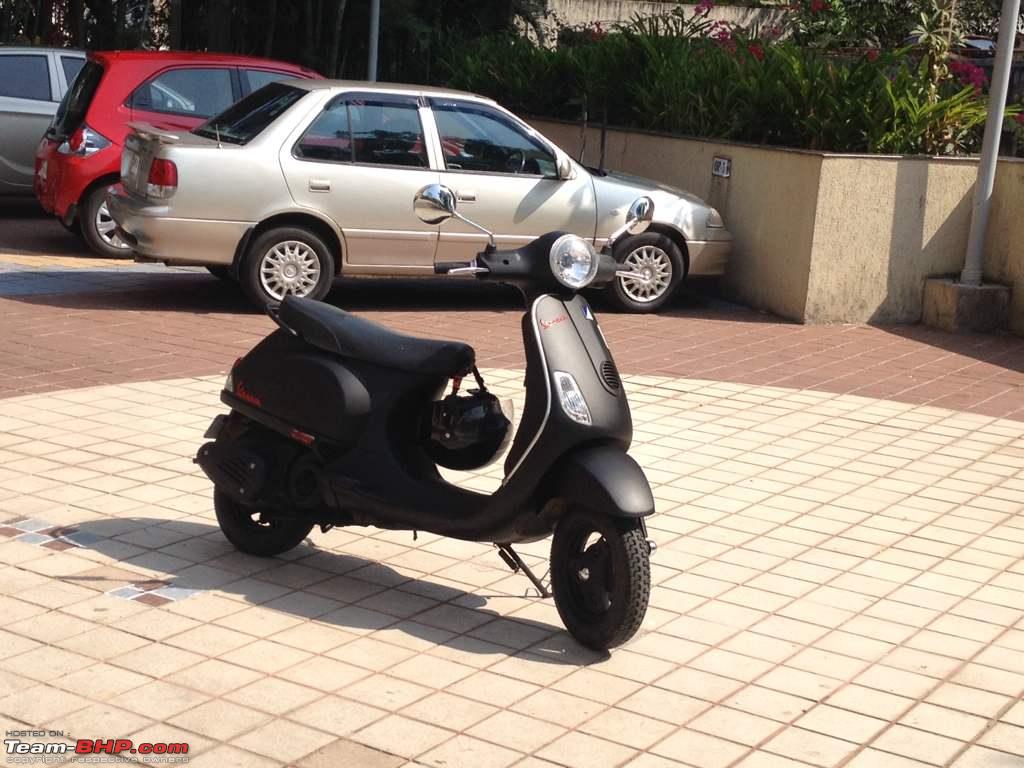
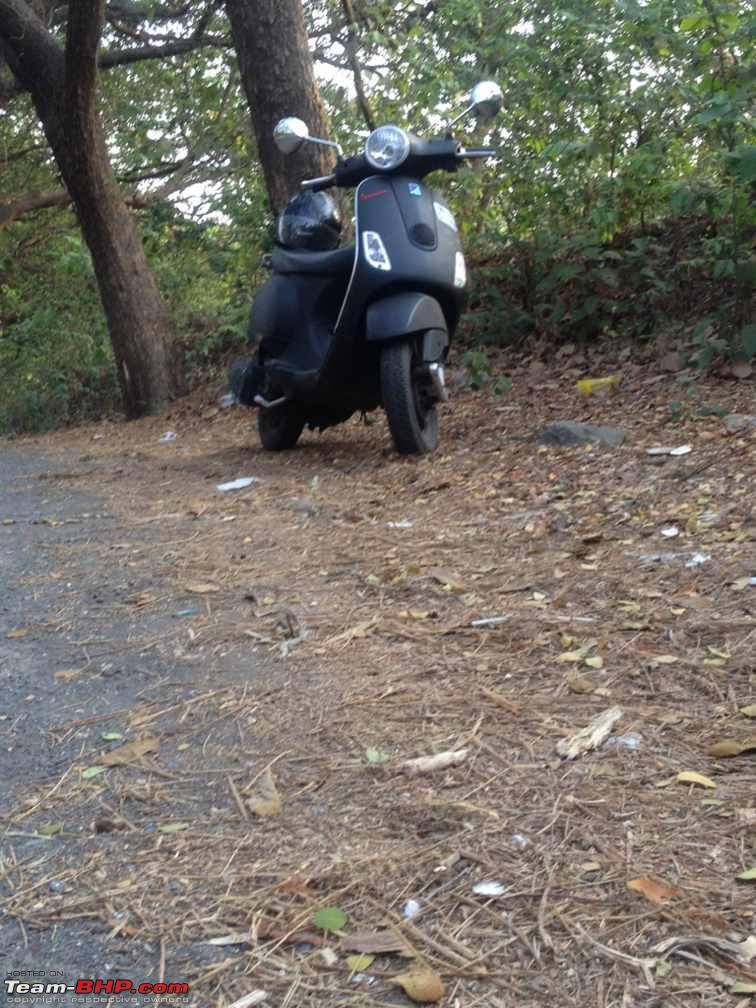
And now my Vespa is a head turner.
Now let the pictures do the talking.
Thanks&Regards
KN


Good use of 10 days of your vacation there!
Looks brilliant! And now, please be careful at the college parking and don't let new scratches/dents develop on this beauty.. *touchwood*
-Bhargav
Fantastic utilization of your vacation. The paintjob looks very neat and clean. Amazing work. Liked the choice of colour too.
By the way, what was the orignal colour of your vespa ? And what about the change of colour in the RC book ?
Once again, hats off, your vespa looks elegant.
Rohit.
Sent from my iPhone using Team-BHP
Congratulations and well doneclap:.
Since it took you 10 days for the job to be completed, I suppose you have not used your bike at all (Came to a conclusion as per your post). Did you have any issues starting your bike after 10 days?
Seems your bike had a good fit and finish. Brilliant work and vacations worth spent:thumbs up.
Great DIY, did you consider using Plastic dip which would have been quicker & restorable if you wanted to go back to original paint?
Quote:
Originally Posted by kn09
(Post 3481340)
Now let the pictures do the talking.
|
The pics *Are talking ! And the scooter is looking good !
Quote:
Originally Posted by JoseVijay
(Post 3481387)
Did you have any issues starting your bike after 10 days?
|
It is a different topic, but Why should there be any problems in starting the vehicle after 10 days ? Many of us have left their vehicles un-used for weeks, yet they have started on first crank.
Good job dude. Please do post some snaps with bright background, that should justify the final outcome.
BTW how did you calculate the quantity of paint required? Is there something left out after the job? Asking this to understand how to estimate the amount of paint required based on the surface area.
Quote:
Originally Posted by Rohitj92
(Post 3481369)
what about the change of colour in the RC book
|
Black remains black, only change is glossy finish to Matte finish. Does it require a endorsement is RC? I know by law it is required, but how to justify the new color's name to RTO?
Amazing work there mate! Looks very professional and you have indeed taken great pains going by the 10 days of effort you have put in for the intended outcome. Awesome work and it is indeed a head turner. :)
The stock color looks to be black/dark blue (cant clearly make out in the initial pics).
Very neatly done DIY. :thumbs up
I purchased a Vespa S over the Vespa LX/VX only because we wanted the Matt black.
One question:
Did you paint the silencer cowl also? I asked this because in our vehicle it is chrome
Couple of suggestions:
Paint the front suspension spring to gloss red (Like the vespa S)
Paint your helmet also to Matte Black
Excellent Job kn09! Looks top class. I am a huge fan of Hemanth's 'Matt Mobil' and now your vespa. The red contrasts look dam good. Like Hemanth suggested please get your helmet painted to matt. More pics buddy, More pics :D
Now I want to paint my bike in MATTE. You guys are not at all a good influence I say.
Wow. A neatly done DIY there :thumbs up
On my new thunderbird matte black I did a pain protection but in a parking lot at work, some moron had kept some heavy stuff on my bike tank. I see some scratches there :( Nothing alarming but I guess in a long run, this will continue to happen. Bike is mine and only I will pamper it, others wont care! So when it gets even more scratches and wear and tear, I will repeat your DIY on my bike for good. So thanks for the thread.
Wow. I ask you for the DIY tutorial and there it is within 2 days! so pleased. Wish I could be less lazy. Still haven\'t written my vespa\'s ownership report after 1.5 years! stupid: BTW, great work there and thanks for the tutorial. Won\'t touch my vespa now, but may try it on my old electric scooter or my scooty es. :D Again, thanks for putting up this thread so soon!
Nice paint job man! I did similar thing with my car\'s old wheel caps. It was just a trial, so didn\'t use any primer/paste/etc. Bought a can of F1 matt black paint online from Tradus.com for 150 bucks and simply applied it on washed & dried wheel caps just to see the outcome, and here it is:

I plan to apply another coat as I like the outcome :).
Quote:
Originally Posted by Rohitj92
(Post 3481369)
Fantastic utilization of your vacation. The paintjob looks very neat and clean. Amazing work. Liked the choice of colour too.
By the way, what was the orignal colour of your vespa ? And what about the change of colour in the RC book ?
Once again, hats off, your vespa looks elegant.
Rohit.
Sent from my iPhone using Team-BHP
|
Quote:
Originally Posted by Mr.Boss
(Post 3481456)
Good job dude. Please do post some snaps with bright background, that should justify the final outcome.
BTW how did you calculate the quantity of paint required? Is there something left out after the job? Asking this to understand how to estimate the amount of paint required based on the surface area.
Black remains black, only change is glossy finish to Matte finish. Does it require a endorsement is RC? I know by law it is required, but how to justify the new color's name to RTO?
|
On the RC book the colour is just BLACK,so as long as i dont change the colour i dont have to change anything in the RC book
Previously I painted my esteem's wheels that is how i could calculate the quantity of paint required,i have 3/4th of a bottle left.
Quote:
Originally Posted by Technocrat
(Post 3481391)
Great DIY, did you consider using Plastic dip which would have been quicker & restorable if you wanted to go back to original paint?
|
Plasti dip was an option but sourcing was a problem plus Plasti dip would have just covered the scooter with a layer but I had to fill up the dents
Quote:
Originally Posted by abhinav.s
(Post 3481486)
Amazing work there mate! Looks very professional and you have indeed taken great pains going by the 10 days of effort you have put in for the intended outcome. Awesome work and it is indeed a head turner. :)
The stock color looks to be black/dark blue (cant clearly make out in the initial pics).
|
Thanks Abhinav,the stock is gloss black
Quote:
Originally Posted by hemanth.anand
(Post 3481495)
Very neatly done DIY. :thumbs up
I purchased a Vespa S over the Vespa LX/VX only because we wanted the Matt black.
One question:
Did you paint the silencer cowl also? I asked this because in our vehicle it is chrome
Couple of suggestions:
Paint the front suspension spring to gloss red (Like the vespa S)
Paint your helmet also to Matte Black
|
Congratulations on your Vespa :D,I love the headlight on the Vespa S and yes,i painted the silencer cowl also
Thanks for the suggestions,I plan to paint the helmet matte black and about the springs,I plan to put disc brakes in the front so i will have to purchase the whole front fork assembly so will get the S spec fork which is mechanically same as the ones in the VX with red springs.
Quote:
Originally Posted by Amarendranath
(Post 3481526)
Excellent Job kn09! Looks top class. I am a huge fan of Hemanth's 'Matt Mobil' and now your vespa. The red contrasts look dam good. Like Hemanth suggested please get your helmet painted to matt. More pics buddy, More pics :D
Now I want to paint my bike in MATTE. You guys are not at all a good influence I say.
|
Thanks,my Vespa has its first fan :)and All the best,please let me know if i can help you somehow
Quote:
Originally Posted by abirnale
(Post 3481620)
Wow. A neatly done DIY there :thumbs up
On my new thunderbird matte black I did a pain protection but in a parking lot at work, some moron had kept some heavy stuff on my bike tank. I see some scratches there :( Nothing alarming but I guess in a long run, this will continue to happen. Bike is mine and only I will pamper it, others wont care! So when it gets even more scratches and wear and tear, I will repeat your DIY on my bike for good. So thanks for the thread.
|
Please make sure you get a colour which matches your bike colour,Check for COMP PAINT as they make factory colours shops in JC road have them.
Quote:
Originally Posted by kaushik51094
(Post 3481979)
Wow. I ask you for the DIY tutorial and there it is within 2 days! so pleased. Wish I could be less lazy. Still haven't written my vespa's ownership report after 1.5 years! stupid: BTW, great work there and thanks for the tutorial. Won't touch my vespa now, but may try it on my old electric scooter or my scooty es. :D Again, thanks for putting up this thread so soon!
|
Thanks,you were the reason I started my first thread.
Quote:
Originally Posted by asethi
(Post 3481989)
Nice paint job man! I did similar thing with my car's old wheel caps. It was just a trial, so didn't use any primer/paste/etc. Bought a can of F1 matt black paint online from Tradus.com for 150 bucks and simply applied it on washed & dried wheel caps just to see the outcome, and here it is: Attachment 1263205
I plan to apply another coat as I like the outcome :).
|
Nice job
Thanks a lot guys for the appreciation,this is my first thread and you all have given me a warm welcome :)
| All times are GMT +5.5. The time now is 00:44. | |