| |||||||

| Search Forums |
| Advanced Search |
| Go to Page... |
 |
| Search this Thread |  32,433 views |
 27th June 2021, 01:11
| #1 |
| BHPian | Restolicious Lockdowns | Mercedes W123 Interior Restoration DIY Lockdowns can be boring. Especially since you have finished watching almost everything in Netflix and YouTube during last years lockdown. And this year when the next lockdown was announced I decided to do something productive. But again ended up waking up at noon, spending the whole day and night in front of TV and phone. That was when the perfect recipe to kill my boredom came in 2 Checkin baggages. A bit of History We all love classic cars. We all dream of owning one, restoring it and maintaining that shiny piece of art. But only a very few of us really take the plunge. Everyone says maintaining an old car is a pain, and you will just waste lots of time, energy and money just maintaining it. But we all live to drive and own some good cars and bikes. Im sure no one else in the world understands it better other than Bhpians here ! The one classic car that I have been a big fan of is the W123 series Mercedes Benz. I always loved the classic lines and the presence of the 123. Since 2014 I have been following W123s coming up for sale. Went and saw a dozen of cars during the later years, almost finalised on few deals but later slipped off due to some or the other reason. And during these years the price of the 123 also started going up. I remember during the initial days a good car was available for 2-3 lakh rupees, but nowadays its very difficult to get good cars below 6 lakhs (talk about price inflation) ! And then I got caught up with work and other things and there was a slow progress in running behind 123s. But in 2020 when the lockdown happened I ended up watching and reading so many videos and articles regarding the 123 and the fire ignited back. Started the hunt again and with the help of a few friends got to meet some cars around Trivandrum and Kochi. This time my elder brother was also super interested in getting a W123 home. Two siblings with equal passion for cars is one deadly combination ! We then started looking for cars again. The problem with seeing so many cars and not finding a good one in your budget is that at one point you really get fed up of all this. Things get much worse when you get good photos of the car, and the owner says the car is in immaculate condition and after travelling so far to see the car and the car doesnt meet your expectations you feel like stopping all this. We were almost in that fed up state. One day we came to know about a well maintained 200D that was for sale just around 60 kms from Trivandrum. The car as always looked good in the photos. A quick background check among few friends who knew the car and owner gave some good impressions of the car and thus we decided to go have a look at it. Me, my brother and a good friend of mine (Mr.D) went to see the car. But this car unlike the usual white, ivory and blue W123s we mostly saw before, was Red. All these years we have seen cars of mostly all colour except red. Also the red colour in the photos actually didnt catch my fancy at first. But since we anyways thought of giving it a try we continued the journey. We reached the town of Punalur, the owner of the car had asked me to give him a ring once we reach there and he will come accompany us to his house. Gave him a call and were waited. Thinking he might come in a motorcycle we stared at almost all motorcyclists who went that way, whenever a car slowed down near us we thought it was him. After waiting for almost 15 minutes, [insert DDLJ BGM] we saw a very pretty red W123 driving towards us. We stood still looking at the car, slowly and elegantly approaching towards us. The owner then escorted us towards his house. None of us spoke a word on that drive, we just couldnt take our eyes off from that car in front of us. It looked so well maintained and refreshing ! Mr.D who came along with us is a classic car restorer and has owned dozens of classic cars in the past (including 3 W123s). According to me he is an epitome of a classic car guy. It is very difficult to convince him, since in most cases before, he finds some fault in a car and asks me to wait for another car. I still remember what he said when we were following that red car, Just pay and take her home . We were super thrilled. Looked like we finally found the car of our dreams ! The owner then took us to his house, where we took a close inspection of the car. Mr D took a test drive and had a thorough look. Since me and my brother were relatively new to this, we just stood there and drooled over the car. The exteriors looked perfect, all body lines and beadings were in place, no nicks or signs of rust anywhere. As per the owner the car had been repainted around 3 years back when it went for Fitness test. The interiors were all original with factory seats, headliner and carpets. There were few signs of ageing inside though, the beige fabric seats had some minor stains. But all those were nitpicking considering how well the rest of the car was. We then spoke with the owner, who initially was quoting a bit high for the car. Did some bargaining and we finally came to an amount that we had in mind (and in the bank account). We paid him an advance and agreed to do the balance payment the next day. The next day my brother had transferred the balance amount and we went and collected the car. It was a dream come true moment ! And after years of dreaming, a W123 finally arrives home. 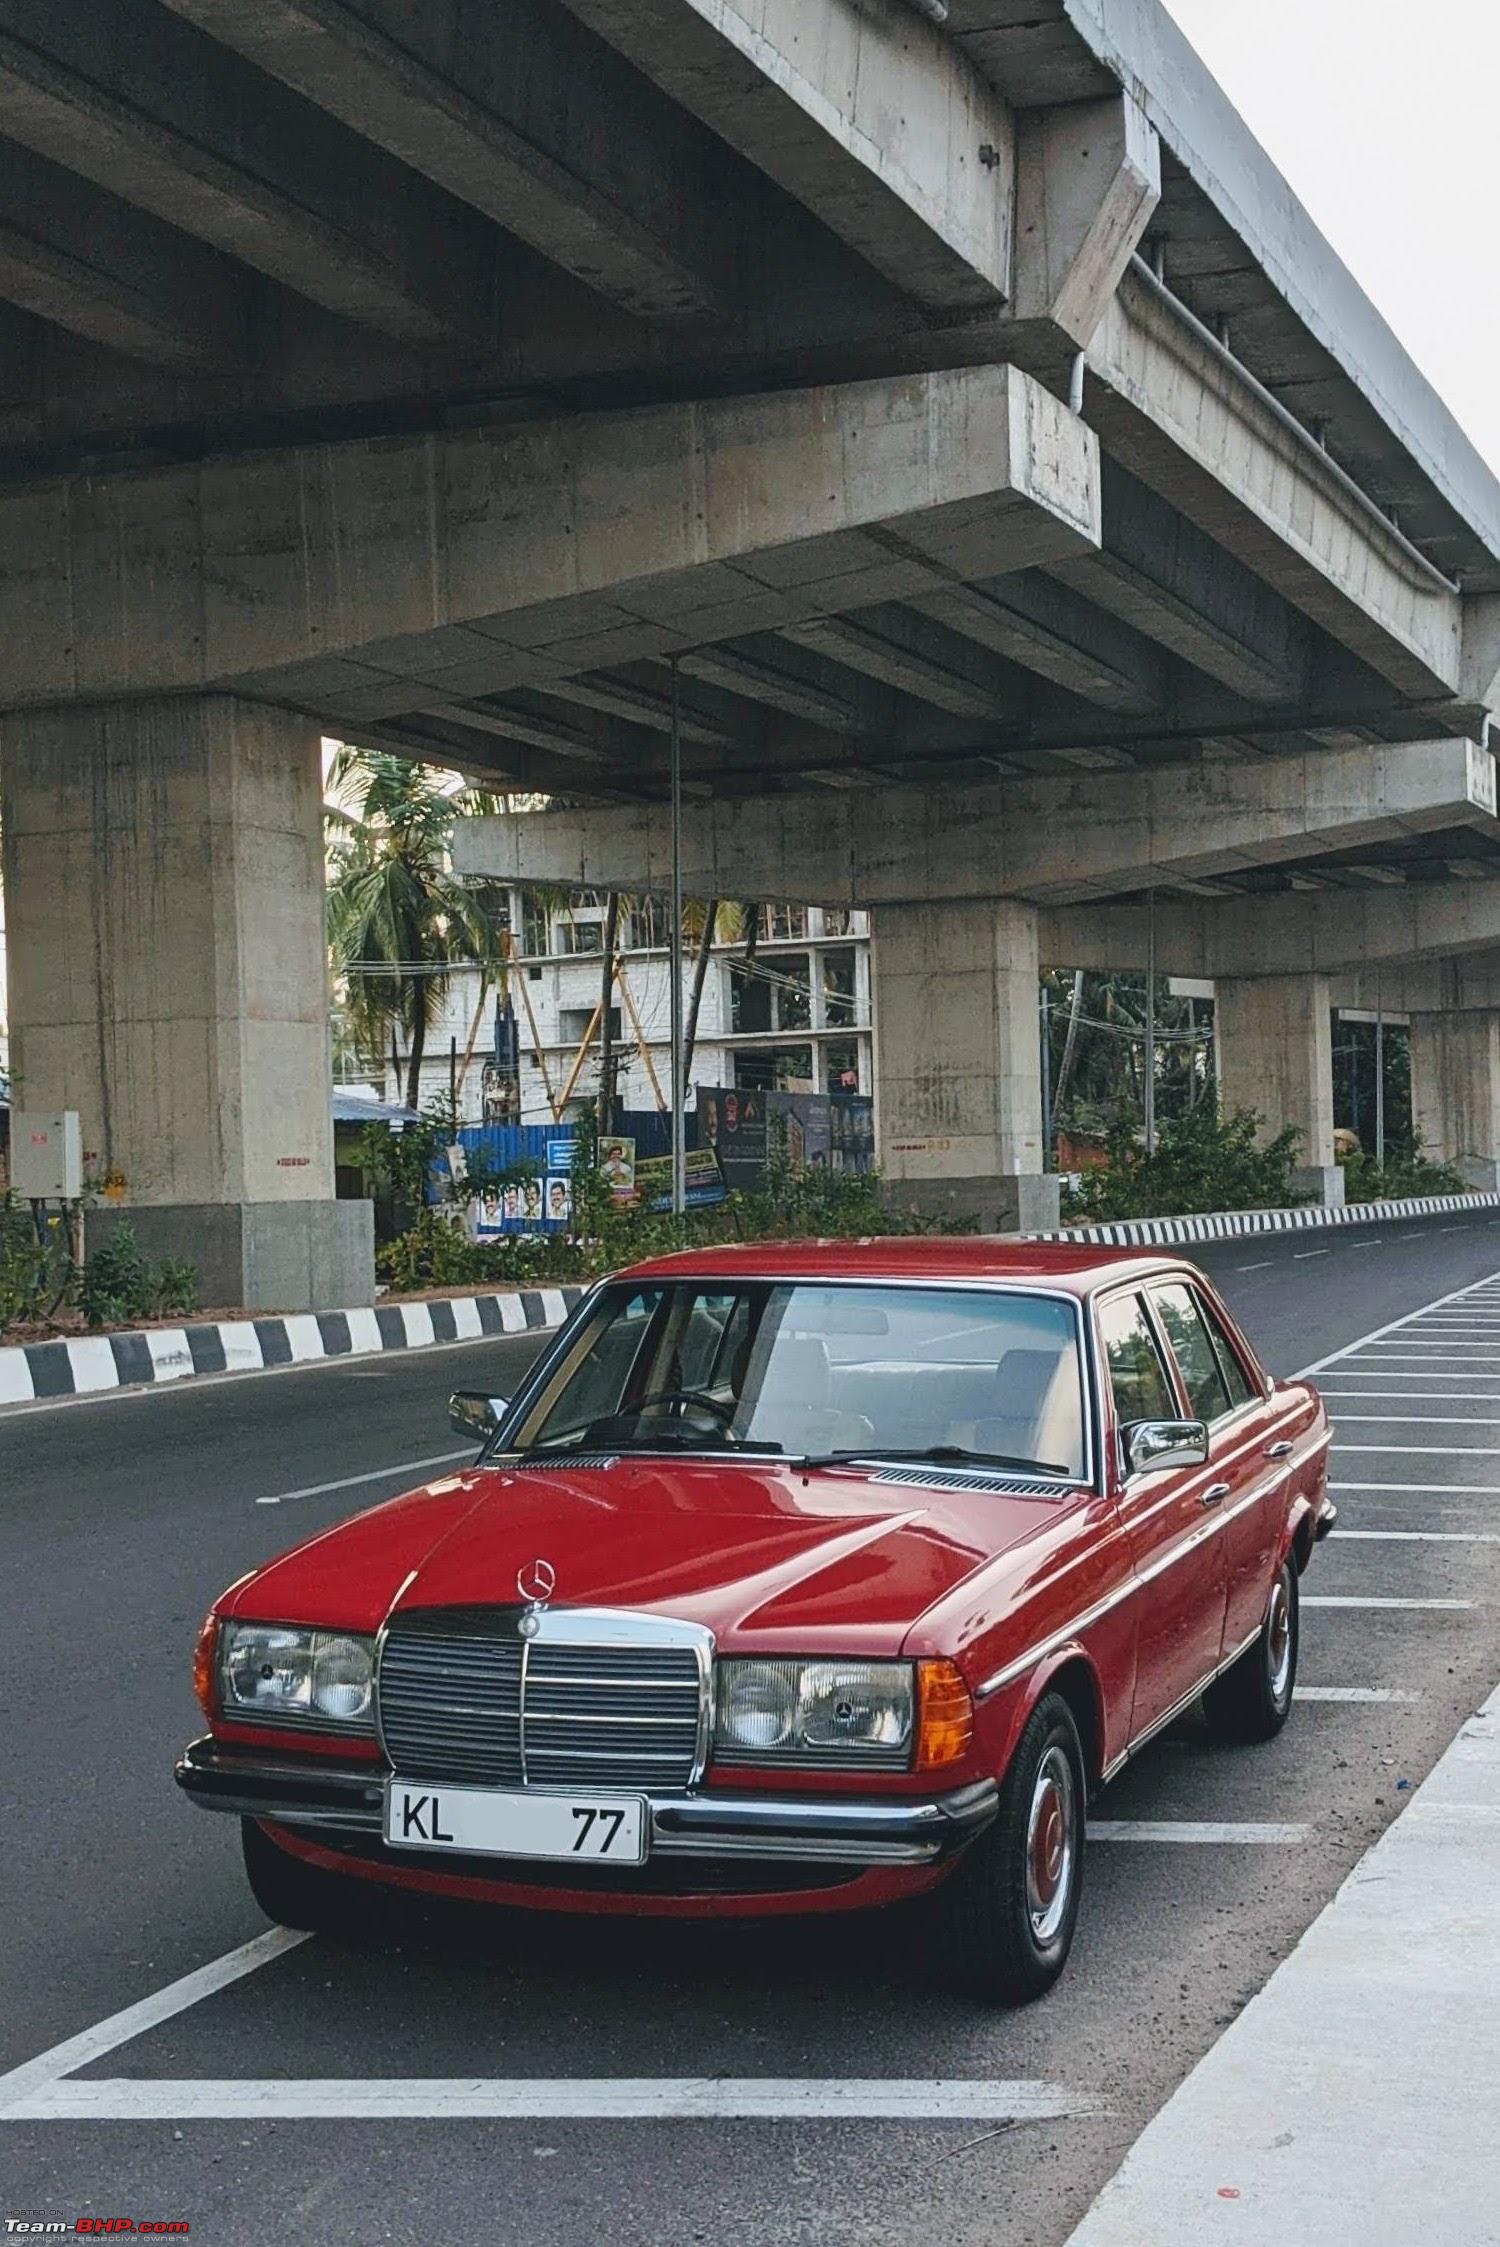 In all its glory ! Every time we take out the car it is a sense of occasion ! We get so many smiles on the way. This being a 200D has the sluggish power train in the 123 series. But that didnt seem much of a problem to us since going slow and meticulously planning the overtakes added more drama to the experience. Sunday mornings became days when the 123 rolled through the roads of Trivandrum. Mr D and his beauties used to join us for a cup of coffee during these drives.   The W123 with Mr D's gorgeous Beetle and Miata When things went wrong We have a big OCD when it comes to cars. We are famous in the neighbourhood as the family which spends hours and hours during weekends just cleaning cars. Those minor stains in the fabric seat in the car have been a big eyesore since day 1. I checked with few of my friends for a good detailing/ interior cleaning place in Trivandrum and few of my friends suggested a place. We took the car there to see if something can be done to clean the seats. Asked them if they have the equipments and expertise for fabric seat cleaning, they said yes and showed few before and after photos of fabric seats they have cleaned. We asked if they can do something about these stains in the seat, they agreed to clean them all without any issue. We stayed there for sometime and asked them to clean some stains in the drivers seat. Since the drivers seat was the least dirty of all. They sprayed some solution and agitated the dirt and did wet vacuum and few stains had disappeared. We told them to do the rest of the seats and went home for lunch. When we returned back, we saw the shock of our lives. We saw a worker trying to dismantle the front passenger seat and on the other side another worker pouring water from a hose on the rear seat which have been removed and kept on the floor ! We just lost it and went and shouted at them why they doing this and we had specifically told them not to remove the seat or try to do something new ! We called up the person who owns the place and asked him why all this was done and finally he admitted the mistake. He said they had applied some cleaning spray on the rear seat and then it started having some discolouration. They tried cleaning it with water and it all went out of hand. The problem with these old seats is that unlike foam in new cars, old cars have mostly organic fibres. The 123 has something called Horsehair cushion if Im right, which looks and feels kind of like dried coconut husk. When too much water gets on it, the husk type material gets mixed and the water turns dark brown. This dark brown water had turned the beige seats into a nightmare ! When a little bit of water made the seat brown, they removed the seat and started pouring water from hose to clean it further which further made the problem worse. And between all this we can see the workers getting in and out and soiling the carpets with their feet. At that moment we asked them to put everything back and stop all this. We put back the seats and drove the car home. It was such a painful sight to see the car in such a bad state. We tried drying the seats and carpets, but they had got really soiled. We tried cleaning them ourselves with some mild soap solutions and microfiber cloths but it didnt return back to how it was. Heart broken we learned our lesson. Around that time my elder brother went back to the U.S for his work. Once he went the car almost sat idle at home since I too didnt get much time to drive it around. One day he sends me a message asking me what if we changed the entire interiors and made them like new. It is a very sad thing to change all those original factory materials and replace them with new. But considering the current condition of the interiors, I was sure we would never be happy inside the car. The first thing he wanted to bring were genuine seat covers and carpets. I was kind of confused how he can bring such big things and we might end up paying a lot as customs duty. He said he can hand carry them next time he comes. I still was not convinced. One day he sends me these photos of seat covers, floor mats, carpets and other parts, and told he bought them and is bringing them home when he comes during the end of May. These photos were a delight to see. 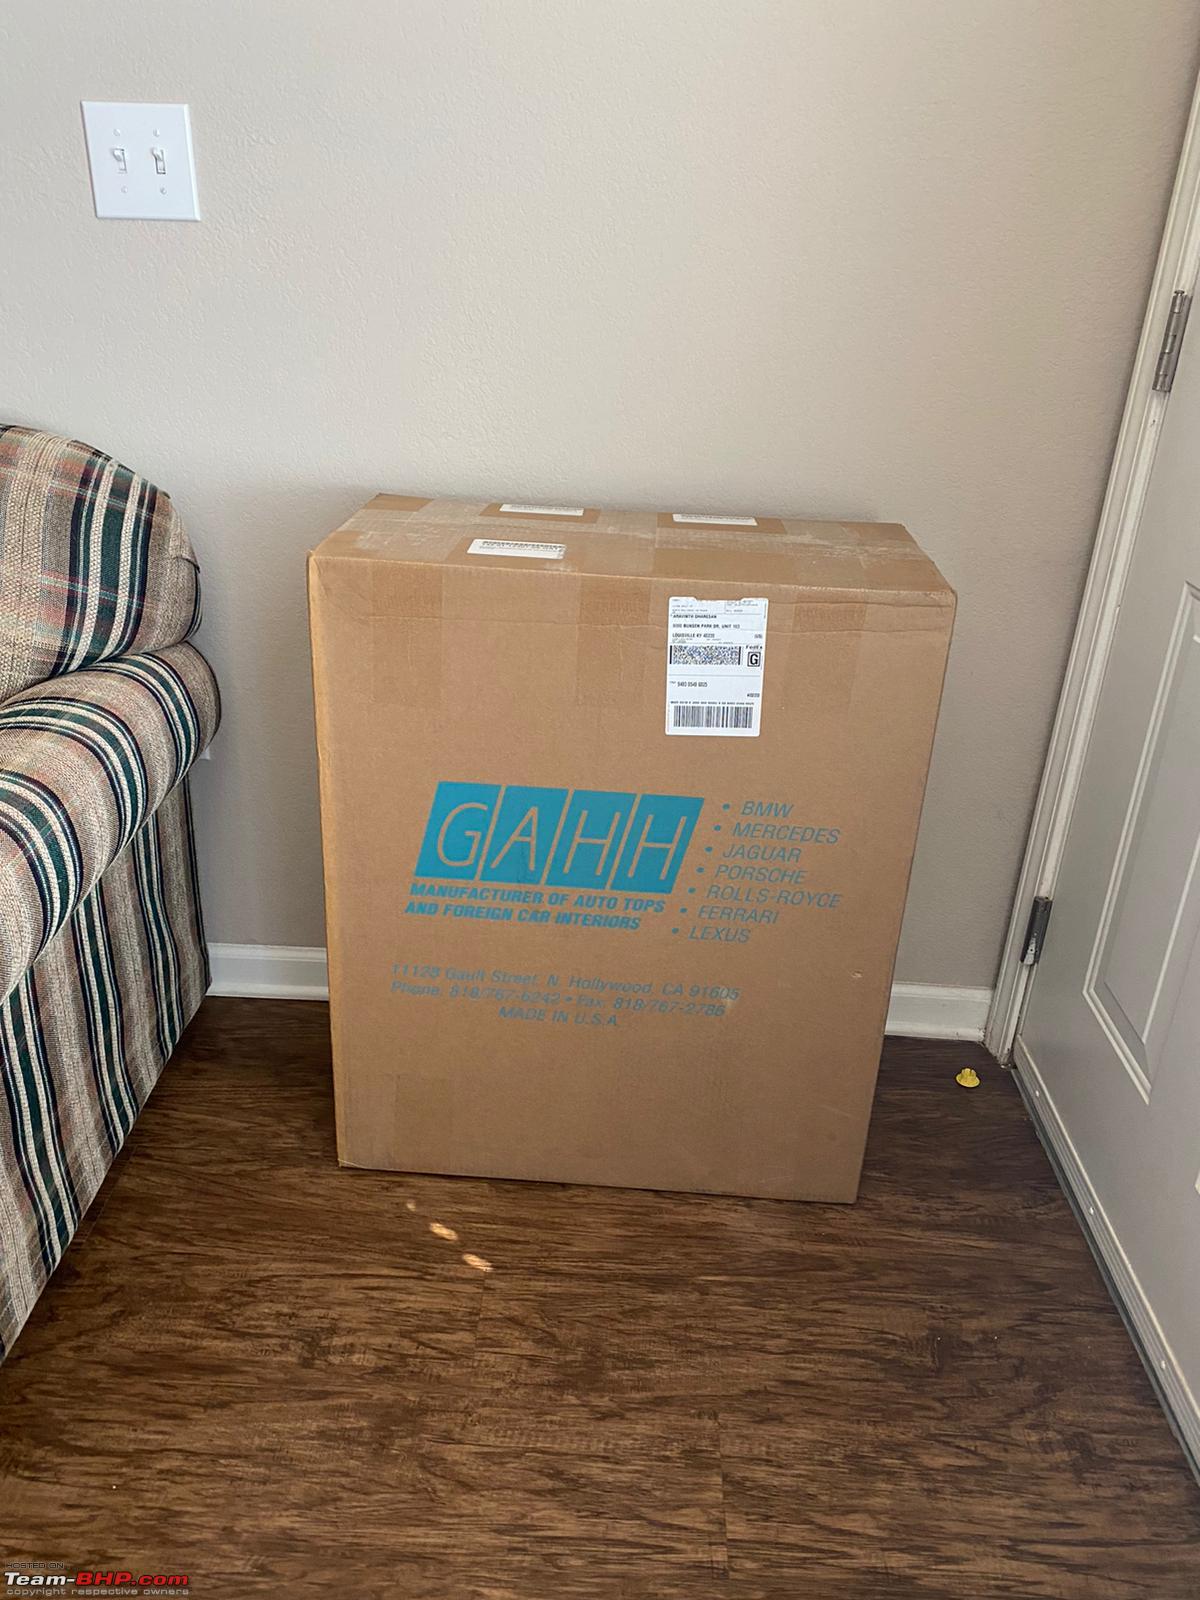      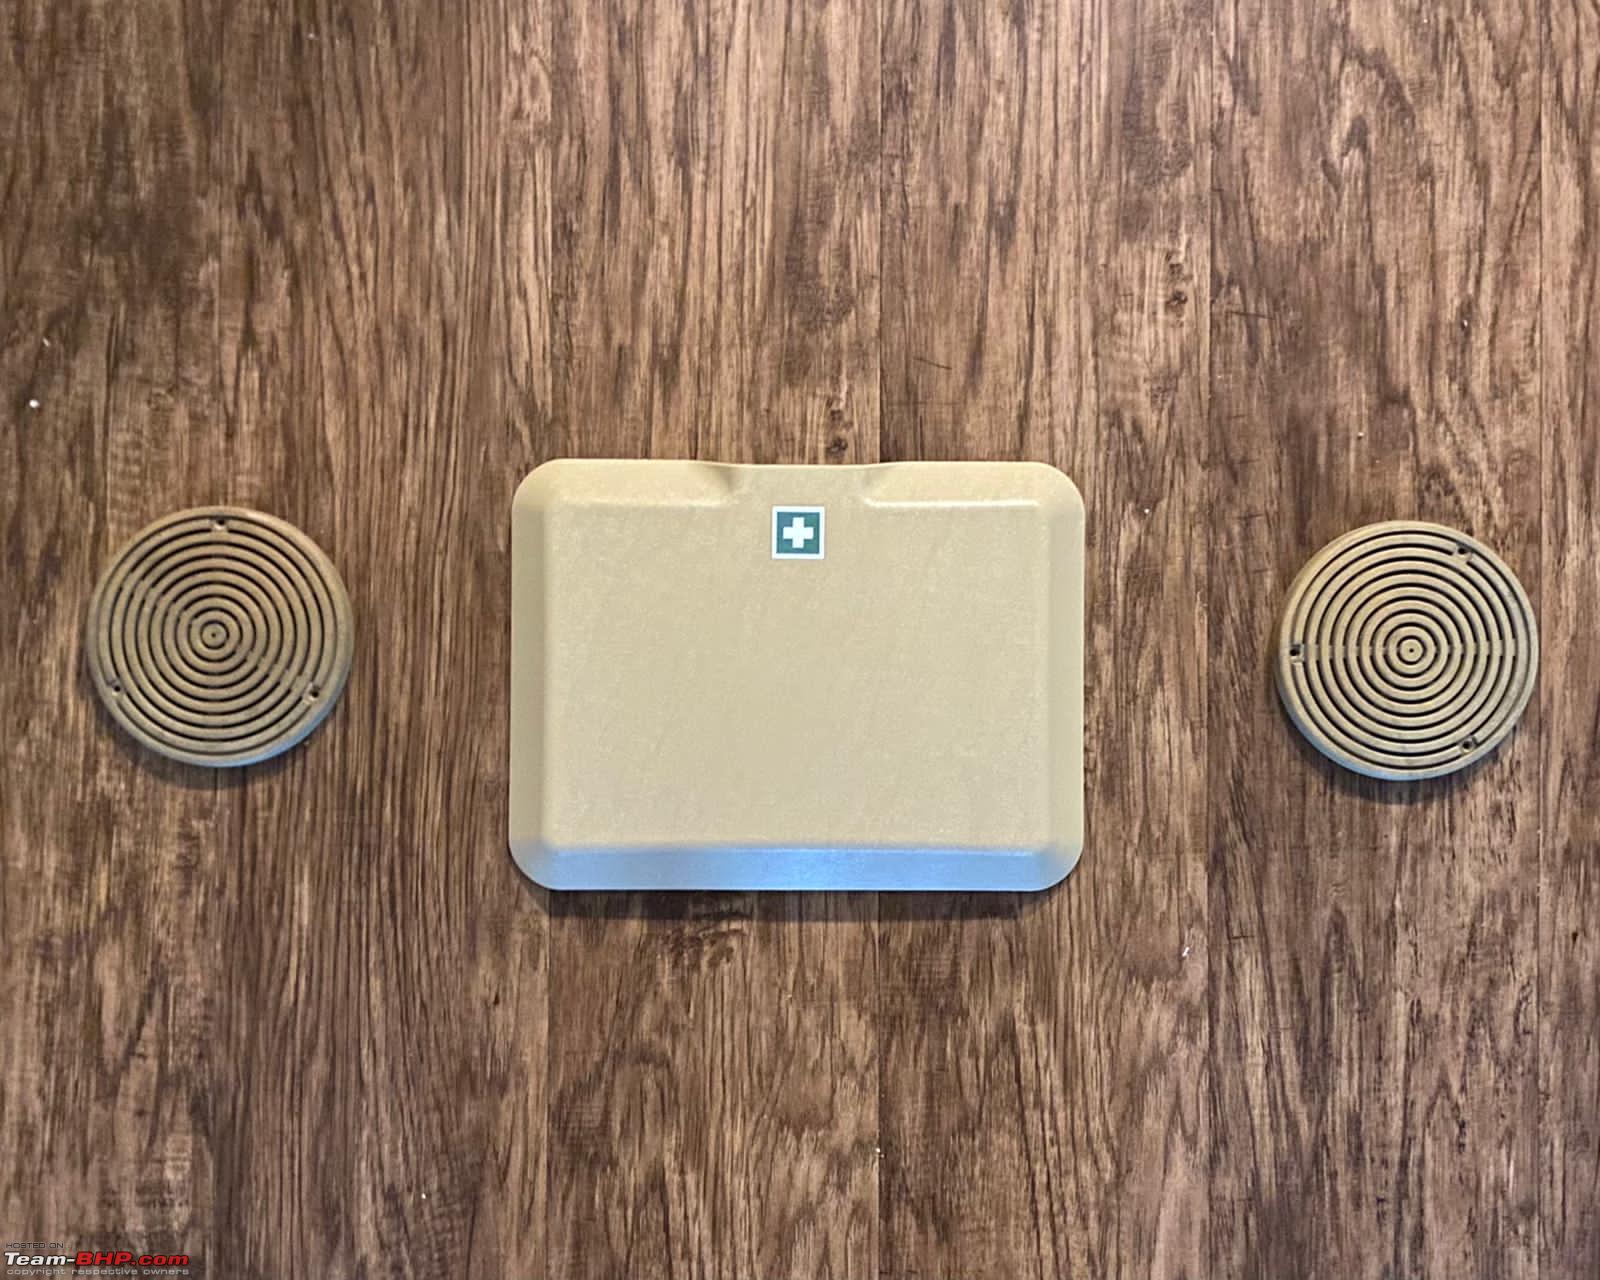   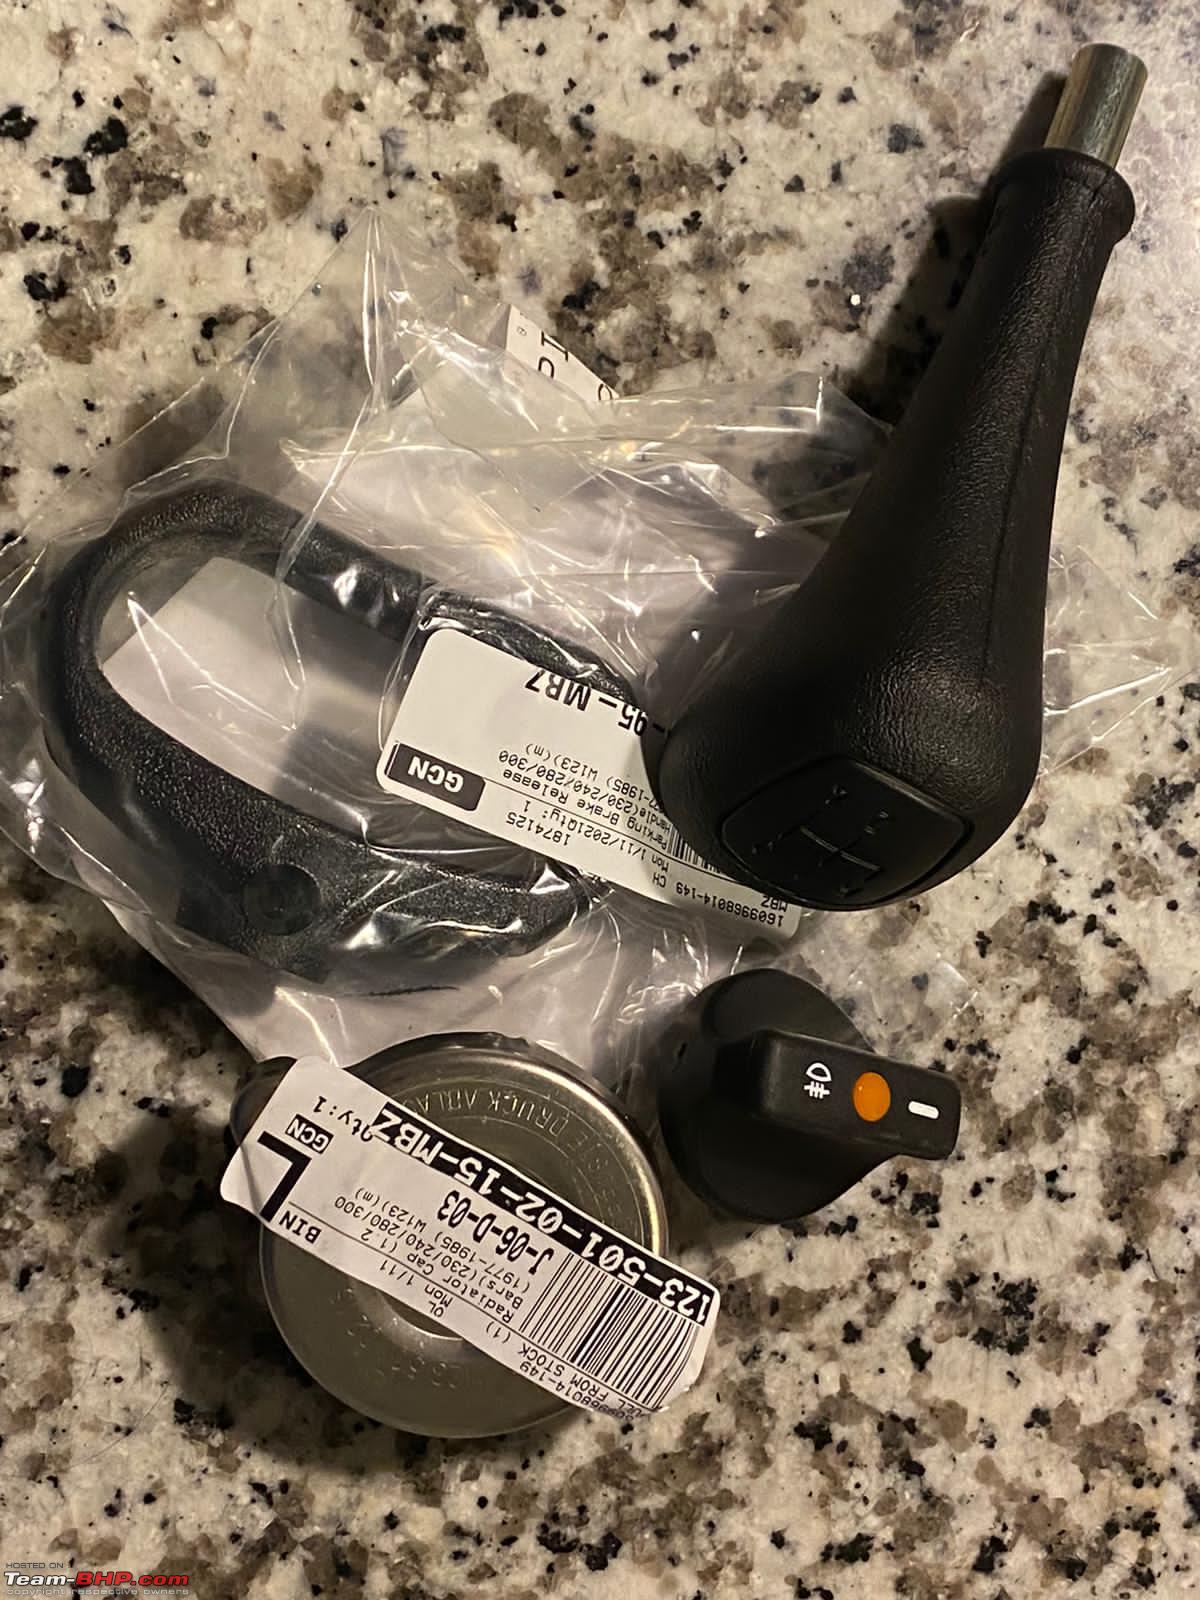  He said it will all fit inside his checkin baggage easily. We started planning on how to get things done this time. Our first hurdle was to get these things here without any customs issue. Once we got them, we thought of giving the car at a good restoration garage and strip the entire interiors and get the seat covers done in a good upholstery shop. Finally my brother arrived and luckily he didnt end up in customs jail and got all his luggage cleared without any issue. He arrived home right at the beginning of the second lockdown. Since he came from abroad he had to undergo the mandatory home quarantine. Once his quarantine was over and he got his negative RTPCR test, I went home and rushed to open the two bags. Took everything out and had a look at them. These were the major parts that came. 1. A Set of MB Tex Seat covers 2. New Carpets 3. Coco Floor Mats 4. New Headliner 5. New Gear Knob 6. Parking Brake Handle 7. ABC Pedals 8. New Front Mercedes Emblem 9. Windscreen Fluid Tank 10. Weather Strip 11. Parcel Shelf Fabric 12. First Aid box cover 13. Rear Speaker Grill 14. Some dashboard bottom panels 15. Front door pockets But due to the lockdown we couldnt take the car and do anything. The lockdown then started extending infinitely. We were so restless to get the interiors fixed. At one side you have all these new parts and on the other end you have the car just waiting for those to get in. With nothing else to do during the lockdown, we then decided to give a try at fixing few of those things ourselves. One BIG advantage I could find out was that almost everything was available in the internet. YouTube and many forums have tons of data and information regarding restoring and fixing the W123. With some sheer determination we thought of starting the restoration at home. The Restoration Process We first decided to start with the rear seat as removal of rear seat was fairly easy. There are 2 pressing type clips below the bench, you press them and the lower bench pops up. Removed the bench. Then we removed the back rest, removed two bolts below, pulled up the seat and it came off. Next was to remove the parcel tray, first we lifted the first aid box cover , removed the screw on the bottom , popped out the first aid box, then lifted the parcel tray from the clips behind and took it out. Once thats done we removed the front seats by removing the 4 bolts from the base and carefully took them out of the car. Once the seats went out, all the carpets were pulled off. Surprisingly all this was very easy, and the entire seats + carpets were pulled off in just an hour.  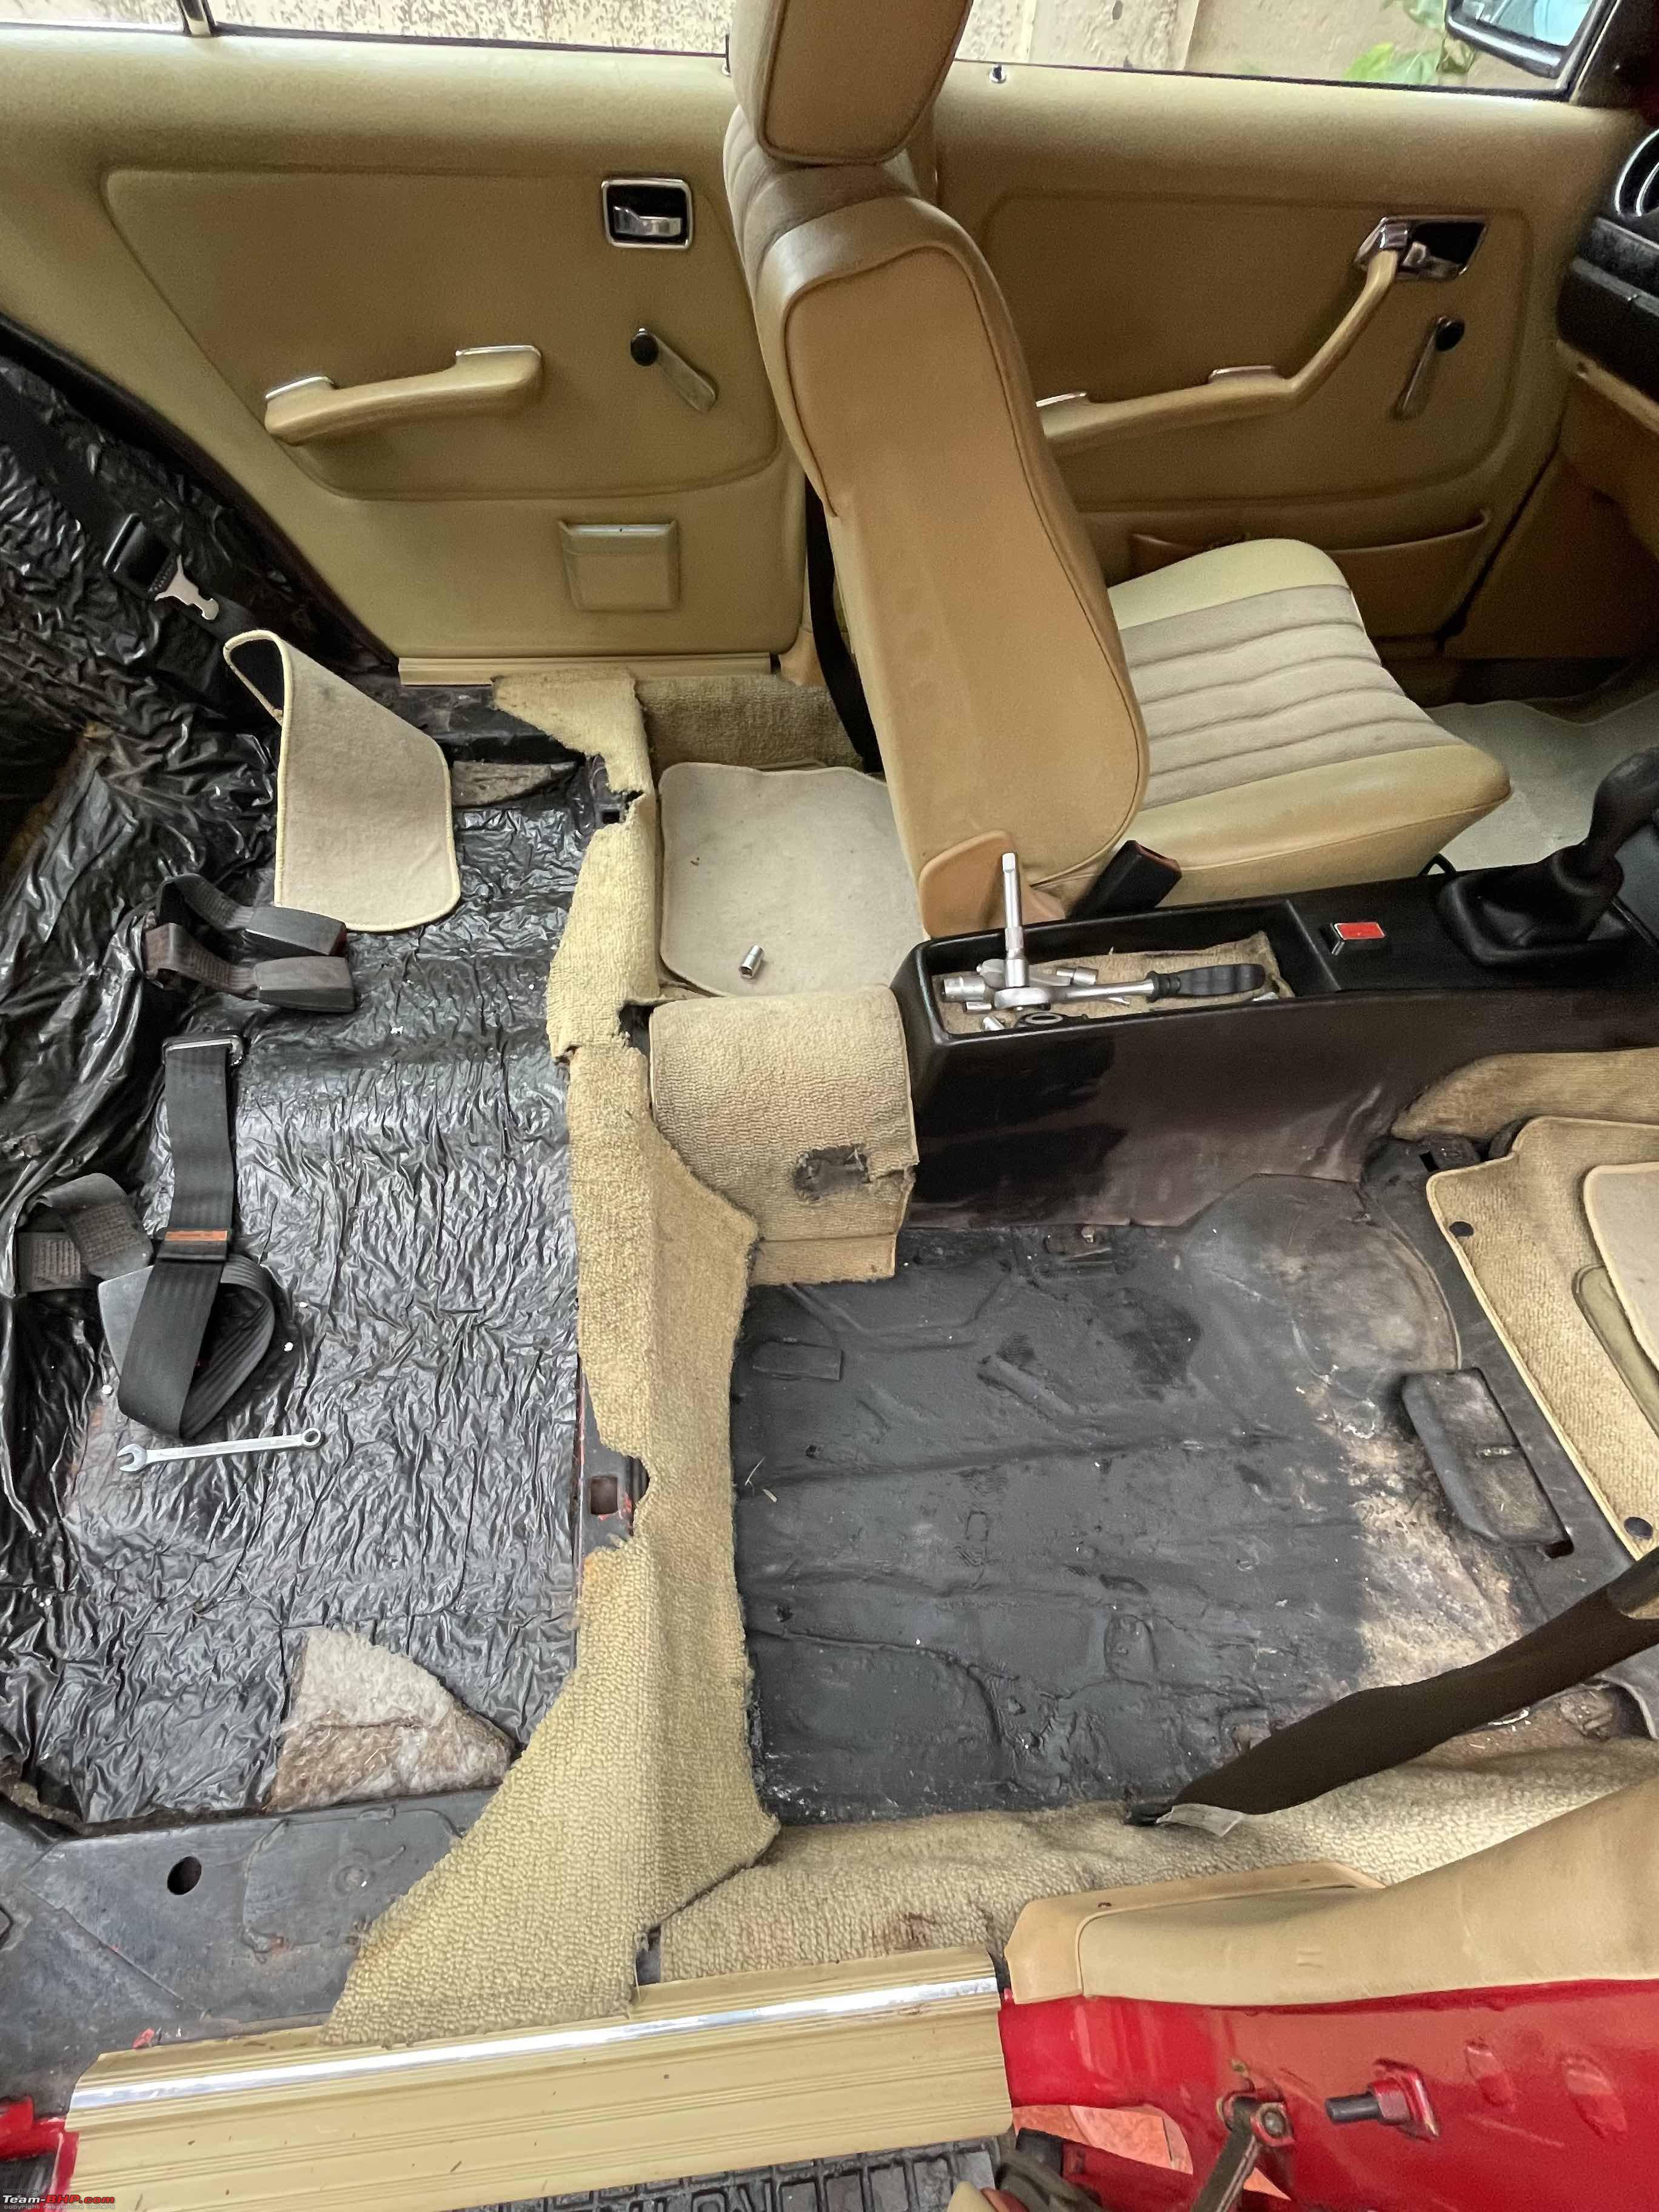    Once this was done, we took the seats inside the house to an empty room , which we converted to our in house workshop. We then started removing the fabric from the rear seat bench. Just a quick search in the web and found out the fabric is folded and inserted to a slot at the bottom of the seat. Just pull it from there and it would come off. This was fairly easy and we removed the fabric from the seat. This revealed the Horsehair cushion below. Carefully we removed the cushion from the metal frame which had some old school springs in them. These springs contribute to the magic carpet like ride in the Old Merc. A quick look at the frame and we found there was rust at some areas. Sprayed some Carpro IronX on them and cleaned them. Next day we rubbed those areas with the green scotch brite, removed the rust build up completely, then sprayed WD40 on them and let it dry. Gave it a good wipe and dried it. Later sprayed black gloss paint on the frame.  Notice the condition of the fabric       |

|  (40)
Thanks (40)
Thanks
 |
| The following 40 BHPians Thank Mr.Perera for this useful post: | --gKrish--, Aish_4761, Bhalla, Big Smoke, CrAzY dRiVeR, Desmosedici, digitalnirvana, dr_petrolhead, earlylifecrysis, Gannu_1, graaja, GTO, InControl, Ithaca, Jeroen, jmjmec, karlosdeville, keroo1099, KPS, krishnaprasadgg, Latheesh, megazoid, motorpsycho, museycal, neil.jericho, ph03n!x, PM - B, PraNeel, Researcher, SibiGeorge, SnS_12, somspaple, Tgo, theexperthand, V.Narayan, vb-saan, vigsom, Vmax1200, vredesbyrd, Xaos636 |
| |
|
27th June 2021, 02:08
| #2 |
| BHPian | re: Restolicious Lockdowns | Mercedes W123 Interior Restoration DIY Once it got dry, we put back the cushion and then started fitting the new seat covers on them. The trick is to compress the springs completely so that the end of the seat fabric goes till the bottom of the frame easily and at that time insert it into the slot below. While my brother helped in pressing the seat springs down, I slowly and carefully inserted the ends to the slot. And Voila the back bench was done. The finished back bench was such a confidence booster ! We were so thrilled to put back the rest of the car.      The next item was the back backrest. Like before we removed the old fabric and cushion, removed the rust and painted the frame. But fitting back the new fabric was a bit of a challenge here. We had a bit of a difficult time reaching the ends to the back slots. The springs needed to be compressed really well to get it almost there. But since the back rest was bigger in size giving equal pressure on it and compressing the entire thing was a challenge. Thats when I came up with an idea. Since the back side is exposed and we can access the springs from there, I thought to tightly tie down the entire springs so that it will compress them and then insert the new fabric and then cut off the ropes from behind and bring back the frame to its full tension. This worked like MAGIC ! Once all the springs were pulled down, the seat cover went in and all the ropes were cut. The back rest was ready !  Tying down the frame in progress. 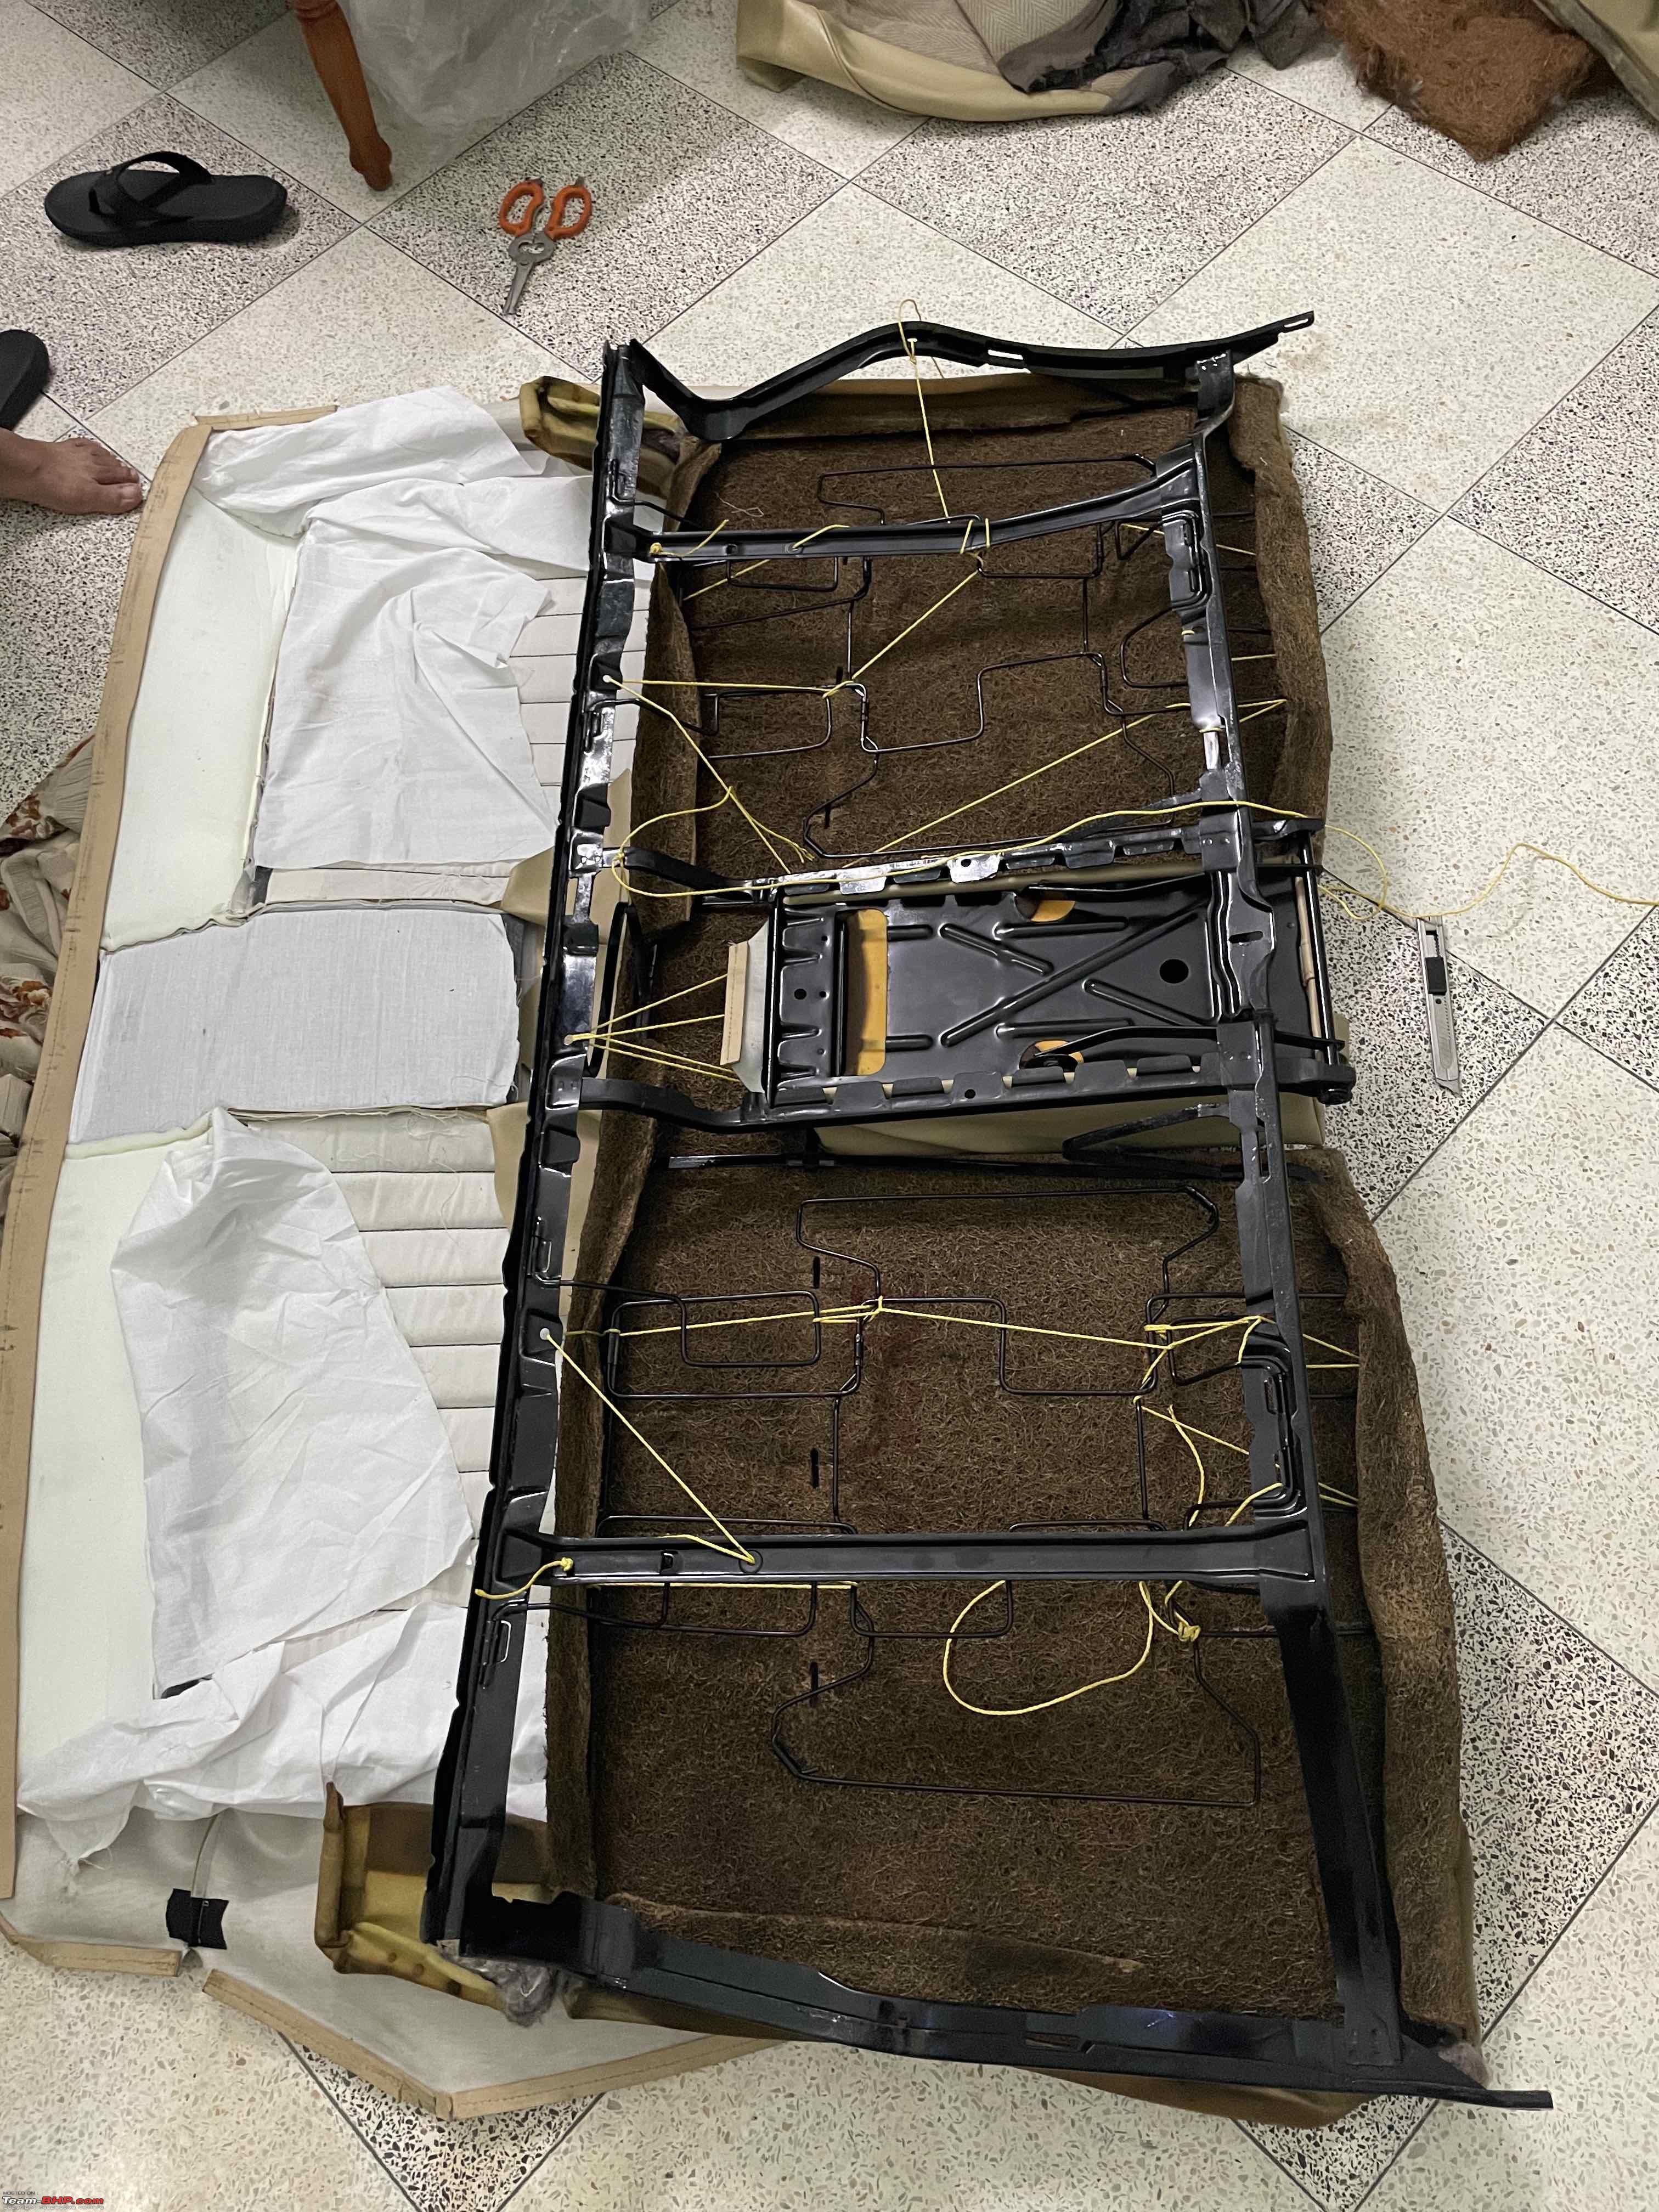  Since both the back bench and back rest was done we now started with the front drivers seat. We knew that this wont be as easy as the rear seats since it looked a bit complicated. First the headrest was removed. To remove the head rest there is a switch behind the seat. We need to press it and then lift the headrest to remove it. Then the rear square panel was slid down. Then the bottom part and the backrest were disassembled. And from there removing the fabric was same as before. The frame was cleaned and painted.     Notice some kind of colour coding on the frame     Now came the most challenging part of the whole process. The front seat back rest. Fitting the new cover was not happening no matter whatever we did. Something was not right and it was not fitting properly. Later we figured out that the seat cover we got was different. The W123 had two types of front seats. The seat cover we got was actually smaller in the shoulders and it was not sliding into the frame and cushion. We had hit a roadblock here. All the rest of the dimension were same and just the thickness of the shoulder area was the problem. Next day we sat and thought on how to fit it and later came up with an idea to cut down a bit of the cushion so that its thickness gets reduced, thus letting the seat cover fit easily. We got the scale type paper cutter and carefully shaved off some of the cushion at the shoulder area. Luckily this time the cover had fit perfectly. Later the holes for the headrest were made carefully and the headrest was fitted. Fixed back the bottom piece and backrest and the front seat finally looked nice !  Now it was time to concentrate on the rear parcel tray. The factory fabric one was pretty dirty and we got a new parcel tray cover. The plan was to fit the new cover over the old one. We got beige paint fabric paint for the parcel tray and painted it. Once that was done we had put the new fabric over it, then we fitted the first aid box (which got a new cover) and some the new speaker covers instead of the old pioneer speakers.  The parcel tray after getting a fresh coat of fabric paint Next we went to the car and did the rest of the interior cleaning. We had taken out the bottom panels on the dashboard, which was kind of dirty and cleaned them. Before all this restoration/cleaning started we had bought a large amount of cleaning supplies. Like detailing bottles, detailing brushes and a variety of Carpro products. This actually made the work so easy. To clean the plastic panels we first mixed Carpro Multi cleaner in a 1: 20 ratio on a detailing bottle and sprayed it on the panels. Then agitated it with a detailing brush. My brother had brought some Mr Clean Magic Eraser. Once the dirt was agitated with the brush, we rubbed it off with the magic eraser and most of the dirt was gone from the panels. This process was very satisfying. One thing I learned was if we have the right tools and supplies cleaning is a very easy and happy process. Cleaning the door panels was a difficult task thought. The discolouration on them were actually not dirt, but looked liked the panel lost its finish at the touch points during all these years. The door panels did not come out as we expected. It remained almost like how it was before. We got new headliners also but to fit the headliner, we had to remove the rear glass. Since we didnt have much expertise in that we just gave the stock headliner a clean and thought of keeping it that way. The next day we cleaned the rest of the parts inside. The dashboard, centre console, steering, A,B and C pillar trims were given a thorough clean with MultiX, detailing brush & Magic eraser. The speedometer console had a bit of a dullness. The transparent plastic cover and the inside definitely needed a cleaning. The cover was slowly and carefully pulled out, and we applied some Meguirs ultimate compound on it and buffed it with hand. The foggy look was gone. To clean the inside, the needles and the inside of the speedometer were given a spray of MultiX + water mix and carefully they were cleaned with the smallest detailing brush. It was carefully dried and cleaned with a microfiber cloth. I was really surprised by how the faded orange needles turned bright orange and came back to life. The cover was then glued back.     |
|
| (33)
Thanks
|
| The following 33 BHPians Thank Mr.Perera for this useful post: | --gKrish--, Bhalla, Big Smoke, chinmaypillay, CrAzY dRiVeR, dailydriver, Desmosedici, digitalnirvana, DrANTO, dr_petrolhead, GTO, g_sanjib, InControl, Ithaca, jmjmec, karlosdeville, keroo1099, krishnaprasadgg, mbz180, museycal, neil.jericho, ph03n!x, PM - B, Researcher, sgm, SnS_12, Tgo, theexperthand, Turbanator, V.Narayan, vb-saan, vigsom, Vishnu Shaji |
|
27th June 2021, 02:36
| #3 |
| BHPian | re: Restolicious Lockdowns | Mercedes W123 Interior Restoration DIY New parts like new ABC pedals, new gear lever, new handles for the handbrake were fitted. We had fitted a new front Mercedes emblem also as the old one didn't seem to be original. Before  After    Before  After  The footwell of the car was cleaned and vacuumed. Those places with signs of oxidation were rubbed with green scotch brite and given a coat of Matt black aerosol paint. This was done so that the floor would be clean and free of dirt so that we can apply the glue for the carpets.  The new carpets were pre-cut and just needed to be stuck at the right points. The old set of carpets were taken and matched with the new ones and we started to fit them. 3M Yellow Adhesive was sprayed on the floor and on the backside of the carpets. And after few minutes we stuck them together. Slowly but steadily the interiors were starting to look fresh.            One of the panels below the steering had a crack from the time we bought the car. We got a new replacement panel for that. But while fitting it we found out it was not right somewhere and later figured out it was the panel for the US spec LHD W123. We then had to cut the edges of it and make it fit properly. Used a rotary blade fitted on a drilling machine and carefully cut the edge and brought it to the right shape. And it had fit perfectly. 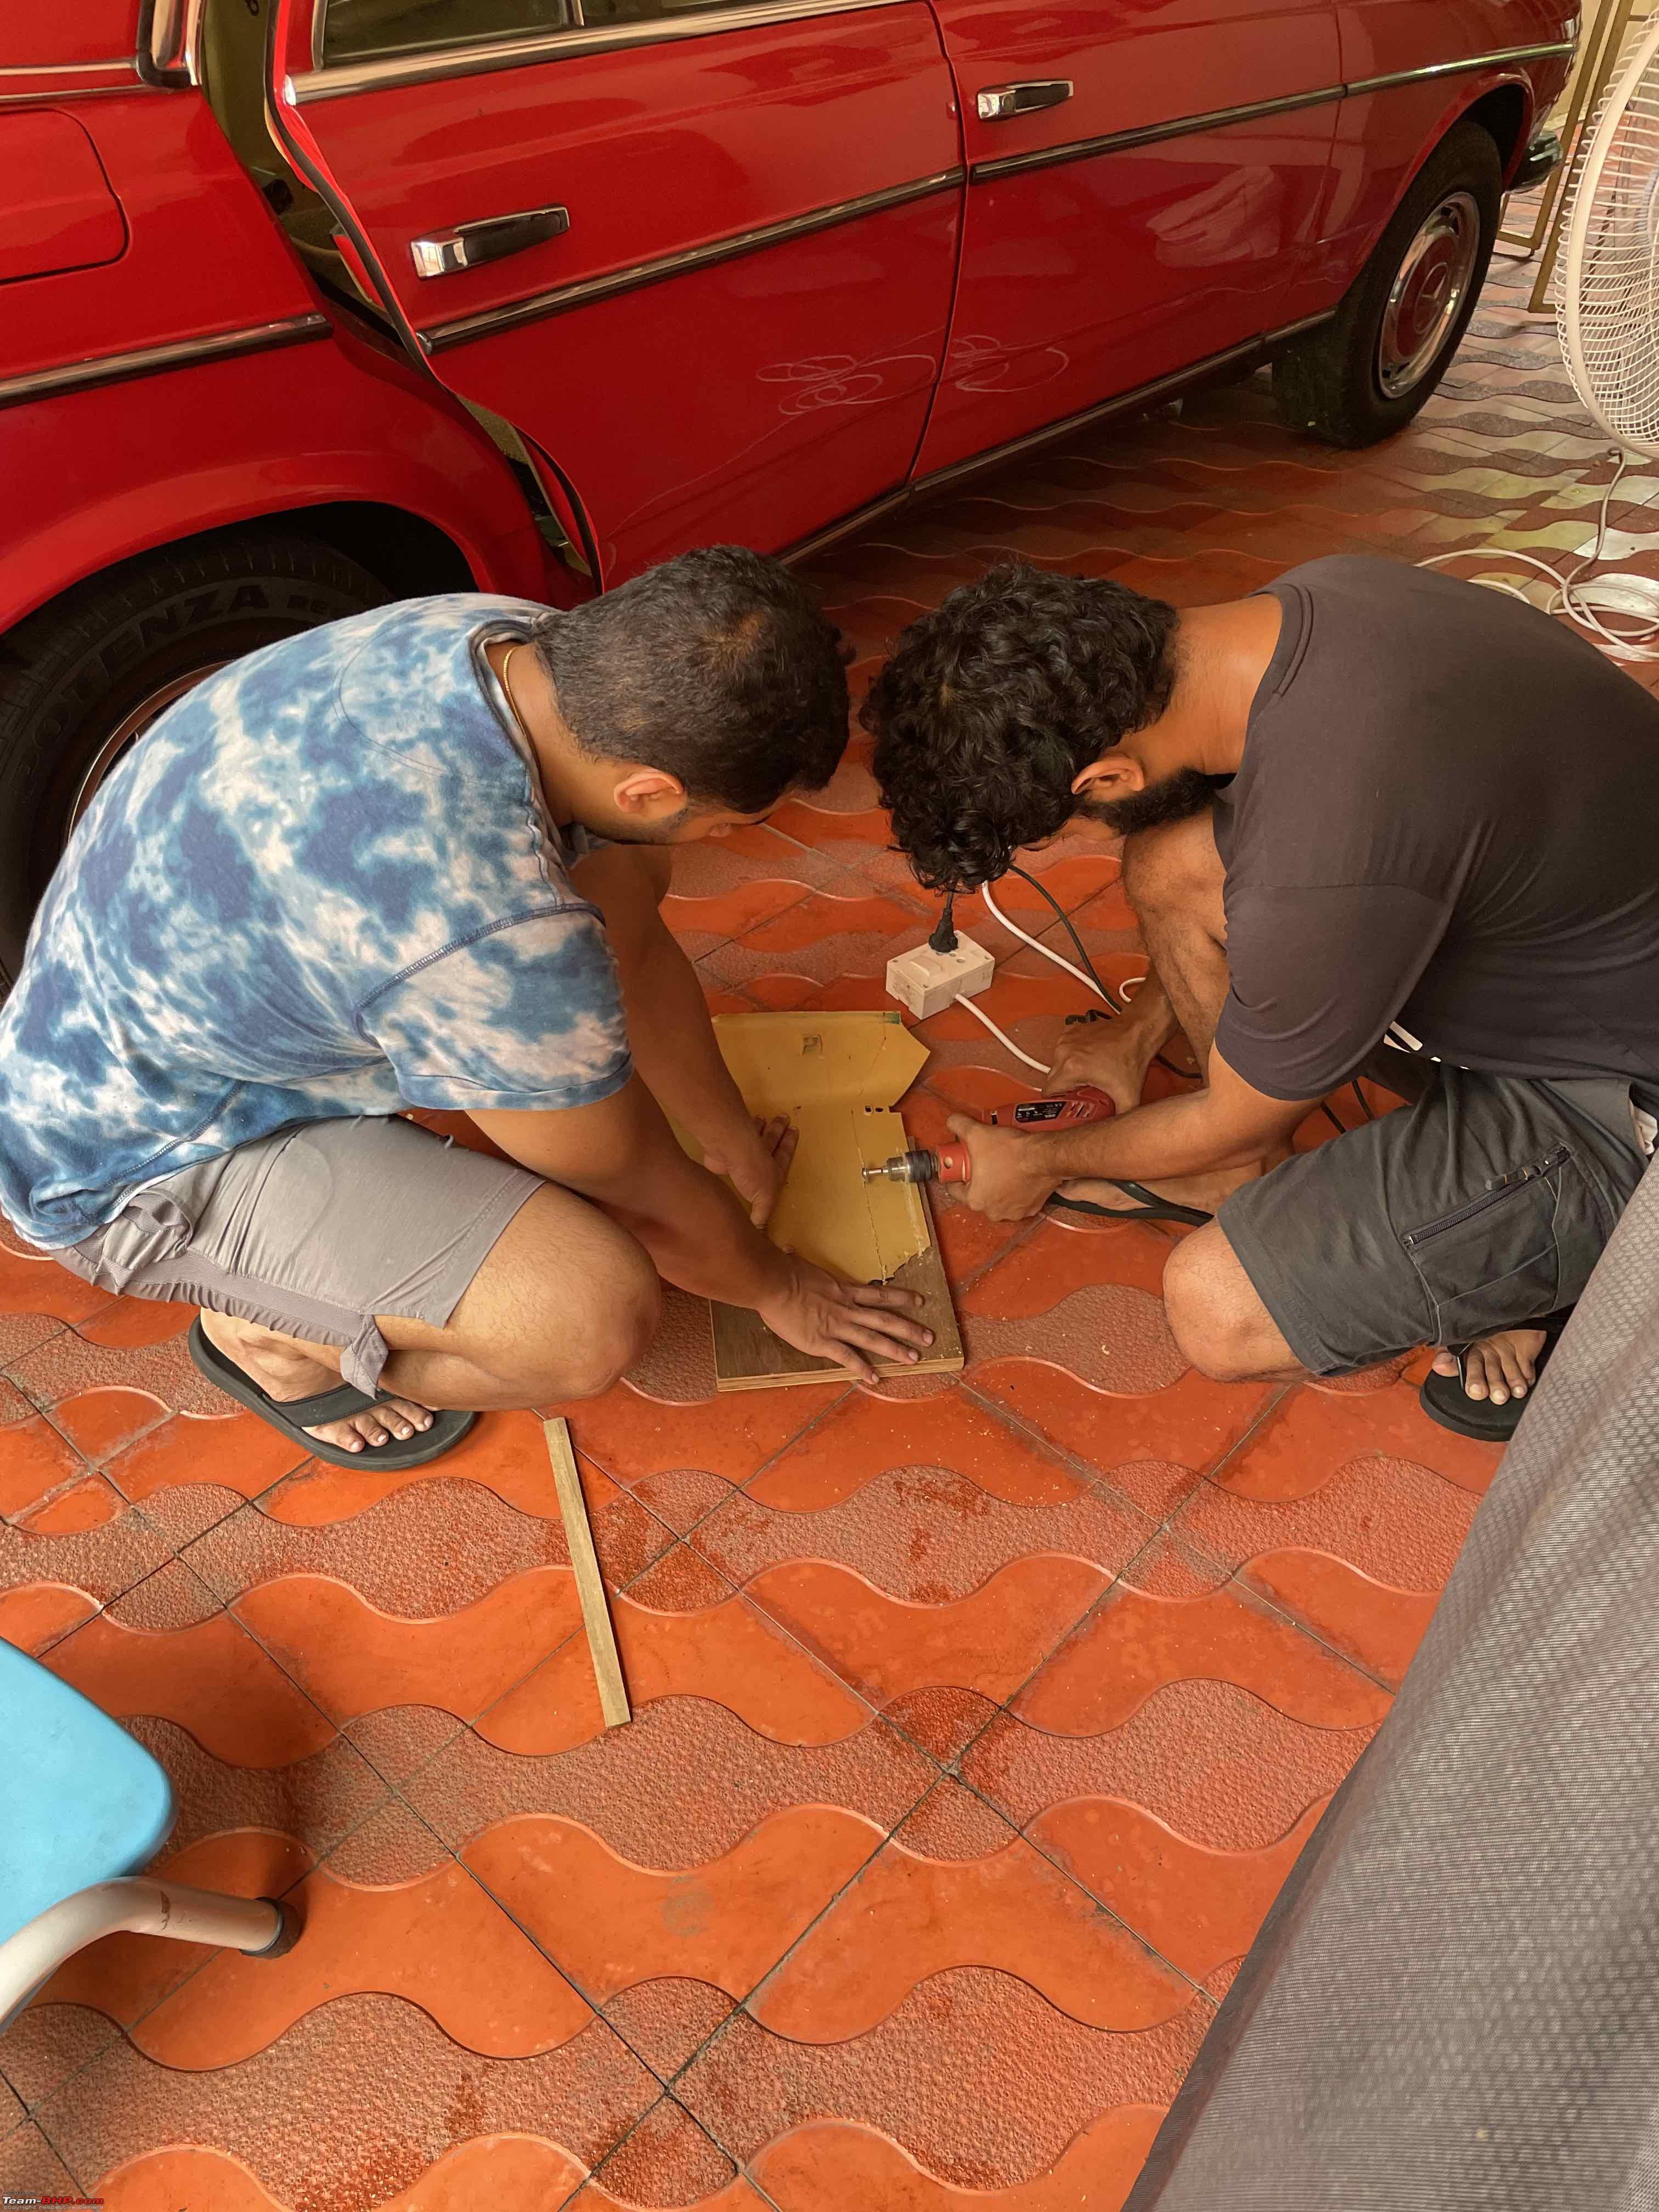   attention to detail ! Now with the inside clean and carpets on place it was time to fit back the seats. First the parcel tray was fitted, then seats were brought and we started carefully fitting them.    |
|
| (41)
Thanks
|
| The following 41 BHPians Thank Mr.Perera for this useful post: | AKSarkar1, audioholic, Big Smoke, chinmaypillay, CrAzY dRiVeR, dailydriver, digitalnirvana, dr_petrolhead, Gannu_1, Geo_Ipe, graaja, GTO, g_sanjib, InControl, Ithaca, Jeroen, jnanesh, karlosdeville, keroo1099, krishnaprasadgg, Latheesh, man_of_steel, mbz180, museycal, neil.jericho, PearlJam, ph03n!x, PM - B, PraNeel, Researcher, RohaNN_kWh, Sayan, SedanGuy, somspaple, Tgo, theexperthand, Torque_Curve, TSIVTEC, vb-saan, vigsom, Xaos636 |
|
27th June 2021, 03:04
| #4 |
| BHPian | re: Restolicious Lockdowns | Mercedes W123 Interior Restoration DIY It was one of the most satisfying things in life to see the interiors starting to look like new ! Everything was fitted and luckily no screw or bolt came extra. Finally the work was done. I must say we never thought it would end up to be so well. It took us exactly 1 week and tons of patience and determination. The next in the list is to get the new headliners and do something with the door panels and make them look perfect. Now let the pictures do the talking  Before  After  Before  After  Before  After  Before  After  Before  After  Before  After  Before  After  Please Note that all these before photos were taken right after buying the car. Sadly we didn't take much photos of the interiors of the car after it was made super dirty when we took it for cleaning. Few more photos below     |
|
| (110)
Thanks
|
| The following 110 BHPians Thank Mr.Perera for this useful post: | akash_v12, AKSarkar1, akshay4587, akshye, amit_purohit20, Arreyosambha, arvindmanju, audioholic, AZT, Batfreak, Bhalla, Big Smoke, BigBrad, bikertillidie, BopsKA12, brownkaiser, capslock, chinmaypillay, CrAzY dRiVeR, dailydriver, Dennis, Desmosedici, digitalnirvana, DrANTO, drift87, Dry Ice, dr_petrolhead, Fateh Salim, Foxbat, funkykar, Gannu_1, Geo_Ipe, graaja, GTO, g_sanjib, igemini, InControl, Ithaca, Jeroen, jmjmec, jnanesh, kalyan_hyd, karlosdeville, Keeleri_Achu, keroo1099, krishnaprasadgg, Latheesh, maddyg, Marc3800, moralfibre, motorpsycho, mugen_pinaki27, museycal, neerajdan, neil.jericho, nettooran, NevGin, ninjatalli, nitrogary, nkapoor777, no_fear, PearlJam, ph03n!x, pixantz, pkulkarni.2106, PM - B, PraNeel, pritanshchandra, Rahulkool, Ramsagar, Researcher, RoboCop13, romil.shroff, samabhi, samee_arian, SandyX, Sayan, SedanGuy, sgm, Shanky_1002, shibujp, Shubhendra, Simha13, SnS_12, somspaple, starter, SuhairZain, Sunny_ST3, Surprise, tchsvy, Tgo, theexperthand, thewhiteknight, the_real_slager, TSIVTEC, Turbanator, Turbojc, V.Narayan, v12, Vasanth, vb-saan, Venom_rider, vigsom, Vijin, Viju, virajmore03, Vishnu Shaji, vishy76, wbd8779, Xaos636 |
|
27th June 2021, 09:53
| #5 |
| BHPian | re: Restolicious Lockdowns | Mercedes W123 Interior Restoration DIY A fantastic job Mr. Perera. I must say this restoration of the interiors is thoroughly professional and really speaks volumes about your attention to detail, patience and getting things done the right way. I love the W123 series. Its one of those cars, if well maintained, continues to run for ages. You have brought new life into the old girl. I hope you enjoy driving this beauty and continue to post more pictures of the restoration you are doing. Were you able to demand compensation from the detailing staff for ruining the previous seat covers? I hate when people start messing up and then end up creating more trouble instead of stopping the work in the first instance. I hope the owner of the detailing company compensated you. |
|
| (11)
Thanks
|
| The following 11 BHPians Thank no_fear for this useful post: | amit_purohit20, chinmaypillay, digitalnirvana, InControl, krishnaprasadgg, Mr.Perera, neil.jericho, Researcher, SnS_12, Torque_Curve, TSIVTEC |
|
27th June 2021, 11:46
| #6 | |
| BHPian | re: Restolicious Lockdowns | Mercedes W123 Interior Restoration DIY Quote:
Regarding compensation, we did not ask for any compensation. The people there were trying to cover up and convince us saying to leave the car for few days there and they will get it all cleaned and give us. But we were not at all interested in that and in no mood to argue with them so just took back the car and came home. | |
|
| (9)
Thanks
|

| The following 9 BHPians Thank Mr.Perera for this useful post: | digitalnirvana, InControl, Latheesh, neerajdan, neil.jericho, ph03n!x, SnS_12, vigsom, vredesbyrd |
|
27th June 2021, 11:48
| #7 |
| Distinguished - BHPian  | re: Restolicious Lockdowns | Mercedes W123 Interior Restoration DIY Excellent job! Great to see such a painstaking restoration of the interior. I believe you got very lucky with this interior colour. It is almost impossible to find original Mercedes carpets and upholstery. If you do, it is usually available in one colour only, yours! Some years ago at a German W123 club event I met a guy who provided all original Mercedes upholstery, materials and colours. Never seen him before, never since. Most of my upholstery is in very good nick, but the springs of the front seat could do with a bit of work. Jeroen |

| (14)
Thanks
|
| The following 14 BHPians Thank Jeroen for this useful post: | chinmaypillay, digitalnirvana, InControl, Latheesh, Mr.Perera, neerajdan, neil.jericho, ph03n!x, Researcher, romil.shroff, SnS_12, theexperthand, vigsom, VivekCherian |
|
27th June 2021, 12:15
| #8 |
| Senior - BHPian | re: Restolicious Lockdowns | Mercedes W123 Interior Restoration DIY Epic this Mr.Perera! Glad to see all the hard work finally paying off. She is undoubtedly a beauty! |
|
| (3)
Thanks
|
| The following 3 BHPians Thank man_of_steel for this useful post: | digitalnirvana, Mr.Perera, viXit |
|
28th June 2021, 10:09
| #9 |
| Team-BHP Support  | Re: Restolicious Lockdowns | Mercedes W123 Interior Restoration DIY What a beauty! Hope to see the car on the roads someday soon. Looks like I need to roam around more on Sunday mornings. |
|
| (4)
Thanks
|
| The following 4 BHPians Thank CrAzY dRiVeR for this useful post: | arun1100, digitalnirvana, Mr.Perera, neil.jericho |
|
28th June 2021, 10:19
| #10 |
| Team-BHP Support | Re: Restolicious Lockdowns | Mercedes W123 Interior Restoration DIY Excellent job Mr. Perera. Always nice to see a W123 and amazing to see one in immaculate condition. The sheer effort and passion that has gone into this restoration is clearly visible. The W123 holds a special place in my heart. It was (and probably still is) THE Mercedes for me and probably many more Indians. This is perhaps because it was the first Mercedes model I ever saw. Still looks so regal! A true keeper. Somehow, even after so many years, the interior of this car still looks like a nice place to be in. There was something about cars like Mercs and Jags from that era that made them timeless and special. Last edited by Aditya : 28th June 2021 at 12:35. |
|
| (7)
Thanks
|
| The following 7 BHPians Thank Aditya for this useful post: | arun1100, digitalnirvana, Dippy, InControl, Mr.Perera, neil.jericho, vigsom |
|
28th June 2021, 10:26
| #11 |
| Newbie Join Date: Apr 2020 Location: Tiruvalla/Dubai
Posts: 15
Thanked: 15 Times
| Re: Restolicious Lockdowns | Mercedes W123 Interior Restoration DIY Wow!!! She is a beauty!! It gives me even more pride to see a fellow Malayalee with so much taste to classics and details  How did you manage the 3M adhesive spray with the lockdown? Where is the car stereo now? |
|
| (1)
Thanks
|
| The following BHPian Thanks navjon for this useful post: | Mr.Perera |
| |
|
28th June 2021, 10:32
| #12 |
| Distinguished - BHPian Join Date: Aug 2009 Location: Cochin
Posts: 3,813
Thanked: 19,342 Times
| Re: Restolicious Lockdowns | Mercedes W123 Interior Restoration DIY What a great thread! This just made my Sunday. The passion that you and your brother have for automobiles comes through every minute detail that you have considered for this interior restoration. It feels like the car has lost 10 years of its life with the upgraded interiors. Also, since your ownership review of the Karoq became the go - to guide for potential owners, would it be possible to pen a similar one for your W123? Im sure it would greatly help the community. Knowing how much you enjoy you cars and bikes, Im sure that it will be a fantastic source of information for all of us. |
|
| (3)
Thanks
|
| The following 3 BHPians Thank neil.jericho for this useful post: | digitalnirvana, Mr.Perera, vigsom |
|
28th June 2021, 10:35
| #13 |
| BHPian | Re: Restolicious Lockdowns | Mercedes W123 Interior Restoration DIY Hello Mr. Perera! That's one heck of a passionate clean-up job. Congrats. |
|
| (1)
Thanks
|
| The following BHPian Thanks jeeva for this useful post: | Mr.Perera |
|
28th June 2021, 11:22
| #14 |
| BHPian Join Date: Jan 2021 Location: Mumbai
Posts: 479
Thanked: 1,098 Times
| Re: Restolicious Lockdowns | Mercedes W123 Interior Restoration DIY Take a bow sir! By far this has to be one of the best restorations that I have read on the forum IMHO. The sheer attention to detail is amazing! I wish this car was in Mumbai so that I could have seen it in real life  Congratulations to you on this sweet sweet ride!  |
|
| (1)
Thanks
|
| The following BHPian Thanks AKSarkar1 for this useful post: | Mr.Perera |
|
28th June 2021, 12:31
| #15 | ||||||||
| BHPian | Re: Restolicious Lockdowns | Mercedes W123 Interior Restoration DIY Quote:
Quote:
Quote:
Quote:
Quote:
The 3M adhesive spray and all other consumables like the paint cans etc were brought by my brother from the U.S . He had got almost everything from there so that we didn't have to source anything from here. He was planning to give it to the restoration shop while we get it restored. Regarding the stereo we removed the Pioneer head unit that was fitted by the previous owner. Anyways it wasn't working properly and it looked pretty bad. We tried to buy the Becker unit that used to come in the W123 but couldn't get one. So we got a cover for the stereo head unit and kept that space blank. Since we are not much into listening music while driving the lack of a music system didn't seem to be much of a problem. And the rear speakers on the parcel shelf were also removed and we covered those holes with a Mercedes speaker cover to give that original look. You can see it in the photos above, even though it looks like a cream colour mosquito coil.  Quote:
 Quote:
Last edited by Mr.Perera : 28th June 2021 at 12:34. | ||||||||
|
| (4)
Thanks
|
| The following 4 BHPians Thank Mr.Perera for this useful post: | CrAzY dRiVeR, digitalnirvana, InControl, ph03n!x |
|