Team-BHP > Shifting gears
Register New Topics New Posts Top Thanked Team-BHP FAQ


Reply
  Search this Thread
13,992 views
Old 5th February 2010, 01:18   #1
BHPian
 
preetam_KORG's Avatar
 
Join Date: Sep 2009
Location: Kolkata
Posts: 700
Thanked: 385 Times
My Artwork : Re-modelling my Guitar

Guitar : Pluto Ovation N
Base coat : White Lacquer
Front Body : Custom Paintjob.
Time : 36 Work hours
Approximate cost : Rs 1500


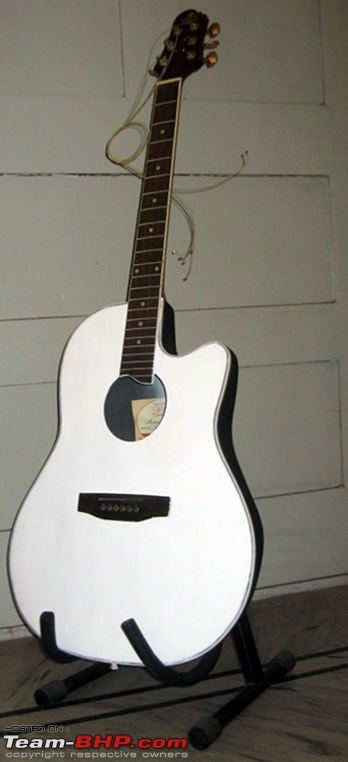
The base coat has been done by the repair shop. The white Lacquer has been spray painted on the guitar.

Rest of the work is going to be done by me. The process is starting today 4th Feb 2010.

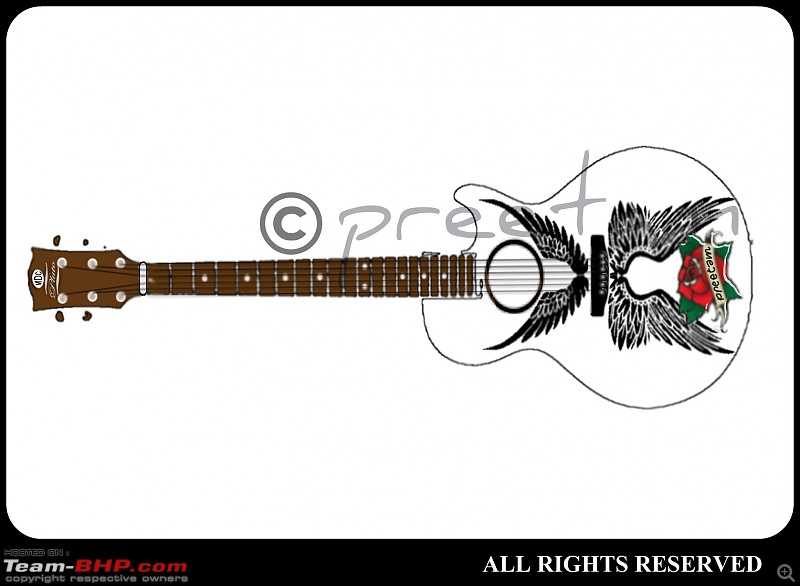
The custom work to be done is as shown in the rendered image.

The rosette in the middle ( the piece around the hole) is also under way. Will be finished in Black and copper.

The first set of wings on the upper part of the body will be finished next.

Note : As only acrylic colours are being used, optimum drying will be undertaken in order to avoid unnecessary smudge.
The build is one of a kind, hence airbrushing (commonly called spray painting is not being done.)


After the drying up of colour, the next set of wings on the bottom half will be completed, along with the bridge, which will also sport the same colour as the rosette.
The rose in between the set of lower wings will be done next. This is going to be tricky as this part will have other colours except black.

Once the three designs are completed, the whole guitar will be dried for 6 hours. This needs to be done, in order to ensure that no portion of the colour is left damp.

Streaks of gold and copper colour will be added on the edges of the wings, once the paint dries up completely.

Lastly I will add my signature, as shown in the rendered image and the build will be complete.


Let the pics do the talking now. Will keep on updating till finished.
Please let me know what you think. I would really appreciate criticism.

Part 1 : Rendered image of how the guitar should look after finishing.
Software : Photoshop CS2
My Artwork : Re-modelling my Guitar-design-pluto-logo-watermarked.jpg


Part 2 : My guitar with white lacquer.
My Artwork : Re-modelling my Guitar-white-stock.jpg


Part 3 : To be updated tomorrow in the evening after I'm back from college.

Last edited by Rudra Sen : 5th February 2010 at 06:27.
preetam_KORG is offline  
Old 5th February 2010, 01:25   #2
BHPian
 
better4worse's Avatar
 
Join Date: May 2007
Location: New Delhi
Posts: 302
Thanked: 2 Times

Guitar talk on a forum for cars and all good things....it can't get any better... can it ? will wait for you to ost more pics...
better4worse is offline  
Old 5th February 2010, 11:06   #3
BHPian
 
preetam_KORG's Avatar
 
Join Date: Sep 2009
Location: Kolkata
Posts: 700
Thanked: 385 Times
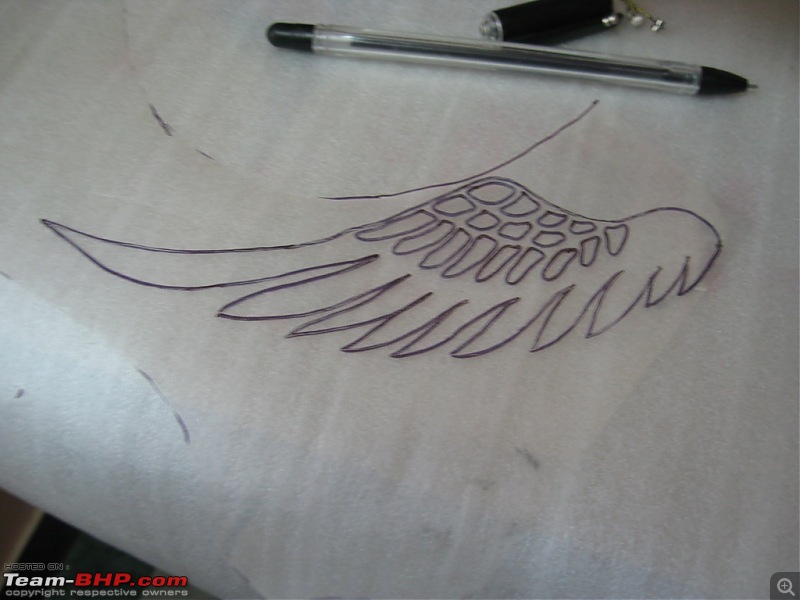
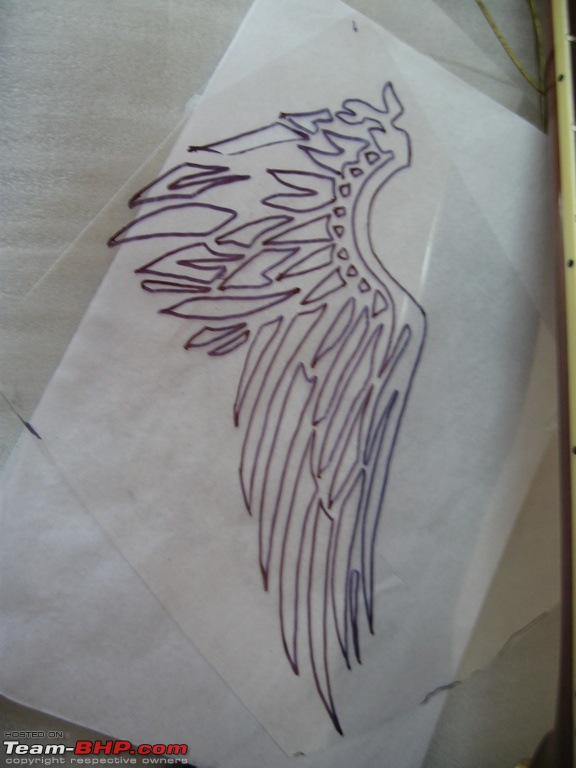
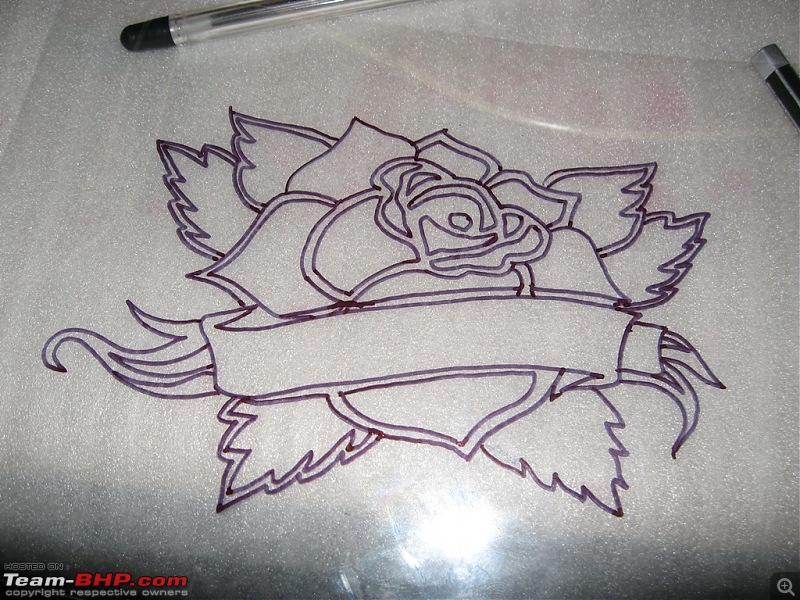
Part 3 : The Stencils

Materials used : OHP sheet and OHP Marker
Procedure : The imprint will be transferred to the guitar body using a simple ball point pen. The images will be traced on to the guitar body by simple press transfer.
Note : Because of the white base coat of the guitar body, carbon paper cannot be used which will smudge on the white body.

Stencil 1 : Wings on the upper half of the guitar body. Less intricate than the lower wings. Colour used will be Black (with Gold and Copper lining on the edges)

My Artwork : Re-modelling my Guitar-stencil-1.jpg


Stencil 2 : Wings on the lower part of the guitar, below the bridge. The work to be done will be more intricate. Same colours as the upper set of wings will be used.

My Artwork : Re-modelling my Guitar-stencil-2.jpg


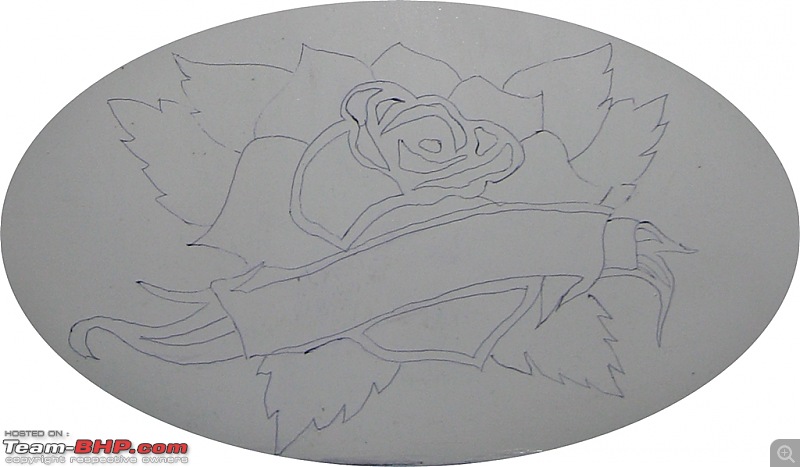
Stencil 3 : The rose between the lower set of wings. This will be the trickiest part as more colours will be used. Colours used will be : Red and Green (Black will be used as outline)
Signature line will be done in golden and the signature will be embossed in black at the end of the custom job.

My Artwork : Re-modelling my Guitar-stencil-3.jpg
preetam_KORG is offline  
Old 5th February 2010, 12:35   #4
BHPian
 
ajitkommini's Avatar
 
Join Date: Sep 2006
Location: Bangalore
Posts: 490
Thanked: 124 Times

Cool! waiting to see how this turns out.
ajitkommini is offline  
Old 5th February 2010, 12:46   #5
BHPian
 
Ripper's Avatar
 
Join Date: Jul 2007
Location: Mumbai
Posts: 260
Thanked: 35 Times

Wow. Do update the progress made.
Just one thing. Mask the bridge and the center hole(dont know what its called) because i see some white paint in there which wont look good when done.
Ripper is offline  
Old 5th February 2010, 14:26   #6
BHPian
 
preetam_KORG's Avatar
 
Join Date: Sep 2009
Location: Kolkata
Posts: 700
Thanked: 385 Times

Quote:
Originally Posted by better4worse View Post
Guitar talk on a forum for cars and all good things....it can't get any better... can it ? will wait for you to ost more pics...
Thank you.
It can, and surely will get better as you see the progress on this thread.
Will keep on updating till done.

Quote:
Originally Posted by ajitkommini View Post
Cool! waiting to see how this turns out.
Thank you. Even I am excited.

Quote:
Originally Posted by Ripper View Post
Wow. Do update the progress made.
Just one thing. Mask the bridge and the center hole(dont know what its called) because i see some white paint in there which wont look good when done.
Thank you.
Well,about that hole thing. As far as even I know that is called a "hole" and nothing more.

In the whole process, the guitar parts need not be masked as it will be hand painted. So there should not be any splatter.
Though, the bridge will be painted with the surrounding areas masked, in order to prevent unwanted hassles.
The people who painted the base coat had not covered the hole while painting so I guess, I will have to patch up the inside and turn it black again.

Note : The total time taken will be more than 36 hours I suppose because the drying process is taking more time than I had imagined.

Last edited by preetam_KORG : 5th February 2010 at 14:29.
preetam_KORG is offline  
Old 5th February 2010, 14:45   #7
BHPian
 
preetam_KORG's Avatar
 
Join Date: Sep 2009
Location: Kolkata
Posts: 700
Thanked: 385 Times
Part 4 : Imprints, and Part 5 : Rosette

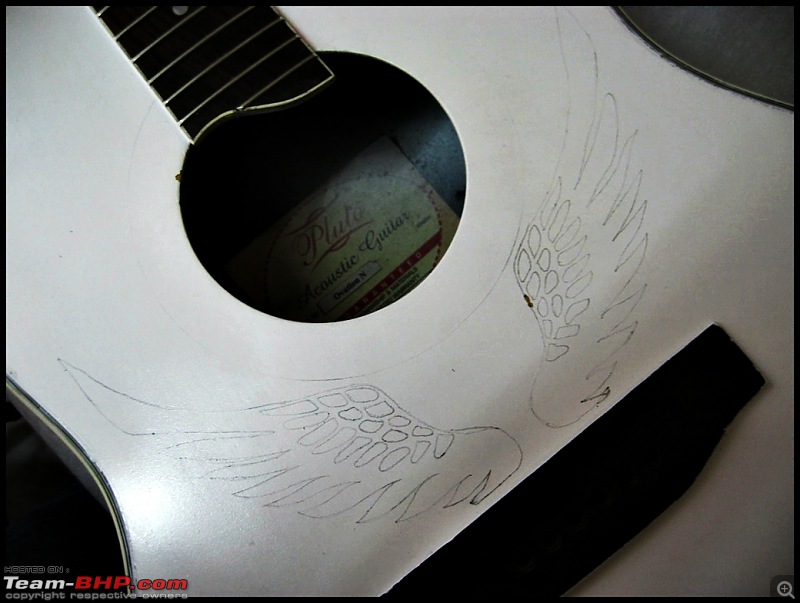
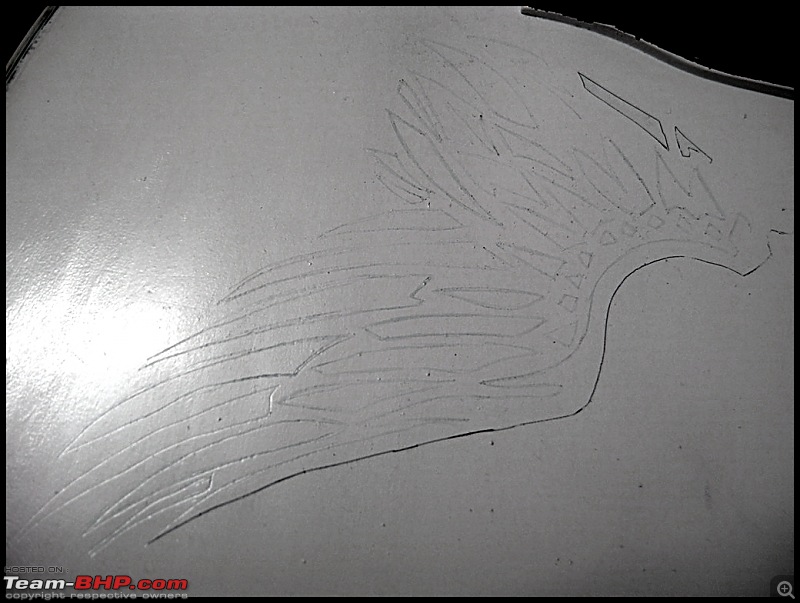
Here are the imprints people.
Transferred them some time back, so here's the update.

Upper Wings :
My Artwork : Re-modelling my Guitar-img_0221.jpg

Lower Wings :
My Artwork : Re-modelling my Guitar-img_0236.jpg

Rose :
My Artwork : Re-modelling my Guitar-img_0242.jpg


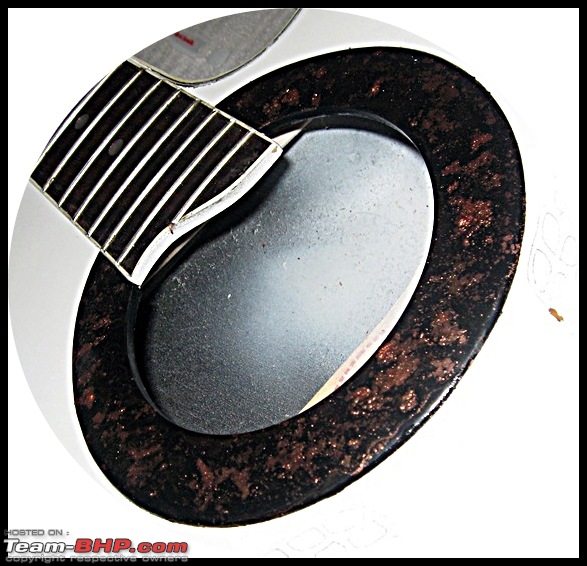
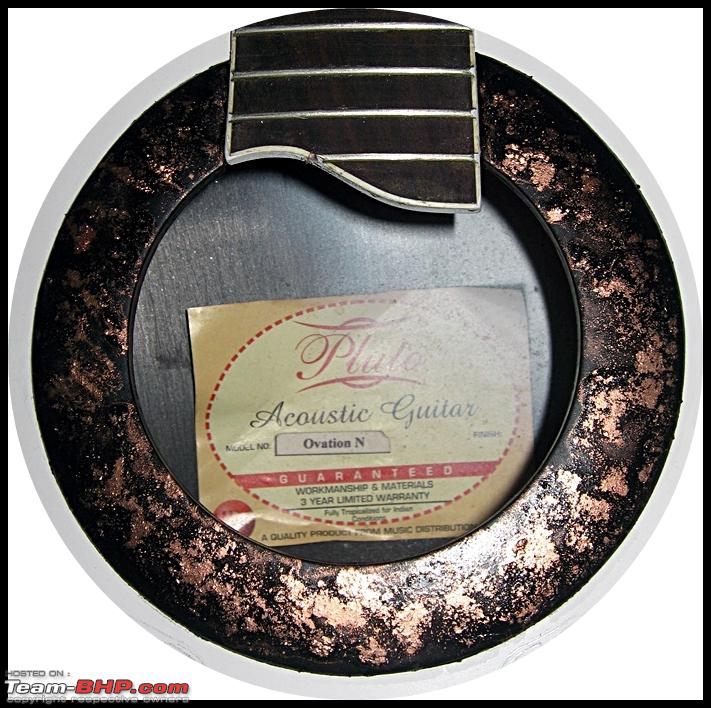
The rosette (center piece) is complete. The bridge is still drying up. The colours used are Black and Copper.


Rosette view 1 :
My Artwork : Re-modelling my Guitar-img_0230.jpg


Rosette view 2 :
Name:  IMG_0232.JPG
Views: 2957
Size:  412.1 KB


Part 6 : Upper wings. To be updated by late evening. Till then, See you.
preetam_KORG is offline  
Old 5th February 2010, 16:12   #8
BHPian
 
Alter_Ego's Avatar
 
Join Date: May 2009
Location: Melbourne
Posts: 444
Thanked: 113 Times

Quote:
Originally Posted by preetam_KORG View Post


Well,about that hole thing. As far as even I know that is called a "hole" and nothing more.
For accoustic guitars its called a sound hole and for violins and cellos its called a f-hole.

By the way preetam great going.
Alter_Ego is offline  
Old 5th February 2010, 16:34   #9
BHPian
 
preetam_KORG's Avatar
 
Join Date: Sep 2009
Location: Kolkata
Posts: 700
Thanked: 385 Times

Quote:
Originally Posted by Alter_Ego View Post
For accoustic guitars its called a sound hole and for violins and cellos its called a f-hole.

By the way preetam great going.
Thank you.

Even some acoustic guitars have a f-hole.
Mostly semi-acoustic guitars have it.
Some Greg Bennett guitars also have it.
preetam_KORG is offline  
Old 5th February 2010, 16:45   #10
BHPian
 
Alter_Ego's Avatar
 
Join Date: May 2009
Location: Melbourne
Posts: 444
Thanked: 113 Times

Quote:
Originally Posted by preetam_KORG View Post
Thank you.

Even some acoustic guitars have a f-hole.
Mostly semi-acoustic guitars have it.
Some Greg Bennett guitars also have it.
Indeed true but the name's copied over from violins and cellos.
It was always a sound hole

By the way I will hand over my Accoustic too to you.Can you make it into a similar beauty as you did to yours

Last edited by Alter_Ego : 5th February 2010 at 16:47.
Alter_Ego is offline  
Old 5th February 2010, 17:03   #11
BHPian
 
better4worse's Avatar
 
Join Date: May 2007
Location: New Delhi
Posts: 302
Thanked: 2 Times

I see the "Hole"...and now that you have the strings off the neck !

I suggest you remove that Pluto sticker, wonder if there is a nice way to remove such stickers off the guitar. I once gave my accoustic for repairs to Bharat music shop. Apart from shoddy repair work, they pasted two ugly looking stickers which have left some ugly stains on the wood (excruciatingly painful I say ...Aaaaargh!)

PS: nice work on the transparent slides, wish you'd put little bird on the fret board...A la Mark Tremonti
better4worse is offline  
Old 5th February 2010, 17:09   #12
BHPian
 
preetam_KORG's Avatar
 
Join Date: Sep 2009
Location: Kolkata
Posts: 700
Thanked: 385 Times

You can certainly count on me for that buddy. Come over to my place sometime and you can check this guitar out. Believe me its gonna look really nice.
preetam_KORG is offline  
Old 5th February 2010, 17:13   #13
BHPian
 
preetam_KORG's Avatar
 
Join Date: Sep 2009
Location: Kolkata
Posts: 700
Thanked: 385 Times
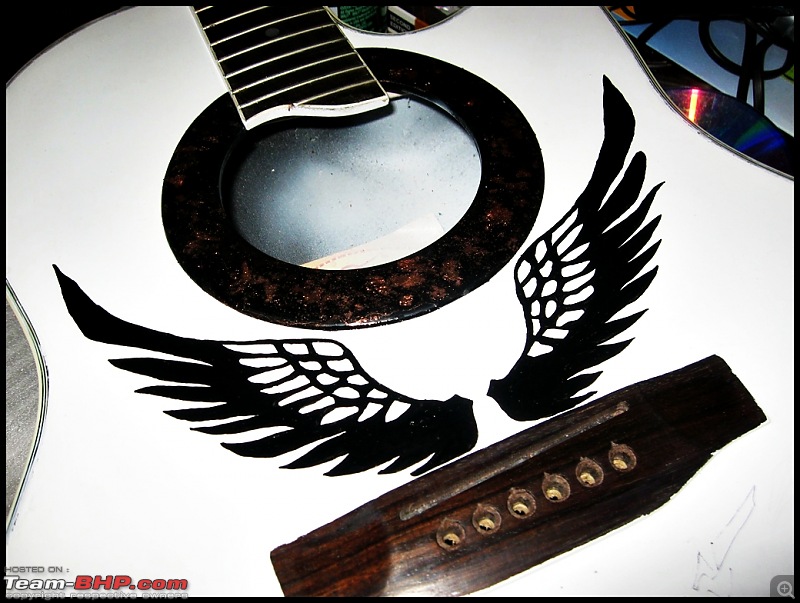
Part 6 : Upper wings

Well I said late evening in my last post, but I've completed the upper wings now.
Here it is. I will say that it looks really nice. Let me know what you all think.


My Artwork : Re-modelling my Guitar-img_0238.jpg

Part 7 : Lower wings and Bridge. Update at 8.
preetam_KORG is offline  
Old 5th February 2010, 17:21   #14
BHPian
 
Alter_Ego's Avatar
 
Join Date: May 2009
Location: Melbourne
Posts: 444
Thanked: 113 Times

Brilliant.Just can't wait now to see it completed.Post the updates soon.
Alter_Ego is offline  
Old 5th February 2010, 19:16   #15
BHPian
 
preetam_KORG's Avatar
 
Join Date: Sep 2009
Location: Kolkata
Posts: 700
Thanked: 385 Times

Quote:
Originally Posted by better4worse View Post
I see the "Hole"...and now that you have the strings off the neck !

I suggest you remove that Pluto sticker, wonder if there is a nice way to remove such stickers off the guitar. I once gave my accoustic for repairs to Bharat music shop. Apart from shoddy repair work, they pasted two ugly looking stickers which have left some ugly stains on the wood (excruciatingly painful I say ...Aaaaargh!)

PS: nice work on the transparent slides, wish you'd put little bird on the fret board...A la Mark Tremonti
I have a penchant for perfection and one-of-a-kind art material so I don't leave anything at risk. I especially like to do any detailing myself due to the fear of the shoddy quality of repairs at most places. The white lacquer has been done well though, I must say.

As for the Mark Tremonti part, I love that guitar dude. The guitar looks especially beautiful in the video of "With Arms Wide Open".

Anyway about my guitar, I'm not very intent on modifying the fretboard as that could lead to scratching in the future. That will not look nice in the long run. This guitar will not be used for much playing though, will be used specially in shows and stuff like that. Will still try something on the fretboard though, as per your suggestion.
Thanks buddy!

Last edited by preetam_KORG : 5th February 2010 at 19:21.
preetam_KORG is offline  
Reply

Most Viewed


Copyright ©2000 - 2024, Team-BHP.com
Proudly powered by E2E Networks