| |||||||

| Search Forums |
| Advanced Search |
| Go to Page... |
 |
| Search this Thread |  28,448 views |
 10th June 2018, 18:19
| #1 |
| BHPian Join Date: Apr 2016 Location: Chennai
Posts: 101
Thanked: 200 Times
| Restoring a 1959 Morris Minor Disclaimer: This is a long read, so buckle up, grab a bucket of popcorn and settle in. This was done in the summer of 2016, I never had the time to complete writing this thread, hence the late post. To begin with, a short backstory. The car in question here is a 1959 Morris Minor. Due to unforeseen circumstances that are unknown to me, Its original engine and gearbox have been replaced with a maruti gypsy engine and gearbox. The car has sat in an open garage for close to 15 years due to a broken windshield that could not be sourced. The car belongs to a friend of mine and he asked me as to whether we could restore the car back to a running condition, on a budget. I thought to myself, why not !? Before I begin, I am the type of person with a deep passion and respect for cars. If something’s not right, it’ll drive me crazy. I always follow the saying “If you’re doing something, do it right or don’t do it at all” and I’m also the type of person who’ll only put OEM parts on a car. I really do not like any “juggad” work, however, yes in certain circumstances, if there’s no other option or alternative, then it has to be done. I always prefer a car that is mechanically sound followed by fabulous paint work and well kept interiors. Cosmetic aspects always come in a little later, once I’m happy with everything else. I don’t really mind little battle scars here and there, as this will keep the other warriors away from giving me new ones. My friend on the other hand is well, the opposite of me. He’s not a car guy and he’d rather have pretty looking car before sorting out the mechanical aspects. To him, cosmetics are a priority. His grandfather owned this car, he also lived out of town from where I reside, so I packed up my bags, all my tools, a steely grit to get the car going and I was off! Honestly speaking, we were desperately short on time and my friend was under the impression that this could be done in a week’s time! while I tried to explain to him that for this project to be complete, it’d take 6 months at best, a year, if not to sort out all the niggles. I did set I time frame to myself of getting this car running in at least 10 days. This was my target. My friend set an initial budget which was soon thrown out of the water. Of course in true team BHP spirit we went way over budget and still climbing.   Everyone at his house was very eager to see this car running and would constantly ask me for updates regarding the same, everyday, every time they could get a hold of me. They all wanted to know if the engine would start on that particular day or not and if we could get the car moving on that day. I felt really bad, every time, I had to tell them that it wouldn’t today, possibly within the next two days. I really had my work cut out for me. ASSESMENT Mechanical aspects The Two Of us pushed the car out of the garage and got to work. Upon opening the bonnet we realized all the rubber parts were brittle and broken/torn. We had no idea as to weather the engine would even turn over. We needed to manually turn the engine with the help of a ratchet. The fact that the engine oil, filter, and all other vital liquids would need to be replaced was quite obvious. Other concern were the brake lines, fuel lines, the carburetor, the radiator and of course, the question of the availability of parts. Electrical Aspects No close inspection was needed to see that the wires were chewed up and that the headlights would not work. Heck, we didn’t even have a battery in the car. We needed a new battery to begin with. Considering that neither my friend, nor myself had any experience with electrical wiring and what not, we decided to get some help. Cosmetics Most of the hood ornaments ,headlight bezels had some surface corrosion and needed to be recoated. That was really not my concern at that point. I insisted that he not venture into cosmetic items at this point of time. Interiors Ah! The interiors. The seat fabric(looked like it used to have a thin rexin coating above the fabric) was in good nick albeit the rexin on top had brittled and had gone powdery . Carpets and floor mats were in good nick. The headliner was almost perfect, until we realized that either a squirrel or a rat had chewed up a few holes along the sides. Not Surprising considering the fact that there was no windshield on there for over 15 years. Fuel Tank Initial impressions were that it was alright. Again, initial impressions. Details to follow. Frame Of The Vehicle For a Car from 1959, Wow it was in good nick. No major rust in the frame , it looked solid .the only rusted areas were the lip below the trunk lid and the underside of a rear door . We decided to leave the bodywork as it is and get it running first. The floor pan had seen better days, evidence of patch work, surface rust and small holes riddle the floor completely. With the assessment completed, work began. PROCESS The real challenge came when we had to remove all the rubber hoses. The fact that the car sat for so long with all the essential liquids still present, the coolant had crystallized resulting in the hoses sticking to the radiator and their respective mounting points. Some careful prying with a screwdriver and some wiggling later, off came the hoses. Space to work was at a premium, so out came the air filter. Trying to figure out how to get the air filter housing unit off was a challenge in itself. A lot of pondering later, there were just a couple of bolts holding the assembly on the inner side of the fender. Luckily since the fender had no cladding, it was easy to get them off. A bit tricky, but easy. All efforts put in seemed to work flawlessly until I came to the inlet hose on top of the radiator (the one near the cap). The weld had become so weak at that particular point that it just snapped off.  With all hoses out of the way, next line of action was to see if the engine would even turn over. This was my biggest concern going into this project! Being a rear wheel drive car, the engine was mounted longitudinally, making clearance a major issue. Since the radiator was in the way, it had to come out. 4 bolts with nuts at the back. A couple of them were placed in such inaccessible areas where one has to be extremely careful while removing and fixing the respective bolts. Again, there was no room for maneuverability. I took my time and tried to be as careful as possible. With the retaining bolt and nuts out of the way, out came the radiator with some careful maneuvering. There were 2 connectors which needed to be disconnected. One for the thermostat and another for the radiator fan. With the radiator out of the way, there was enough clearance for a ratchet. The bottom most bolt (a.k.a the crankshaft bolt) turns the crankshaft, which in turn turns the pistons .A 17mm socket, did the trick. The moment of truth soon approaching, the viability of this project hanging in the balance, heart pounding, anxiety levels soaring, sweat pouring, legs trembling, having mustered up the courage and resigned to my fate, I turned the ratchet, and much to my relief, It turned over!! After that it felt as though a massive weight was lifted off my shoulders. One complete revolution later, This was the cue for the go ahead for all the remaining work to be done. Engine Firstly, a list was made as to what needed to be replaced/Repaired with respect to the engine to get it running. The primary list was as follows, 1.Engine oil 2.Oil filter 3.Spark plugs As I could not get a hold of hydraulic jacks, like the ones they use in garages and tire stores, I started to ponder about alternatives. Scissor jacks were out of the equation due to safety concerns. I however did manage to get hold of a couple of screw jacks. Jacks procured, I ran into another problem. I couldn’t find the reinforcements for the jacking points! Plus I was worried about how well the metal would hold up. Some scouting later, I found 2 areas suitable for the jack, placed them under the car and evenly jacked up both sides. It did take some time as I was alternating sides, trying to get to both jacks to elevate the car evenly . I got it to a height that would be manageable to get the drain plug out. Again, I was not too keen on getting the car to a height where I would be able to get comfortably under the car. PLEASE NOTE: NEVER go under the car to work on something while its on scissor jacks. The drain plug was either a 20 or 21” bolt (pardon me, I don’t remember the exact size). I tried loosening it with my ratchet and none to my surprise there was no movement. Remember this bolt was left untouched for over 15 years. Considering the fact that I don’t have a breaker bar, I took a thick, long metal pipe, attached it to the end of my ratchet and tried again. It came out without a fuss. I placed a pan under a drain plug and loosened the nut by hand. NOTE: Remember never to place it directly under the drain hole but a little forward as the oil will flow in more of a parabolic path during the initial stages. This was not a major concern for me as the drain hole was perpendicular to the ground. Yet I followed the same. The oil was thick, viscous, sludgy and really black. It took almost an hour to completely drain out. It looked almost like diluted tar. I let the car sit overnight for every drop of the oil to drain out plus I had other priorities to attend to at that time. Next on my priority list was to get rid of the filter. Got up early the next day and tried to get it out. I tried a pair of crocodile pliers. I failed. The next thing I did was a rather desperate attempt to get the filter out using a pipe wrench. I failed again rather miserably. It was seriously stuck. I wasn’t keen on breaking the filter off or using the screwdriver and hammer method. My friend suggested calling a guy from a FNG, and rather unwillingly I finally agreed after a lot of discussion. The guy came, and the first thing he did was whack the filter off with a flathead screwdriver and a hammer. With that out of the way and necessary parts procured. I put back the drain plug, applied a smear of oil around the inner circumference of the oil filter and fitted the filter, hand tight. This particular engine uses 3.5l of oil. I carefully poured in the oil constantly measuring the level using the dipstick. Hand rotated the engine 5 times (5 revolutions) to circulate oil to the various components. NOTE: An engine running below the max mark wont affect the engine in comparison to one running over the max mark. I made a colossal mistake of not replacing the sump gasket while I was at it  . 4 spark plugs out, 4 fresh ones in. Same HT leads used. . 4 spark plugs out, 4 fresh ones in. Same HT leads used.BRAKES I noticed the Brake master cylinder had sized up. Sent it to the FNG guy for an overhaul. I knew the slave cylinders would need replacement but postponed their replacement for a little later. Got the Master cylinder back, fitted it to the car and flushed the system with DOT3 brake fluid. There were 3 bleed points on the car. I started with the one at the furthest from the brake pedal. The stuff that came out was rather dark, flushed till the solution in the bleed tube became pink. The two points in the front were clogged, plus one of the bleed nipples refused to open. I just left it as such for the time being. Brakes to be continued later on. EXHAUST The whole exhaust was held on by 3 rubber mounts which had gone brittle and sheared off. These surprisingly were mounted using nuts and bolts. Having purchased 3 of these bushings and gotten a mouthful of dust, rust and whatnot on my face and in my mouth, and a few battle scars later, with some difficulty mounted the exhaust back to where it belonged. Radiator I tested the radiator for blockages using a garden hose. The radiator was clogged. Sent it out to be cleaned as a temporary solution. Also got the snapped off mouth welded back. The cleaning didn’t help much as it was still pretty clogged, and I knew, that we’ll have to be replace the radiator. As I searched for a new one I realized that “off the market”, ones sold today even by OEM’s are made of plastic bodies and cannot be tweaked, And the lack if clearance in the engine bay didn’t help either. I had to have one custom made, but decided to take a swing at it and see if the old one would work. P.S. It didn’t, we ended up buying a new custom made one. INTERIORS Like I had mentioned before, the interiors were a bit powdery and needed attention. The seats needed to be taken out of the car along with the door cards and the center console. Four bolt and nuts held the front seats to the floor. The back seat popped out easily and the backrest was held on by 2 nuts. Unsurprisingly, we found what looked like nests, either from squirrels or rats under the back seat, and on the part of the floor under the back seats. We removed all the seats out, including the center console, which meant disconnecting a few wires for the stereo, and with that out came the carpets. We set aside these items along with the door cards, handed them over to the upholstery guy and got cleaning. 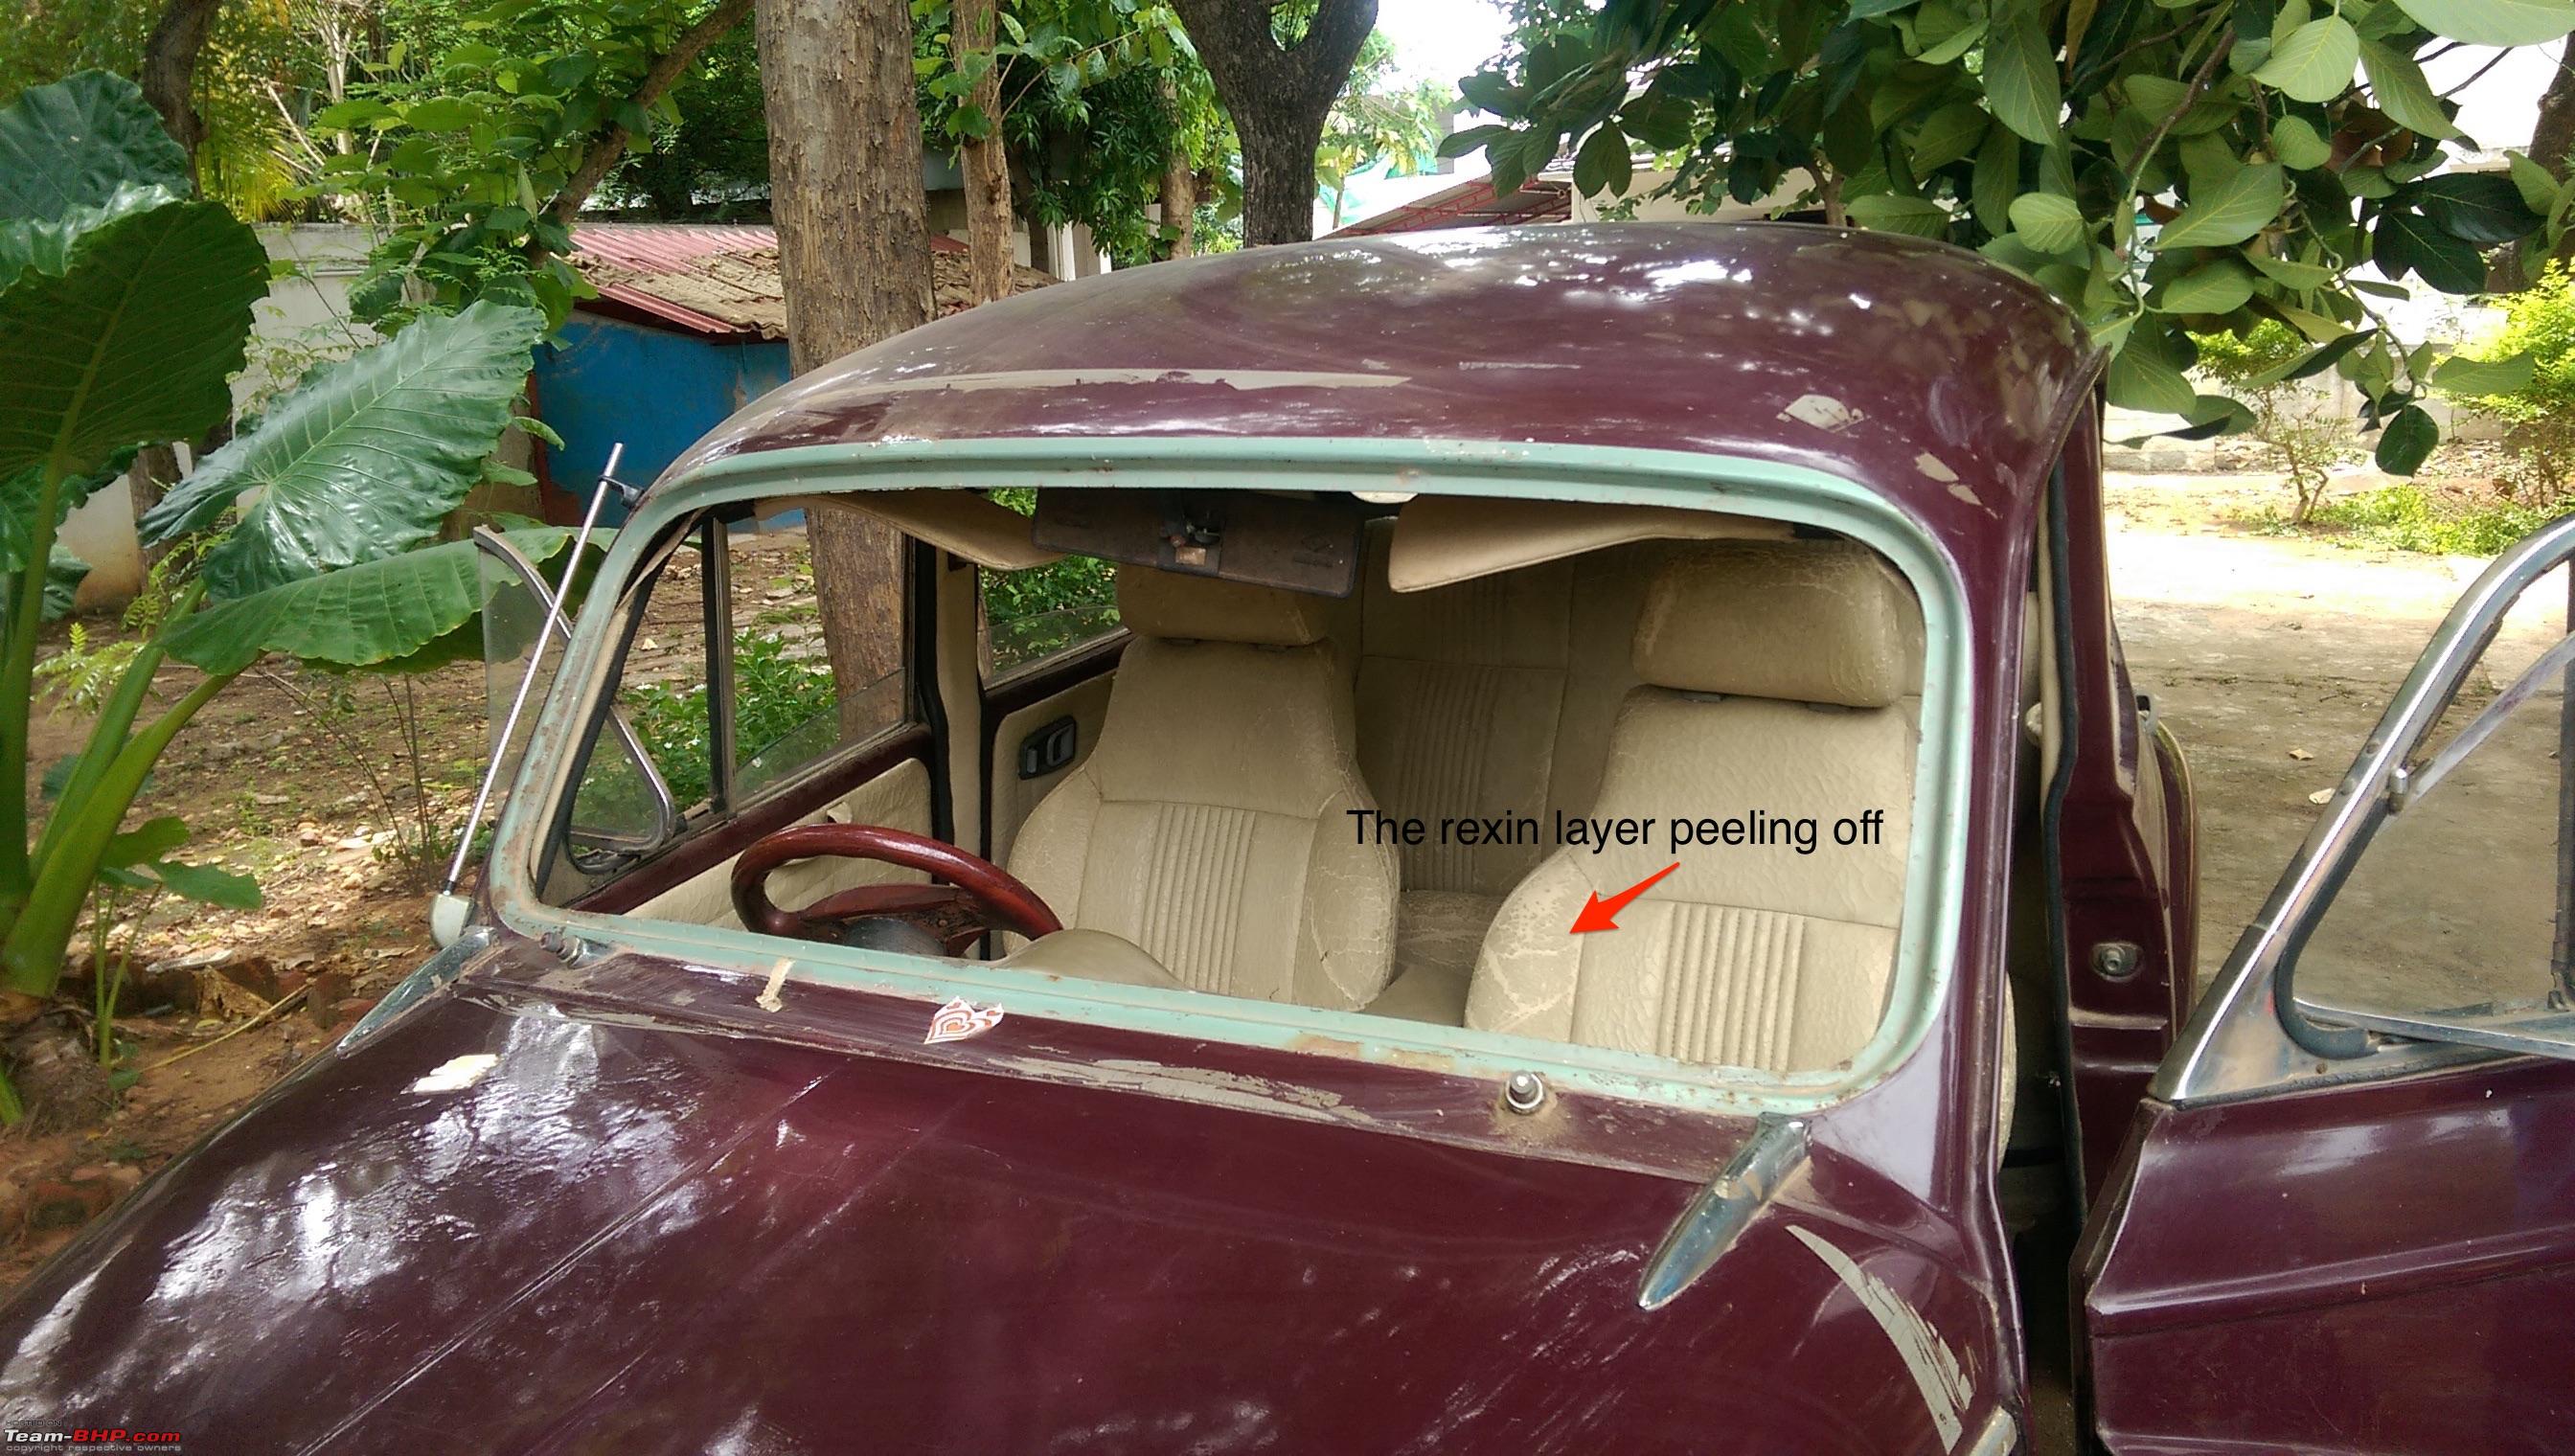 Housekeeping? We put on a pair of gloves, face masks and eye protection, took an empty 25l paint bucket, broke out the vacuum cleaner and got cleaning. what came out was nothing short of astonishing! The nests alone took up 2 full buckets. After that we got vacuuming. Out came dust, dirt, leaves, bits of broken glass (Read: Shattered Windshield), and the dried carcasses of 2 rats hidden in the frame. We had to empty out the vacuum cleaner thrice as each time it became full. 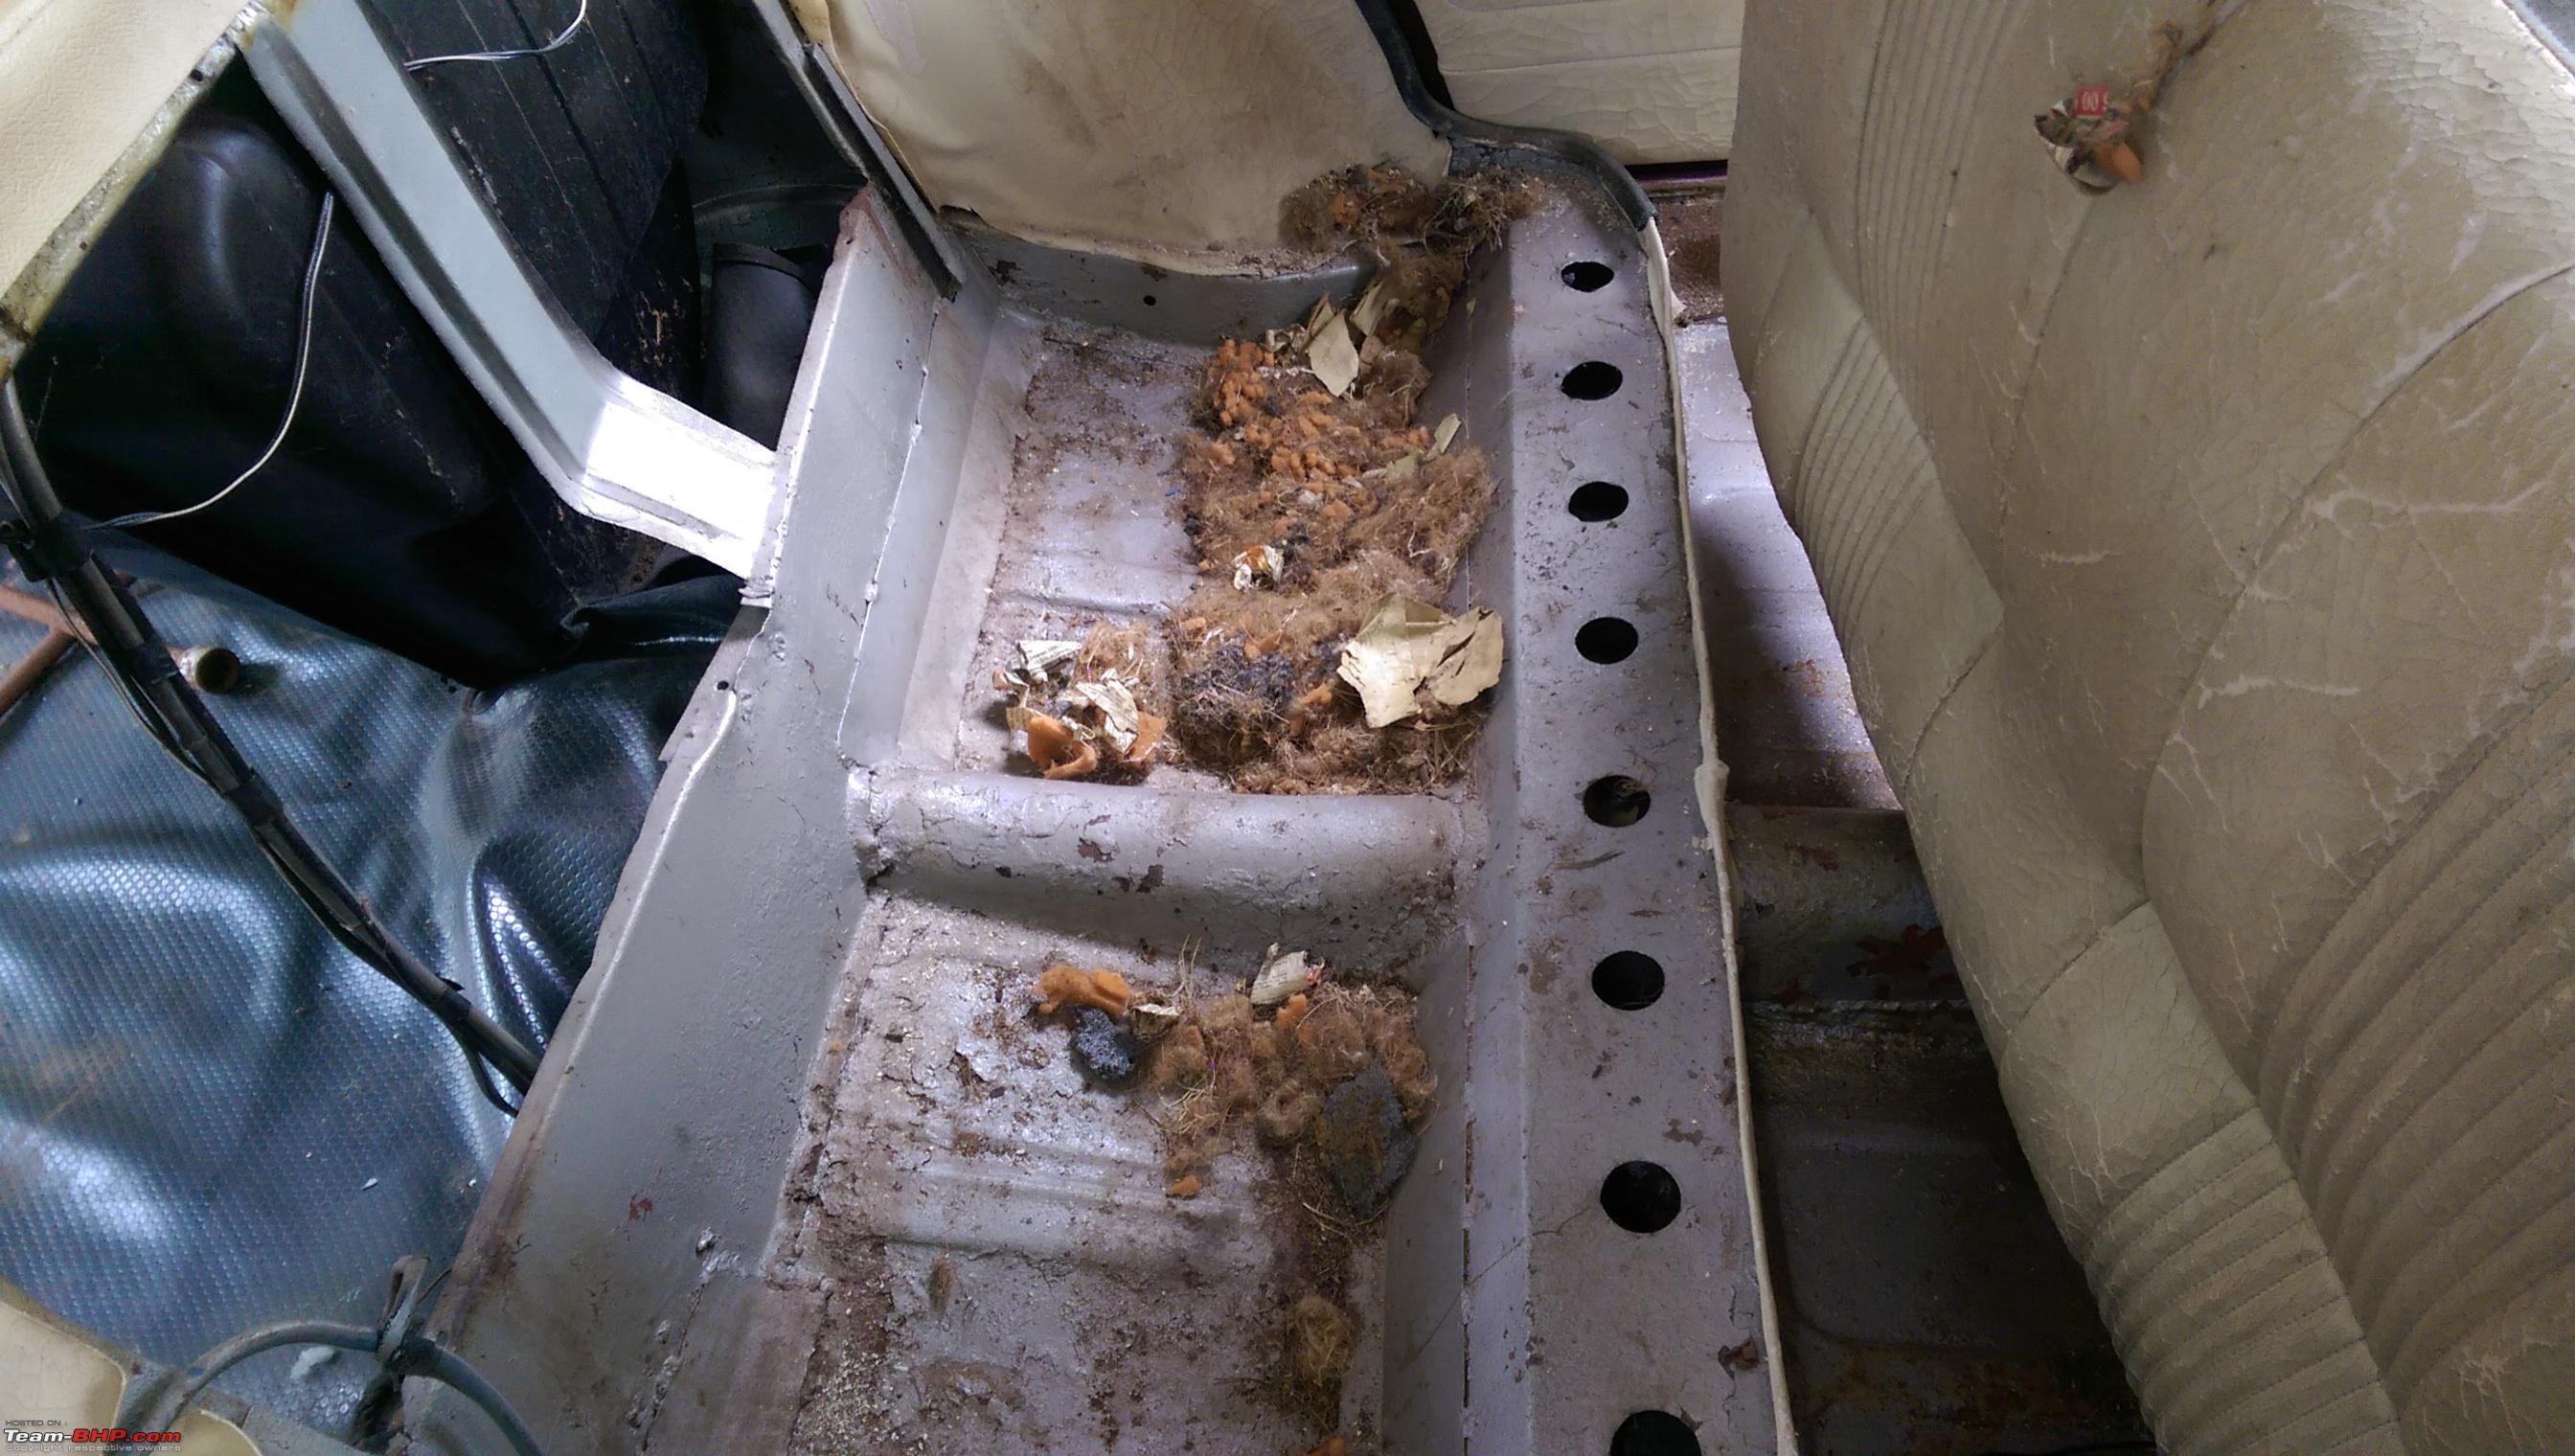  THE FLOOR The floor was surprisingly in good condition considering the age of the car. I could see signs of some patch repair work here and there with some surface rust. 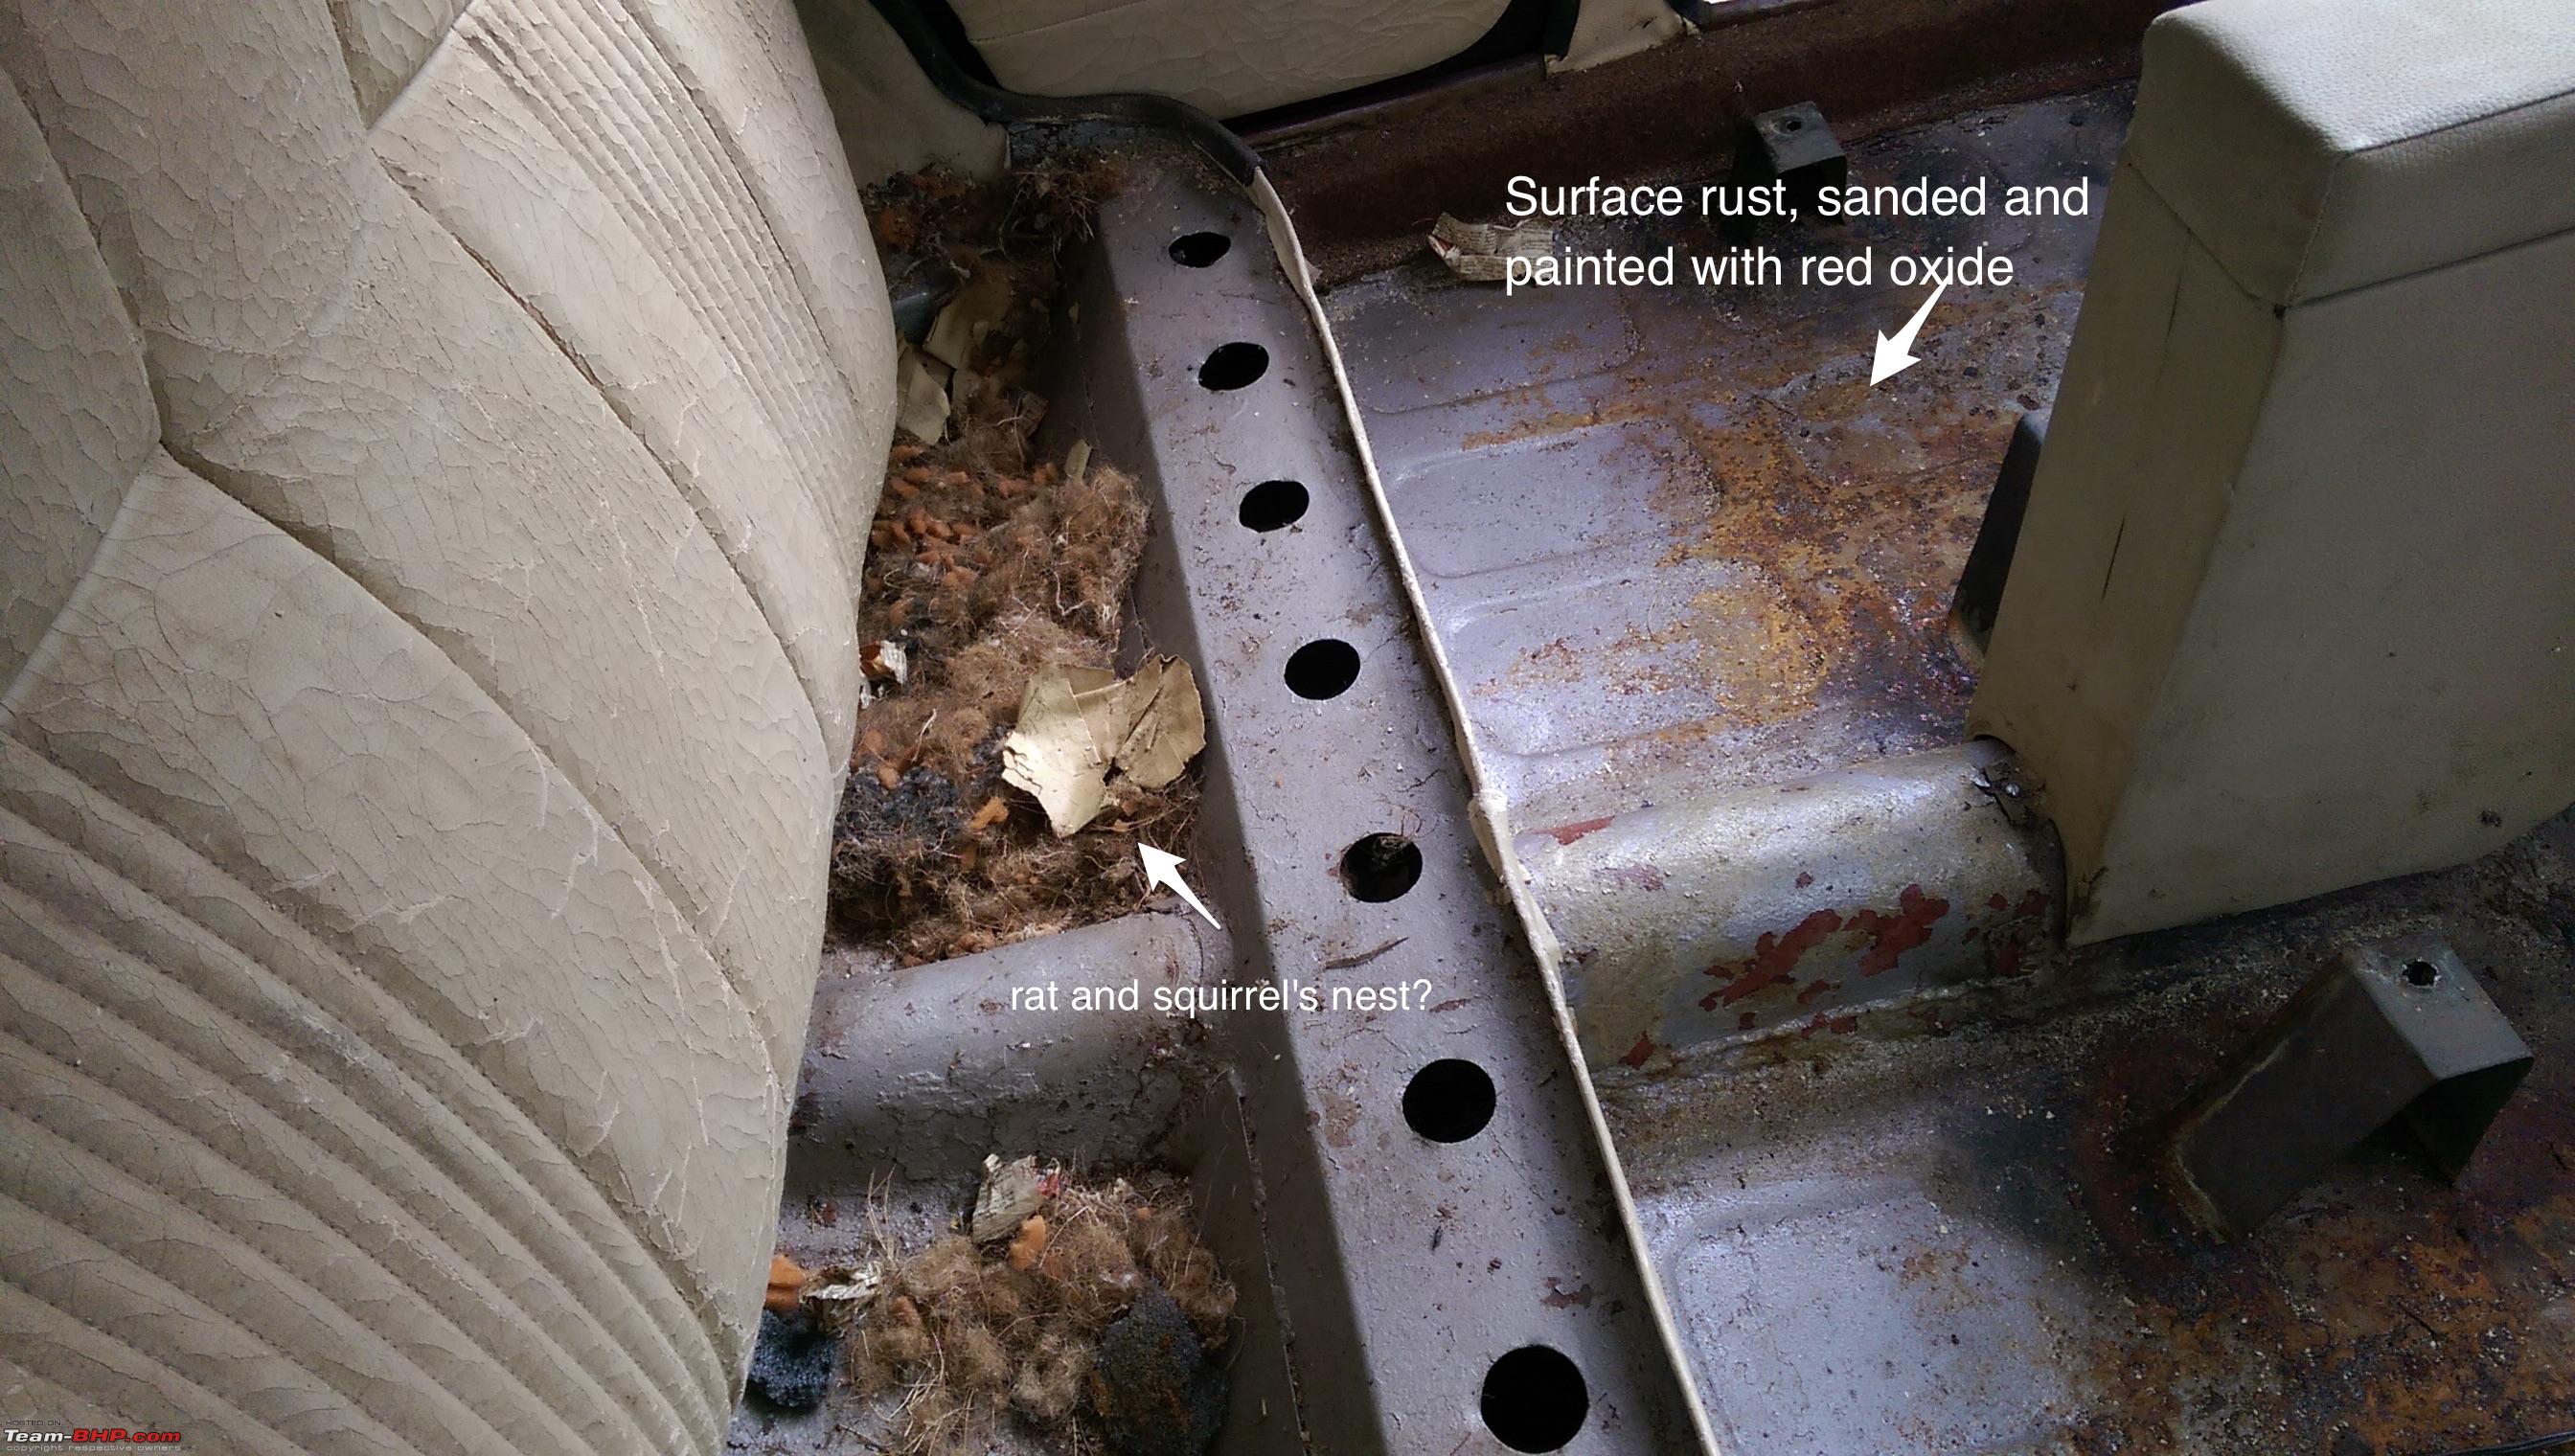 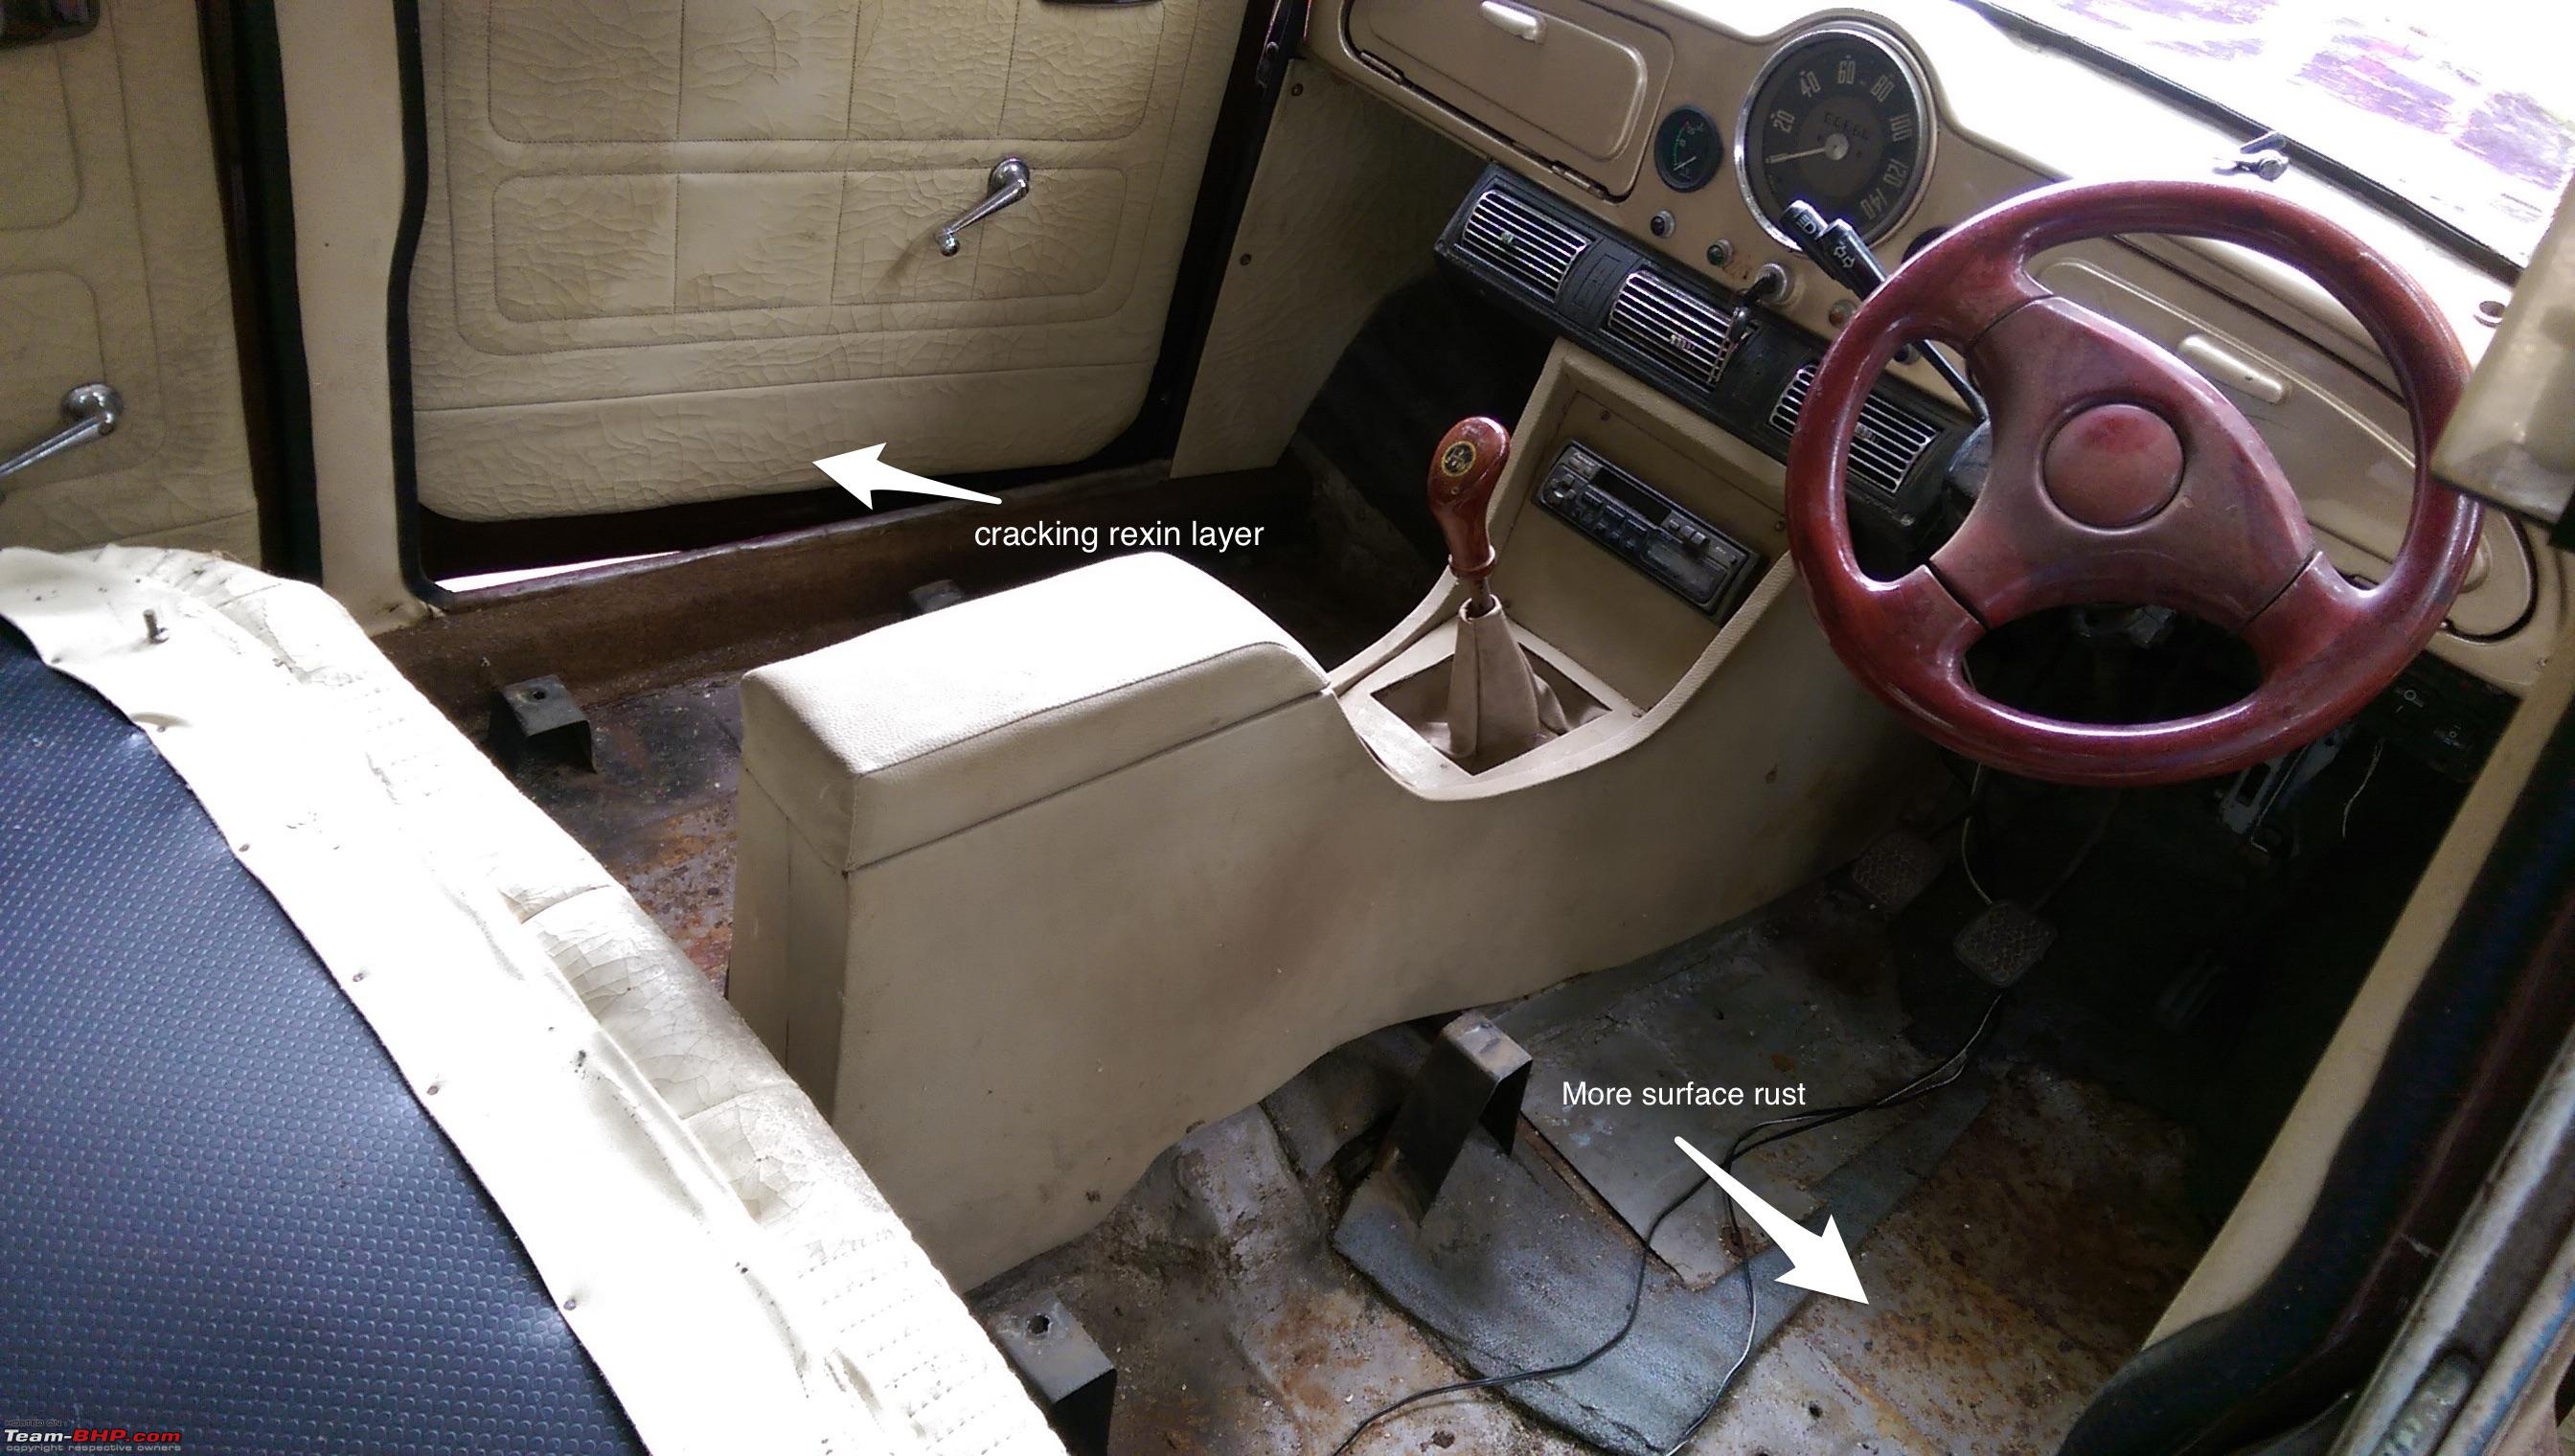 I decided to paint the floor of the cabin and the boot with red oxide paint which was a seemingly good option considering the lack of time and budget. Scouring for red oxide paint on a Saturday night at 21:00hrs is not an easy task considering we weren’t in a metropolitan city. Managed to get hold of a liter of paint, some thinner, and a couple of brushes. Mask, goggles, and latex gloves on, began the work of sanding down the whole floor pan. Better the prep, better the end result. A hour or so rolled by and with no visible traces to surface rust, on went a generous layer of paint in every nook and cranny. The floor was let to dry overnight. Fuel Tank The fuel tank was held on by just a bolt-nut and a flat metal clamp. With The two hoses disconnected and a couple of clamps removed the tank was out. Four 7mm nuts held the cap of the tank. With the cap removed, I overturned the tank and chunks of rust came out. I made arrangements for the tank to be rinsed with diesel and dried after. BATTERY There was no battery in the car. Took a battery from another car at home as a loaner till we purchased a new battery. ELECTRICALS In all honesty, I’m not really the right person to be messing around with the electrical’s of the car, let alone my friend. We called a local FNG guy to sort out all the electrical’s. A couple of hours and he was done. Everything was in working order. New Windshield anyone? Talk about a challenge, long story short, we got a new windscreen! 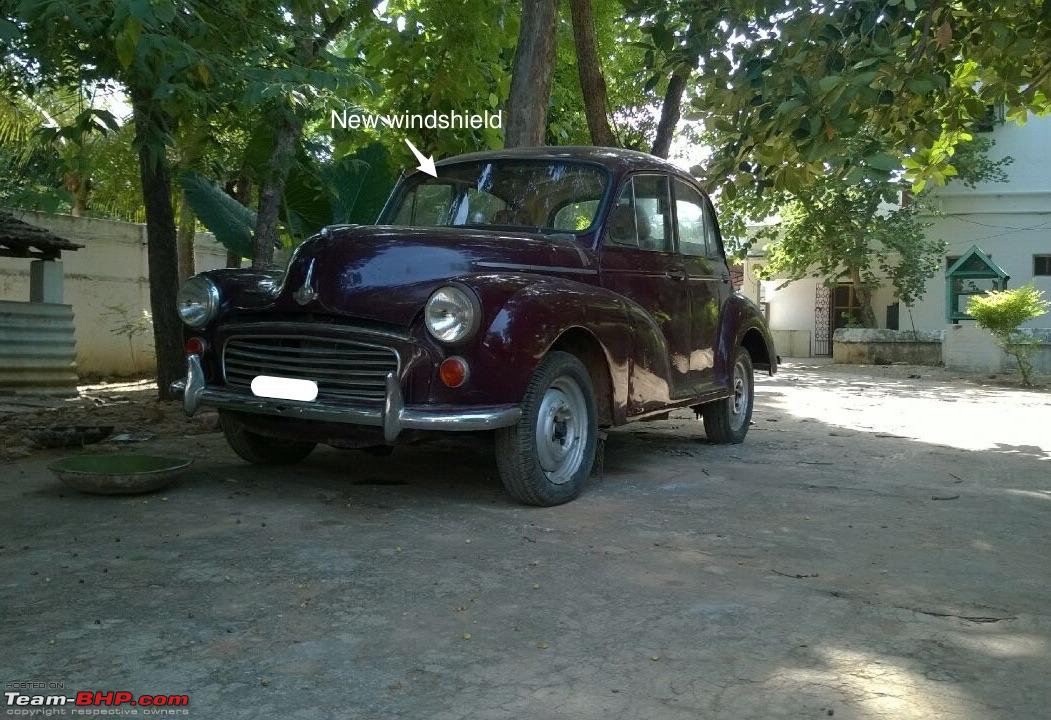 THE MOMENT OF TRUTH-(ROUND 1) Having received the fuel tank and the radiator back, I put everything back together in its respective places, new hoses, the whole 9 yards, filled the radiator with coolant and filled 5 litres of petrol in the fuel tank. Connected the Loaner battery, Checked and rechecked all connections. Having a watchful eye and ear, I turned over the key. The engine was cranking, but not turning over. Rechecked all the connections once more, sucked the fuel lines to make sure the lines were not blocked. And for those who have been wondering what petrol tastes like, it tastes like a mixture of Vaseline and acetone accompanied by a strong pungent burning sensation that remains for quite a bit. Attempt no.2 same result. With the second attempt, coolant had circulated around the cooling system, thus unearthing a major leak in the inlet head. TROUBLESHOOTING Took off the water inlet head and the carburetor to have them overhauled. Estimated time was about 3-4 days. Meanwhile the next morning I noticed a fuel leak all over the back of the car. Immediately pulled out the fuel tank only to notice it was riddled with tiny pinholes. Drained the remainder of the fuel, let the tank dry and sent it off to be patched up. THE MOMENT OF TRUTH-(ROUND 2) With the inlet head, carburetor and fuel tank back, I fitted them back , filled the radiator with drinking water this time, petrol back in the tank and turned over the key. Surprise, surprise everything was not A-Okay! It didn’t fire. TROUBLESHOOTING There can be 2 major possibilities for an engine not to turn over. 1.lack of fuel supply 2.lack of ignition from the ignition system From What I could make out at that point was that fuel was reaching the carburetor. I then Pulled out one spark plug, connected its HT lead and turned it over. No spark. Possible scenarios, 1.Ignition coil 2.HT leads 3.Distributor cap Replaced the ignition coil and tried again, to no avail. Had all the wirings checked to make sure the ignition coil was receiving power. Went ahead with cleaning the distributor cap Distributor cap cleaned, I took another go at starting it. No avail. A tiny tweak to the delco later, and tediously checking each and every plug for a spark by physically looking at each one outside the cylinder, connected to the HT leads, there was no spark, or it was intermittent to say the least. Changed the HT leads for new ones, and did the same procedure all over again, it seemed to work. OH FOR CRYING OUT LOUD JUST START ALREADY! With the interior still not bolted back in the car, I grabbed a small plastic stool, put my foot hard down on the A-pedal and cranked the car to glory at the same time pumping the A-pedal as much as it would go. For those of you who have watched the likes of Overhaulin, Fast N’ Loud or any other motoring show and have seen fresh motors that just wont start for some reason or another, followed by the celebration of joy and relief once it finally does, well let me tell you, Boy, those celebrations are not faked cause I know what it feels like to live in that moment! Cause boy did she start running like a champ! Everyone in the house dropped everything in that very moment that they were upto and rushed to the back of the house, rejoicing the utter fact that it was running again. My friend, still high on adrenalin from the start decided to tell me to get the car moving as he joined me in the vacant space of where the passenger seat used to be. As I depressed the clutch and shifted into first using the leaver with no gearknob, I always suspected that the clutch might be jammed. No pressure I thought as everyone watched, released the clutch ever so slowly, trying to find that bite point, much to my misery, even at almost half clutch, it just didn’t bite. Hating to be the bearer of bad news and looked over to my friend and said, “I think the clutch is jammed” and much to his disappointment as he got out of the car and shut the door, my audience still watching, I decided that if im going down, im going down swinging, and in that moment as I tried every method in and out of the book to get the damn thing to bite, blow me down, it did, and as the car stared to move, I yelled out to my friend, whom I’ve never seen happier till this day, opened the door and hopped into the still moving car. As I drove around the house, I realized a few things 1) Everyone was truly happy and awestruck. Each and everyone. 2) I was driving around the house sitting on a bathroom stool 3) I actually got this thing running. AND, 4) The brakes don’t work! 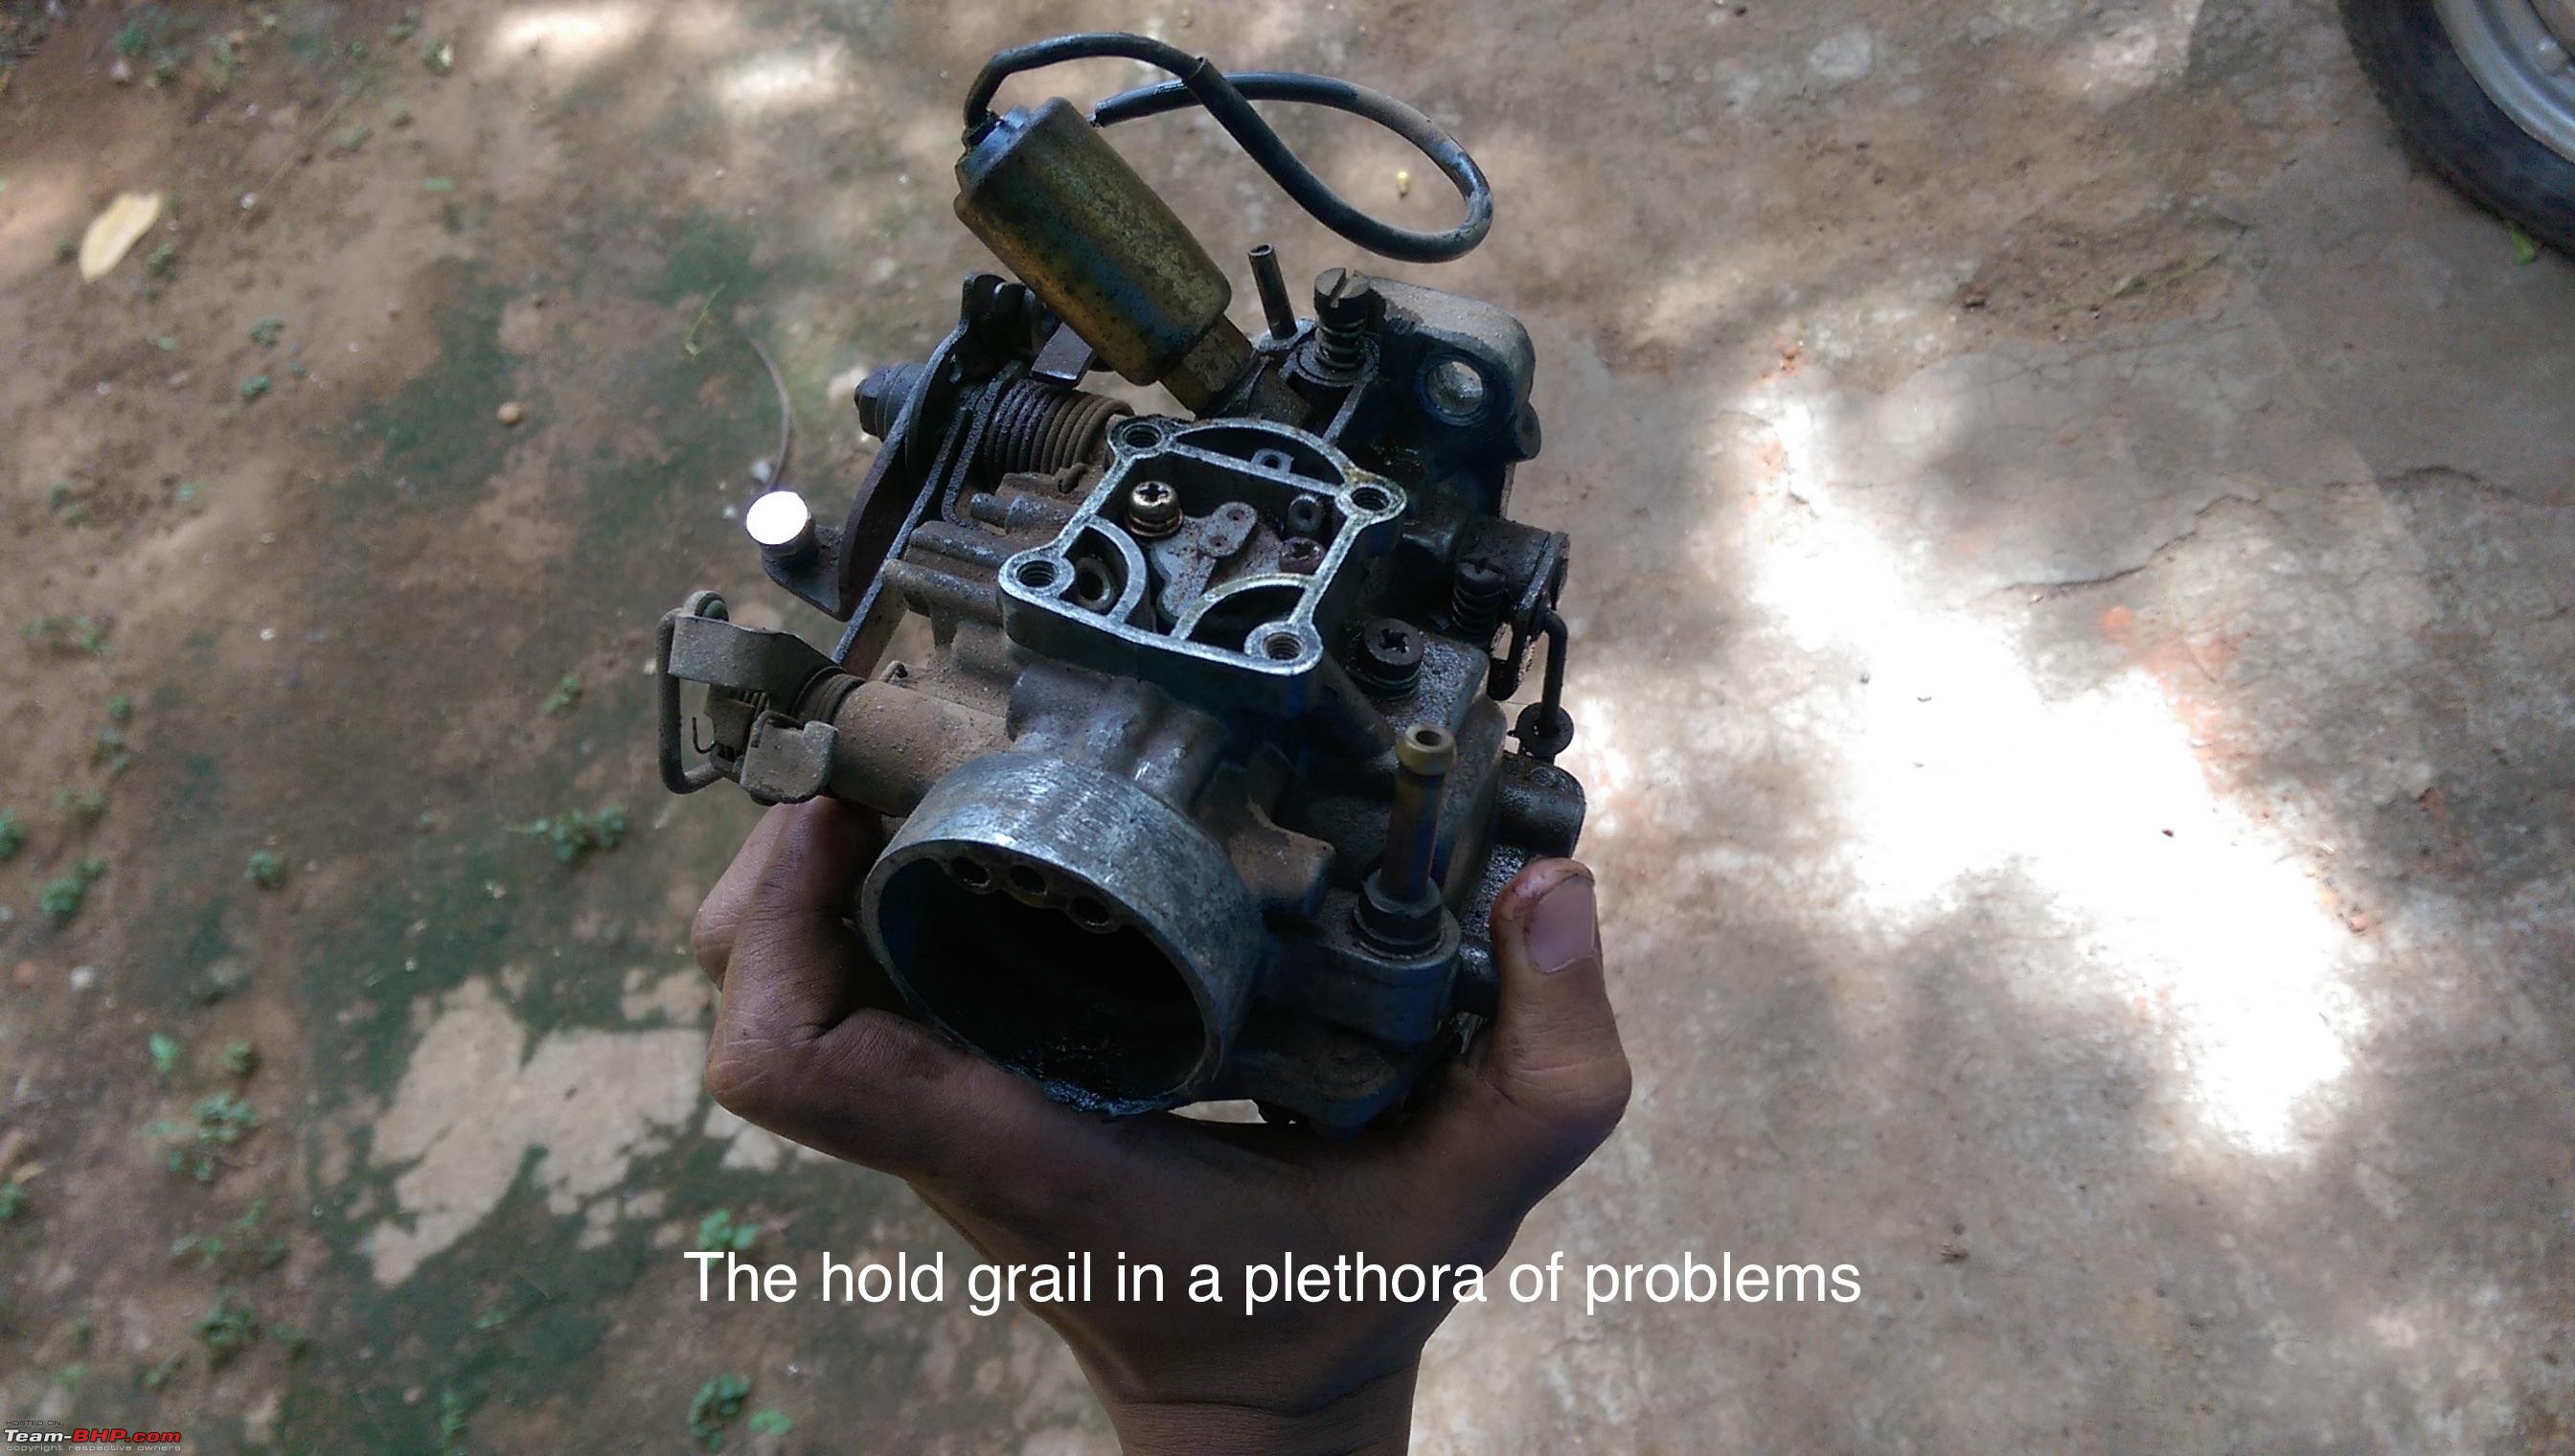 The car parked back in its spot, there was a lot of niggles that needed to be sorted out. For instance, whenever I put my foot on the throttle, the car would stall. Turned out that the guy who claimed to have completed the “overhaul” of the carburetor happed to have missed a fist full of dry rust inside it. I tried finding a used one, only to no avail, finally ended up buying an aftermarket replacement for the stock carb as the OEM one cost an arm and a leg. The barkes, I got someone to work on them as I did not have the time for it and had to get back home the day after, and the interior still needed to be put it. Had the interior delivered the next evening and sat through the evening and into the night putting it in. NEW INTERIOR  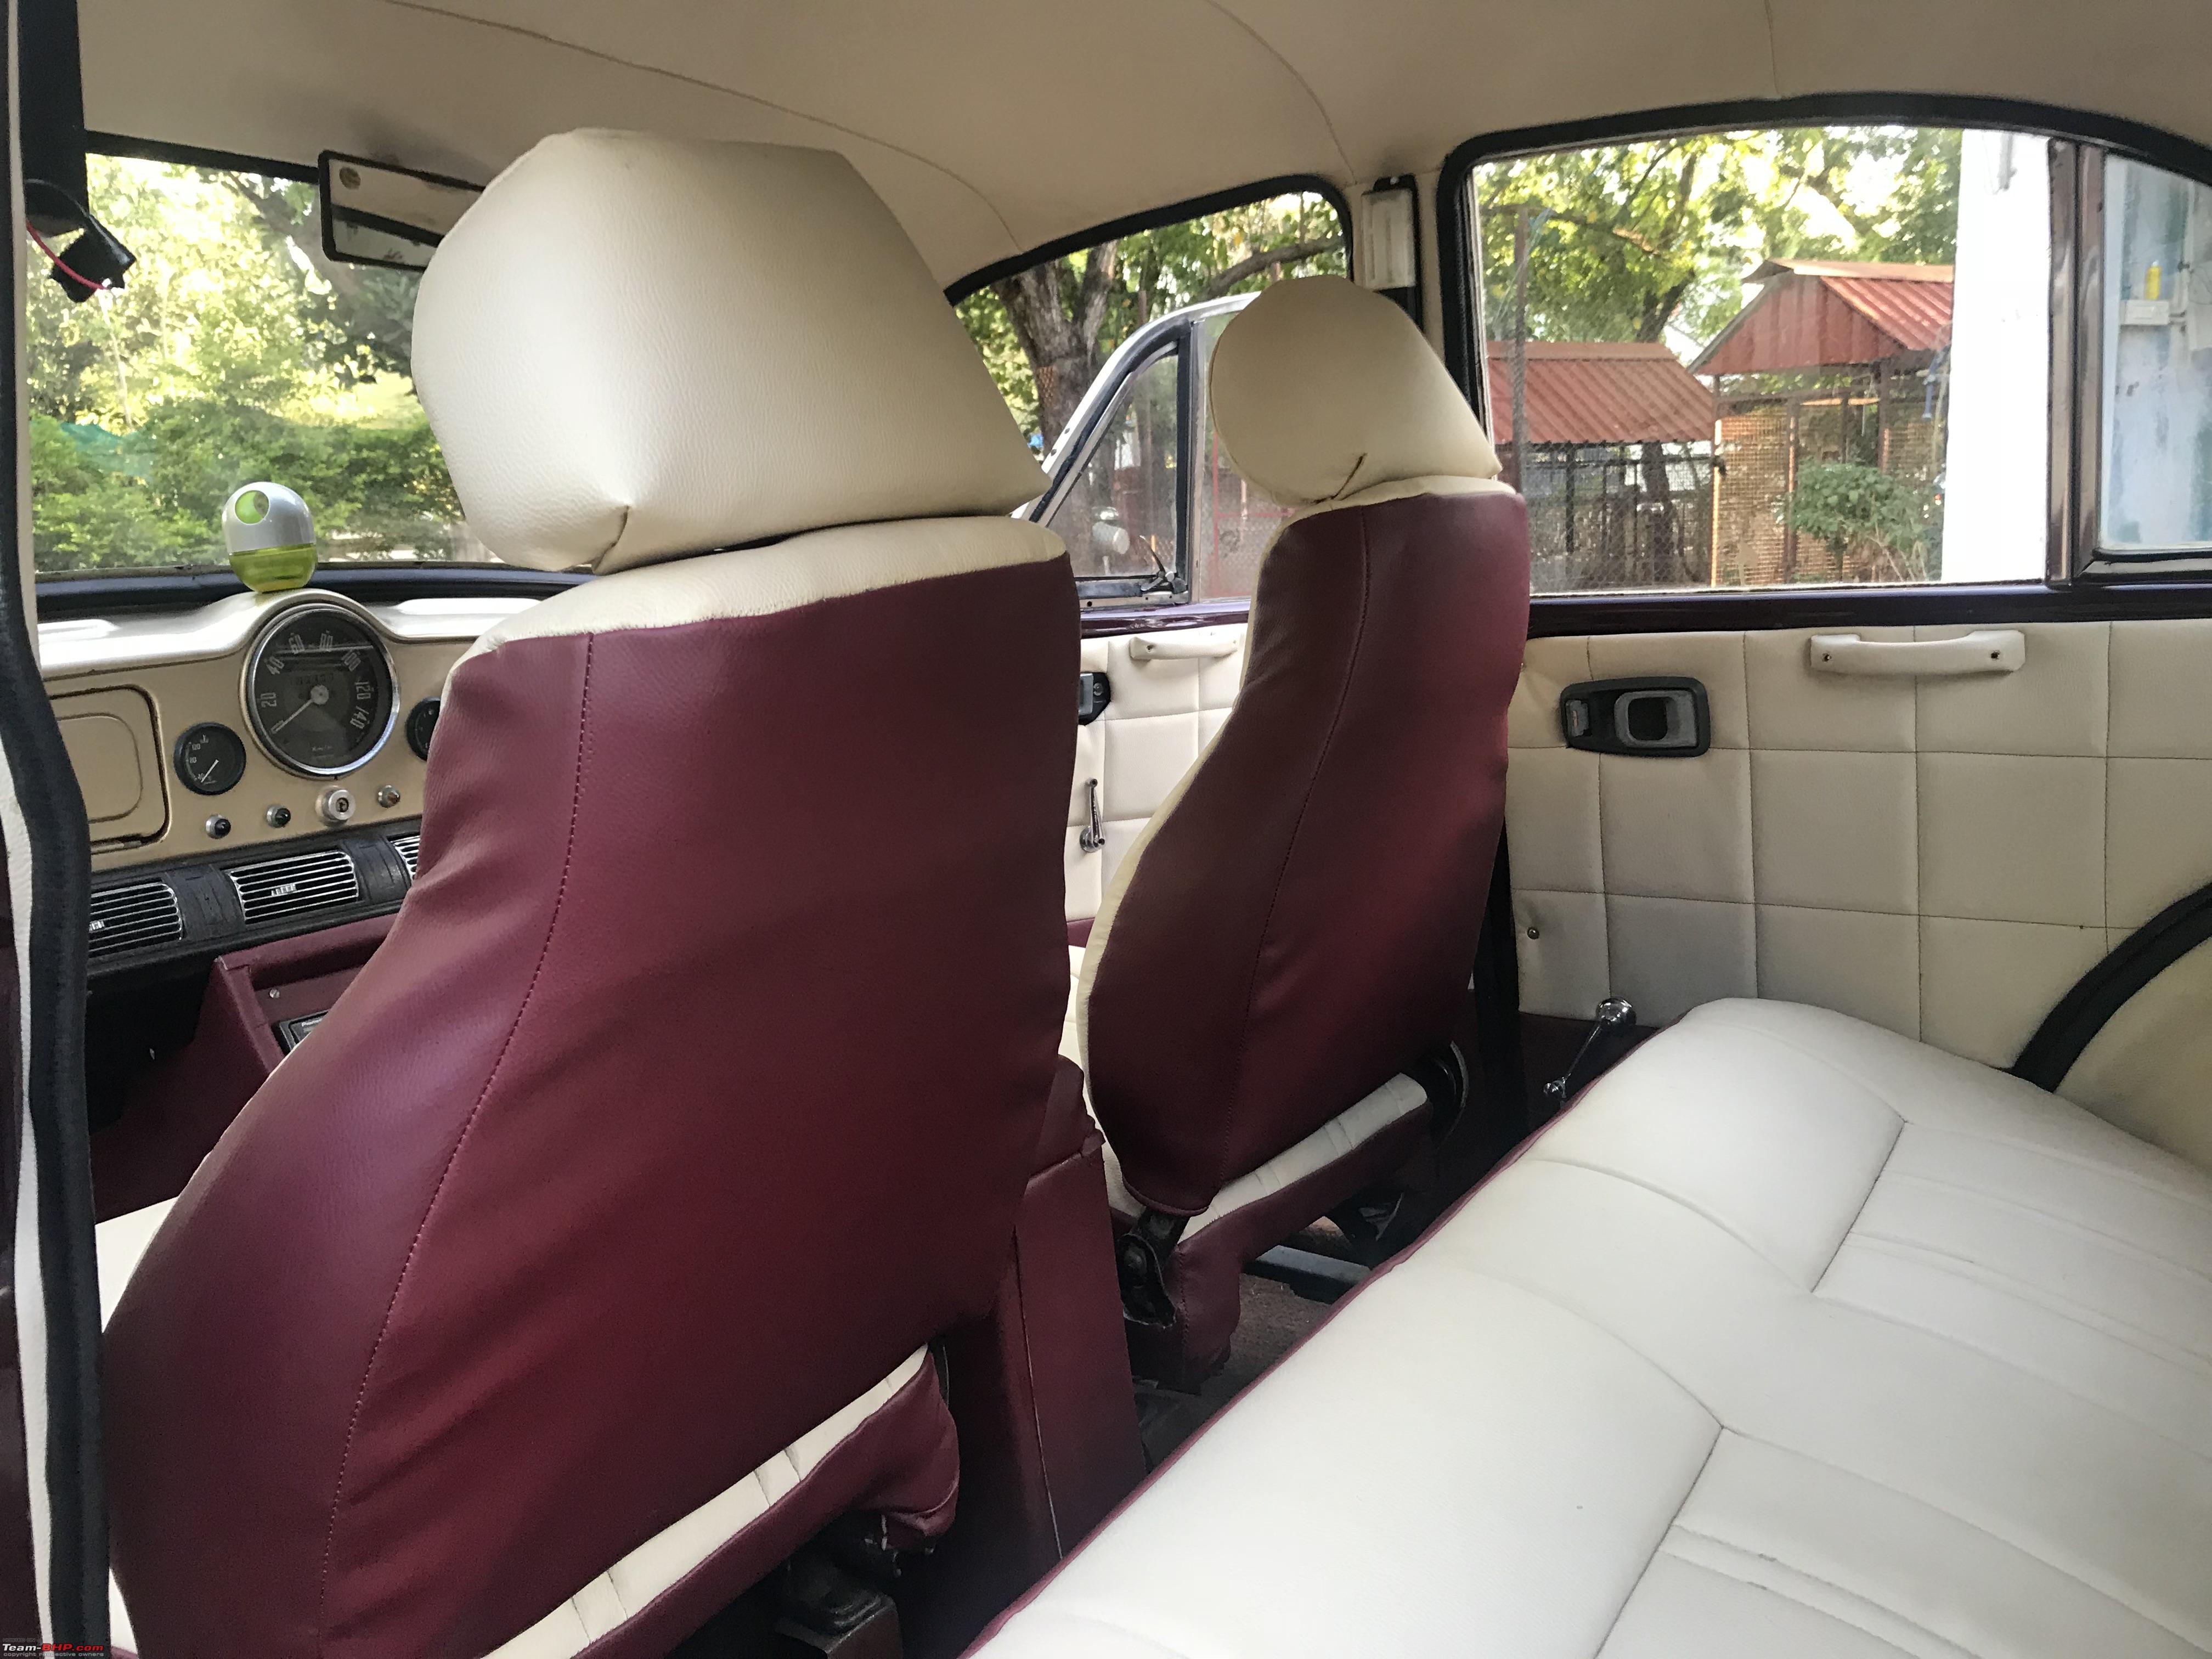 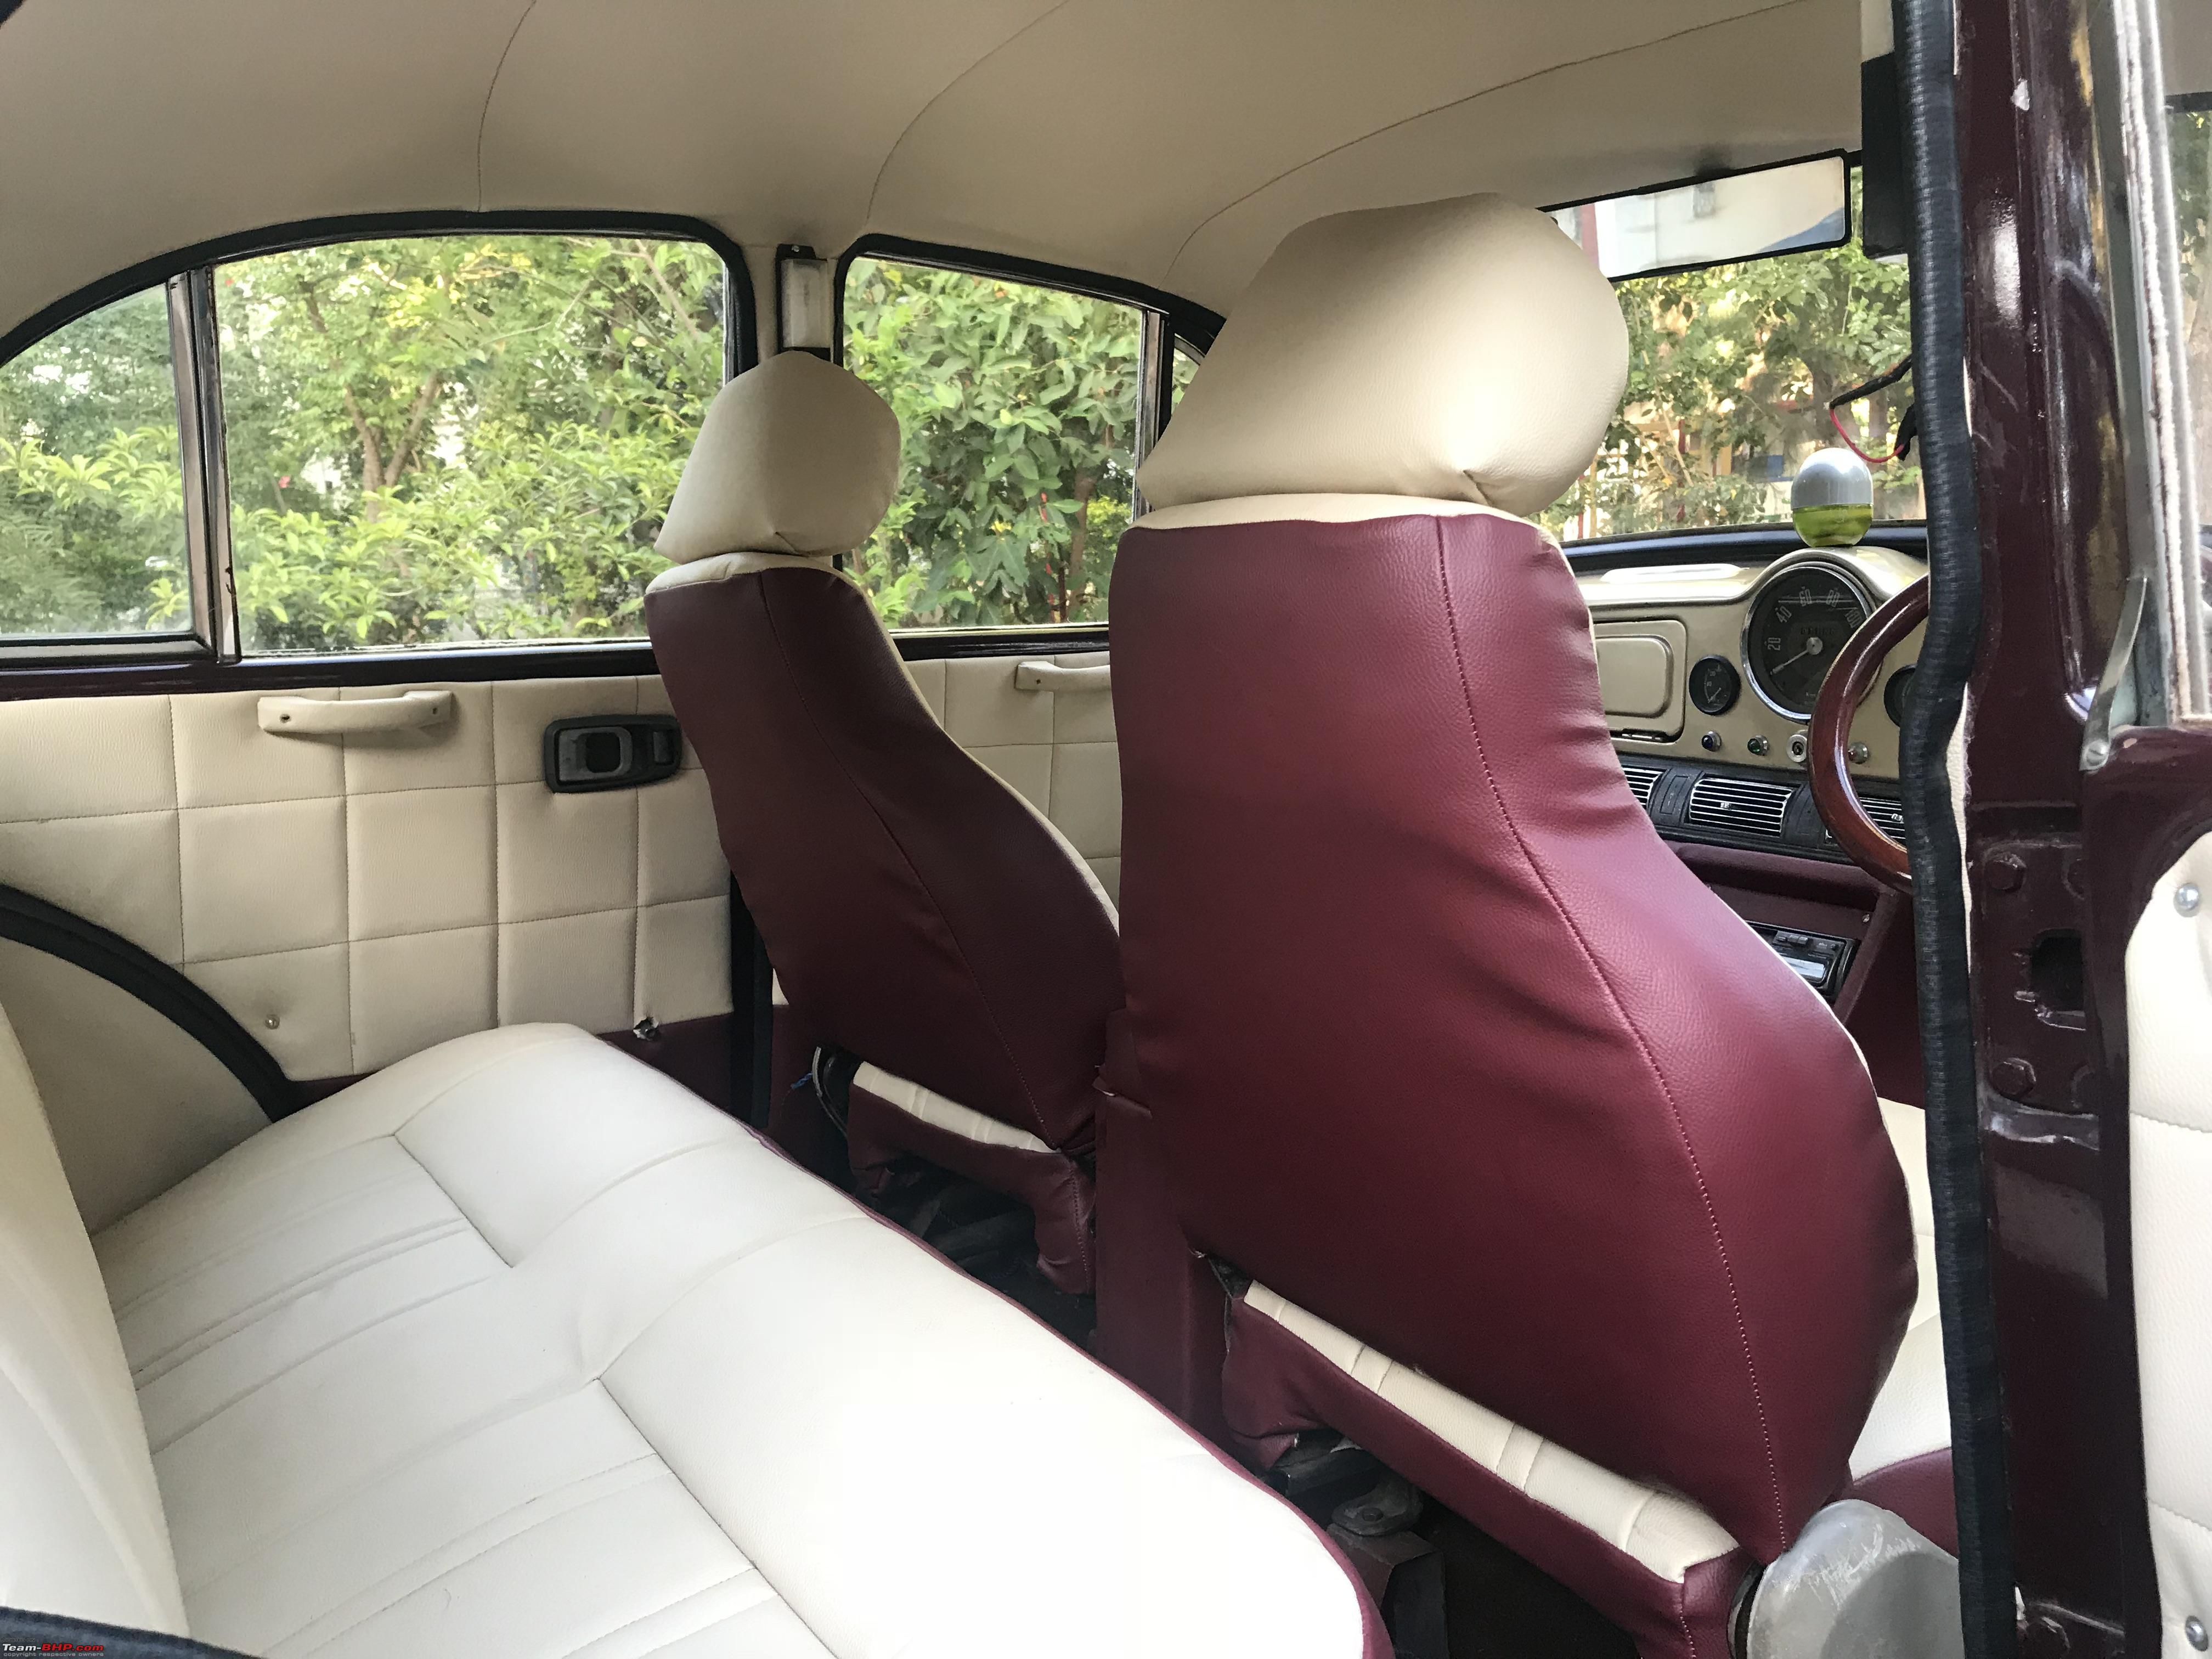 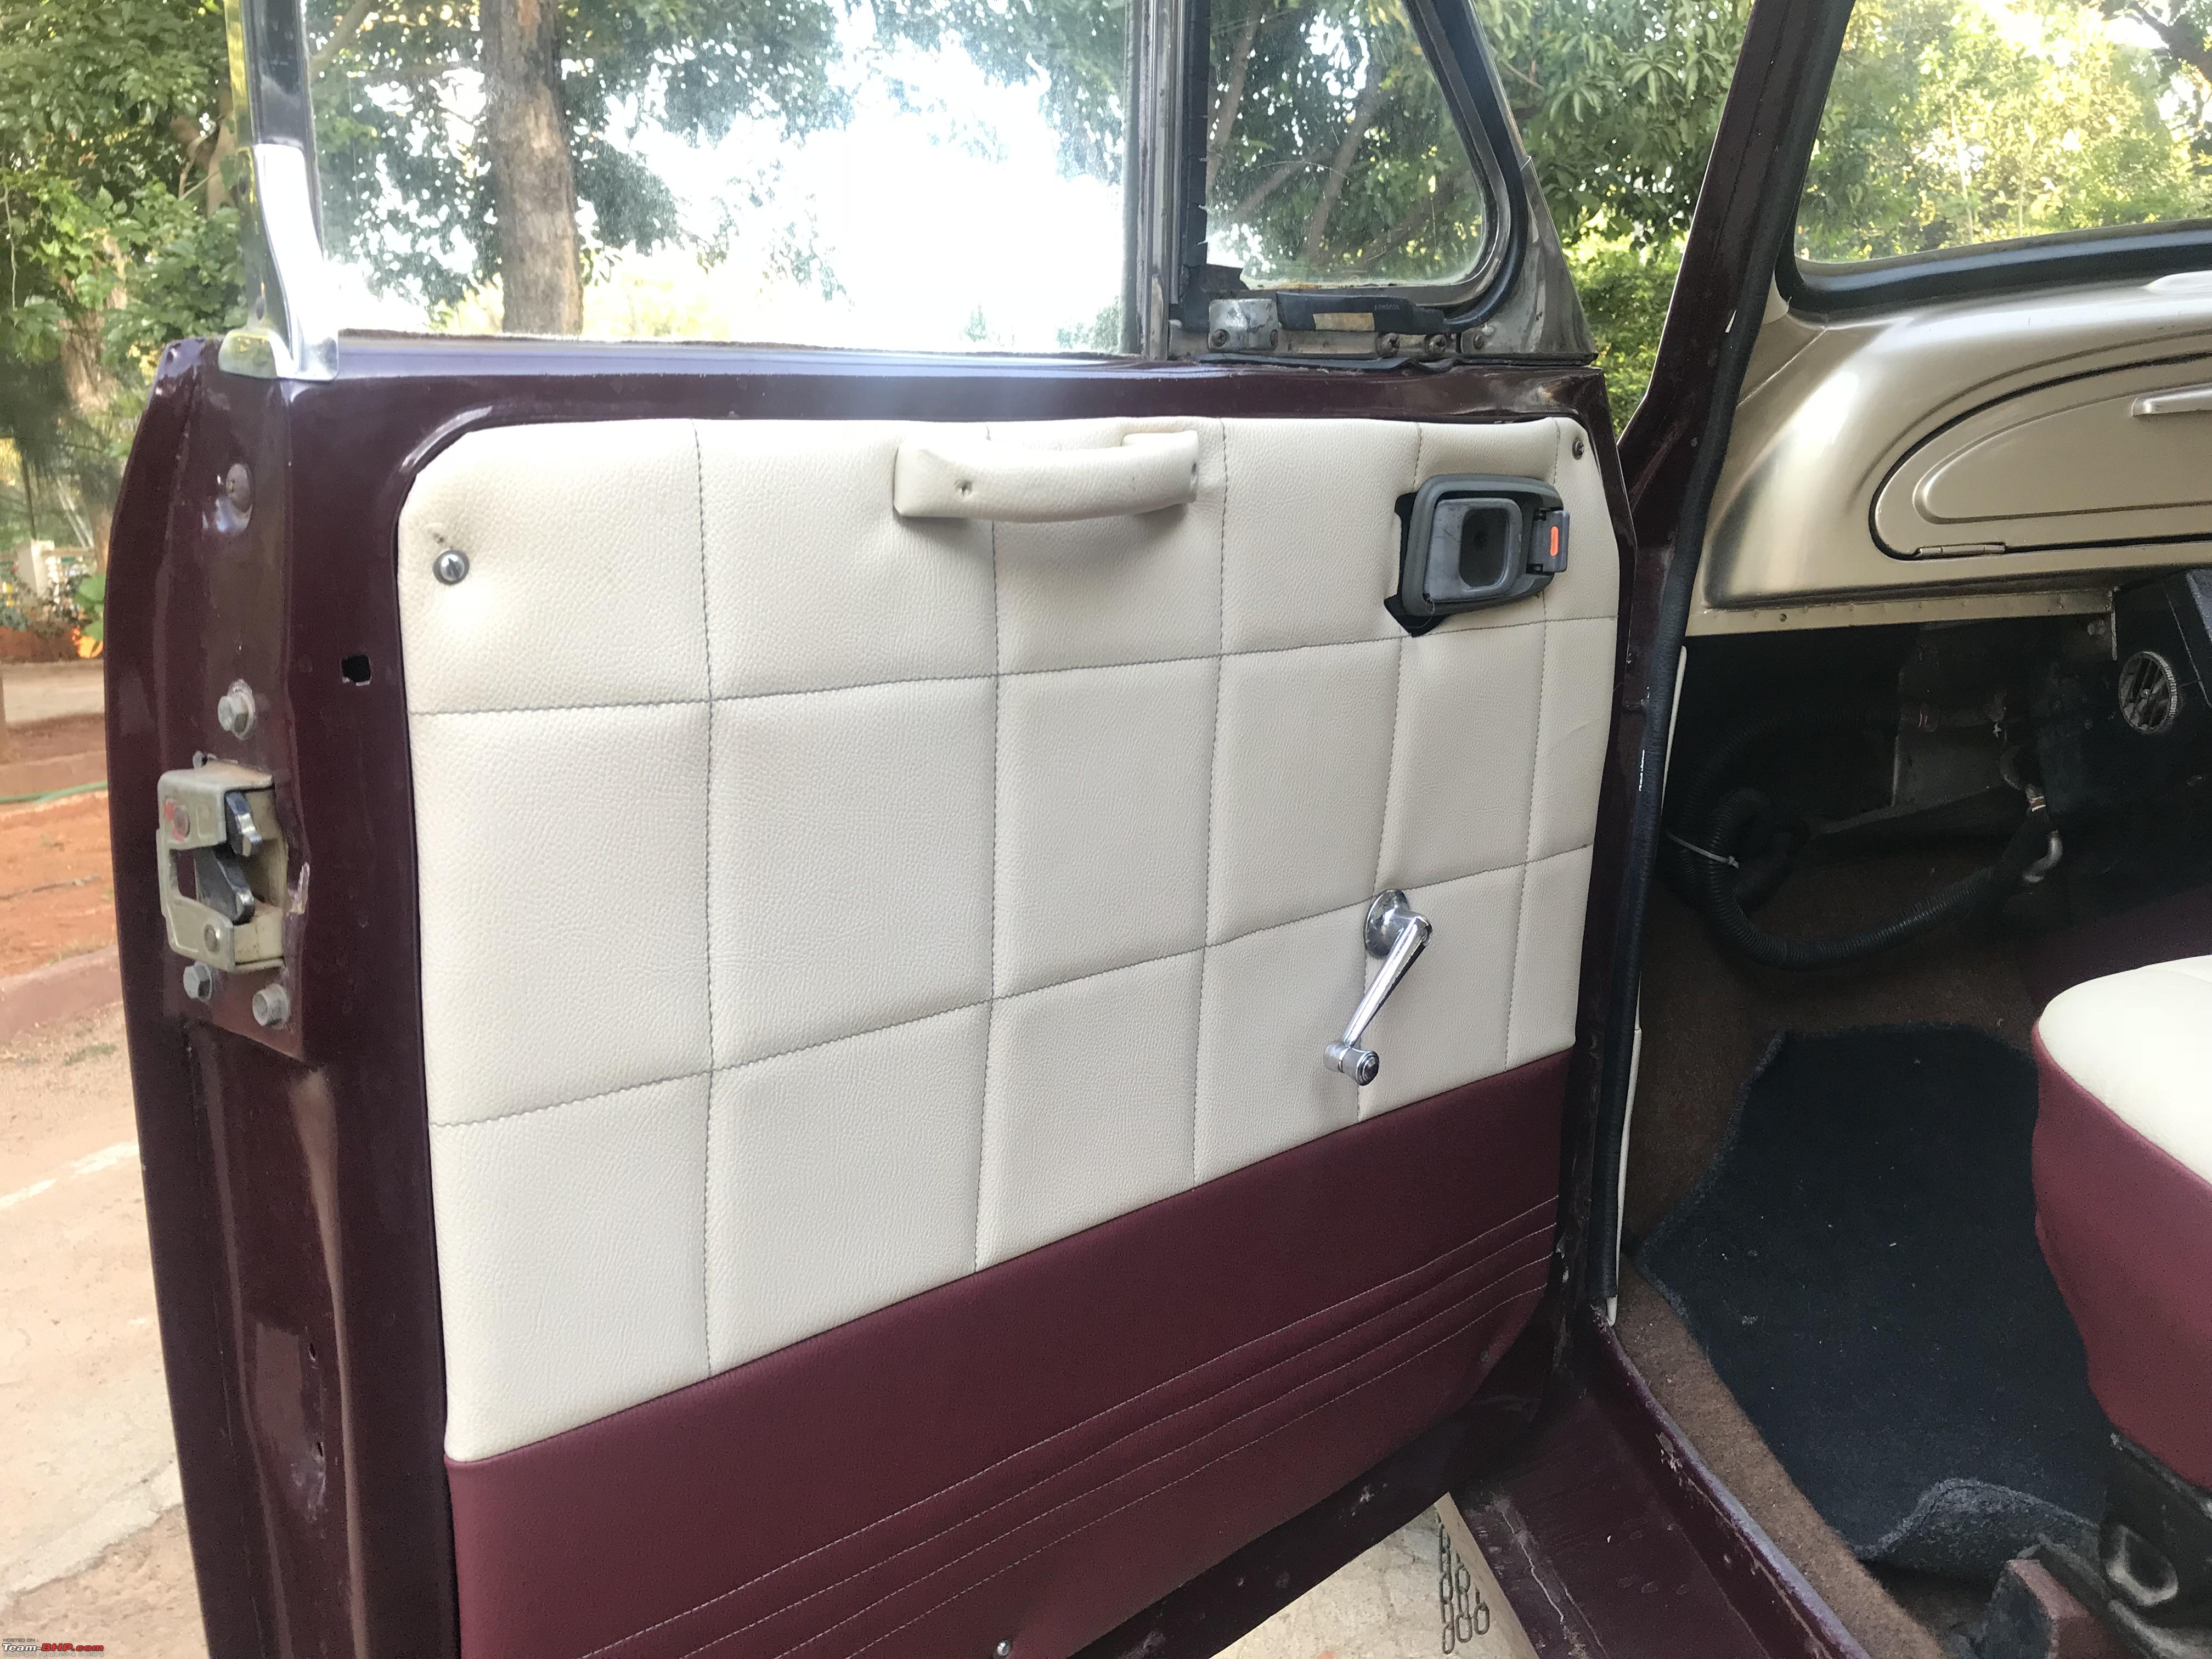 THE COCKPIT  The very next day after I got home I got a call stating the car was overheating, so I asked him to get a radiator fabricated and installed. And put in a higher capacity fan if necessary. I Got another call in a weeks time, with him telling me that he got the radiator replaced and the overheating issues sorted out and that he gotten the car some fresh rubber and he happened to have white walled them! Plus all the rubber belts and worn out bushes were replaced for new ones. There are still some issues that need to be sorted out, but that’s for another day. And with this image I bid Adieu, All in all, this was an experience that few get, and I for one cherished it to the fullest! 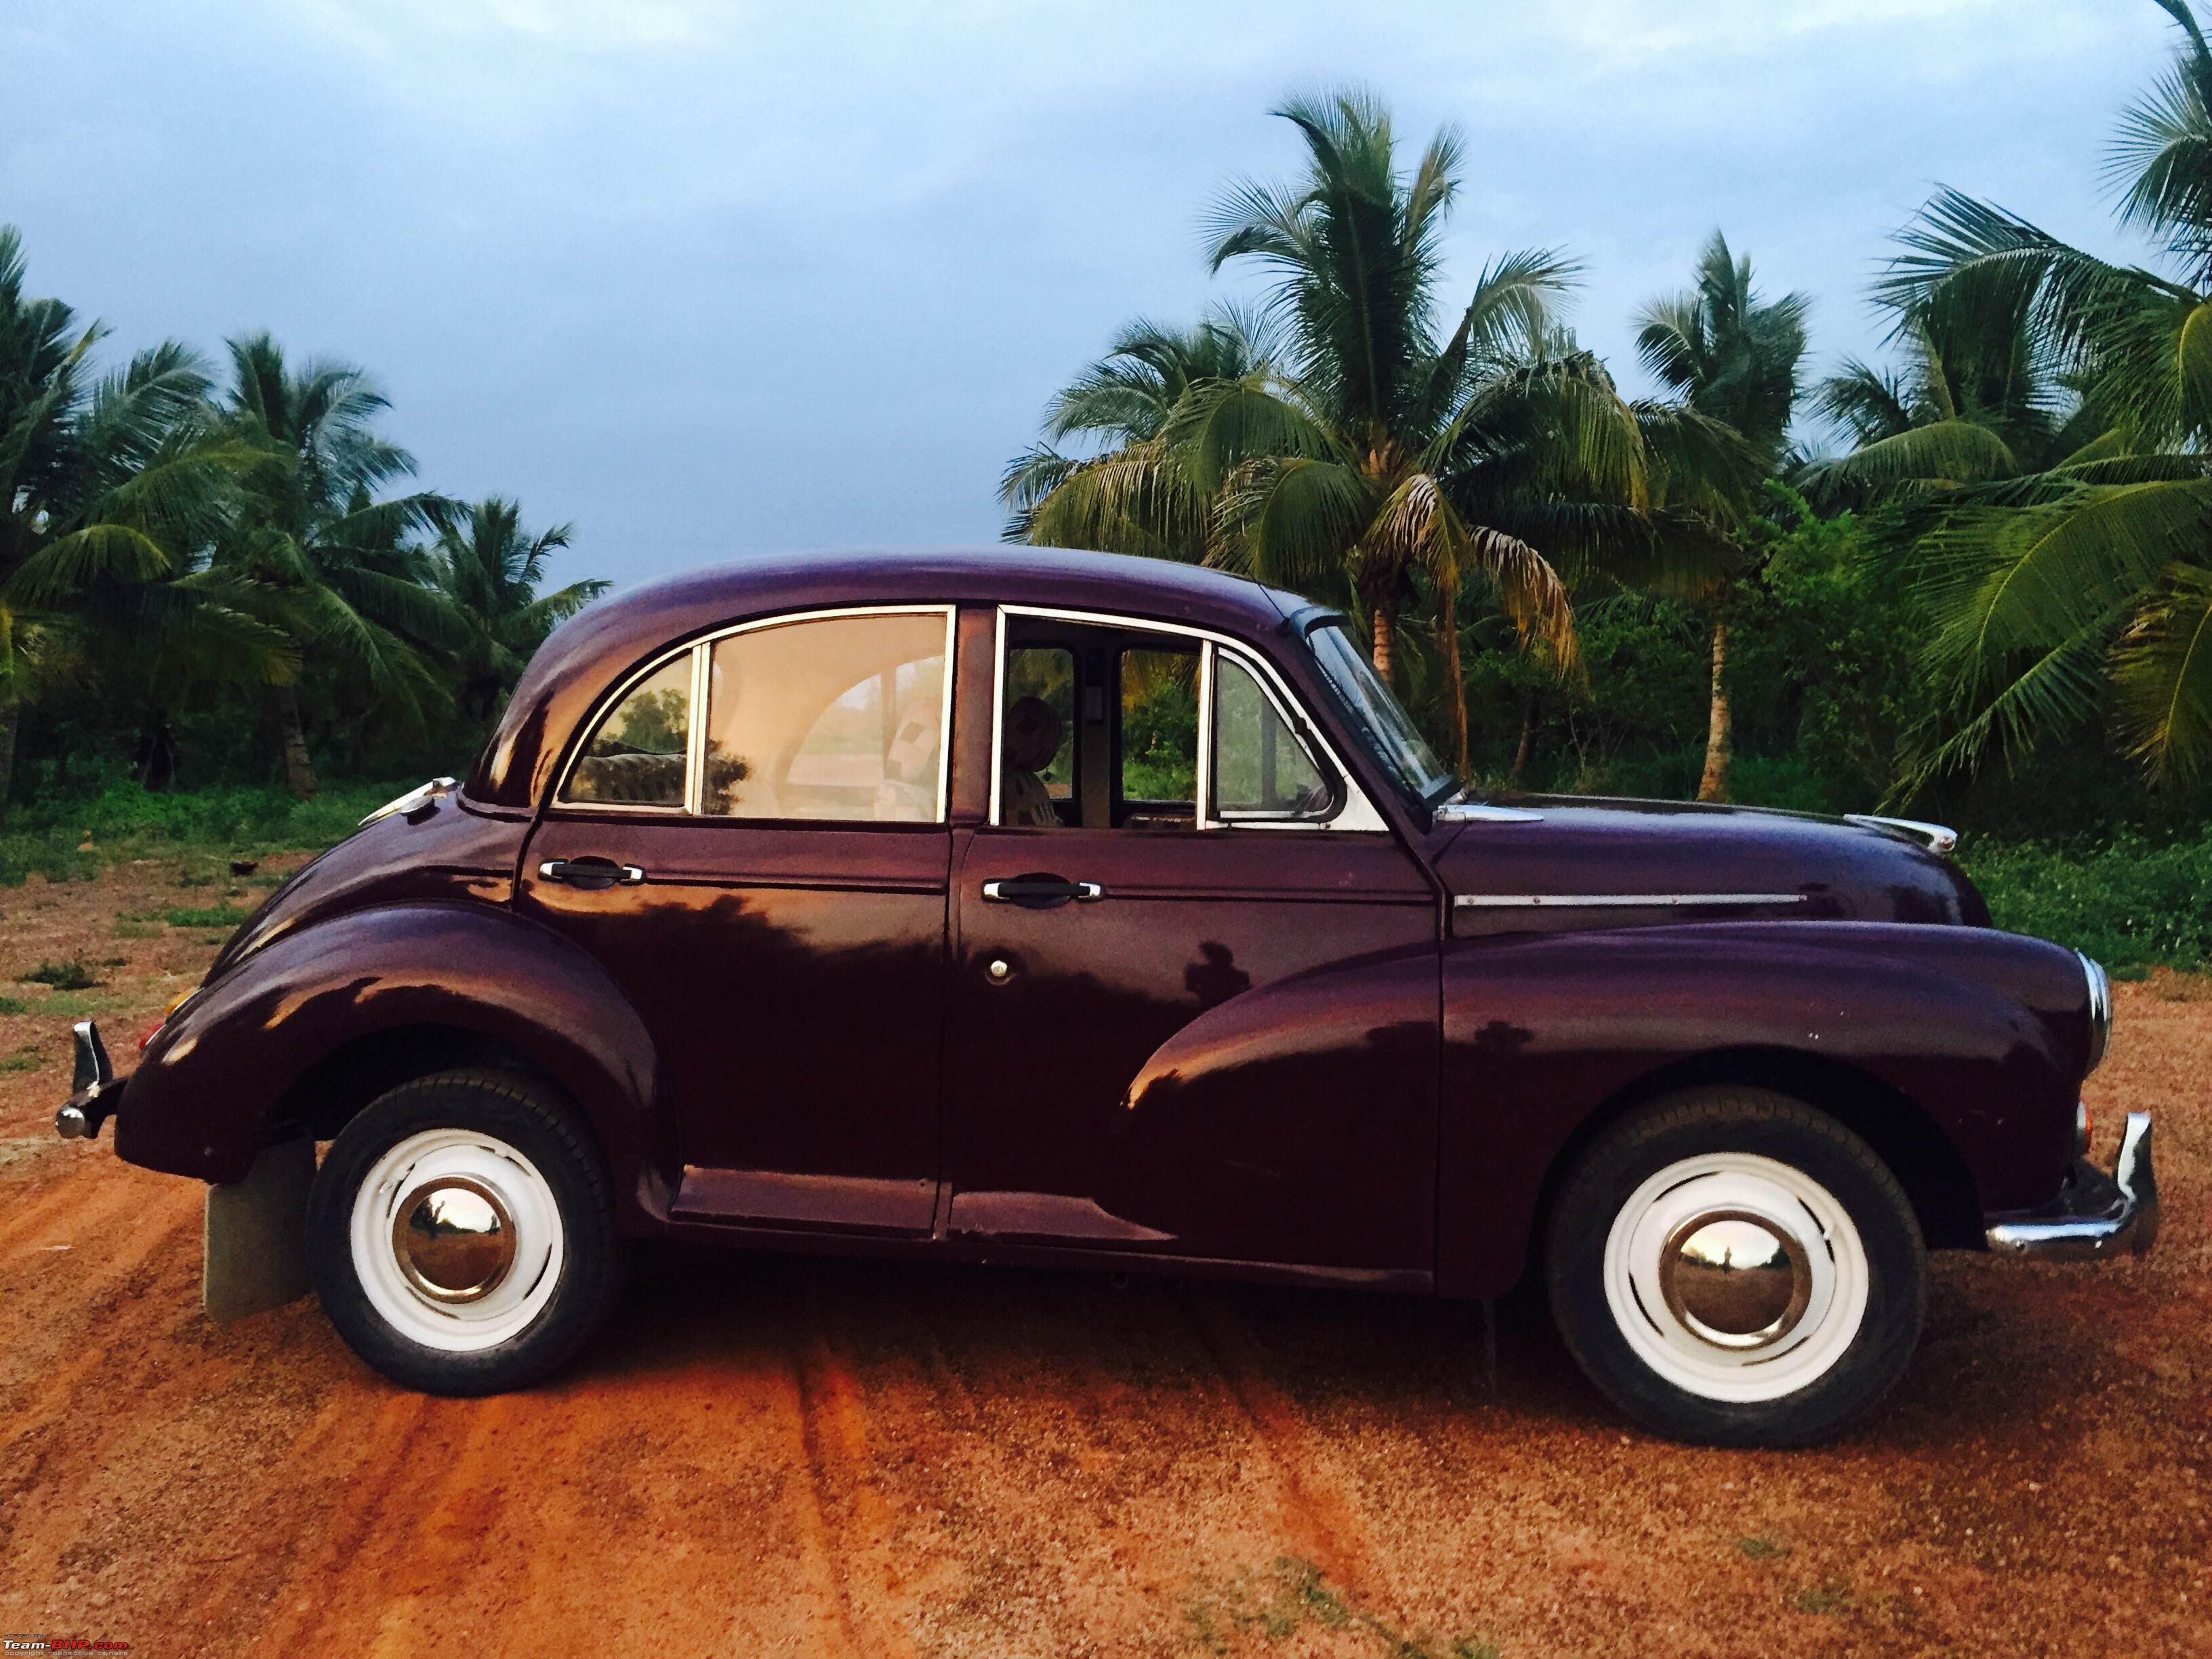 This is what she looks like today, 2 years on  Last edited by theMAG : 12th June 2018 at 16:46. Reason: Updated as requested |

|  (43)
Thanks (43)
Thanks
 |
| The following 43 BHPians Thank One:1 for this useful post: | 9thsphinx, adneeraj, ashwinprakas, BLACKBLADE, BoltThrower, catchjyoti, deehunk, deepfreak15, Flyer, GM6James, GTO, hemanth.anand, InControl, Jaggu, jeeva, Jeroen, karan561, karlosdeville, Klub Class, mac187, mallumowgli, mh09ad5578, mishraak, Nohonking, paragsachania, parsh, Prathiiik, puneetakhouri, RaghuVis, revintup, rjstyles69, RoverX, samabhi, samaspire, samsag12, smuniswami, SS-Traveller, theexperthand, thewhiteknight, V.Narayan, VaibhaoT, wbd8779, YanTra Makto |
| |
|
11th June 2018, 09:31
| #2 |
| Distinguished - BHPian  | Mod's note: Thread moved from the Assembly Line to the Vintages section. Thanks for sharing! Last edited by GTO : 11th June 2018 at 09:32. Reason: Bump |
|
| (2)
Thanks
|
| The following 2 BHPians Thank theMAG for this useful post: | gauravanekar, GTO |
|
11th June 2018, 13:06
| #3 |
| BHPian Join Date: Nov 2015 Location: Bangalore
Posts: 78
Thanked: 205 Times
| Re: Restoring a 1959 Morris Minor All though I love getting my hands dirty, for some odd reason can't think of spending so much time trying to do a restore. A feeling I can't explain  . .Must say, you did a great job. I know how it feels when the whole generation was watching you when the car fired up  |
|
| (1)
Thanks
|
| The following BHPian Thanks T-Bone for this useful post: | One:1 |
|
11th June 2018, 18:24
| #4 | |
| BHPian | Re: Restoring a 1959 Morris Minor Quote:
| |
|
| (1)
Thanks
|

| The following BHPian Thanks justin.das for this useful post: | One:1 |
|
12th June 2018, 09:58
| #5 |
| BHPian | Re: Restoring a 1959 Morris Minor That's a labor of love. The word "Morris Minor" brings back a lot of memories. I was restoring one for my late dear friend KK. I remember the innumerable collection of information,pics,data sheets, spares ..that we collected for the restoration, and all of the conversations that we had. Slowly, it dawned upon us that what we had in hand was a very rare model. Gone too soon..Only memories remain. |
|
| (1)
Thanks
|
| The following BHPian Thanks jeeva for this useful post: | One:1 |
|
12th June 2018, 16:38
| #6 | ||
| BHPian Join Date: Apr 2016 Location: Chennai
Posts: 101
Thanked: 200 Times
| Re: Restoring a 1959 Morris Minor Quote:
I cannot seem to find the "Vintage section" under classifieds, if the original engine and gearbox is available, then please send me a link. Quote:
If its not too much to ask, do you happen to have any of these materials that you mention still with you? I Would love a copy of them, these would help tremendously with taking this restoration forward. Last edited by One:1 : 12th June 2018 at 16:46. | ||
|
| (1)
Thanks
|
| The following BHPian Thanks One:1 for this useful post: | justin.das |
|
12th June 2018, 18:41
| #7 | |
| BHPian | Re: Restoring a 1959 Morris Minor Quote:
Find the Engine And Gear Box Here : http://classifieds.team-bhp.com/buy-...is-Minor.html/ . | |
|
| (2)
Thanks
|
| The following 2 BHPians Thank justin.das for this useful post: | mh09ad5578, One:1 |
|
12th June 2018, 23:38
| #8 | ||
| BANNED Join Date: Oct 2012 Location: Bangalore
Posts: 89
Thanked: 128 Times
| Quote:
Is that a Morris 1000? The center speedo, the radiator grill and the windscreen looks like those from a Morris 1000. I own a 1951 Morris Minor Series MM (Split Windscreen model). Here she is.  Cheers and happy motoring! Praveen Quote:
Cheers, Praveen Last edited by aah78 : 14th June 2018 at 18:51. Reason: Posts merged. Please use MULTI-QUOTE / QUOTE+ when responding to multiple posts. Thanks! | ||
|
| (4)
Thanks
|
| The following 4 BHPians Thank CAC444 for this useful post: | ariesonu, karlosdeville, mh09ad5578, One:1 |
|
13th June 2018, 19:08
| #9 | ||
| BHPian Join Date: Apr 2016 Location: Chennai
Posts: 101
Thanked: 200 Times
| Re: Restoring a 1959 Morris Minor Quote:
Your MM, She looks Stunning! Did you ever perform a restoration or was she kept pristine from the get go? Quote:
Thanks for this, albeit expensive and out of the country, this helps leaps and bounds especially when looking for something specific | ||
|
| ()
Thanks
|
|
14th June 2018, 08:55
| #10 | |
| BANNED Join Date: Oct 2012 Location: Bangalore
Posts: 89
Thanked: 128 Times
| Re: Restoring a 1959 Morris Minor Quote:
| |
|
| (1)
Thanks
|
| The following BHPian Thanks CAC444 for this useful post: | One:1 |
|
14th June 2018, 13:24
| #11 |
| BHPian | Re: Restoring a 1959 Morris Minor Interesting restore! Kudos to completing it in such a short time! |
|
| (1)
Thanks
|
| The following BHPian Thanks rmonie for this useful post: | One:1 |
| |
|
14th June 2018, 15:39
| #12 |
| BHPian Join Date: Oct 2012 Location: Mumbai
Posts: 247
Thanked: 328 Times
| Re: Restoring a 1959 Morris Minor Really enjoyed reading your post. My dad owned a 1950 Morris 8 from about 1967 to about 1986. I practically grew up in it and still have fond memories of it. Cheers |
|
| (1)
Thanks
|
| The following BHPian Thanks FarPatel for this useful post: | One:1 |
|
17th June 2018, 13:44
| #13 | |
| BHPian Join Date: Apr 2016 Location: Chennai
Posts: 101
Thanked: 200 Times
| Re: Restoring a 1959 Morris Minor Quote:
| |
|
| ()
Thanks
|
|
18th June 2018, 22:14
| #14 | |
| BANNED Join Date: Oct 2012 Location: Bangalore
Posts: 89
Thanked: 128 Times
| Re: Restoring a 1959 Morris Minor Quote:
If you're interested, take a look - http://www.team-bhp.com/forum/post-w...ct-1100-a.html | |
|
| (1)
Thanks
|
| The following BHPian Thanks CAC444 for this useful post: | One:1 |
|
19th June 2018, 15:56
| #15 |
| BHPian Join Date: Jul 2016 Location: London
Posts: 134
Thanked: 600 Times
| Re: Restoring a 1959 Morris Minor Good work! I'm in the UK, Moggie parts are very easy to come by here so if you need anything really hard to find, just PM me. As the owner of a 1961 Austin myself, I have to say that steering wheel is making my eyes hurt. The original BMC wheels are part of the charm of the old girls and that is something I would put back to standard. A non-standard engine and box doesn't matter so much! |
|
| ()
Thanks
|
|