Team-BHP
(
https://www.team-bhp.com/forum/)
Hello guys !!
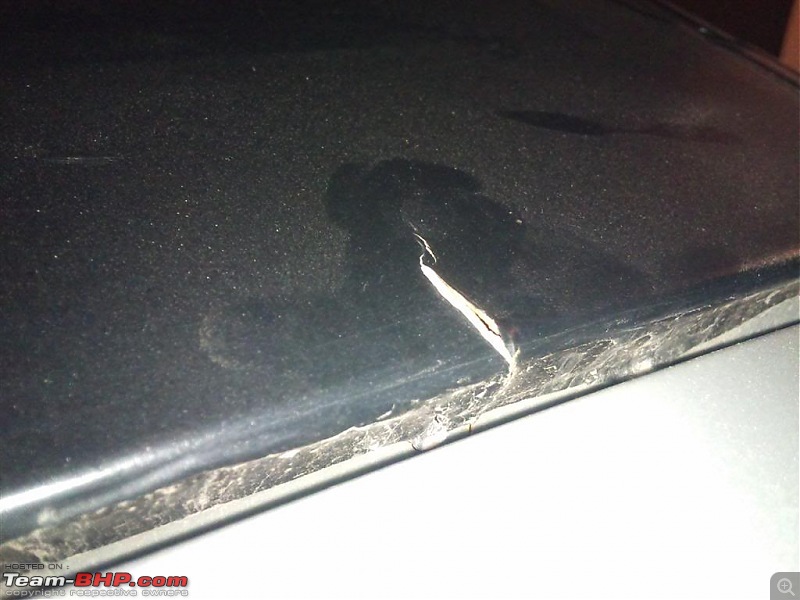
It has been a year my ground pounding machine was dismantled. The car could not take the beating lots of stuff came loose...the roof was torn apart here is the pic of the same !!!!

And also the car was 6 years old already. So had to sell it off before I have to give away for scrap rate !!!!
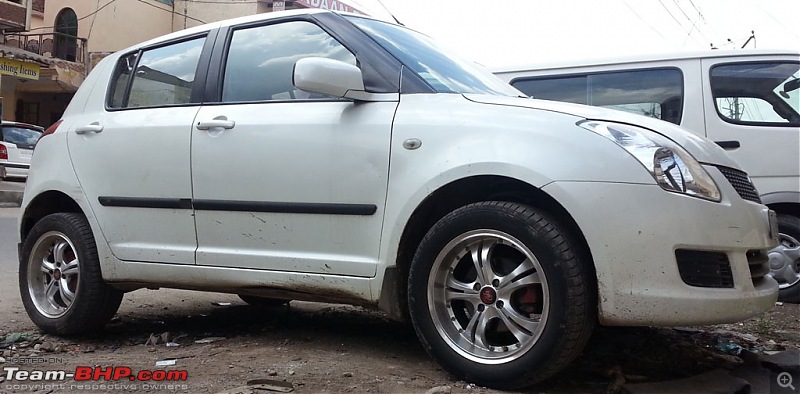
Anyways I have bought a new car again, Maruti Swift as I had lots of stuff still which could be changed/replaced without any issue and I know the vehicle inside out.
Here are few pic of the car in raw shape.

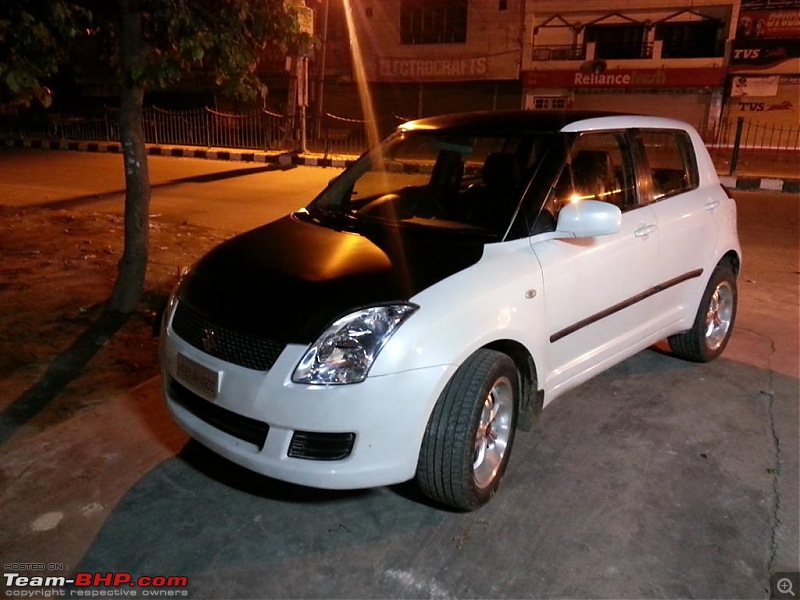
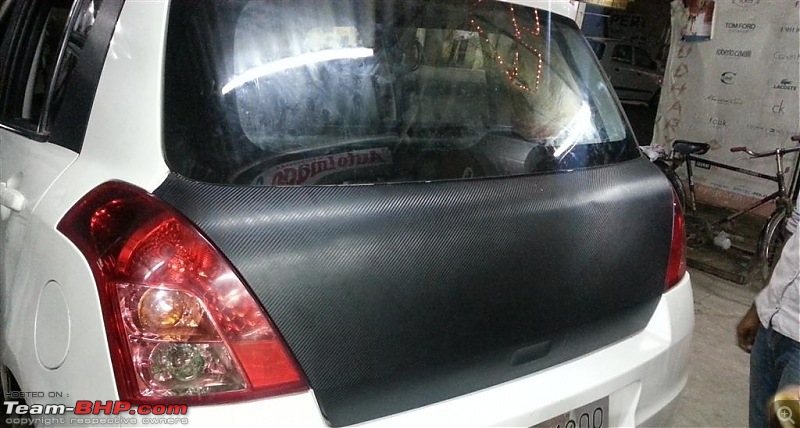
Have done vinyl of the Hood, Roof and boot, along the a-b-c pillars of the car. Few pics...
List of Equipment
Source -> Kenwood KOS-A300
Processor -> Alpine PXA - H 701 With controller
Amp for High -> ????
Amp for Mids -> ????
Amp for Subs -> ????
Highs -> ?????
Mids -> ????
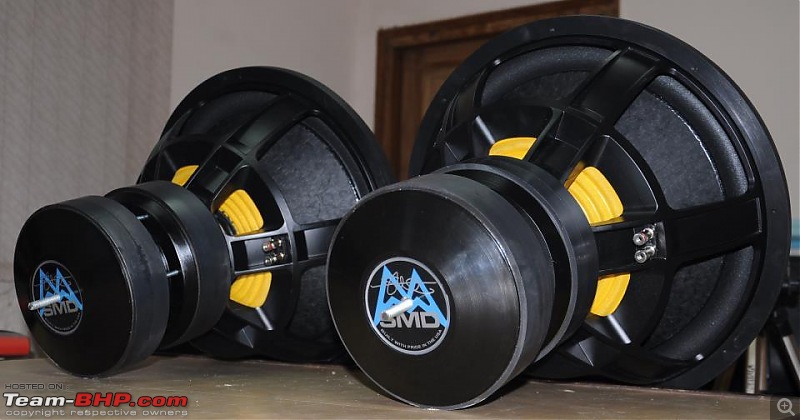
Subs -> SMD 18 inches
#59 and
#60
Alternator -> Mechman 220 amps
Batteries -> Northstar NSB 170 (about 600+ ah combined )
Wiring -> welding copper cable 0/1 and 0/2 runs with copper busbars
Rca -> Sommer cable with Neutrik Connectors
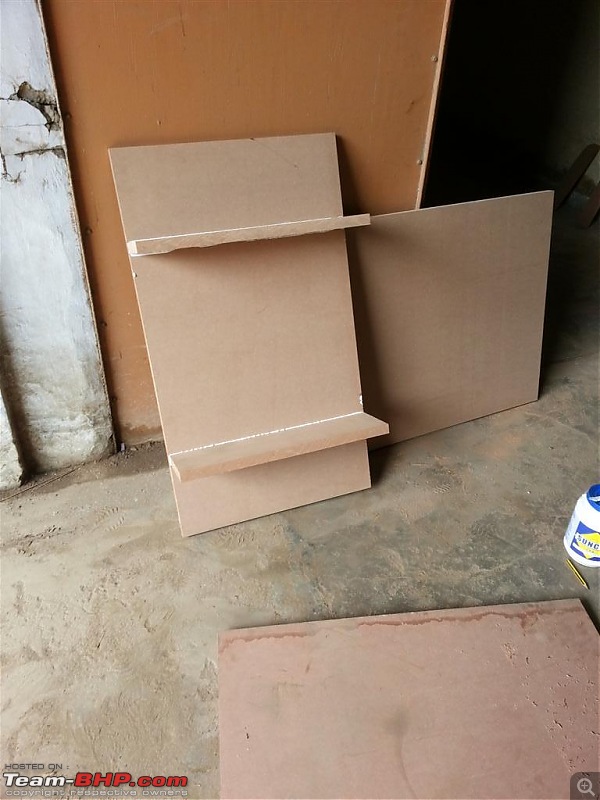
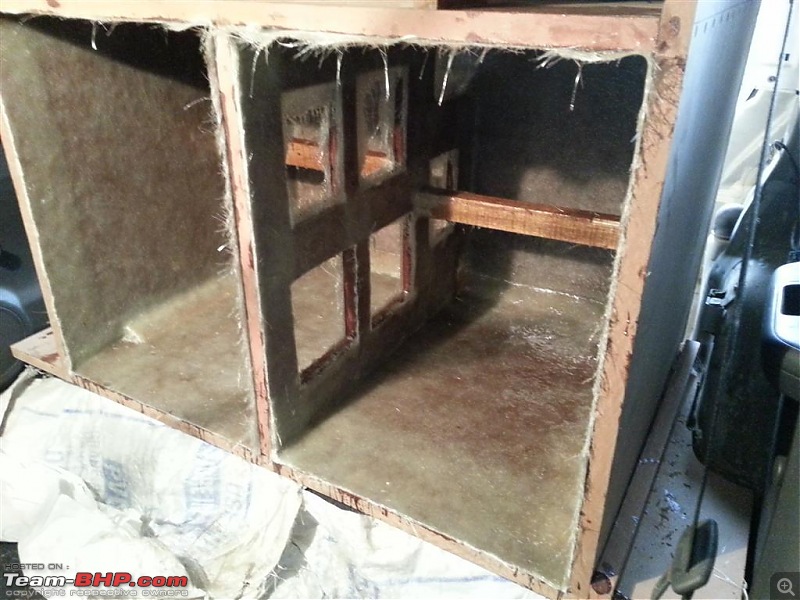
Enclosure -> 1 inch MDF with lots and lots of Reisn (approx 15-18 kgs with 5 kgs glass...solid as rock)
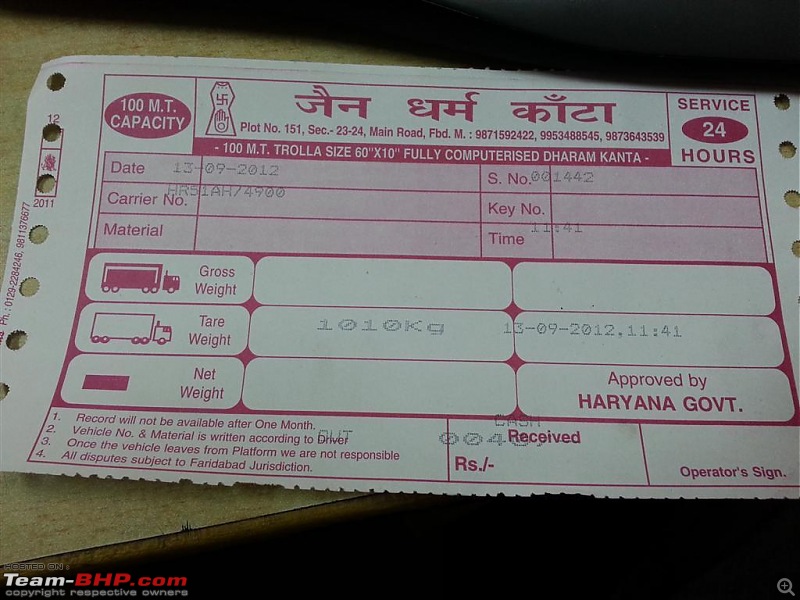
The weight of the car is 1010 kgs. Will take the final weight when the install is complete !!!
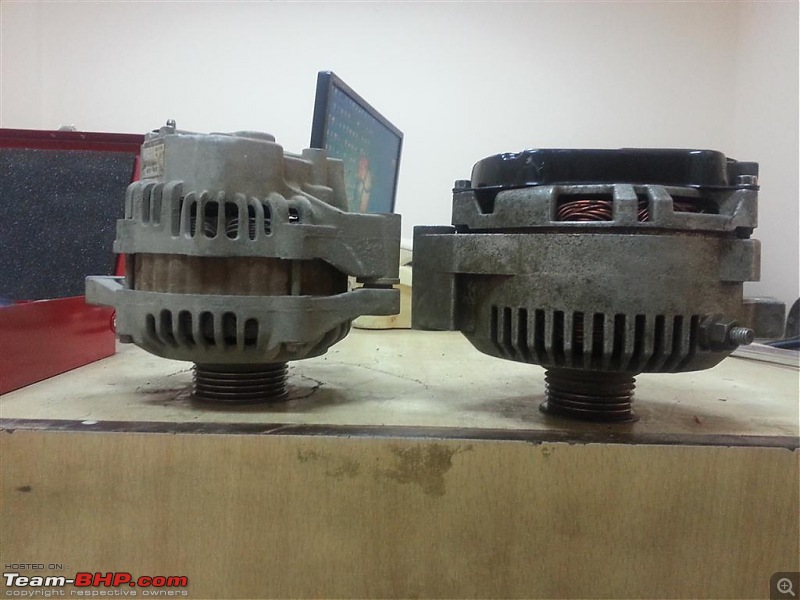
Ok then, the first upgrade the HO alternator. I have the Mechman 220 amps alternator so plan to use it for the time being, will add another when the setup is complete. Planned to use approx 10k+ rms this time. I know this alternator would be a bottle neck for the same but still....here are few pics...
The stock one was 70 Amps only...

The both alternators.

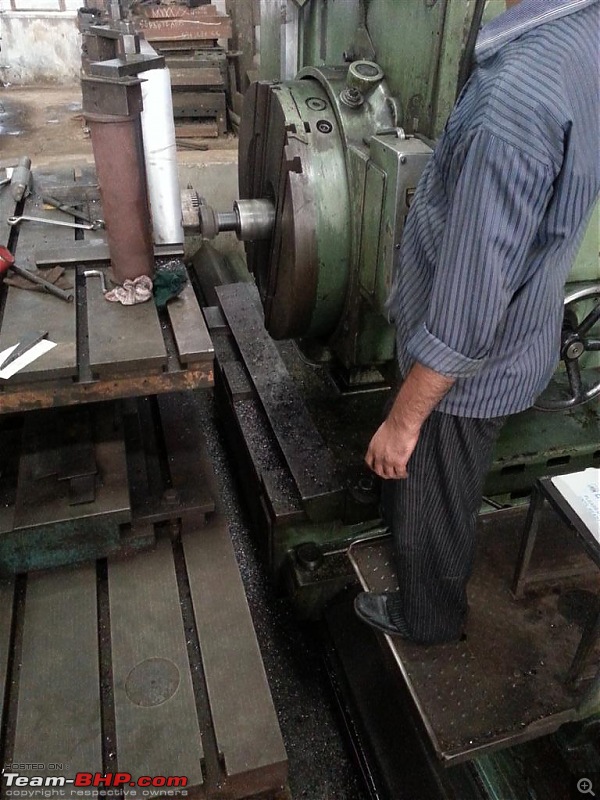
The sizes were a little different so had to machine the arms to make the alternator fit...here are few pics of the same...

Machining being done to match the stock alternator dimensions

The other side !!

The machining was done on a FLOOR BORING MACHINE !!!
Cover after machine.

After assembly !!!

0/1 gauge wiring connected !!

The location !!!!!
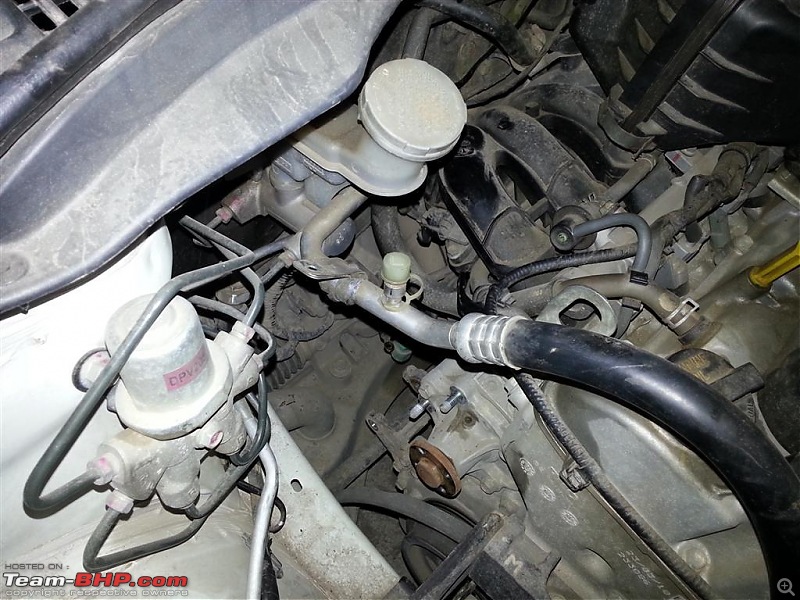
Installed !!!.

Checked , up and running !!!!

All the removal , dis-assembly and re-assembly, re-install was done myself !! Except the machining for that I had the machine operator !!!!
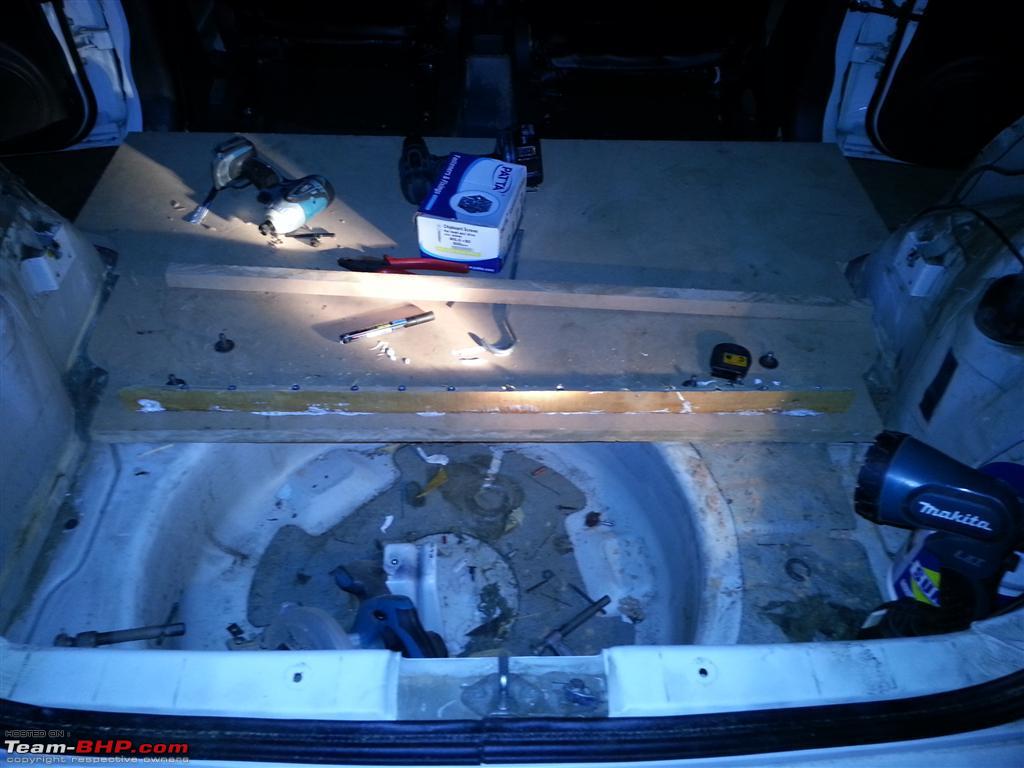
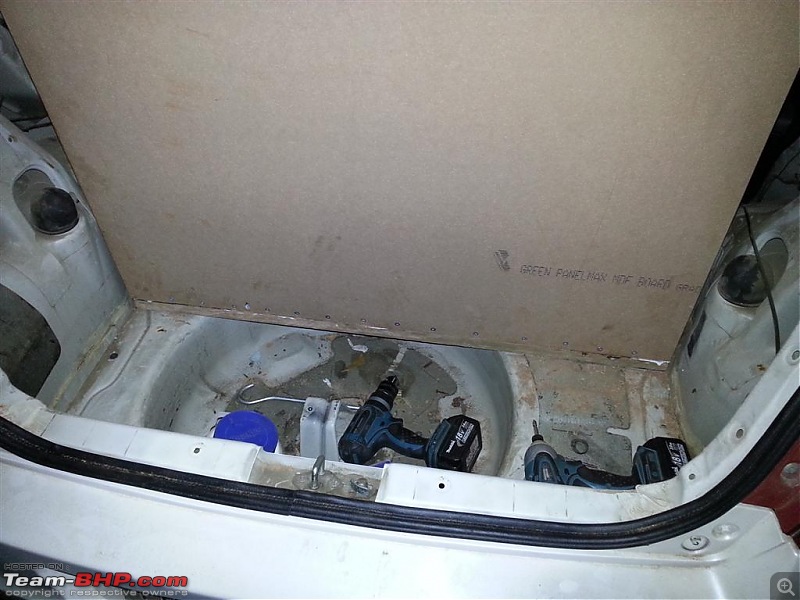
The car interior stripped !!!

Continue....

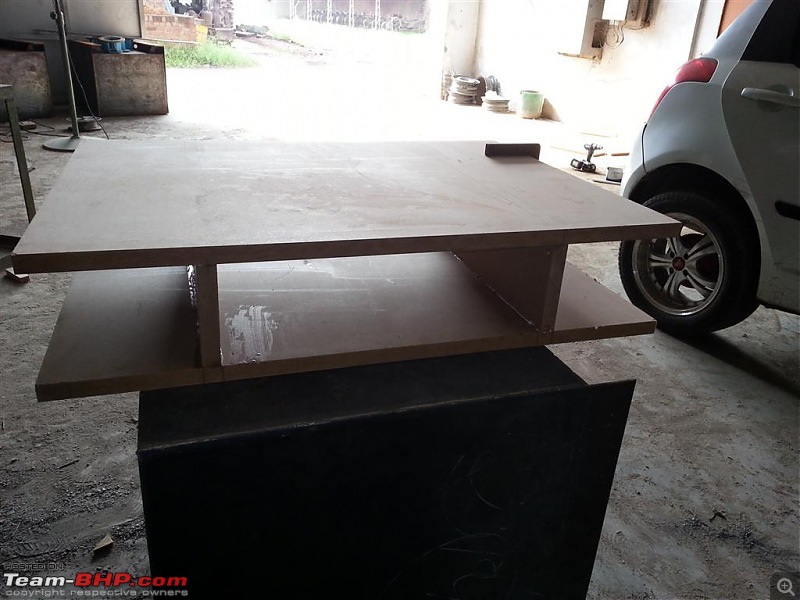
Base size check !!!

Base installed..Could not add more bolts in the front because of the fuel tank underneath. Will hold it from the front at the later stage

Rear wall mounting support !!!

The enclosure will be filled with resin and glass fiber and that to lots of it to make it strong !!!
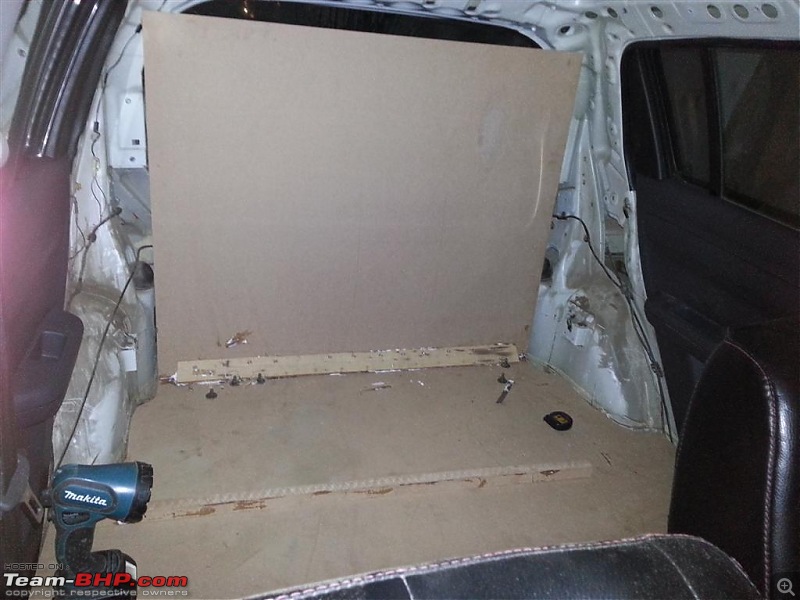
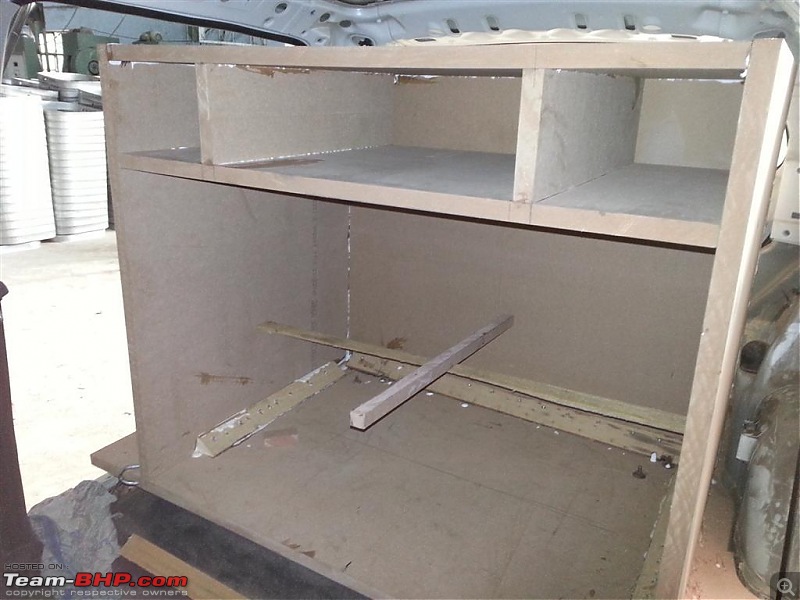
Back wall installed
From the front, Back wall !!!
This install cannot be done without this !!!!
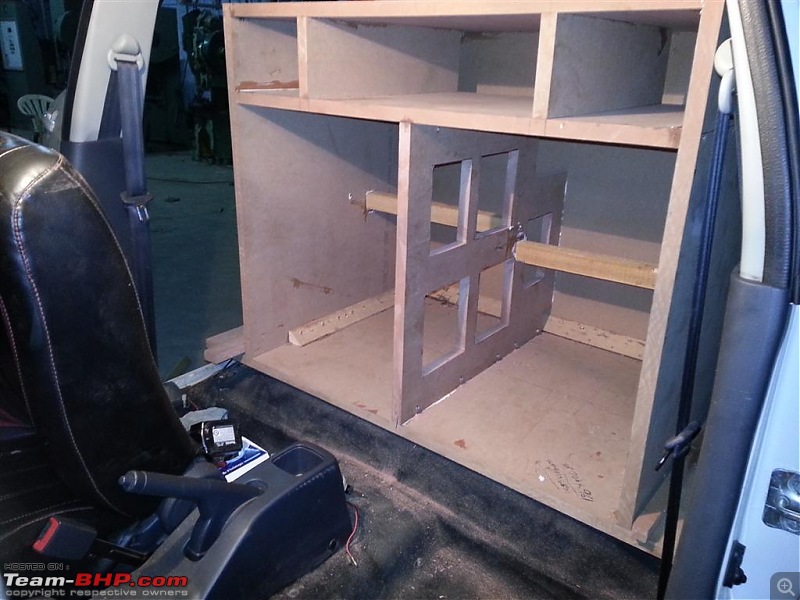
Side walls mocked up !!!

Setting the base up !!!

Driver side installed

Left Side !!!
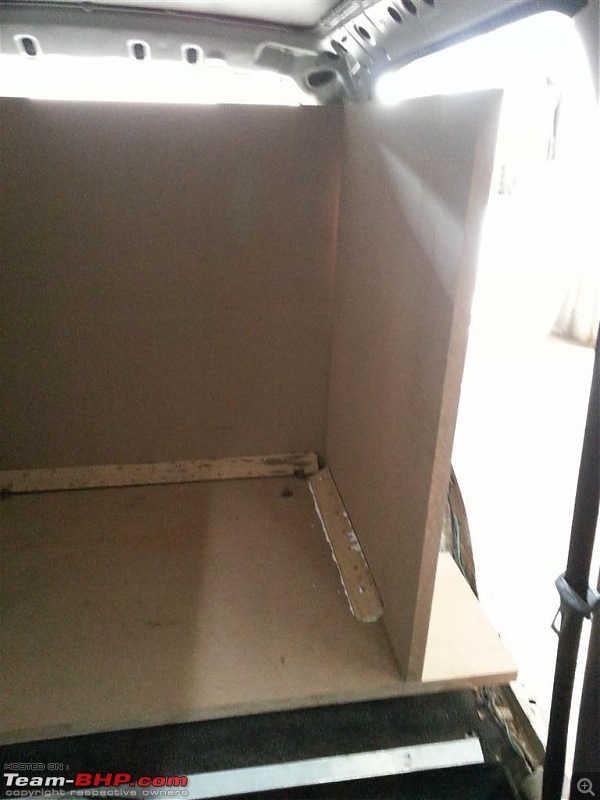
Both Sides !!!

Port layout made !!!

Mocked up before fitting !!!

One side done !!!
The other side mocked up !!!
Fixed !!!

I will be using blockers (closing port vents) to tune the enclosure !!! I have tuned the stock one close to 32 hz, and can go as low as 22 hz still with port area of 7.6 sqinch per cuft !!!
Port inside the enclosure !!!

Mocked up at position !!!

Installed and checking for bracing options !!!
Finally planned to go this way, one soild one inside..Marking done !!!

Cutting done !!!

Installed

Further bracing done for more strength
Fiber work coming up next along with CNC Laser cut amp rack !!!

These two are going in this ride !!!!!
Along with this !!!

Resin work done !!!! It is as solid as a rock !!! Looks it will sound tight !!!!
Trimmed and ready to install the front baffle. The front baffle will be 2 inch thick !!!

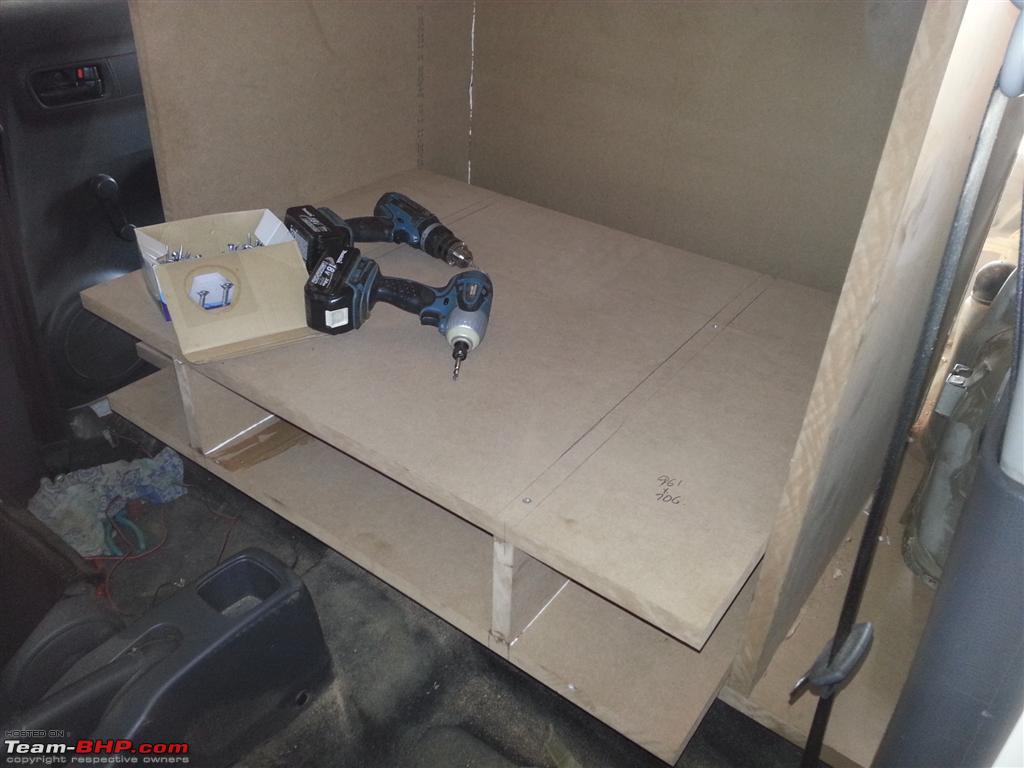
The amp rack base mocked up !!!

Finished and ready !!! The batteries and the copper bus bars will be going underneath the same !!!


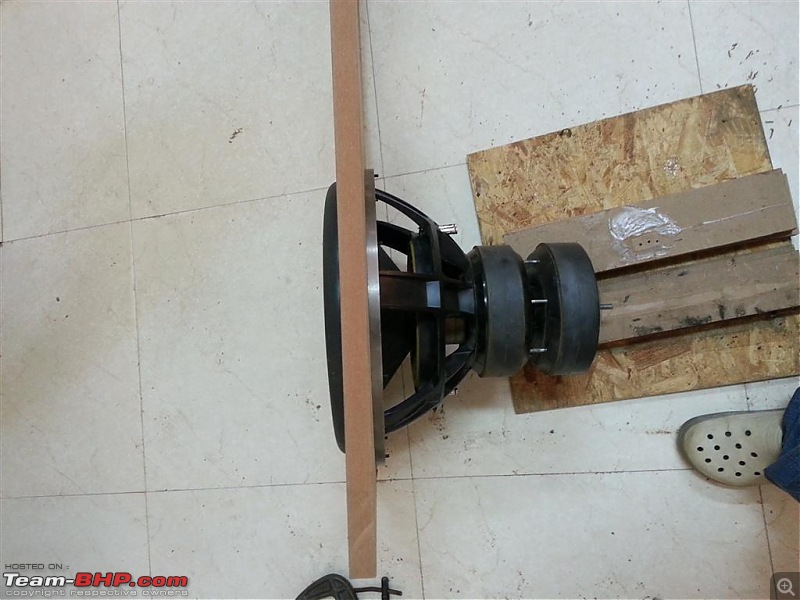
I will be using this method to install the subs. I cannot think of any other which can handle the weight of the sub (75lbs-34kgs each) !!! Also the same will be reinforcing the whole wall for added strength !!!


As you can see in the pics I have done this in the year 2007 !!! Long time back !!!
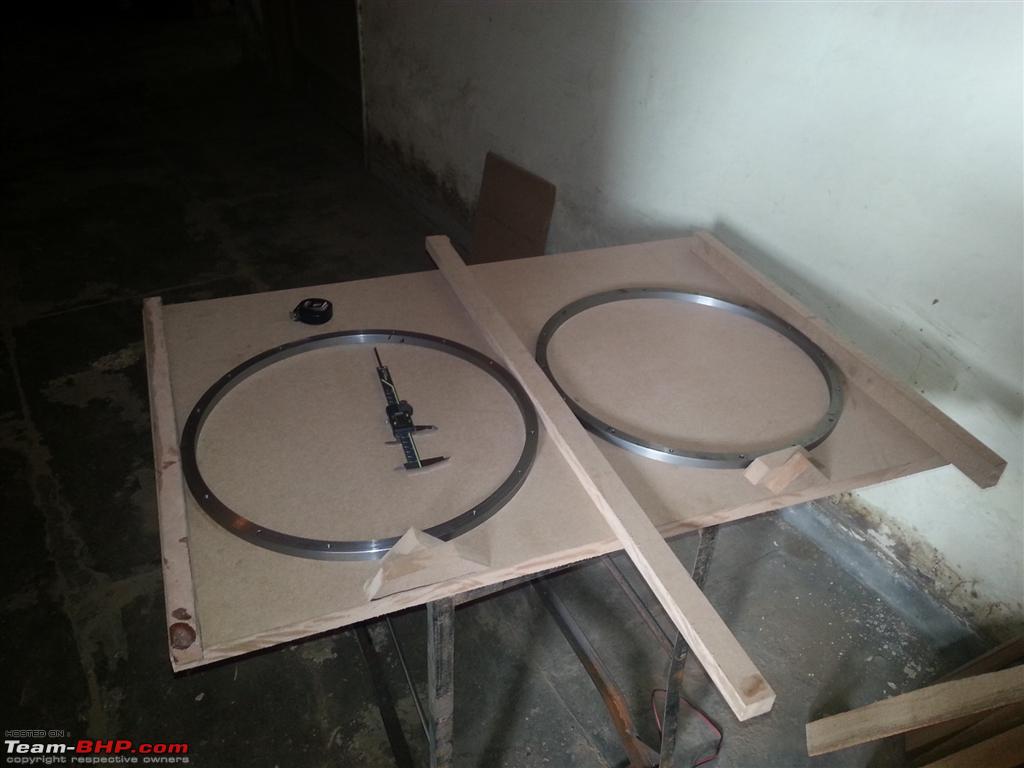
The rings placed to take marking.

One hole cut !!! Perfect fit in the iron ring !!!

Both holes cut, Checking the subs holes are okay !!!

Mocking the rings and the sub

One sub installed !!!
Other beast waiting to be installed !!!

Both done and the rings are also screwed in so that they remain in place when we install the front face of the enclosure !!

Face ready to be installed !!!

Front Baffle inside the ride !!!

Installed !!!

Fellow Ice lovers helped me a lot in installing these subs !!!!


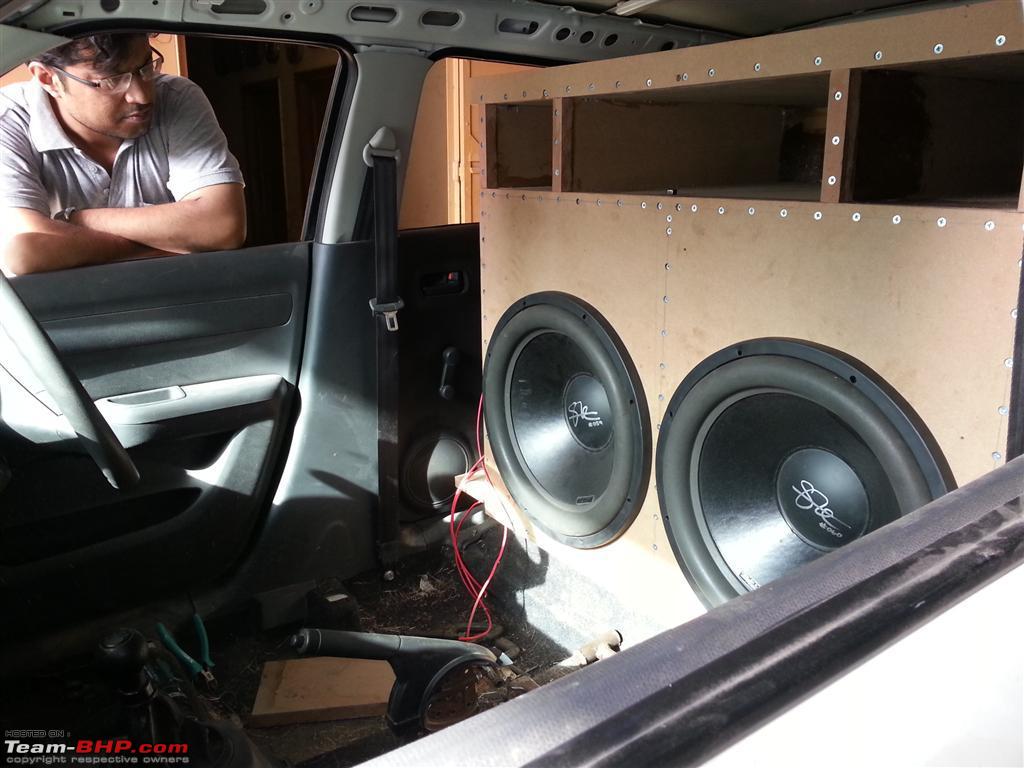
One installed !!!

Both done !!!
 So finally presenting the WALL !!!

Lots of work has yet to be done on the front face of the wall !!! More pics coming up !!!
More details on the cooper busbar coming up next along with the battery details

Total of four (4) will be going in !!! Other two will be arriving soon !!! At least I will fire up the setup with these two !!! One more thing I need to add here is that the batteries are 5 x 12.5 x 22 inch in dimensions (very odd size) and each battery weights just 58 kgs !!! (58 kgs x 4 = 232 kgs) !!!
For those who need info about these here is a link of the same ...
http://www.northstarbattery.com/batt...blue/index.php These are not the normal wet type lead acid battery it is a sealed one with AGM technology these batteries are used by pros worldwide !! And these are not designed in USA, They are MADE IN USA !!!

Thread moved from the Assembly Line to the Sound off & Show off Section. Thanks for sharing!
Looks cool until we get to hear the roar of the devil lol: By the way, it would be nice if you included the cost for the whole setup and the time it consumed until completion of the project?
Cheerz!
SJD
That's some devil kind stuff inside a Hatch !
The Sub Itself looks to be heavier than my weight.
I am sure one would be able to feel the music from C.P. to Lajpat Nagar :-)
I wish I could be close to your place to assist you and get first hand experience with such extreeme I.C.E. Stuff.
Hats off LBM Sir Ji.......
Quote:
Originally Posted by SJD@NewDelhi
(Post 2917451)
it would be nice if you included the cost for the whole setup and the time it consumed until completion of the project?
|
Cost I have not calculated but it would a big one !!!
It took me about 20 days to reach at this stage, a day or two I will able to fire it up !!!
Quote:
Originally Posted by ghpk
(Post 2917482)
That's some devil kind stuff inside a Hatch !
The Sub Itself looks to be heavier than my weight.
I wish I could be close to your place to assist you and get first hand experience with such extreeme I.C.E. Stuff.
Hats off LBM Sir Ji.......
|
Thanks for such kind comments !!
Each sub weights about 35 kgs. I have also done a weight check again. The weight of the enclosure is approx 70-75kgs, that is wood and fiber work only !!!
Good stuff, LBM.
What have you planned to do to the cars mechanicals to handle the massive increase in weight?
The rear springs and damper selection is important there's a drastic weight increase there. If you run stock damper, you will need new rear dampers every month.
I would suggest Swift diesel springs+struts up front and Dzire springs+dampers at the rear. This is the farthest you can go with OEM stuff.
Congratulations on the new ride & the fresh ICE setup. Must be a whole lot of fun, especially since you will be getting a setup after a gap of one year :)
I have only heard & seen videos of your previous car on TeamBHP/Youtube, but it would be great if I can actually witness the "Ground Pounder" in person some day. Good luck with the install :thumbs up
OMG LBM, thats some real heavy stuff in your car. Would love to see the Ground Pounder after the completion.
BTW how much weight is expected to be increased due to the ICE? Also will it be legal on the road.:D.
How is the rear view vision being planned due to the wall?
Very interesting thread, i will stay tuned for more updates, LBM are those steve meade designs subs? any specific reasons for choosing those over other spl subs, one other thing when you alter the existing power/ charging system does it effect other electrical equipments like AC, bulbs etc do share in detail if you can and please do clean the car after the install,:D
| All times are GMT +5.5. The time now is 14:34. | |