Team-BHP > In-Car Entertainment
Register New Topics New Posts Top Thanked Team-BHP FAQ


Reply
  Search this Thread
17,486 views
Old 18th May 2008, 11:14   #16
BHPian
 
Dhar's's Avatar
 
Join Date: Dec 2006
Location: QLN/TRV/DXB
Posts: 420
Thanked: 627 Times

@ Redfire
Congrats! and all the best on your DIY project. Appreciate your DIY spirit.
More pics and details please. (Amp placement, distribution block, RCA cable sub etc etc.)

Please give the source for Finoles cables in TVM.
(Last time I searched whole of Kollam and couldnt get anything more than 12ga and I had to run two cables).

I suggest that you run those cables through flexible conduit at least where the cables has a possibility of rubbing against metal (if you already haven't).
Dhar's is offline  
Old 18th May 2008, 11:41   #17
Senior - BHPian
 
Join Date: Mar 2006
Location: Faridabad
Posts: 6,815
Thanked: 305 Times

In the above pic
  1. Lug
  2. Spring washer
  3. Simple washer
  4. ????? (Seatbelt retanier part)
  5. ????? (Seatbelt retainer part)
  6. washer
  7. ???? (seat retainer)
If 1 is the thimble/lug it is not fully tightened kya ?

If it is loose then it might serious damage to the amp due to loose connection. As in the pic it is seriously loose

Have you scraped the paint before fitting it there.
Attached Thumbnails
DIY Started, surprising result - will continue-gnd.jpg  


Last edited by low_bass_makker : 18th May 2008 at 11:46.
low_bass_makker is offline  
Old 18th May 2008, 14:18   #18
Senior - BHPian
 
Bass&Trouble's Avatar
 
Join Date: Mar 2006
Location: Bombay
Posts: 2,754
Thanked: 124 Times

Quote:
Originally Posted by redfire View Post
My co-installer. Had a very hard time controlling this installer from running around the car and 'installing' various things
Looks like he was looking for a good point to ground your amp.
Quote:
Originally Posted by DerAlte View Post
BTW, is "leg" related to "lug" the same way as "Gelf" is related to "Gulf"? (Apologies, please don't be offended, I'm just pulling your "lug")
Masterpiece.
Bass&Trouble is offline  
Old 18th May 2008, 14:52   #19
BHPian
 
redfire's Avatar
 
Join Date: Jan 2008
Location: Chicago, USA
Posts: 449
Thanked: 27 Times

Quote:
Originally Posted by low_bass_makker View Post
tightened kya ?

If it is loose then it might serious damage to the amp due to loose connection. As in the pic it is seriously loose

Have you scraped the paint before fitting it there.
Thanks LBM for pinting out this as this is a very important thing in power connection. But the connection is fine and tight. The shape of that body part and angle of the pic makes it appear loose. I have dealt with power and UPS things a lot in office and know how it will impact. I haven't scraped paint though. Have read it somewhere else too. Will do it and refit it anyway.

Quote:
Originally Posted by Dhar's View Post
Please give the source for Finoles cables in TVM.
(Last time I searched whole of Kollam and couldnt get anything more than 12ga and I had to run two cables).

I suggest that you run those cables through flexible conduit at least where the cables has a possibility of rubbing against metal (if you already haven't).
Available at any decent electrical shop. I got it from a shop at Saphalyam complex - Palayam. Yes, The part of cables in engine compartment are covered with flexible conduit. Waiting for remaining materials (RCA, damping etc) to come. Will send a detailed report with pics after that.

Last edited by redfire : 18th May 2008 at 15:02.
redfire is offline  
Old 18th May 2008, 15:01   #20
Senior - BHPian
 
Bass&Trouble's Avatar
 
Join Date: Mar 2006
Location: Bombay
Posts: 2,754
Thanked: 124 Times

Quote:
Originally Posted by redfire View Post
I haven't scraped paint though. Have read it somewhere else too. Will do it and refit it anyway.
Please do it. Paint will act as an insulator between the ring terminal and the chassis. After removing the paint and re-tightening, use something like hot melt to seal all the connections to prevent the exposed car's body at that point from corrosion.
Bass&Trouble is offline  
Old 20th May 2008, 22:42   #21
BHPian
 
redfire's Avatar
 
Join Date: Jan 2008
Location: Chicago, USA
Posts: 449
Thanked: 27 Times
Changed RCAs and SW speaker wire

Hi All,
Today afternoon I got my parcel from B&T and could change RCAs to both amps and speakerwire to sub. The keen observation of installers work helped me to remove the HU block, remove both RCAs (to each amp) and run the speakerwire without any hastle. It took 2 hours to complete the job. Now I have peace of mind and can proudly say that I am running on standard cables and wires (Ichibahn RCAs and Illusion speaker wire). Here are some pics which may help to understand.

Ichibahn RCA (black) against 'Boss' RCA
DIY Started, surprising result - will continue-01rcas.jpg

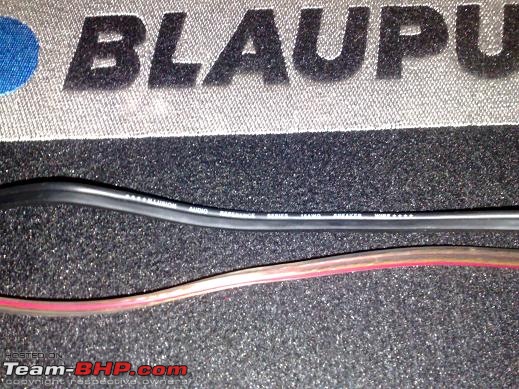
Illusion speaker wire (black) with local wire
DIY Started, surprising result - will continue-02wires.jpg

To remove HU block in Swift, take out the nut here (look through glove box)
Name:  03screw.jpg
Views: 1415
Size:  14.8 KB

HU block poped out
DIY Started, surprising result - will continue-04removing.jpg

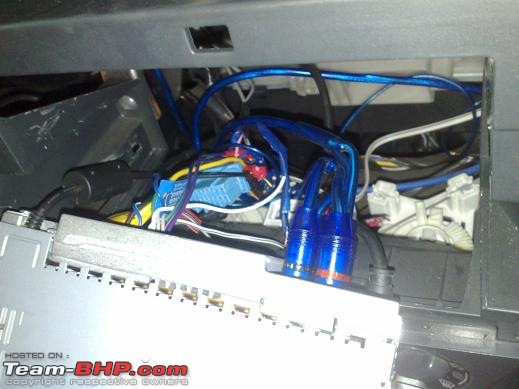
HU connections, see old blue 'Boss' RCAs
DIY Started, surprising result - will continue-05hu_removed.jpg

Routing of RCA
DIY Started, surprising result - will continue-06routing.jpg

My 12v accessory light helps a lot (with magnetic base)
DIY Started, surprising result - will continue-07worklight1.jpg

New banana connectors for sub box
DIY Started, surprising result - will continue-08banana_cons.jpg

Blau PA275 amp with new power and RCA under co-driver seat
DIY Started, surprising result - will continue-09blaupa275.jpg

Blau GTb1200 at boot
DIY Started, surprising result - will continue-10gtb1200.jpg

JBL GT5-A402 amp under driver seat
DIY Started, surprising result - will continue-11.jpg

This time my co-installer was more busy, trying to plug RCAs
DIY Started, surprising result - will continue-12installer1.jpg

item for weekend - noisekill
DIY Started, surprising result - will continue-13noisekill.jpg
redfire is offline  
Old 20th May 2008, 23:52   #22
BHPian
 
srijit's Avatar
 
Join Date: Jan 2008
Location: Trivandrum
Posts: 598
Thanked: 8 Times

Sigh. I was at a friend's house when you called :(
Looks like you got a good helper. I would probably have pestered you the whole time
srijit is offline  
Old 21st May 2008, 14:03   #23
BHPian
 
MillionSwords's Avatar
 
Join Date: Nov 2007
Location: Chennai Pattanam [ellam kattanam]
Posts: 172
Thanked: 2 Times
Cool - looks wonderful!

Quote:
Originally Posted by redfire View Post
Hey redfire,

All looks cool and nice!
Cheers to your DIY spirit and successful installations.
Hope the NoiseKill comes in good too! Get some one to take pictures while you are at work!

can you post pictures of your

1. Magnetic Base 12V light and
2. Your Wireless Drill

Where did you get them and how much do they cost.
Is your drill powerful enough? [you can scrap the paint off the body using a grinding bit on this grill, do you have one?]

cheers,
MS
MillionSwords is offline  
Old 21st May 2008, 17:45   #24
BHPian
 
redfire's Avatar
 
Join Date: Jan 2008
Location: Chicago, USA
Posts: 449
Thanked: 27 Times
Completed remaining cabling and front doors damped

Hi all,
completed wiring new speaker cables from Amp to comps and also done one major step! damping the front doors. Used 20 sqf of noisekill. As someone pointed out we can use another 10sq or more if you want to stiffen it. But 20 (10 sqf each) is a decent quantity to start with for basic damping the front doors. Thanks to Srijit who came and helped me. Greenhorn - please accept my sincere apologies as I had time only today afternoon. Coming days in this week I am busy in afternoons and working this weekend. Will do the rest soon (hatchdoor is a must).

Impression - doors feel heavy as a big car. Doors closes with a more good thud. On our testride with ICE, I felt less vibrations are affected inside and an increased clarity in vocals and mid. Definitely, damping the rear doors and hatchdoor (must!) will help to improve.

GTO607Cwoofer
DIY Started, surprising result - will continue-01gto607c.jpg

Front right door, doorpad removed
DIY Started, surprising result - will continue-02doorfr1.jpg

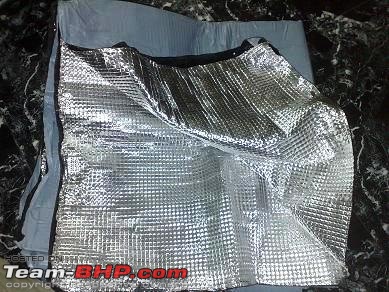
FR door, noisekill applied layer1
DIY Started, surprising result - will continue-03dfrnk1.jpg

FR door, noisekill applied layer2
DIY Started, surprising result - will continue-03dfrnk2.jpg

FL door, noisekill applied layer1
Name:  04dflnk3.jpg
Views: 1353
Size:  76.6 KB

FL door, noisekill applied layer2
DIY Started, surprising result - will continue-04dflnk4.jpg

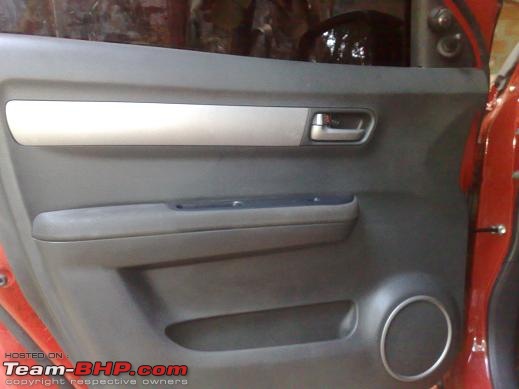
Finished door
DIY Started, surprising result - will continue-06finisheddoor.jpg

View from rear
DIY Started, surprising result - will continue-05carice.jpg
redfire is offline  
Old 21st May 2008, 17:52   #25
Senior - BHPian
 
Bass&Trouble's Avatar
 
Join Date: Mar 2006
Location: Bombay
Posts: 2,754
Thanked: 124 Times

Hi redfire, thats an awesome job with the cabling and damping. cheers:

WRT your little one: Looks like he has a thing for The Doors. lol. He seems to be trying to plug in whatever he can get his hands on into it.
Bass&Trouble is offline  
Old 21st May 2008, 18:00   #26
Senior - BHPian
 
jkdas's Avatar
 
Join Date: Sep 2005
Location: Thiruvananthapu
Posts: 9,687
Thanked: 1,492 Times

Man! nice job.

Heard you were in bed ! We should have a meet soon. How about this Saturday morn.

Edit: Pricing would help others who wanna do DIY.

Last edited by jkdas : 21st May 2008 at 18:02.
jkdas is offline  
Old 21st May 2008, 18:01   #27
Senior - BHPian
 
greenhorn's Avatar
 
Join Date: Apr 2007
Location: KL-01
Posts: 7,745
Thanked: 4,402 Times

no issues mate. the pix are all i wanted.
And my apologies for not showing up at your place so far. It's been a busy week preparing for mom's transfer
besides, now i have bigger problems than rattling door panels.The rears sound very muddy :( started saving up for my subwoofer fund
greenhorn is offline  
Old 21st May 2008, 18:05   #28
BHPian
 
redfire's Avatar
 
Join Date: Jan 2008
Location: Chicago, USA
Posts: 449
Thanked: 27 Times

Quote:
Originally Posted by MillionSwords View Post
Hey redfire,

All looks cool and nice!
Cheers to your DIY spirit and successful installations.
Hope the NoiseKill comes in good too! Get some one to take pictures while you are at work!
Thanks MS, see the noisekill installation.

Quote:
Originally Posted by MillionSwords View Post
can you post pictures of your

1. Magnetic Base 12V light and
2. Your Wireless Drill

Where did you get them and how much do they cost.
Is your drill powerful enough? [you can scrap the paint off the body using a grinding bit on this grill, do you have one?]

cheers,
MS
As you can guess, from US when I visited last year. Bought from a Wallmart. Some 7 and 13$ respectively IIRC. The torch is extremely good. Drill is OK for our general applications. I have even drilled wall to install wallplugs. I think I can use them to scrap paint wit grinding bit.

Quote:
Originally Posted by Bass&Trouble View Post
Hi redfire, thats an awesome job with the cabling and damping. cheers:

WRT your little one: Looks like he has a thing for The Doors. lol. He seems to be trying to plug in whatever he can get his hands on into it.
Thanks Sir, with your great help and sending goods ontime made it easy for me.
Hehe, since he cant get into the car he concentrated on doors.


Pic of my 12V torch
DIY Started, surprising result - will continue-07light.jpg
redfire is offline  
Old 21st May 2008, 18:34   #29
Senior - BHPian
 
Join Date: Mar 2006
Location: Faridabad
Posts: 6,815
Thanked: 305 Times

I liked your DIY and your torch also

Keep up the good work.
low_bass_makker is offline  
Old 21st May 2008, 18:41   #30
BHPian
 
redfire's Avatar
 
Join Date: Jan 2008
Location: Chicago, USA
Posts: 449
Thanked: 27 Times

Quote:
Originally Posted by low_bass_makker View Post
I liked your DIY and your torch also

Keep up the good work.
Many thanks LBM. Actually it was your detailed posts and charts regarding cables I reffered a lot for ths DIY. Now next thing is to tune the system properly with new accessories in place. All suggestions welcome .
redfire is offline  
Reply

Most Viewed


Copyright ©2000 - 2024, Team-BHP.com
Proudly powered by E2E Networks