Team-BHP > Technical Stuff > DIY - Do it yourself
Register New Topics New Posts Top Thanked Team-BHP FAQ


Reply
  Search this Thread
16,385 views
Old 27th October 2014, 00:07   #1
BHPian
 
Join Date: Mar 2013
Location: Hyderabad
Posts: 200
Thanked: 289 Times
DIY: 1st-Gen Honda City Door Panel Removal

So I was on the way to office the other day when a guy on a bike bumped the passenger door of my "precious" (1st gen Honda City VTEC) rather hard. I didn't pull him up for it because it looked like someone hit him from behind and he lost his balance.

But I was still fuming because I had bought the car 18 months ago in perfect condition (it had only 27k on the odo, now at 37k) and this was the first major hit that it took. I had kept it in dent-less, even scratch-less condition till now and some dude ruined it for me. He had also ruined my day as I knew I wouldn't be able to concentrate on my work that day.

I couldn't stop to check the damage because of traffic so I grit my teeth and drove on. After reaching office, I steeled myself expecting the worst as I got out of the driver's seat. I was imagining a huge dent and horrible scratches but I was rather surprised and relieved to see a somewhat manageable dent and absolutely no paint loss.

DIY: 1st-Gen Honda City Door Panel Removal-city-door-panel-dent.jpg

But I knew I couldn't rest until I had it restored back to perfect condition. This weekend, I called up my mechanic and he said he wasn't free the whole weekend! I was crestfallen but since he knew I had knowledge about tinkering with my car (I had previously opened up door panels, carpeting, steering wheel, etc.) he suggested I fix it myself. All I had to do was open up the door panel and push the metal back into shape with my hand.

I was skeptical but also intrigued at the same time so I decided I would try it out. And that was how this guide to removing the front passenger door panel of the 1st gen Honda City (RHD) was born.


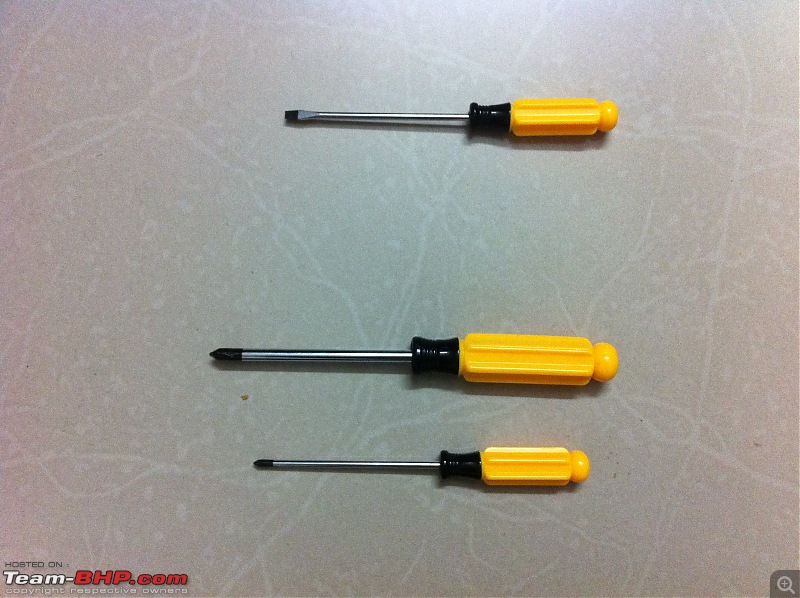
Tools: A small and medium Philips screwdriver. Also a small flat head screwdriver to help open up some panels. It's preferable to use screwdrivers with long shafts because you may not be able to reach a couple of screws.

DIY: 1st-Gen Honda City Door Panel Removal-city-door-panel-tools.jpg


Step 1: There are 3 screws that need to be removed first. One in the top right corner, one in the middle behind the door handle, and one in the bottom left corner. All these screws can be removed with the small Philips screwdriver. Sorry for the poor quality of this pic, I had forgotten to get a pic from this angle during the day and had to get it at night in the parking area.

DIY: 1st-Gen Honda City Door Panel Removal-city-door-panel-step-1.jpg

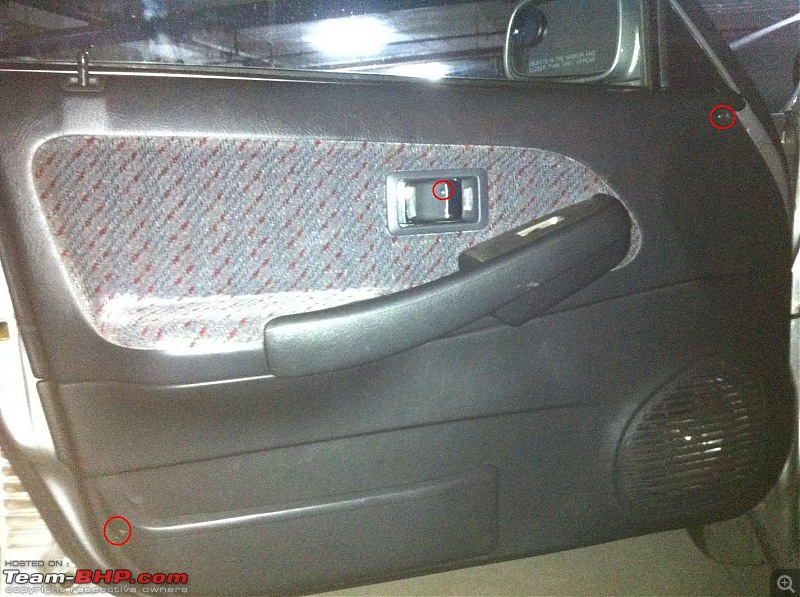
Note: If your Honda City is a 1.3 DX/EXi, you may not have the door pocket at the bottom but the screw should still be there.
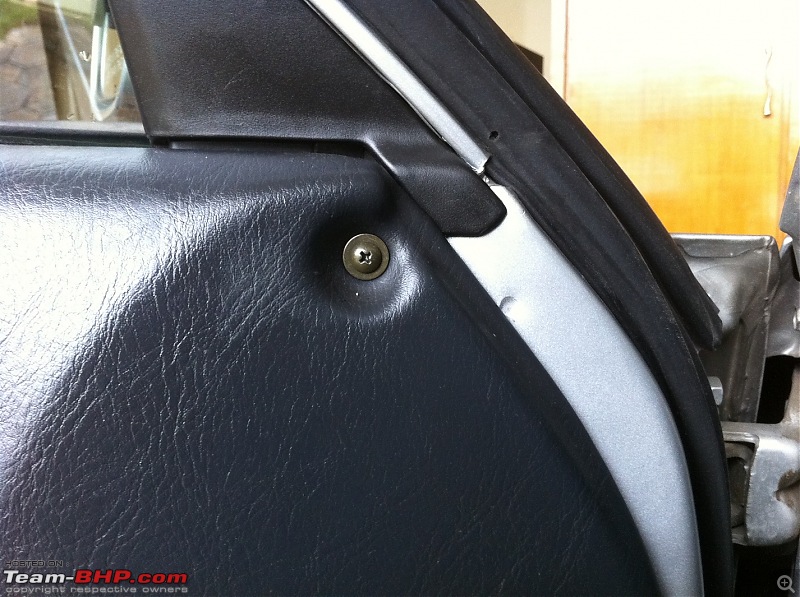

Top right screw:

DIY: 1st-Gen Honda City Door Panel Removal-city-door-panel-step-2.jpg


Bottom left screw:

DIY: 1st-Gen Honda City Door Panel Removal-city-door-panel-step-3.jpg


After removing the middle screw, the plastic around the latch can be removed easily. Pull the door handle, and use the flat head screwdriver to gently pry it out.

DIY: 1st-Gen Honda City Door Panel Removal-city-door-panel-step-4.jpg


Step 2: 
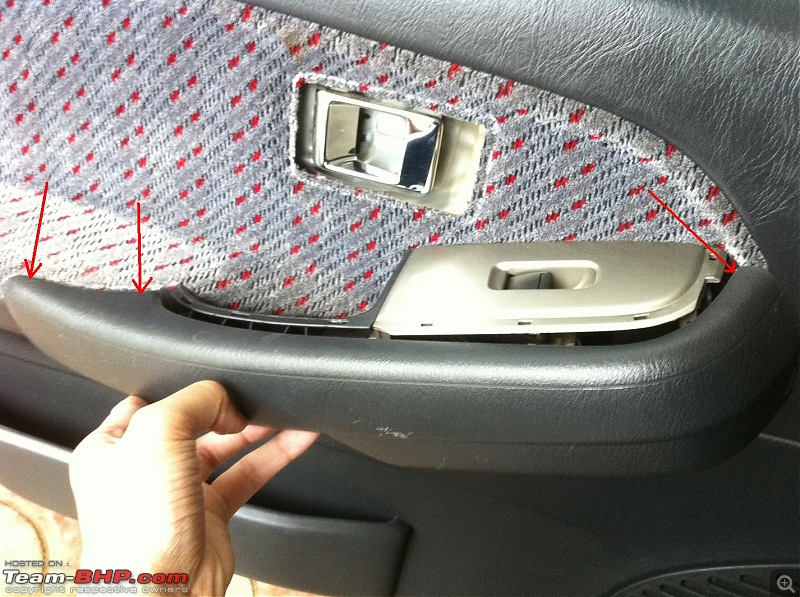
Now we have to remove the covering panel of the arm rest that is in the middle of the door (refer 1st pic in Step 1). This is rather tricky and it is hard to remove without any damage. You have to use the flat head screwdriver to pry it out and may end up scratching it if you're not extremely careful.

There are 3 externally visible tabs on the bottom of the front edge, just under the power window switch.

DIY: 1st-Gen Honda City Door Panel Removal-city-door-panel-step-5.jpg

You can probably insert the flat head just behind the tabs (between the plastic and door fabric) and pry it open. But I decided to pry it open from the top after watching a YouTube video for a 2002 Honda Jazz/Fit. I put the flat head in the places shown with arrows and pulled the panel up and out gently. I had to run my fingers along the top of the panel while pulling up and out to free all the internal tabs. Then I had to run my fingers along the bottom of the panel because there were a few more tabs there.

DIY: 1st-Gen Honda City Door Panel Removal-city-door-panel-step-6.jpg

Remember not to pull too hard on the left side because there is a sideways tab there. Pull it out on the right side with the left side as a pivot and then move the entire panel to the right and then out.

Arm rest panel removed:

DIY: 1st-Gen Honda City Door Panel Removal-city-door-panel-step-7.jpg

Back side of the panel with all the tabs circled in red. The sideways tab is circled in green.

DIY: 1st-Gen Honda City Door Panel Removal-city-door-panel-step-8.jpg


Step 3: 
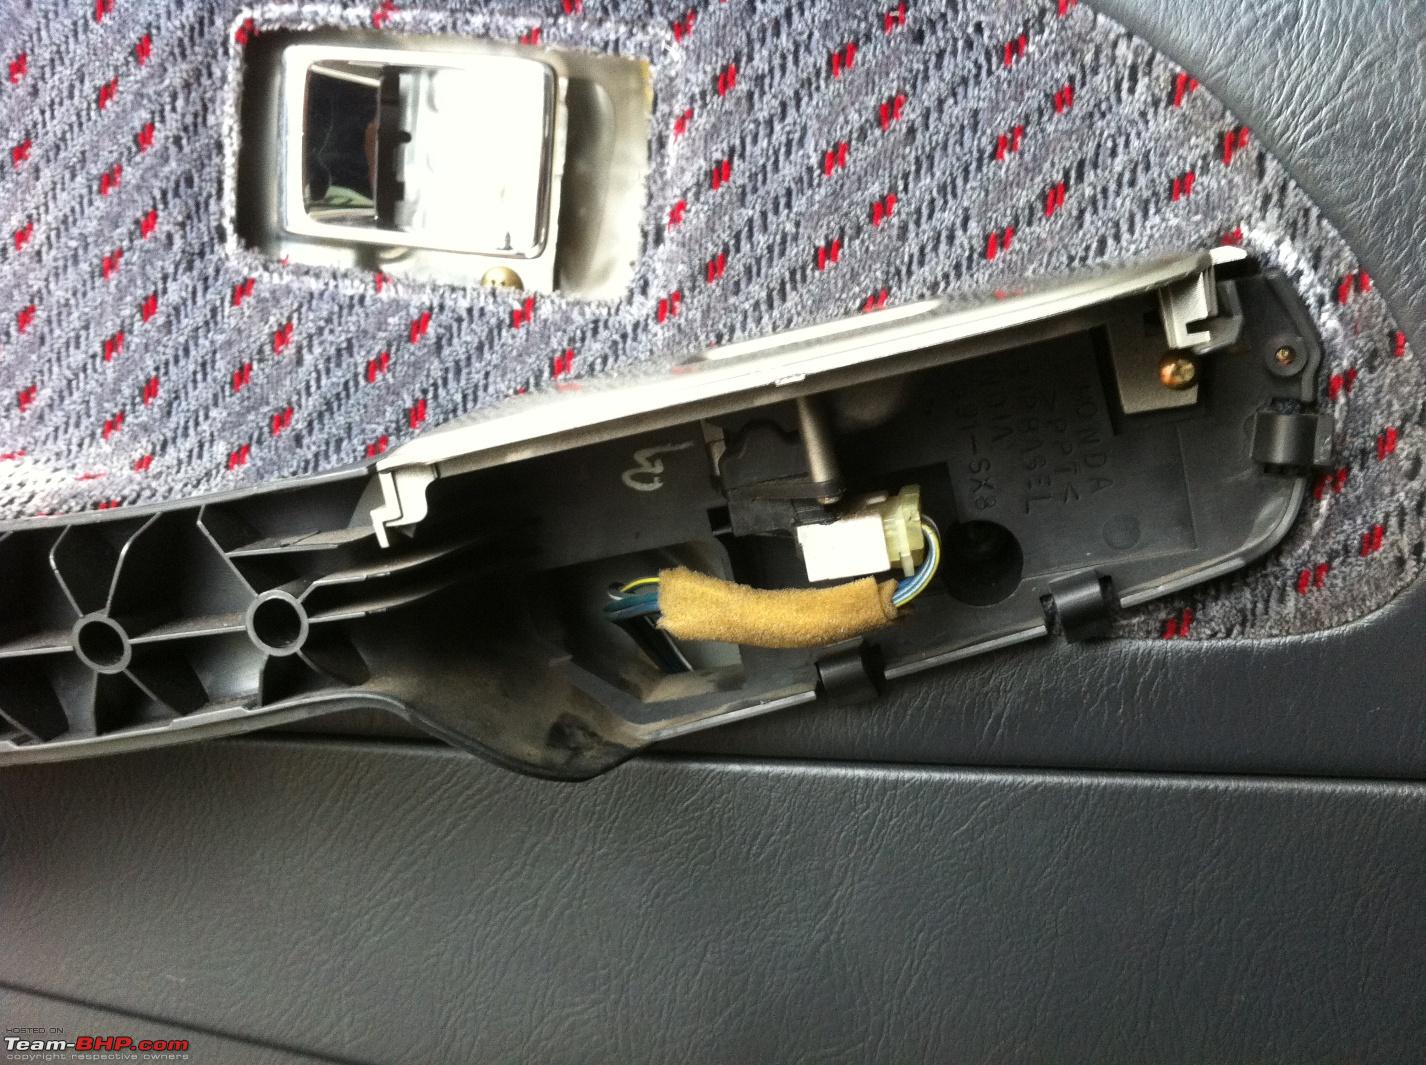
Remove the power window connector that is plugged in to the panel. There is a small tab on the bottom of the connector. Pinch the connector with your thumb and forefinger, press the tab with your thumb, and slide the connector out to the right. Then push the power window connector out through the small hole behind it.

DIY: 1st-Gen Honda City Door Panel Removal-city-door-panel-step-9.jpg


Step 4: Remove the 2 screws circled in red with a medium size Philips screwdriver.

DIY: 1st-Gen Honda City Door Panel Removal-city-door-panel-step-10.jpg

Closer view of the screw to the right:

DIY: 1st-Gen Honda City Door Panel Removal-city-door-panel-step-11.jpg

Closer view of the screw to the left:

DIY: 1st-Gen Honda City Door Panel Removal-city-door-panel-step-12.jpg


Step 5: Now it's time to remove the entire panel off the door. There are 8 "hooks" behind the panel. They are all on the bottom half of the panel along the border. I've circled their approximate locations in red. Just run your fingers along the border and keep tugging on the panel straight out with a bit of force at the locations of the hooks.

DIY: 1st-Gen Honda City Door Panel Removal-city-door-panel-step-13.jpg

Slowly and carefully lift the panel up. Be mindful of the door lock, it's delicate and can get bent if caught on the panel.


Step 6 (optional): Remove the small triangular piece in the top right corner.

DIY: 1st-Gen Honda City Door Panel Removal-city-door-panel-step-14.jpg

Just grip it on both sides and pull it out.
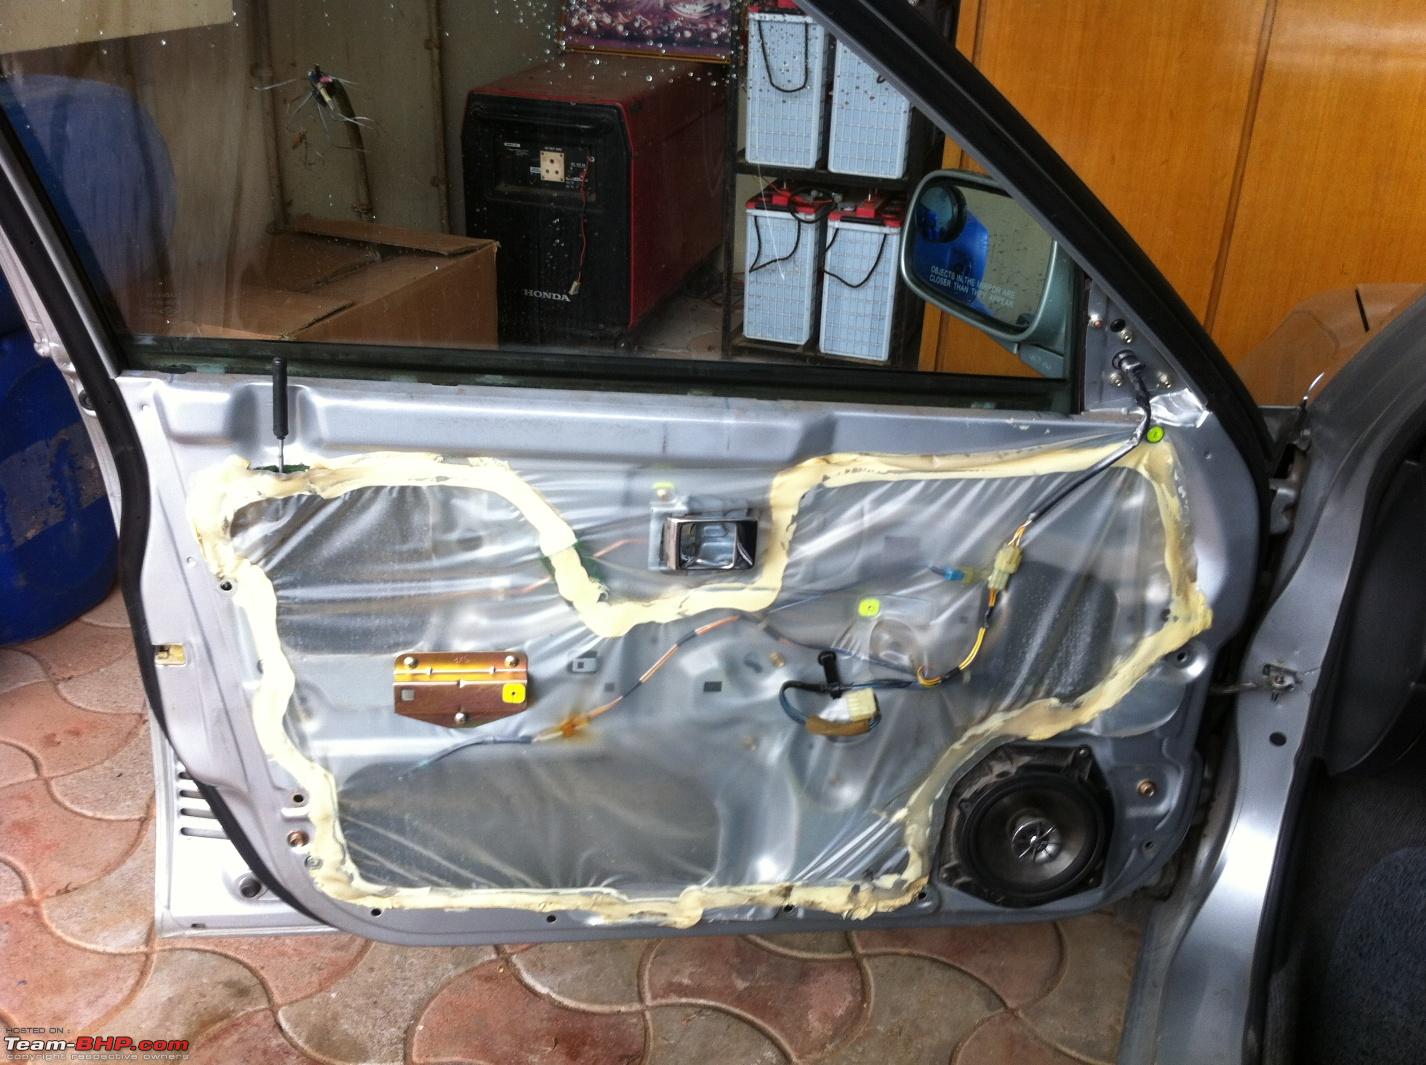
DIY: 1st-Gen Honda City Door Panel Removal-city-door-panel-step-15.jpg

DIY: 1st-Gen Honda City Door Panel Removal-city-door-panel-step-16.jpg


ALL DONE!

DIY: 1st-Gen Honda City Door Panel Removal-city-door-panel-step-17.jpg


To put it all back together, just follow these steps in reverse.


After opening the panel, I had to lift up the bottom half of the plastic cover, slide my hand into the opening and push the outer metal panel. It just snapped back into shape with a loud bang.

Dent fixed:

DIY: 1st-Gen Honda City Door Panel Removal-city-door-panel-fixed.jpg


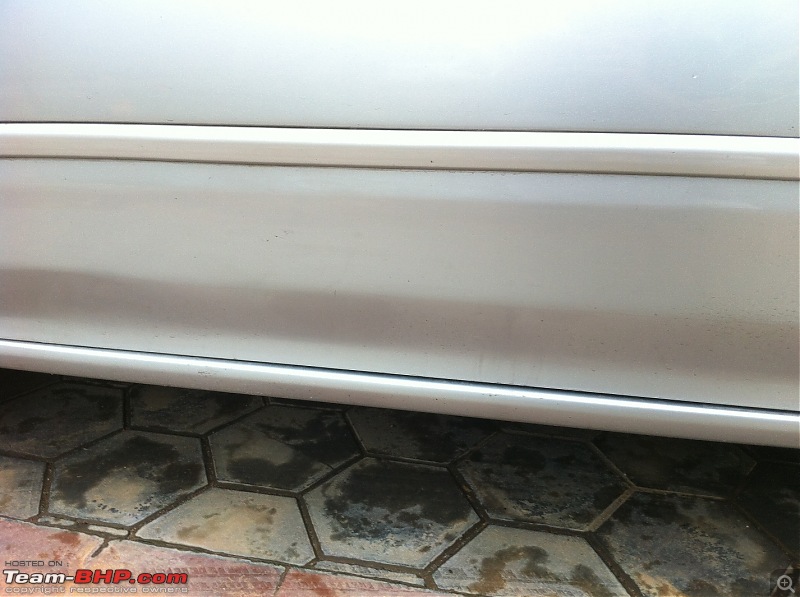
Now my car is back to (almost) perfect condition. There is the tiniest of dents that can only be seen when really close up but I'm happy with the result.

Last edited by bowser : 27th October 2014 at 01:23.
bowser is offline   (7) Thanks
Old 28th October 2014, 12:13   #2
Team-BHP Support
 
Join Date: Feb 2004
Location: Mumbai
Posts: 17,835
Thanked: 77,058 Times
re: DIY: 1st-Gen Honda City Door Panel Removal

Thread moved from the Assembly Line to Technical Stuff. Thanks for sharing!
Aditya is offline  
Old 29th October 2014, 11:15   #3
BHPian
 
ssjr0498's Avatar
 
Join Date: Mar 2006
Location: Blr-Ccu
Posts: 860
Thanked: 516 Times
Re: DIY: 1st-Gen Honda City Door Panel Removal

Good job mate! Also, the fact that your vtec is in such a immaculate shape, it's an eye candy for a Ohc Vtec lover like me!

My Vtec also has a similar but smaller ding exactly at the same place, done by the leg guard of a motorcycle! Will try it out now that I have your post/pictures as reference!

Cheers!
ssjr0498 is offline  
Old 29th October 2014, 14:45   #4
BHPian
 
baddy's Avatar
 
Join Date: Oct 2005
Location: Chennai
Posts: 82
Thanked: 89 Times
Re: DIY: 1st-Gen Honda City Door Panel Removal

Hi bowser, Really appreciate the effort taken to record this process and your intention to DIY. My OHC has a problem with the driver side power windows Auto Up function. Looks like a loose contact or something, basically as i hold the window button it should roll up/down. But this does not happen most of the times. I have tried spraying WD 40 and other cleaning sprays meant for electricals, but with no permanent fix. Since then i have been contemplating opening the handle myself. I guess the time has now come, thanks to your detailed DIY procedure . Thank you and glad your car lost the dent.
baddy is offline  
Old 29th October 2014, 15:13   #5
BHPian
 
Join Date: Dec 2008
Location: Nuremberg
Posts: 670
Thanked: 582 Times
Re: DIY: 1st-Gen Honda City Door Panel Removal

Looks like Tata Indica Vista door design is copied from old honda city. Basic design is same in Vista, screw to screw, power windows switches, hand rest cover, inside it, screws inside hand rest cover... litterly everything looks like copied in Tata Vista.
sushantr5 is offline  
Old 30th October 2014, 00:18   #6
BHPian
 
Join Date: Mar 2013
Location: Hyderabad
Posts: 200
Thanked: 289 Times
Re: DIY: 1st-Gen Honda City Door Panel Removal

Quote:
Originally Posted by ssjr0498 View Post
Good job mate! Also, the fact that your vtec is in such a immaculate shape, it's an eye candy for a Ohc Vtec lover like me!

My Vtec also has a similar but smaller ding exactly at the same place, done by the leg guard of a motorcycle! Will try it out now that I have your post/pictures as reference!

Cheers!
I'm glad you found this useful. Please let me know how it goes!

If your dent has a crease in it you may not get it back to the original shape perfectly. But if it is just a smooth concave dent it should come right out. You may have to press the panel a bit hard to pop out the dent.

Quote:
Originally Posted by baddy View Post
Hi bowser, Really appreciate the effort taken to record this process and your intention to DIY. My OHC has a problem with the driver side power windows Auto Up function. Looks like a loose contact or something, basically as i hold the window button it should roll up/down. But this does not happen most of the times. I have tried spraying WD 40 and other cleaning sprays meant for electricals, but with no permanent fix. Since then i have been contemplating opening the handle myself. I guess the time has now come, thanks to your detailed DIY procedure . Thank you and glad your car lost the dent.
Though my guide was for the passenger side, I'm sure the steps are exactly the same for the driver side panel. It may be sufficient for you to just open the arm rest panel and nothing else. You may have to remove the switch and clean it.

I would again like to stress that opening the arm rest panel without damaging it is very difficult. Do be very gentle and try to use a hard plastic tool if available instead of a flat head screwdriver.


Good luck to both of you!

Last edited by bowser : 30th October 2014 at 00:24.
bowser is offline  
Reply

Most Viewed


Copyright ©2000 - 2024, Team-BHP.com
Proudly powered by E2E Networks