Shortcut - If the LED glows when you press all the three buttons and still the remote doesn't work, you can skip everything till 2.4
1.First step - Physical inspection
1.1. Inspect the remote from outside. Is it damaged? Was it dropped or waterlogged anytime? Are the buttons worn out? +ve if alls well. -ve if not.
1.2. Open up the remote by twisting a screwdriver or a prying tool in the gap provided. Sorry for not showing an image since my remote is chipped out in the sides

If step 1 turns out to be positive, skip the next step.
1.3. Since you have located some sort of physical damage, water logging or wear, as you open the remote, look for damage to the inner parts as well, corresponding to the external damage. This may include corrosion(water-logging/chemical influx), damage to PCB. If the PCB is damaged, maybe thats the end of the post mortem.
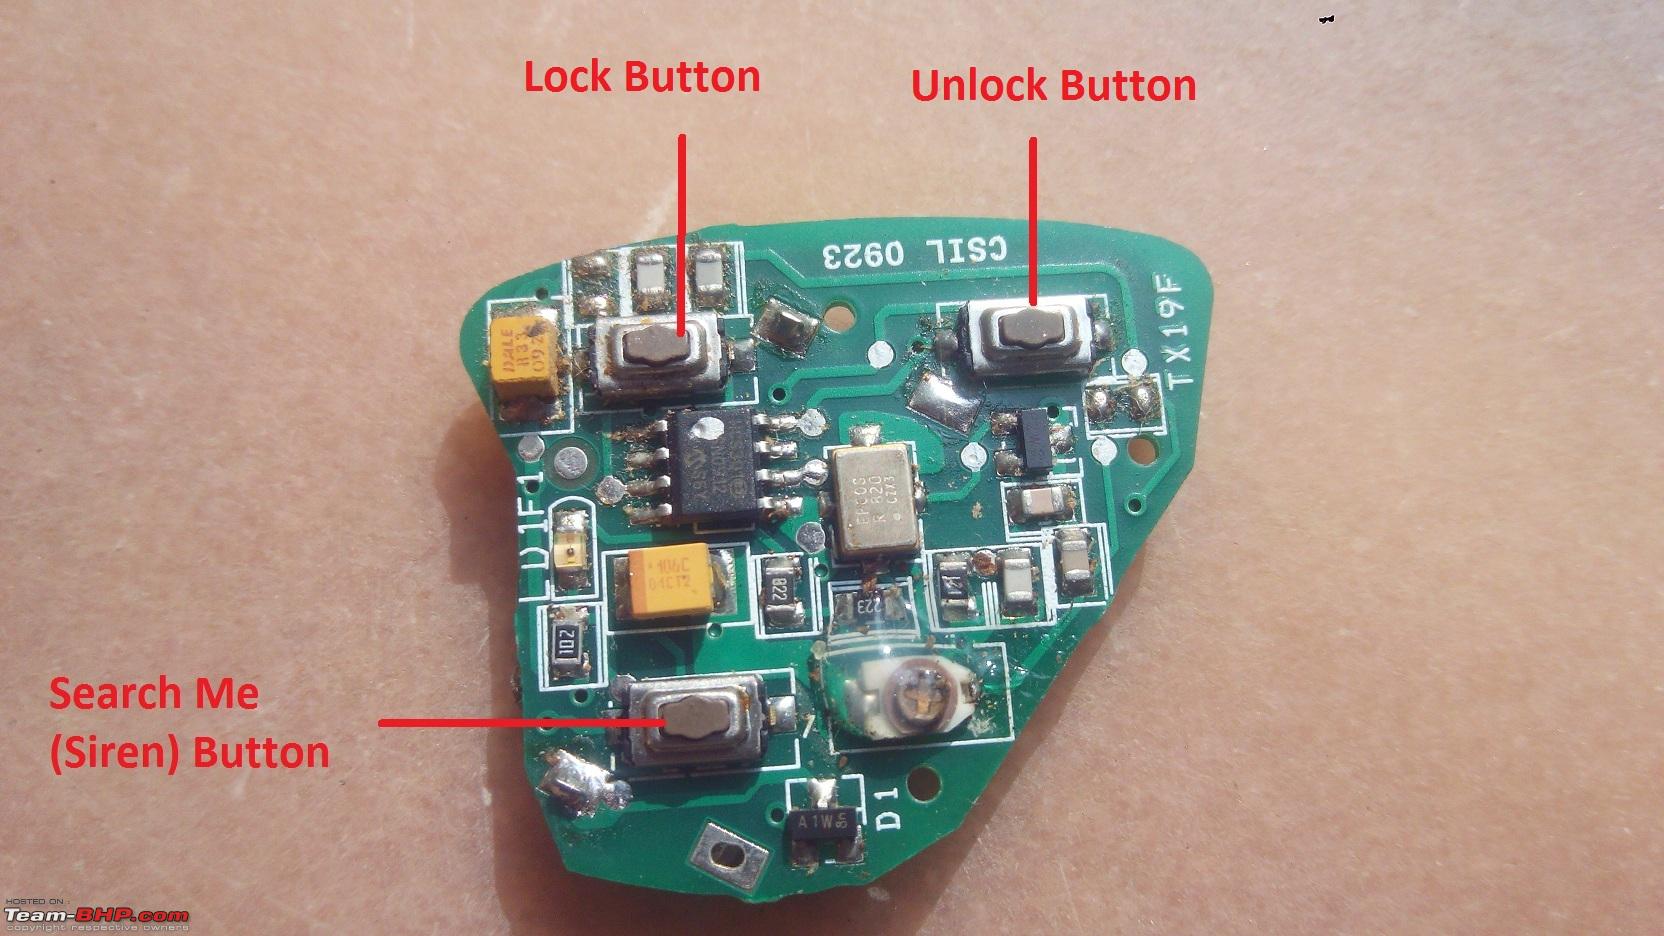
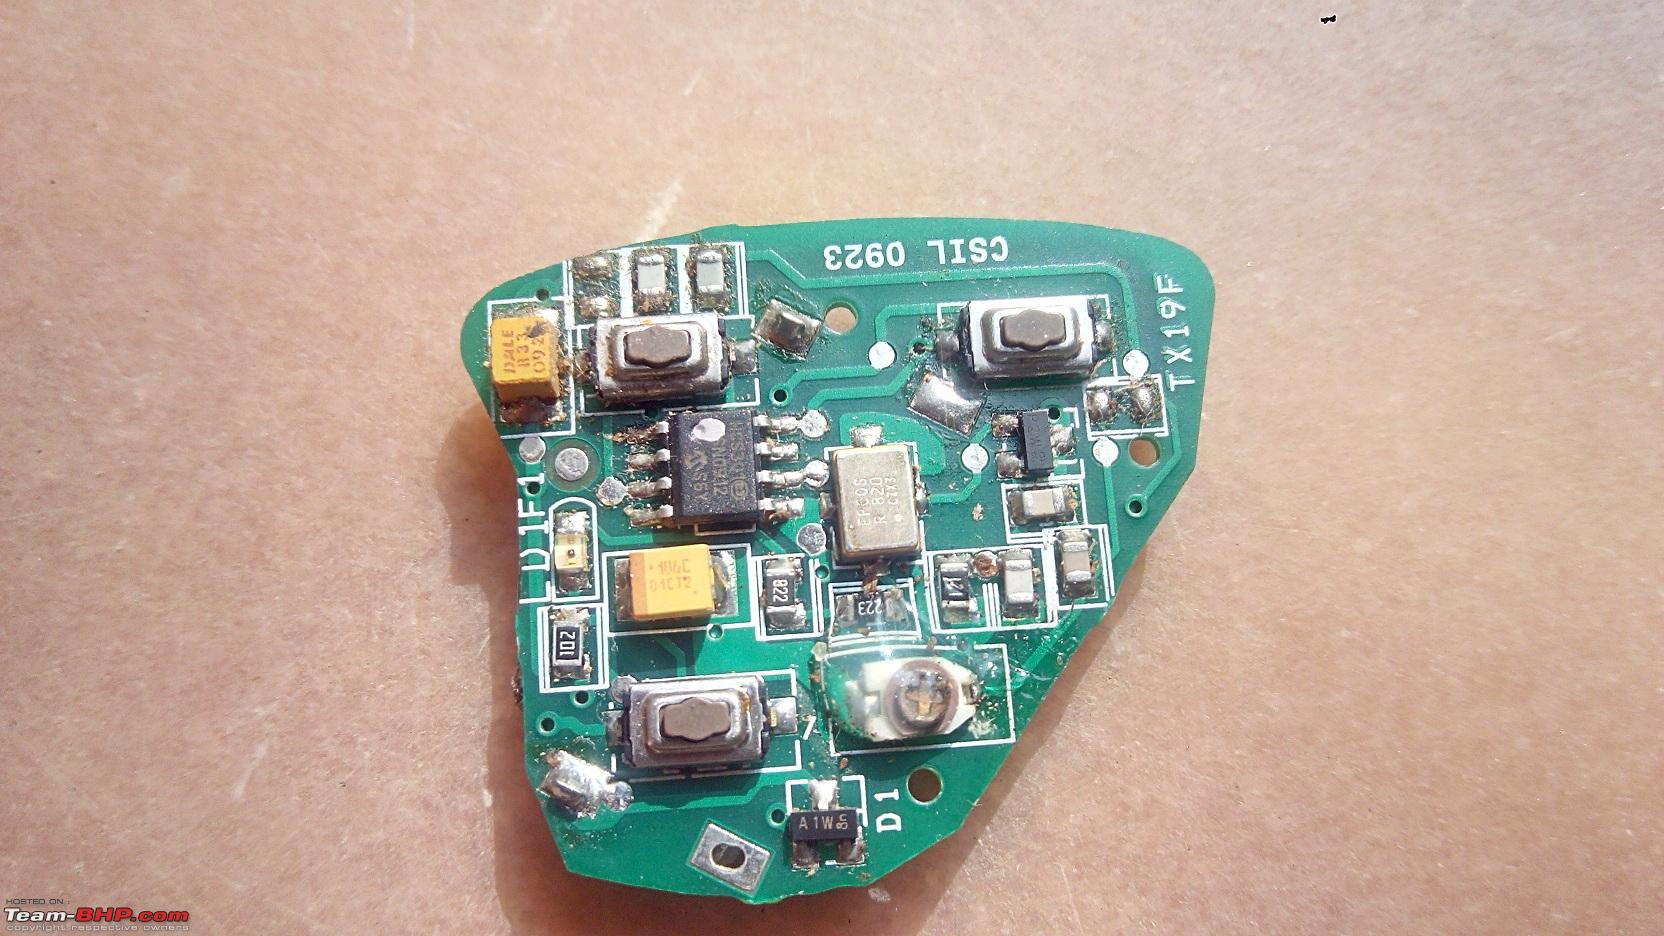
1.4. Remove the PCB from the remote shell and keep it on a clean surface. It will look like this:
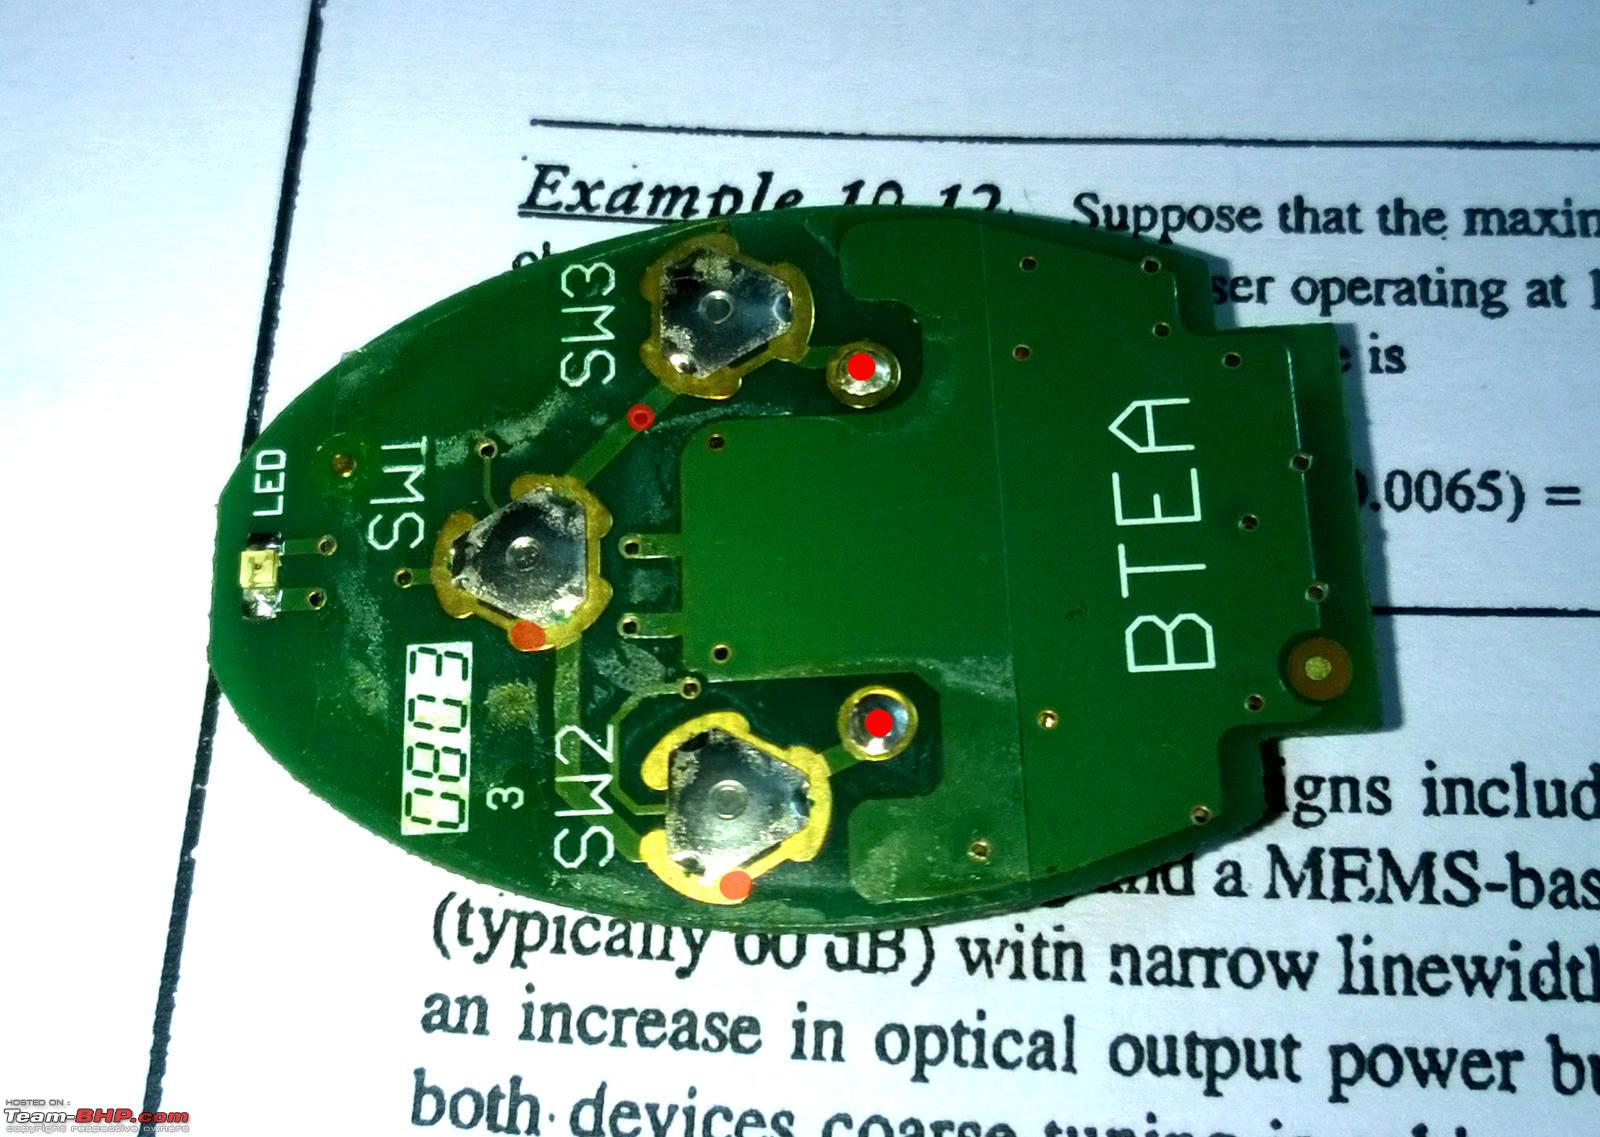
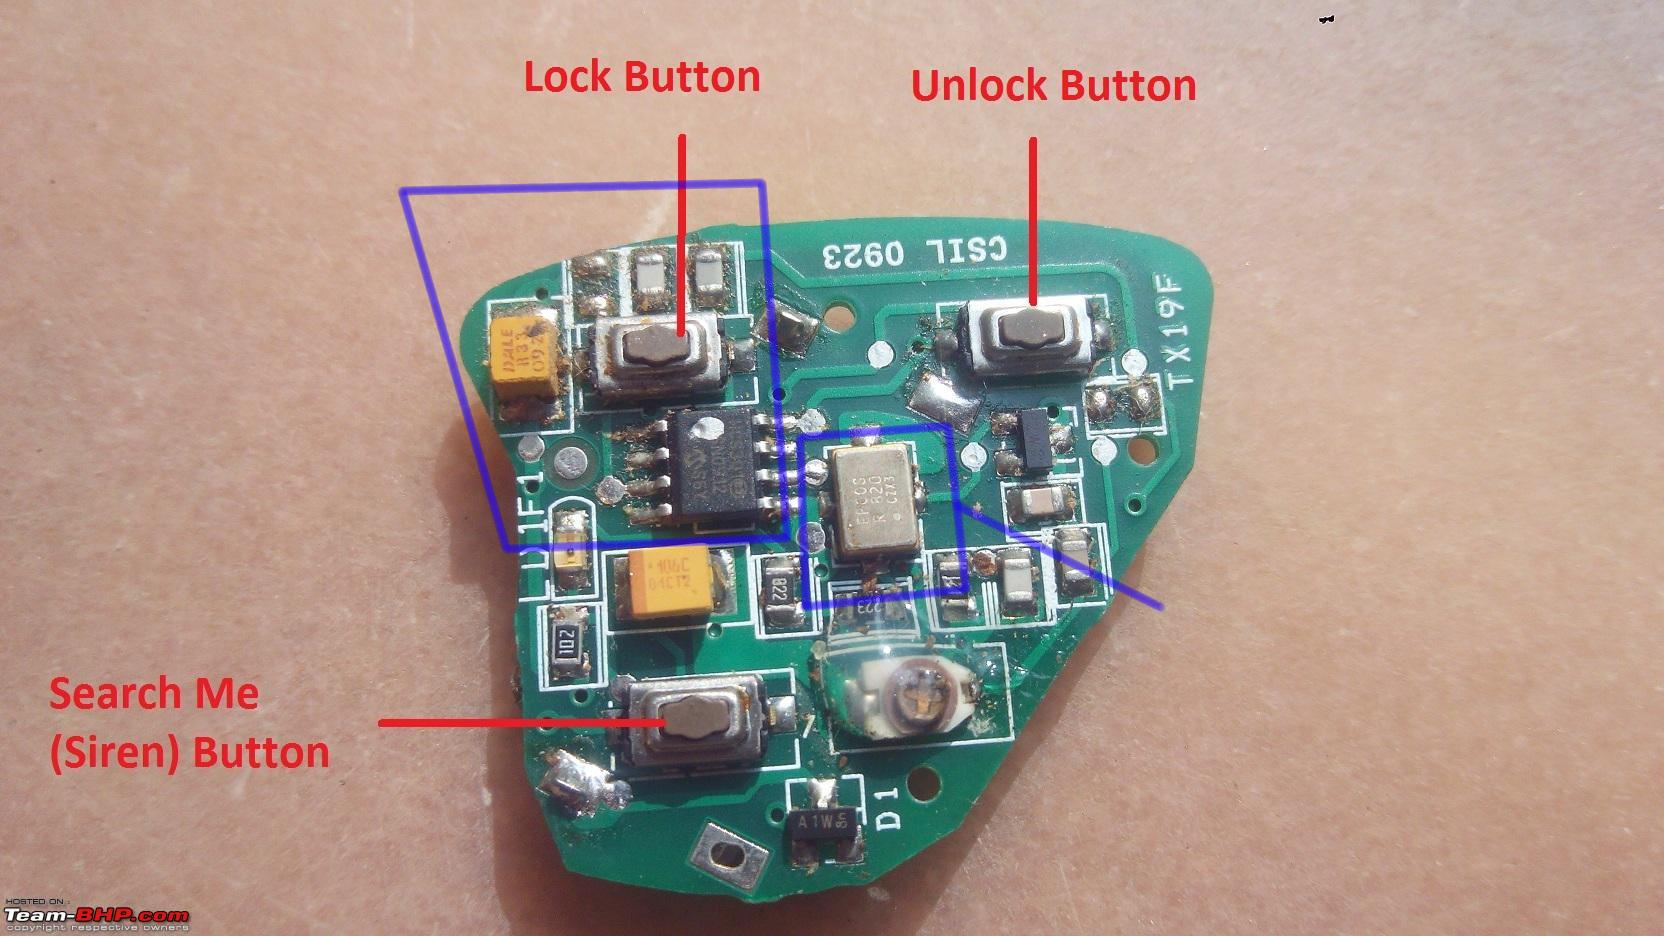
We shall name this the button side:

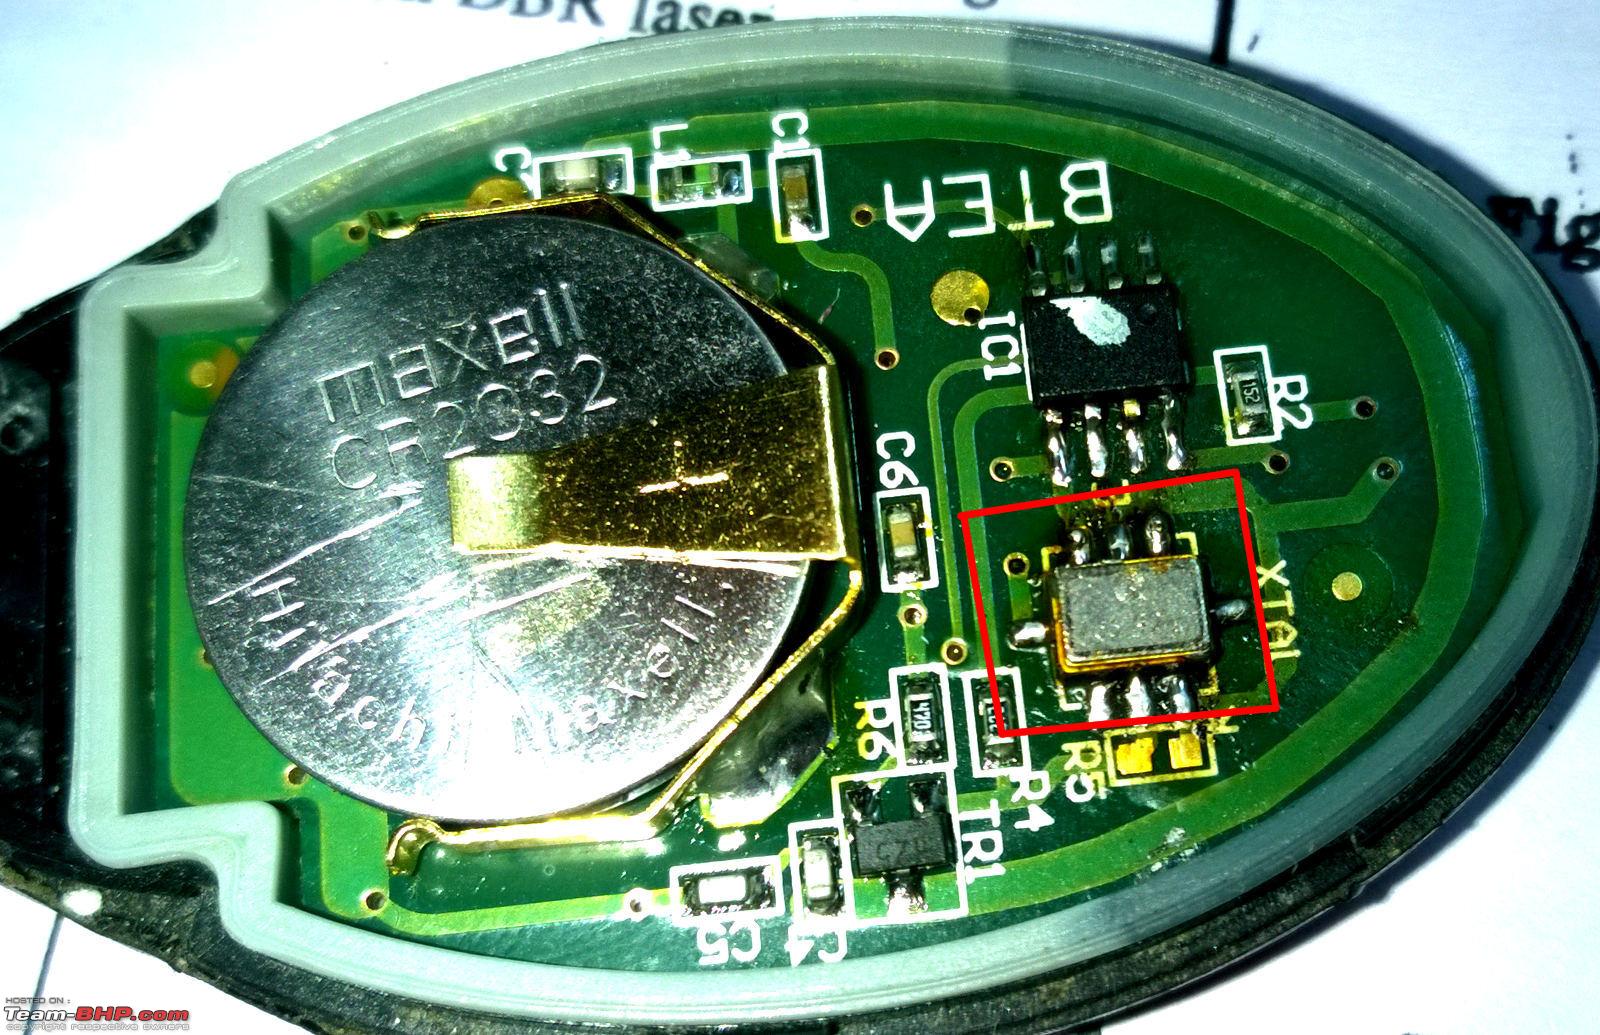
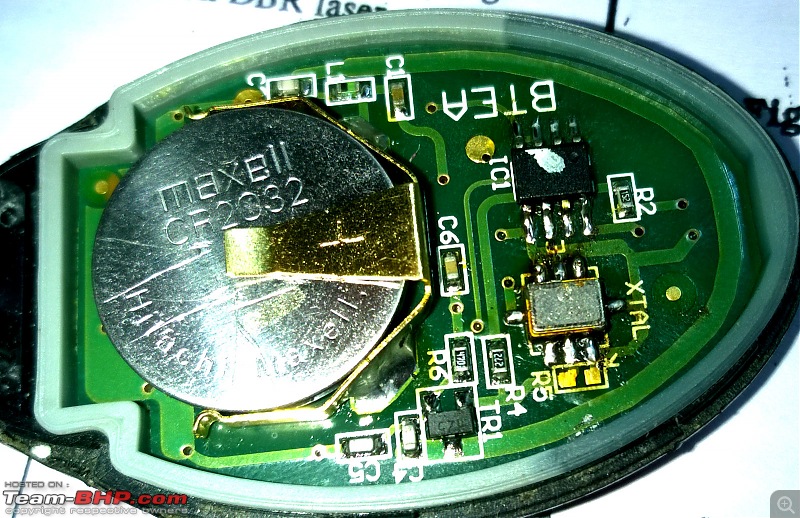
And this, the circuit side:
 2. Coming to the electronics part:
2.1. As obvious as it is, the remote will have a battery that is bound to get weak and die. So, the first test will be removing the battery and checking for its voltage. If this isnt possible due to equipment limitations, wipe the battery contacts on the board and replace with a new battery and check if the LED glows and the remote works. If the remote works, done.
- If the LED doesnt glow, then move to the next step
- If the LED glows and yet the car doesnt respond, move to step 2.4
2.2. Upon replacement of the battery or confirmation of the health of the battery, if the LED still doesnt glow upon pressing any key, we have to check if the fault lies in the buttons. If you see the button side, you will notice that a thin adhesive film is stuck, which carries the three button contacts. These are the flimsiest switches I have come across, and they are just metal buttons pasted onto the sheet as shown
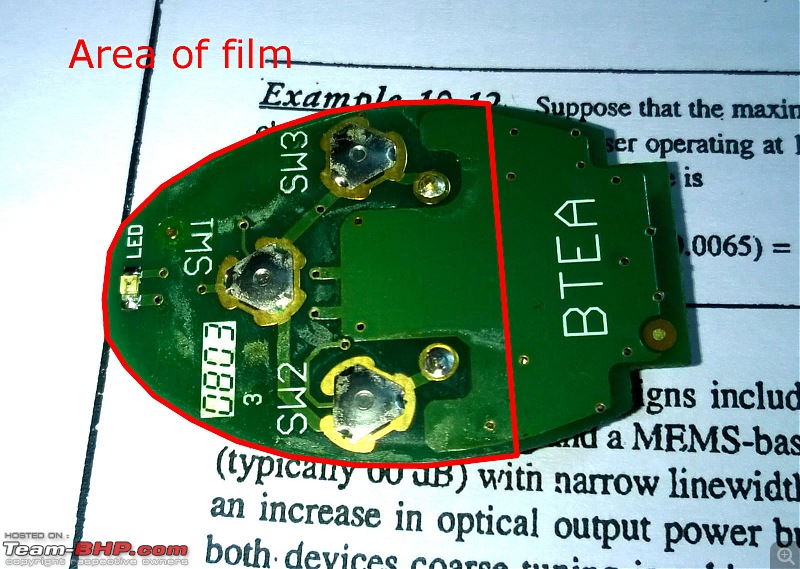
Gently, peel off the sheet and keep it aside. Dont disturb the metal contacts on the sheet. Clean the board under the sheet to remove contaminants and corrosion etc
2.3. With the film removed, measure voltage at the points marked red. It should read the actual battery voltage. In most cases, it will.
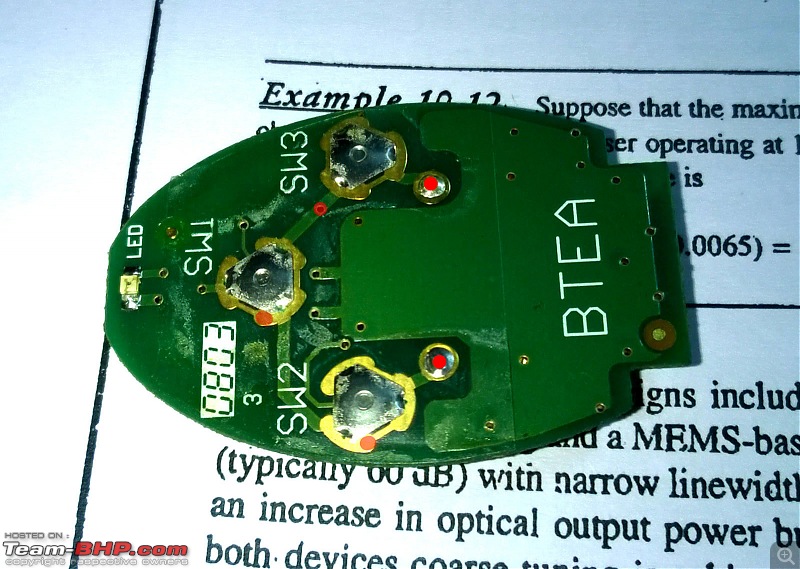
After this, replace the film back and check each switch for continuity. This will require an additional person to press the switch while you check for its working. If the switch is the culprit and has worn out, you might have to replace this with a different switch which can be done in any electronic repair or mobile repair shop. To check the continuity of the switch, check the voltage when each switch is pressed at these points, corresponding to Sw1, Sw2 and SW3:

If there is an issue with the switch, these voltages will not exist even when the switch is pressed. Hence, a 3V signal is necessary at these three points when each of the switch is pressed and only then we can continue to the next stage of debugging.
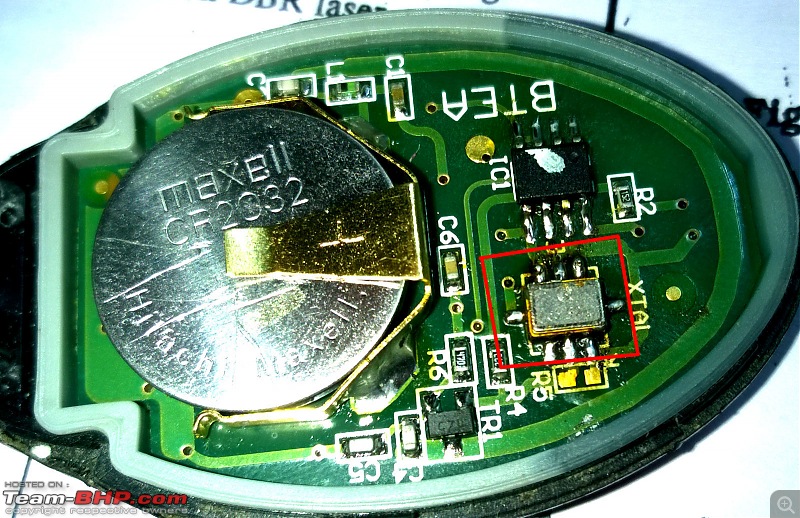
2.4. The next in line will be this IC which I couldnt decode. The part number is near invisible so I couldnt find out what it did. Just to ensure things are right, resolder the pins by melting the solder and resetting it, in case there are any cracks that may have formed in the bond due to shock(physical).
2.5
The last, but the most significant culprit in this circuit, which has created issue in two of my remotes is this component. The same problem, in both remotes. It definitely deserves a special note.
 What it is
 - A crystal oscillator
What it does - Generates the Radio signal for the remote. Here, technically it is a ~400Mhz signal that is combined with a key code to let the car know what button is pressed.
What happens when the issue is with this component - Remote LED will glow on pressing the buttons, but the remote doesnt control the car, or in simple words wont work.
Why did this single component cause the problem:
Design issue. The component unlike the other IC is SMD based. Lets not make it technical, but in simple words, the PCB of the remote isnt strong enough to stay rigid. Each time we press a button, the entire PCB flexes a little. Such flexing causes this component to develop cracks in the soldering. In addition to that, shocks caused due to bad roads where the remote slams against the interior panels, or when we drop the remote, or having the habit of throwing the remote into a key bowl(all applies to me
) all these will cause the component to become loose over a period of time. Hence, it is a bad idea to use such a component.
How to repair this issue:
Irony is, this component has eight pins to hold it in place. However, only two of them are responsible for the actual working in addition to a ground. The remaining six pins are signal grounds and optional pins which are grounded. Hence, if the two crucial pins develop problems, the ouput is affected. These two are the pins located in the middle of each side surrounded by two other pins. Technically, pin 2 and 6(refer to image attached). When any button is pressed, the pin 2 will have a 3V voltage while the output pin 6 will have somewhere around 0.8V. So these two pins must be connected to the board for the remote to work properly. Due to the reasons mentioned above, it will become loose and hence, melt the solder or add a little more solder along with flux. It will recreate the connection.
Once this is done, the remote will work since this is the last fault I could find. Apart from this there are a few resistors and capacitors which are quite reliable and will not fail.
2.5. Verifying the working and checking for further faults. In the most probablity, this should solve any problem with the remote. If not, then either the remote has lost pairing with the car or something is wrong with the security system. At this stage, try pairing the remote again using the procedure available on YouTube.
3. Assemble the remote back to shape and enjoy!
If you have any queries regarding some other version or any specific problem do let me know. I shall try to understand what could've gone wrong and help you out. However, I do not offer any commercial repair services or stuff like that. I am just putting to use what I have studied so far and that did help me solve the problem with not just two but another remote of my cousins car which had the same problem too. Hence I wanted to share it with people who are facing similar issues. Of course if anyone here in TBHP wants my help, I shall definitely help to the possible extent.
If I get any other remote in my hands for this analysis, I will post another checklist for that too.
PS: You can use this procedure to sit along a mobile repair guy and get things done by him if you are not used to electronic stuff.


 11th December 2014, 20:39


 (4)
Thanks
(4)
Thanks