The windshield wiping fluid tank of the VW Polo/Vento is located in front of the driver-side wheel well cladding. The tank is hidden from the view and there’s no way to assess the level of the fluid inside the tank.
The other day, I was browsing through some Russian forums and stumbled upon this retrofit (
link) wherein a level sensor was installed to the bottom of the tank and the output was fed to the instrument cluster plug. That link didn’t have much details so dug a bit deeper and came across a link on Briskoda forums (
link) wherein the owner had retrofitted this on his Octavia. Turned out to be a very simple mod. The level sensor is installed at the bottom-most part of the windshield washing fluid tank, 2 wires originate from the sensor - one goes to the instrument cluster’s plug and the other to GND. Enable the option in VCDS and we’re done! As always, I’ve detailed the steps below.
Parts Required:
Parts with the part numbers and the quantity follows:
1. Sensor -
7M0 919 376, Qty - 1 no.

2. O-ring -
7M0 919 382, Qty - 1 no.

3. Connector plug -
7M0 973 202, Qty - 1 no.

4. VW terminal -
N 906 844 05, Qty - 2 nos.

5. VW terminal -
N 907 647 01, Qty - 1 no.

6. Earth crimp terminal, Qty - 1 no.

7. Seal -
357 972 741B, Qty - 2 nos.

8. Wire - 1.25 sq. mm, Qty - 5 m.
OR
Just get the entire kit from Aliexpress (
link) which includes all the above parts.

This is the better option IMO since everything is included in the kit and would end up being cheaper than sourcing all the parts separately.
7. Plain water, 3 L.
8. Heat shrink sleeve - 3 mm , Qty - 150 mm.
Finding the part numbers for the sensor assembly was easy since the Partsbase
link had the details:
 Tools Required:
1. Drill with the chuck key.
2. Hole saw - 1” suitable for wood/plastic.
3. T20 Allen key/hex bit or equivalent Torx. bit.
4. Wheel wrench (from the car’s tool-kit).
5. Screw jack (from the car’s tool-kit).
6. Triangular file
7. Silicone sealant (
Anabond 666T Plus or similar).
8. Heat gun.
9. Jack stands.
Wiring Schematic: 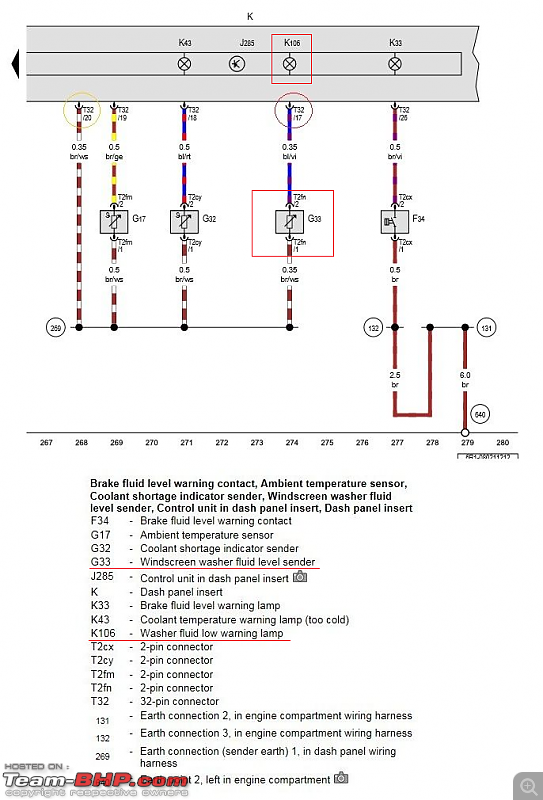 G33
G33 is the sensor and one lead goes to the instrument cluster plug’s pin
# 17 and the other one to
269 which is GND. Pin no. 20 from the cluster plug is also GND.
Procedure:
1. Jack up the front of the car and rest the front part under 2 jack stands.
2. Unscrew the 5 bolts of the wheel using the wheel wrench and remove the wheel:
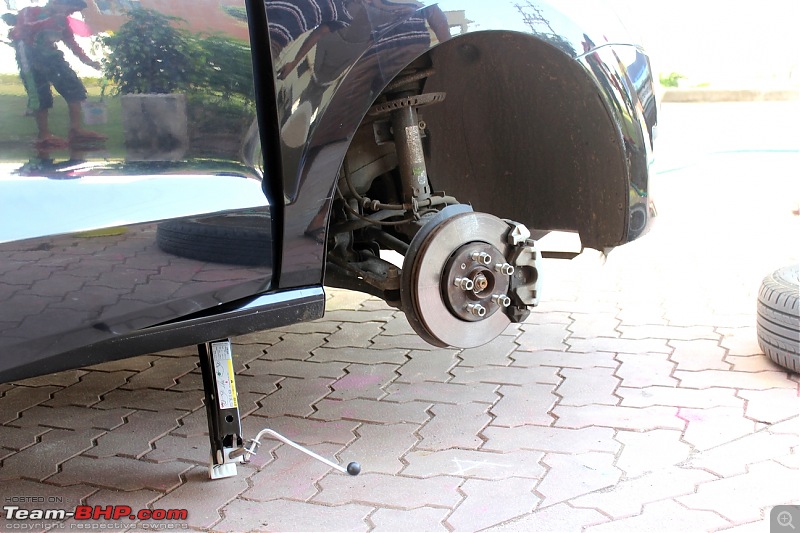 Important
 - The jack shown above was oriented incorrectly. The correct way to mount the jack is this way:

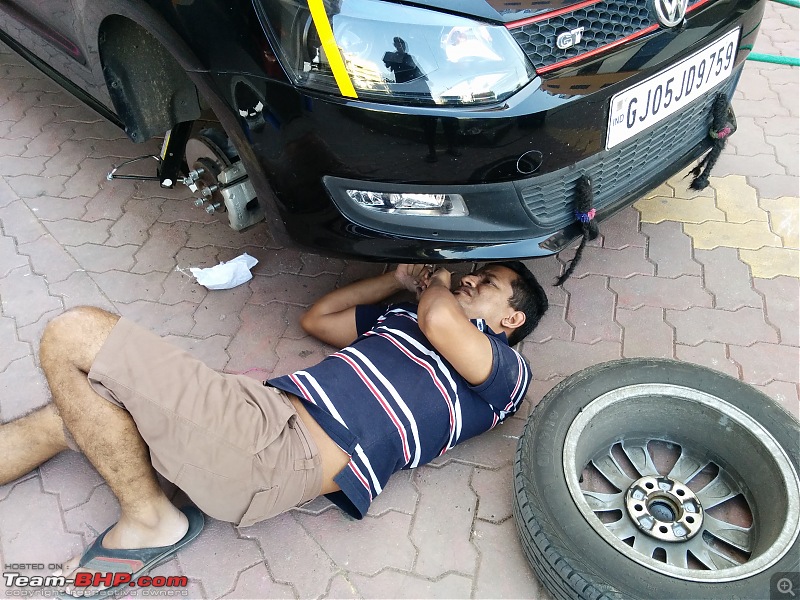
3. Unscrew 14 nos. T20 socket screws that holds the wheel well liner in place, using the allen key or hex. bit and pull the wheel well liner out.

Note that there are 2 screws beneath the front bumper and you may have to access it this way:
4. The plastic tank that stores the windshield washer fluid and the pump is now visible:
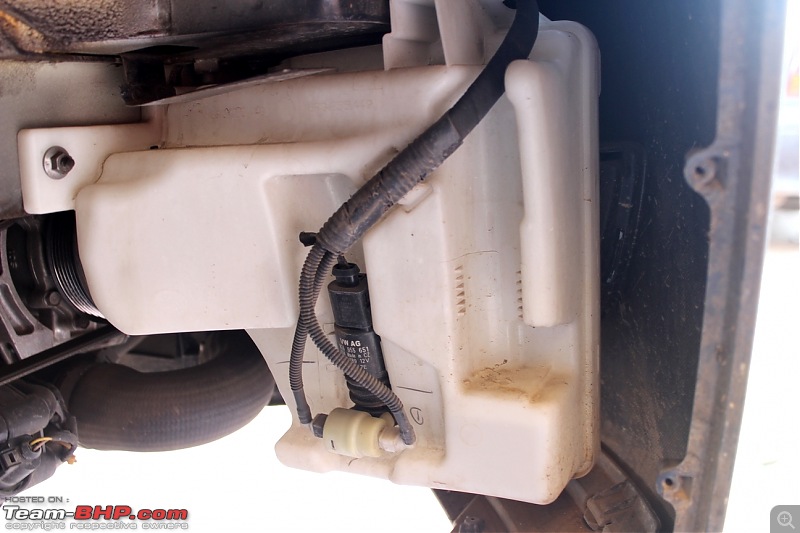
Drill a 1” hole at the location as indicated below and let the water inside the tank drain out:


Use the file to smoothen out the rough edges of the hole and remove the swarf.
5. Insert the sensor + o-ring into the hole:
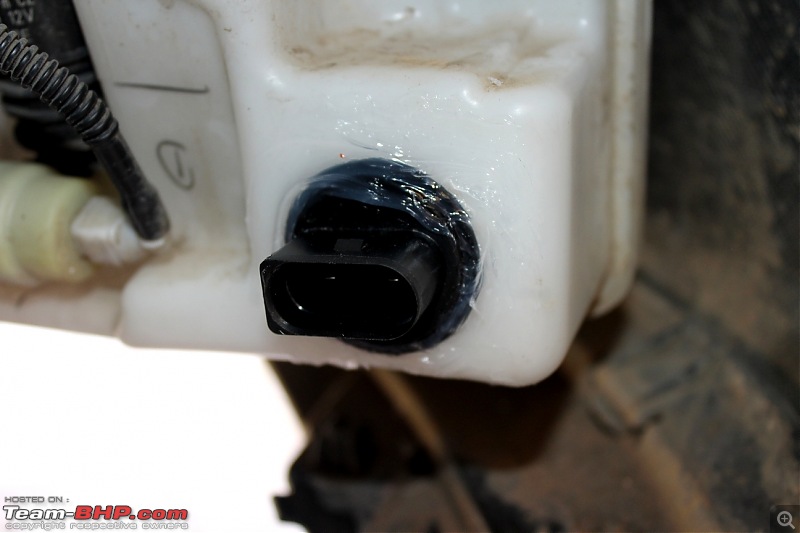
It should be a tight fit and there should be no leakages. Seal the edge using the silicone sealant and allow it to cure for an hour. Test for leakages by pouring clear water through the pipe.
6. Connect the plug of the harness to the sensor’s male socket:

and connect the GND wire from the harness to the nearest nut that holds the tank to the car's frame as indicated in the snap above.
7. The second wire must be led near the instrument cluster through the grommet located at the co-driver side of the firewall:
 Image credit: VW Workshop Manual
The hood release cable comes through the grommet located at the driver side but I was unable to use this grommet due to the wiper lever mechanism. The hole on the other side (used for LHD cars through which the hood release cable goes) was closed with a dummy grommet so we used that instead. The routing of the cable turned out to be longer but we had no other option and did not want to drill a hole on the firewall just for the sake of this wire.
8. We're done with the cabling on the outside. Replace the wheel well cover, replace the tire and screw it using the wheel wrench. Remove the screw jack.
9. Refer the link
here and follow steps 2 to 6 to remove the instrument cluster and unplug the connector behind the cluster.
Remove the blue cover from the plug and insert the pin into the vacant slot
#17:


Replace the blue cover and the plug into the cluster. Screw the cluster back and replace the plastic trim.
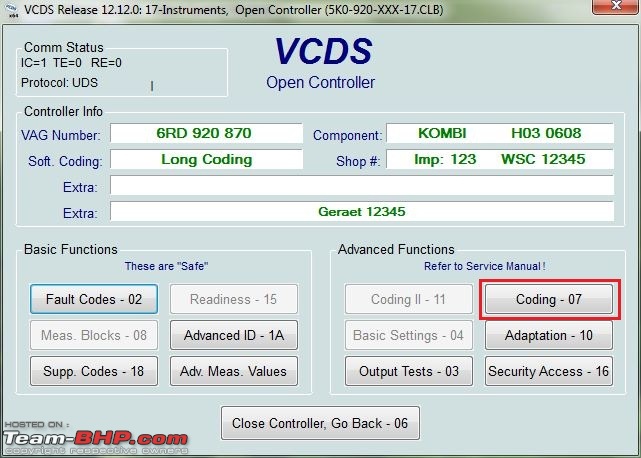
10. Enable the option in VCDS.
Head to
17 - Instruments:
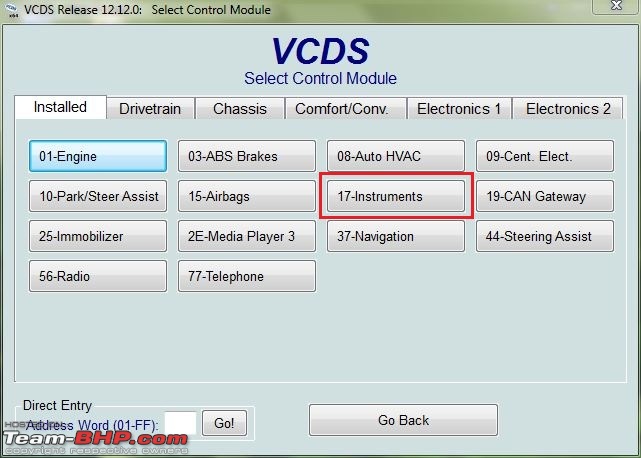 Coding - 07:
  Long Coding Helper:
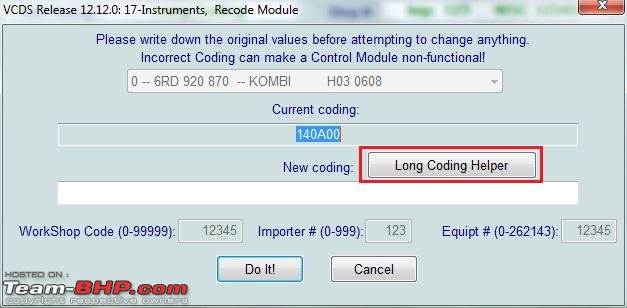
Under Byte 1, click on
Washer Fluid Warning active/installed:
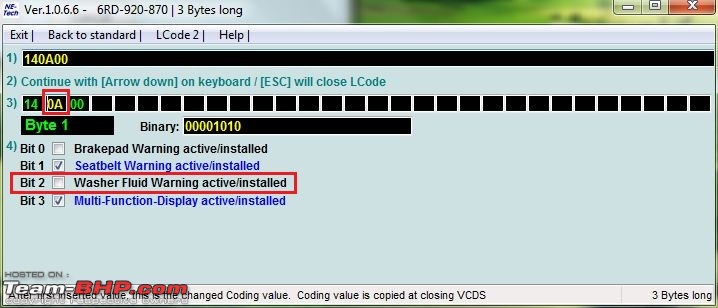 Exit
Exit out of the window and
Do It!:
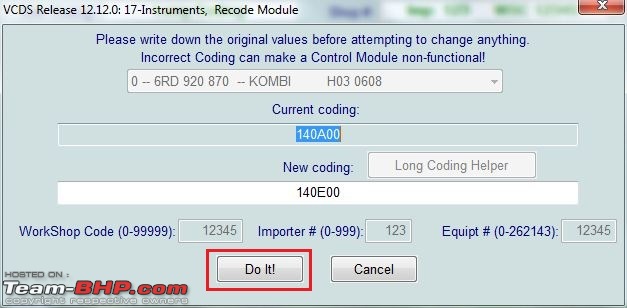 Results:
We had drained the entire tank when the hole was made so the warning should come up:

Once the tank was filled, the warning went off.
Total expenses incurred: Rs. 1888 (for the sensor + loom) + Rs. 250 (for 1” HSS hole saw).
Many thanks to
Moorthy for lending me a helping hand (as always),
ciclo - a member from the UK Polo forums for helping me with the electrical schematic, moderator
ajmat - our in-house VAG guru for his prompt feedbacks and go-ahead for this retrofit and finally,
ze Russians (

) for attempting these nifty modifications which improves the overall experience of a VAG car ownership.
The same DIY can also be extended for installing the coolant level sensor on the coolant expansion tank to eliminate the low coolant sensor warning light which was originally done by connecting pin #18 to GND.
And guys, it looks like there are tonnes of excellent information hidden in the Russian forums. Unfortunately, they do not turn up in the Google results because they post entirely in the Russian language. In case you wish to do such simple mods, do go through these Russian forums. You may find what you were looking for.
It was also Holi yesterday and these little buggers gave us company while we were working on the car yesterday:


 (78)
Thanks

 (8)
Thanks

 (40)
Thanks

 (8)
Thanks
 (20)
Thanks
 (1)
Thanks
 (1)
Thanks

 (5)
Thanks
 (2)
Thanks
 (3)
Thanks

 (1)
Thanks


 (1)
Thanks
 (1)
Thanks


 ) for attempting these nifty modifications which improves the overall experience of a VAG car ownership.


