Team-BHP
(
https://www.team-bhp.com/forum/)
The Brio comes with a fairly large and usable glove compartment and over the past few years I've owned this car, I've always enjoyed the quiet interior only to be let down by a few clanks and rattles from contents (coins, AUX-in cables, pens) stored in the glove compartment when the car is driven over some non-existent patches that make up Bangalore's roads.
Some premium cars come with a felt lined glove compartment like the Skoda Octavia pictured here in this
link and I've always been wanting to add this lining to the Brio and hence this DIY.
Tools Needed- Philips head screwdriver
- Hobby knife
- Two layers of Felt lining - Size: 13.5" x 16"
- Fevicol SR 998 - Synthetic Rubber Adhesive - 100 ML
- An expired loyalty card/old credit card
- Tissue paper
- Colin Spray
- Three sheets of news paper
Step 1: Remove the glove compartment from the dashboard
Removing the Brio's glove compartment is a breeze, just press the edges and it slides out. A slight tug on the bottom end of the glove box and the press-fit clamps comes out and voila, the glove box is free from the rest of the dash.
Step 2: Unscrew the 9 screws as indicated below.
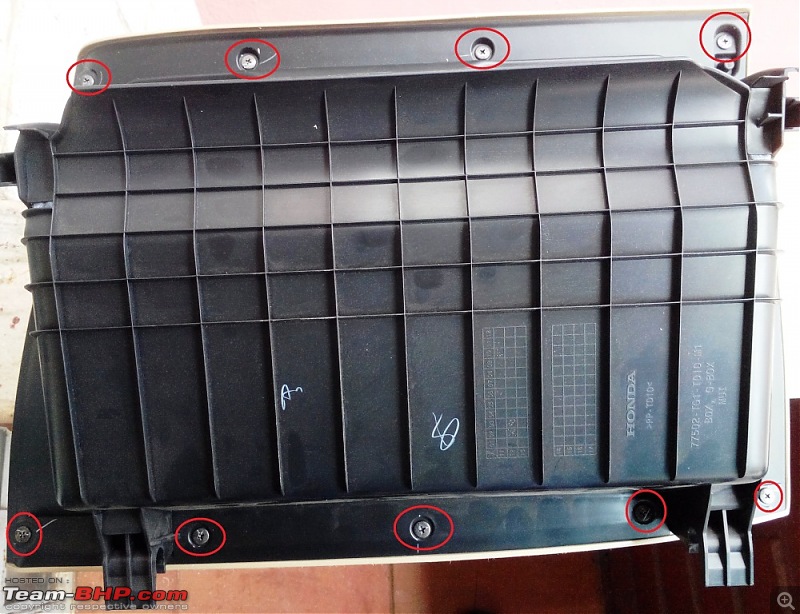
Gently tug the corners of the glove compartment and it will detach into two pieces

 Step 3:
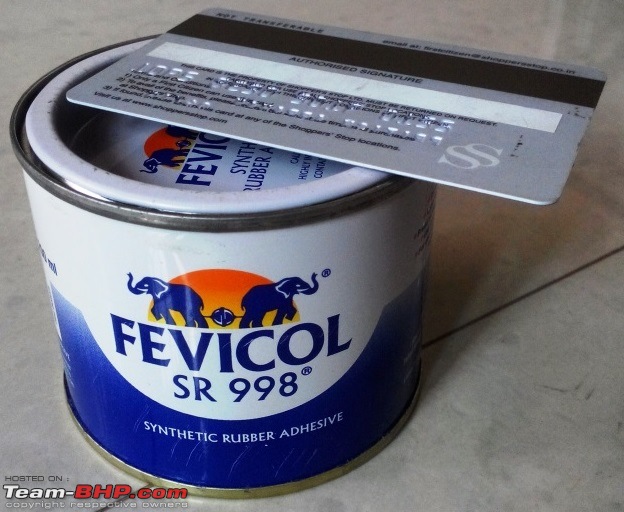
 Keep the tin of Fevicol SR 998, expired loyalty card, tissue paper and Colin spray handy
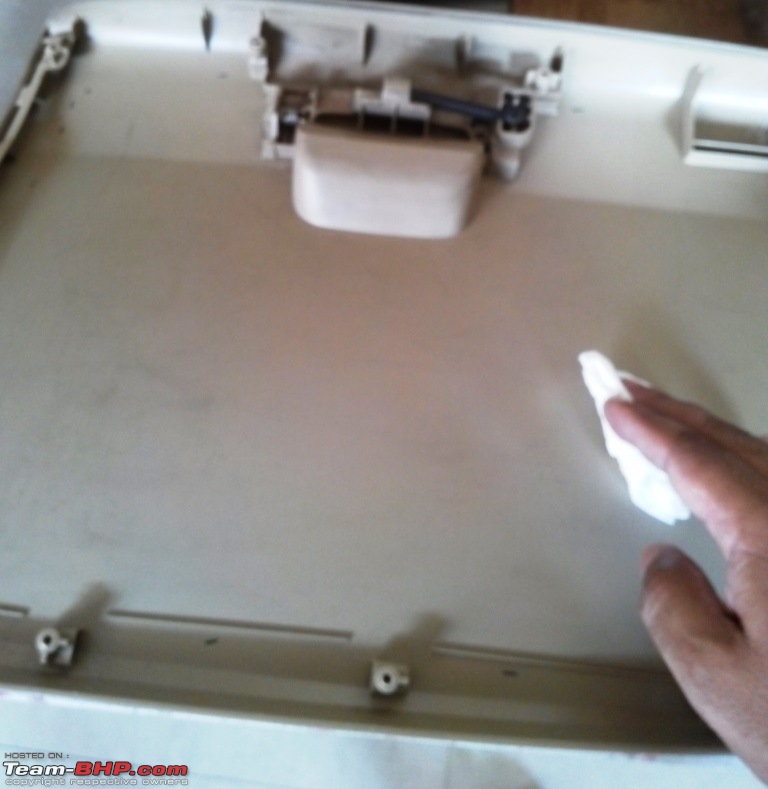
Spray a light mist of Colin spray glass cleaner over the surfaces and wipe them clean to make them free of any dust. The Honda sticker on the innser side of the glove compartment can be removed by soaking it in Colin and gently scraping it with the hobby knife
 Step 4:
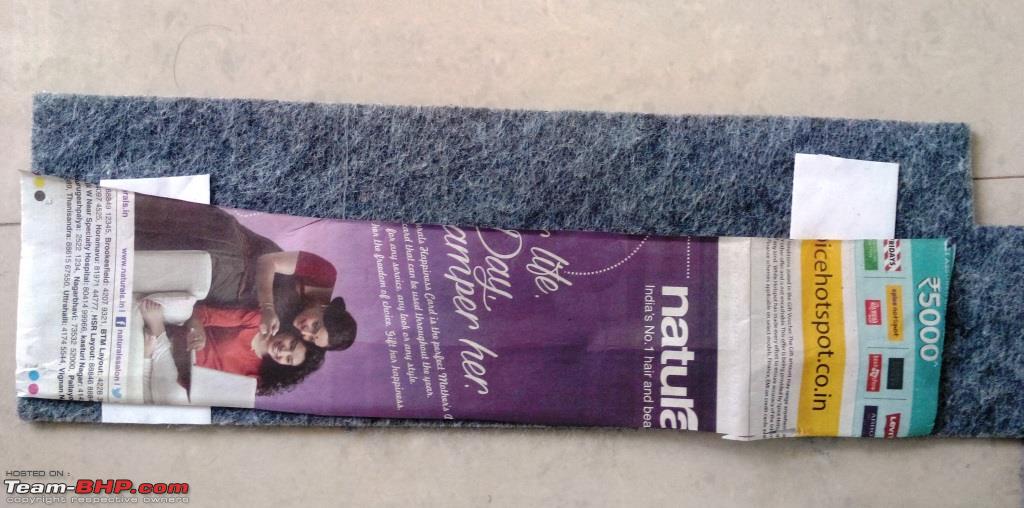
 Use newspaper to draw out a template for each inner side of the glove compartment. Having a template also makes it easier to cut the felt lining to the right size.
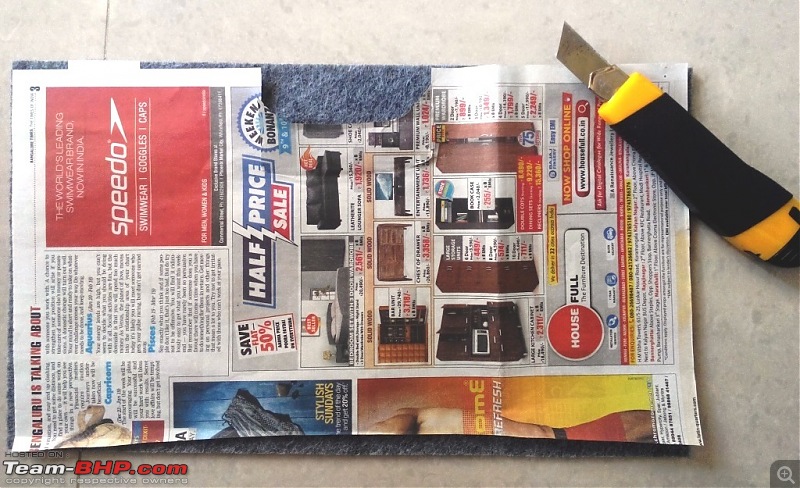
After measuring and cutting the paper, use that as a template by placing it over the felt and using a knife to cut the right curve of the felt to make sure it fits correctly when pasted

The pieces (5 in total) after being cut using the newspaper template will look like this
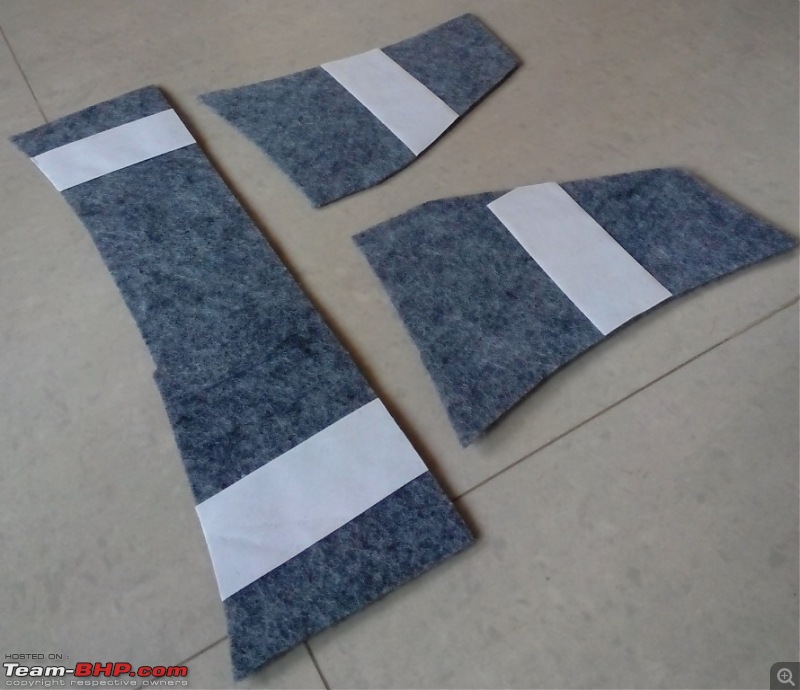
Before pasting it, check if the felt lining is cut to the right size by placing it over the inner lid of the dashboard and checking if it fits perfectly.
 Step 5:
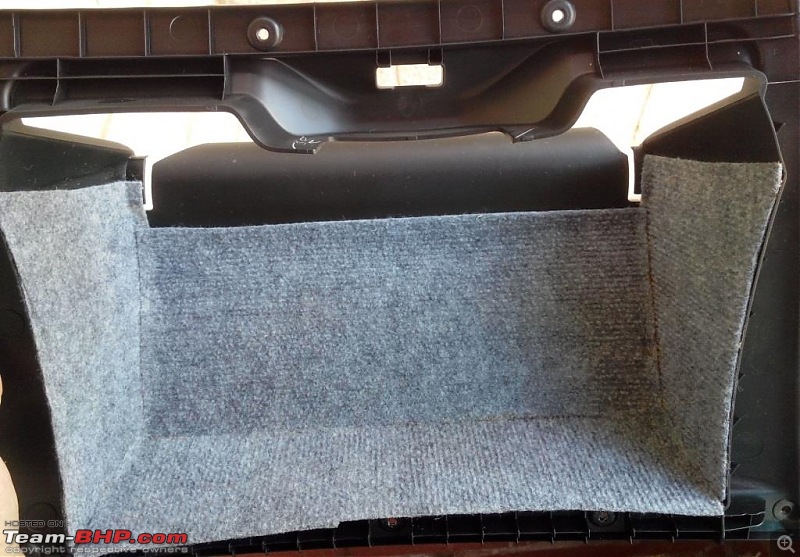
 Working in a well ventilated area, mix the Fevicol SR 998 adhesive and spread a thin even layer over the inner lid of the dashboard and stick the felt gently while making sure all the nooks are covered. A little excess on the sides is okay as that is covered up once the lid is screwed onto the glove compartment

Spread a thin layer over the sides of the glove compartment and paste the felt lining over the sides first before any other part as that will allow for a perfect seamless fit

Apply thin layers to the remaining inner sides of the glove compartment and gently stick the felt lining into place
 Step 6:
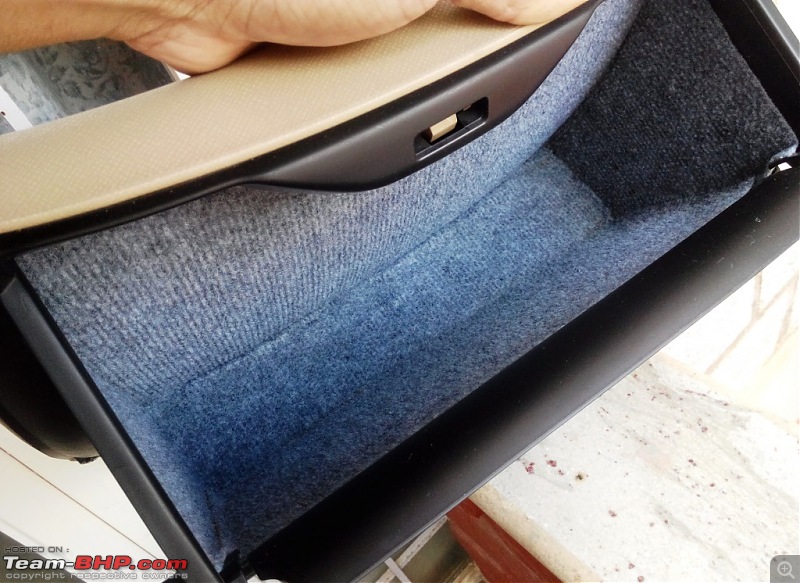
 After letting the pieces dry for about 15-20 minutes, refit the lid to the glove compartment and smoothen any creases in the felt for a perfect fit that looks like an OEM fitment:D

Let the finished glove compartment air in the open for a few hours before you fit it back on the dashboard to prevent the smell of the adhesive permeating into the interiors of the car.
Great mod! Where do we get this felt lining?
You can get it at some stores that stock automobile carpet and insulation material. You can also check in your local arts and craft stores since they also sell felt lining.
Neat work there ! Need to do this on both my cars.
Thanks for sharing the step-by-step procedure. That's a nice and simple modification.
How much time did you totally take to get this done? I'm guessing a darker coloured felt would have looked better, no?
Quote:
Originally Posted by S2!!!
(Post 3745241)
How much time did you totally take to get this done? I'm guessing a darker coloured felt would have looked better, no?
|
Took me about two hours in all from start to finish. I preferred this light colored felt since light dust will show up better and I can use a vacuum cleaner to clean it. Besides, the innards of the glove box is not usually seen when one is seated in the car :)
Great job and a nice idea that can be used across models. May the coin rattles rest in peace :D.
Will look forward to doing it in my zest.
Post deleted by the Team-BHP Support : Please do NOT post messages that add little or no informational value to the thread. We need your co-operation to maintain the quality of this forum.
Please read our rules before proceeding any further. We request you to post ONLY when you have something substantial to add to a discussion.
Neat job! This truly looks like a OEM job. Thank you for the step by step procedure. I will try this tomorrow itself!
Superb! Every cubby hole and storage recess in the interior is a candidate for this, with the right shade of felt.
At first when I saw the title of the thread, I was like Why? Upon seeing the fit and finish from the accompanying photos I was like WOW!
Now, I plan to felt line not only my glove box but also several storage spaces in my home.
Nicely done! Have been thinking of trying this for several months but never progressed to actually working on it. Will try this once I have some time to spare.
Thanks for the tip. Will practice the same in my Fortuner. Appreciate it once again mate !
Thanks gpa for the detailed post. Glove box of our brio has got this trouble of rattling since long time. The car came back from the service recently and i think the issue still persists. Will try this DIY over the weekend.
Also, i suspect the spring or lock assembly is the culprit in my case and i am tired of explaining this to the service guys. Do you have any remedy to get this sorted?
Amazing & very well thought DIY.
I would suggest other members to get small pockets sewn on the side wall felt pieces. These can be used to store USB cable, pendrive, pocket knife, slim torch etc, that may get lost in deep recesses after we put car docs and manuals there.
Just my two cents.
Regards-Sonu
| All times are GMT +5.5. The time now is 00:26. | |