Team-BHP
(
https://www.team-bhp.com/forum/)
On the morning of 14th October, 2014 (
Link Here) on my way to work, a medium sized stone flung off the truck that I was overtaking and hit the windshield at the base of it. Had I been tail gating that truck exactly behind, the damage would have been somewhere in the center or towards the driver’s side. Luckily, the damage being at the passenger’s side and at the base, vision was never hampered. This was the sole reason I never pushed for windscreen replacement.
The Chip + Crack 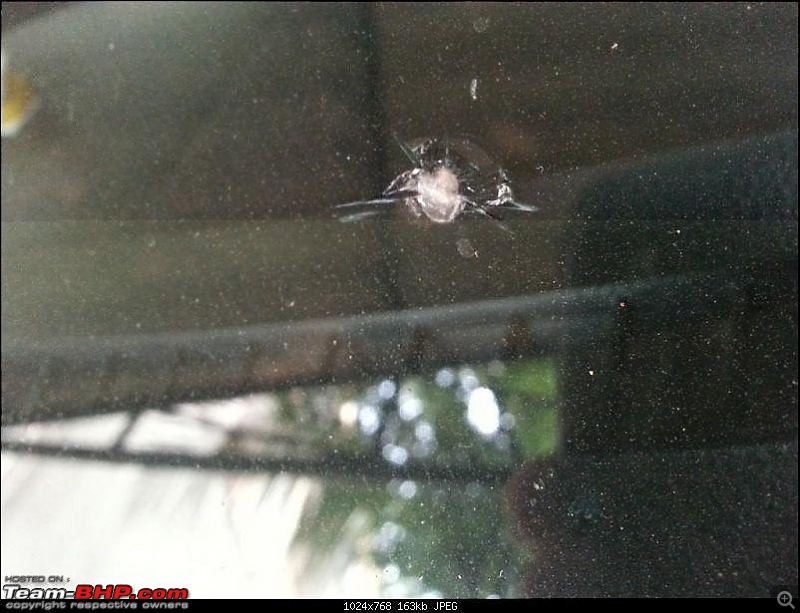
MASS had given a quote of near ₹7,000 for replacing the windshield as repairing want possible as per them. Replacement IMO wasn't needed as the crack was neither spreading nor was it hampering my vision so I continued driving. All this while I did try contacting "Windshield Experts" but they weren't functional in Hyderabad and I wasn't confident in going to local repair guys for the job. Ignored the chipping but kept an eye on the crack every day to check if it is expanding but it never did more than 3cms. The crack is same since the time it happened.
A week back while I was browsing Amazon.com for Rain-X windshield treatment, I came across this product "
Windshield Repair Kit by Rain-X" . Called up my friend who stays in US and asked him to buy one and get it to India when he comes. He agreed and bought it. Reason I asked him to buy as opposed to me buying it here is the landing costs coming to $60.98 (₹4070).
Item Cost: $10.97 (₹732)
Shipping Cost: $5.66 (₹ 378)
Total: $16.63 (₹1110)
He chose the regular shipping and got it delivered to his house in US. The estimated delivery date was 23rd November but he received the package on 29th November. Due to this lapse in delivery timing, I wrote a mail asking for reason for late delivery? To my surprise, they did refund the shipping amount and also sent another package free of cost as under their efforts to maintain customer satisfaction. Funniest part, he didn’t receive the second package too hence they did refund the full amount. Hats off to Amazon.com!
So I got that for Free Of Cost! Yes, that’s what it is!
After I received the kit, read the manual twice to understand what and how this is to be done.
Rain X Repair Kit as seen on Amazon.com  Final pricing after refund
  What all this kit repairs
  Repair Kit
Coming to the process now:
Shall put it in simple steps that will be easy to read and understand by all.
Items Required for the DIY: - Windshield Repair Kit
- Goggles
- Microfibre Cloth (2 no's) - To clean the windscreen and also to wipe off resin later on.
- Glass cleaner (Preferably)
PROCEDURE FOR REPAIRING CHIPS/BULLS EYE/STARS - The below process is mainly for chips/bulls eye and stars type.
Step – 1: Park your car in a shady place. Wash/clean the windshield thoroughly before starting the D.I.Y
*;
Step – 2: Use Glass cleaner to remove any traces of water in and around the area to repair;
Step – 3: With the supplied razor blade, clean the surrounding of the chipped windshield and also the chipped area to remove any fine dust
**.
Step – 4: Position the applicator base onto the chipped area in such a way that the center of the applicator is just above the chipped surface.
Step – 5: Screw-in the resin chamber till the rubber mouth comes in contact with the chipped surface. Tighten the resin chamber till there is sufficient contact with the glass below
***.
Step – 6: Open the repair resin bottle and add 5-7 drops into the resin chamber.
Step – 7: Screw-in the pressure driver all the way in. Be careful to not over tighten it as it may split open the rubber mouth located at the base of the resin chamber spilling out all the resin.
Step – 8: Apply heat or tap around the device to remove any air bubbles that could be trapped. Wait for 10 minutes for the resin to dry.
Step – 9: After 10 minutes, remove the apparatus from the windscreen.
Step – 10: Add 1 drop of resin on the chipped surface area and place 1 curing strip over it and move the car under direct sunlight for the resin to harden.
Step – 11: After the resin has dried under the curing strip, pull the strip off and scrape the excess hardened resin using the razor blade holding it at 90° till all the excess resin is removed.
We are now good to go! *Preferably use Colin/glass cleaner after washing to dry off the windscreen and to rinse the chipped area well for the resin to do its job.
**As we are talking of using the razor blade to clean the chipped area and remove all dust, PLEASE ensure that protective eye gear is worn to prevent any fragments from entering the eye. Totally dangerous.
***Please do
NOT over-tighten the resin chamber too much or else it will have adverse effects on the chip that one is trying to repair. The pressure exerted from the chamber would spread the crack or damage the rubber seal causing the resin to leak. This will spoil the whole work and be of no use later.
__________________________________________________ __________________________________________________ ___
PROCEDURE FOR REPAIRING CRACKS From the manual -- This kit will not work if:
- Cracks are above 12 inches in length;
- The cracks have reached the edges of the glass;
- The crack is deep inside and not superficial.
Step – 1: Hold the resin bottle above the crack and start from one end of the crack and proceed further making sure no air bubbles are there.
Step – 2: After removing any trapped air, add a drop of the resin and then place the curing strip over the crack area and repeat the same till the length of the crack and ensure that the curing strip is placed at the full cracks length. No extra pressure is required.
__________________________________________________ __________________________________________________ ___
A Declaration:
Since the stone that flung over my windscreen was of large size, the damage is more than superficial. It is almost cracked to the other end of the screen (what I mean is had it been harder the stone would have pierced through but as luck favoured the chip was controlled till the last stage.
Now who all are reading can think, why in the first place did I put this thread if it hasn\'t repaired the chip in the first place!!! I’ll answer it: Since the chip was deep, there was a depression and a 3 cms crack that I could clear with this kit making the surface flat. The chip traps dirt and also was spoiling the wiper blades causing streaking and un-wiped areas so had to do something to get a solution. Hence I went for this kit and did the job. Also will spread awareness in terms of such kits are available for small D.I.Y’s rather than depending on any ASC.
__________________________________________________ __________________________________________________ ___
Just when I was compiling this D.I.Y now, I came across a video, doing the same as mentioned above. :D
Windshield Repair by Chris Fix
Pictures of the process The Crack + Chip 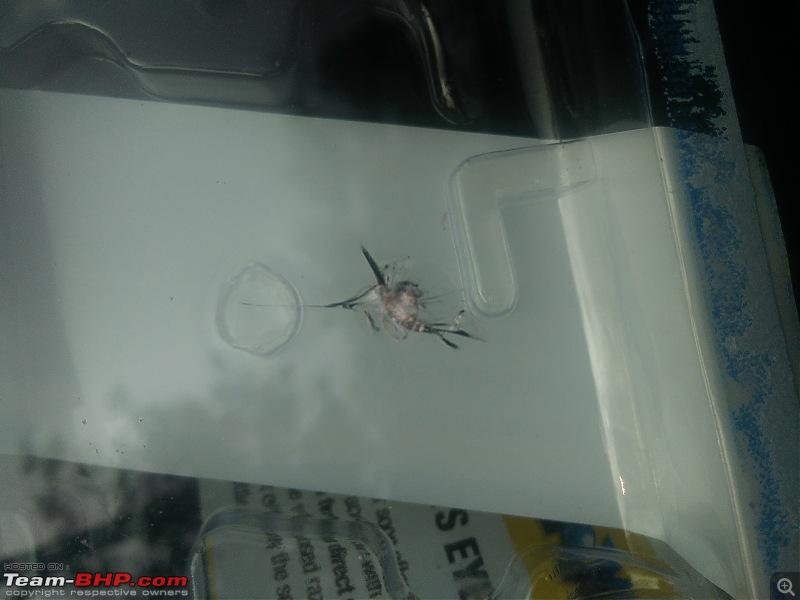 Applicator base with suction cups placed on the repair area
 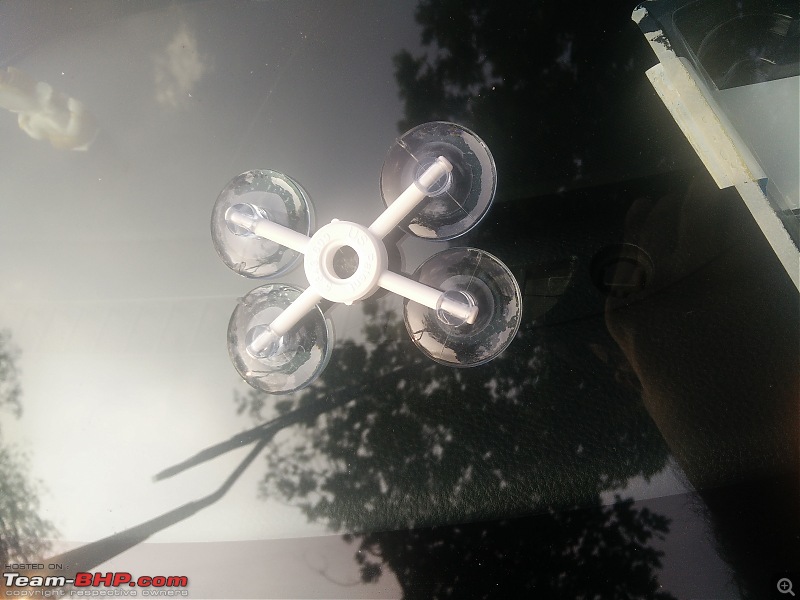 Placed exactly in centre
  Resin chamber fixed on the applicator base
  A view from inside the cabin
  Curing strip placed on the chipping and crack and left for curing
  Post treatment - Chip is flat but crack is sealed to a certain extent
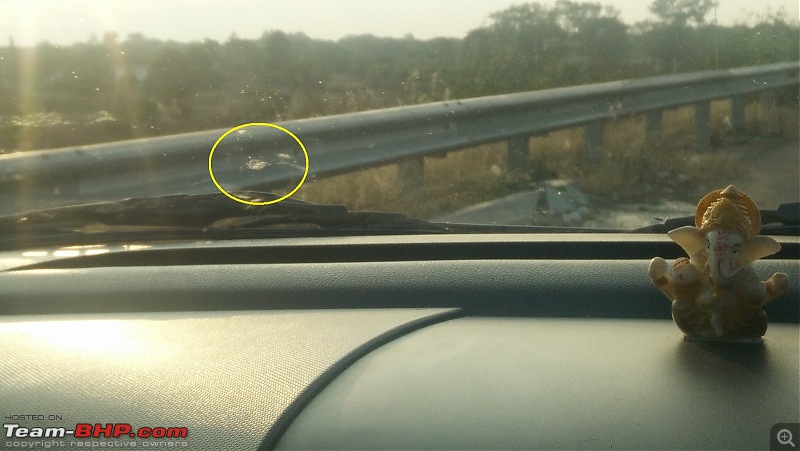
__________________________________________________ __________________________________________________ ____
On the 1st of December, I did visit both:
- Windshield World;
- Windshield Experts.
Went there to get a suggestion and to know how easy or difficult it is to repair this. if not completely just to mask the depression and to stop the crack from expanding.
Replies from both were just as what I got from MASS. Sir there is no way out, just replace the whole windshield. :Frustrati
Thanked both of them and walked out!
SOURCE of Purchase: Rain-X Windshield Repair Kit
Thanks for reading. :)
Thread moved from the Assembly Line to the DIY Section. Thanks for sharing!
Thanks for sharing this buddy. It immediately caught my interest, because I have the exact same issue with the Windshield on my car. Appreciate the detailed steps and pictures, and most importantly, highlighting the safety precautions to be taken :thumbs up.
I mean no offense, but was a little disappointed with the end result. I actually thought that the crack/chip would not be visible post the fix, and would magically disappear. I suppose that was just wishful thinking on my part stupid:
Quote:
Originally Posted by Joxster
(Post 3868508)
I mean no offense, but was a little disappointed with the end result. I actually thought that the crack/chip would not be visible post the fix, and would magically disappear. I suppose that was just wishful thinking on my part.
|
Thank you sir.
Initially I too was expecting the coping to disappear but the damage is more than superficial.
Had it been superficial the kit would have solved out but the damage is more than its limitations. But I am happy with the results.
Quote:
Originally Posted by a4anurag
(Post 3868516)
Thank you sir.
Initially I too was expecting the coping to disappear but the damage is more than superficial.
Had it been superficial the kit would have solved out but the damage is more than its limitations. But I am happy with the results.
|
The results are marvellous. Obviously the crack was quite nasty and to expect 100% repair was IMHO wishful. Having said that, this product will work 100% for small indentations, etc.
Thanks for sharing :)
Thank you so much for the post. I have the same issue with my windshield and thought there isn't any cure except replacing it. Definitely going to order it. :thumbs up
Nice product, yet it doesn't actually repair the glass on the whole.
As a matter of fact, the front windshield is covered for replacement with minutest of damage under your insurance. The difference of sealant cost is same as this products cost. (just another perspective to look at it IMO)
I'd echo MASS. Always better to replace it. Why take chances?
You have insurance, don't fret about it.
I would never go through the repair process for something as critical as the windshield. Straight up replace.
That is some effort there Anurag clap:.
I have a similar crack in my Ertiga's windshield since 35K on the Odo and been living with it as the Odo reaches the 75,000 mark in few days. It remained as it is post the incident after which I have driven in continuous rains on regular basis and the crack never expanded.
Correct me if I am wrong here but the procedure you have mentioned has only ensured to plug the chipped surface and make it
feel uniform and hasn't necessarily repaired the crack
per se.
I was expecting the finish like how the product packaging has advertised "Before/After" through the pic and if that was the case, it would have been marvelous.
As I noticed this thread, I quickly scrolled down mainly to check the after repair pics and was scratching my head to make out any significant difference but read your comment that read:
Quote:
"Chip is flat but crack is sealed to a certain extent"
|
I guess the first sign of a really bad crack is when it begins to expand. The moment that happens, just replace the windshield. In my case, the crack stayed as it is and faced a lot of abuse in terms of wind, Rain, hot sun and dust but never expanded. So I decided not to touch it as it was never hampering my vision as well.
A request - Can you take a close up pic from the outside focusing just the crack/chip? I would really love to check out the difference that way.
I have a policy an insurance policy from royal sundaram and they have a windshield add-on. Basically you can get your windshield replaced under zero-dep terms without affecting your NCB. But this is allowed only if the windshield alone is damaged. The additional premium for this add-on was only around INR200.
Quote:
Originally Posted by The Great
(Post 3869651)
Nice product, yet it doesn't actually repair the glass on the whole.
|
+
Quote:
Originally Posted by H_Dogg72
(Post 3869656)
I'd echo MASS. Always better to replace it. Why take chances?
|
The crack is at the base of the windshield and it neither obstructed my vision in the last 50,000 kms nor expanded hence I didn't go for the replacement. Found this product nice and cheap so invested in it. Just did an R&D. Will be selling the car off in another 7 months so why go with the whole replacement when there is no alarming issue.
That's why I added the "Declaration" at the end.
The picture of the windshield you posted is off the limits for this kit and such magnitude of damage warrants replacement. The chipping I have on my windshield is too small as compared to that picture.
Quote:
Originally Posted by paragsachania
(Post 3869685)
That is some effort there Anurag.
|
Thank you sir for the kind words.
Quote:
Originally Posted by paragsachania
(Post 3869685)
So I decided not to touch it as it was never hampering my vision as well.
|
That's the same reason as I mentioned in my posts above. Since the crack never expanded, I didn't opt for replacement of the whole windshield be it through my pocket or insurance for that matter.
Quote:
Originally Posted by paragsachania
(Post 3869685)
A request - Can you take a close up pic from the outside focusing just the crack/chip? I would really love to check out the difference that way.
|
Here is the pic from outside.

Replacing the glass damages the car a lot. I have seen windshield replacement procedures first hand. The rubber needs to be sawed off which damages the paintwork and dashboard specially for cars with a high dash. Though after fixing the new glass the damage will be completely masked from outside, its still painful to think its actually there. So unless its a big damage its better to have them repaired, DIY or by experts, or leave it as is.
| All times are GMT +5.5. The time now is 05:39. | |


