Hi everybody,
Its been a while since Ive actually written about my car, and all the additions / upgrades / service / replacements Ive made to it. TBH its just been weekends Ive got to get down in the dirt and have fun, I just didnt get the time to do what Ive been meaning to for so long
Im going to cover all the little things Ive done since my last share (my DIY brake disc & pads replacement), chronologically one by one!
Suspension mounting bushes (September15) Difficulty level: 7.5/10
So it all started with the steering starting to feel a little harder to operate and got worse when while turning, whether standstill or moving there was a swoosh and ticking like noise every time. It didnt have an impact on driving but the noises made me worried about steering rack.
I put the car on jack stands and got under, to visually inspect the steering components from under the car, but couldnt really figure out much. There were no leaks, no damage at least externally. I then started to read a little more about what could cause noises like this.
A lot of people had written about similar experiences with their steering and recommended to check the suspension mounts and bearings, now this was something I never planned to do on my own but something always gives and I found the motivation to give it a shot!
I started watching videos on how to safely remove suspensions and change mounts and it really looked quite a handful without the right tools.
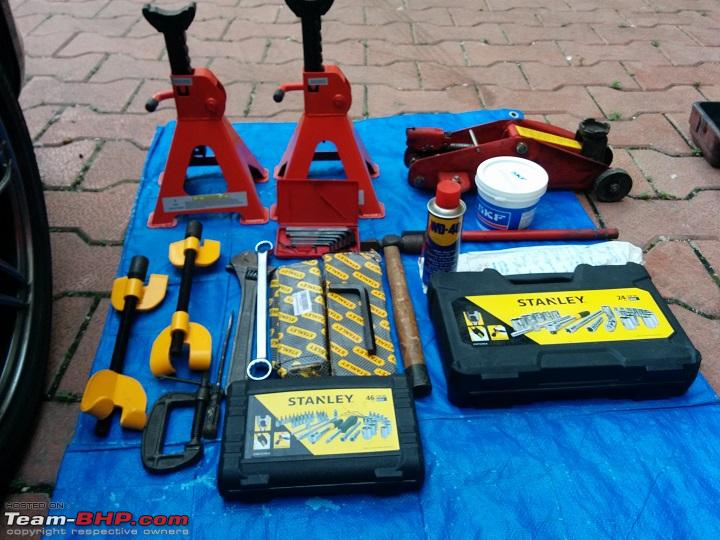
So off I went to Opera House to source what I needed:
1. Spring compressors (sourced from Opera House)
2. Splitter tool (as per VAGs list) didnt find
3. Strut nut socket didnt find
4. Hex bits (various sizes) T15 & T30 (already had them)
5. Allen Key No 7 ¼
6. Socket Set ½ inch already had this
7. New mounts from Opera House (brand FEBI)
8. Bearings from Opera House
9. Socket wrench had this
10. Jack & jack stands had these
11. Rubber mallet or hammer had the hammer
12. WD40 400 ml can already had this
13. Lots of patience running out

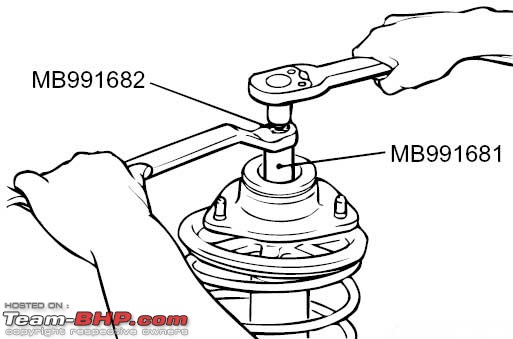
Now the tricky part in removing the suspension is actually getting them off the top where they connect to the chassis in the engine bay.
It requires a special tool which has holds the nut and has a hole to drive down a hex bit and unscrew the suspension. This tool was nowhere to be found, so I had to make do with a spanner and spark plug socket more about this soon.
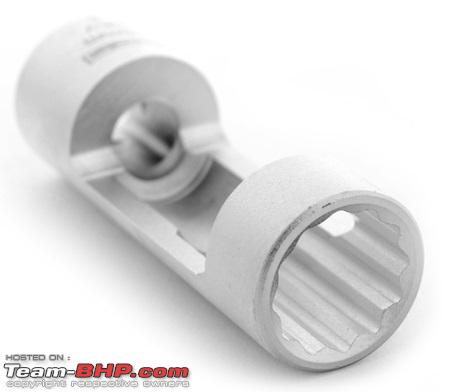
It was quite easy to get most of the tools, but I wasnt able to find the Splitter tool for VAG and the Strut Nut Socket, they look like this:
I was certain there was another way to get around the splitter tool and strut nut, so I decided to just go with it!

Went ahead and purchased what I needed and on a Saturday morning started my operation!
So heres what needs to be done, the simple stuff:
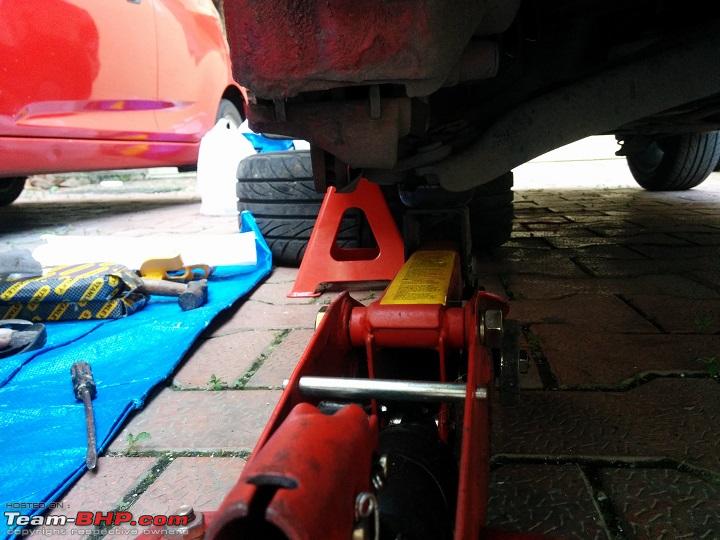
1. Raise the car, and put it on jack stands (once again never get under a car without stands)
2. Remove the front wheels and put them under the car for more protection (in case of a slip off the jack stands)


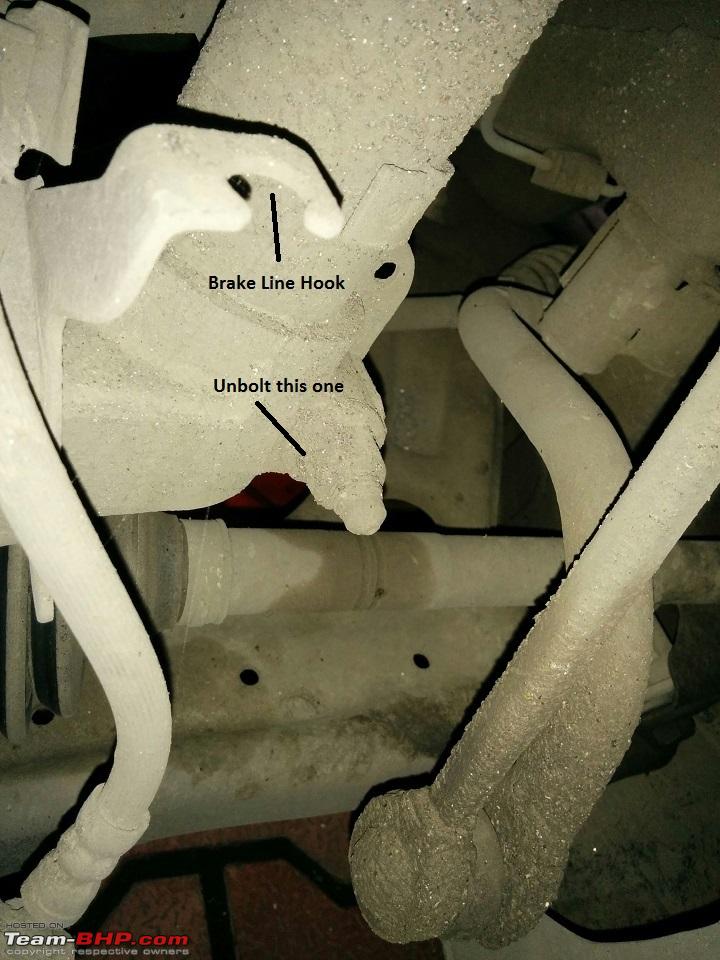
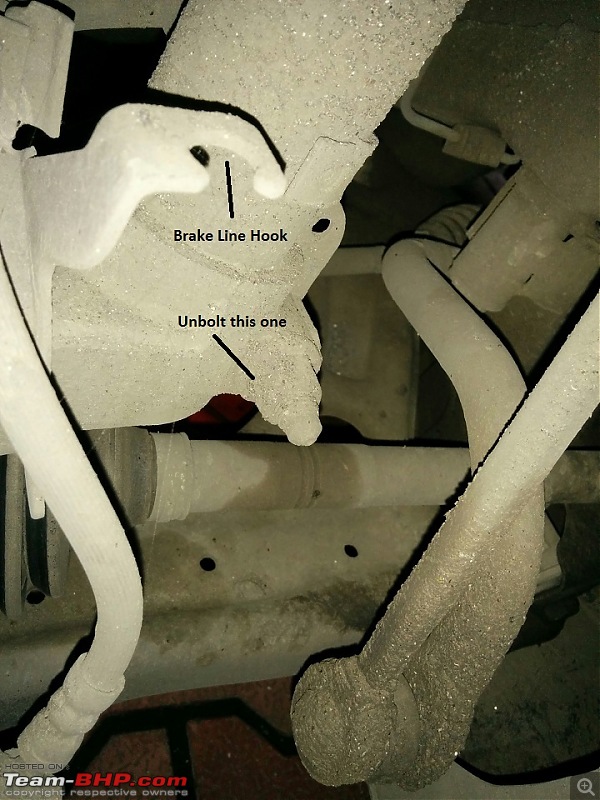
3. Unhook the brake lines from the strut (it only needs to be removed from its holder)
4. Place the wheels under the car as backup for the stands (just in case)
Once this is done, we need to start disconnecting the tie rods from the suspension using a T30 hex bit, once the screw is off, it just comes off easy!
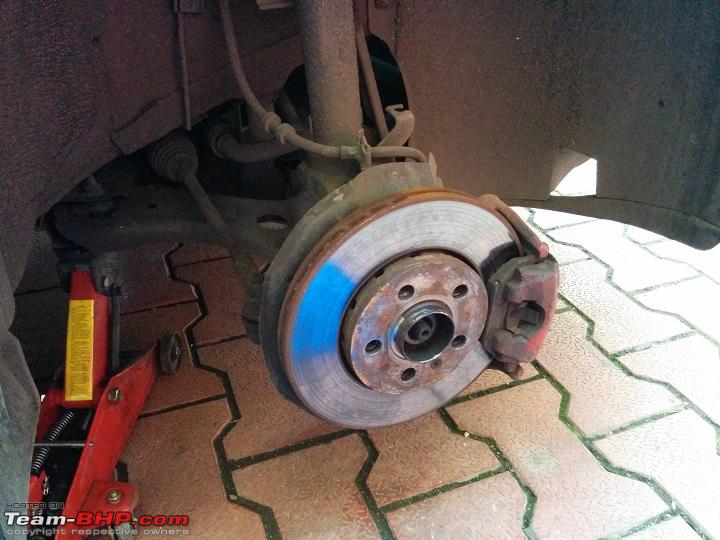
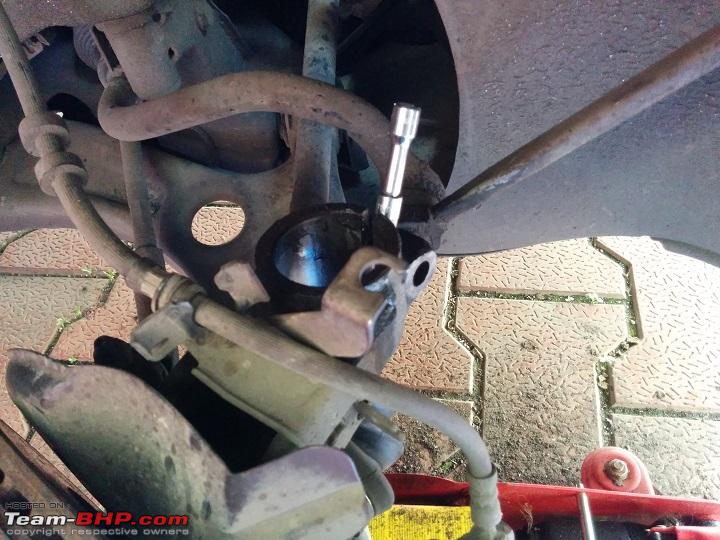
Next, there is nut and bolt which connects the suspension to the rest of the wheel hub (as shown here) this needs to come off too. Socket wrench helped a lot here and so did WD40.
Tie rod off the strut:

Before we do this, always remember to support the wheel hub using a jack to prevent it from falling to the ground (not entirely) but it can cause damage to the hub or the brake lines.

Now comes the part where we need the splitter tool to be able to free the suspension entirely from the wheel hub, but since I didnt have this I used a hex bit instead and slowly screwed it in.

The way the splitter works is by increasing the diameter of the joint to allow the suspension to come out easily. So in order to completely remove it:
1. Raise the jack a little
2. Insert the splitter (now hex bit)
3. Spray a lot of WD40
4. Lower the jack
and with some hammering (with an iron hammer clad with a cloth cover to make it less damaging) off came the joint.
Now its only connected at the top mount and once again I needed to improvise to remove this, it wouldve been a lot easier if I had the strut socket, just couldnt place it!
So I used a spark plug socket instead and held the big nut in place with the spanner, used T30 hex bit and held that with my much shorter socket wrench (the ¼ inch drive set version) and gave it a twist.
At first it just wasnt budging and I ended up moving both, the idea is to turn both in an opposite direction and thats what will do the trick, easier said than done but managed it after a couple (ok may be a little more) tries!
Phew
at long last the suspension strut was off!
It works like this:
This is the strut now out and about!

To replace the mount, its important to remove the top nut on the strut and if thats to be done the springs must be compressed to allow you to open the top nut otherwise BOINNGG and a lot of damage, hurt and pain!
If you ever do this, please remember to never open the top nut without compressing the springs with a spring compressor, it can hurt you really bad!
Compressed Springs:

I took pictures of exactly how the suspension parts fit so I know exactly what comes where when I need to assemble it back together, let them talk for a bit:

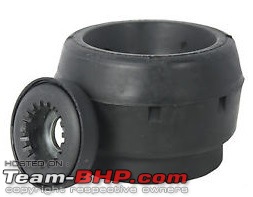
Now the bearings I sourced were not original spec and they felt downright cheap, so I decided to use the older ones for now, with a little service:
Im sorry I didnt take these pictures but the bearing looks like this:
So I opened them and the entire unit inside (bearings) was super dry and almost rusted. So I removed the wheel bearings and sprayed them with WD40 let it soak and then gave it a nice rub with clean cotton rag VOILA! Almost as good as new. Filled the assembly with grease (white) and put it back together.
From the pictures and guides I sourced, I never saw the 2 rings before.
So after a little research, they were actually spacers to increase the ride height. Skoda had added these about 2 years back to the car as part of a circular. Hated the height of the car as it made it feel like it was perpetually raised from the front with wheel well gaps as big as Skodas ego in helping customers out!
Decided to get rid of them! I still have the spacers, but removed them from the unit.
Now the process is simply reverse put everything back in the same order and put back together with the new mounts (notice the difference, the older one is like a mushroom, actually they both are but a lot more prominent)

Once the entire strut was back and car back on the ground, the steering noise was gone, the feel was back to normal and a job well done, and car looked a lot like it did when I bought it, without the extra height making it look like a cross-over. Lemon iced tea anyone!
What I learnt from this:
1. It really took long for me to finish this, actually more than 1 day had to leave the car overnight on jack stands and continue in the morning the next day to finish at 3:00pm (considering I started at 8:00 am the previous day and worked right until 06:00pm a tiring 16hrs, it took a real long time putting the strut back on totally needed another hand!
2. Always have another person handy, I think I wouldve done this much faster if I asked one of my friends to help!
3. The right tools will definitely help; Im going to order my set of tools (the ones I didnt find here) to help me do this better. Sometimes improvising doesnt help just takes a lot longer!
4. DIY is Uber fun! (Skoda alone knows how much they wouldve charged me for this!)
Next up
Cruise Control
Cheers,
Aayush


 27th March 2016, 16:34

 (48)
Thanks
(48)
Thanks