Team-BHP > Technical Stuff > DIY - Do it yourself
Register New Topics New Posts Top Thanked Team-BHP FAQ


Reply
  Search this Thread
60,077 views
Old 10th June 2016, 22:06   #1
Team-BHP Support
 
Gannu_1's Avatar
 
Join Date: Apr 2013
Location: Madras
Posts: 7,174
Thanked: 20,220 Times
VW Polo DIY: Installing the OE auto-dimming interior mirror

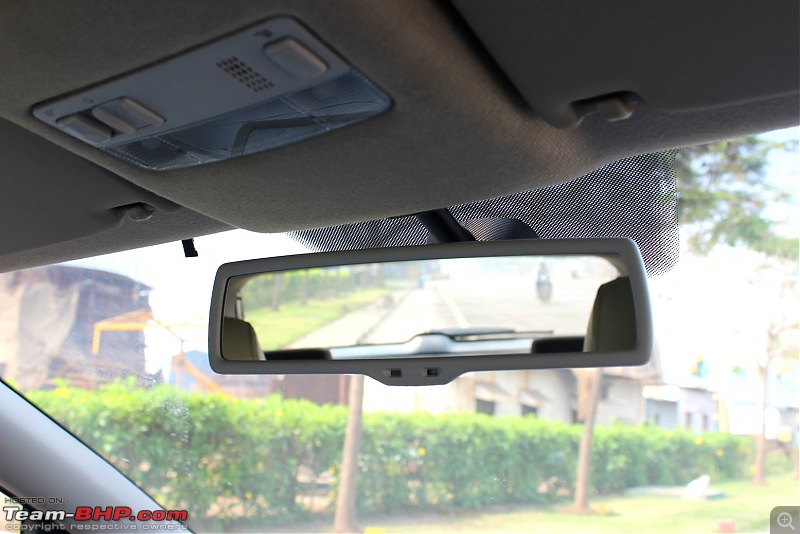
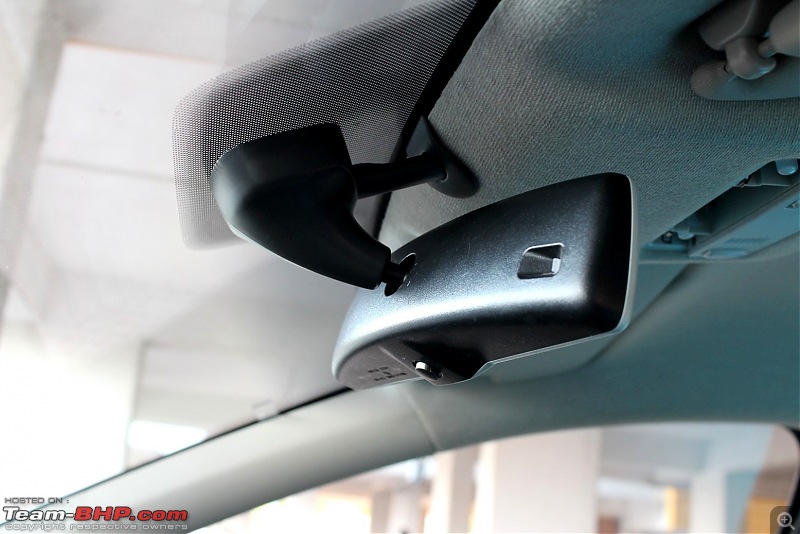
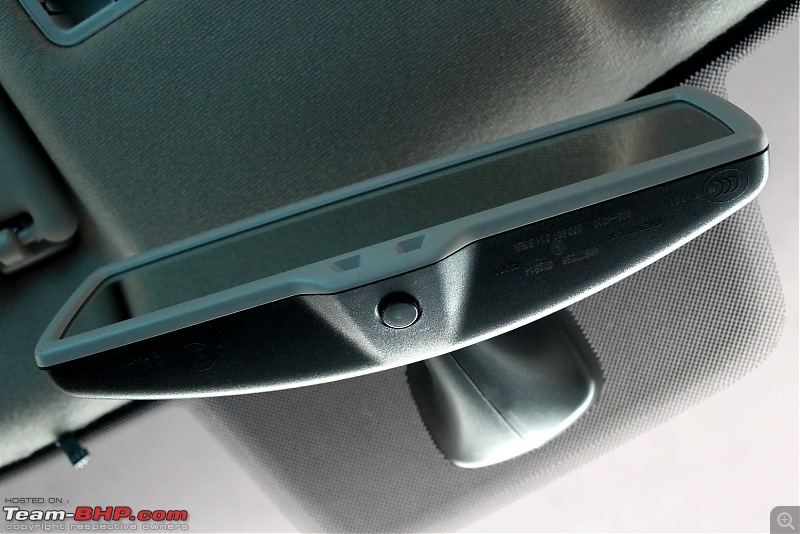
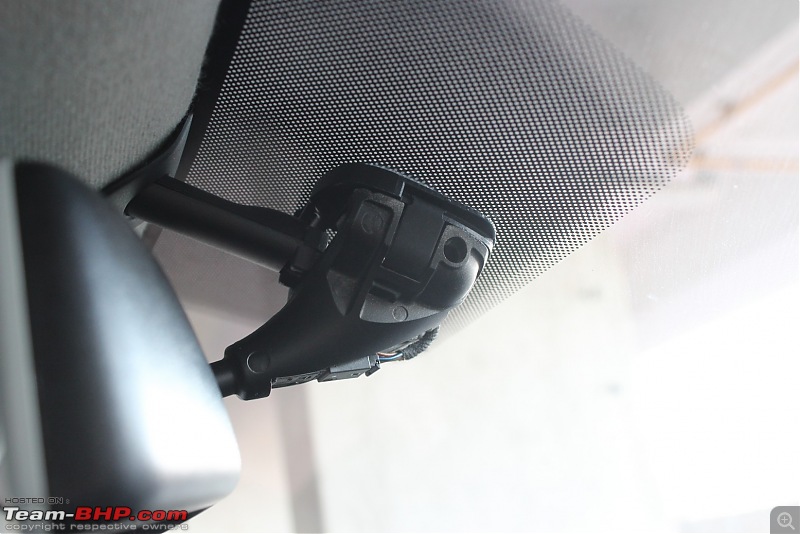
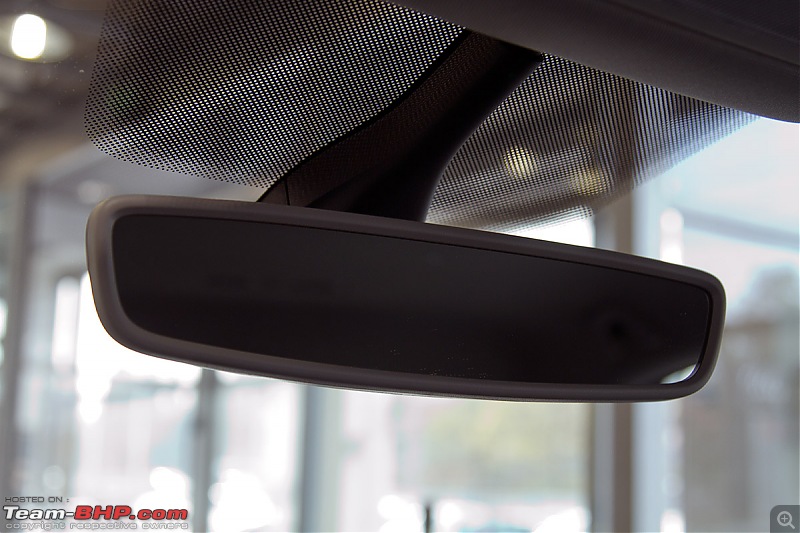
Back in Feb 2016, we installed the OEM VW anti-glare rear view mirror which is given as a standard equipment with the Jetta and Passat.

VW Polo DIY: Installing the OE auto-dimming interior mirror-res_1.jpg

VW Polo DIY: Installing the OE auto-dimming interior mirror-res_2.jpg

VW Polo DIY: Installing the OE auto-dimming interior mirror-res_3.jpg

Since I found some spare time last weekend, I thought of doing a write-up of the installation. Just for the record, this DIY will focus only on the installation of the anti-glare mirror. The installation of the RLS (rain-light sensor) will follow up later on.

Parts Required:
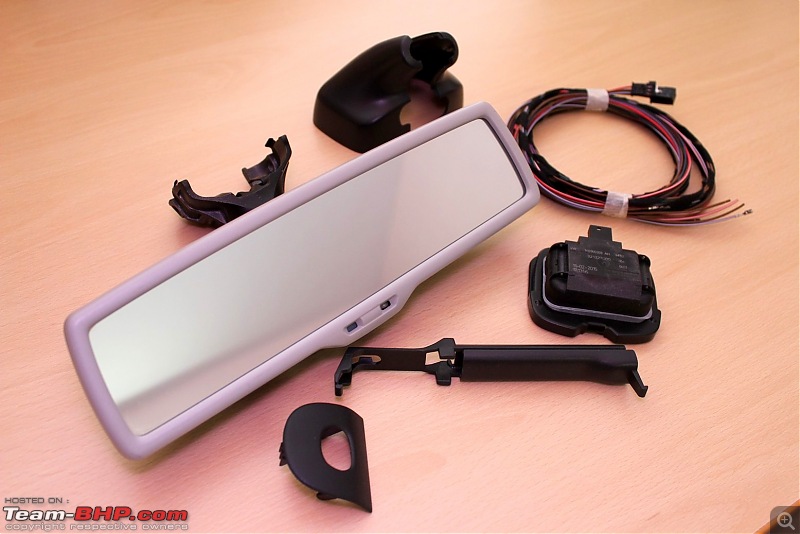
  1. Anti-glare mirror assembly – 56D 857 511B SMA

    VW Polo DIY: Installing the OE auto-dimming interior mirror-agrvm1.jpg

    This one comes with a pearl grey and black color combination. There’s a different variant which comes in all beige.

  2. Mount – 1K0 845 543B

    VW Polo DIY: Installing the OE auto-dimming interior mirror-mount.jpg

    This is a metal mount which is stuck to the windshield. The mirror slides onto this mount. I sourced 2 mounts - one for installing the mirror and the other for the RLS.

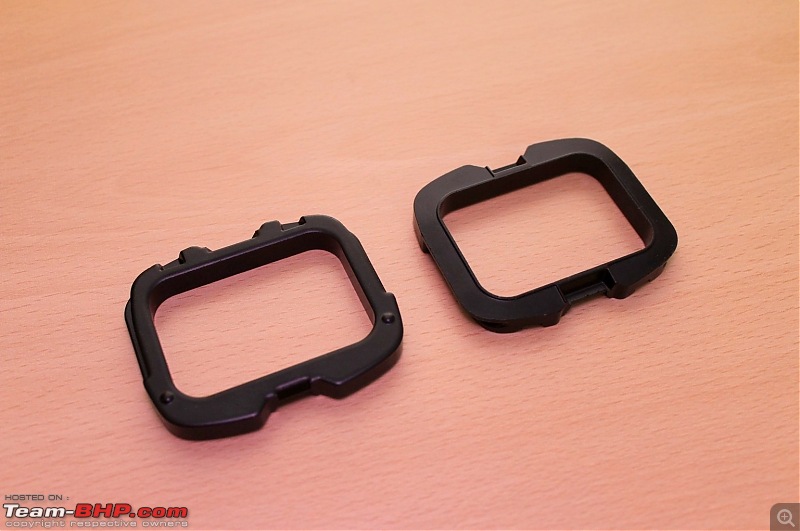
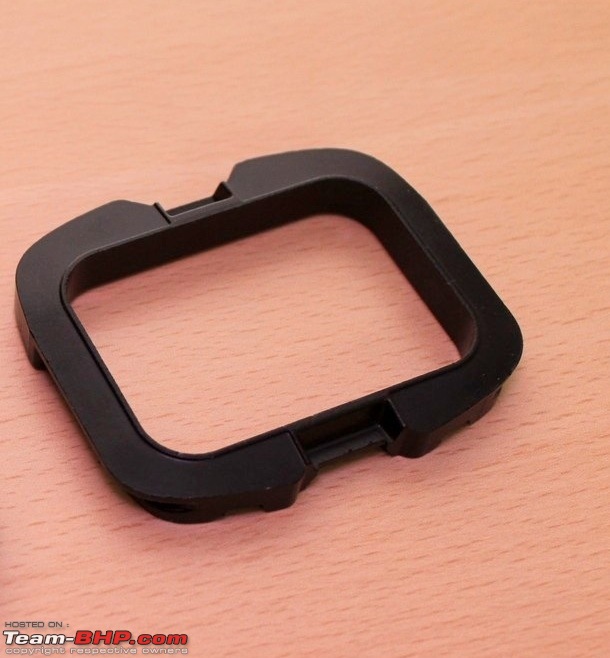
  3. Mount cover - 1K0 858 547 9B9, 1K0 858 548 9B9

    VW Polo DIY: Installing the OE auto-dimming interior mirror-covers.jpg

    The mount covers clip to each other hiding the unwanted bits of the assembly.

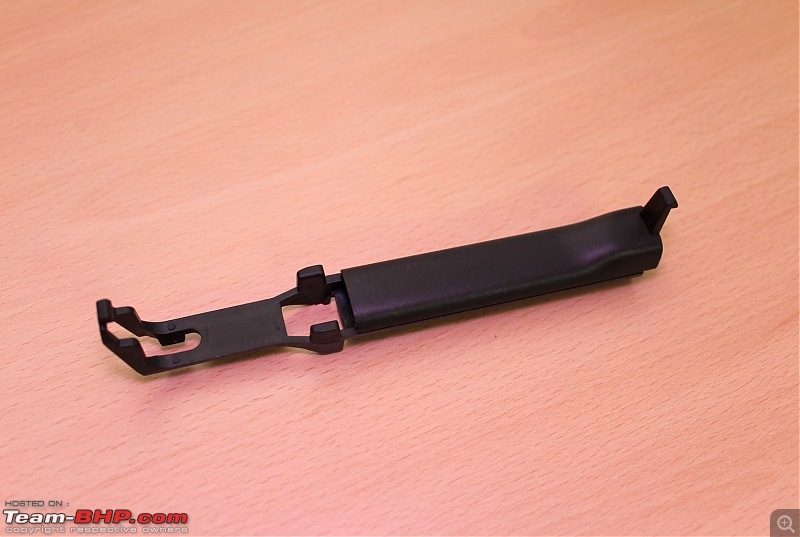
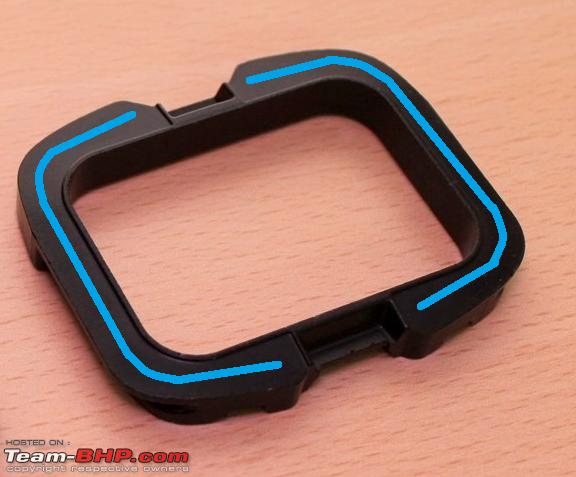
  4. Harness cover – 5SZ 1K0 857 593A, 5SZ 1K0 857 594

    VW Polo DIY: Installing the OE auto-dimming interior mirror-harness-covers.jpg

    The harness cover routes the harness which goes from the headliner to the mirror.

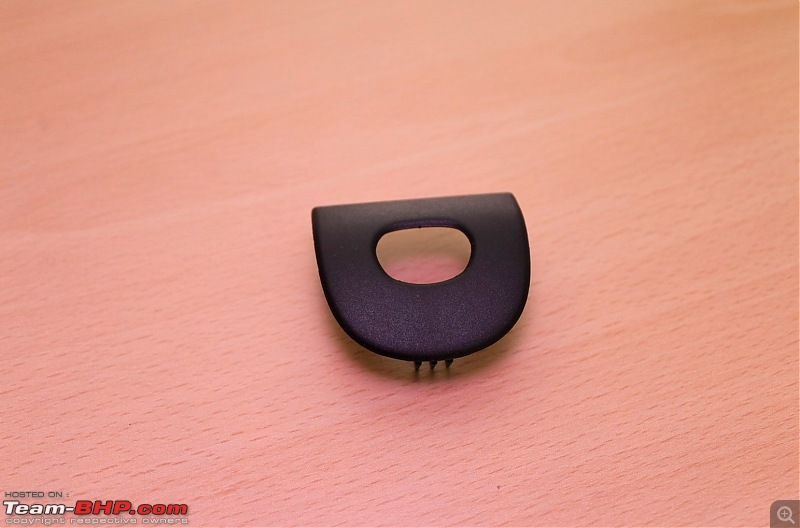
  5. Headliner trim – 5N0 857 304 9B9

    VW Polo DIY: Installing the OE auto-dimming interior mirror-headliner-trim.jpg

    The headliner trim goes into the hole on the headliner through which the harness cover comes out.

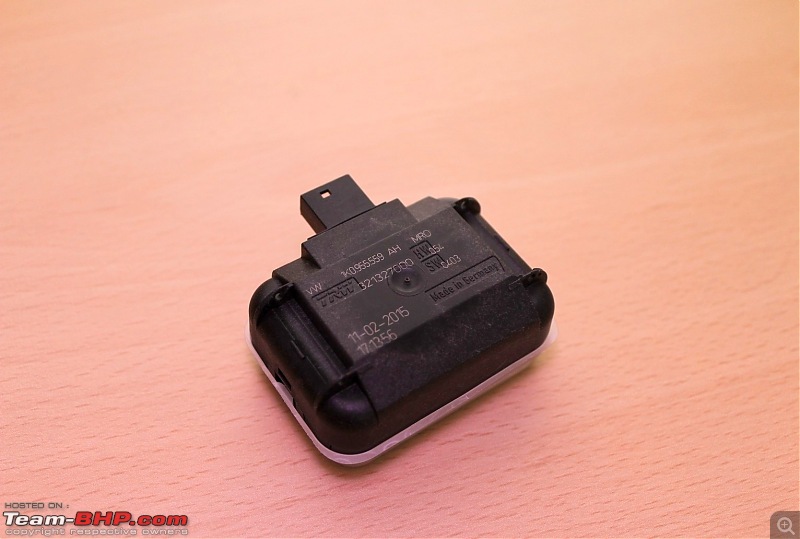
  6. RLS – 1K0 955 559 AH

    VW Polo DIY: Installing the OE auto-dimming interior mirror-rls.jpg

    This one is not essential for the anti-glare mirror retrofit and can safely be omitted if it is only the mirror you’re looking to install. The RLS is used to turn on the wipers automatically when it senses the water droplets on the windshield and to close the windows after a 24 hour gap (if the car is unused and any of the windows are left open).

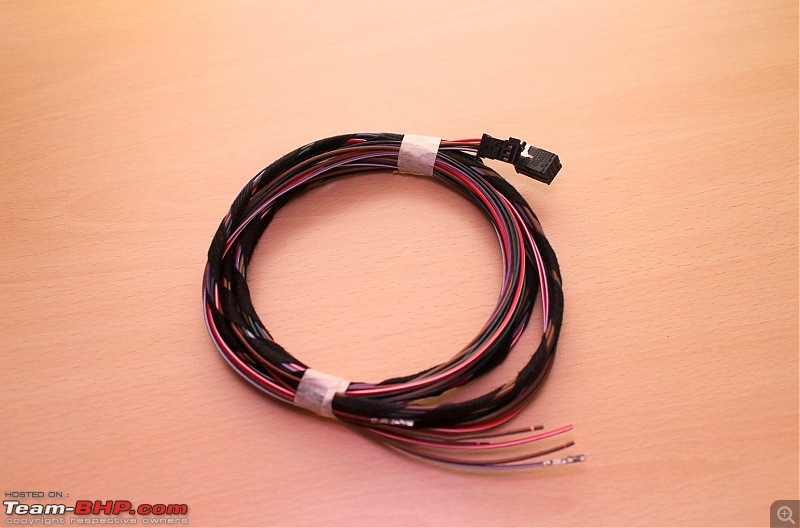
  7. Harness:

    VW Polo DIY: Installing the OE auto-dimming interior mirror-harness.jpg

    No specific part numbers for the harness. This harness is used to connect the mirror and the RLS. If you don’t intend to use the RLS simply tuck the relevant connector inside the headliner trim.

    A shot of all the contents:

    VW Polo DIY: Installing the OE auto-dimming interior mirror-contents.jpg

  8. Fuse tap cable:

    VW Polo DIY: Installing the OE auto-dimming interior mirror-fuse-tap-cable.jpg

    You’ll need this to tap a +12V connection from the car’s fuse box without any cutting/splicing/soldering/taping involved. Consider an extra one if you intend to connect the RLS as well as it goes into a different fuse slot (requires power even after the car is locked).

Tools Required:
  1. Utility blade - for cutting the hole on the headliner trim and the template on the self-adhesive paper. I have a Stanley 10-175 utility knife with replacement blades and has served me for most of the plastic/trim cutting till date. The blades wear out over time and I have a set of replacement blades handy just in case.

  2. Trim removal tools – for removing the driver side A-pillar trim. Although one can whack the end of the A-pillar trim to remove it off the first clip, it’s a good idea to use the tool so as to not damage the trim.

  3. Crimping tool – to crimp the +12V cable with the fuse tap cable. The fuse tap cable usually comes with a butt crimp at the end of the cable. Else a butt crimp or a soldering iron + solder + heatshrink sleeve + heat gun may be used to connect the joint and cover it up neatly.

Misc. things Required:
  • Masking tape – to secure the harness along the A-pillar and hold the mount to the windshield after the glue was applied to the base. Similar alternatives may be used. Consider having a bottle of Mr Muscle spray and a microfiber cloth to clear the sticky residue the tape leaves on the windshield.

  • Bondtite Fast & Clear adhesive – to stick the mount to the windshield. I used a 6g pack which comes with 2 tubes; sufficient for this installation. The glue is whitish in appearance after mixing, sets in about an hour and has a curing time of 24 hours.

    Ideally a primer and a polyurethane glue is required which is also used to stick the windshield with the frame of the car but I decided to use this instead as it was inexpensive and hasn’t caused any trouble in the long run despite the car being parked under the sun over long hours, driving over bad roads with severe undulations and potholes and rotating the mirror by holding it - the mount is still intact.

  • A4 self-adhesive paper – to print the template of the mount which is then cut and stuck on the windshield. This paper ensures that any excessive epoxy glue doesn’t spread outside the mount on the windshield. If it does, it will go over this paper which is removed at the end ensuring a clean job. You'll get this is most stationery shops.

  • 1200 grit sandpaper – to clean the mount before the epoxy glue is applied.

  • Toothpick – or something similar to apply the glue over the mount.

  • A piece of cardboard – 100 mm x 100 mm area from a discarded box to draw and cut the cutout template for the headliner trim.


Wiring diagram:

From ELSAWIN, this is the relevant current flow diagram:

VW Polo DIY: Installing the OE auto-dimming interior mirror-cfd.png

Procedure:
  1. Take two printouts (an extra one just in case) of the template (Template.pdf) on the self-adhesive A4 paper.

    Cut along the boundaries of the inside and the outside of the template using the utility knife. Take time and do it.

  2. On the piece of cardboard, using the headliner trim (part no. 5), mark the outer boundary. Use the utility knife to cut out the area (resembling a triangle of sorts) and insert the trim over the piece to check if it goes inside.

    If it does very smoothly, the cut is probably a notch too big. Repeat the step but give it a smaller cut this time. The same cutout is going to be marked over the headliner trim and cut. And the trim should have a snug fit with the headliner and you will get only one shot at this! Give it a couple of iterations if required.

  3. Using the 1200 grit sandpaper, lightly sand the surface of the mount which sticks to the windshield. It is this surface:

    VW Polo DIY: Installing the OE auto-dimming interior mirror-gluing-surface.jpg

  4. Collect all the parts, tools and misc. things and, head to the car. Remove the stock mirror.

    VW Polo DIY: Installing the OE auto-dimming interior mirror-stock-mount.jpg

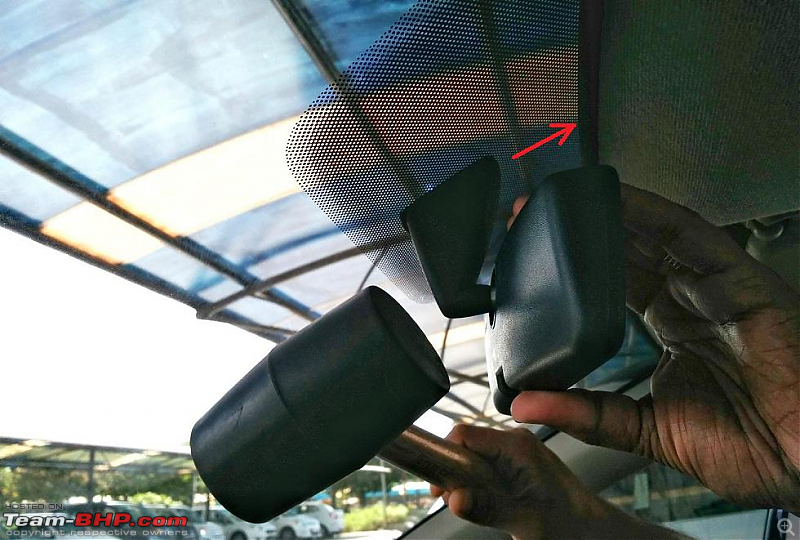
    Give it a whack at the bottom towards the top to get it off the mount. Do not twist or turn the mirror as you may have read elsewhere. It doesn’t apply to the Indian Polo/Vento variants.

    VW Polo DIY: Installing the OE auto-dimming interior mirror-removing-stock.png

    If it doesn’t budge, use a mallet as shown above.

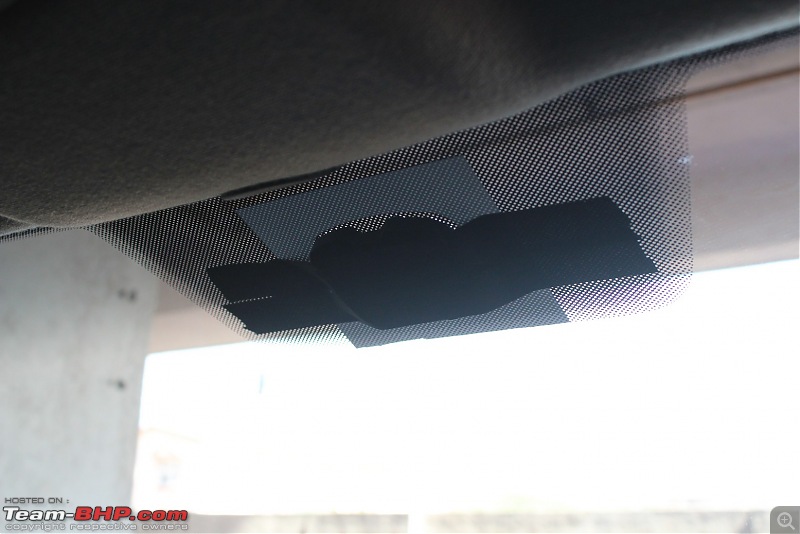
  5. Stick the template on the self-adhesive paper on the windshield around the stock mount:

    VW Polo DIY: Installing the OE auto-dimming interior mirror-template-applied.jpg

    Ensure that the center line on the cut-out matches the center line of the mount to ensure symmetry.

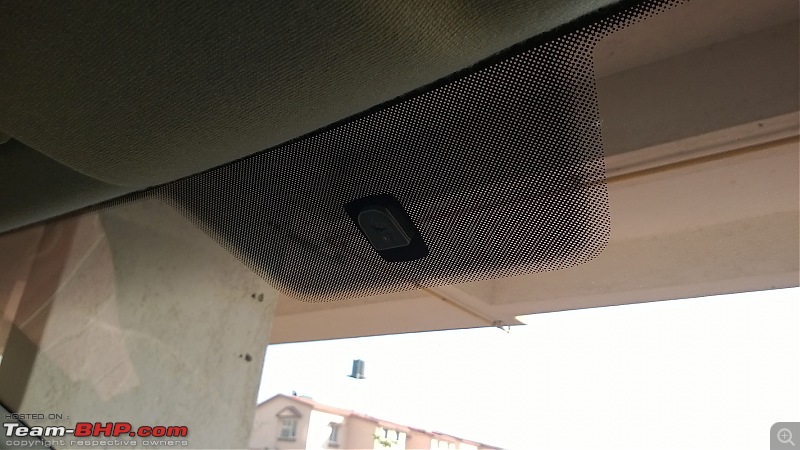
    We do not intend to use the stock mount anymore and removing it can be painful as it requires heating the mount to weaken the glue using a heat gun, scraping the remains of the glue, sanding it etc. If one isn’t careful, it can crack the windshield. I chose to leave it as it is. The RLS can be mounted on a different location of the windshield; I intend to do it this way.

  6. Tear away 2 equal parts of the masking tape (say, 200 mm in length) and stick one end somewhere (ensure the tapes don’t coil!) on the dashboard for easy access. Do this step before attempting to stick the mount on the windshield.

  7. Squeeze 2 equal parts of the Bondtite tubes on a piece of cardboard or a discarded visiting card and using a toothpick mix the 2 parts thoroughly to form a whitish looking compound.

  8. Use the toothpick to apply the glue over the mount as shown below:

    Name:  Glue app.png
Views: 27934
Size:  349.6 KB

    Remember to apply a thin line of glue over the mount as the mount will squeeze out any excess glue outside over to the windshield.

  9. Place the mount carefully on the exposed area of the template and keep it pressed for a minute or so while you apply the tapes kept aside over it.

    VW Polo DIY: Installing the OE auto-dimming interior mirror-mount-stuck.jpg

    Curing time = 24 hours. Leave it aside for a day if you can and ensure that the mount isn’t exposed to direct sunlight during this period.

  10. Using the cardboard template for the headliner, mark the area around the center of the headliner. Use the utility knife to carefully cut the area as shown:

    VW Polo DIY: Installing the OE auto-dimming interior mirror-headliner-cut.jpg

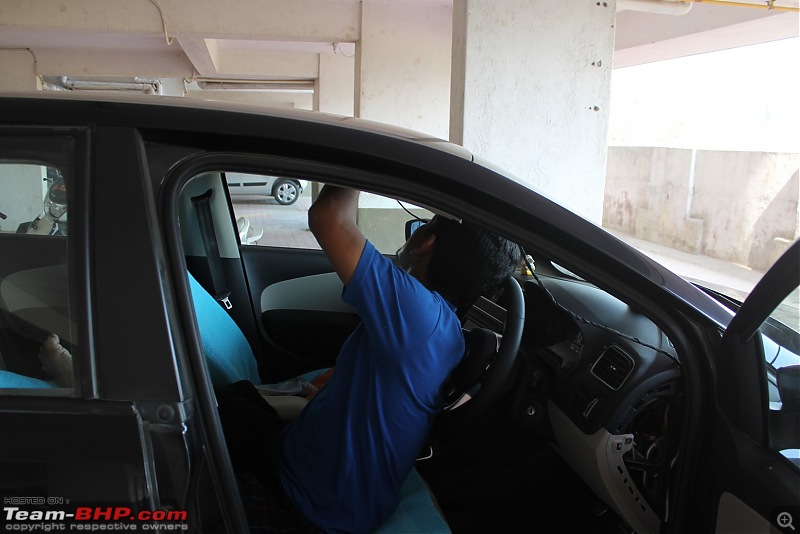
    Remember to do this step carefully as an ungainly large cut will make the trim a loose part and will keep sliding over the wire covers. I moved the driver seat to the AFT and reclined the seat-back positioning like this:

    VW Polo DIY: Installing the OE auto-dimming interior mirror-position.jpg

    Once the piece is cut from the headliner, place the trim over it. The trim should have a snug fit with the headliner.

  11. Using the trim removal tool, dismantle the driver-side A-pillar trim. Route the harness from the headliner (pull the edge near the windshield with the hand and insert the harness) and tape it to the A-pillar:

    VW Polo DIY: Installing the OE auto-dimming interior mirror-pillar.jpg

    Use the masking tape to stick it with the pillar. Route the remaining part of the harness towards the fuse box by removing the side trim of the dashboard and leave it aside.

  12. The harness has 2 connectors at one end – a 6-pin connector for the mirror and a 3-pin connector for the RLS. The 2 connectors would be wound using a cloth tape from the factory. Undo a bit of this cloth tape so the 2 connectors can be separated.

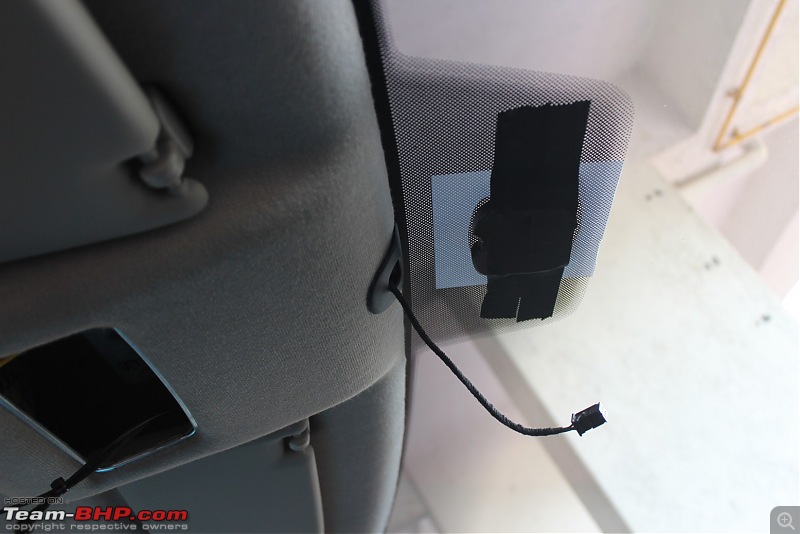
  13. After routing the harness through the gap between the headliner and the car’s ceiling, take out the 6-pin connector through the headliner trim as shown below:

    VW Polo DIY: Installing the OE auto-dimming interior mirror-harness-thru-headliner.jpg

    That’s all the work for day one.

  14. On the second day after letting the glue cure, take out the tapes holding the mount and the adhesive paper around the mount:

    VW Polo DIY: Installing the OE auto-dimming interior mirror-mount-cured.jpg

  15. Join the harness covers (part no. 4) together and slide it over the headliner trim while the other end rests on the mount as shown:

    VW Polo DIY: Installing the OE auto-dimming interior mirror-harness-routed.jpg

  16. Connect the 6-pin connector to the mirror (the male connector on the mirror can rotate to some extent) and slide the mirror into the mount from the bottom to the top which will end with a reassuring click:

    VW Polo DIY: Installing the OE auto-dimming interior mirror-mirror-slid.jpg

  17. Use the mount cover (part no. 3) to cover both sides of the assembly.

    VW Polo DIY: Installing the OE auto-dimming interior mirror-covers-both-sides.jpg

    That completes the installation part.

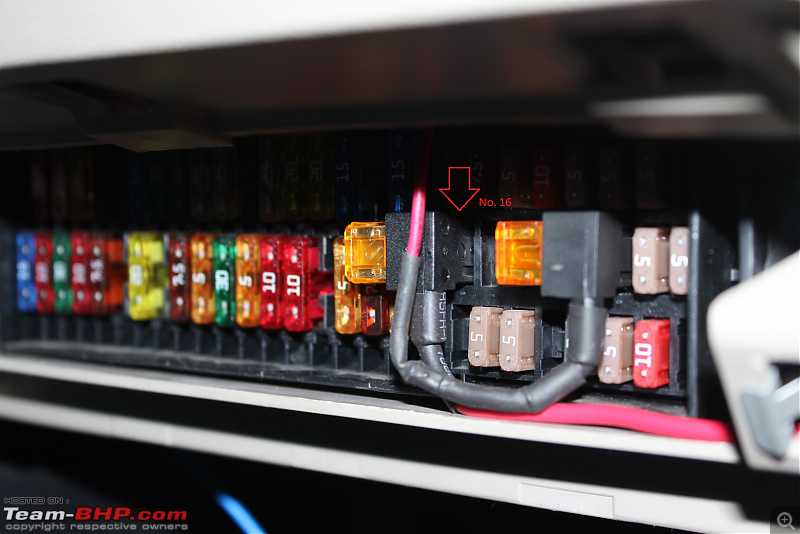
  18. Powering the mirror - open the fuse box and locate fuse no. 16. Route the fuse tap cable’s free end through the tiny hole on the top of the fuse box and pull it from the other side.

    VW Polo DIY: Installing the OE auto-dimming interior mirror-fuse-box.png

    Connect the positive wire from the harness originating from pin no. 1 of the 6-pin connector. I forget the color of the wire now; look at the pin designation of the 6-pin connector indicated on the connector, match the color of the wire and crimp the cable from the other end of the harness to the fuse tap cable. Plug the fuse into the slot.

    Connect the brown wire to GND – essentially, any nut screwed to the body of the car. These are available in plenty. Wind the cables for the RLS from the harness and tie it using a cable tie.

    Note: Although slot 16 is officially for the parking aid control unit, I decided to use this since I had a mini fuse tap cable lying around not the regular size. Otherwise the slot is no. 25 as indicated by the current flow diagram. You need a [b]5 A fuse[b] in the tap cable in any case

Results:

Click image for larger version

Name:	Res_1.jpg
Views:	7165
Size:	241.6 KB
ID:	1516489

Click image for larger version

Name:	Res_2.jpg
Views:	1683
Size:	244.3 KB
ID:	1516490

Click image for larger version

Name:	Res_3.jpg
Views:	973
Size:	297.8 KB
ID:	1516491

Here's a short clip on the working of the anti-glare function:


Shopping Experience:

I sourced the components from Aliexpress. The entire kit cost me $125 back in December 2015 including an extra mount for the RLS and shipping through Hong Kong post. The consignment reached me in less than 2 weeks and no customs duties were charged. The dealer was “Landsounds Technology Co.” and the contact was Tank Tao. I’ve sourced a lot of OEM parts from him and he was helpful as always.

That would be all. I'll update this thread when I install the RLS on the windshield.

Let me know if you have any queries!

PS: Coming up next - puddle lamps installation. Coming up later - Front parking sensors installation + PDC unit upgrade.

Last edited by Gannu_1 : 10th June 2016 at 22:28.
Gannu_1 is offline   (54) Thanks
Old 11th June 2016, 10:30   #2
GTO
Team-BHP Support
 
GTO's Avatar
 
Join Date: Feb 2004
Location: Bombay
Posts: 70,546
Thanked: 300,788 Times
re: VW Polo DIY: Installing the OE auto-dimming interior mirror

Thread moved from the Assembly Line to the DIY Section. Thanks for sharing!
GTO is offline   (1) Thanks
Old 11th June 2016, 15:38   #3
Distinguished - BHPian
 
vishy76's Avatar
 
Join Date: May 2016
Location: BDQ
Posts: 1,251
Thanked: 9,811 Times
re: VW Polo DIY: Installing the OE auto-dimming interior mirror

Gannu sir, a comprehensive DIY as usual.
I think this is useful for all polo owners and also for some current ones as I find the auto dimming ORVM on the new polo(2015 facelift) too small.
Is there any way of enabling the light sensor on the 2016 spec polos as the RLS is already present?
cheers,
vishy76

Last edited by vishy76 : 11th June 2016 at 15:40.
vishy76 is offline   (1) Thanks
Old 11th June 2016, 18:33   #4
BHPian
 
Join Date: Mar 2015
Location: pale blue dot
Posts: 589
Thanked: 2,863 Times

Brilliant DIY per usual - detailed instructions, and really clean and tidy work. This is a nifty modification, thanks for sharing
digitalnirvana is online now   (1) Thanks
Old 11th June 2016, 20:59   #5
BHPian
 
Thebat's Avatar
 
Join Date: Apr 2014
Location: Bangalore
Posts: 200
Thanked: 646 Times
re: VW Polo DIY: Installing the OE auto-dimming interior mirror

Wow Gannu, VW should take lessons from your thread on how to make the Polo a complete car. The only thing I find off about my Polo are the ORVM's , being made by TATA they just feel very very cheap to touch and are a couple sizes small. I will surely be replicating your install . Thank you for the inspiration .
Thebat is offline   (1) Thanks
Old 11th June 2016, 23:39   #6
BHPian
 
TwistOfFate!'s Avatar
 
Join Date: Jul 2013
Location: Luxembourg, EUR
Posts: 45
Thanked: 140 Times
re: VW Polo DIY: Installing the OE auto-dimming interior mirror

Quote:
Originally Posted by Gannu_1 View Post
Here's a short clip on the working of the anti-glare function:
Hey Gannnu 1,

That's quite a noticeable difference and I'm glad you've DIYd this! Great addition to your car. Hope you have 1000s of glare-free miles ahead.

Regards,
Vinay.

Last edited by Gannu_1 : 11th August 2016 at 08:09. Reason: Adding quote tags.
TwistOfFate! is offline   (2) Thanks
Old 12th June 2016, 06:49   #7
Senior - BHPian
 
W.A.G.7's Avatar
 
Join Date: Jun 2010
Location: Pune
Posts: 1,385
Thanked: 2,025 Times
re: VW Polo DIY: Installing the OE auto-dimming interior mirror

Wow! Super fun DIY. Your Polo is now completely "europian-ised", I can safely say. I have read each and every Polo DIY thread of yours and found them very useful. Question - If and when you sell your Polo, will you be giving away all these accessories "as-is" to the buyer?

Now looking forward for your RLS update to this thread
W.A.G.7 is offline   (1) Thanks
Old 13th June 2016, 09:43   #8
Distinguished - BHPian
 
AtheK's Avatar
 
Join Date: Jun 2014
Location: Bangalore
Posts: 2,040
Thanked: 8,428 Times
re: VW Polo DIY: Installing the OE auto-dimming interior mirror

great one Gannu, you continue to inspire a lot of folks here. If you ever get bored of what you are doing, you can pretty much open up a small garage with a couple of trained mechanics, i am sure you will have tons of VW's lined up in front of your garage, day in and night out.
AtheK is offline   (1) Thanks
Old 13th June 2016, 10:55   #9
Senior - BHPian
 
abhishek46's Avatar
 
Join Date: Oct 2010
Location: Bangalore
Posts: 1,813
Thanked: 5,864 Times
re: VW Polo DIY: Installing the OE auto-dimming interior mirror

Dear Gannu,

Loved reading your DIYs.
May I ask, if there is any facility to do similar stuff for the ORVMs also? (Auto dimming)
abhishek46 is offline   (1) Thanks
Old 13th June 2016, 13:53   #10
Distinguished - BHPian
 
AtheK's Avatar
 
Join Date: Jun 2014
Location: Bangalore
Posts: 2,040
Thanked: 8,428 Times
re: VW Polo DIY: Installing the OE auto-dimming interior mirror

Quote:
Originally Posted by abhishek46 View Post
Dear Gannu,

Loved reading your DIYs.
May I ask, if there is any facility to do similar stuff for the ORVMs also? (Auto dimming)
Yes you can do it, I have done it on my car, Frankmehta has a thread to do it.
You can order the OVRM set from Aliexpress(i ordered one with integrated blinker) and then pry open the current ovrm and fix the new one.

Link for the one i ordered -> http://www.aliexpress.com/item/Anti-...456797115.html
AtheK is offline   (1) Thanks
Old 14th June 2016, 11:56   #11
BHPian
 
proxax's Avatar
 
Join Date: Oct 2012
Location: Chennai
Posts: 29
Thanked: 17 Times
re: VW Polo DIY: Installing the OE auto-dimming interior mirror

Quote:
Originally Posted by Gannu_1 View Post
Let me know if you have any queries!
What was the problem with the manual anti-glare unit? Did the Polo not roll-off the assembly line with one?
proxax is offline  
Old 10th August 2016, 21:04   #12
Team-BHP Support
 
Gannu_1's Avatar
 
Join Date: Apr 2013
Location: Madras
Posts: 7,174
Thanked: 20,220 Times
re: VW Polo DIY: Installing the OE auto-dimming interior mirror

Quote:
Originally Posted by proxax View Post
What was the problem with the manual anti-glare unit? Did the Polo not roll-off the assembly line with one?
It did but the rearward viewability was poor and besides, the electronic dimming mirror is superior compared to the manual unit in terms of glare reduction. Check out the video I have uploaded at the end of the first post.

The newer Polo/Vento/Rapid now comes with the electronic auto-dimming mirror but the mirror area is a notch too low hampering the rear view.

VW Polo DIY: Installing the OE auto-dimming interior mirror-6l3fbow.jpg

Last edited by Gannu_1 : 11th August 2016 at 08:09.
Gannu_1 is offline   (2) Thanks
Old 17th August 2016, 18:21   #13
BHPian
 
antardaksh's Avatar
 
Join Date: Jan 2006
Location: delhi
Posts: 380
Thanked: 295 Times
re: VW Polo DIY: Installing the OE auto-dimming interior mirror

Quote:
Originally Posted by Gannu_1 View Post
The newer Polo/Vento/Rapid now comes with the electronic auto-dimming mirror but the mirror area is a notch too low hampering the rear view.
Hi Gannu,

Would this kit be compatible with BCM in 2015 Polo/Vento TSI for rain and light sensor function?

http://www.aliexpress.com/item/OEM-O...2d565b5a&tpp=1

Regards.

Last edited by antardaksh : 17th August 2016 at 18:26.
antardaksh is offline  
Old 4th September 2016, 12:31   #14
BHPian
 
cedricsg's Avatar
 
Join Date: Nov 2008
Location: Mumbai
Posts: 168
Thanked: 40 Times
re: VW Polo DIY: Installing the OE auto-dimming interior mirror

Quote:
Originally Posted by AtheK View Post
Yes you can do it, I have done it on my car, Frankmehta has a thread to do it.
You can order the OVRM set from Aliexpress(i ordered one with integrated blinker) and then pry open the current ovrm and fix the new one.

Link for the one i ordered -> http://www.aliexpress.com/item/Anti-...456797115.html
Is this applicable for New Polo GT's? I have a 2015 Nov GT where the side mirrors are smaller.
cedricsg is offline  
Old 4th September 2016, 12:32   #15
Distinguished - BHPian
 
AtheK's Avatar
 
Join Date: Jun 2014
Location: Bangalore
Posts: 2,040
Thanked: 8,428 Times
re: VW Polo DIY: Installing the OE auto-dimming interior mirror

Quote:
Originally Posted by cedricsg View Post
Is this applicable for New Polo GT's? I have a 2015 Nov GT where the side mirrors are smaller.
Even I have the Dec 2015 vento, so should be fine.
AtheK is offline  
Reply

Most Viewed


Copyright ©2000 - 2024, Team-BHP.com
Proudly powered by E2E Networks