Team-BHP
(
https://www.team-bhp.com/forum/)
Putting up another successful D.I.Y that I completed. Two friends came up to me asking if there was a possibility to add a tachometer in their cars. The two car's in question are:
- 2003, WagonR LXi and
- 2009, A-Star LXi
As seen both cars being the low end variants, they do not get tachometers from factory. It was not that difficult to get to wiring ready but difficulty was in getting the parts from MGP. Also it is no short of yoga that one needs to do for completing all the wiring properly.
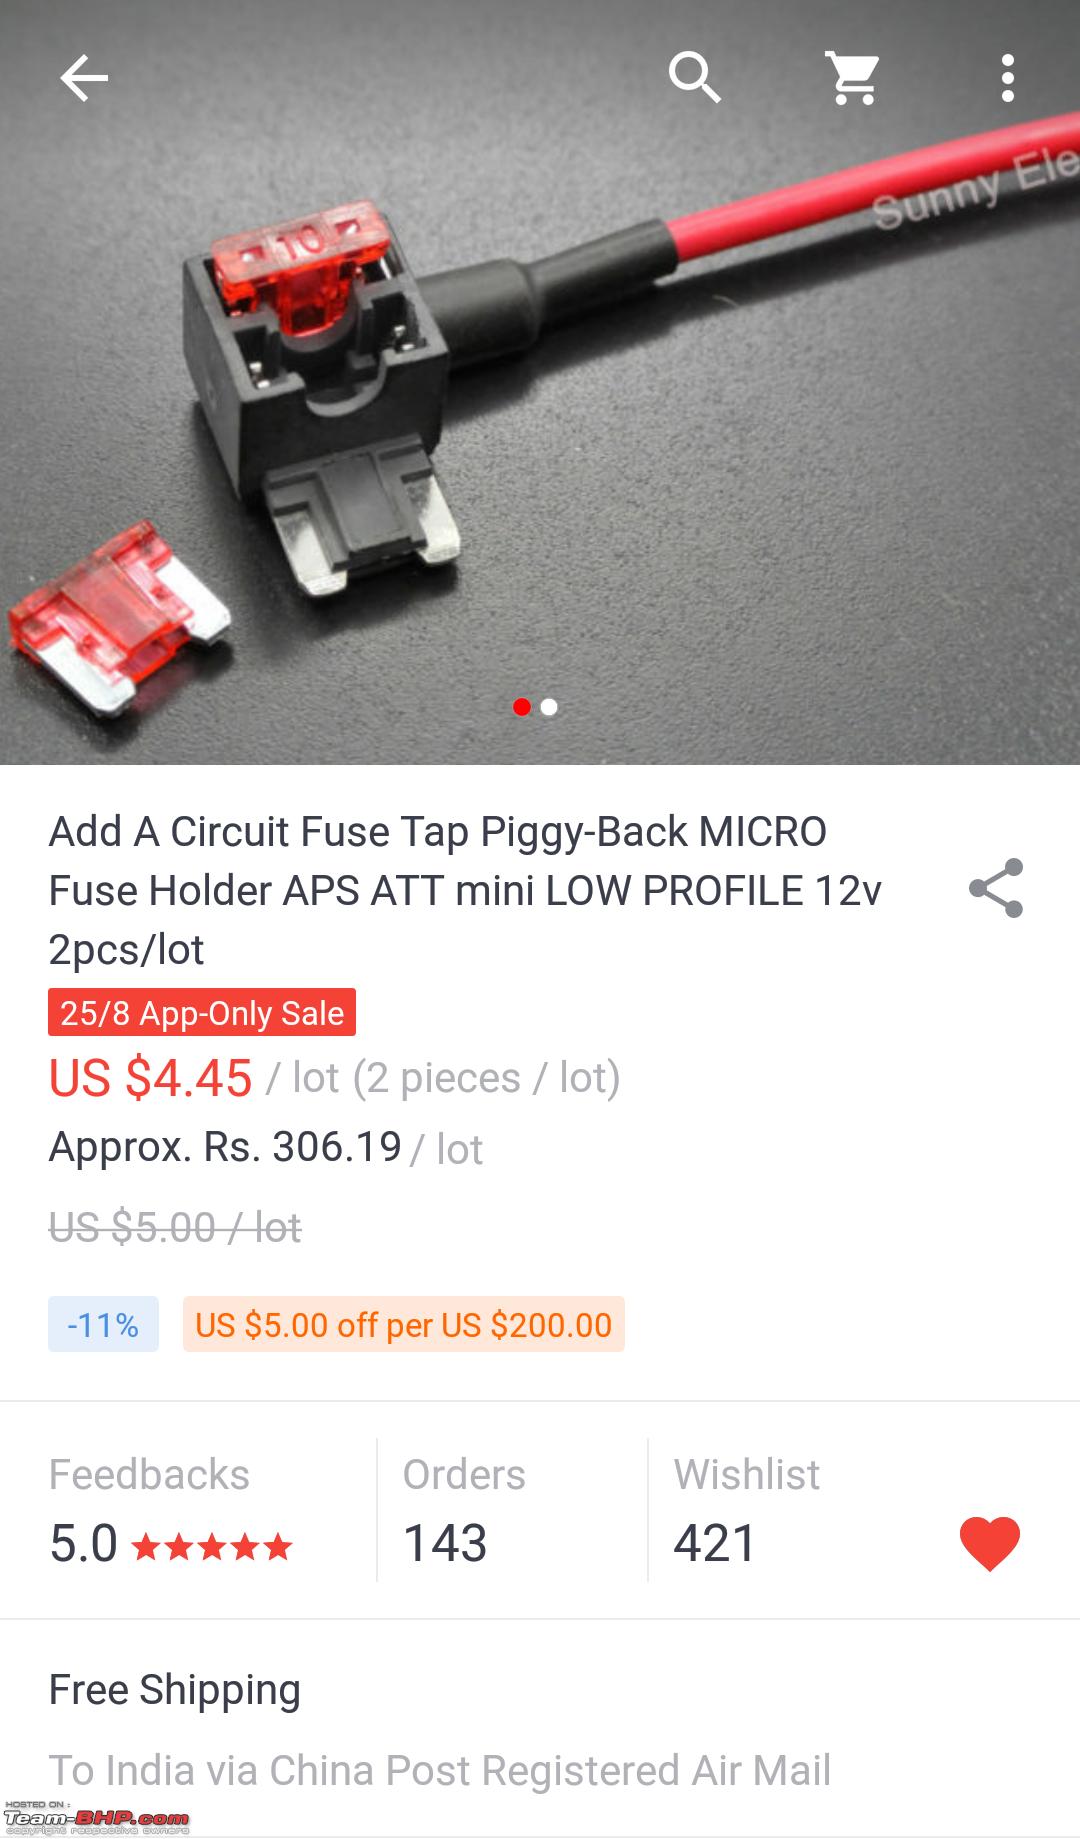
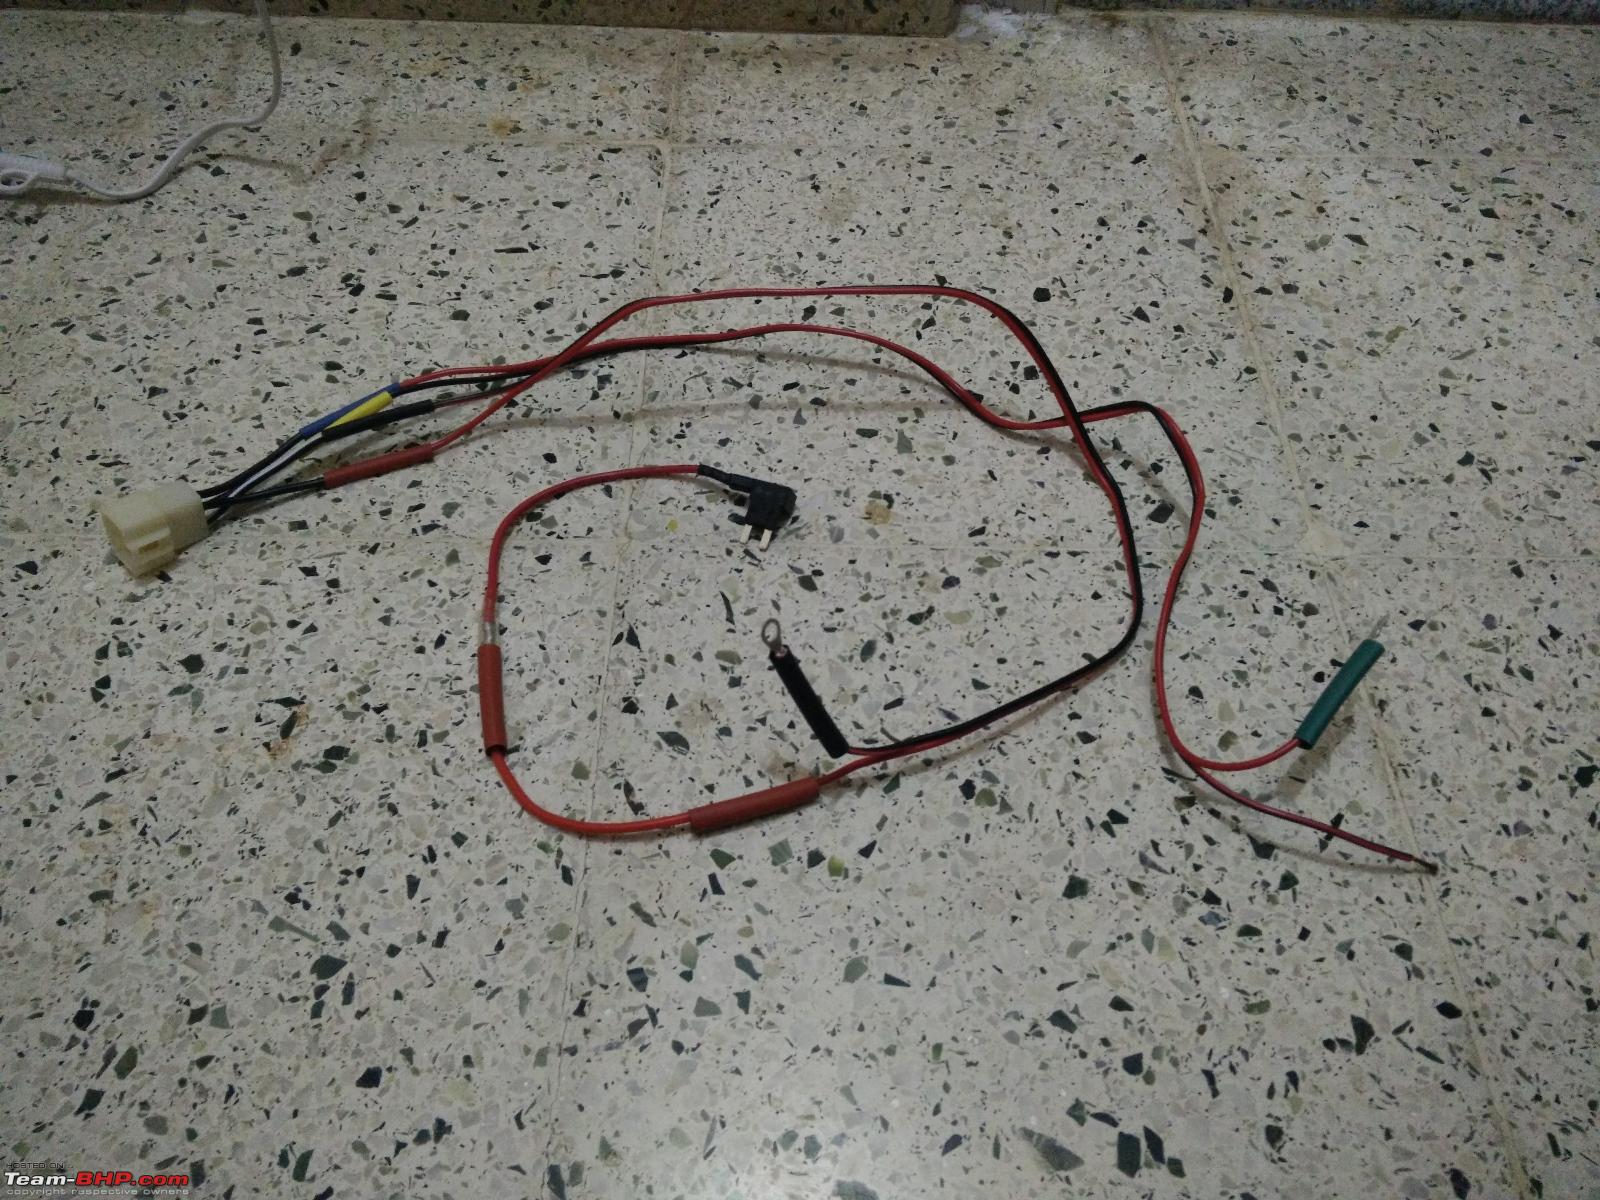
Tools/Parts required for the installation - Micro Fuse Tap Cable x 2 (For A-Star)
- Mini Fuse Tap Cable x 2 (For WagonR)
- Heat shrink tubes
- Hair dryer/hot air gun
- 4-Pin Connector
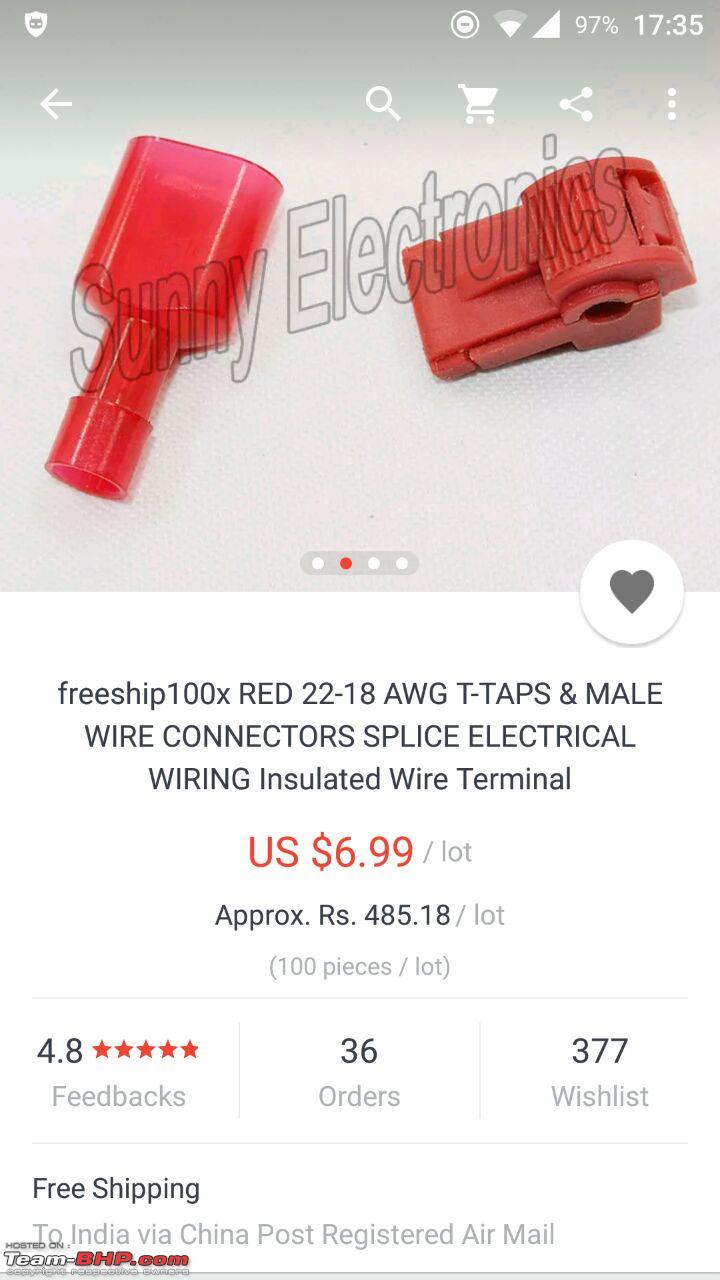
- T-Tap Connector
- 12V Tester
- Panel removal tool kit
- Crimping tools
- Star screwdriver
- Flexible corrugated Bellow sleeve
Fuse Tap Cable  Fuse Set
 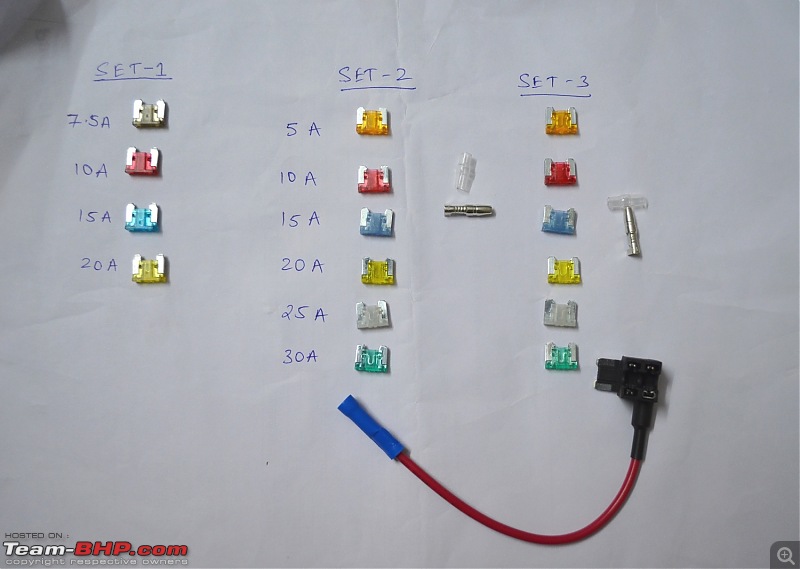 Stanley Crimping Tool
  Heat Shrink Tubes
  12V Tester Pen
  Hair Dryer
  Panel/Trim Removal Kit
 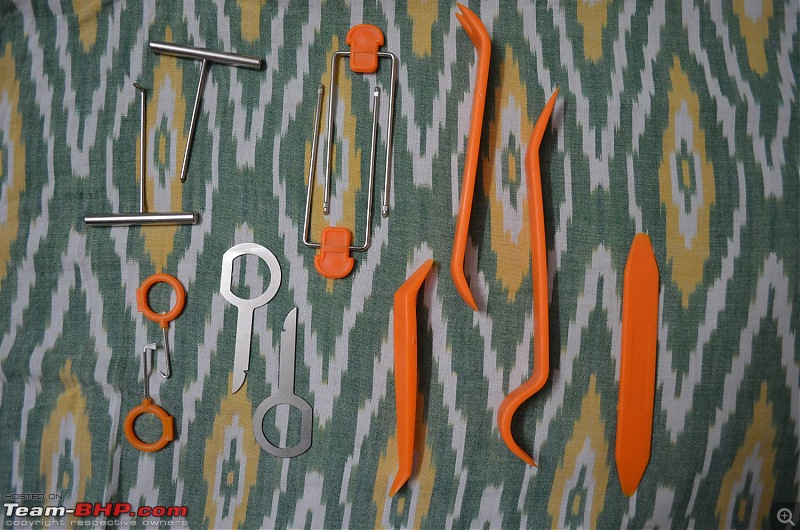 4-Pin Connector
  T-Tap Connector
  Flexible Corrugated Bellow
Sincere Thanks to
BHPian LeoShashi for helping me source the Tachometers and panels from Delhi/Ranchi and to ship it to me and
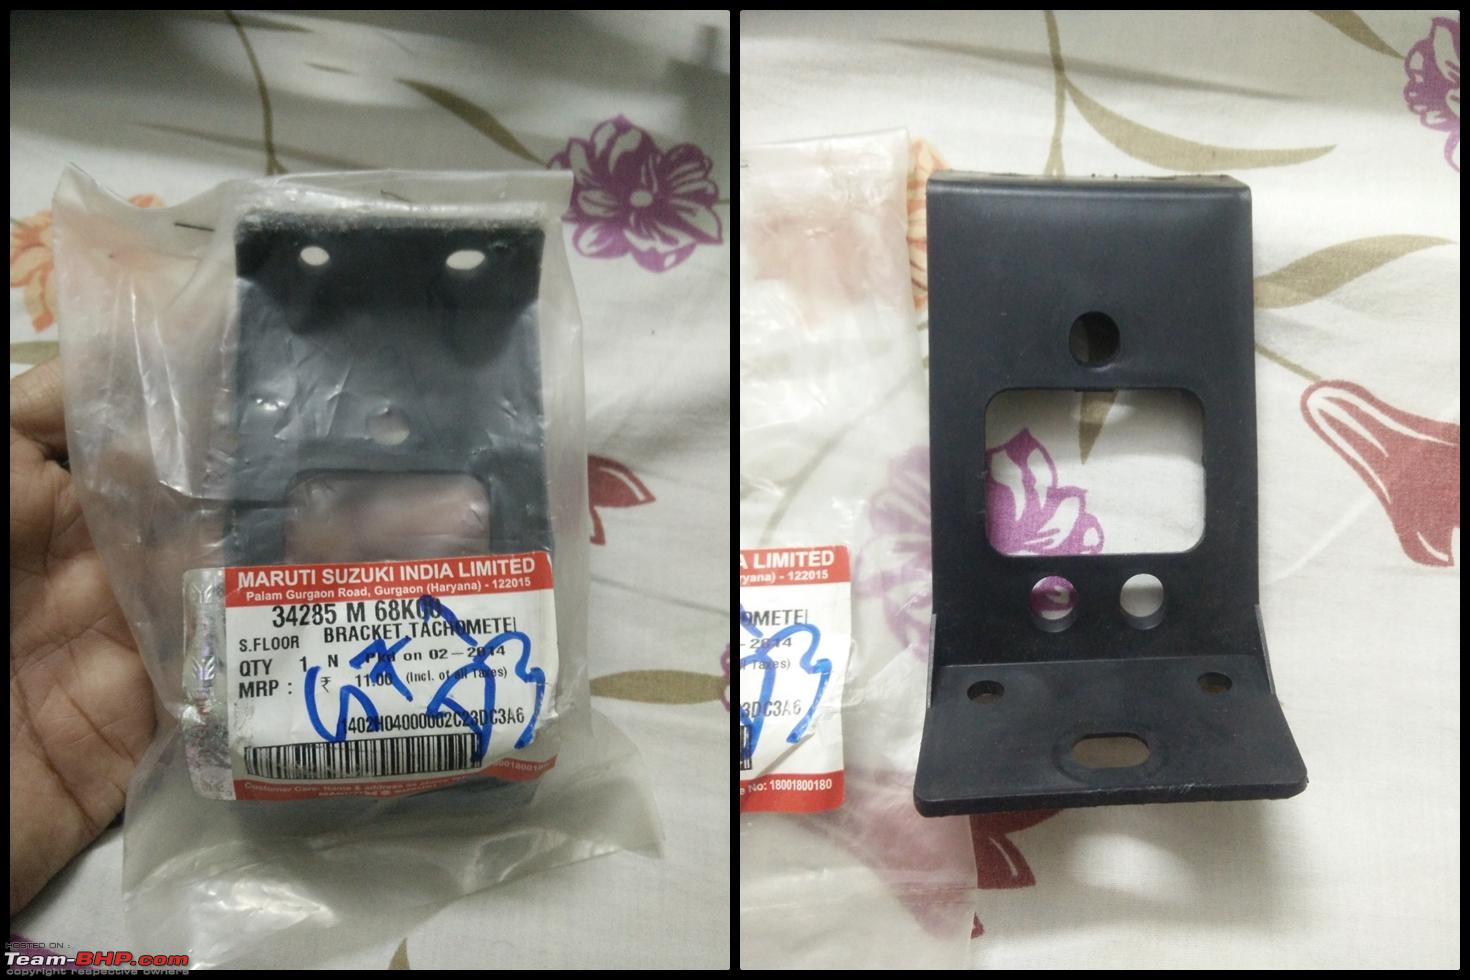
Mr Vinesh to ship me the tachometer bracket for A-Star.
Also thanks to
BHPian LeoShashi,
BHPian interc00led and
BHPian im_srini for patiently answering all my silly doubts that I had all throughout since I took up this DIY project over 8 months ago. Also thanks to
DBHPian Sankar for confirming the possibility to fix A-Star tachometer in the LXi variant.
Now, coming to the DIY, I'll explain a bit in detail taking each car in isolation so focus is better than making it generic.
1) Maruti WagonR LXi – 2003 model
The tachometer I used for the WagonR is from the Ritz since both are 4 cylinder engines so the logic used in the tachometer would almost match and give out correct readings (Verified using Suzuki Diagnostic Tool @ MASS).
Ritz Tachometer Parts and Price  PROCEDURE:
I’ll keep this simple and straight forward:
For the ease and flexibility, I have used a 4 pin connector for this installation. It is easy to use mainly during the initial testing phase and before re-fitting everything back so one is sure of all working well.
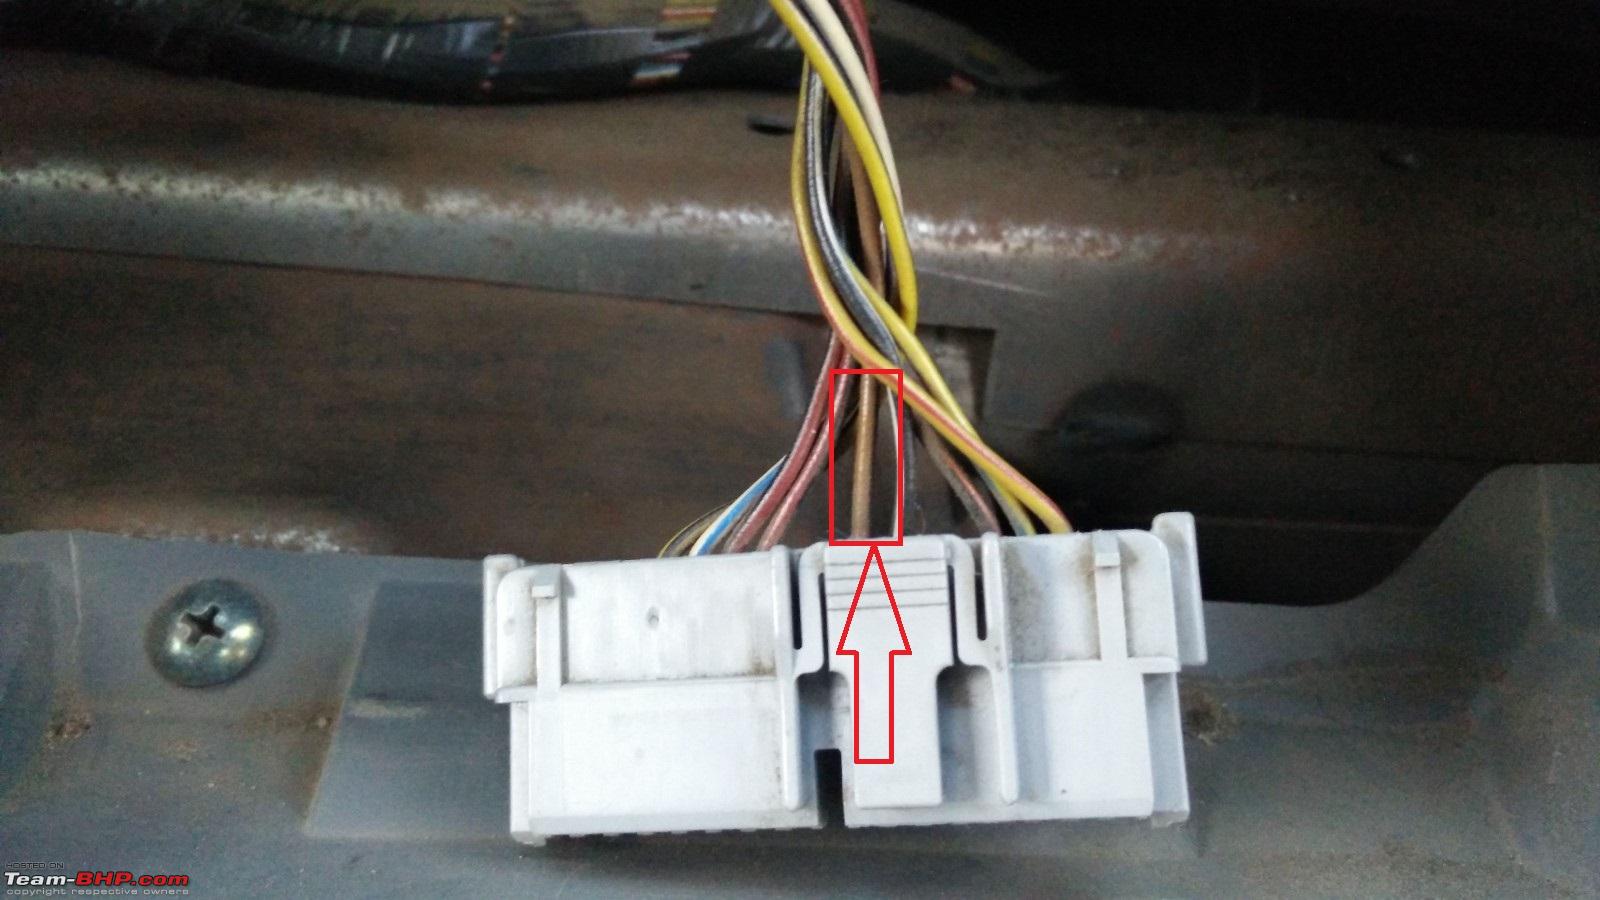
To start off, first one needs to remove the instrument console and get to the ‘Brown’ wire that carries the Tacho/Engine RPM Signal from the ECU to the instrumentation console. This is located in the Coupler on the instrument console. So the process to remove the instrument cowl and instrument console is as below:
- Using a star screwdriver, remove the two screws that hold the instrument console cowl. These are found on the underside when seen from below. Once these are removed, just pull the cowl with light pressure so is free from the dashboard.
- Once the cowl is removed, in the instrument panel is held by four star screws located on its four ends. Remove them to free the instrument console so as to gain access to the couplers having the ‘brown’ wire.
- As per the service manual, there are two couplers connected to the instrument console; one is Coupler ‘K’ and Coupler ‘L’. The coupler that interests us is, Coupler ‘K’ which has the brown wire in the center. Initial plan was to splice the wire but later decided to use a T–Tap connector and pull a parallel line from there connecting it to the tachometer.
************************************************** ***********
Wiring Preparation: Ritz Tachometer Wiring 
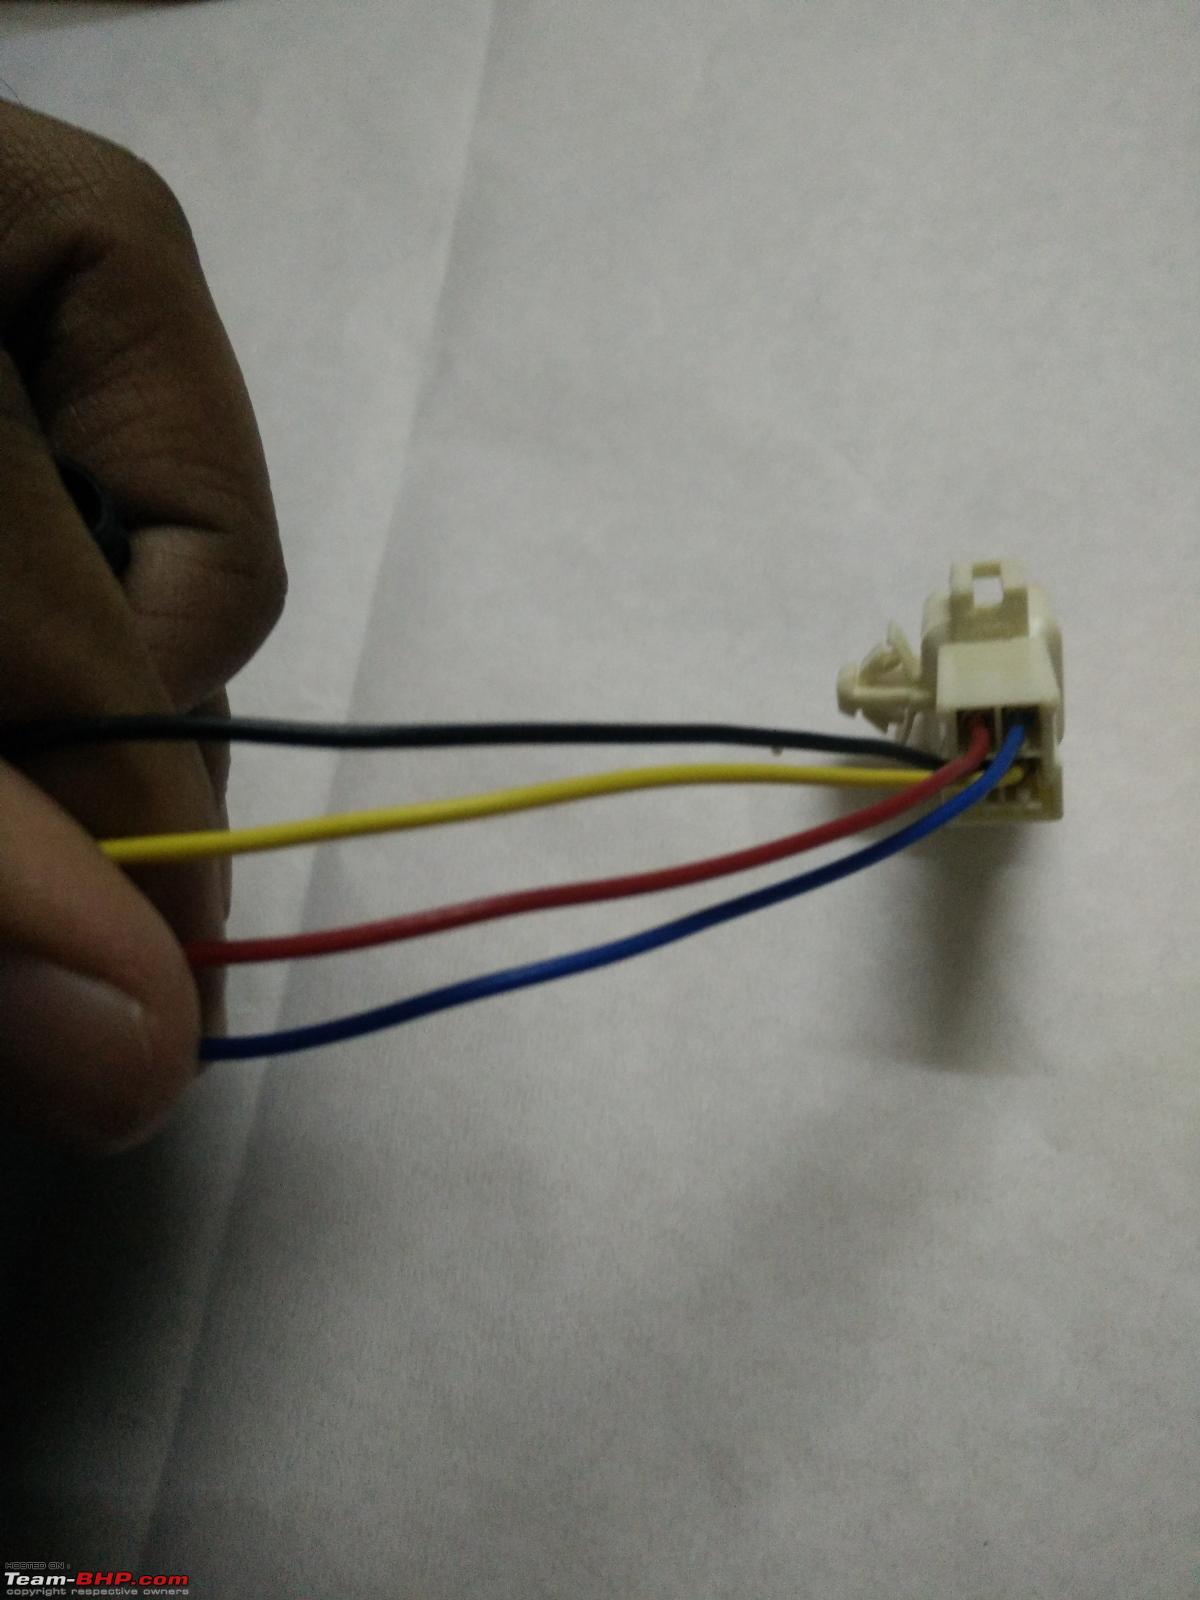
- The Tachometer comes with 4 wires (Red + Black, Black + White, Yellow + Blue and Yellow + white), whereas the Red + Black is +ve; Black + White is –ve; Yellow + Blue is tachometer backlight and Yellow + White is the RPM/Tacho signal wire.
- For the Red + Black wire, I have used a fuse tap cable and connected to a fuse in the BCM that works only when ignition is ON. Same is what I have done with the Yellow + Blue wire that is the backlight one that requires a 12V supply so connected it to the BCM fuse via another fuse tap cable.
- The black + White wire is crimped using a ring terminal connector to be used as Earthing on any bolt.
- The Yellow + White wire is connected to via a T-tap connector to the brown wire that was separated from the coupler.
- Before completing everything, push-in the desired length of corrugated bellow sleeve that will keep all wires at one place and avoid any issues in future plus gives neatness to the job.
************************************************** ***********
Tachometer mounting preparation: - I didn’t want to drill many holes on the dashboard so started looking for alternate solutions to mount the Tachometer. Since the WagonR gets OE tachometer integrated in the console, it had to be mounted at a separate location that doesn't obstruct view-ability. So while thinking my colleague whose car it is, came up with an idea to use a small mount and bolt the tachometer on it and then fix it on the dashboard using 3M double sided tape. We only drilled a small hole just sufficient to get the wiring pass through.
- We had a spare non-usable star guide from the PET Bottle filling machine so we made two halves of it and gave it the shape of the tachometer base with the three holes drilled in it where two larger ones for the Tachometer legs to fit in and the third hole for the wiring to pass through.
- Once the position was decided, a small hole was drilled and the wires were passed through, then the tachometer was placed over it and secured using 3M tapes and then covered the tachometer mount with the carpet sheet for a cleaner look.
PET Filling machine star guide used to make the Tachometer mount  End Result
 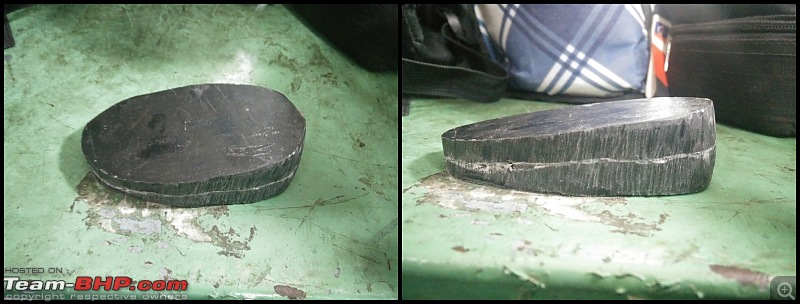 PS:
PS: This mount was actually made for the A-Star following the angle of the tachometer but we didn't use it as I brought the ZXi panel. For the WagonR the same material was used but the top part is flat.
2) Maruti A-Star LXi – 2009 model
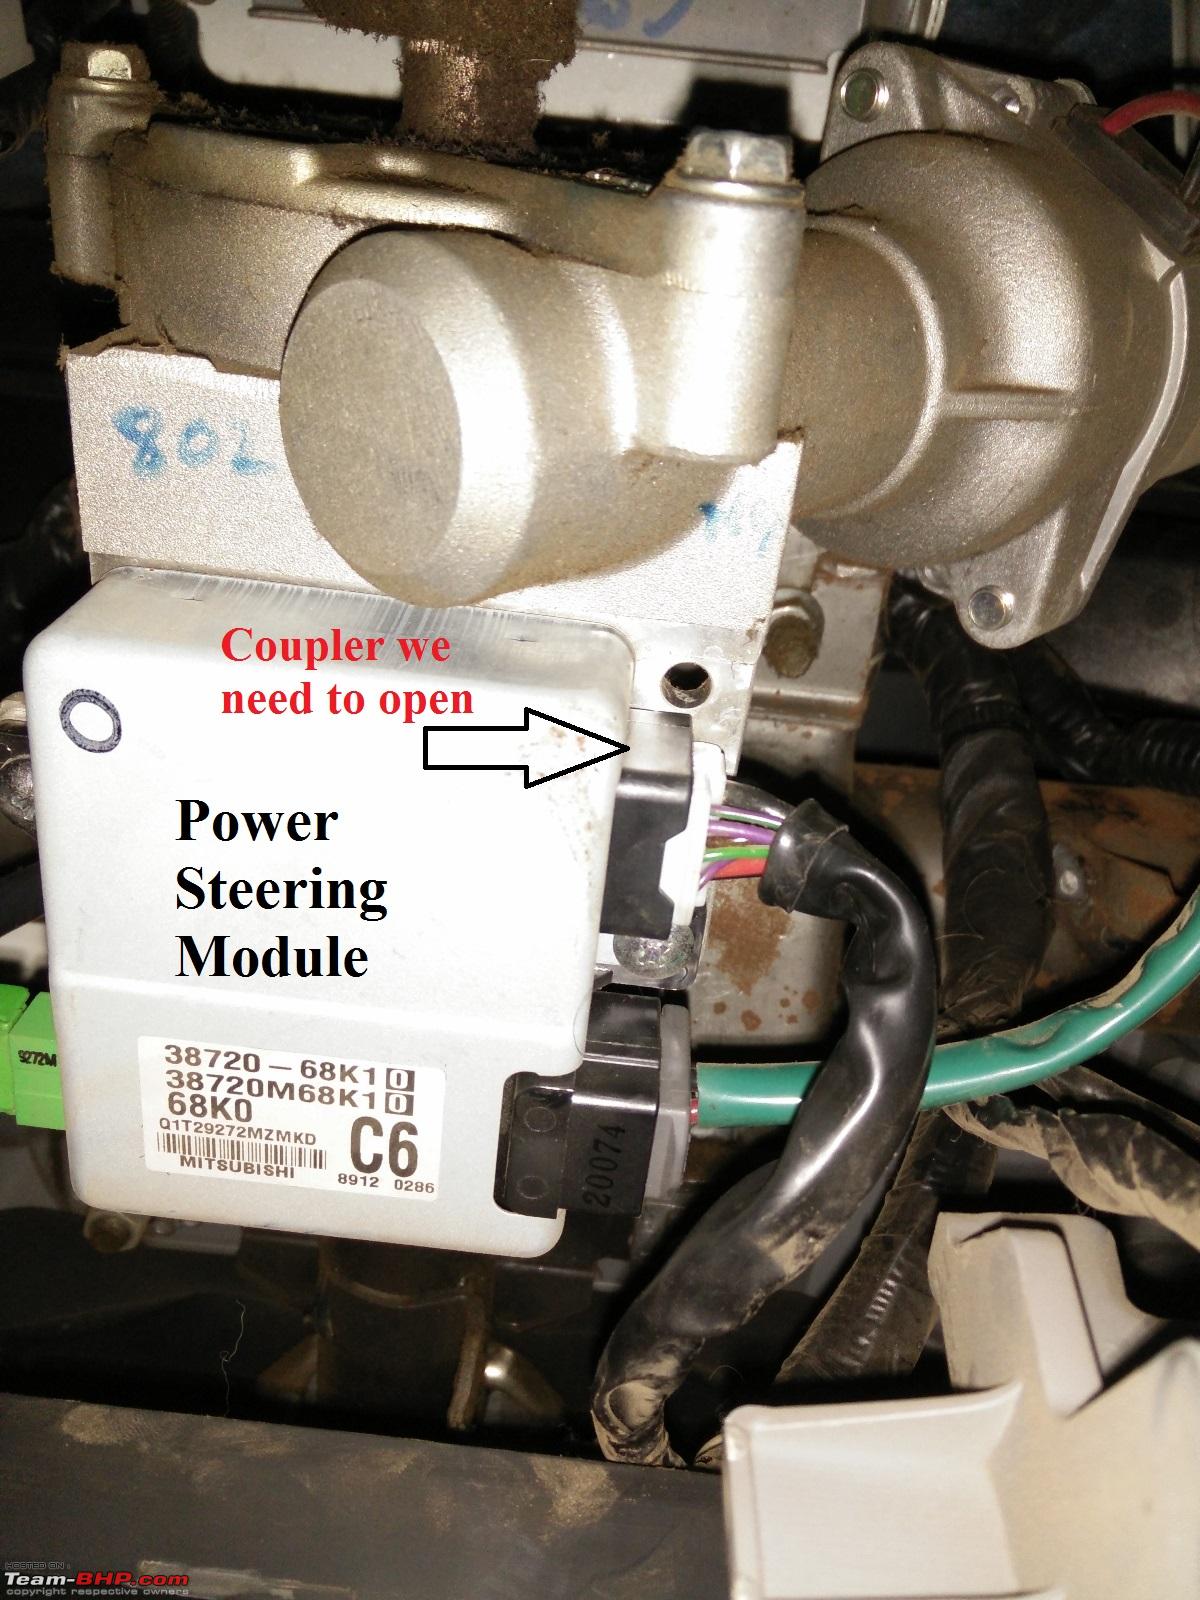
With the experience of installation that we gathered on the WagonR, going about the same on the A-Star wasn’t difficult expect that we stopped at the point where we were searching for the brown wire behind the instrument console but later got a doubt that the EPS unit should definitely be getting this wire for the EPS to work accordingly. It was the right thing as the coupler had the wire in it. From here on things were easy except for parts sourcing.
While preparing the tachometer mount, we made one extra with the same contours as the A-Star tachometer but later the plan was shelved as I went with installing the tachometer the OEM way. I placed an order for A-Star’s ZXi Instrument panel + Tachometer bracket. I wanted the installation to be OEM type so never came a need to splice or drill a hole during this cars tachometer installation.
A-Star OEM Tachometer Parts & Price  A-Star ZXi Instrument Panel
 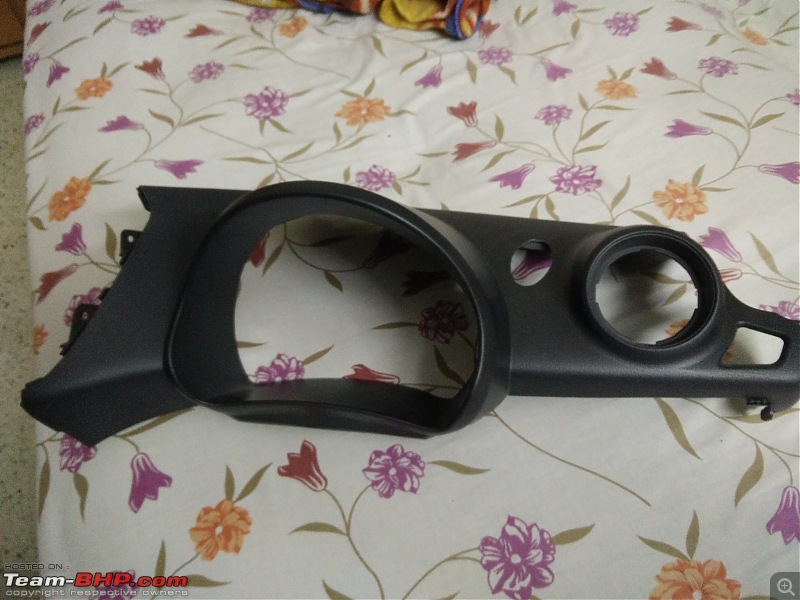 Tachometer Bracket
  EPS Controller Location:
The A-Star has it located under the steering wheel just above the lower dashboard panel. It has three connectors and the one that is of use to us is white in colour and has the ‘Brown’ wire in the center on the top row.
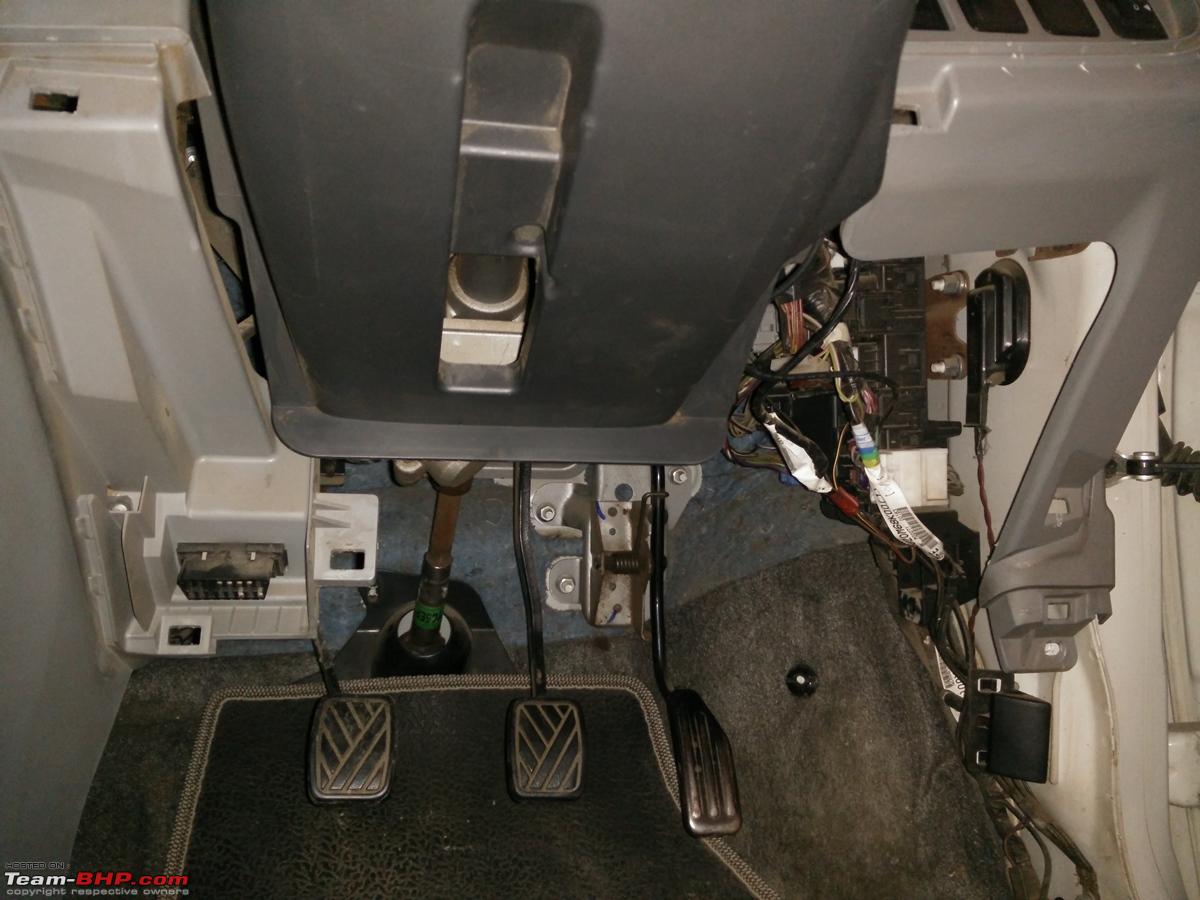
Instrument Panel & Lower Dashboard Panel Removal Process - First remove the driver’s side foot-well panel (Curved L Shape) that is located on the door frame that takes the wiring from the BCM to the rear end of the car and also houses the Hood opening lever. It is a simple push-fit type panel so all that one needs to do is, yank it open with a light force. Once that is opened, it exposes the screw that needs to be removed to free up the lower dashboard panel.
- Using a star screwdriver, remove the screw and pull the panel gently towards the driver’s side to let it come off from the plastic panel clips. Be careful with the OBD 2 Port. This sits on the left-lower side of the dashboard panel.
- Once the panel is off, move to remove the instrument panel. For this one needs to remove the HU and central AC vents to gain access to the clips holding the instrument panel.
- To remove the HU, first remove the triangular pieces located beside the AC vents. Once that is removed, 4 screws (Star Screws) that hold the AC vents and HU would be seen. Unscrew them and gently pull out the AC vents, AC vents cowl and HU. Disconnect the HU and keep it aside till the DIY isn’t completed successfully.
- Using the panel removal kit, slowly lift the instrument panel in the clockwise direction as shown in the picture with orange arrows.
Wiring Preparations A-Star Tachometer wiring 
It is similar to what I have descried for the WagonR except for the two things in precise, One is the Location of Brown wire that we tap the source from for connecting the Tachometer is located underneath the steering wheel (read on the EPS controller unit) whereas it was behind the instrument console in the WagonR. The other difference is the colour coding for the tachometer wiring as compared to the ones we have seen on the Ritz Tachometer.
A few points:
The Tachometer comes with 4 wires (
Red,
Black,
Blue and
Yellow), the
Red is +ve;
Black is –ve;
Blue is tachometer back light and
Yellow is the RPM/Tacho signal wire.
- For the Red wire, I have used a fuse tap cable and connected to a fuse in the BCM that works only when ignition is ON. Same is what I have done with the Blue wire that is the backlight one that requires a 12V supply so connected it to the BCM fuse via another fuse tap cable.
- The black wire is crimped using a ring terminal connector to be used as Earthing on any bolt.
- The Yellow wire is connected to via a T-tap connector to the brown wire that was separated from the coupler.
Before completing everything, push-in the desired length of corrugated bellow sleeve that will keep all wires at one place and avoid any issues in future plus gives neatness to the job.
Let the pictures do the talking now..
1) Maruti WagonR LXi – 2003 model Tachometer Connections - How to do!  Fuse Box (Passenger Compartment in driver's foot-well) - Used the 12V Socket fuse 15A
  Fuse tap cable inserted and Earthing fixed too
  Instrumentation Console Cover Opened
  Screw's that hold the Instrumentation Console(4 in no's)
  Instrumentation Console removed to expose the Coupler's
  Coupler 'K' - Highlighted the 'Brown' Wire a.k.a RPM/Tachometer Signal Wire
 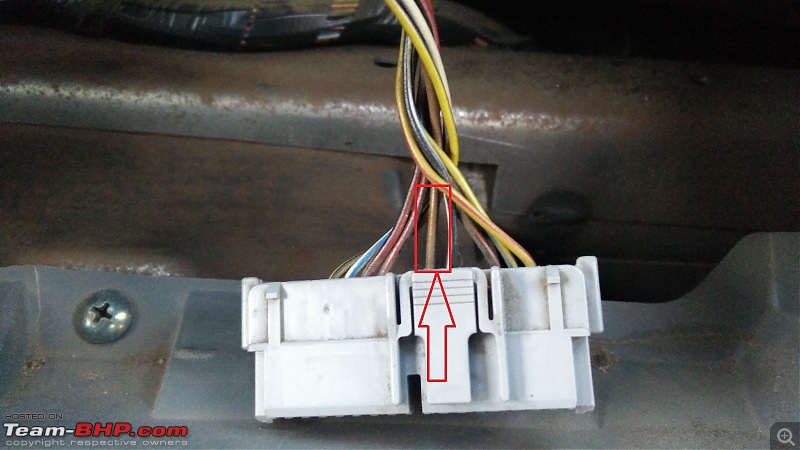 Coupler 'L'
  Tachometer Connected for Trial
  Trial Connections (Just to be sure before fixing it permanently)
 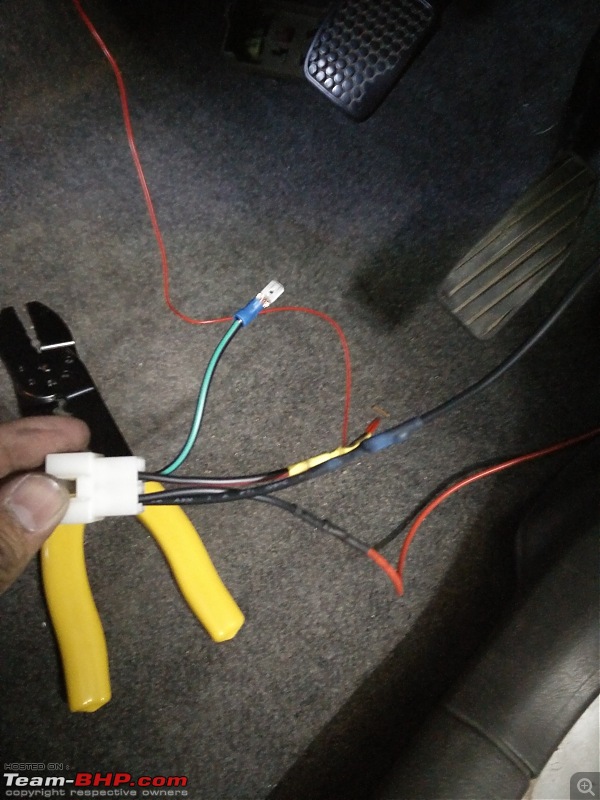 Hole made in Dashboard to pass the wiring
  Tachometer Fixed and Dressed
  Tachometer back-light at Night time
  Driver's View - Day Time
  Driver's View - Night Time
2) Maruti A-Star LXi 2009 model A-Star Dashboard Panel parts and numbers  BCM Unit
  Central AC Vents panel removed to expose screws holding vents and HU
  Driver's side footwell panel removed to unscrew the lower dashboard panel
  Lower dashboard Panel Removed exposing the EPS controller
  OEM Instrument Panel
  Points to use to remove the Instrument Panel
  Instrument Panel, Central AC Vents and HU removed
 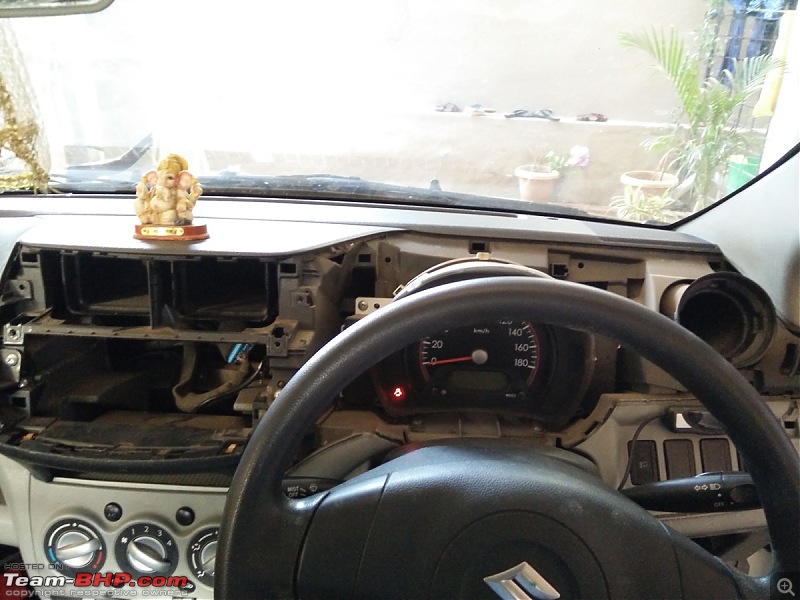 Instrument Panel, Central AC Vents and HU removed - Another Angle
  EPS Module and Connector that carries the 'Brown' Wire
  Earth (-ve) Connection point
  EPS Connector and the 'Brown' Wire
  ZXi Instrument panel
  ZXi Instrument Panel - Part Number & Cost
  Temporarily placed Tacho on the panel
  Closeup of the Tacho on the ZXi Instrument panel
  Tacho with the associated wiring
  Dedicated hole (slightly smaller in size than Tachometer) for a tight mount
  Tachometer mounting bracket
  Holes given underneath for the tachometer bracket
  Tachometer tested temporarily
 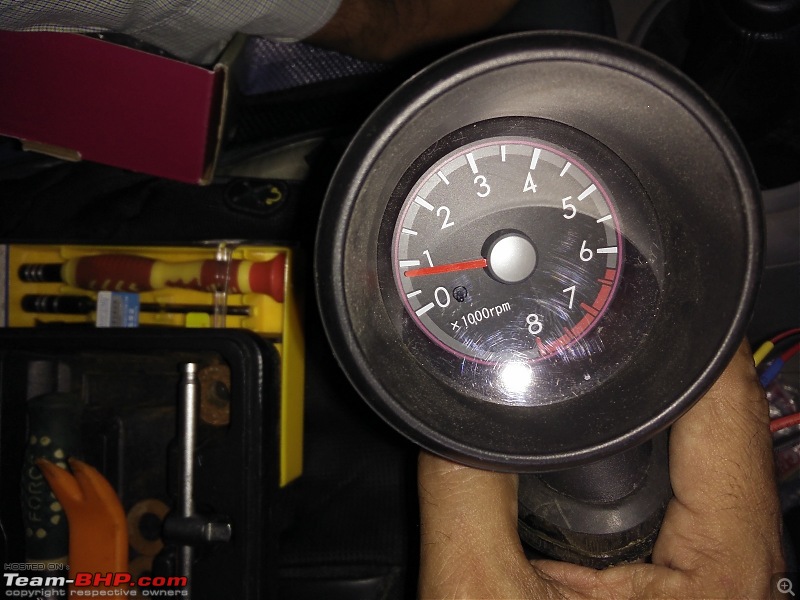 All Panels re-fixed
  ZXi Panel with tachometer mounted
  Pink-ish back light for Tachometer matches the Instrumentation Console back light
 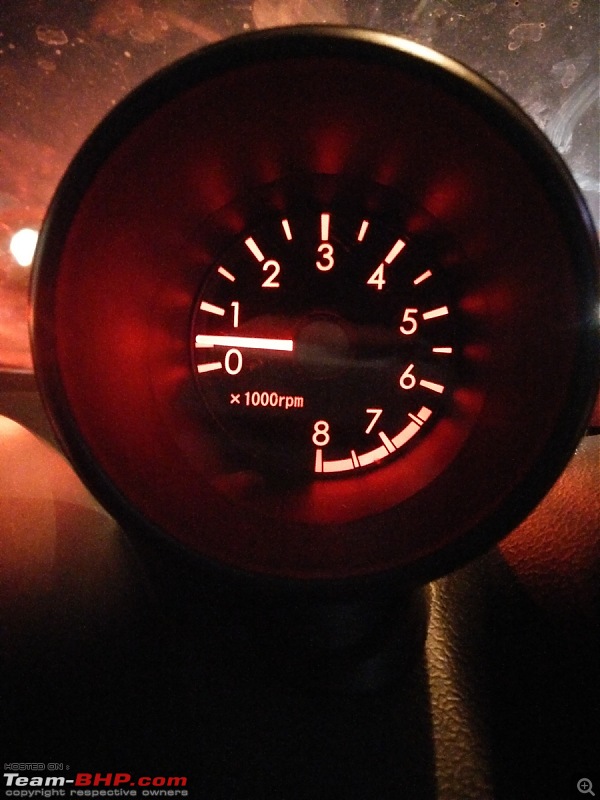 Tachometer Fixed permanently
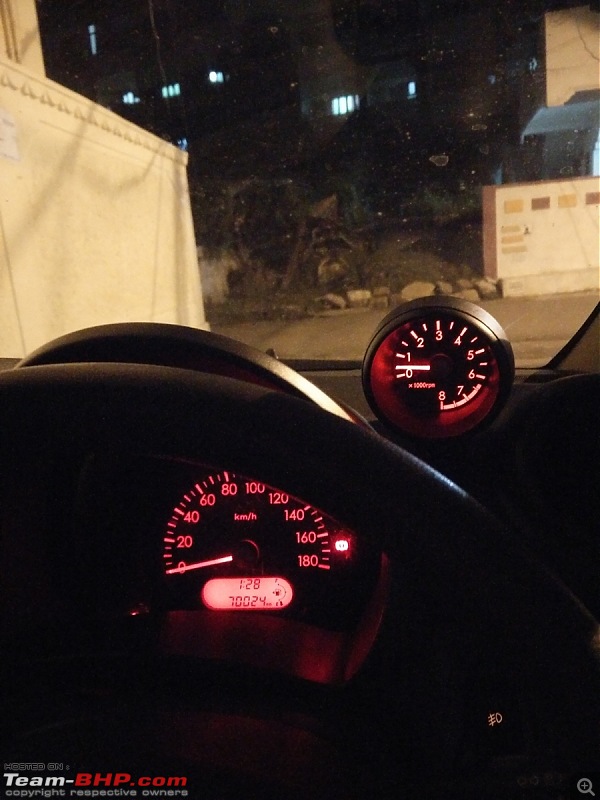
Thread moved from the Assembly Line to the D.I.Y. Section. Thanks for sharing!
@Anurag, that's super ! That's a detailed explanation !
For the A-Star, are you going to tap that brown wire for the rpm signal ?
Though we got an AT, I would still like to put up a tacho .. just for the heck of it !
Quote:
Originally Posted by condor
(Post 4073659)
@Anurag, that's super ! That's a detailed explanation !
For the A-Star, are you going to tap that brown wire for the rpm signal ?
|
Yes buddy. That wire is the rpm signal one we need to tap.
Wow!!!
Absolutely stunning work.
Good job brother. Keep it up
Quote:
Originally Posted by a4anurag
(Post 4073288)
1) Maruti WagonR LXi 2003 model
The tachometer I used for the WagonR is from the Ritz since both are 4 cylinder engines so the logic used in the tachometer would almost match and give out correct readings (Verified using Suzuki Diagnostic Tool @ MASS).
....
PS: This mount was actually made for the A-Star following the angle of the tachometer but we didn't use it as I brought the ZXi panel. For the WagonR the same material was used but the top part is flat.
|
Wagon R does come with a tachometer in the higher trim I believe. Could have used the stock console to avoid the drilling, custom fit etc. But yes, it would have reset the odo to 0. :)
Great job though! :thumbs up
Quote:
Originally Posted by Dry Ice
(Post 4074309)
But yes, it would have reset the odo to 0.
|
Do I need to answer still?! :D :D
That's what I didn't want to happen hence tree retrofit. Nothing more.
Quote:
Originally Posted by Dry Ice
(Post 4074309)
Wagon R
But yes, it would have reset the odo to 0.
|
Are you saying disconnecting the cluster's cable resets the odo to 0?
Quote:
Originally Posted by a4anurag
(Post 4074322)
Do I need to answer still?! :D :D
That's what I didn't want to happen hence tree retrofit. Nothing more.
|
Why, would have certainly helped in resale. :D
Quote:
Originally Posted by Gannu_1
(Post 4074342)
Are you saying disconnecting the cluster's cable resets the odo to 0?
|
No, I meant if he had bought a new console through MGP, it would come with 0 reading.
| All times are GMT +5.5. The time now is 10:25. | |