| |||||||
| Search Forums |
| Advanced Search |
| Go to Page... |
 |
| Search this Thread |  960,314 views |
| | #571 |
| Distinguished - BHPian  | Re: My Car Hobby: A lot of fiddling, and some driving too! Jaguar XJR, Mercedes W123 & Alfa Romeo Sp Yesterday we had the first ever virtual Technical meeting of the Dutch Alfa Romeo Spider Register. Obviously, all our events have been cancelled. So spanner mate Peter and I approached the board to organise a virtual meeting. Of course, we got the green light straight away. We have been on the board for many years and for almost a decade Peter and I were the technical committee helping out our members during our tours. Peter, as I have shown in this thread, is also a professional Classic Car Appraiser. So Peter talked for 45 minutes about car appraisals, why they are useful, what to look for in a appraiser etc. I had prepared a technical presentation showing a number of relatively simple jobs people could consider doing themselves. All photographs and all jobs come from this very thread by the way. We had over 40 members joining us on line. For all my hobbies, interest and personal virtual meetings I use Zoom. Teams for work. I have a personal Zoom paid account, which means I can host meetings up to 100 people, no time limit. Zoom has been in the news lately with some security breaches and concerns. Personally, I donít think it is a problem at all, as long as you keep tight control on the invites, use individual entry via the waiting room etc. Friday night my council held their very first virtual Zoom Council Meeting. By law council meeting need to be publicised well in advance and are public, anybody can join. But our council had take this a bit to literally when organising the Zoom meeting. They published the zoom logon details on their website. And sure enough even before the formal council meeting started, some idiot was sharing pornographic images and spewing racist comments Anyway, not such problems with our Zoom Meeting. I always use three different devices when I am organising and moderating a Zoom meeting. I had made Peter a Co-host. So we could both check who came into the waiting room, check their details against our list of invites, keep an eye on the general chat, etc. I also had a few props at the ready for a bit of show and tell. Among others some ECUís and some seal kits. It went very well. I might do my presentation with an English voice over in the next few days or so.  Yesterday I also received my new capacitor for the kitchen extractor fan. Well, I received ten as they only sold them in bags of ten 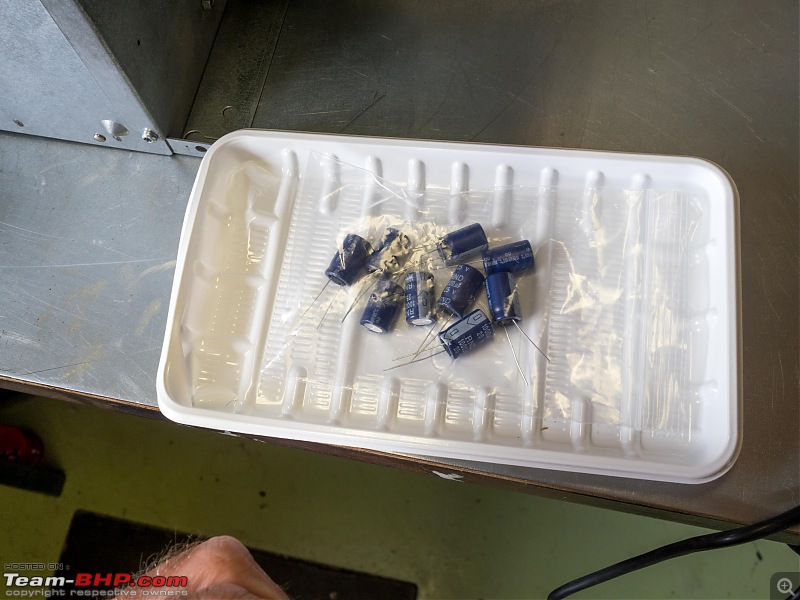 So out comes the extractor fan once more:  Opened up the electronic speed control box once again control  This capacitor is very easy to remove. Just need my soldering gun.  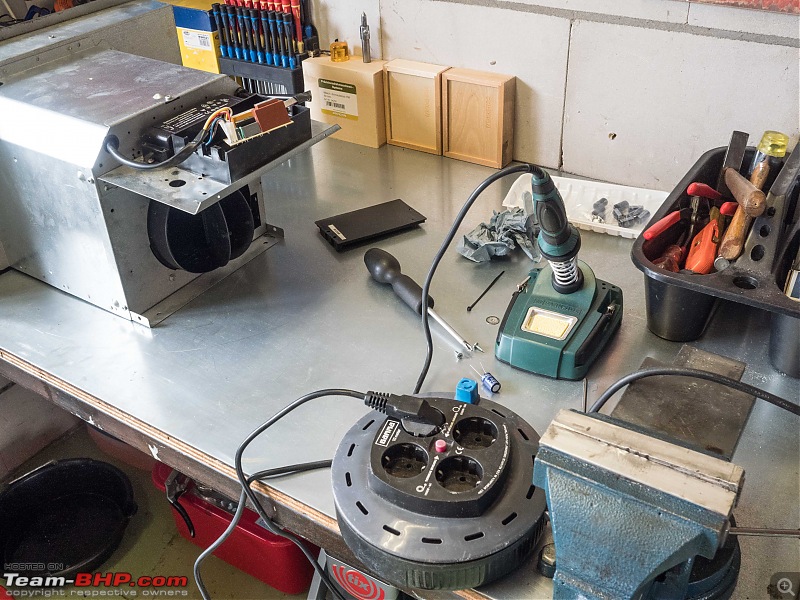 Even though we are talking electronic parts here, I still do my side by side comparison. And the new capacitor was bigger then the old one! Never mind, it will still fit. Besides, bigger is better, everybody knows that!!  All done, one new, bigger (physically) capacitor installed! 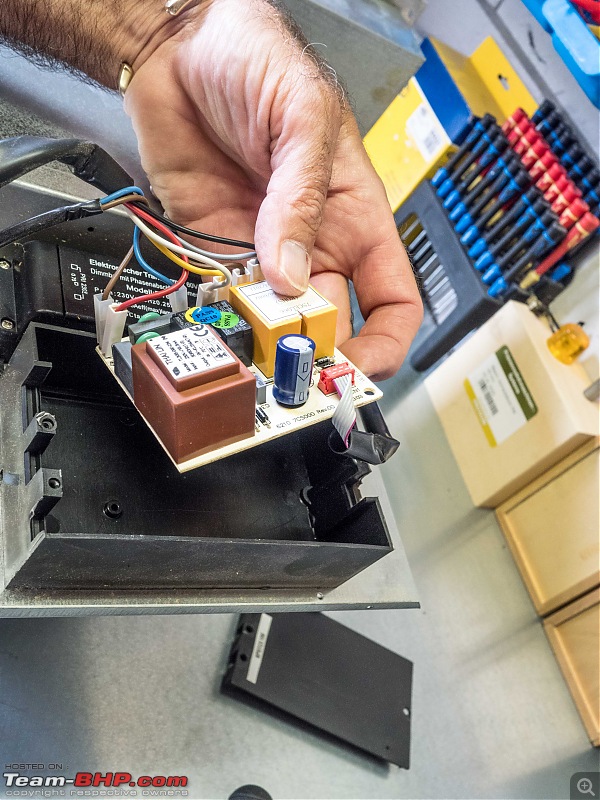 My wife is in charge of taking the extractor fan for a shake down test drive tonight whilst cooking dinner. Also, my new brake discs and brake pads for the Jaguar arrived. I will be installing sometime in the coming week or so  |
| |  (9)
Thanks (9)
Thanks
 |
| The following 9 BHPians Thank Jeroen for this useful post: | --gKrish--, digitalnirvana, Gannu_1, InControl, Leoshashi, Miyata, Researcher, Thad E Ginathom, VivekCherian |
| |
| | #572 |
| Distinguished - BHPian  | Re: My Car Hobby: A lot of fiddling, and some driving too! Jaguar XJR, Mercedes W123 & Alfa Romeo Sp Peter and I have been busy with the aftermath of our virtual technical meeting. We have been getting endless mails and calls from members who attended the meeting and have additional questions. Good fun to do! Last night I had a quick look at the brake pads for my Jaguar I ordered and received earlier. They look very cool, very green!  These are EBC brake pads. They are also the first brake pads I am installing that have these so called “Brake-In Coating”. It’s this pink coating you see on the pad. Apparently, this is a mild abrasive coating intended to de-glaze the brake rotor and assist in fast bed-in of the new pads. Or so the manual tells me. Have a look:  So we will see how that goes. I have not gotten around to replace the disc and pads yet. Maybe this weekend. I did start on another little odd job. The Spider has a so called third brake light. Mounted inside the spoiler at the rear. Sometime ago, I lost the little cover for it. Not a huge problem, with the trunk closed you don’t see it. Still, I don’t like it, and also of course, potential an area for water ingress and electrical problems. The third brake light is a known MOT failure! 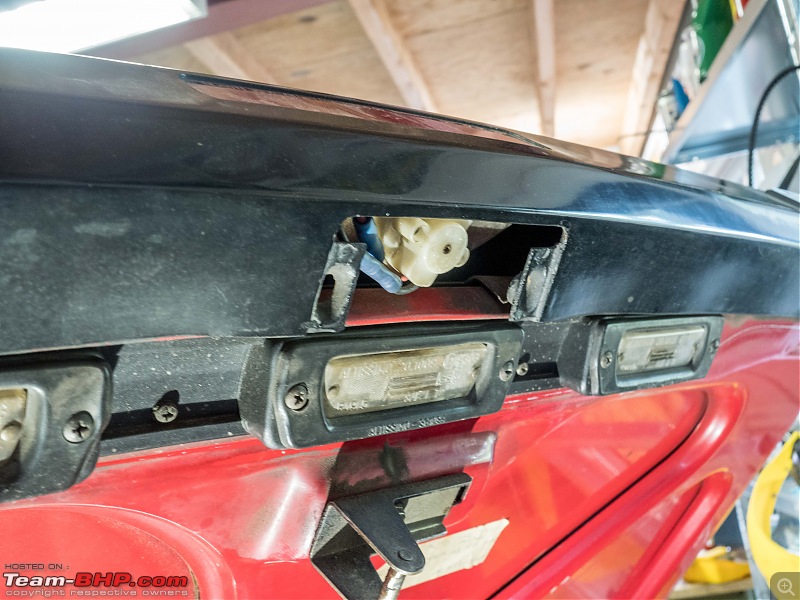 So I decided to make a new cover. Rummaged around for a piece of plastic of the correct size and thickness. I found one of my Jaguar old registration plate holders. Correct thickness and by careful cutting I could get a large enough section out of it. I made a simple paper template to start with:  Attack with hack saw and voila: One basic shaped cover 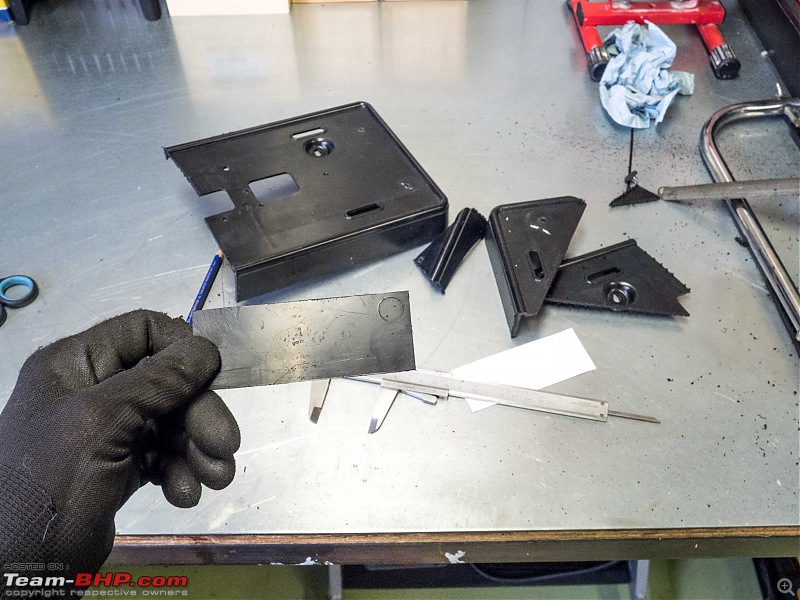 A bit of filing and rounding of the corners and it makes for a perfect fit:  So far so good, but then I hit a snag. I am not quite sure how the original one was held in place. There are these large sort of lugs attached to the spoiler edges, see first image. So more rummaging through all my various bolt/nuts/washer boxes to see if I could find something that would work:   I tried gluing a nut in place, tried two different types of glue, but neither of them held. I found this toggle bolts, would work, other than they are too large, I would need to get smaller ones. Or these hollow wall anchors would probably work too.  In the end I decided to order a box with an assortment of various plastic fasteners. As luck would have it, for some reason an add for one of these keeps popping up in my FaceBook feed. So I have just ordered the box. Wait and see, if that works. If not I will probably try to modify the anchor bolts or try the hollow wall bolts. I might even figure out how this cover was held in place originally! I am also happy to report my wife has test driven our extractor fan at max speed for extended periods of time, during some lengthy meal preparations. And it keeps running, so the capacitor replacement did the trick. Please note that in all my years on the forum talking about so called electronic problems on cars, planes and appliances, this is the very first time ever, it was actually due to an actual failed electronic component. Rather than a poor contact/ground/earth etc. This capacitors was simply leaking, so also more mechanical than electronics, but at least this repair involved replacing an actual electronic component! Soldering gun and all! As they say, a first for everything. Jeroen Last edited by Jeroen : 13th May 2020 at 13:15. |
| |  (7)
Thanks (7)
Thanks
 |
| The following 7 BHPians Thank Jeroen for this useful post: | digitalnirvana, Leoshashi, Miyata, Researcher, vaasu, VivekCherian, wbd8779 |
| | #573 | |
| BHPian Join Date: Sep 2018 Location: Bangalore
Posts: 337
Thanked: 1,696 Times
| Re: My Car Hobby: A lot of fiddling, and some driving too! Jaguar XJR, Mercedes W123 & Alfa Romeo Sp Quote:
The way it hold right now, I suspect there will be water seepage through the minuscule gaps between the cover and gap at the spoiler light? I loved how you've also been tackling the PCBs. The one posted above seemed like a 1 (or 2) layer PCB. Would it not make it challenging if you had a multi-layered PCB? | |
| |  ()
Thanks ()
Thanks
 |
| | #574 | ||
| Distinguished - BHPian  | Re: My Car Hobby: A lot of fiddling, and some driving too! Jaguar XJR, Mercedes W123 & Alfa Romeo Sp Quote:
Quote:
Multi-layer is likely to become a problem very quickly for a simple DIY guy like me. But it depends a bit on what has gone wrong and whether you can get access to the faulty component. As I have said many times before, it is quite rare for actual electronic components to go faulty. These capacitors, Elco’s are known for eventually wearing out and after so many years they start to leak. Of all electronic components, capacitors are the ones most likely to show their problems in a way you can visually identify. (e.g. leaking, exploded etc) On car’s ECUs and various controle module the most common problems I have come across, were usually poor soldering that fails, so a loose component, or a cracked soldering line or something like that. And let's not forget connectors failing in a huge variety of different ways as I have shown in earlier posts. Even when the soldering connection might look ok, sometimes they just don’t conduct well enough. There are several companies specialising in redoing the soldering work on old ECUs. Works very well if I go by several comments on the Jaguar x308 forum. They claim they sort of re-bake the ECU at a high temperature? Not sure what they do, I need to check it out some time. Jeroen Last edited by ajmat : 13th May 2020 at 21:19. | ||
| |  (3)
Thanks (3)
Thanks
 |
| The following 3 BHPians Thank Jeroen for this useful post: | digitalnirvana, Miyata, Thad E Ginathom |
| | #575 |
| Distinguished - BHPian  | Re: My Car Hobby: A lot of fiddling, and some driving too! Jaguar XJR, Mercedes W123 & Alfa Romeo Sp An old Spider friend of mine Klaus participated in our virtual technical meeting. Klaus and his wife Hildegarde are German and have always lived in Germany. But they have been members of the Dutch Alfa Romeo Spider Register for decades. They are active members too, joining many of our tours and other events. As I donít frequent our events that much any more I had not seen Klaus for quite some time. So it was good to catch up with him on the Zoom Video Call. During my presentation he took a picture of his laptop. This image is now shared across the member section of the Register website. On the top you can also see spanner mate Peter. An interesting feature of Zoom is the ability to very easily put any of your photographs up as background. Obviously, for me, on this virtual technical meeting this one was a no brainer! Jeroen  |
| |  (3)
Thanks (3)
Thanks
 |
| The following 3 BHPians Thank Jeroen for this useful post: | digitalnirvana, Thad E Ginathom, VivekCherian |
| | #576 |
| Distinguished - BHPian  | Re: My Car Hobby: A lot of fiddling, and some driving too! Jaguar XJR, Mercedes W123 & Alfa Romeo Sp Last night after a long day at work at home, behind my computer I took the Mercedes for a nice little spin. The weather is nice, although not particularly warm, it is sunny and dry. And of course, it being Summer time here, sunset is well pass 2100 pm! So plenty of time to relax after work before dinner  This (Saturday) morning I decided to start on the replacement of the rear brake discs and brake pads of the Jaguar. Firs thing is always to shuffle the cars. Whichever car I am working on, should not block the other cars. You never know what will happen. It would not be the first time I canít fix or finish a job in one day. So the car needs to be in a place where it is not in the way.  As always on these sort of jobs, I checked the workshop manual first. All very straight forward. First thing is to open up the brake fluid reservoir and extract some brake fluid. Once I am ready to fit the new brake pads, the brake piston needs to be pushed in. That means it displaced brake fluid back into the reservoir and you do not want brake fluid spillage. It is very corrosive.  Next, jack up the rear of the car and put it on axle stands.  Again, it is really important to check your manual where you can position the jack to lift the rear centrally. It is not the differential! Which for instance on the W123 it is! Here you need to get it underneath a particular point of the rear sub frame 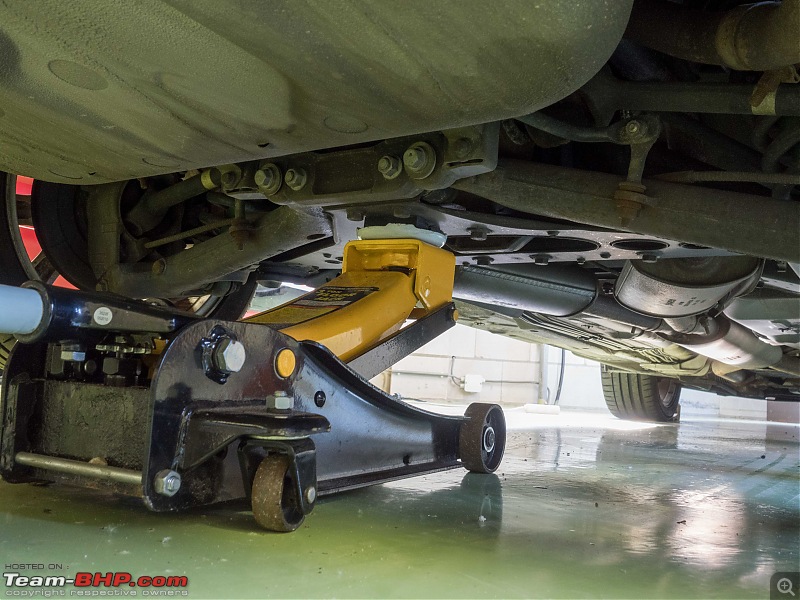 Next both rear wheels come off. I have also placed blocks and stoppers around the front wheels. The automatic box needs to be in Neutral.  This is what the right rear brake assembly looks like with the wheel removed  First things that come off anti rattle spring, the dust covers for the guide pins and the guide pins themselves.  I had a bit of a problem with the guide pins. It needed an Allen key 7mm. Would you believe I did not have one! Must have misplaced it. It is not a regular size in most Allen key sets, but I know I have one. So I decided to use a T45. It fitted very snuggly and these guide pins are installed with 20 Nm only! Worked a treat. The next thing is to swing the caliper housing aside. This by the way is the official Jaguar procedure. They do warn you not to let the caliper hang by its hydraulic hose. I used a tie wrap to tie it to the spring. Neatly out of the way!  With the caliper out of the way the old brake pads can be taken out and discarded. The official Jaguar advise is to always install new pads when installing new discs. Of comes the caliper carrier from the hub carrier. Two bolts only. Bit stiff, but my pneumatic tools to the rescue! 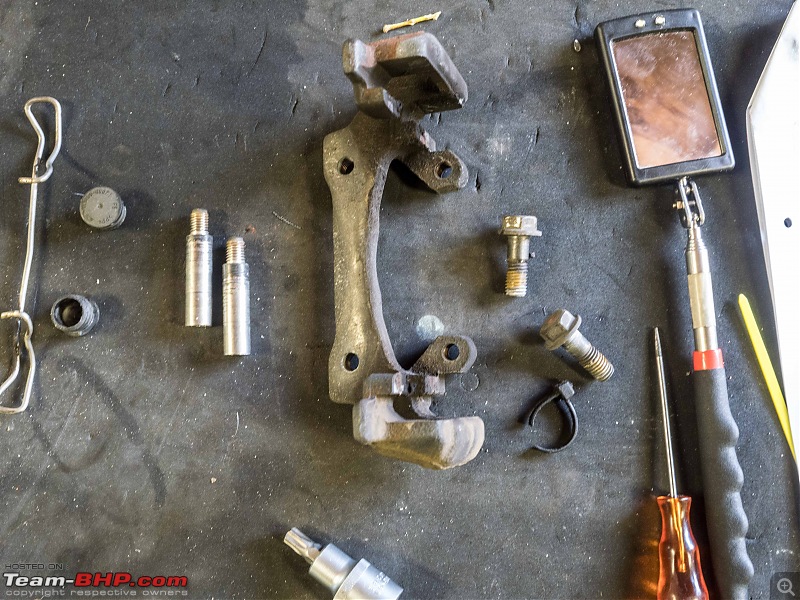 Next you need to align the brake disc access hole with the adjuster. Which is at the top. There is a small dust cap mounted in the hole. 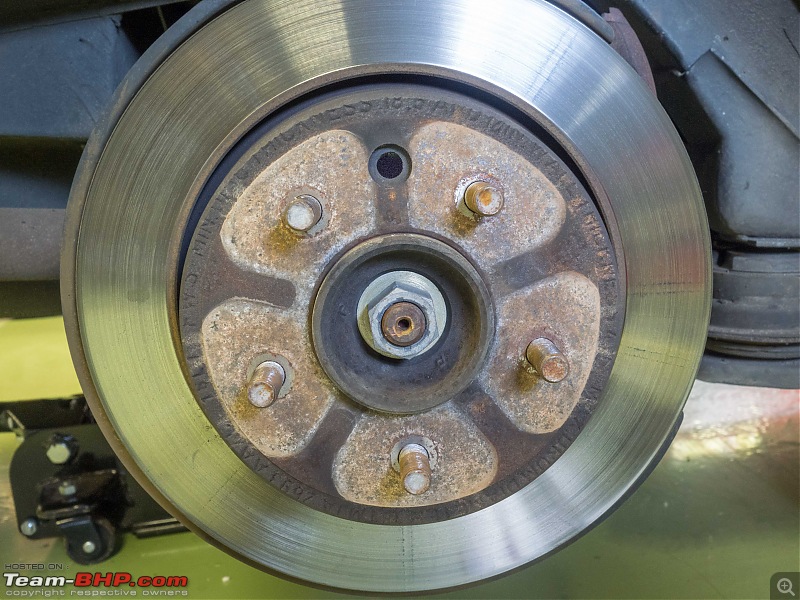 All that is left to do is to turn the parking brake adjuster so it pulls in the brake shoes. That allows you to remove the brake disc from the wheel studs. Well in theory. Literally that is what the manual says too. In practice these things tend to get a bit stuck. So I had been applying liberal amounts of penetration oil. Getting the disc of requires gentle tapping and prying. Took me 30 minutes before I had it off. You donít want to be using to much force. It might damage the bearing of the rear axle!  This is what it looks like with the disc brake of, essentially what is left is the interworks of a drum brake, the parking brake! 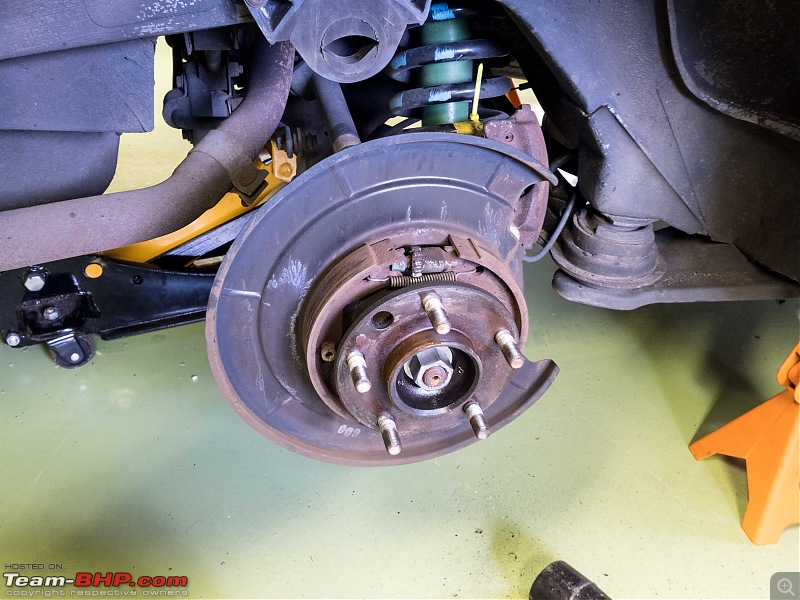 A little more close up, shows the parking brake adjuster I mentioned earlier. It is that teethed little wheel. You move it by poking a screw driver through that hole in the disc!  Everything needs careful cleaning and inspection 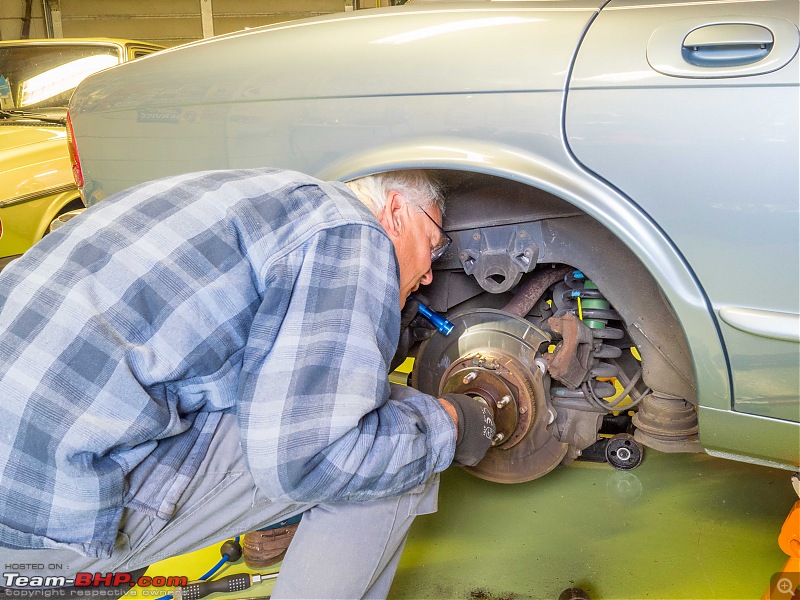 When working on brakes, you tend to get very dirty due to the brake dust. Brake dust is very fine dust and is potentially harmful for your lungs. So you must wear goggles and a dust mask.  As both the old discs and pads have worn down, the brake piston in the caliper must be pushed in. Now on many cars you will need to turn the piston on the rear brakes. You might even require a special tools. Not so on the Jaguar. It was the very fist time I used this very simple brake spreader tool. Worked a treat!  Correct position for mounting with new disc and new pads  As always a lot of time for these jobs is taken up with cleaning, brushing, bit of sandpapering. Eventually everything was clean enough and assembly can start. As always compare old with new, new with old  These new discs came with a very thin layer of some protective coating. That needs to be well removed. You will never know what it will do to your new brake pads otherwise. Brake cleaner will do nicely  Beginning to look good!  Before proceeding you need to adjust the parking brake mechanism. Which requires the disc to be secured with three lug nuts torqued at 20 Nm.  Adjusting the parking brake is simple. You turn the adjuster so that the parking brake shoes are full on, so you canít turn the hub/disc anymore. Then, you carefully start slacking it, so the hub/disc can be turned without the shoes touching. Simple, effective. I wanted to close off the hole, only to find out the old dust cap would not fit on the new discs! I will need to call Raymond about that on Monday. For now I just installed everything with this part missing. No big deal. 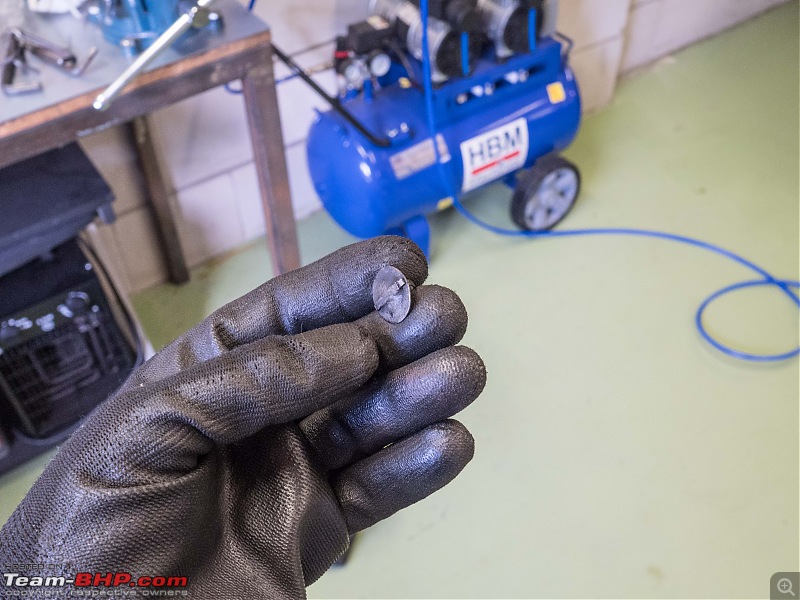 Before proceeding I cleaned the disc very thoroughly on both sides with brake cleaner once more. Once you re-install the caliper carrier and caliper itself, access to the disc, especially the rear, is limited. The brake pads come supplied with their own little ratchet of Caliper lube as they call it. Very convenient.   Mounting the carrier is straightforward. I always use my torque wrenches on every bolt in the brake system. You donít want to over tighten or under tighten any bolts on your brakes! And of course, use some copper grease on the bolts too   Callipers and new brake pads go on next. |
| |  (7)
Thanks (7)
Thanks
 |
| The following 7 BHPians Thank Jeroen for this useful post: | digitalnirvana, keroo1099, Leoshashi, Miyata, Thad E Ginathom, vaasu, VivekCherian |
| | #577 |
| Distinguished - BHPian  | Re: My Car Hobby: A lot of fiddling, and some driving too! Jaguar XJR, Mercedes W123 & Alfa Romeo Sp With everything installed on the right side (except the wheel) time to move the left side for the same procedure. Everything looked identical 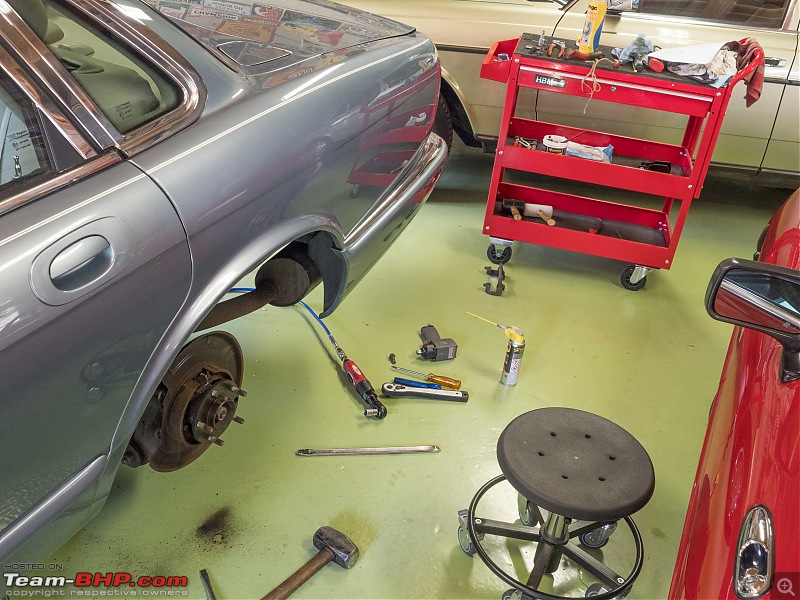 But everything was not identical. Somehow the brake line on this caliper was mounted at a slightly different angle. Which meant I could not get my T45 socket into it. The body was to thick! I could just remove the brake line. But that would require replenishing and bleeding the whole brake system again. I also did not have sufficient brake fluid in stock for that either. So I decided to pop over to my local auto parts store and find a proper Allen 7mm bit. to be on the safe side I bought a large and a small one.  With a ratchet wrench on the large version the last guide pin came out fine. Getting the disc off was even more a bear than on the right side. But I managed after some 45 minutes of whacking, squirting penatration oil, wiggling it about and a lot of cursing (It is well established that cursing loudly on stuck bits helps) 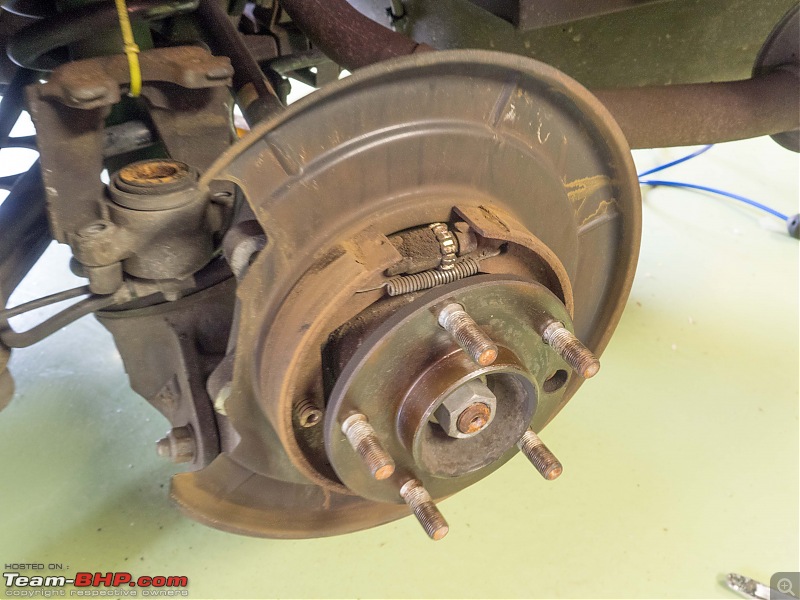 With everything back on, I put the wheels back on and lowered the Jaguar of the axle stands. As always, final tighten of wheel nuts with a proper torque wrench.  Took the Jaguar for a twenty minute test drive. No noises, no heat build up, perfect braking action, pedal feels as new. So job well done! My garage floor was pretty mucky. What with the brake dust and the penetration oil everywhere. So I mopped everything before parking my cars. 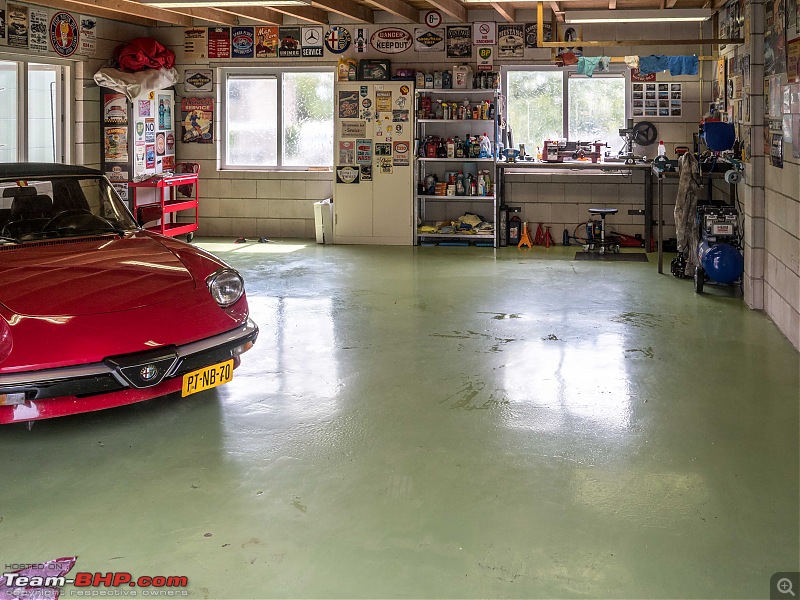 So now the almost twenty year old Jaguar, with its petrol guzzling 4.0L, supercharged, 400BHP V8 engine now has GREEN brake pads!!!  |
| |  (7)
Thanks (7)
Thanks
 |
| The following 7 BHPians Thank Jeroen for this useful post: | ajmat, digitalnirvana, keroo1099, Miyata, Thad E Ginathom, VivekCherian, wbd8779 |
| | #578 |
| Distinguished - BHPian  | Re: My Car Hobby: A lot of fiddling, and some driving too! Jaguar XJR, Mercedes W123 & Alfa Romeo Sp Looks like I have some more brake work coming up. Our good friend Cees and Annelies who run a B&B in France are back in the Netherlands. They are not allowed to be open yet. We were supposed to visit them second week of June, as we do every year, with some other Spider friends. Unfortunately, all cancelled. As they have no customers to attend, they decided to come to the Netherlands for a few weeks. Looks like their Dacia van has developed a problem with the left rear drum brake. According to Cees brake fluid was pouring out of it. So he is going to see if he can get the part and come over on Thursday so we can fix it. Thursday is Ascension day here in the Netherlands, an official holiday. Will be fun doing this with Cees. He is a very capable and experienced hobby mechanic. Little he has not done on his Spider and other cars. Some years ago, Cees and Annelies drove their Spider, top down, from the Netherlands to Singapore! So they are used to some ďon the road spanneringĒ too. Jeroen |
| |  (1)
Thanks (1)
Thanks
 |
| The following BHPian Thanks Jeroen for this useful post: | digitalnirvana |
| | #579 |
| Distinguished - BHPian  | Re: My Car Hobby: A lot of fiddling, and some driving too! Jaguar XJR, Mercedes W123 & Alfa Romeo Sp And now for something completely different: My neighbour Henk called me over this morning as he wanted to show something in his shed. Henk is well into his 70s and he used to run the local garage. His shed is right behind our garden. He still has a proper lift and a couple of old classic cars he thought he would restore when he retired 15 years ago, but never got round to it. You can see his shed, well the roof of his shed that is, right behind our garden:  Henk, despite his age, is still very active in numerous clubs, societies and volunteers for all sorts of odd jobs. One of his clubs is the World War 2 pilot museum. https://www.egvl.nl All in Dutch I’m afraid. The Netherlands was hit very hard at the beginning of the war. During the war, especially towards the last couple of years, many allied flights came across the Netherlands on their way to bomb Germany. Many bombers and fighters were shot down over Dutch airspace. To date, they dig up parts of planes and unexplored bombs and munition. This is partly due to the fact that in those days, large parts of the Netherlands were water (IJsselmeer) and lots of land was pretty much swamps. So a plane that crashed was often not even noticed and would sink quickly into oblivion. But the Dutch still honour all this mem and women that lost their lives, to help liberate us. Henk is part of this society and they were given a salvaged engine. It is difficult to make out, all markings were gone and it is far from complete, but I suspect it is a Rolls Royce Merlin. Spitfires, Lancasters and other airplanes used this engine in many different versions. Can anybody make a better identification on what engine this is? Here is a nice cut-away drawing of a RR Merlin:  Long story short; Henk had this salvage RR Merlin in his shed! It will be on display in an old fortress nearby. It is not going to be restored, that would be way to much work. But they just cleaned it and tidied it up a bit.    Four valves per cilinder, even in those days!  What is left of the camshaft assembly   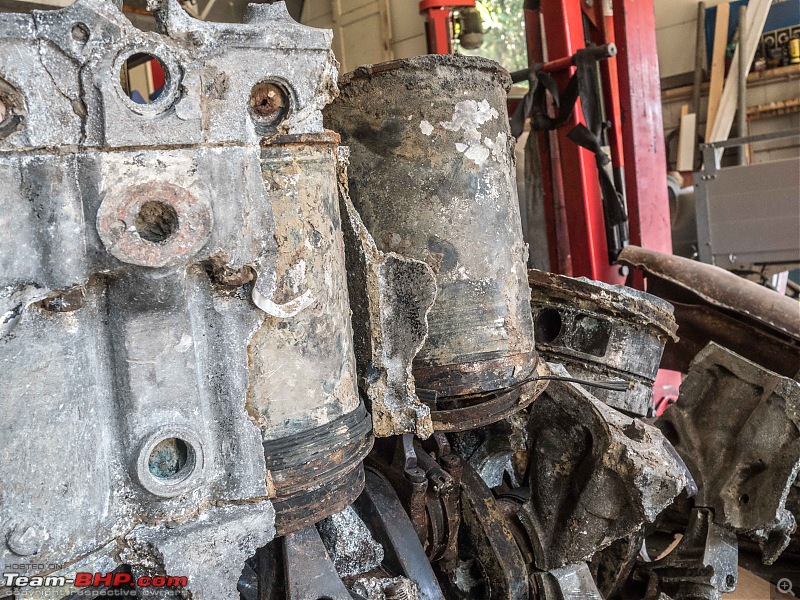  There are quite a few of these engines (and similar) parts all over the Netherlands. Sometimes in museums, but sometimes they are just left outside near the place it was salvaged as a momentum to the fallen crew. Henk did not know the full story of this particular engine. I will go and visit the museum in the months to come, because they will have some more information on display. Jeroen Last edited by Jeroen : 18th May 2020 at 18:50. |
| |  (9)
Thanks (9)
Thanks
 |
| The following 9 BHPians Thank Jeroen for this useful post: | blackwasp, digitalnirvana, Leoshashi, Miyata, Researcher, Thad E Ginathom, vaasu, VivekCherian, wbd8779 |
| | #580 |
| Distinguished - BHPian  | Re: My Car Hobby: A lot of fiddling, and some driving too! Jaguar XJR, Mercedes W123 & Alfa Romeo Sp I got my fancy analyser/tester back. Unfortunately, in the end they were not able to repair it. They tried swapping some parts with one of their own old ones. However, when they opened up that one, they found out it was a more modern version, with very different electronics. It is shame. But then again, we do know that most functions are actually working and I know now how to use it, sort of. I also have more information on the missing High Voltage probe and we had a very nice afternoon talking to Leon. So earlier this week I headed over and picked it up. Leon did not charge us anything, so I gave him a very nice bottle of red wine. I had called his son earlier and checked what he liked. With the Pro’s not able to do anything, time for me to dig in again. I thought this time I will just remove each and every PCB and do a very thorough inspection! On old equipment like this there is always some risk of breaking more stuff. But what the heck! And sure enough, that turned up some interesting things! First thing is to take of the back and open it up so I have access to the PCBs  Next I took out each PCB, one by one.    On each PCB I check that each component is properly fitted and the soldering is intact. I inspect each component to see if I can spot anything amiss. I look on both sides of the PCB to see/feel if anything looks odd or loose. I clean the base connector very thoroughly with electronic cleaner. I take all the little (glass) fuses out, check for corrosion, clean them before re-inserting them. I also lift each IC out of its base and re-insert it. Notice how some of the capacitors appear to be corroded? There were about 16 of these across multiple PCBs. They all looked like this. Some a bit worse. Remember I replaced the capacitor on our kitchen extractor fan earlier on, which fixed the speed problem. But that was a so called Elco Capacitor. The ones here, showing this corrosion are paper capacitors as far as I can tell. I am not sure what this corrosion on the outside is, but I doubt it is causing any problems. Remember, most of the function of this analyser did work. I did find one wire that had come undone. It popped out of the PCB, due to what appears bad soldering. You can just about see it, resting on the yellow capacitor!  On the back of the PCB you can spot the empty little hole, not much solder to be seen.  I soldered it back on. It is the power supply to the relais. I am not sure when it came loose. Again, a lot of the functions were working. It might have come undone during the transportation back home. Whatever, this bit and the subsequent relays it powers is fine again. Endless PCBs 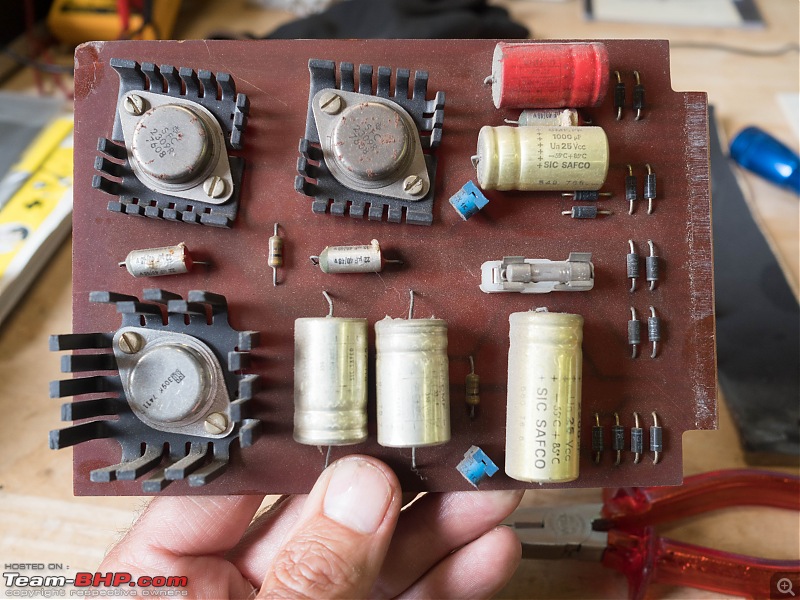 Look at the fuse holder on this one! One end was bend out of place! 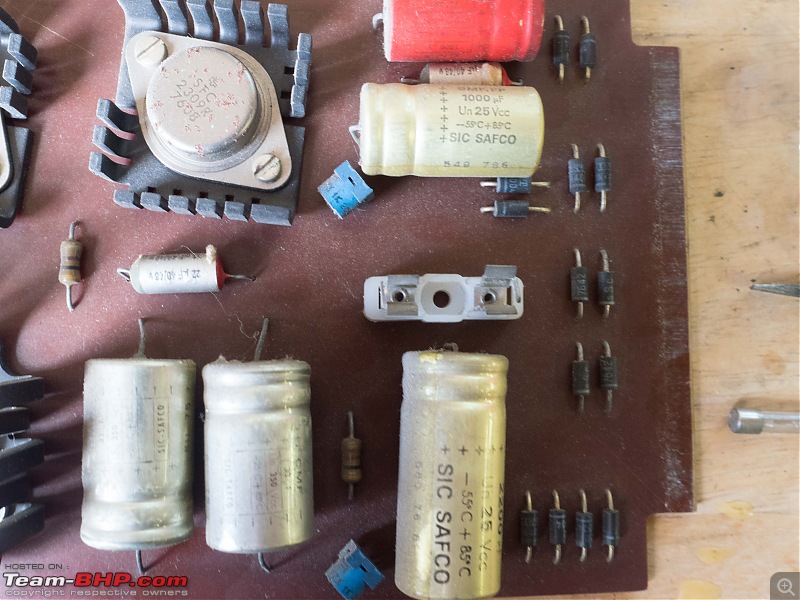  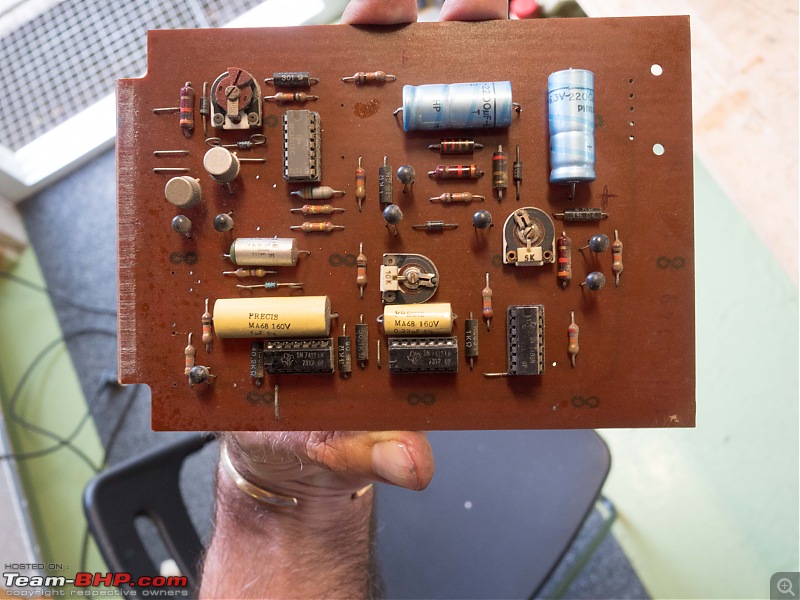  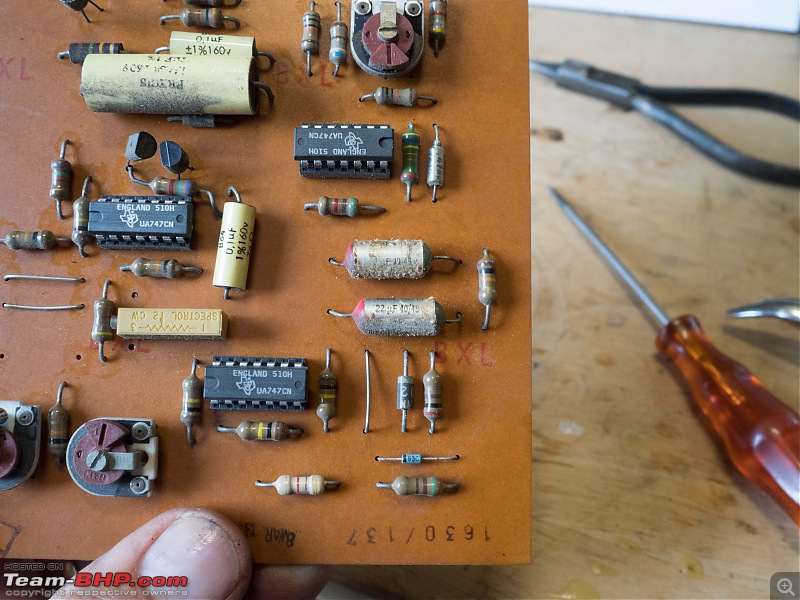 Look at these capacitors! Not sure at all what causes this?  Upon closer inspection I also noticed that one other relais was not properly mounted. The spring holding it in place had come undone.  That was an easy fix. In all I spend about two evenings, taking PCBs out, inspecting them, fixing what appeared broken, cleaning and re-inserting everything. I have also started on fabricating the High Voltage Probe. I have a large number of old spark plugs cables and I hope I can make do with these old parts. So far, I haven’t found the right bits yet. I might have to produce a little adapter on my lathe!  On the W123, I was not entirely happy on the wheel alignment, so I took it back and they redid it:    The problem is that it all shows green in the measurements. But these cars are very finicky, so we have to find a way to slightly offset the right front wheel, but still within the allowable margins. They tried, but on the test drive I was not convinced yet! Anyway, some very nice weather and my wife and I are enjoying the countryside around us, doing little tours in the Spider  Jeroen Last edited by ajmat : 23rd May 2020 at 11:08. |
| |  (6)
Thanks (6)
Thanks
 |
| The following 6 BHPians Thank Jeroen for this useful post: | blackwasp, digitalnirvana, Leoshashi, Miyata, Tgo, vishy76 |
| | #581 |
| Distinguished - BHPian  | Re: My Car Hobby: A lot of fiddling, and some driving too! Jaguar XJR, Mercedes W123 & Alfa Romeo Sp My good friend Cees came around yesterday with his Dacia Logan. He and his partner Annelies own and run a very nice B&B in France. We met many years ago through the Spider Register. At one point they owned two Alfa Romeo Spiders, both Coda Troncaís. Cees is a very gifted handyman who will tackle just about any job in and around the house and garage. As their B&B is still closed due to the Corona situation they came to visit their parents here in the Netherlands. And stock up with Dutch goodies. Cees had called me earlier, their Dacia had developed a brake problem. Brake fluid was leaking out of the left rear brake. We discussed, Cees managed to block of the one brake line, procure all the parts and came over yesterday to fix it. The Dacia has simple drum brakes at the rear. Brake fluid coming out of the brake drum usually means the brake cilinder/piston is leaking. It had only been replaced last year. So a bit unusual, but sometimes these things happen. What with brake fluid having spread all over the brake shoes, we decided to replace everything. Dacia up on the Jack and axle stand As everything had been taken apart only a year ago, we had no problems taking things apart.   Brake drum opened up, all wet and dirty inside   As always, cleaning everything takes a lot of time, but you better do so, dust, brake fluid, muck inside a brake drum will spell imminent disaster!  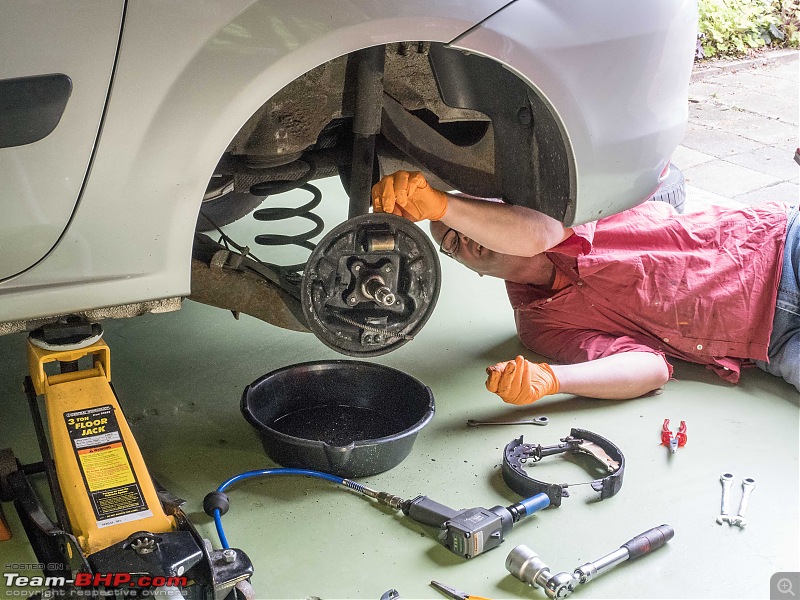 The company logo  Getting ready to put all the new bits back together again  All new and shiny again! 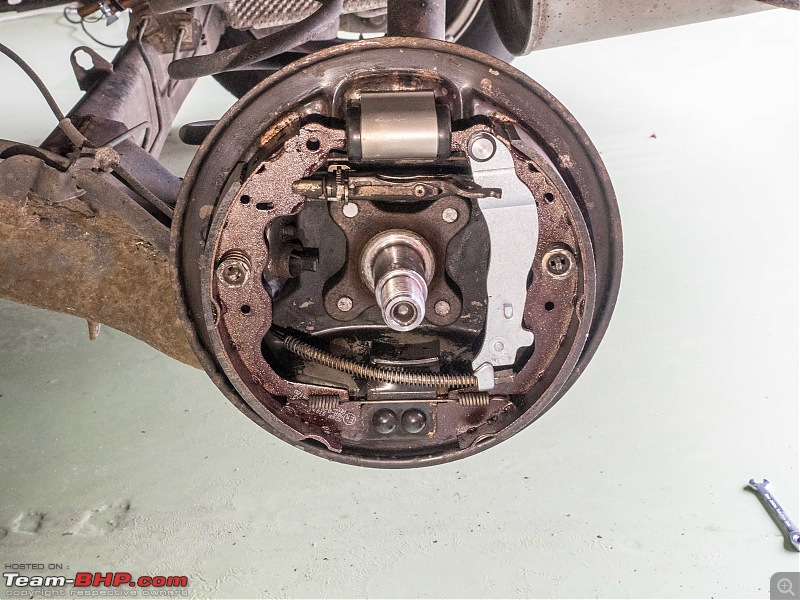 Cees doing the final inspection  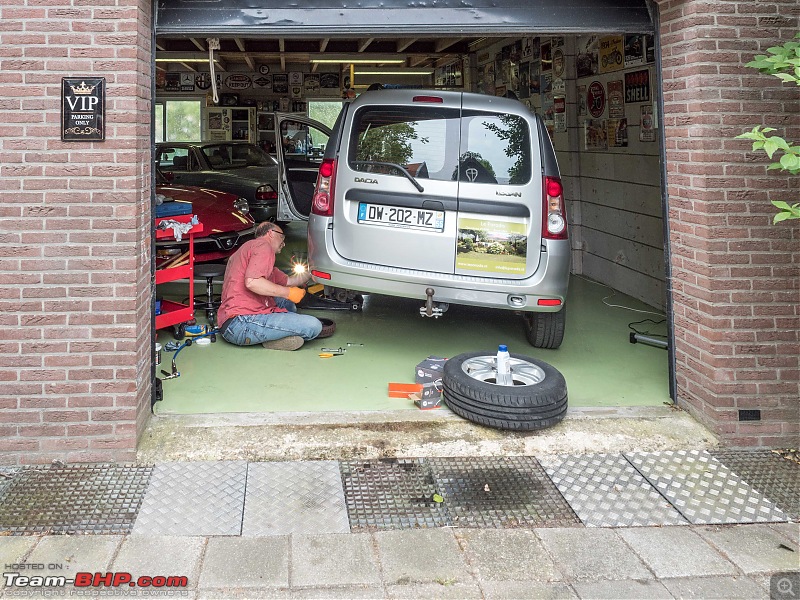 Most of the time was spend bleeding the brake system. Initially we started with my vacuum bleeder. But as before, and for reasons I still donít fully understand sometime the vacuum bleeder just does not do a good enough job. So we had to put the pressure bleeder on. Luckily, that did the trick! In all, it took us less than two hours, very relaxed, easy job! Jeroen |
| |  (1)
Thanks (1)
Thanks
 |
| The following BHPian Thanks Jeroen for this useful post: | digitalnirvana |
| |
| | #582 |
| BHPian Join Date: Aug 2008 Location: bangalore
Posts: 574
Thanked: 1,528 Times
| Re: My Car Hobby: A lot of fiddling, and some driving too! Jaguar XJR, Mercedes W123 & Alfa Romeo Sp The golden yellow ones branded SIC are electrolytic capacitors and the other yellow ones that you said could be paper caps look like metalized polypropylene to me, both which are used in speaker crossovers. The discolored ones seem to have burnt out, but you should be able to get replacements at any DIY audio store. Love all your DIY posts. |
| |  (2)
Thanks (2)
Thanks
 |
| The following 2 BHPians Thank keroo1099 for this useful post: | digitalnirvana, Jeroen |
| | #583 |
| Distinguished - BHPian  | Re: My Car Hobby: A lot of fiddling, and some driving too! Jaguar XJR, Mercedes W123 & Alfa Romeo Sp I have put my engine analyser back together again. Powered it up and so far so good!  As you might recall there was one part missing, the so called High Voltage Probe. It took me a long time to figure out what this part is and looks like. I did find a few photographs on the Internet eventually.  It basically allows the analyser to pick up the high voltage signal between coil and distributor.  I spoke to Leon about it. Obviously he knew it exactly, he did not have one either. But he did confirm this is just a passive device, i.e. just a T-piece. Nothing fancy, or as I like to think of it another perfect little lathe project! I decided to make it out of two main parts. The core, all aluminium and the sleeve out of delris.  . . Little job, lots of tools and other bits required somehow!  I am very pleased with this little lathe. When needed I can get very precise cuts!  Easy drilling. However, I was not that impressed with the finish of the hole. It will do, but I will have to trial a few other pieces to get a smoother finish.  The cable will have to be attached on the the core. In order to fasten it I made I drilled a little hole, squared of the outer diameter and threaded the hole, M$.   I tried several of my M4 bolts, but they are ultimately all too large. The whole core will need to fit into the sleeve. i will have to order something else this coming week.   Nice weather outside, but I preferred to stay indoors and finish this job before going out!  The end result: 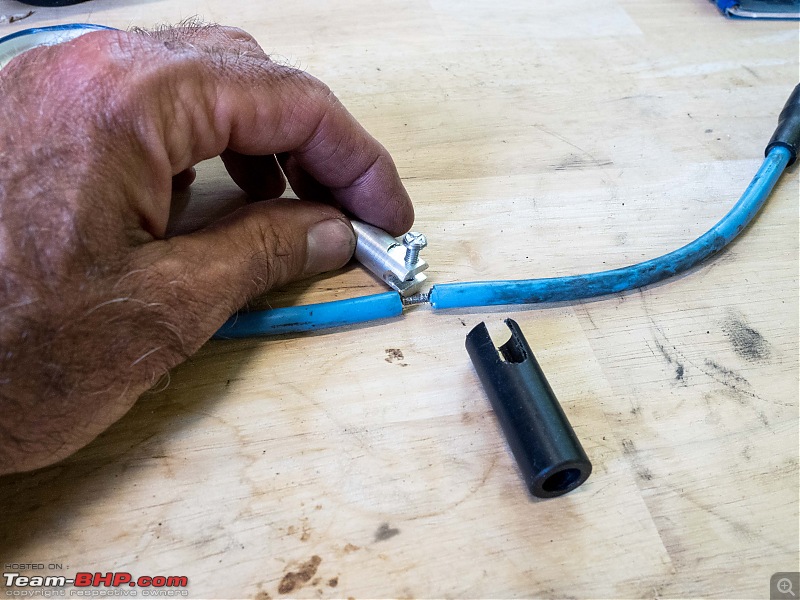 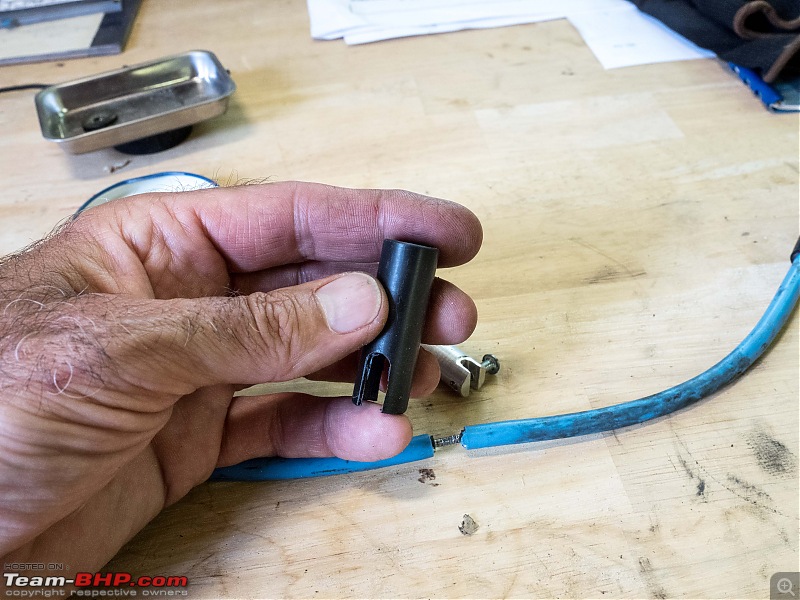  Two more things to do, order the little M4 bolt (I will try to find a little Allen Bolt) and I still need to fabricate an end stop on the sleeve that keep everything together. Very pleased with it so far! Jeroen Last edited by Jeroen : 24th May 2020 at 11:47. |
| |  (3)
Thanks (3)
Thanks
 |
| The following 3 BHPians Thank Jeroen for this useful post: | digitalnirvana, keroo1099, Thad E Ginathom |
| | #584 |
| Distinguished - BHPian  Join Date: Jun 2007 Location: Chennai
Posts: 11,005
Thanked: 26,443 Times
| Re: My Car Hobby: A lot of fiddling, and some driving too! Jaguar XJR, Mercedes W123 & Alfa Romeo Sp I can't picture it... You need a male part to fit the coil, but you have drilled the part making it look female? Also wonder why you would not use copper or brass (and enjoy the splinter like swarf!) unless it is just that Aluminium is what you've got. Last edited by ajmat : 24th May 2020 at 21:58. Reason: male not mail! |
| |  ()
Thanks ()
Thanks
 |
| | #585 | ||
| Distinguished - BHPian  | Re: My Car Hobby: A lot of fiddling, and some driving too! Jaguar XJR, Mercedes W123 & Alfa Romeo Sp Quote:
You will notice that it is the end of the HV cable that connects to the coil that goes onto the probe! Most coils have a female connector, so the cable is a male. Hence my probee is modelled on the female part of the coil.  Quote:
So this afternoon I wanted to finish this little project. First thing was to get a proper little bolt. I spend some time trawling the internet, but I could not find anything. (Unless you order 500 pieces). So I decided to take the Jaguar for a little spin and drive out to the nearest DIY Hornbach store open on the (Corona) Sunday afternoon. Turned out it was their branch in Breda. Sure enough they had every imaginable type of bolt, sold per piece, imaginable. I bought a few just to be on the safe side.  The bolts cost about Euro 0,05 a piece. It was about a 110 km journey, with the Jag doing 1;7 that cost me 16 liters of fuel, so about Euro 25. For that money I could have ordered a bag of 500 pieces. But at least I had these now, this very afternoon and I could just crack on!  Tricky bit, getting the stripped cable into the core and bolting it down with the little M4 and an Allen key.   Next, back to my lathe and quickly produced an end cap!    Bit more careful measuring and fitting and shortening it a bit  Here it is, my first official replica of a 1980 Sourieau High Voltage Probe!  I put a few drops of locktite under the Cap to keep it firmly in place. My original design called for the cap to be threaded, But that was too much of a hassle and I did not have the correct size die/tap either. Here it is fitted on the analyser where it belongs! At long last this piece of equipment is complete and more or less in working order. I will have to give it a try on the Mercedes next weekend or so!  Jeroen Last edited by Jeroen : 24th May 2020 at 23:30. | ||
| |  (1)
Thanks (1)
Thanks
 |
| The following BHPian Thanks Jeroen for this useful post: | digitalnirvana |
 |


