Installing OPS (Optical Parking System) in Polo/Vento
VW India offers rear parking sensors with audio feedback in following variants
- Polo (HL)
- Vento (TL/CL/HL)
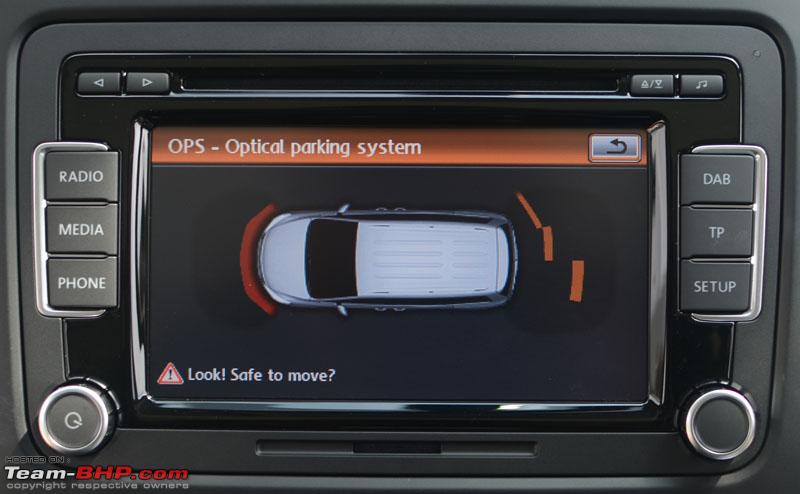
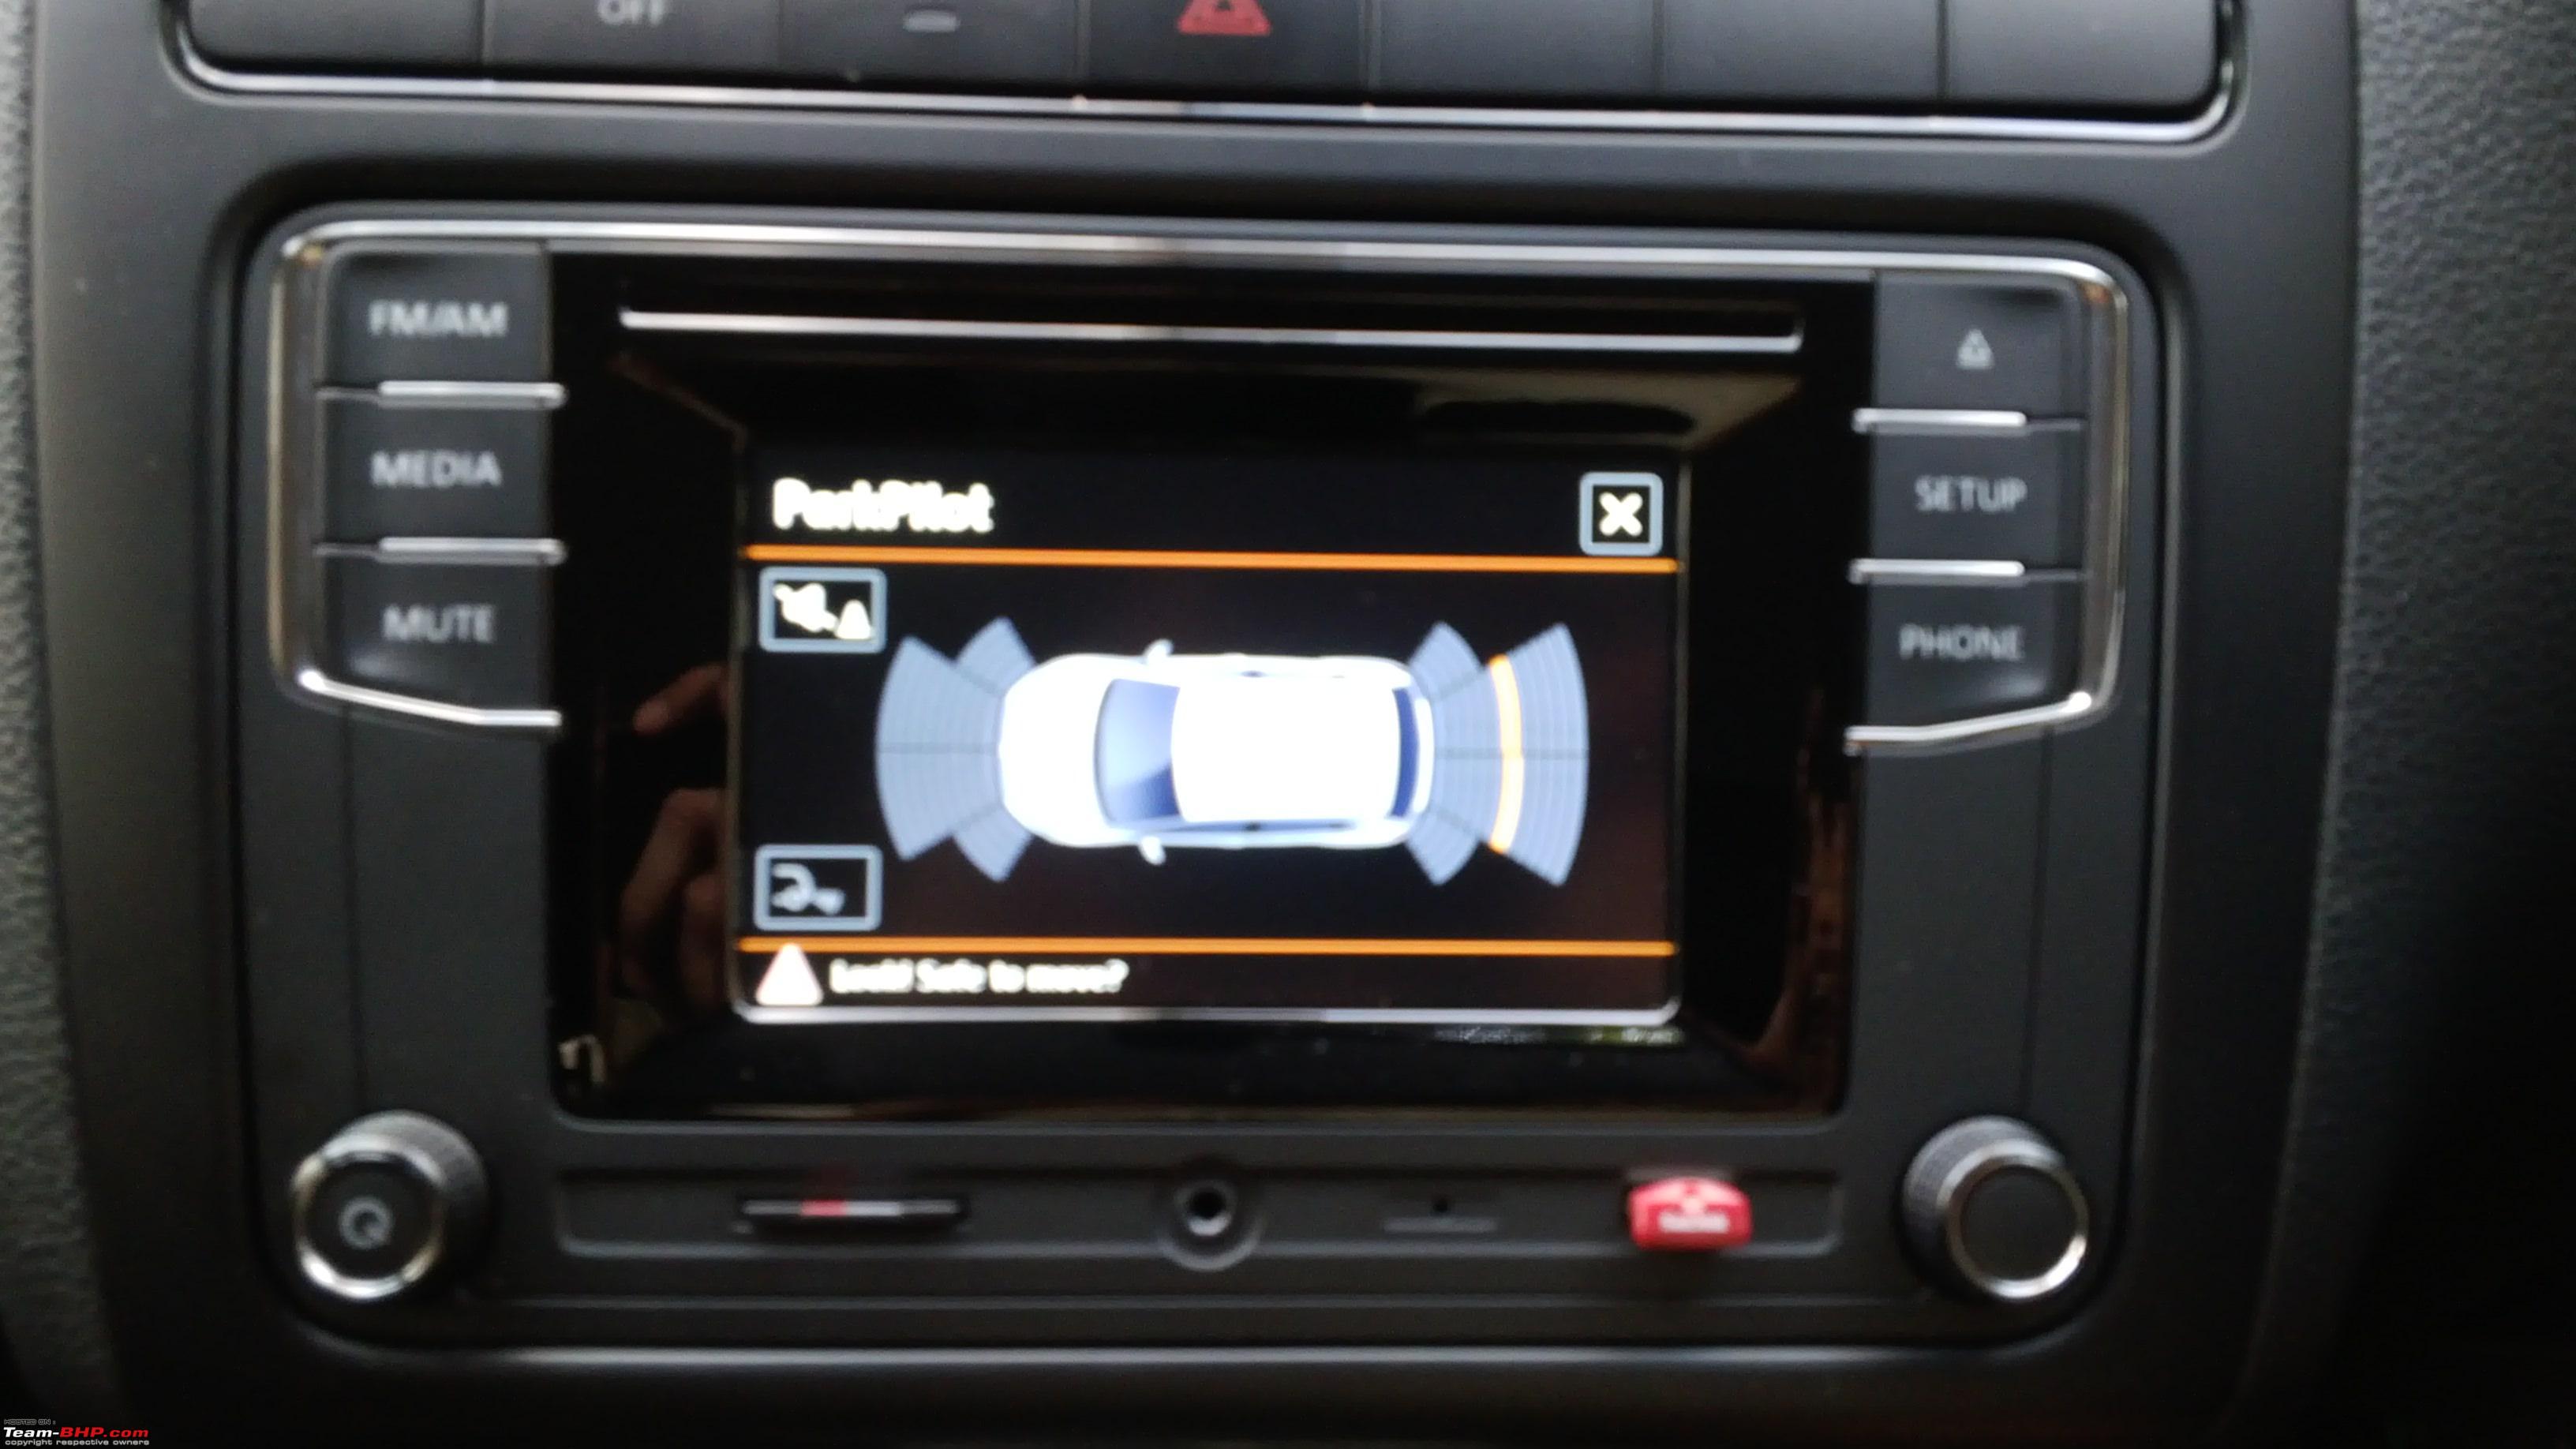
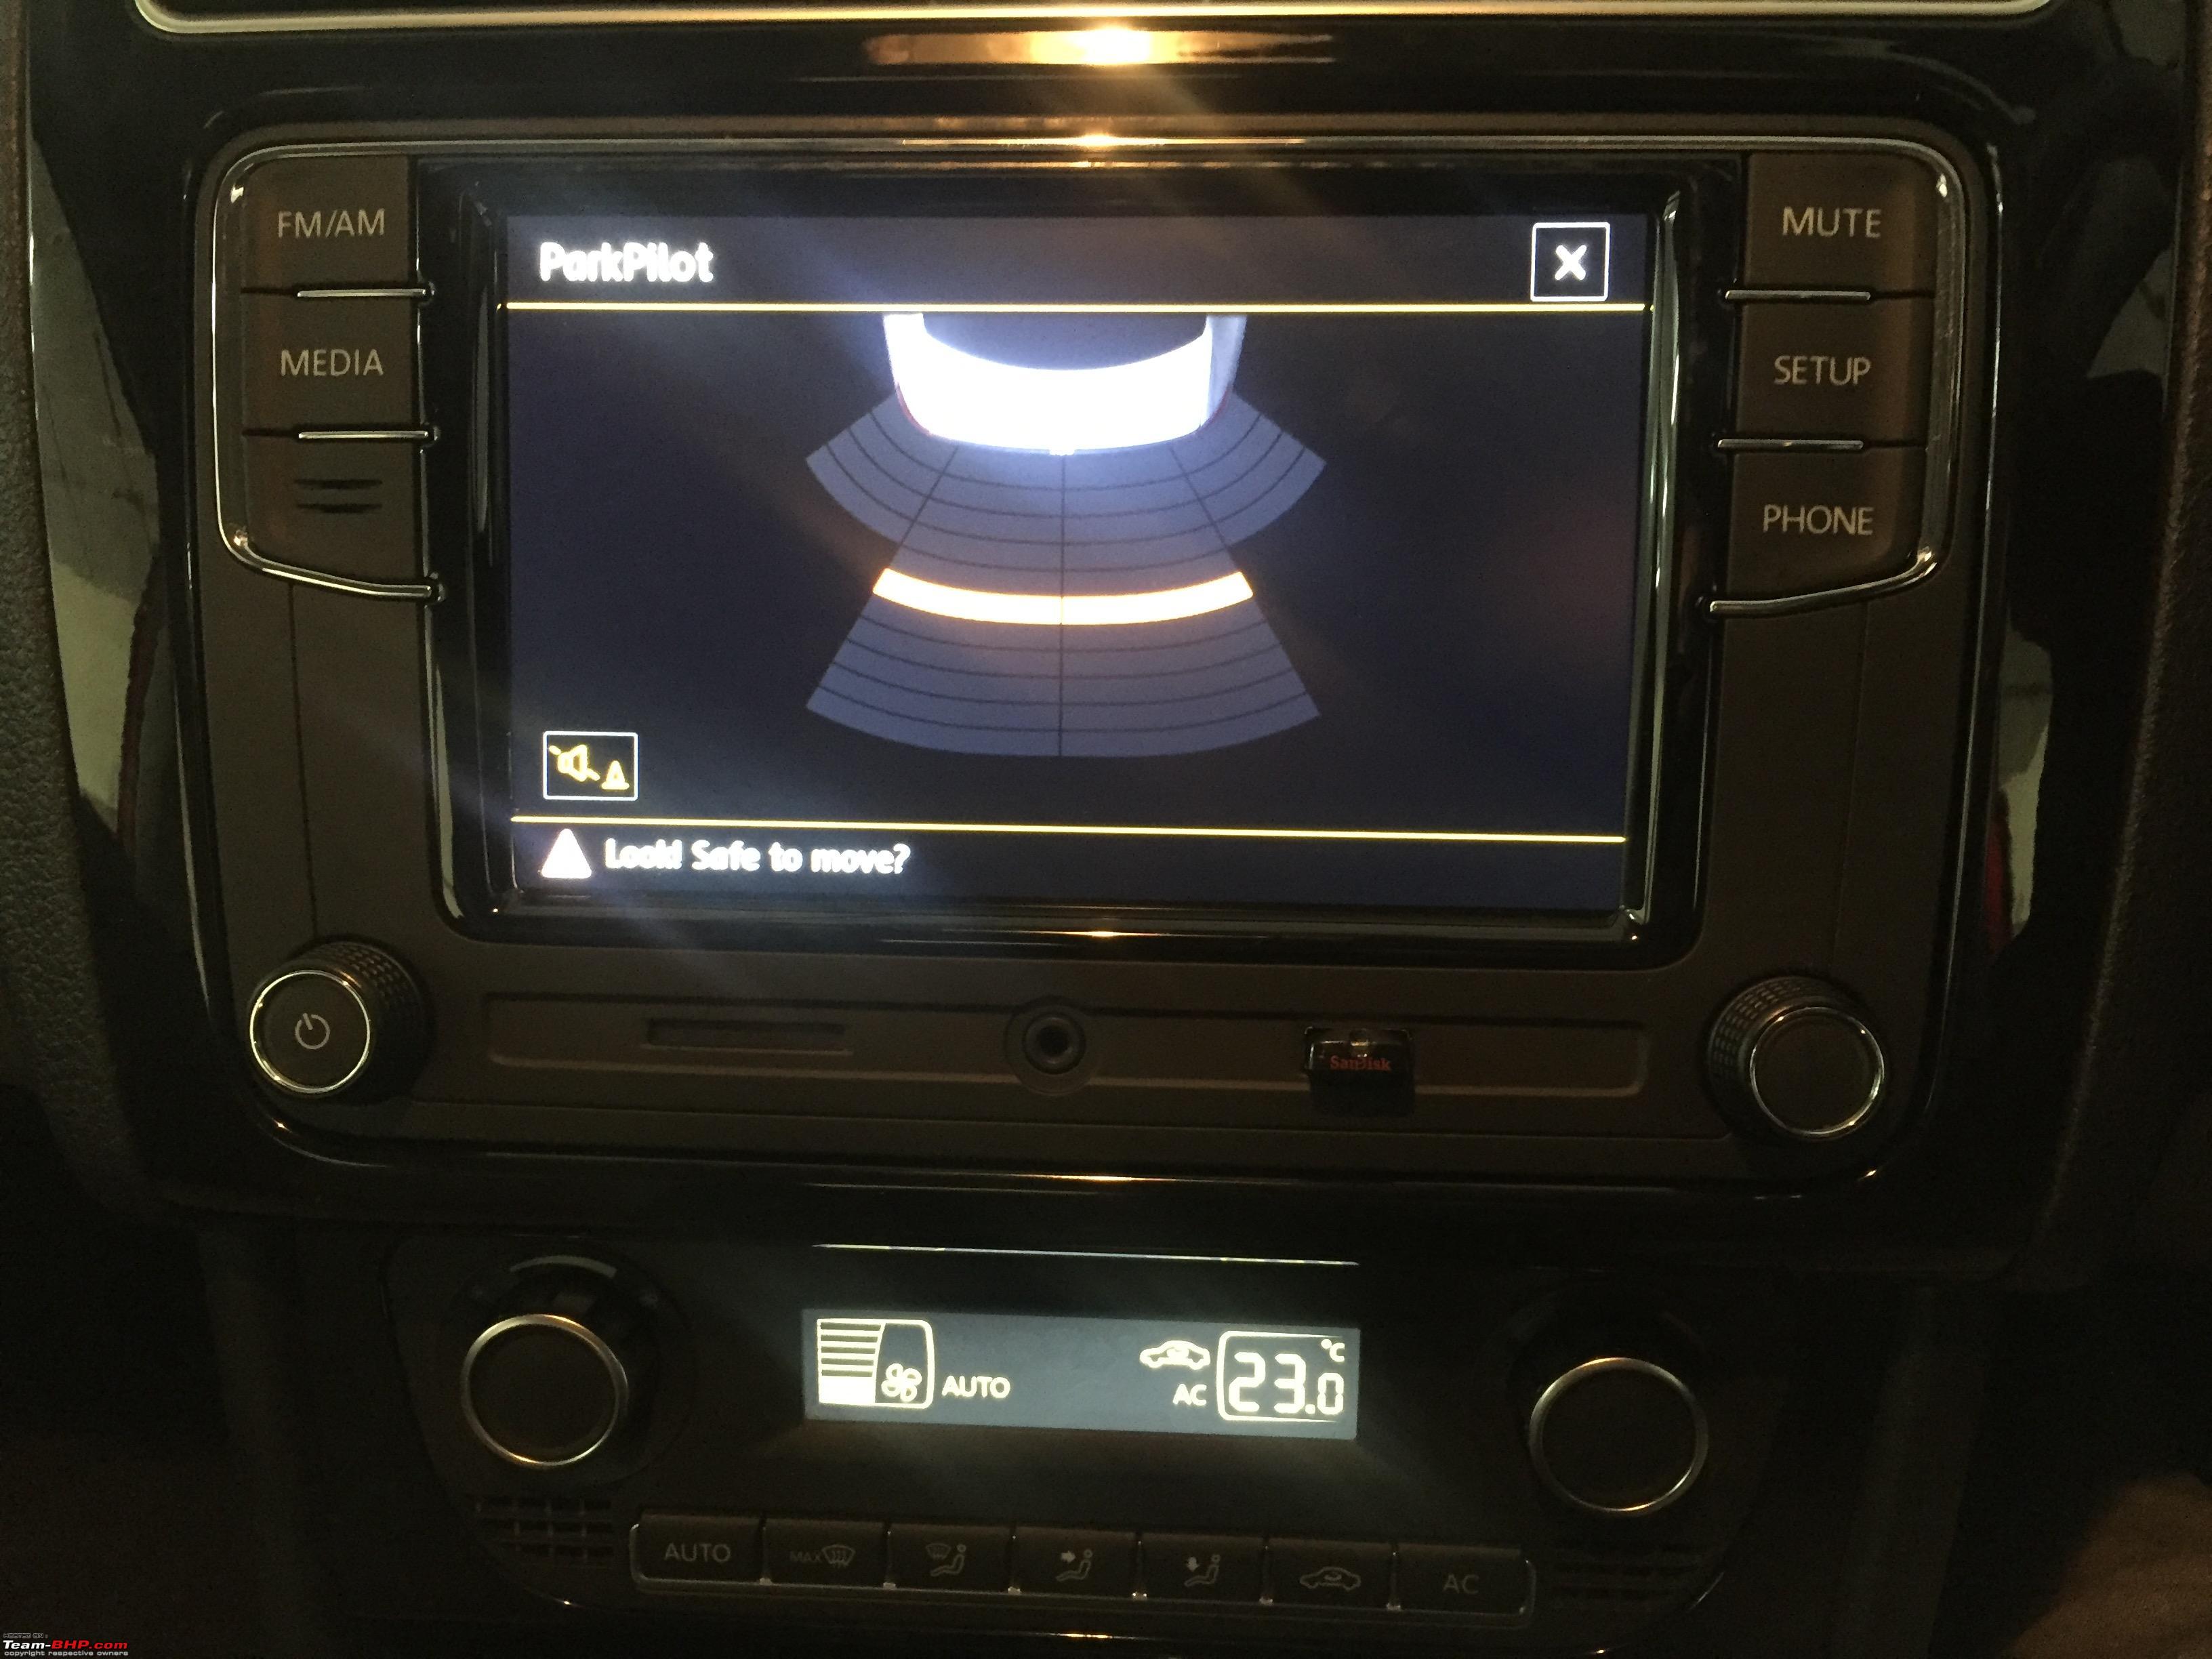
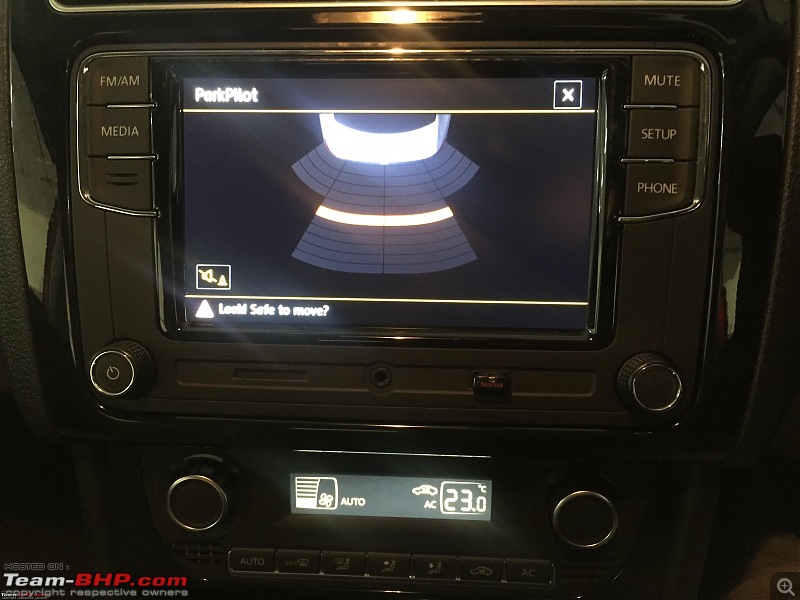
Although this feature is quite useful but lack of camera in the older variants warranted some kind of visual feedback. This function can be supplemented with visual feedback if we have head unit supporting OPS (Optical Parking System).
Some of the common head units supporting OPS are
RNS/RCD 510 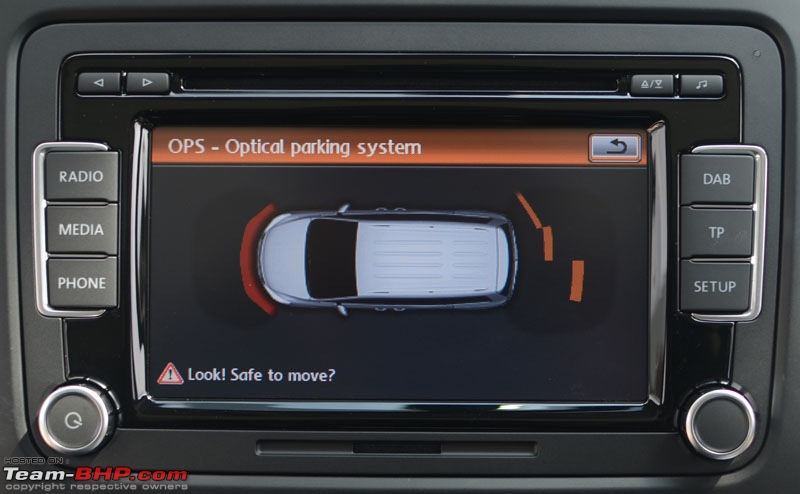 RCD 310
 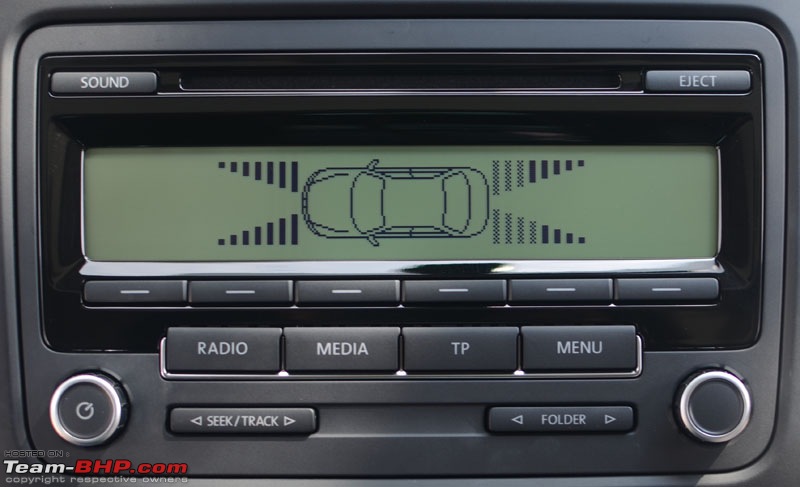 RCD330
 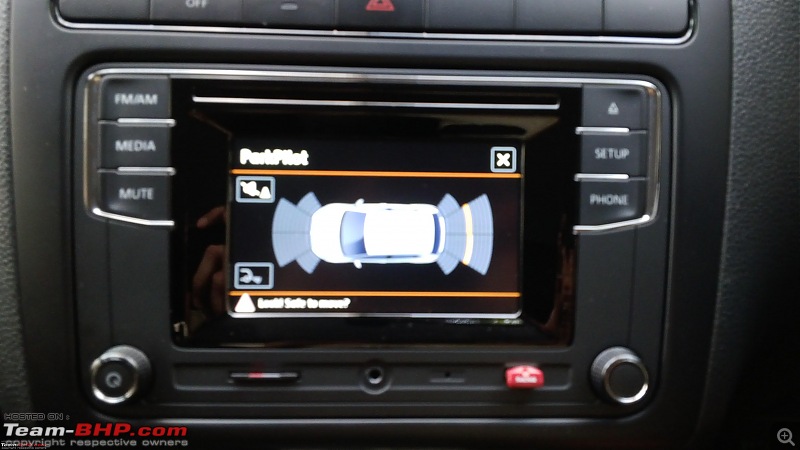 There are two options for installing OPS (Optical Parking System)
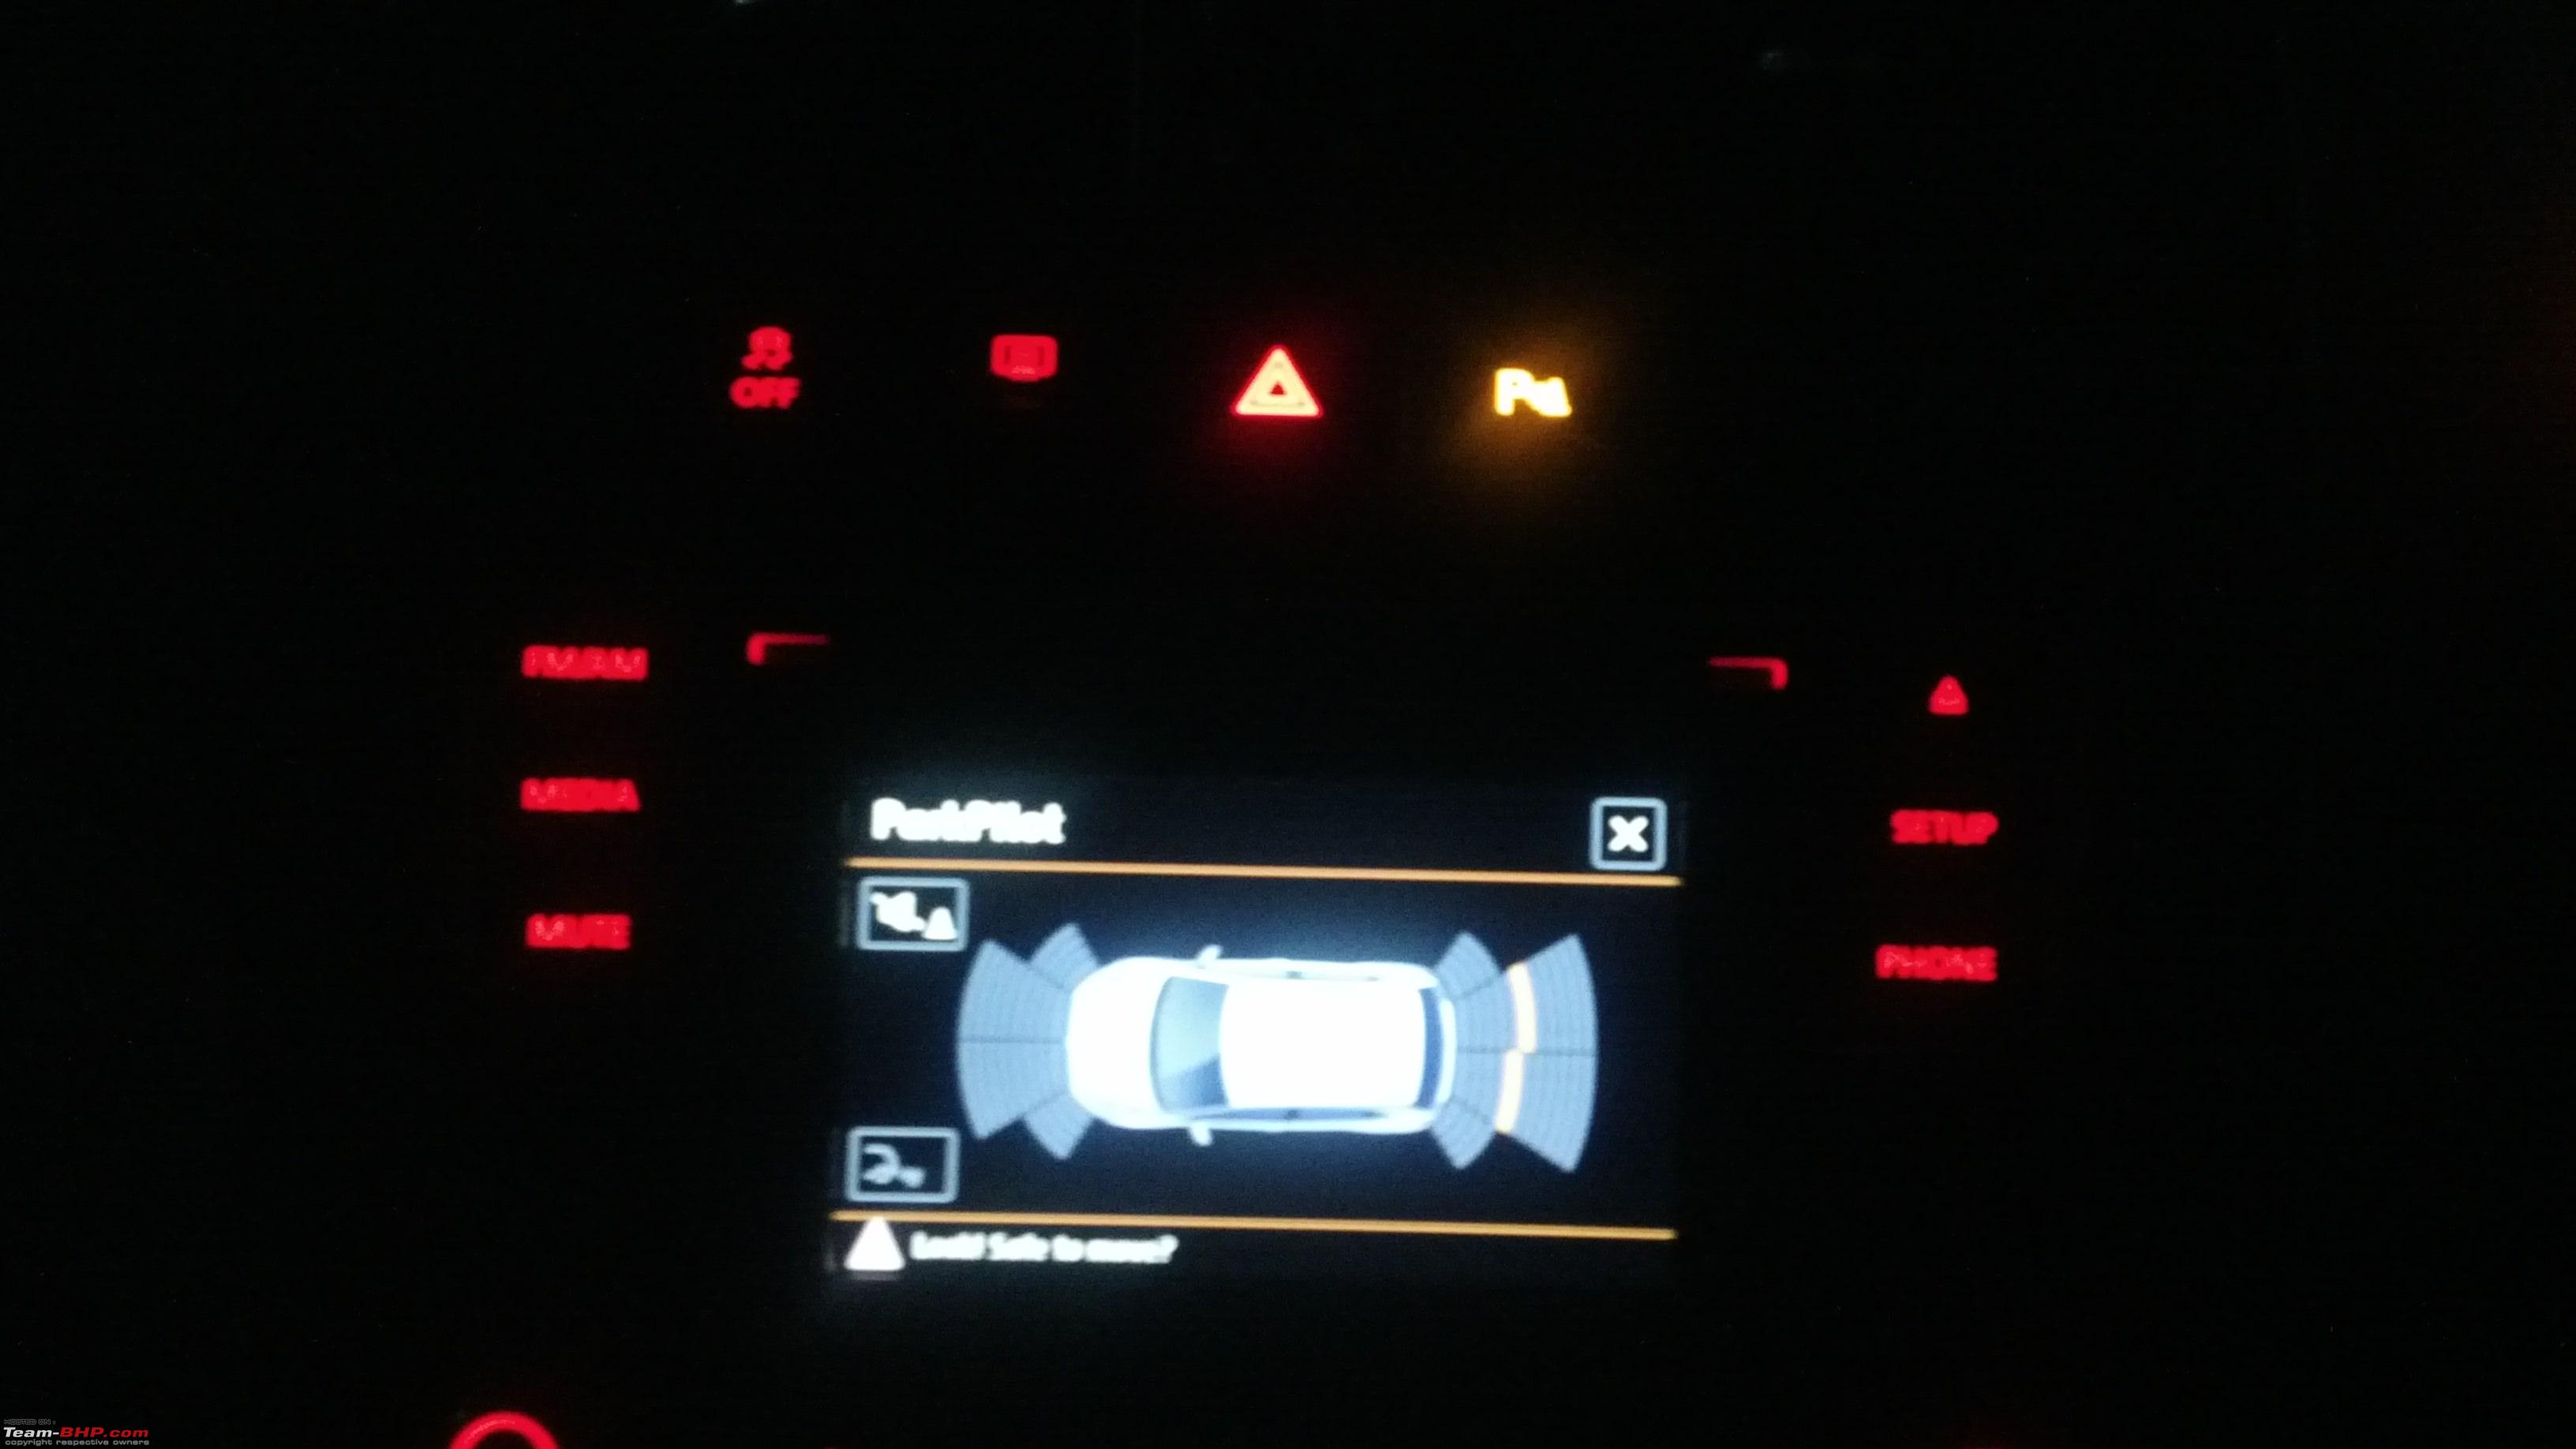
4K OPS which would enable audio/visual feedback from 4 rear parking sensors.
8K OPS which would enable audio/visual feedback from 4 front and 4 rear parking sensors.
 Amount of work required to retrofit OPS in your vehicle would depend on following
- Do you have rear parking sensors in your vehicle?
- Do you have head unit supporting OPS?
- Do you have parking module supporting OPS?
- Do you want to install 4K OPS or 8K OPS?
In older variants of Vento/Polo 4K OPS module was present, hence if they replace existing head unit with RCD 330 they would automatically get OPS display. This has been confirmed by some of the users.
Before we proceed further let’s look at some of the terms we would use
Ques: What is CANBUS?
Ans: The CAN Bus is an automotive bus developed by Robert Bosch, which has quickly gained acceptance into the automotive and aerospace industries. CAN is a serial bus protocol to connect individual systems and sensors as an alternative to conventional multi-wire looms. It allows automotive components to communicate on a single or dual-wire networked data bus up to 1Mbps.
Reference:
http://canbuskits.com/what.php
Ques: What is BCM (body control module)?
Ans: In automotive electronics, body control module or 'body computer' is a generic term for an electronic control unit responsible for monitoring and controlling various electronic accessories in a vehicle's body. Typically in a car the BCM controls the power windows, power mirrors, air conditioning, immobilizer system, central locking, etc. The BCM communicates with other on-board computers via the car's vehicle bus, and its main application is controlling load drivers – actuating relays that in turn perform actions in the vehicle such as locking the doors or dimming the salon overhead lamp.
Reference:
https://en.wikipedia.org/wiki/Body_control_module Installing 4K OPS - Install 4 rear parking sensors if not present (Polo CL )
- Install head unit supporting OPS if not present (RCD 220/320).
- Install/replace OPS capable 4K parking module.
- Connect rear parking sensors with OPS module (Black 12 pin connector).
- Connect rear warning buzzer with OPS module (Orange 16 pin connector)
- Connect CANBUS powertrain High/Low with OPS module (Orange 16 pin connector)
- Connect power supply from Fusebox to OPS module (Orange 16 pin connector)
- Check settings through VCDS and enable OPS if it’s disabled.
Installing 8K OPS- Complete all steps for installing 4K OPS (except OPS module).
- Install 4 parking sensors in front bumper.
- Install/replace 8K OPS module.
- Connect front parking sensors with OPS module (Orange 12 pin connector)
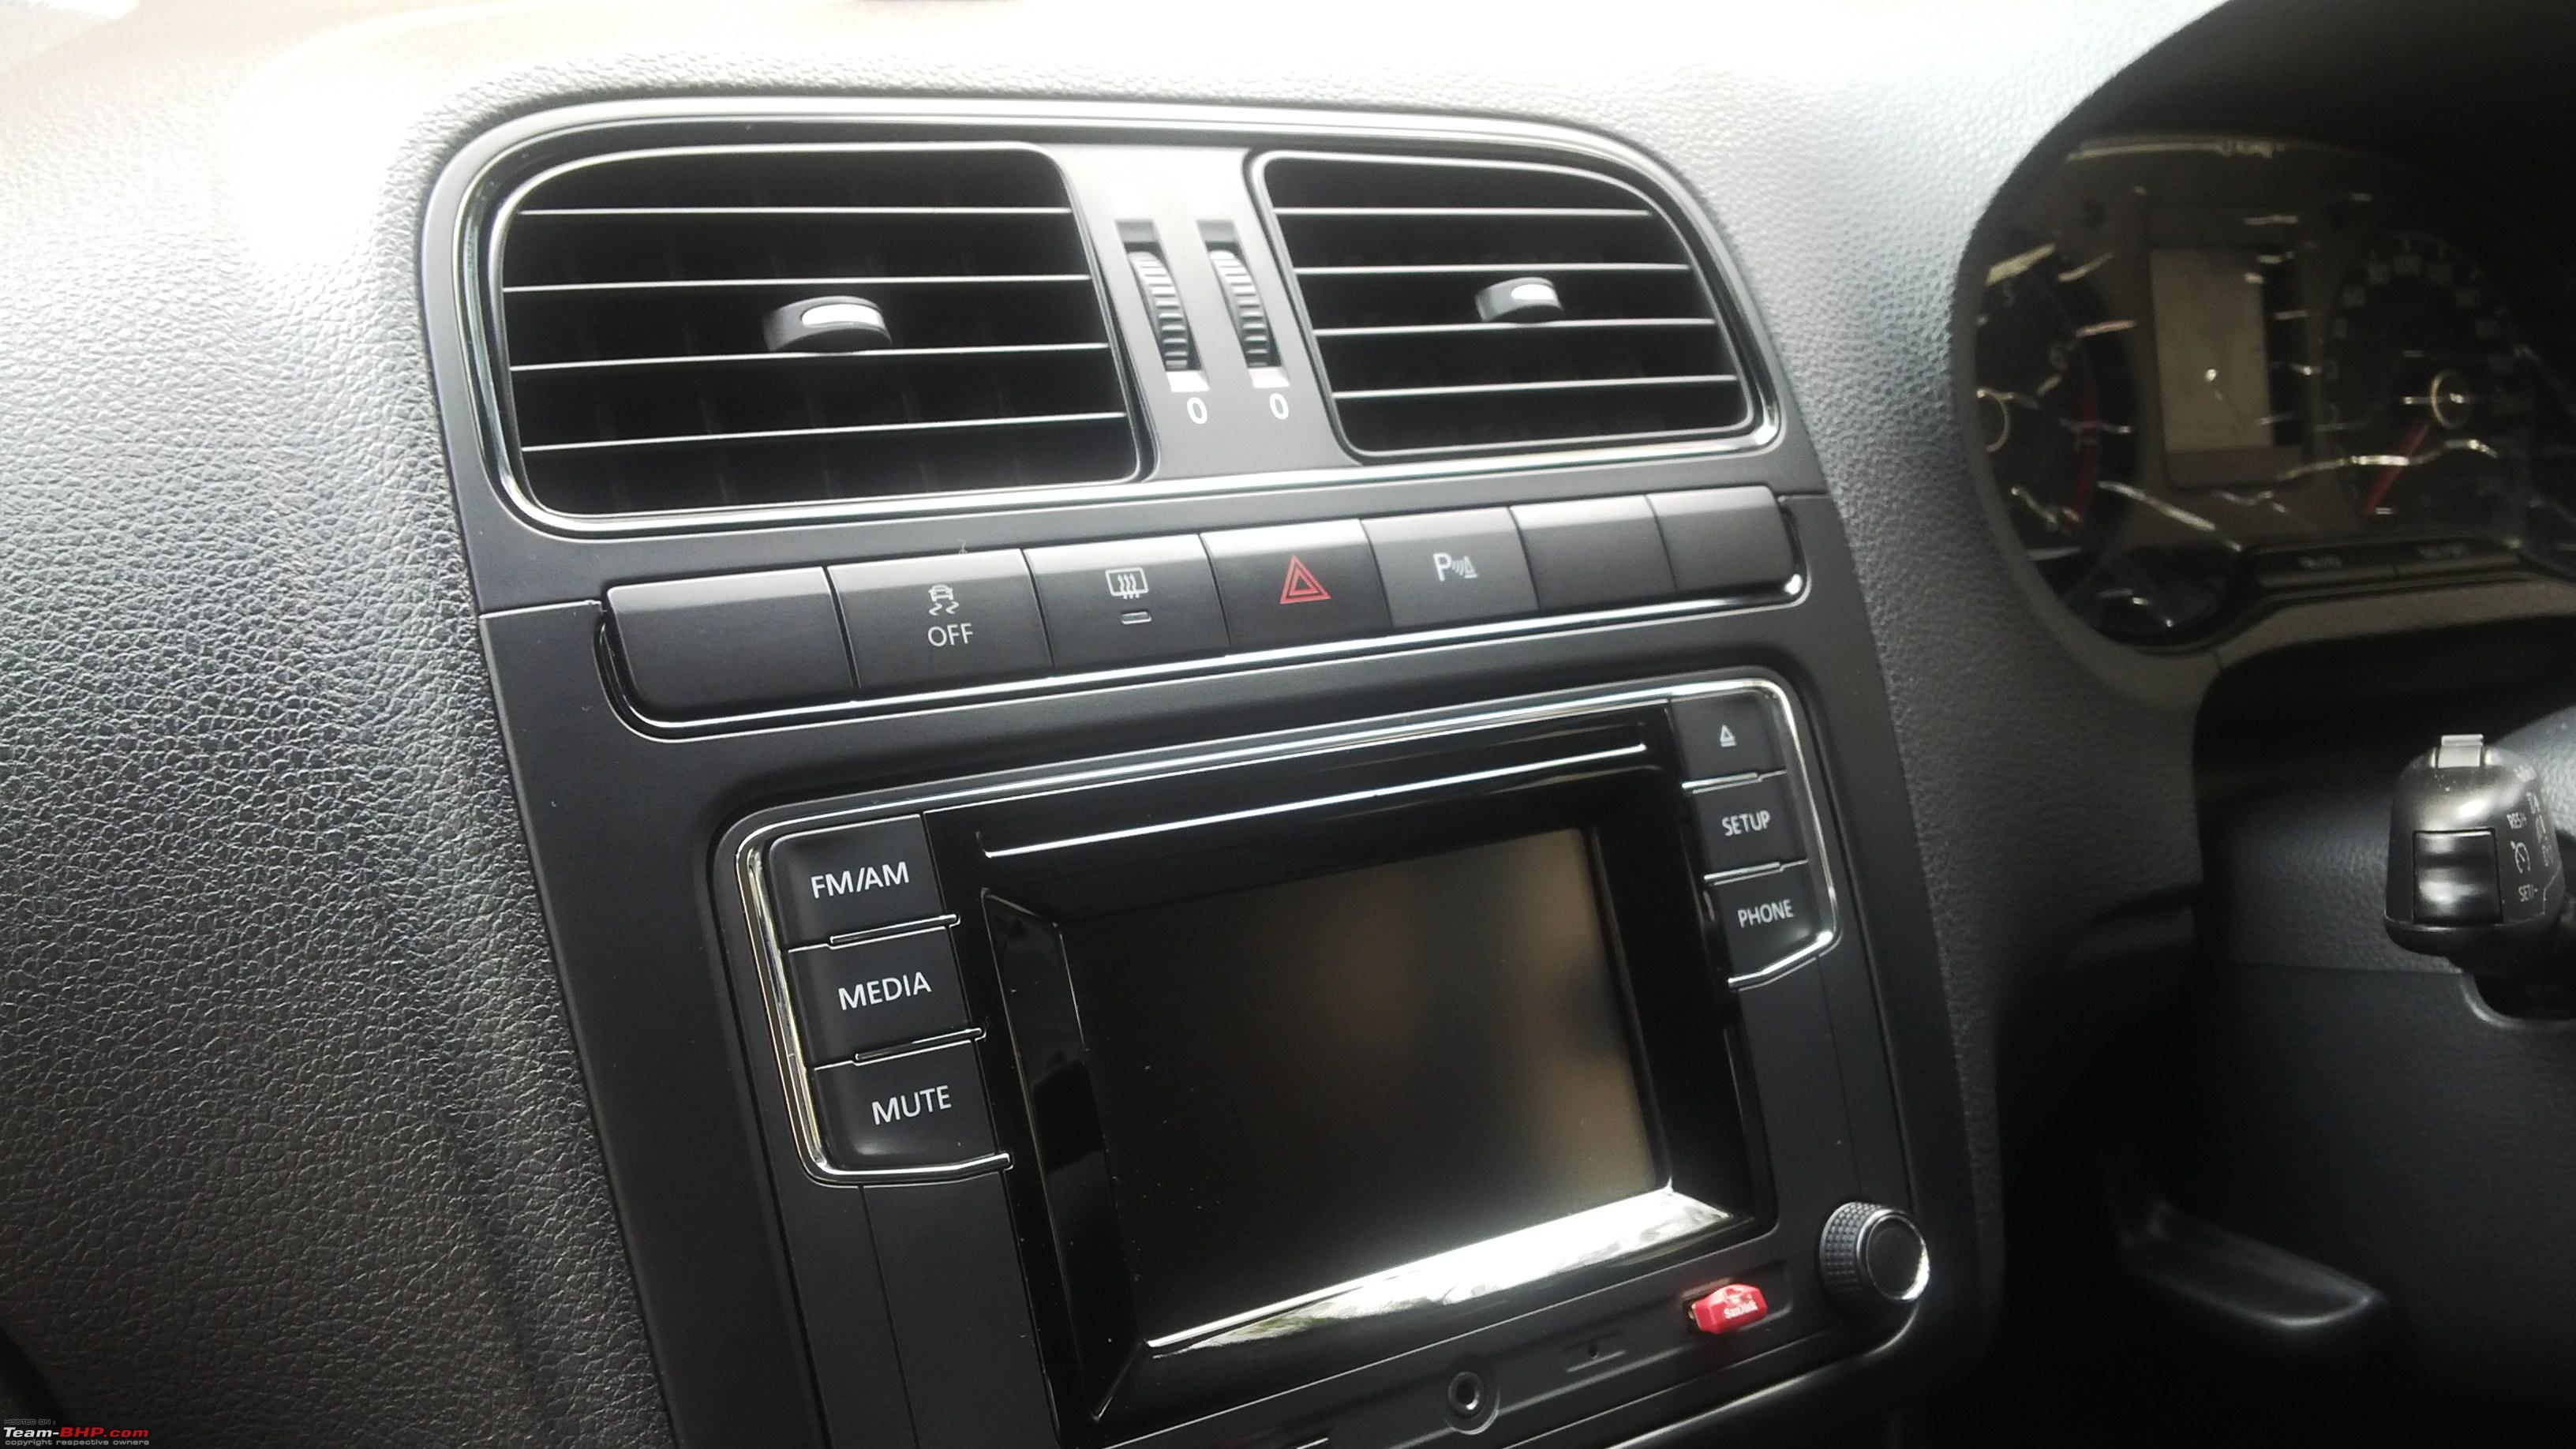
- Install PDC switch in dashboard (next to hazard warning switch).
- Connect PDC switch with OPS module (Orange 16 pin connector)
- Install front parking buzzer near passenger side dashboard and connect to OPS module (Orange 12 pin connector).
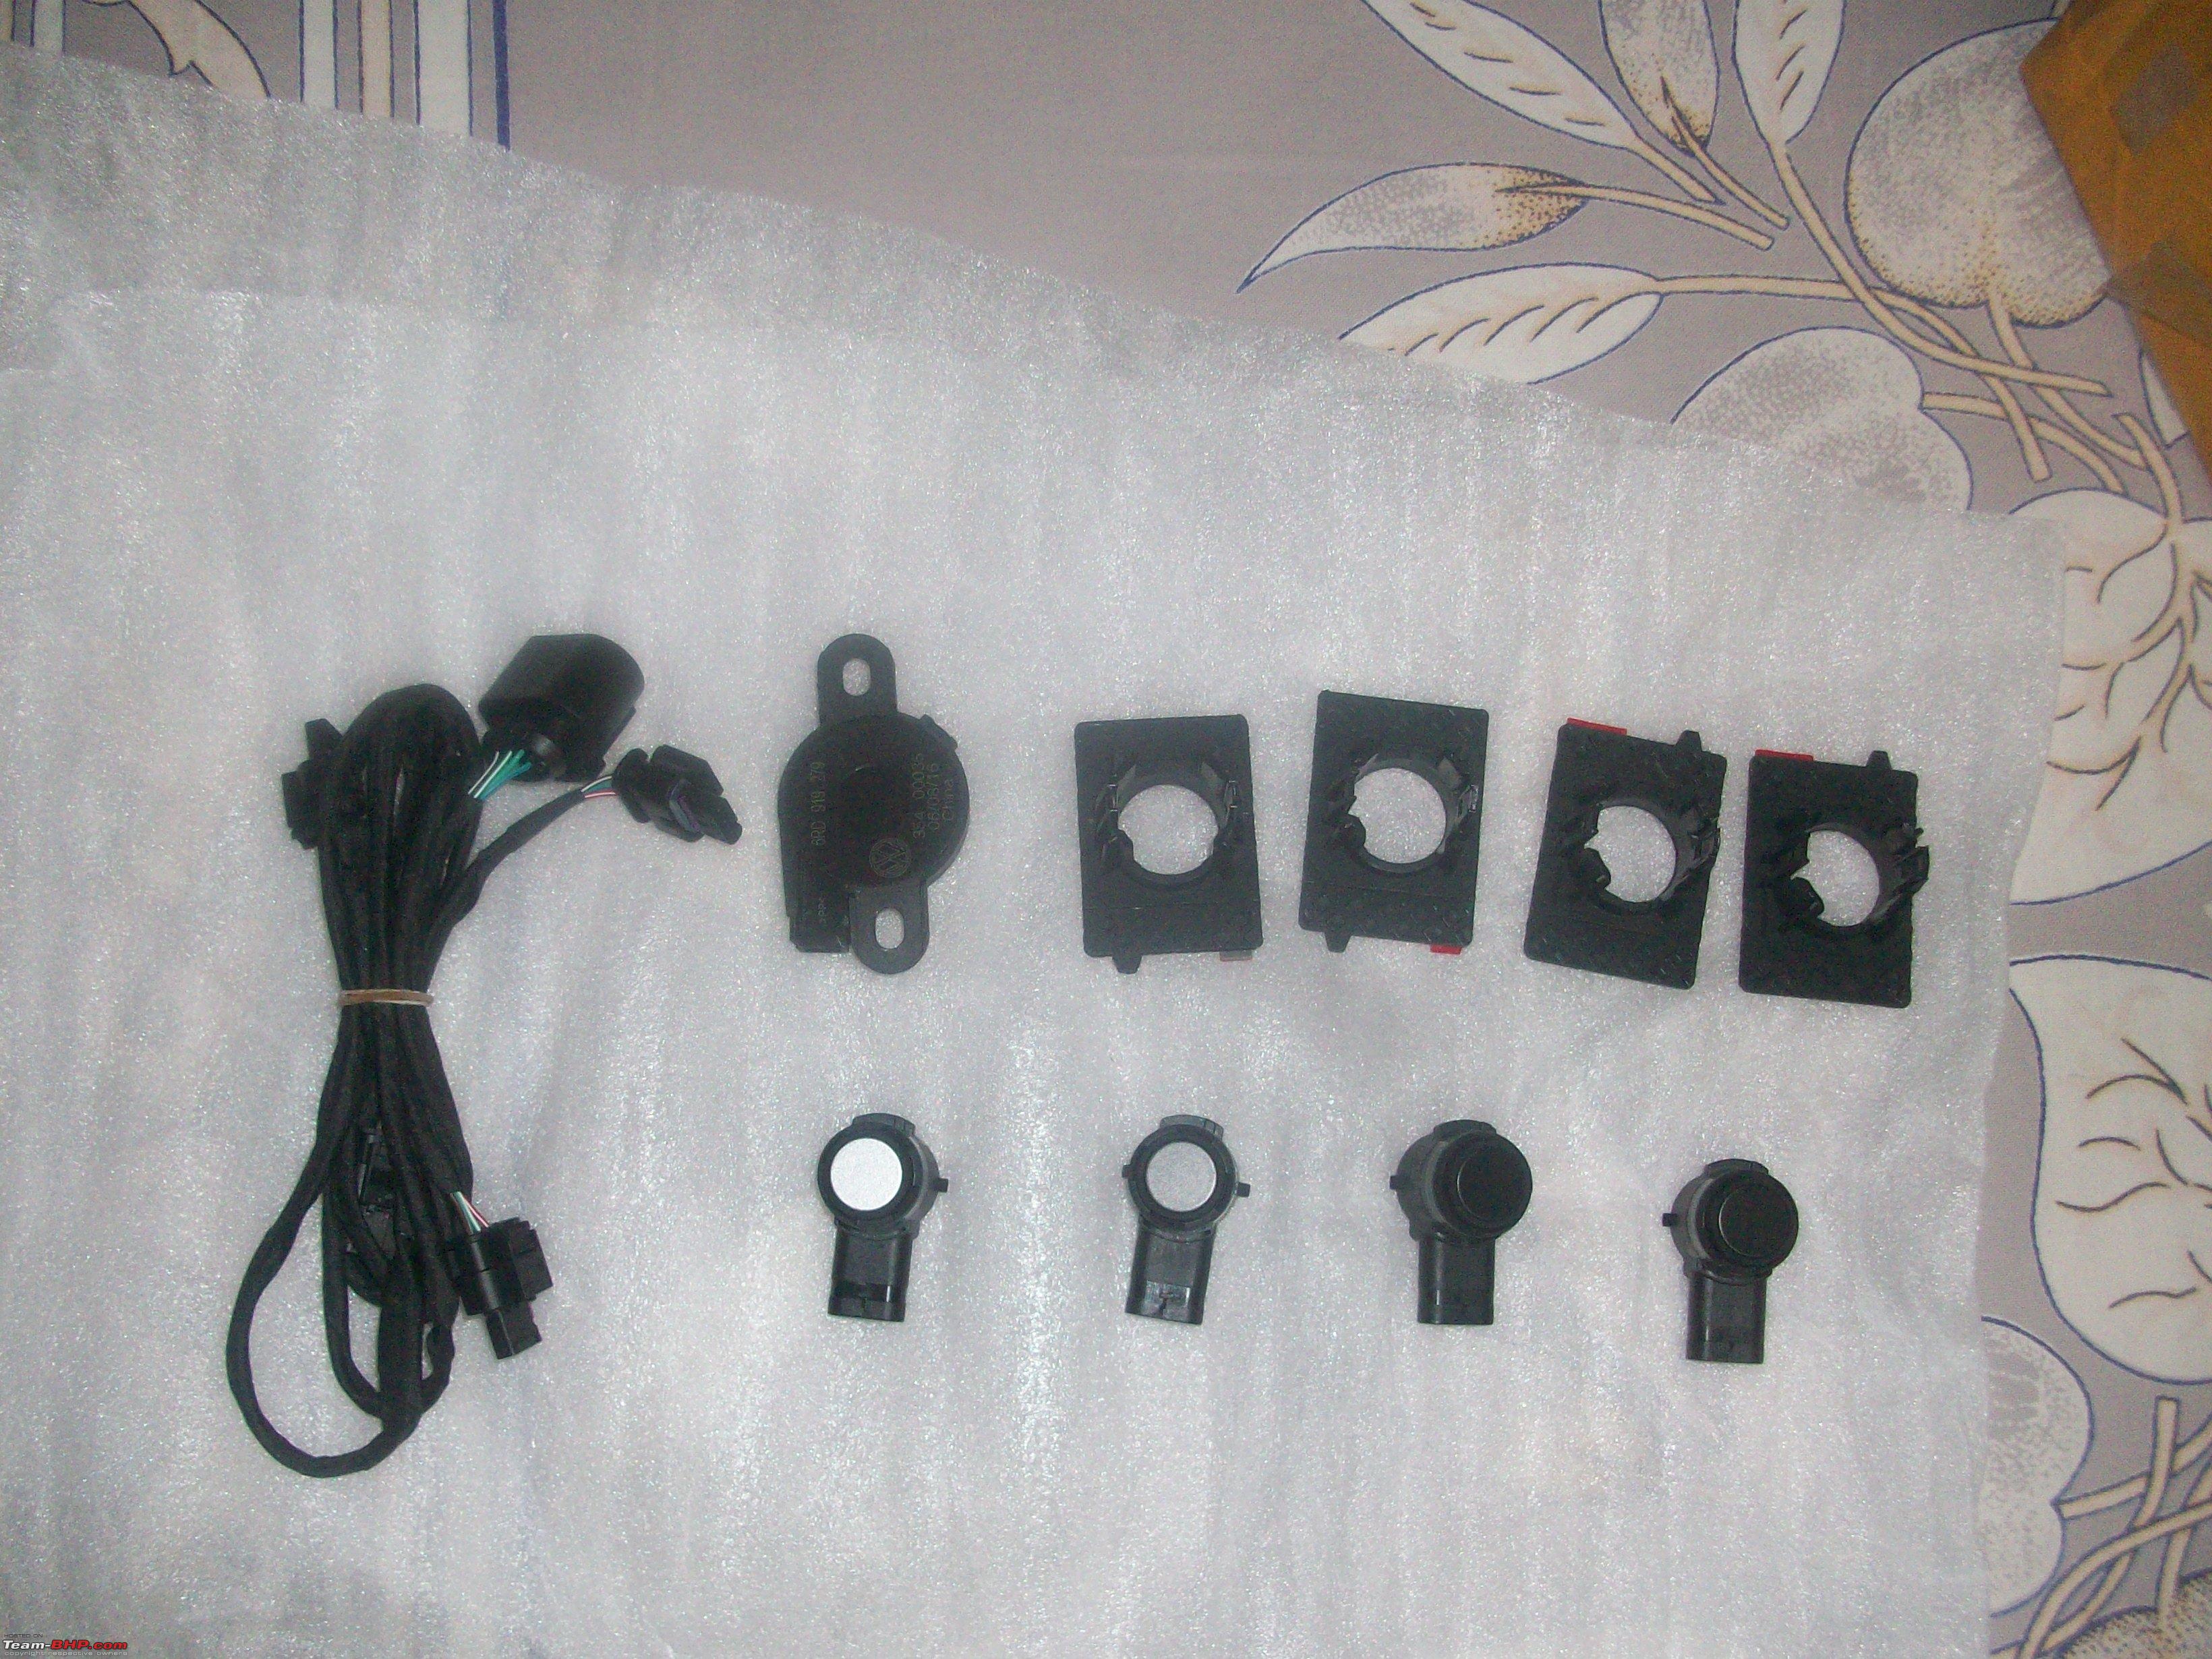
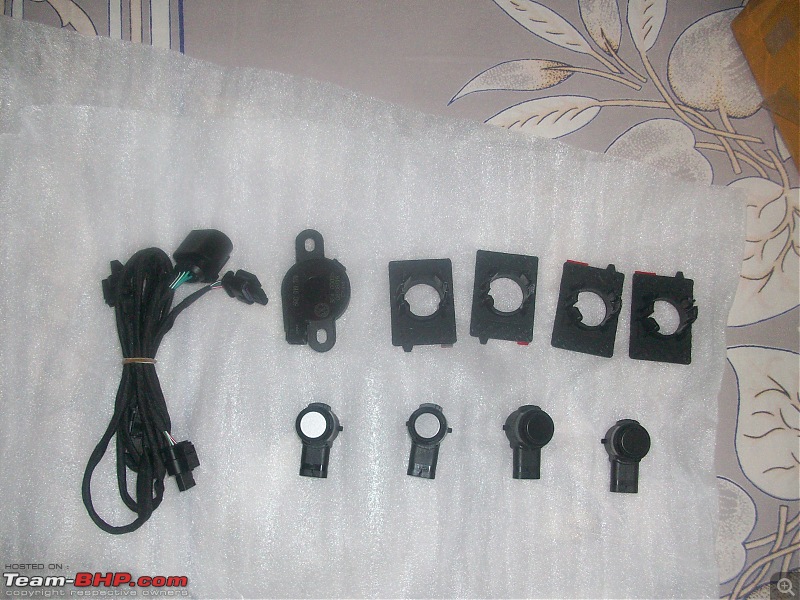
Components required (PQ25 platform)
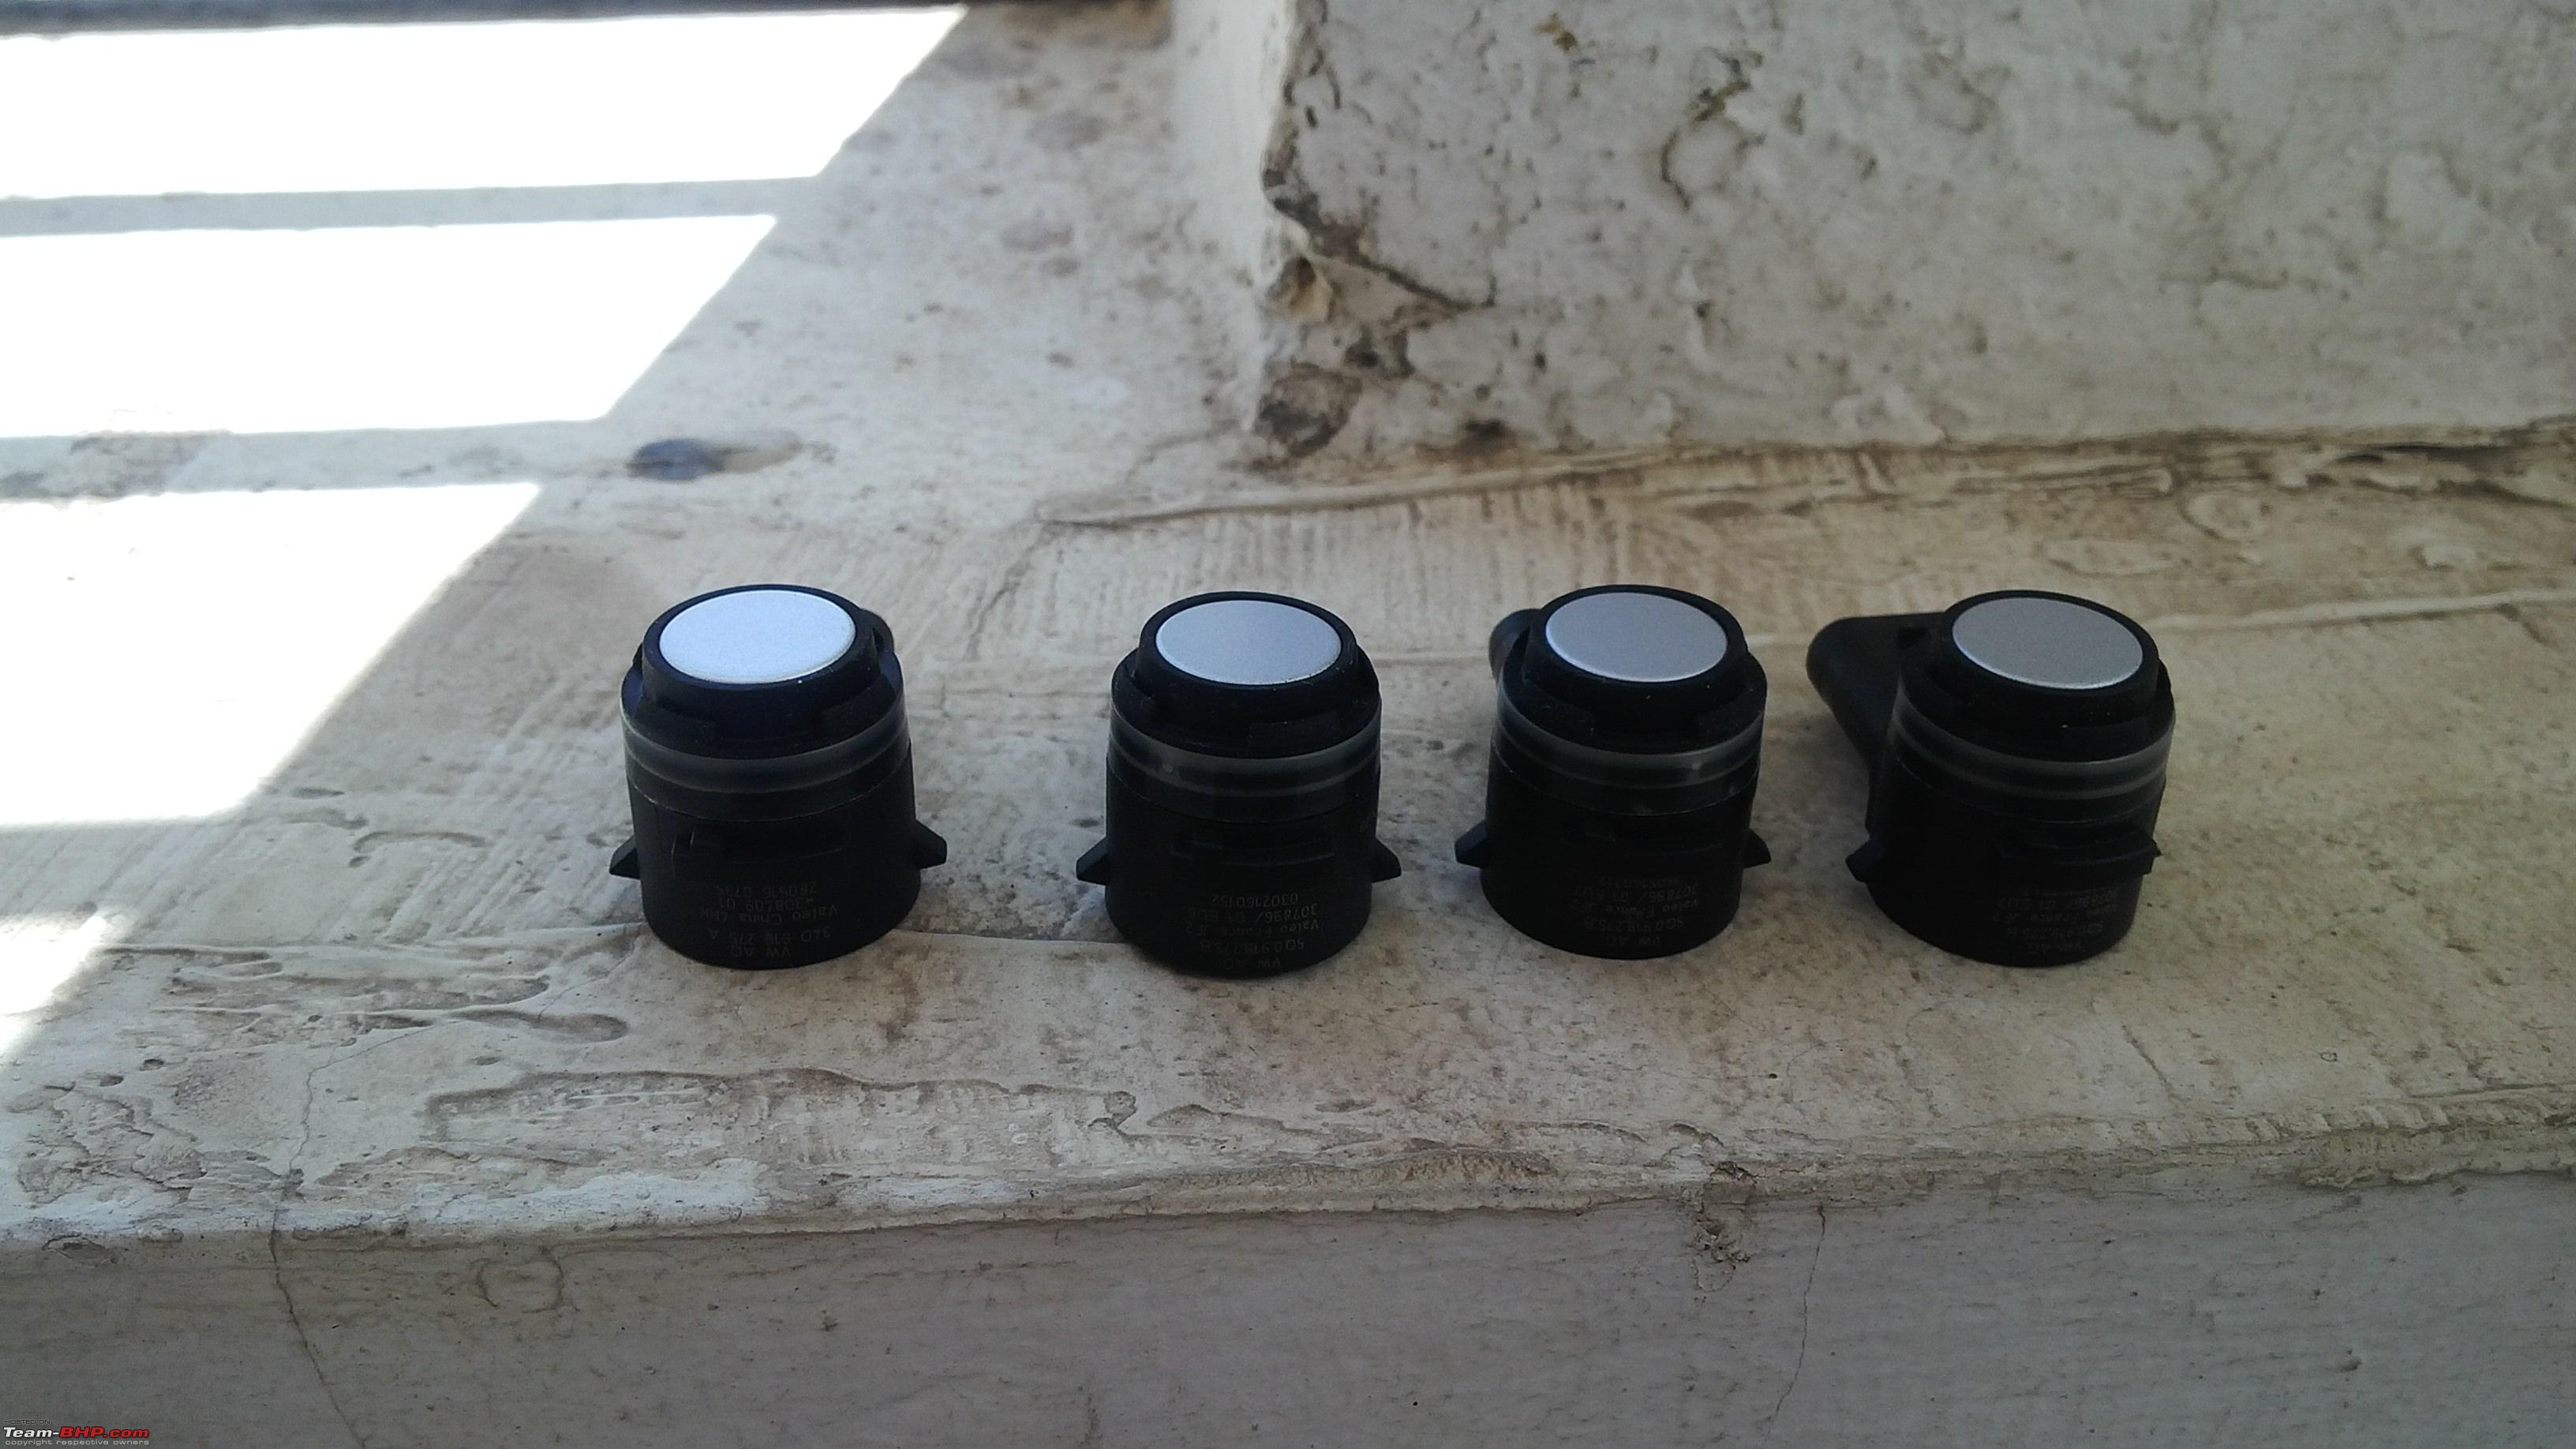
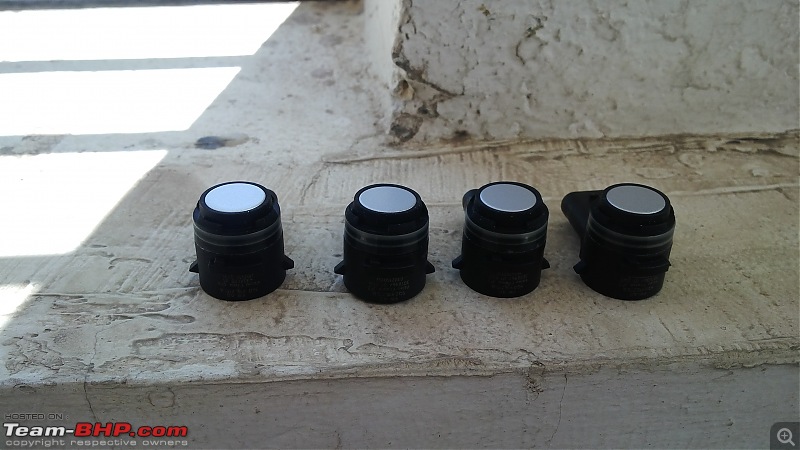
- 4 parking sensors if you have rear parking sensors and want to install 8K OPS, or you want to install4K OPS in Polo which does not have rear sensors.
- 8 parking sensors if you want to install 8K OPS in polo which does not have rear parking sensors.
- 4K/8K OPS module (PQ25).
- PDC switch (please mention car model as Polo 6R, since Polo 6C has different type of switch).
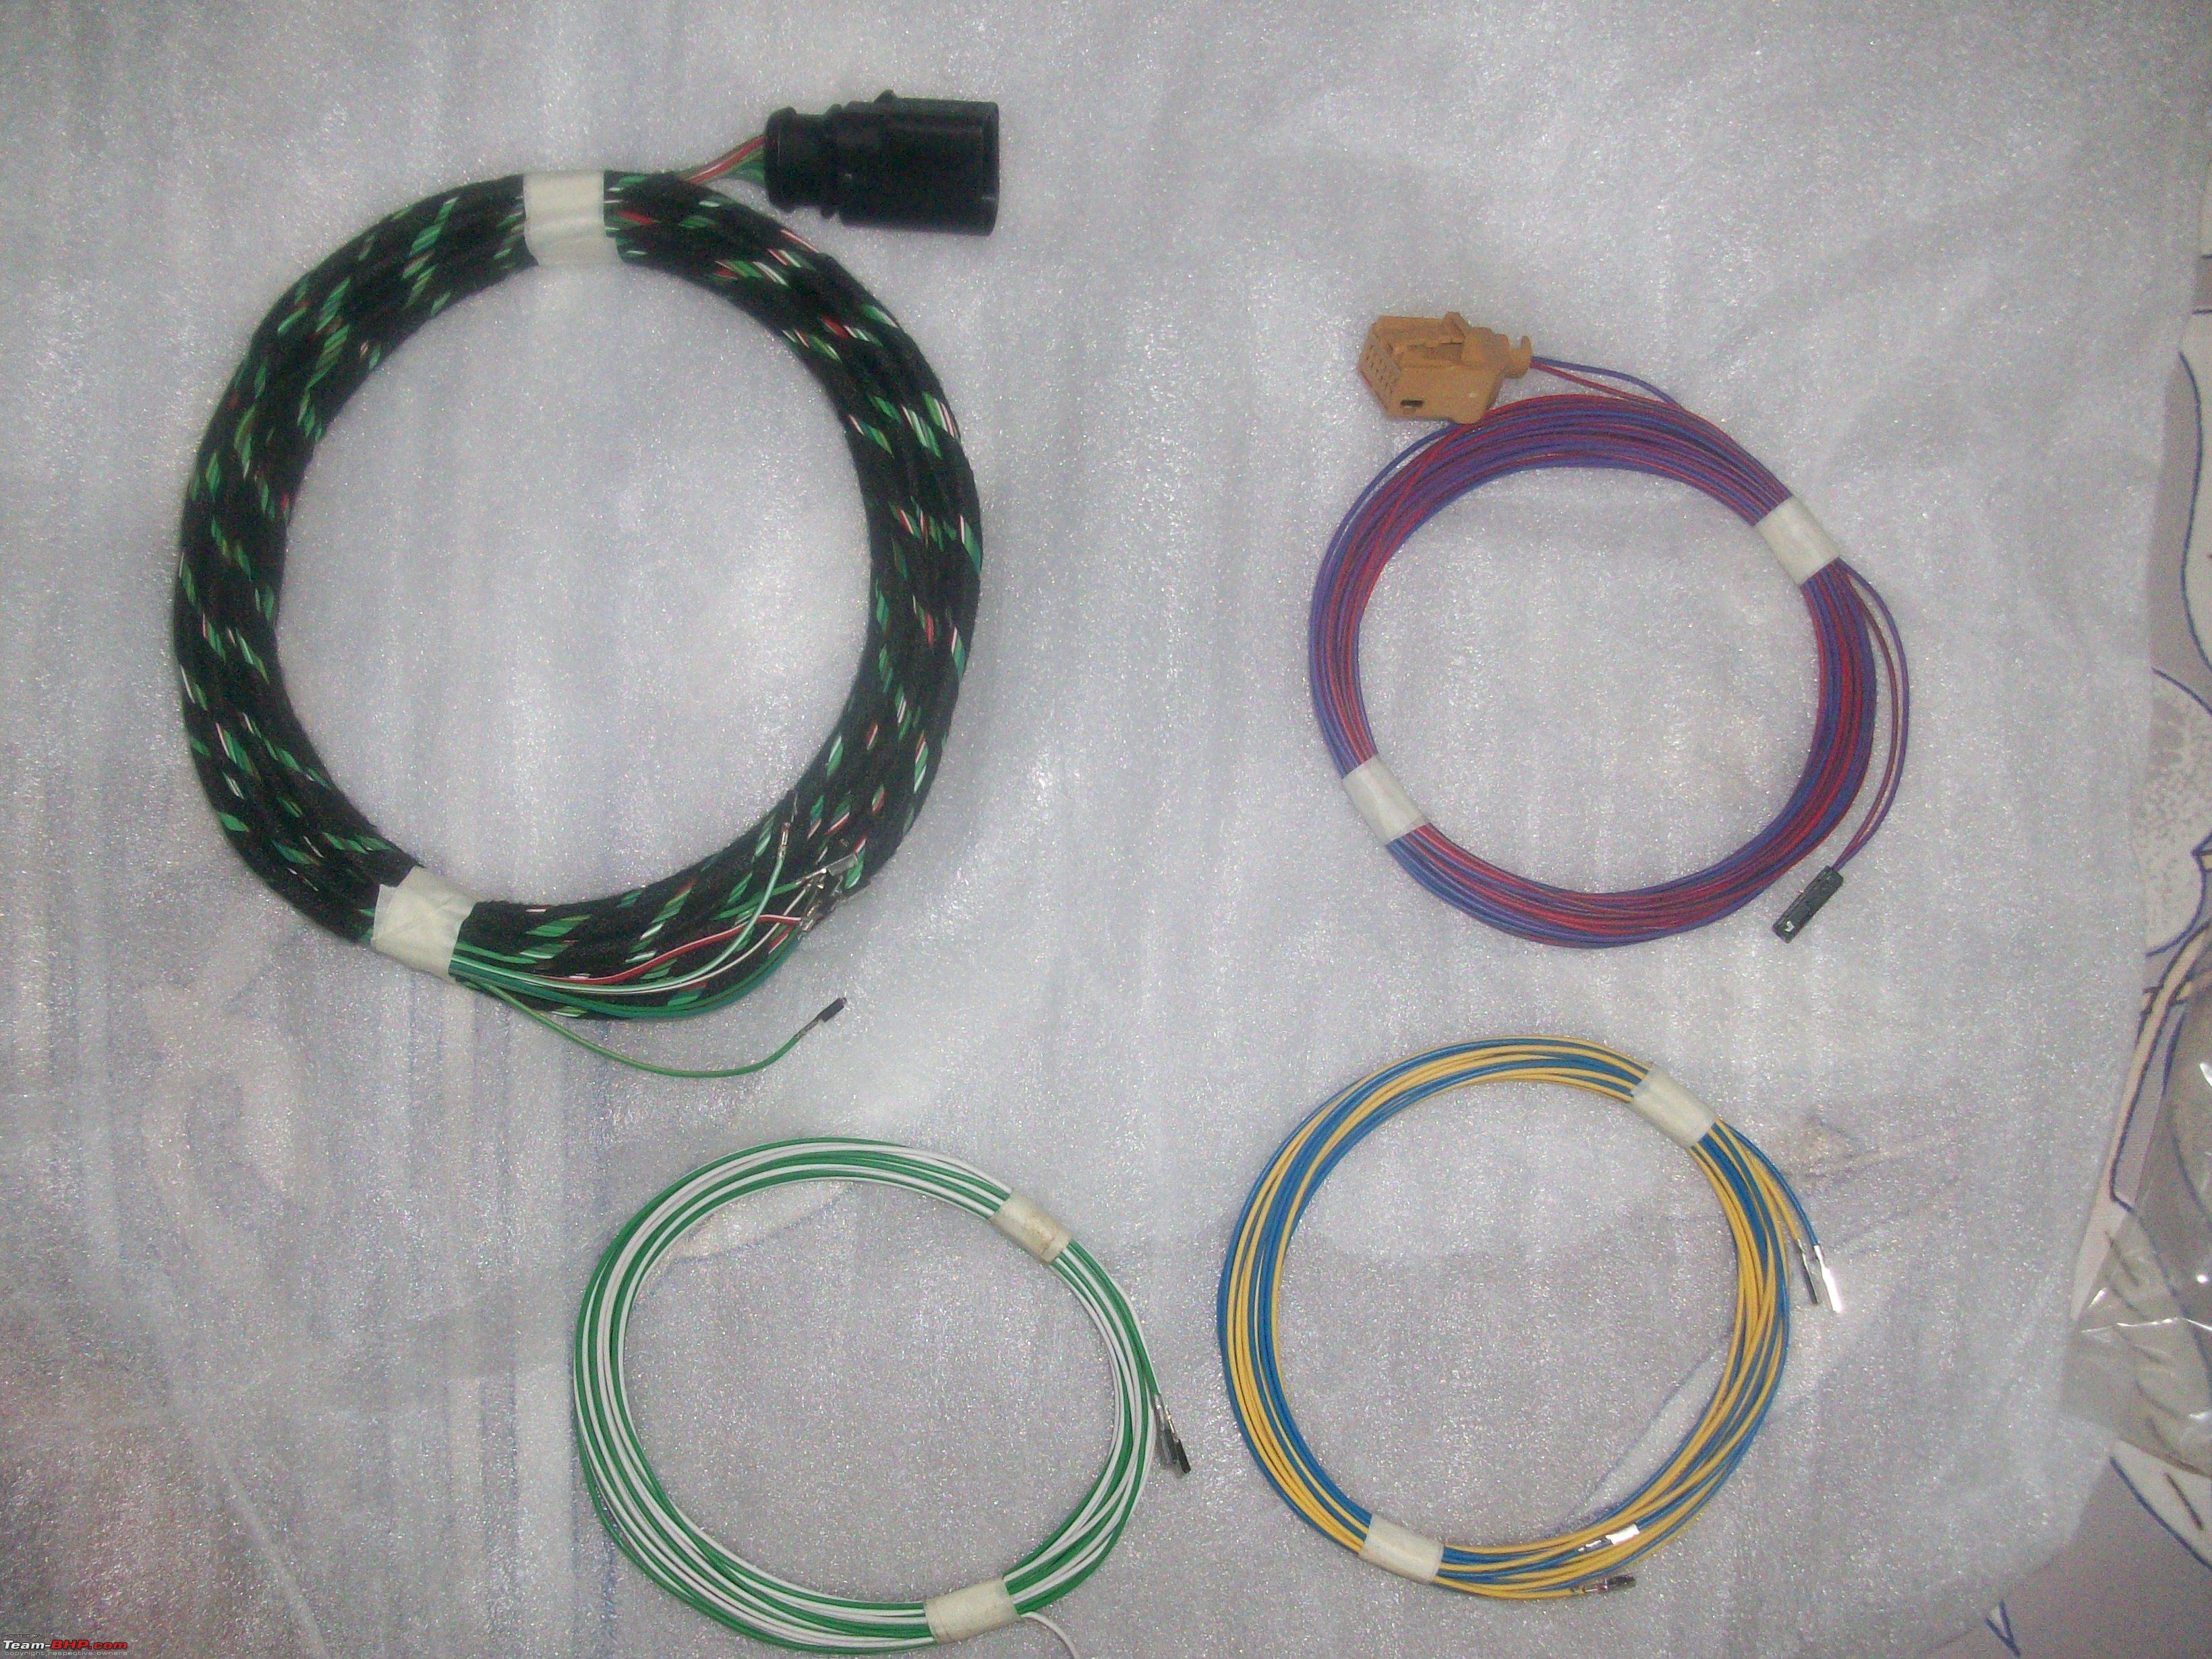
- Wiring required for connecting all components.
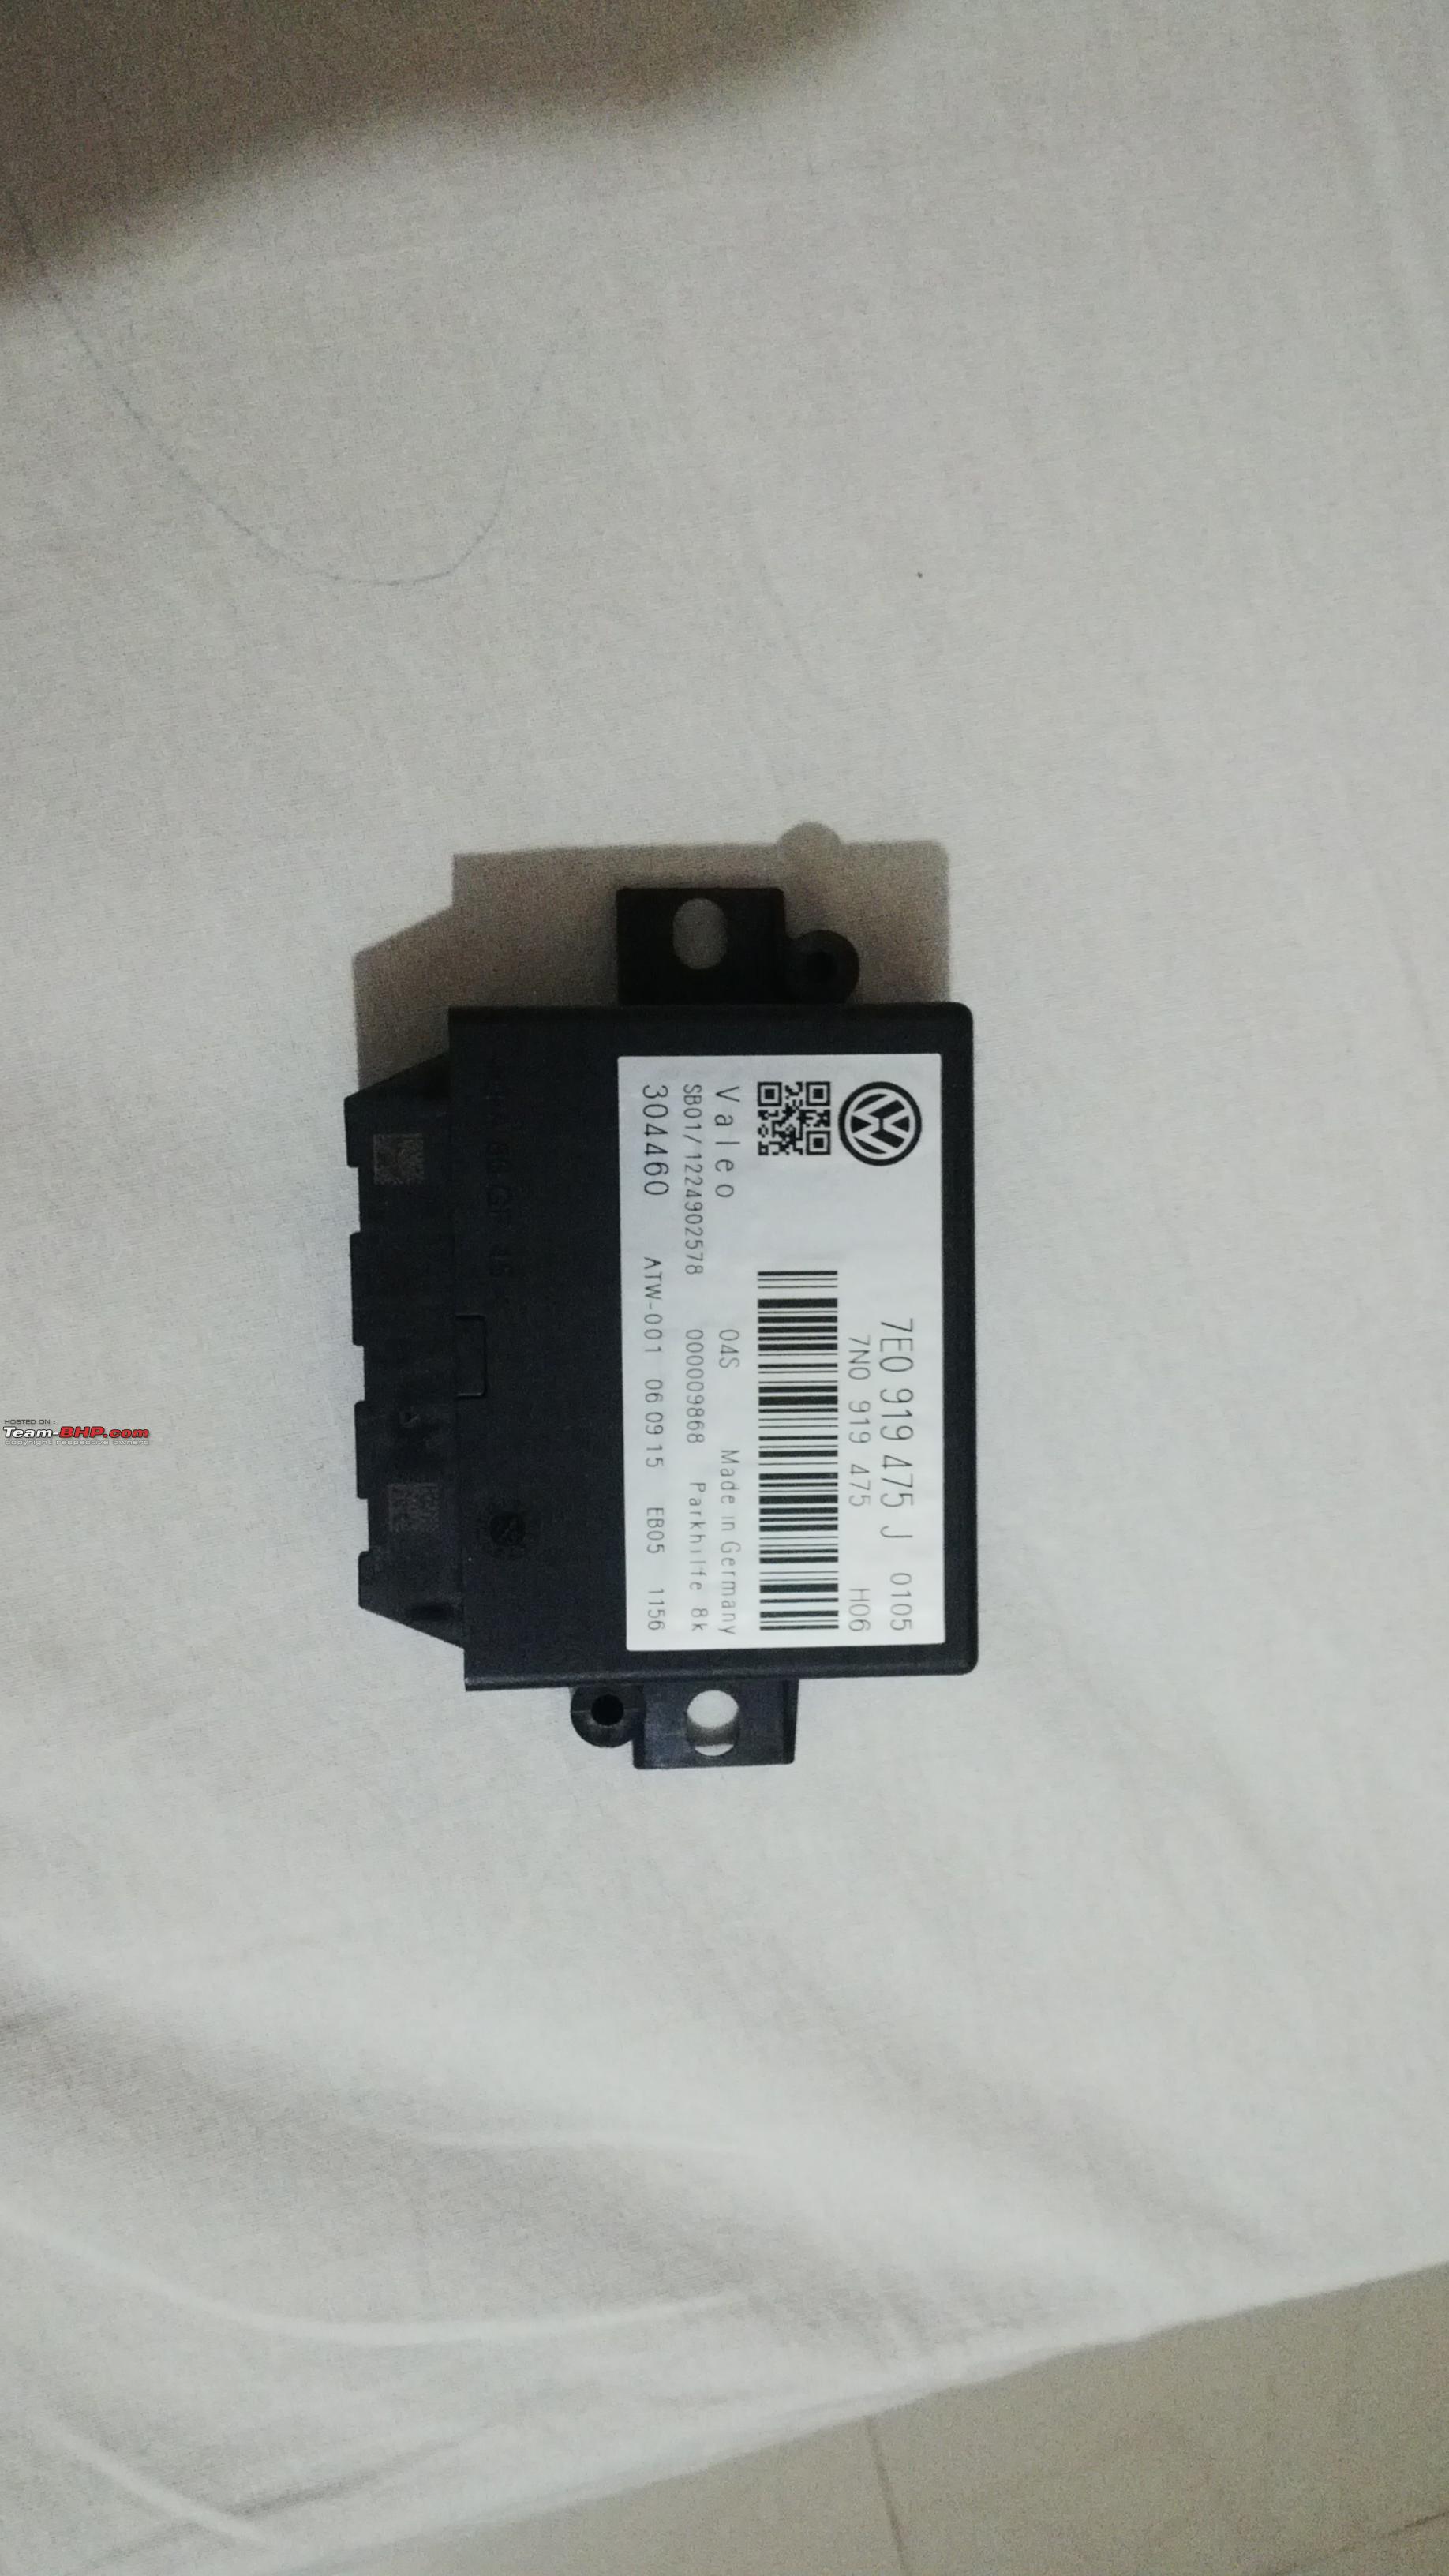
Here are few pictures of the components used by me

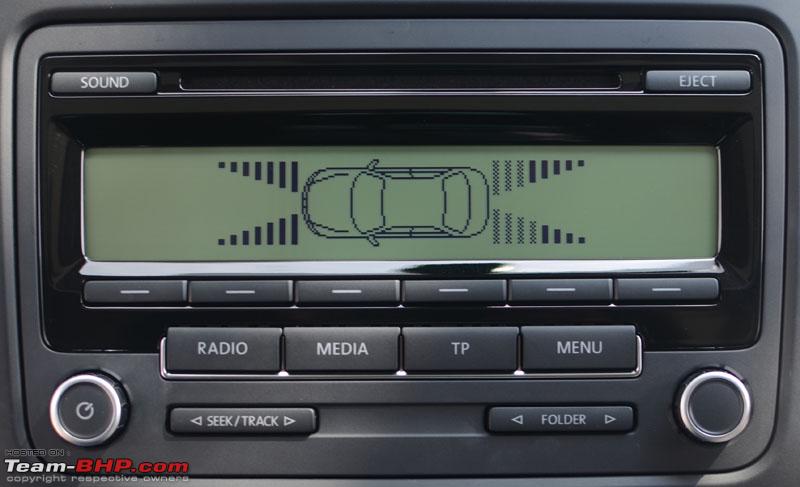
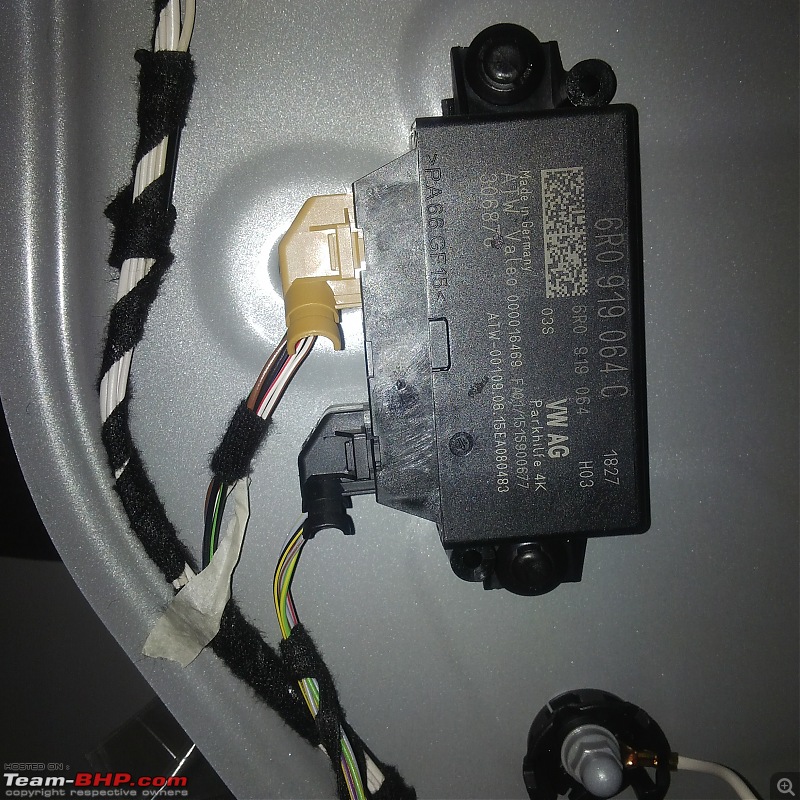
Following is the original parking aid module in my car, this only provides audio feedback
 Options to purchase components/kit
It would be easier to purchase complete kit instead of individual components. Both 4K and 8K OPS kits are available on Aliexpress and other websites. I am posting few examples but please feel free to search for same product on all sites to identify best price.
OEM Rear OPS 4K Park Pilot 4 Parking Sensors Kit For VW New Polo 6R PQ25 6R0 919 475
https://www.aliexpress.com/item/OEM-...208.8.5.WyHsS3
OEM PQ25 8K OPS Parking Sensor System PDC 8 Sensors for VW New Jetta 1.6T New Beetle
https://www.aliexpress.com/item/VW-N...208.8.4.zE7Vd1 Installation steps Installing/replacing OPS module:
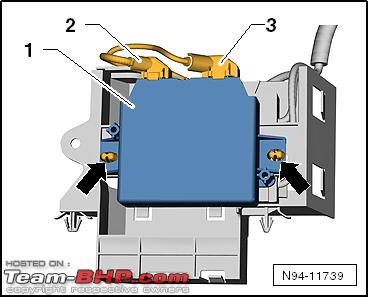
Vento: OPS module is located on the left side within boot. Remove luggage lock carrier trim and then remove clips holding the cladding on the left hand side. Install/replace OPS module.
 Polo:
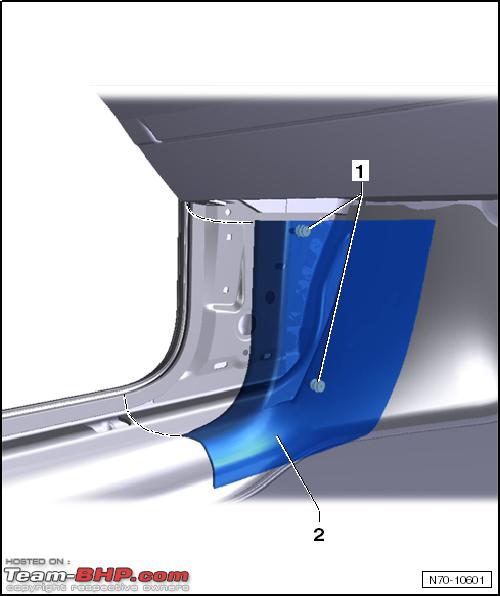
Polo: I don’t have access to polo hence I am posting reference from online workshop manual. According to manual its located on the right had side luggage compartment.
http://workshop-manuals.com/volkswag...trol_unitj446/ 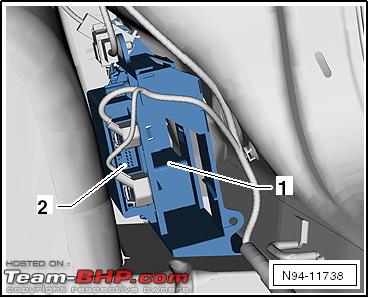
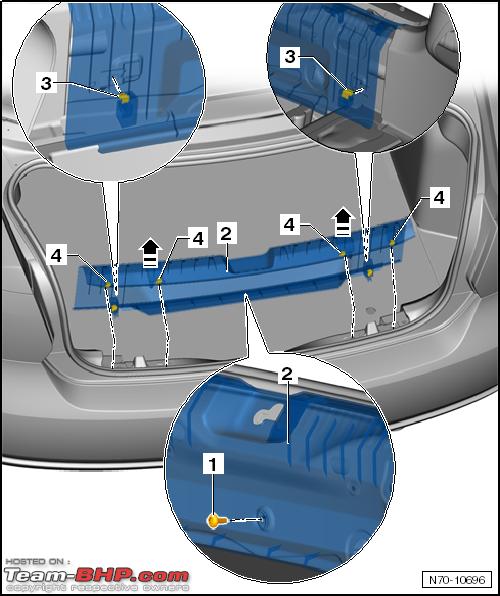
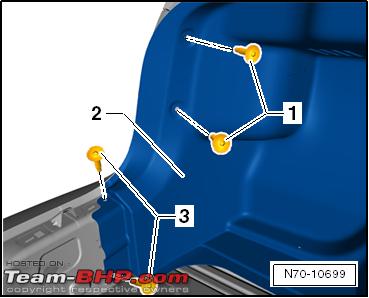
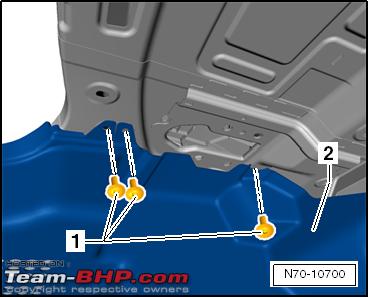
 Installing rear parking sensors:
Installing rear sensors requires removal of rear bumper , steps would be slightly different for Polo/Vento.
Installing front parking sensors:
This requires removal of front bumper and installation of sensors and has been covered in detail by Gannu over here
http://www.team-bhp.com/forum/long-t...ml#post3917698
Wiring from front sensors has to be routed from engine compartment to passenger cabin.. We can route this wiring from the following plug in case of automatic transmission.
http://www.team-bhp.com/forum/attach...ewall-plug.jpg
We need to use following option for manual transmission cars
http://www.team-bhp.com/forum/attach...l-img_2765.png http://www.team-bhp.com/forum/attach...l-img_9864.jpg
This wire then needs to be routed to OPS module installed in luggage compartment.
Installing rear/front buzzer
Rear parking buzzer is installed near OPS module and front buzzer can be installed on the passenger side behind glove compartment.
You will have to remove lower B pillar trim and passenger side trim to route all wires from front to the luggage compartment.
 Important points about painting parking sensors
To avoid malfunctions in the parking aid sensor, always observe the following when painting:
Painting new parts
- Maximum layer thickness 125 µm; a measurement of layer depth is absolutely essential following application of the paint
- Maximum hardening temperature 1 hour at 90°C
Painting used parts
- Remove old finish (sand) only as far as the primer
- Minimum layer depth of 5-10 µm must remain.
- Maximum layer thickness 125 µm; a measurement of layer depth is absolutely essential following application of the paint
- Maximum hardening temperature 1 hour at 90°C
Installing PDC switch
PDC switch to enable/disable OPS(only required with 8K) is installed in the dash panel. Following is the process to install this.
http://workshop-manuals.com/volkswag...of_dash_panel/  Wiring
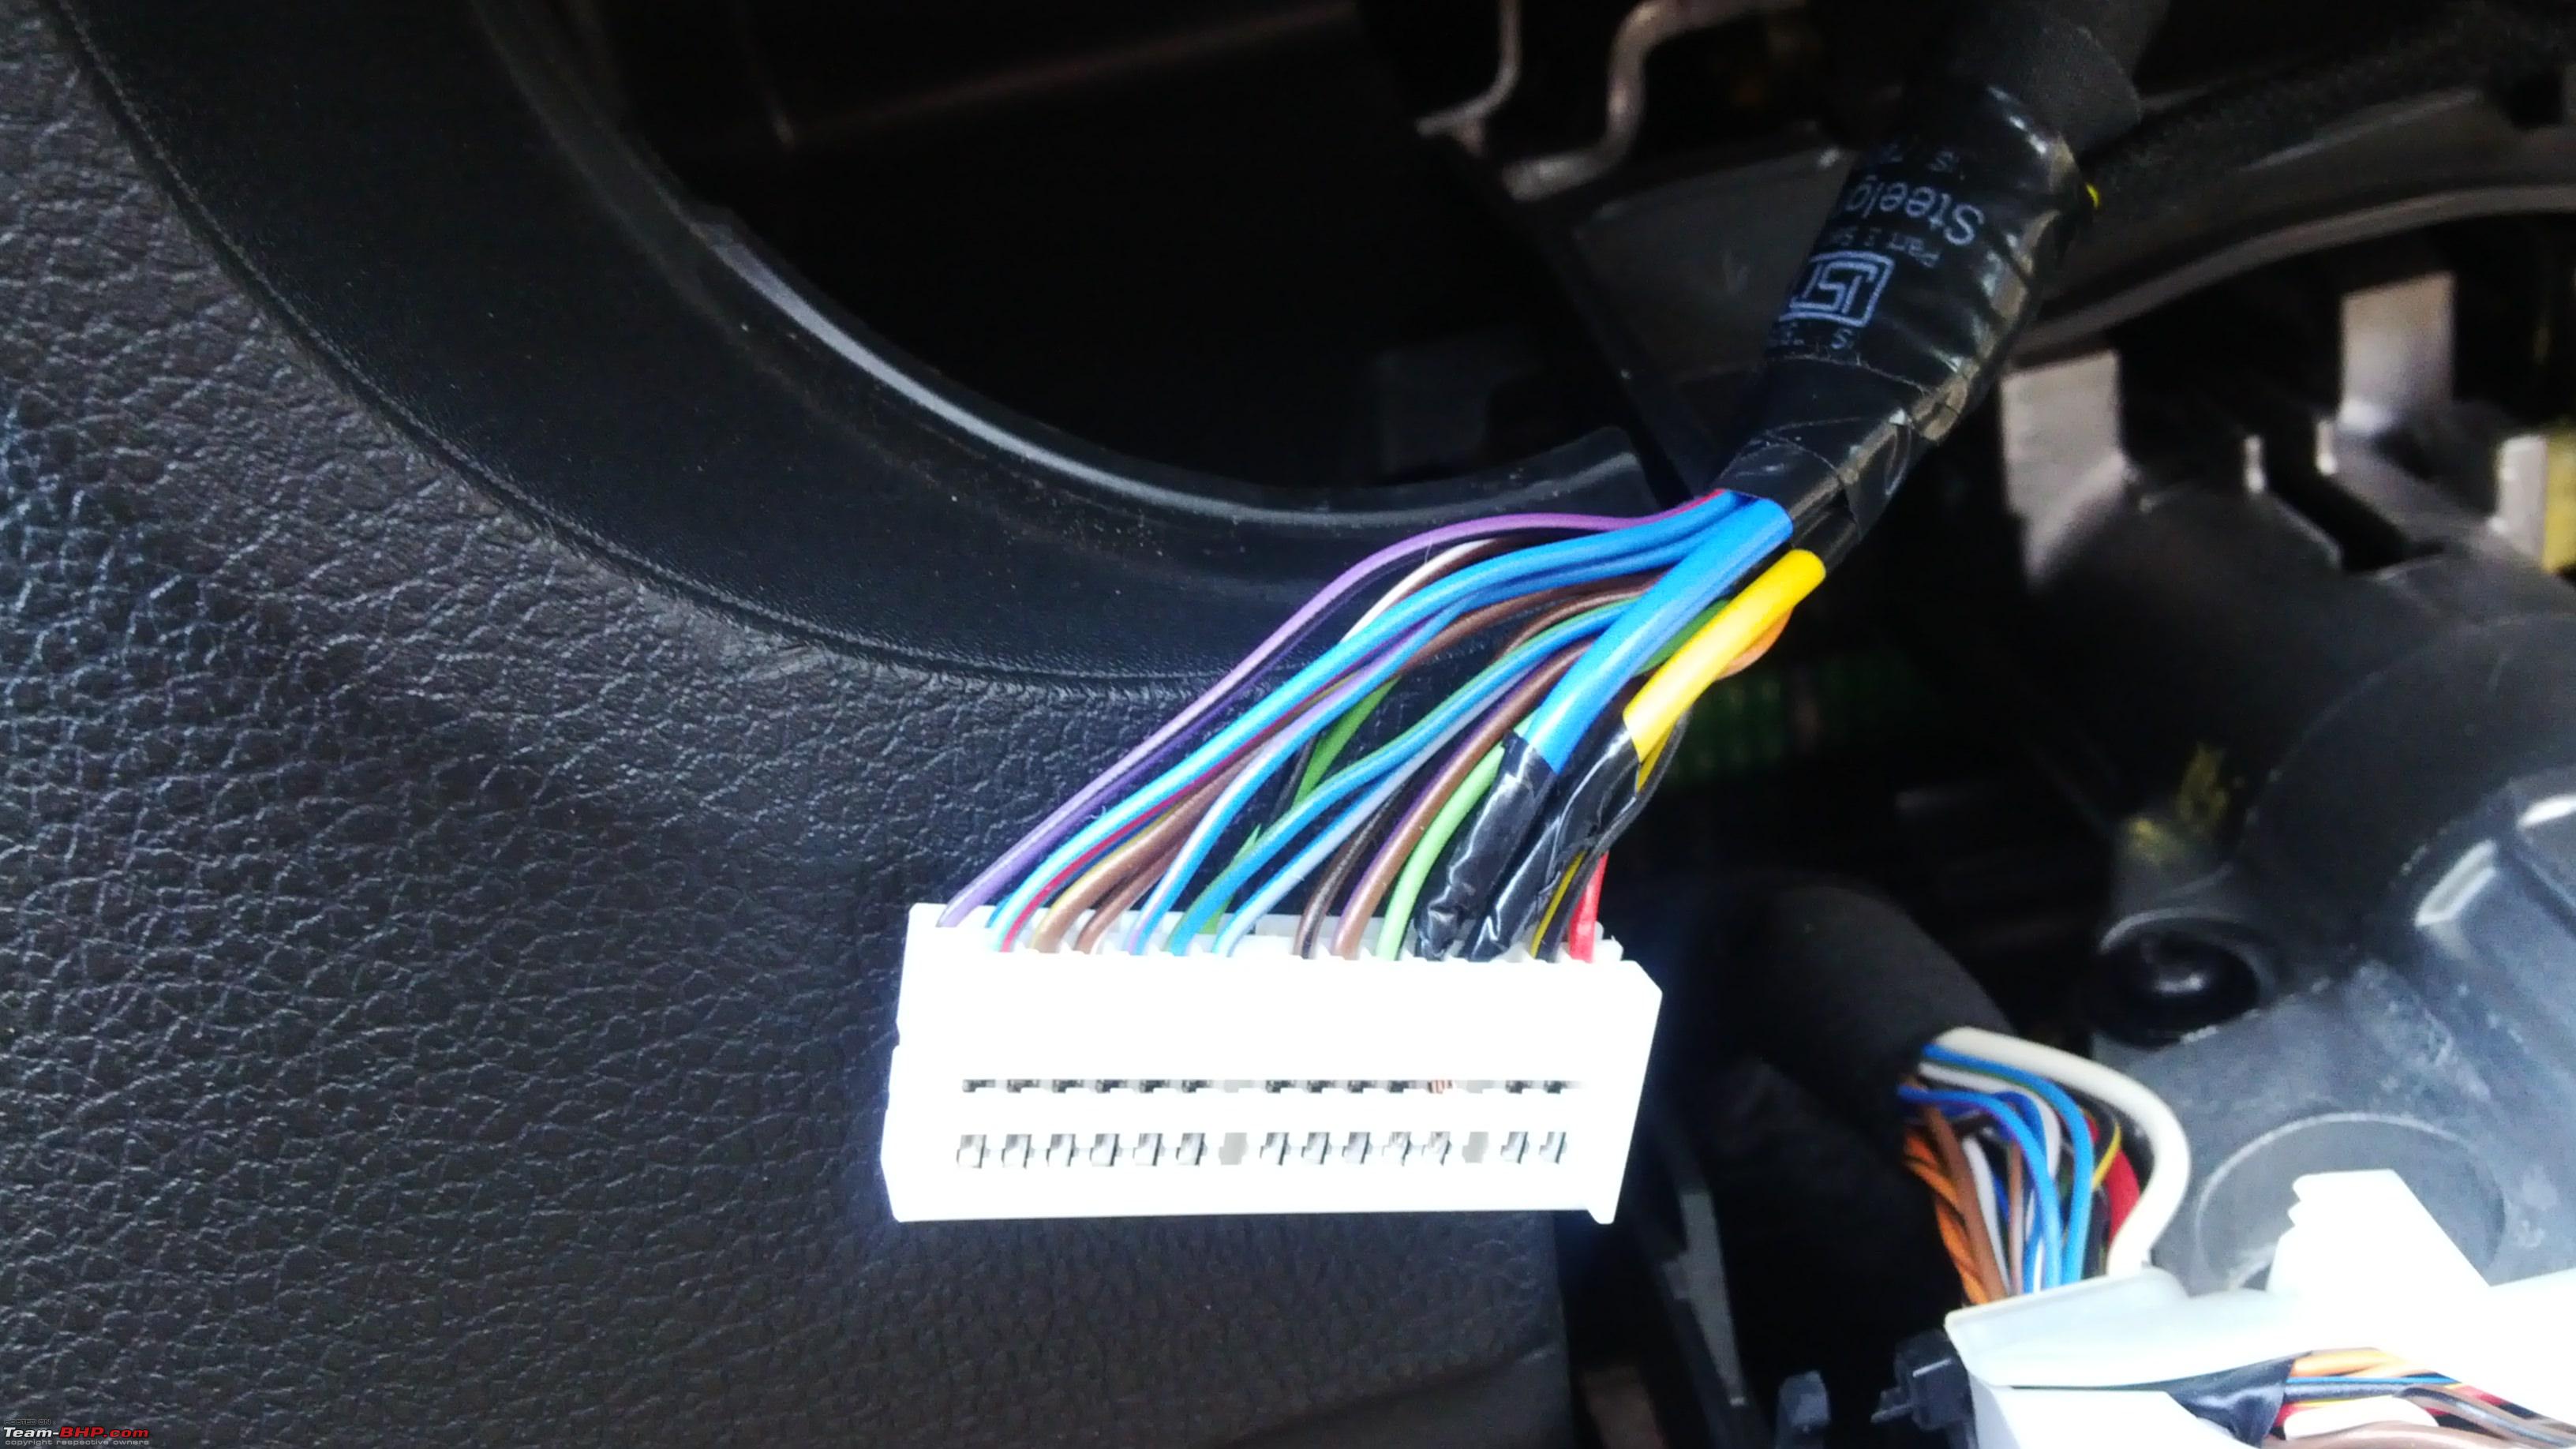
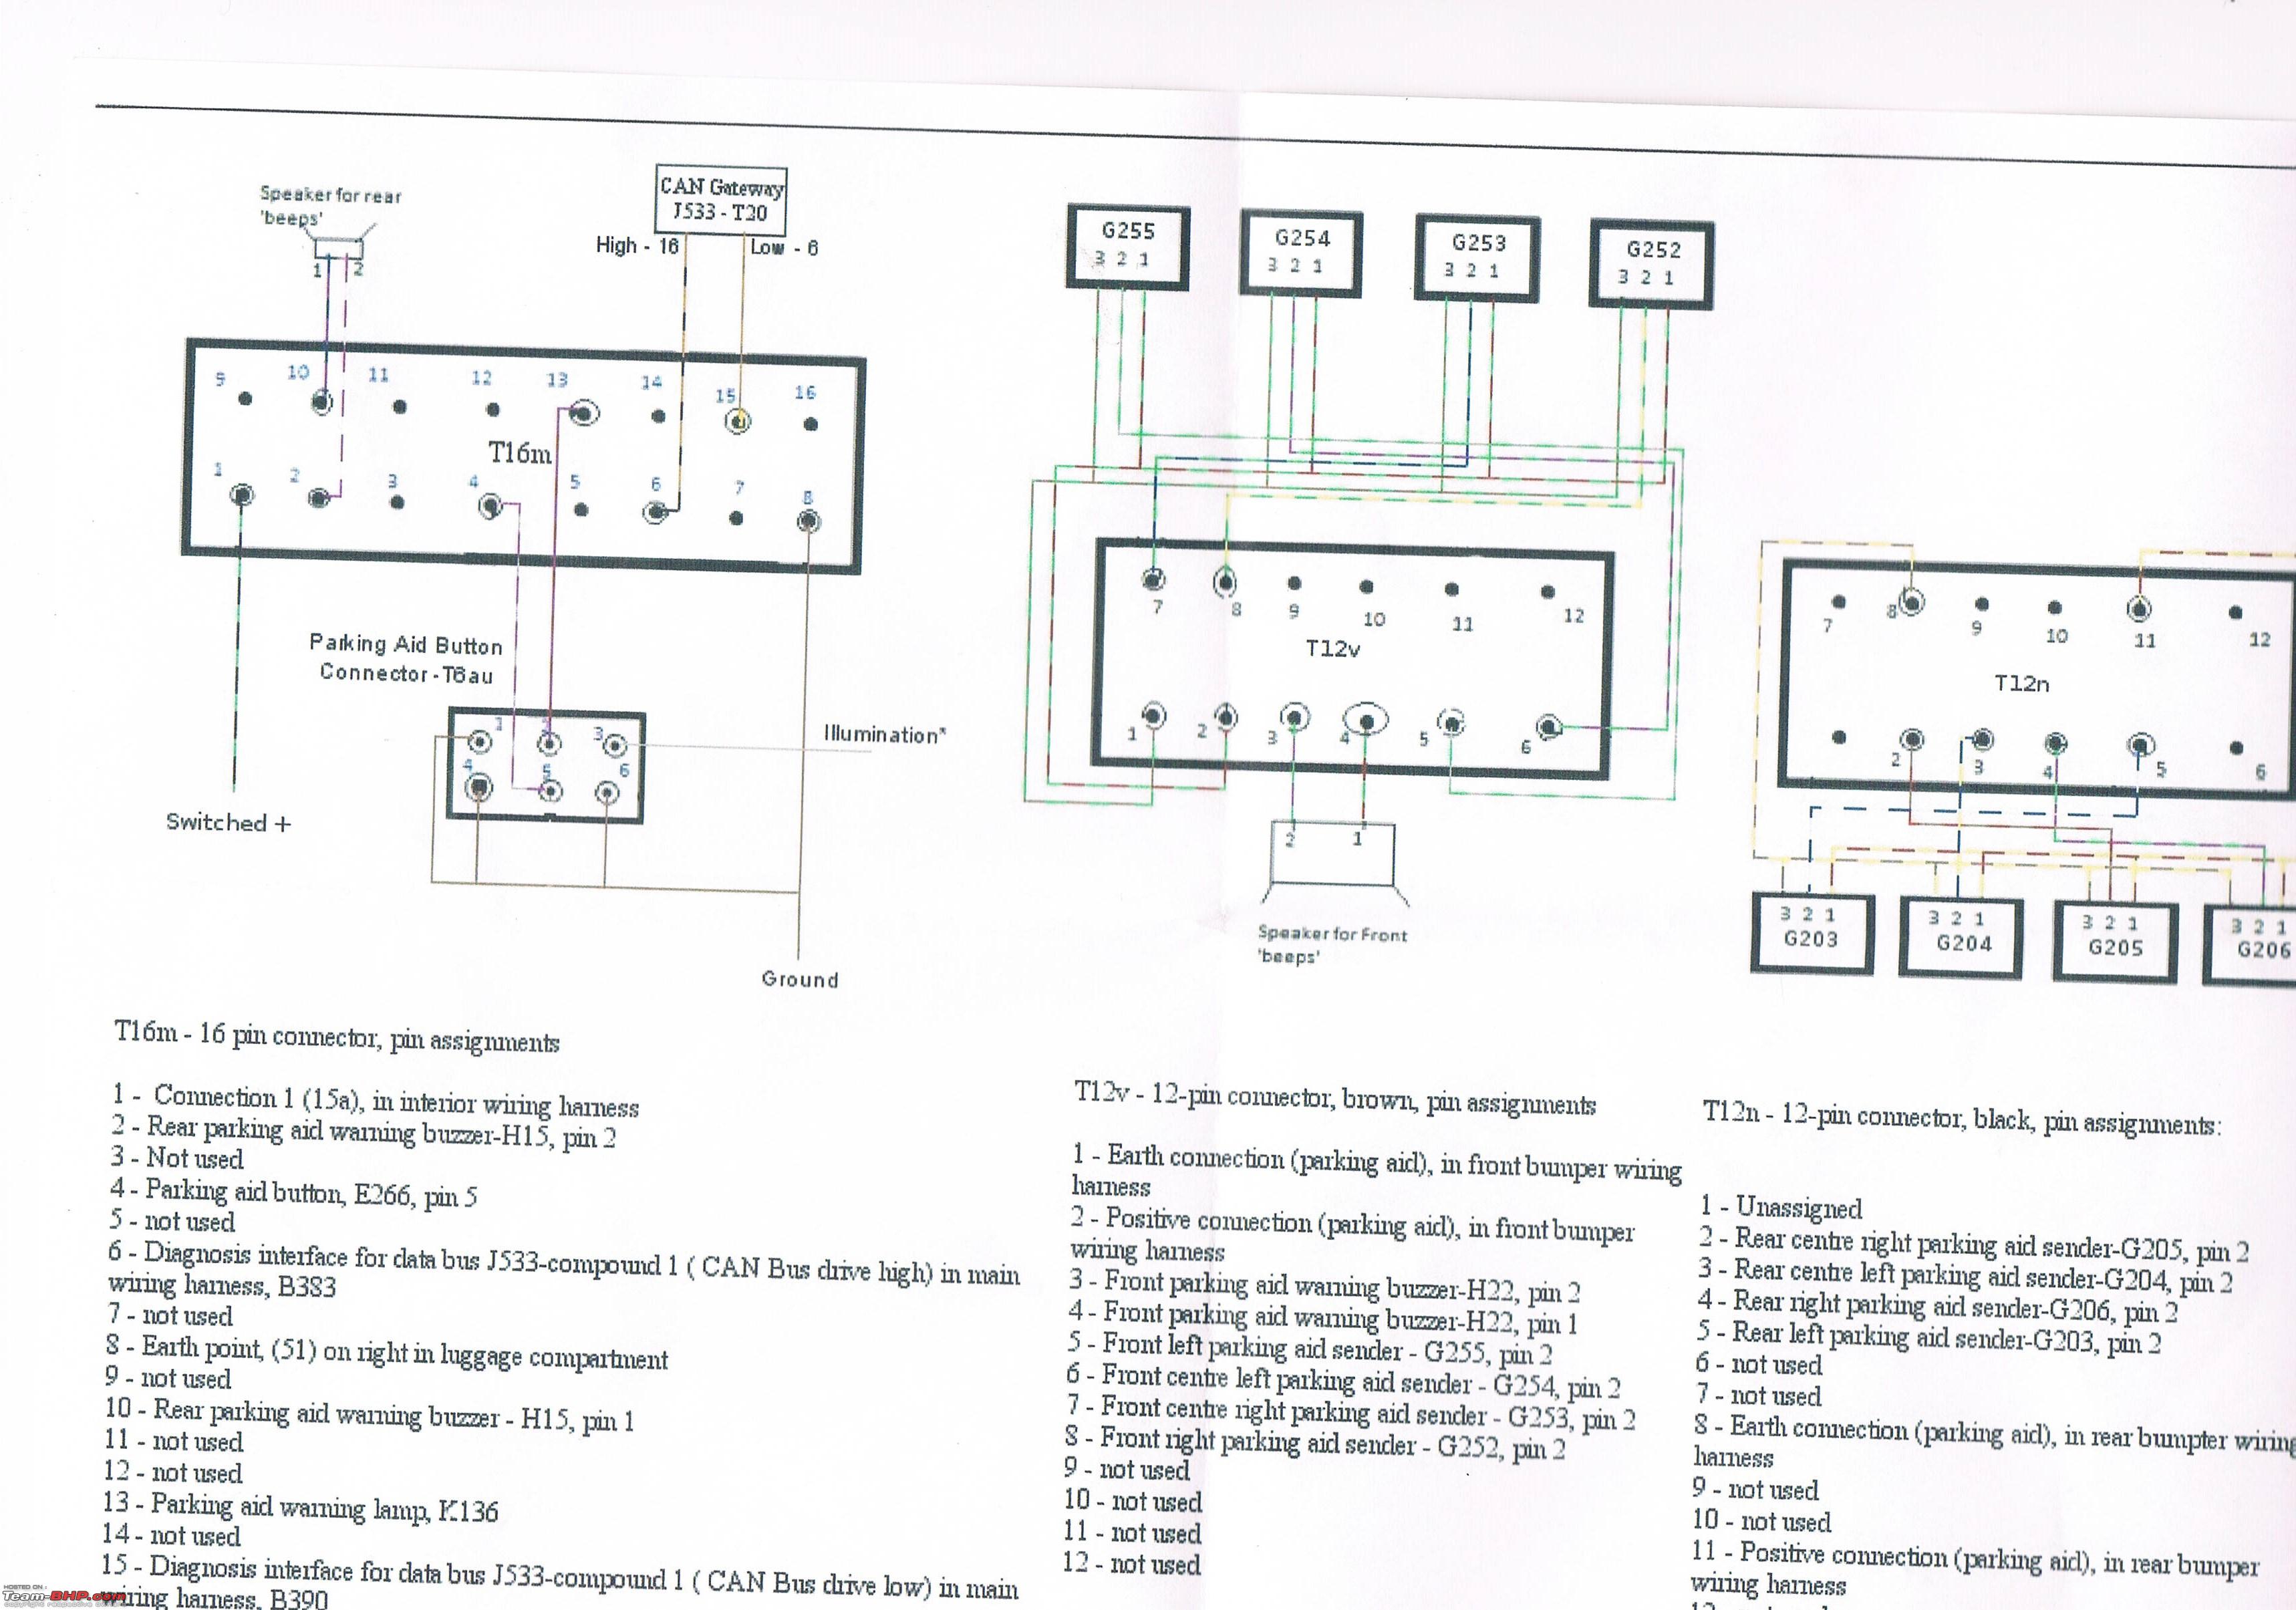
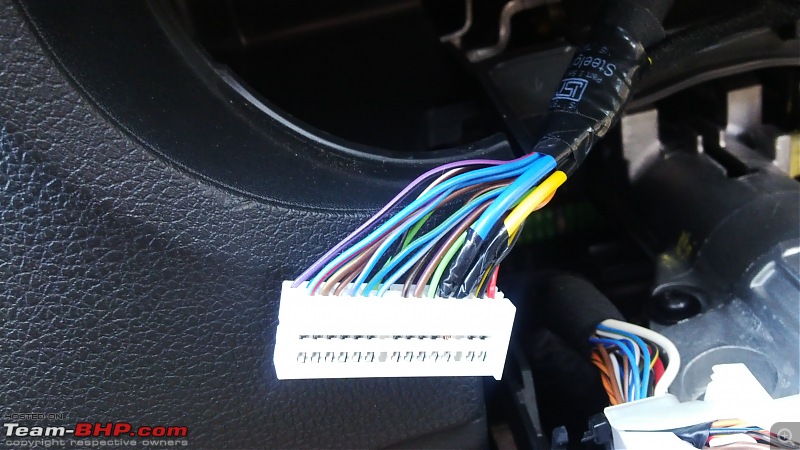
There are 3 connectors in OPS module.
16 pin orange connector RIGHT
12 pin orange connector (front sensors) CENTER
12 pin black connector (rear sensors) RIGHT
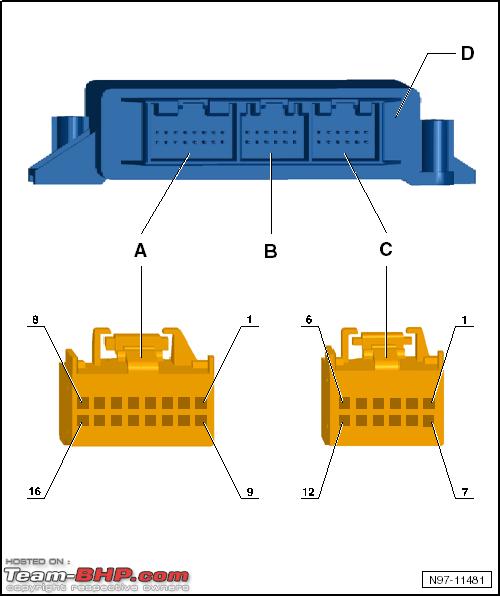 Pin assignment for T16 connector (orange)
T16/1 SB16b (Fuse Holder)
T16/2 Rear Buzzer T2/2
T16/3
T16/4 PDC Switch (on/off) T6a/5
T16/5
T16/6 (Can High) T73b/19 orange/black , T32/28
T16/7
T16/8 Ground
T16/9
T16/10 Rear Buzzer T2/1
T16/11
T16/12
T16/13 PDC Switch Backlight T6a/2
T16/14
T16/15 (Can Low) T73b/18 orange/brown , T32/29
T16/16
Note: You can connect to CANBUS powertrain using blue connector for instrument cluster (T32) instead of BCM (T73b).

I have tried to include as much detail as possible in this guide and I hope this is useful for other members planing similar retrofit.
Regards.


 4th July 2017, 02:35

 (35)
Thanks
(35)
Thanks