Here's a small oil change DIY write-up for the BMW E90 (also for E91, E92, E93) chassis.
BMW USA gives free oil changes during the warranty period of 4 years / 50,000 miles (@ 85,000 km).
The interval between oil changes is 1 year or 15,000 miles (@ 25,000 km).
Additional (customer requested) oil changes are charged.
If you feel like saving some money, have an hour or so free on a weekend and want to do an oil change in between the recommended intervals, then here's how you can go about it.
I'm not sure what the service intervals are in India, but the procedure wouldn't change.
[The oil spec
might be different for Indian cars but from what I know it's the same - but better to confirm with the local BMW dealer.]
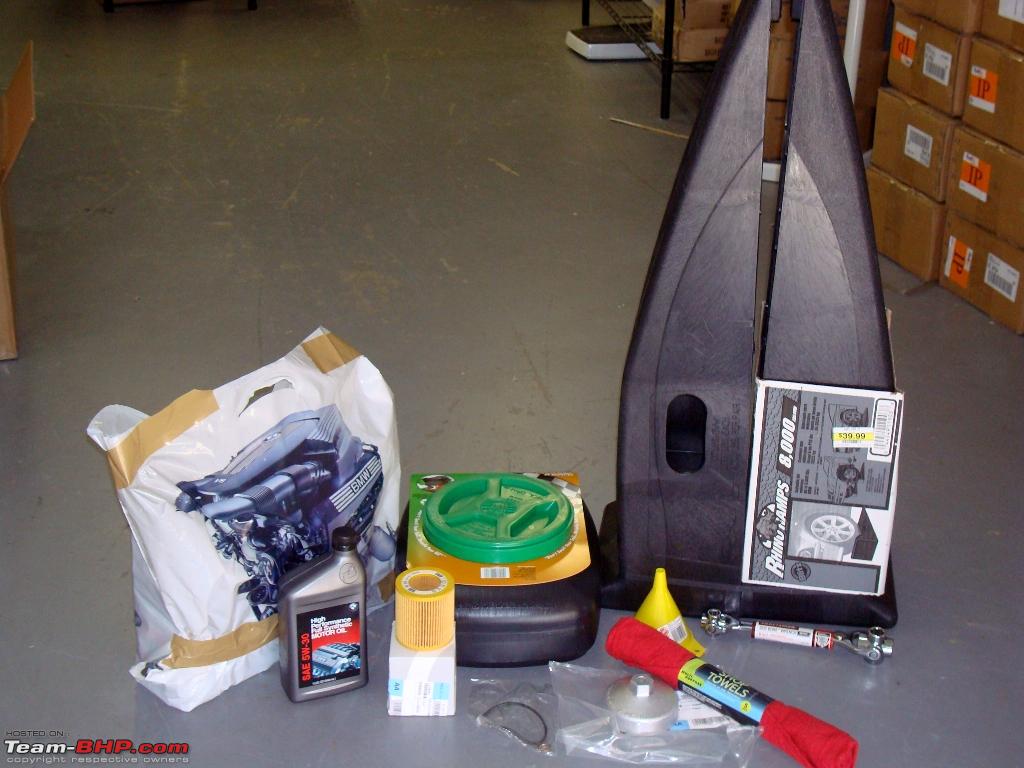
Here's what you'll need:
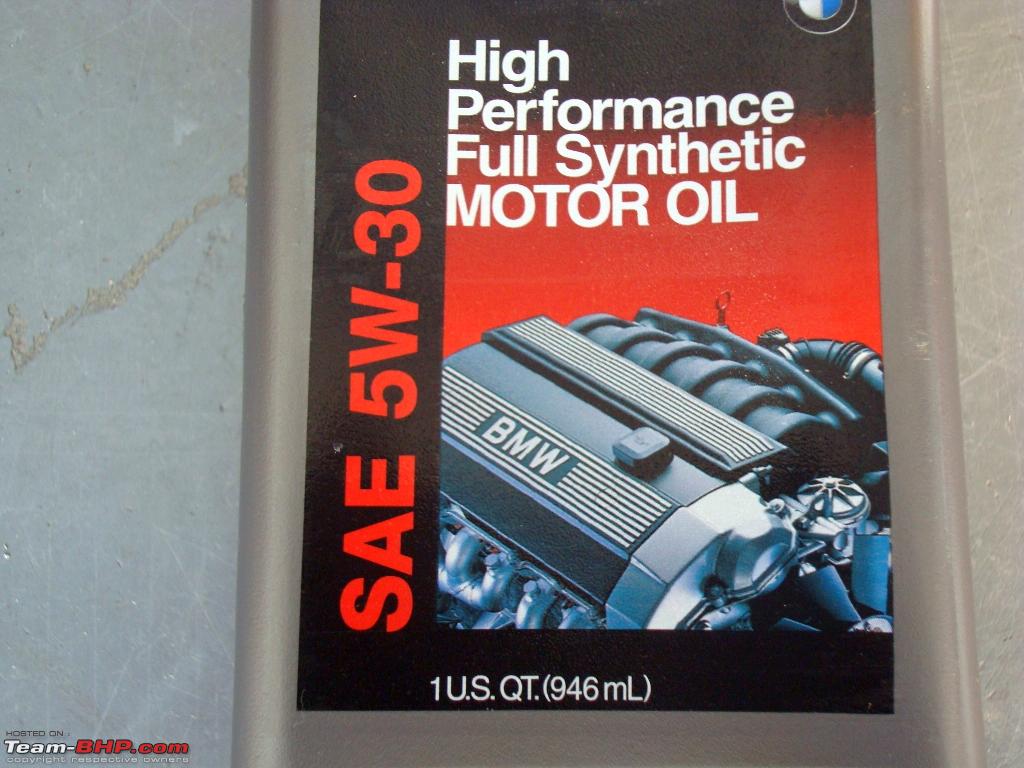
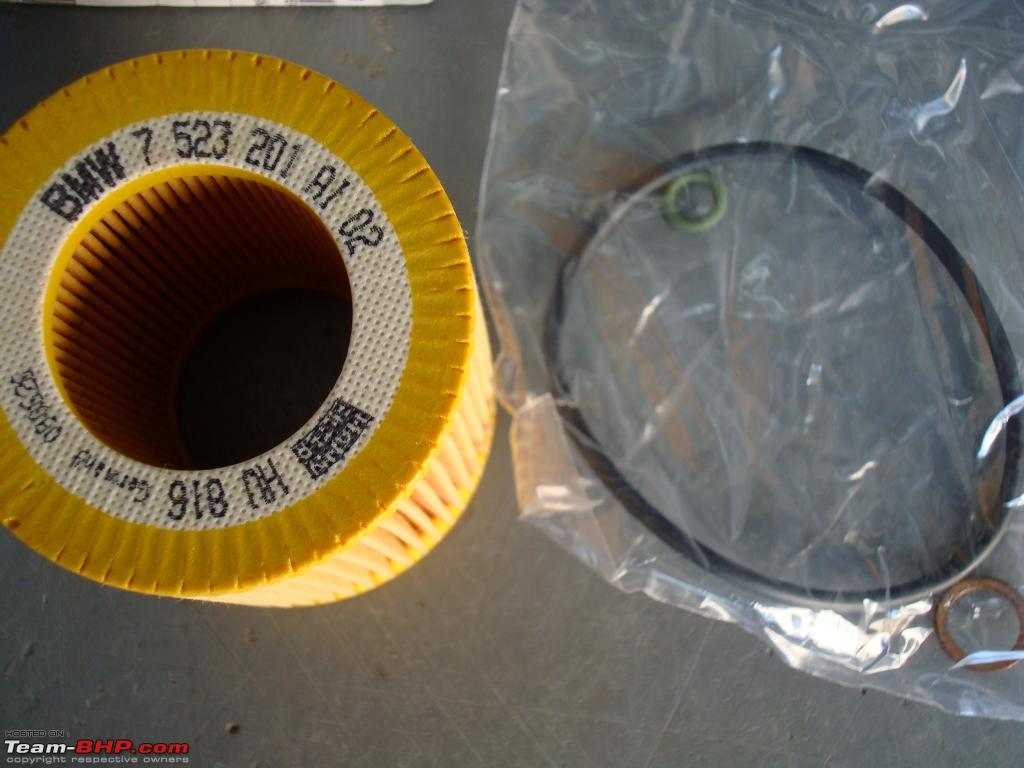
- Fully Synthetic Oil [6.9 quarts (@ 6.6 litres / 7 bottles)] - BMW High Performance Full Synthetic 5W30* (BMW P/N: 07 51 0 017 866), Mobil 1 0W40, or Castrol Syntec European Formula 0W30.
- Oil Filter (BMW P/N: 11 42 7 566 327) - Comes with 2 o-ring washers (1 big black, 1 small green), and 1 copper crush washer.
- Oil Filter Wrench (BMW P/N: 83 30 0 493 936) - Some people can do without this but I found it useful. You'll also need a 29 mm socket (1/2" drive wrench) to you use with it. I used a 1-1/8" socket.
- Ramps (or a lift jack with jack stands).
- Oil Drain Pan.
- 17 mm socket (1/2" drive wrench).
- Rags / paper towels.
- Disposable rubber gloves.
- Funnel.
- Plastic fork.
- Coin (1 quarter / Re. 1)
I initially bought a multi-socket dog-bone wrench / spanner but my oil drain bolt was just too tight so I had to return it and use a normal 1/2" ratchet drive.
[PICTURE 1 - Parts]  [PICTURE 2 - Oil quart]
  [PICTURE 3 - Oil Filter]
*The BMW Full Synthetic is known to be a re-labeled Castrol - if you know which one, you can use that one instead.
Note 1: Motor Oil is corrosive, poisonous to you and harmful for the environment so
please use gloves while handling it.
Don't dump used oil down the drain.
Most auto-parts chains and repair shops have oil recycling drums that'll let you dump your oil for free. I'm sure such facilities are available in India too - best choices would be a local petrol station, or the corner mechanic.
Note 2: Turn clockwise to tighthen it, anticlockwise to loosen ->
righty tighty lefty loosey.
Note 3: Don't over-tighten your bolts. Some of the bolts will have markings on them - all you have to do is make sure the markings are aligned when you re-tighten.
Note 4: An oil change is best performed when the engine is warm or at operating temperature so drive around for a few minutes before you begin.
Now begin:
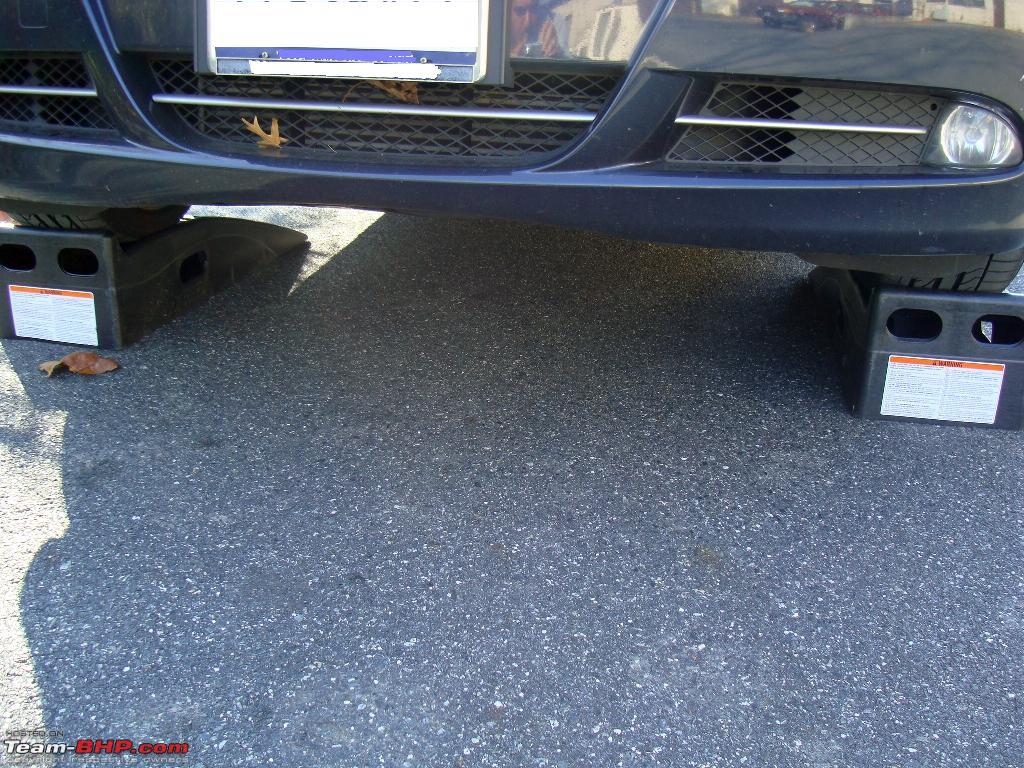
Get your car up on the ramps (I bought 8000 lb / 3629kg Rhino Ramps). If you have the Sport Package, the aero rubber-flap in front of the wheels will brush against the ramps and push them forward if the ramps are on a smooth surface or on concrete.
Rubber mats placed below the ramp will prevent this slippage. I did my oil change on a tarred road - no slipping.
[PICTURE 4 - On ramps] 
Set the hand-brake and put the car in gear (for manual) / Park (for auto).
Place a wheel chock / wedge behind one of the rear wheels as an additional protection.
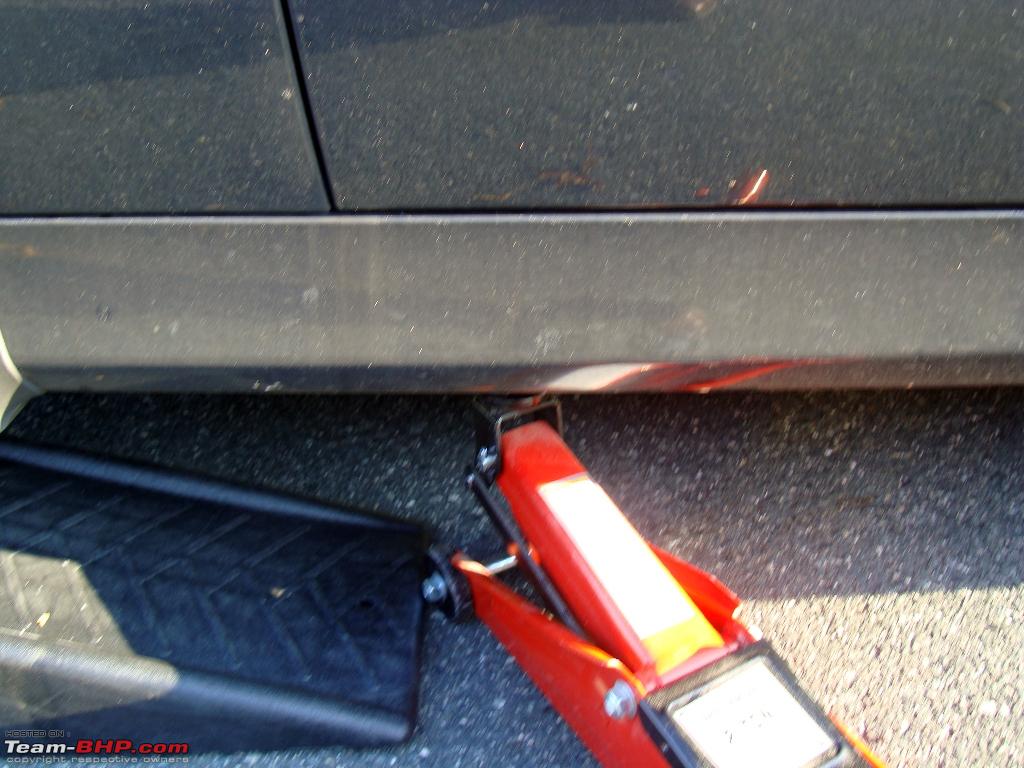
I placed a chock behind one of the front wheels and put up a hydraulic lift jack under the other side jacking point, as an additional support - just enough so as not to raise the car. Don't use a stone as chock.
[PICTURE 5 - Chock - Front Right wheel]  [PICTURE 6 - Hydraulic Jack - Left Front wheel]
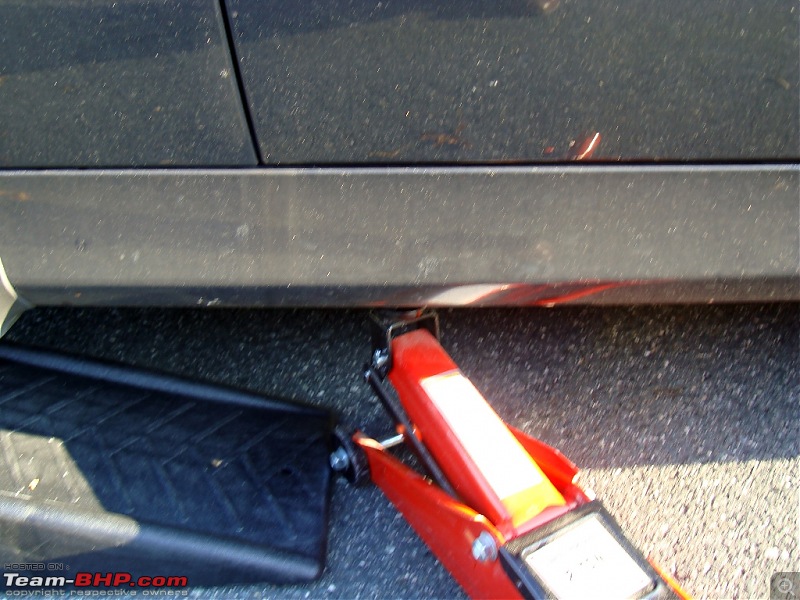
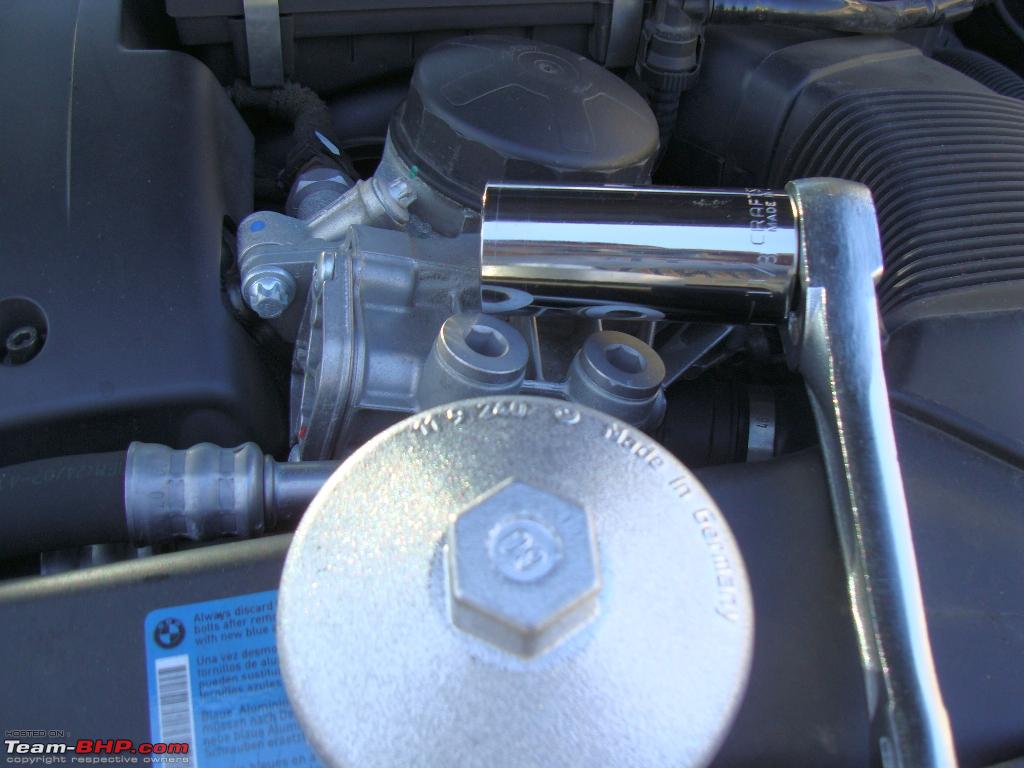
Open the bonnet (hood) and undo the Oil cap. Be careful as the engine is hot.
Now's a good time to get those nice tight disposable gloves on and loosen the Oil Filter housing - don't remove it just yet.
I used the Oil Filter Wrench with a 1-1/8" socket mated to a 1/2" drive. A 29 mm socket is what you need.
You can also remove it with your hands and a couple of rags (it's hot!) depending on how tightly it was torqued perviously.
If you can make out those blue markings on the Oil Filter housing, you have to match those when you re-tighten.
[PICTURE 7 - Oil Filter Wrench] 
Now get under the car.
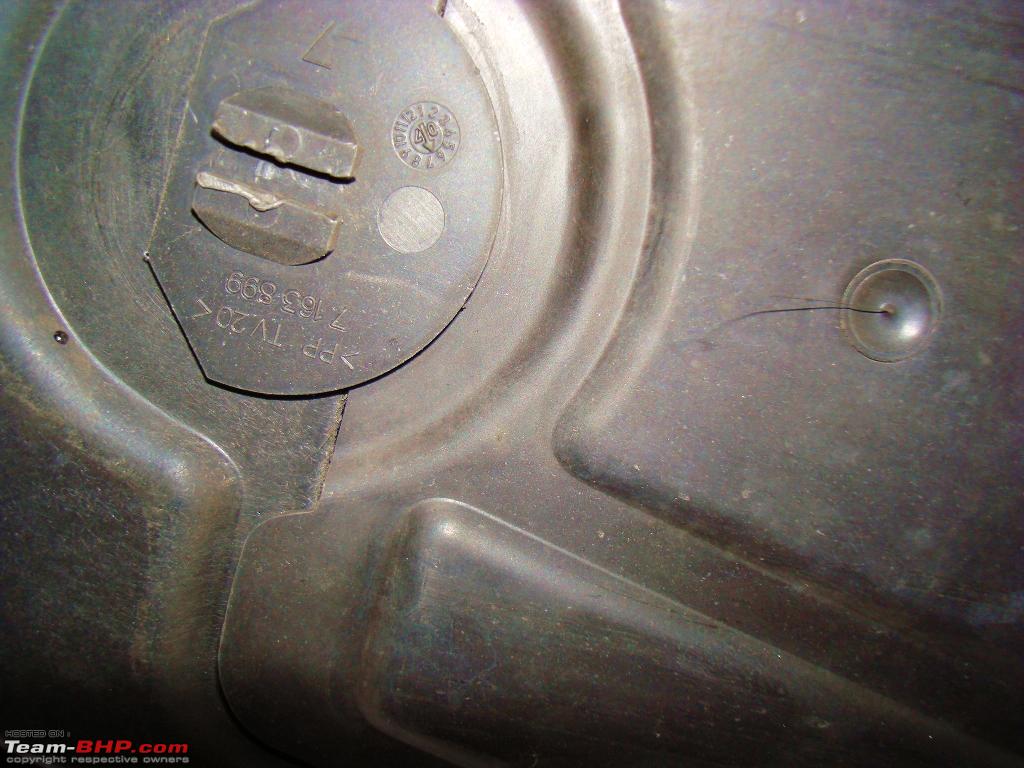
Open this hatch / trapdoor using your coin. It's just behind the front-center jack point. Remove the hatch so it doesn't interfere when you're undoing the drain bolt.
[PICTURE 6 - Trapdoor / hatch] 
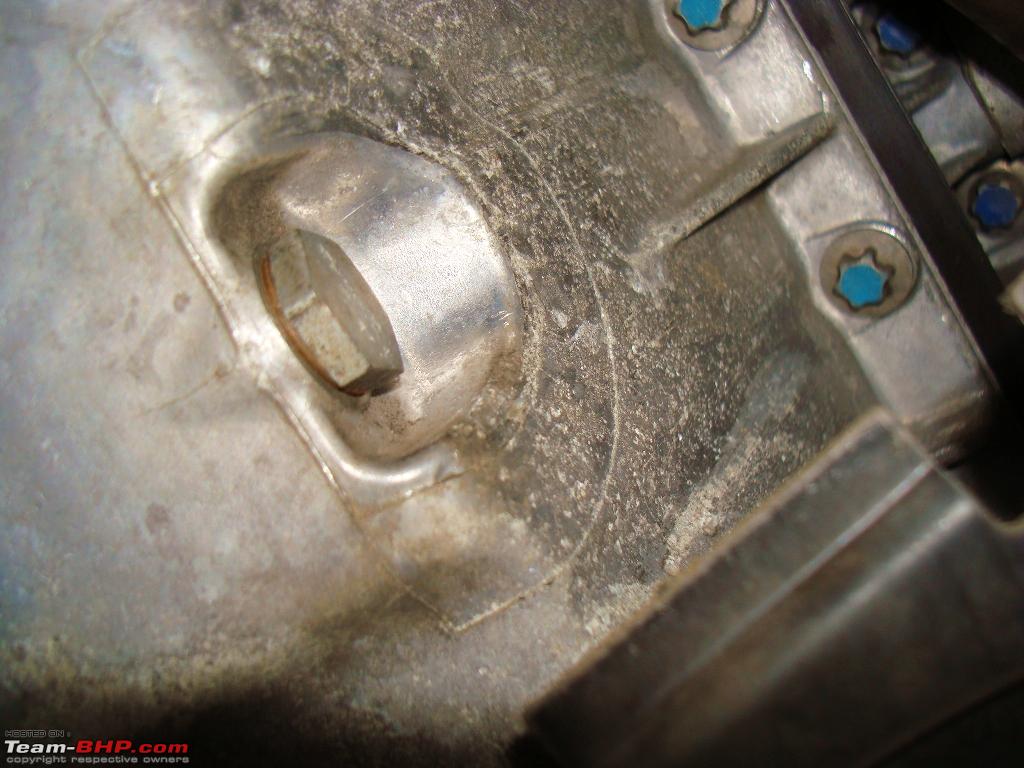
Set the oil drain pan a few inches off to the right of the drain bolt.
Use a 17 mm socket mated to a 1/2" drive to undo the drain bolt. It should come off using hand-power but sometimes it might be set just too tight.
If this is the first (break-in) oil change on your car, then the bolt will have a silver metal washer - don't reuse it.
If the oil has been changed before, then the bolt will have a copper crush washer - don't reuse it.
If the bolt was over torqued by the BMW technician who did your previous oil change, now's the time to put all that gymming to good use.
Be careful - if the wrench slips you will get hurt.
[If you were too lazy to go to the gym, reverse the procedure and just get your car serviced at the dealer.

]
[PICTURE 7 - Drain bolt] 
Once you've got the drain bolt loose, you can unscrew it with your hand and hot black motor oil will flow out. If your calculations were correct, then it'll shoot straight into the Oil Drain Pan.
[If your calculations were incorrect, then you now have a an additional mess to clean-up and maybe some burns. You can see from the picture that I was a little bad at math. Not as bad as aiming for the Moon and landing on Mars but a mess nonetheless.]
[PICTURE 8 - Oil draining into pan] 
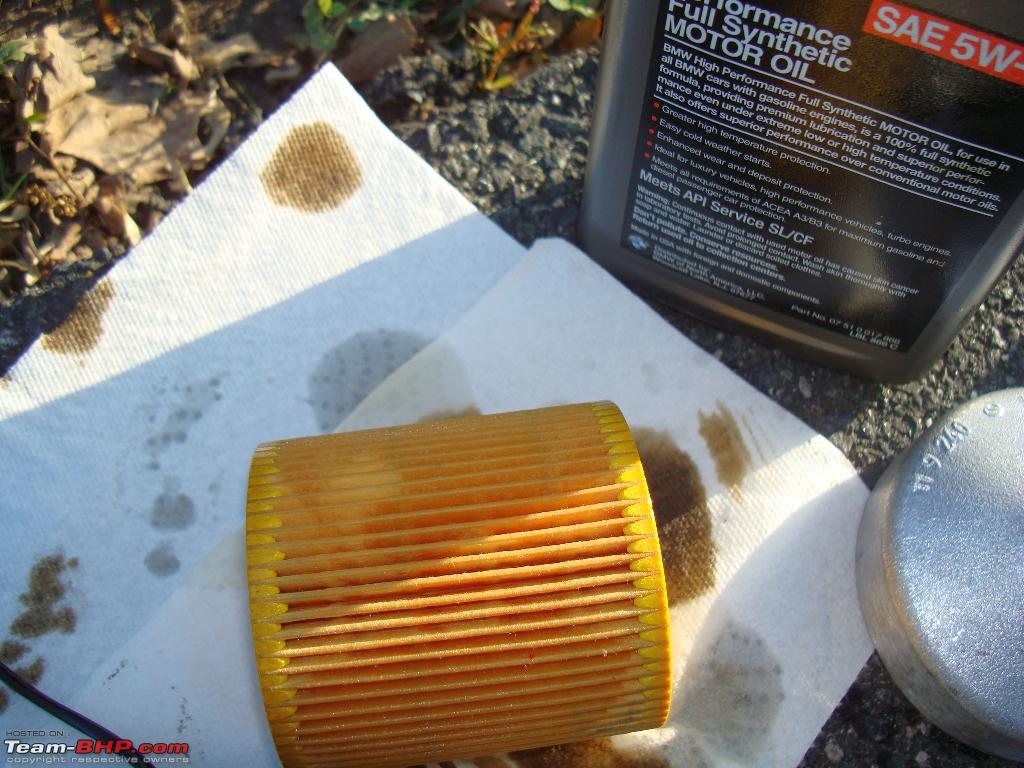
While the oil is dripping into the pan, remove the Oil Filter housing, and get the used Oil Filter out. Using the plastic fork pry out the 2 o-rings (big black and small green) on the housing, and replace them with the new o-rings that came with the new Oil Filter. Note the position of the black o-ring. If you position this incorrectly, the housing won't fit back properly onto the engine.
You can use a screw driver or a metal fork too if you wish. Also put that new copper crush washer on to the drain bolt now.
[PICTURE 9 - Oil Filter comparison] 
Pre-wick your nice new Oil Filter. Just pour small amounts of oil directly onto the filter and watch the material soak it up - nice way to pass time as by now you're bored that all this is taking too long.
[PICTURE 10 - Pre-wick] 
When all the oil has drained out replace the drain bolt (with new copper crush washer) and the hatch. Don't over-tighten.
Also replace the Oil Filter housing (with the new Oil Filter and the new o-rings installed). Don't over-tighten.
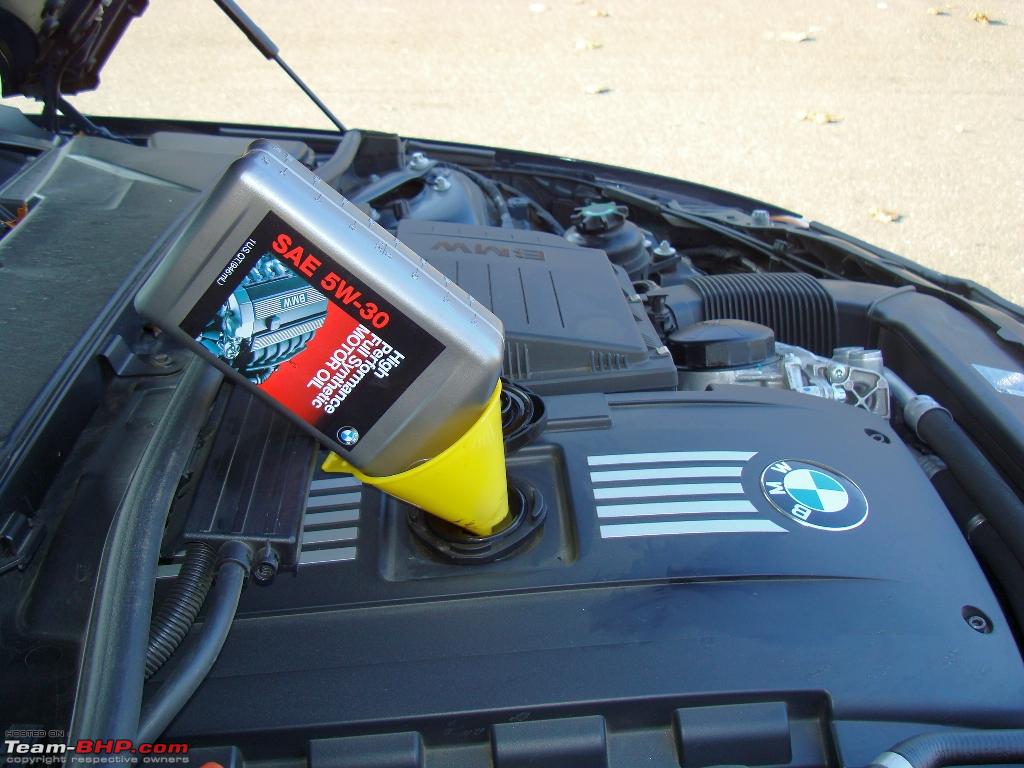
Pour in the new oil - a funnel helps channel it straight into the engine. You want the oil
in your engine, not
on it. Rubber hoses and plastic trim will corrode early if engine oil spills on them.
[Some folks pour in 6 quarts (@5.6 litres / 6 bottles), drive around for a bit and then pour in the last bottle but you can pour it all in one go - all's good.]
[PICTURE 10 - Pouring oil] 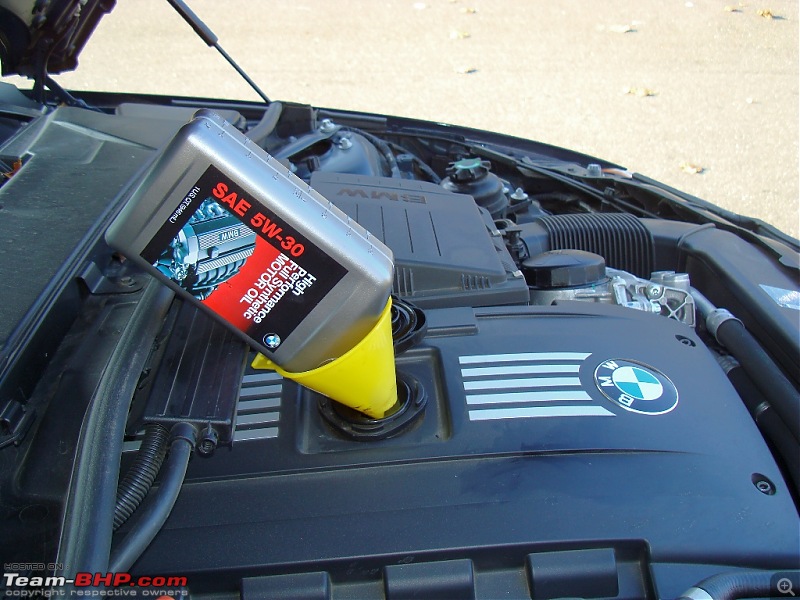
When you're done, close the Oil cap, close the hood (bonnet), start your engine and drive car off the ramps.
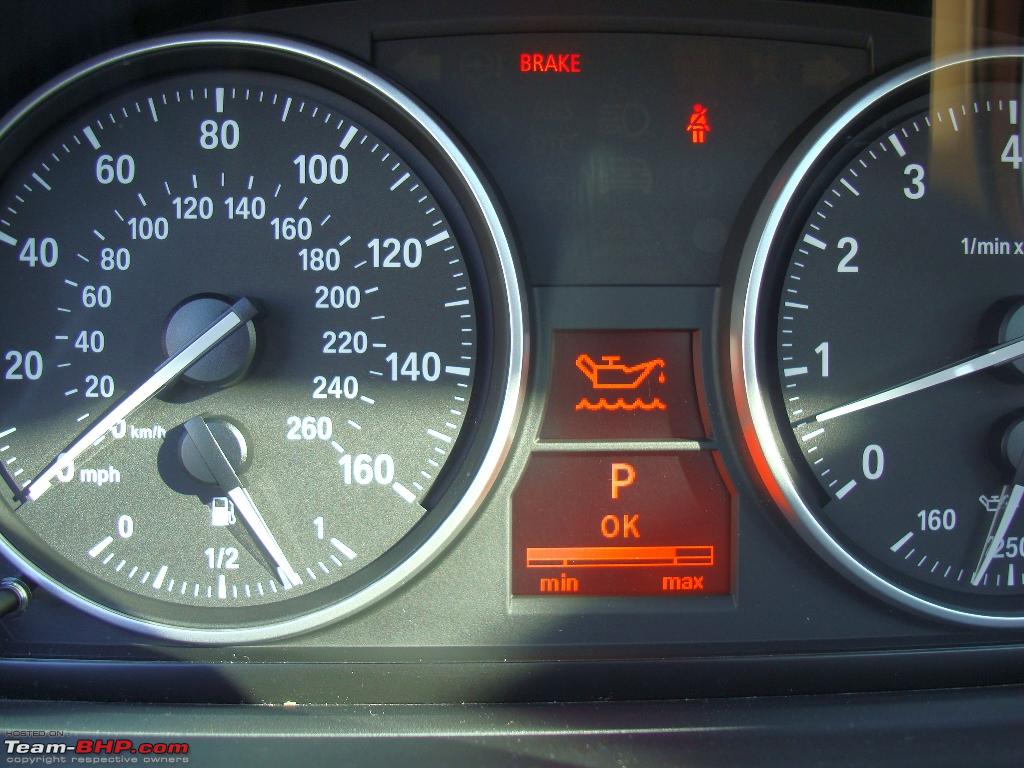
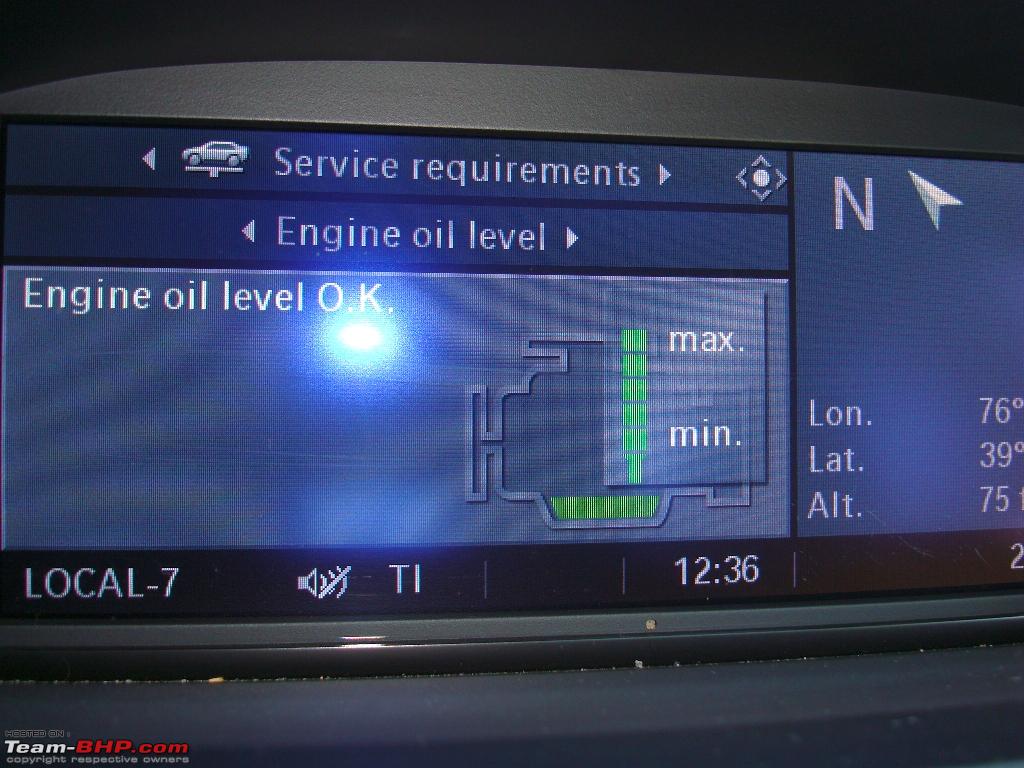
The new Oil is cooler than the one you got out so let the engine warm up a bit and then check your oil levels.
[PICTURE 11 - Oil level]  [PICTURE 12 - Oil level - Nav]
After a while (maybe half an hour or so) check for any leaks under the car. If there is a puddle, then the drain bolt might not be set properly. Otherwise you're all set.
Thanks for reading!
Due credit to the E90Post.com members whose oil change guides were a tremendous help.


 26th November 2009, 05:37


 (1)
Thanks
(1)
Thanks


 isnt that dangerous for the ECU?


