Team-BHP
(
https://www.team-bhp.com/forum/)
Fantastic build Narendra!! Hats off to your patience and your vision! Enjoy your ride.
Cheers!
Quote:
Originally Posted by Maverick5490
(Post 3267206)
Fantastic build Narendra!! Hats off to your patience and your vision! Enjoy your ride.
Cheers!
|
Thanks I needed that for my future.:thumbs up
Narendra, not that I've seen a lot, but that's the most tastefully restored vans that I've come across, with just the right amounts of modern detailing. Superb effort man!
But you know what, I think blackening out the VW logo on the grille takes a little bit of character away front the front.
Woow! That's a beauty!! Awesome work. Hope to see this beauty somewhere on Bangalore roads.
The biggest thing about it is the attention to detail, which I feel is a benchmark for restoration works.
Cheers
Quote:
Originally Posted by AyAn!
(Post 3267665)
I think blackening out the VW logo on the grille takes a little bit of character away front the front.
|
Sorry for late reply. Out of station
Thanks AyAn.
I agree with you about the emblem . The emblem chrome had faded away & it is made of plastic. Chroming plastic I have no idea .I dint want to use sticker on it. I am planning to caste the same in brass & chrome plate it. Present blacking is a standby.
Your van looks absolutely brilliant. But I have to ask, is there is reason why you have a small strip of blue paint on both sides of the vehicle?
Quote:
Originally Posted by Jimmy_u
(Post 3267154)
various angles of the final setup, this should complete the need for more on this wonderful ride.
Regards,
jimmy
|
Sorry for late reply. Out of station .
Still, front seats & floor matting to be completed. Waiting for swirl plate for front seats. Once finished I will.
Quote:
Originally Posted by coloneljasi
(Post 3271165)
is there is reason why you have a small strip of blue paint on both sides of the vehicle?
|
I was hoping it to be noticed. Well, I wanted to camouflage the length of the van .
Color:- Choice was between onion blue or olive green. These sheets are removable, held by two screws each.
Mod performance report.
Drive:--Bangalore -Hassan - Chikmagalur & beyond . Distance covered :--900kms.
Part, highway part, country road.
Weather:- Mix of all but pleasant.
Driving impression
Once the dynamic of the van is known, it will stay as owner driven .
Started journey from home early morning 6 am. Drive started from Kanakapura side NICE road. Reached destination at 11.30am with 30 minute break. Distance traveled 350 km.
Nearer to Hassan, drive was good. Suddenly van started loosing power. I really got scared. Speeds up to 80/100 was fine, but it was struggling. Since Hassan was approaching, I stopped using ac & drove to Hassan with caution. After having breakfast I plugged my pocket scanner . Got a code for turbo booster. Means related to turbo. I was in no mood to put my fingers into the engine bay. So I decided to carry on. Luckily I reached my destination .
After over night rest, next day morning got under side of the engine where turbo is located. My fear came true. Turbo flange which was welded had snapped. ( Ref Page 2).The extra clamp( Ref page 2) which was added was holding the weight of Turbo. The clamp saved me to reach the destination. Or else stop would have been Hassan.
Got the turbo removed and got it rewelded in my presence. Fixed it back. Every thing was fine till I reached back home. I am still not satisfied. Thinking of some other solution .( Turbo)
Ho yes, :)
1. Engine torque even with ac on.
2. Handling at high speeds ( Three digits), felt like wheels on rails. No body roll while cornering. Note:--stabilizer rod, only for front suspension.
3. Any kind of road undulation, hardly noticeable.
4. I have fallen in love with the turning radius. 35[10.7 m] is the max it needs to take a U turn.
5. Engine temp stayed normal through out the journey . No coolant added.
6. Mileage is app 10+ km/L
7. Old front seats were very comfortable.
8.AC works efficiently. Power drop hardly noticeable.
10. In heavy rains no water leakage from sun roof . Big relief.
Ho no,
M= Manageable S = Solution found.
1. Engine at 3100 rpm, resonance is definitely there. (?)
2. Air filter sucking sound. (S)
3. Slight engine vibration in idling for back row seats. (S)
4.Sun roofs sun shade rattles when closed. (M)
5. Second gear shifting is bit sticky. (S)
6. Absence of power steering in city. (S)
7. Lack of power windows. (S)
8. Speedometer erratic reading. (S)
9. Oil leakage in engine main bearing seal . (S)
All solution will be done in stage 2.
A bit of progress in upgrading.
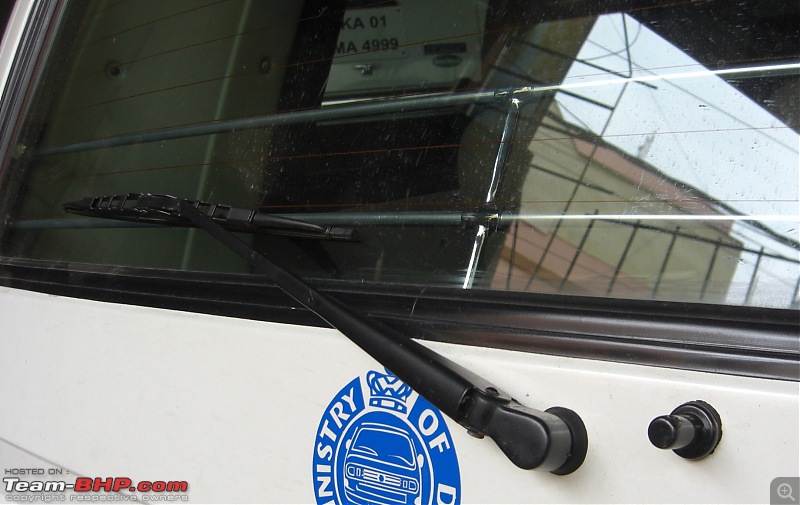
AC gas filled & back wiper plus window washer fixed.
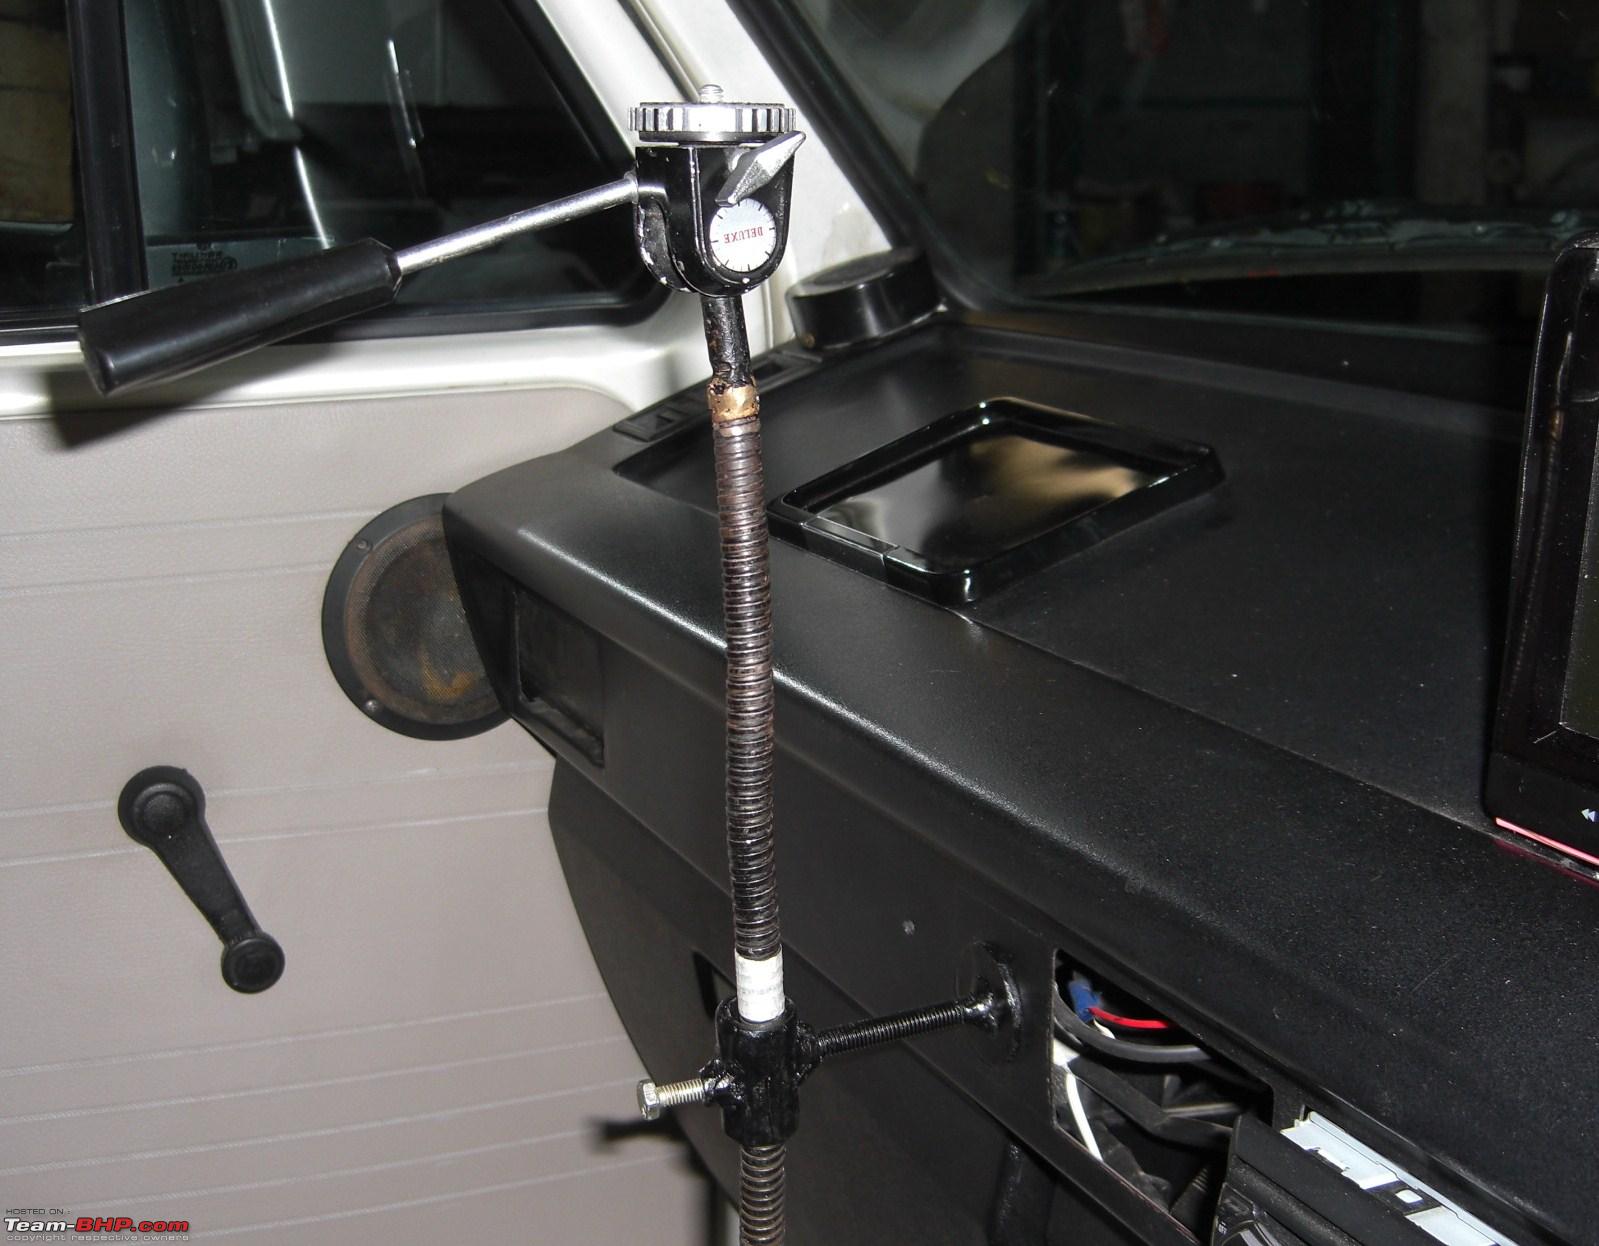
Temp fixture for cam holder. ( Hole was meant for 12v plug.)

I am not able to upload my url. (If some one can load these for me I will be very thankful.)
Some of my videos in 'you tube' are under these titles. Please give me your thoughts of these.Sorry to make you work out.
1.MY TDI vw van on country roads
2. My TDI van rainy night drive
3.My tdi VW van fast & furious
My last update posting in this thread. Different Thread for stage2 in a months time.
Roof Railing.
From the beginning I had set my mind to have roof railing.
Did a lot of homework in selecting the railing in terms of good looks, simplicity, strength, firm fitting & finally costing. ( Keeping in mind not to have to many holes drilled on the roof.)
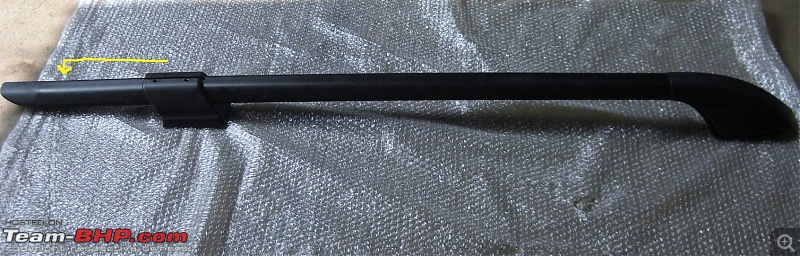
The one I selected is made of mild steel tube. OE fitments for a particular make. I can load many things on it. Not just a show piece .
I will leave the guessing work to you. Most of you will come to know it just by a glance. Photo follows.
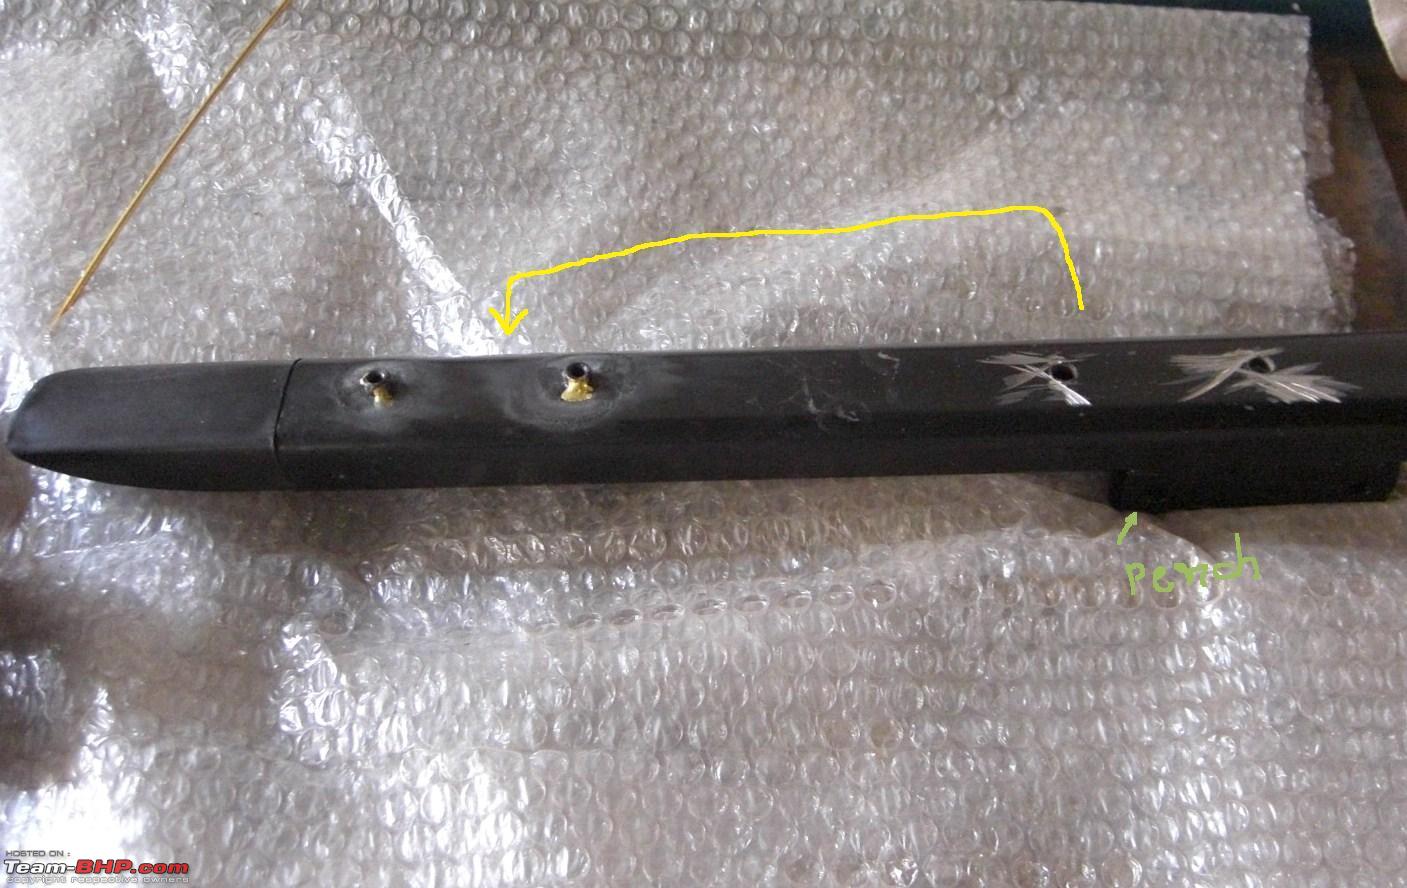
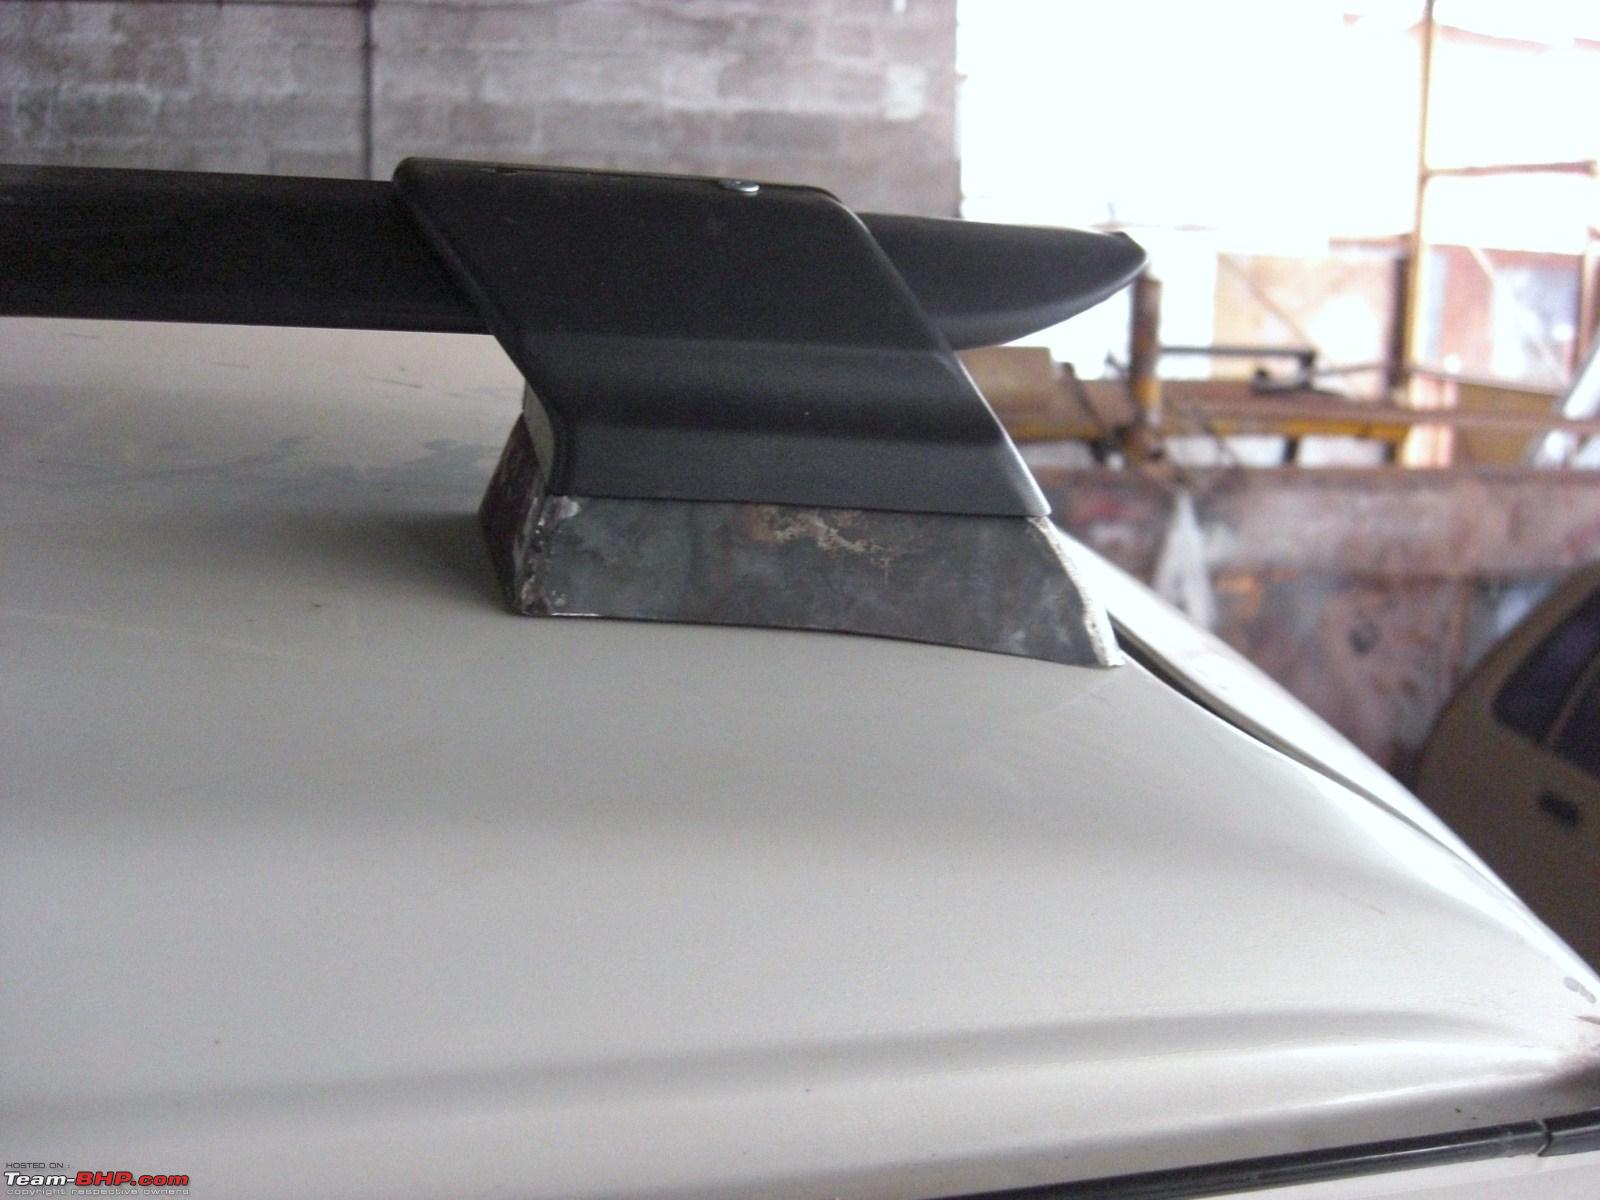
As per the arrow mark shown the box with perch will be shifted ( Note:-- Box with perch of both railing are interchanged.) Photos will explain the reason.
The threaded bush removed & re welded in required position. (Arrow shown.)
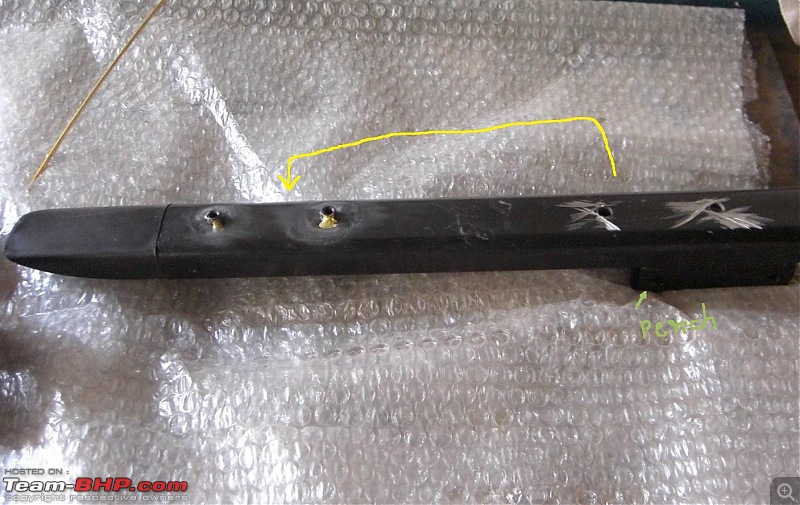
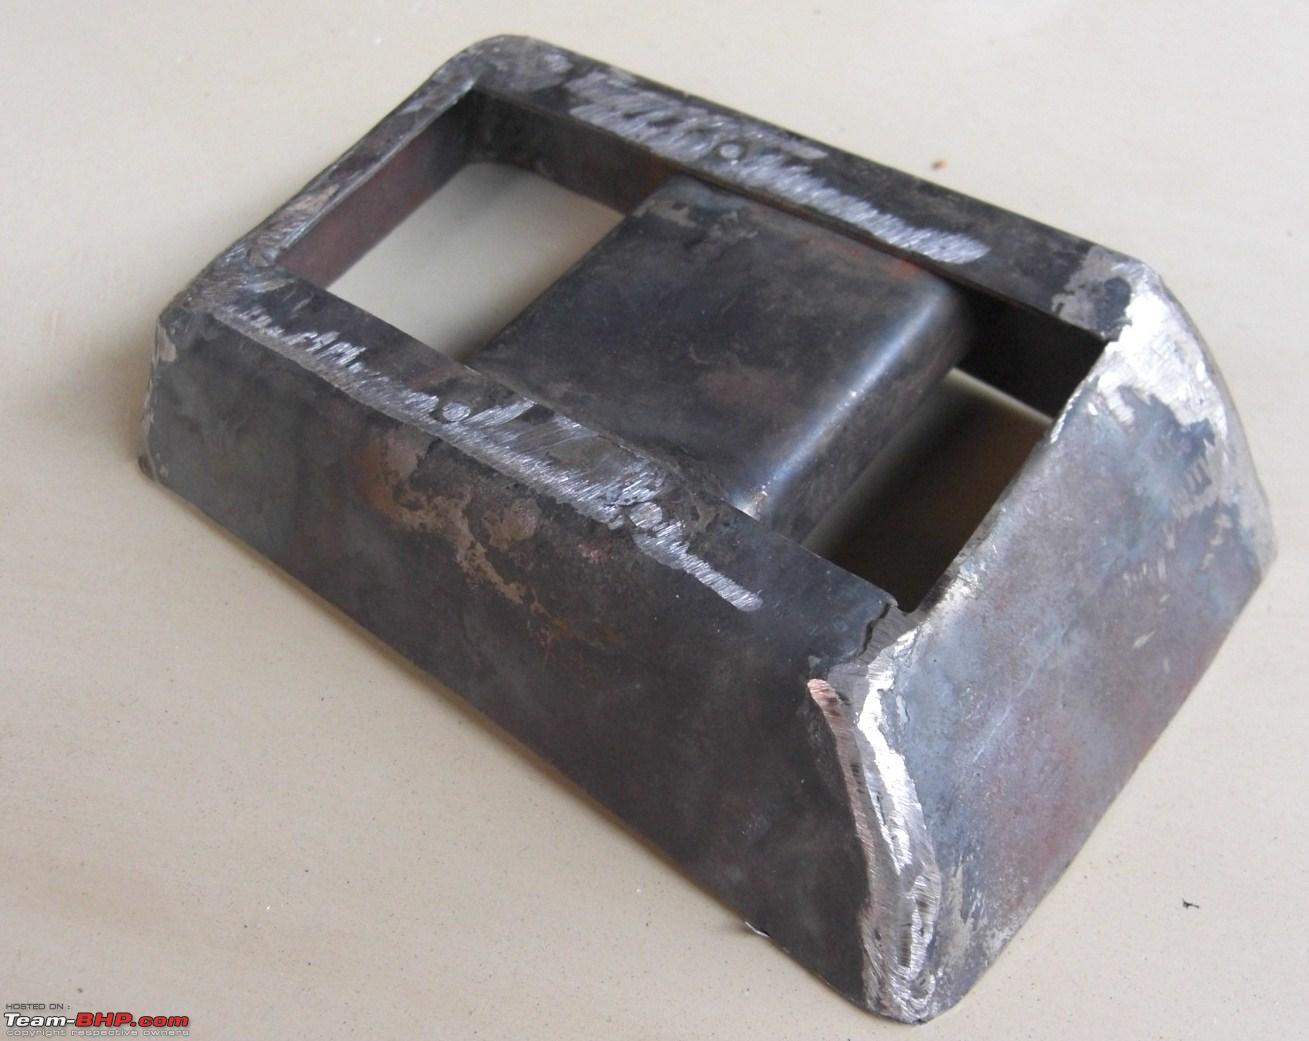
Spacer box fabricated to over come height difference. Its about 1H

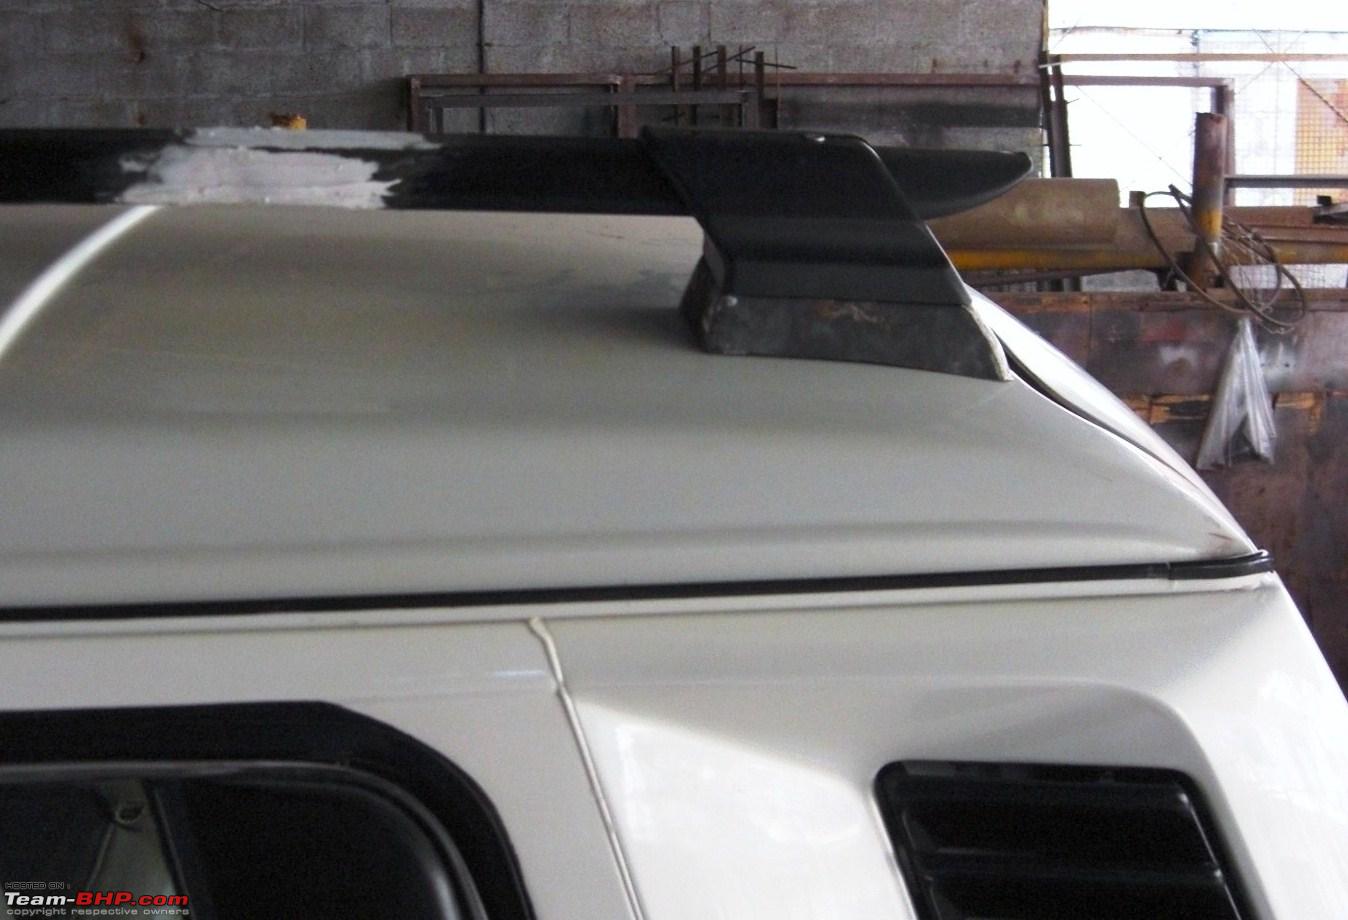
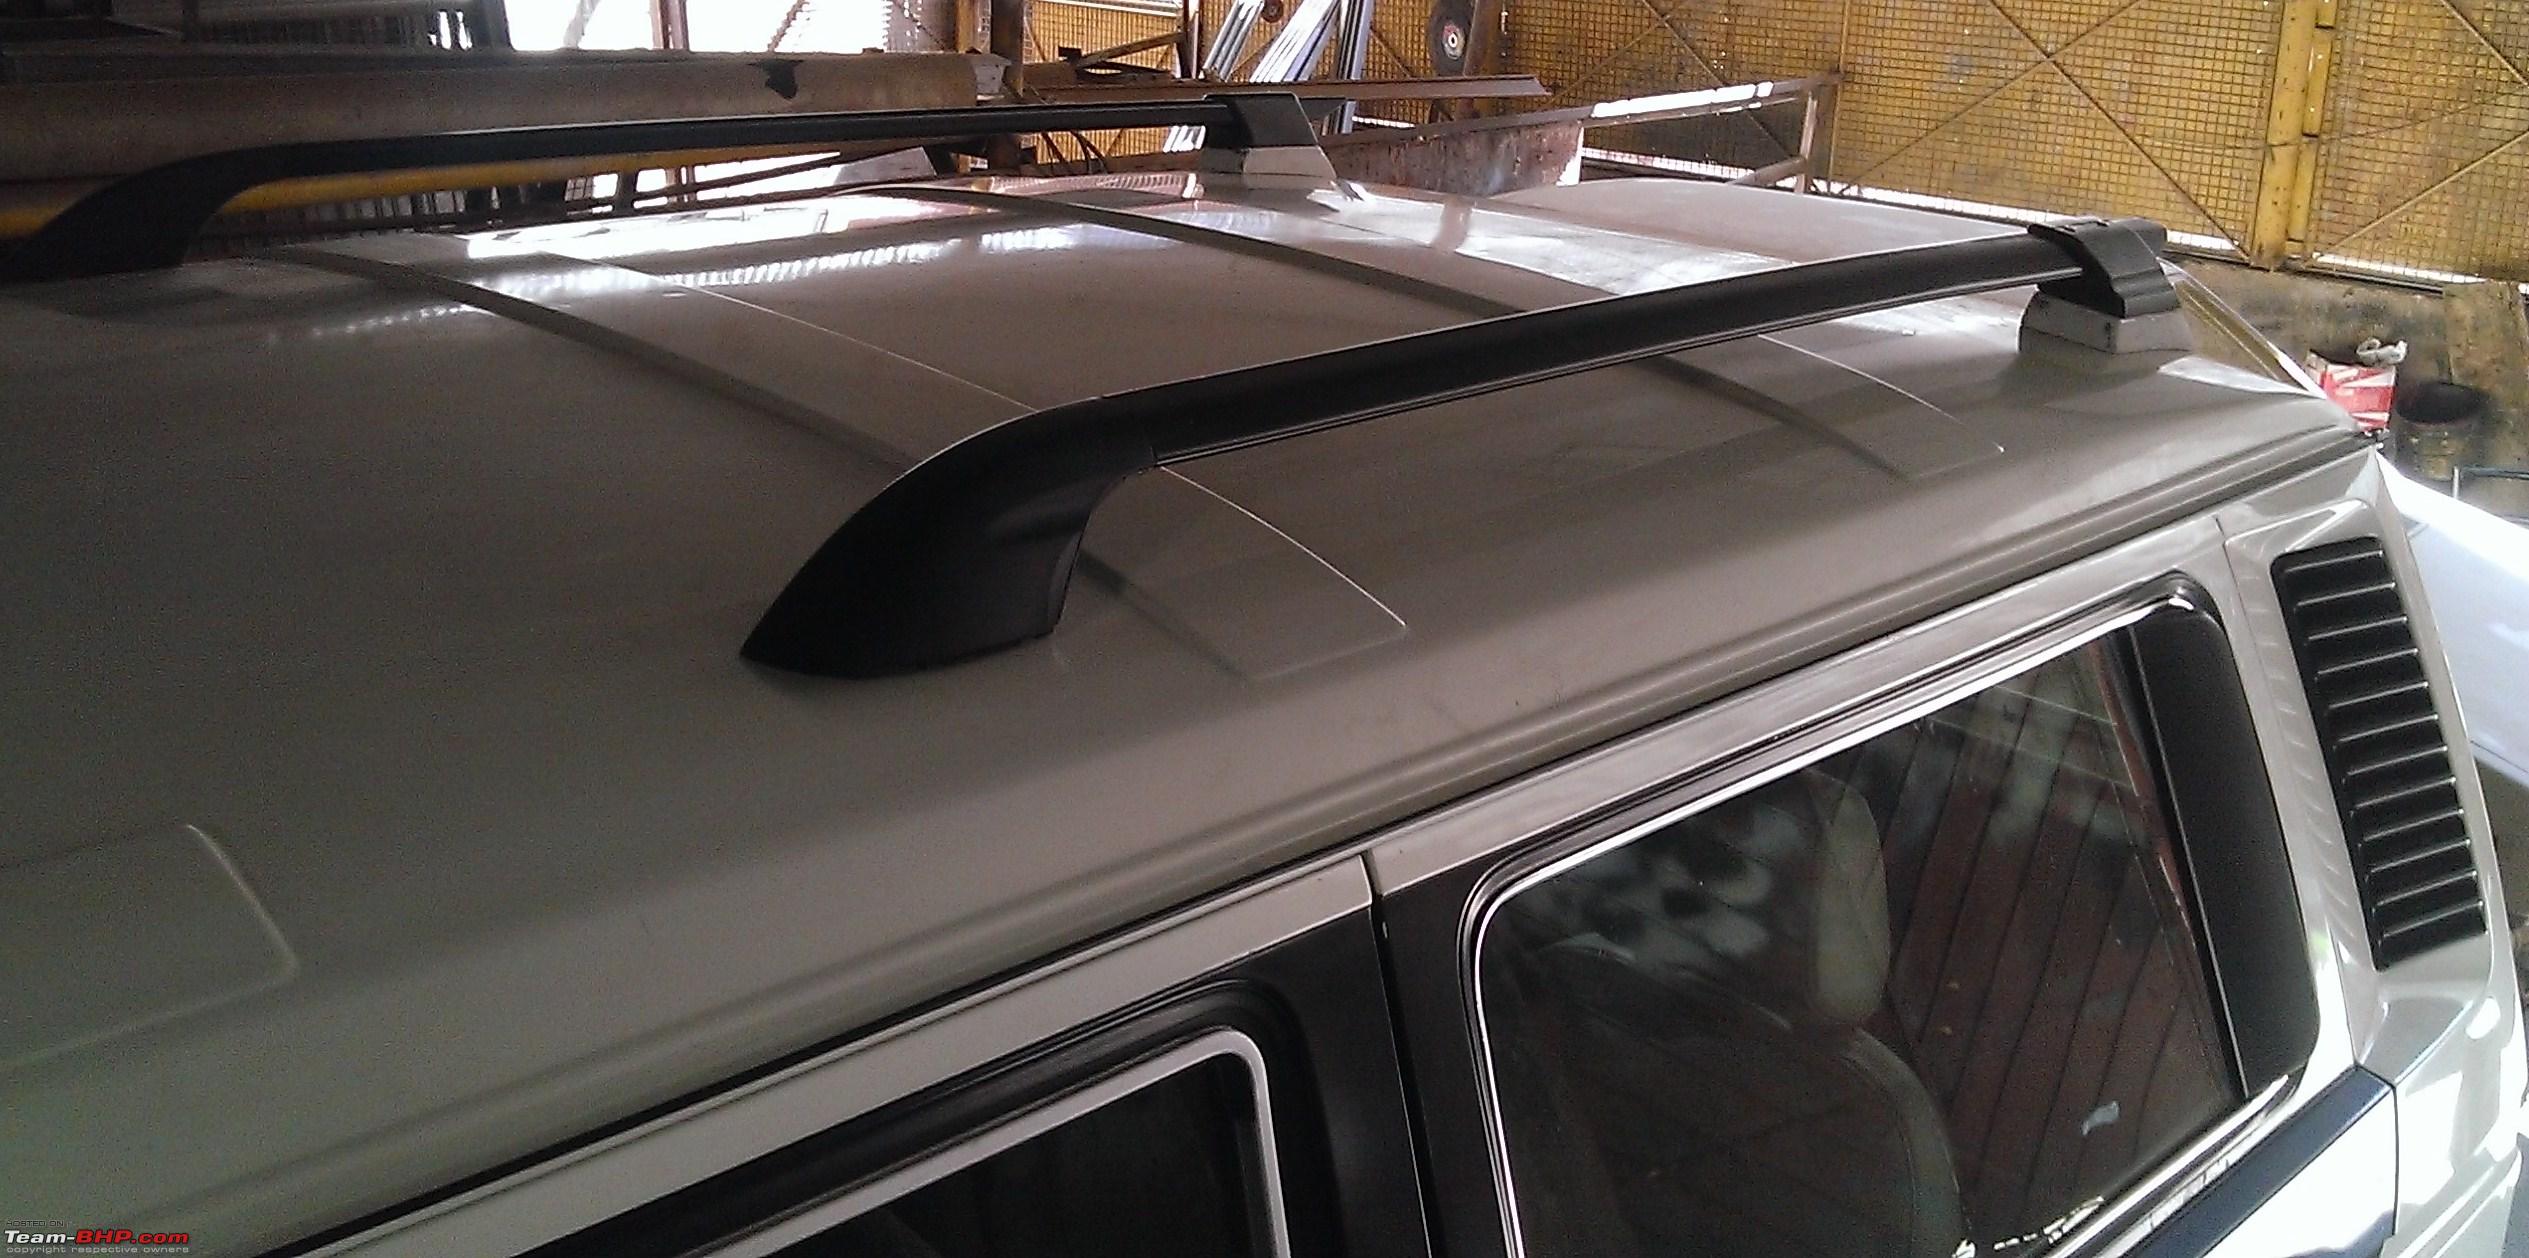
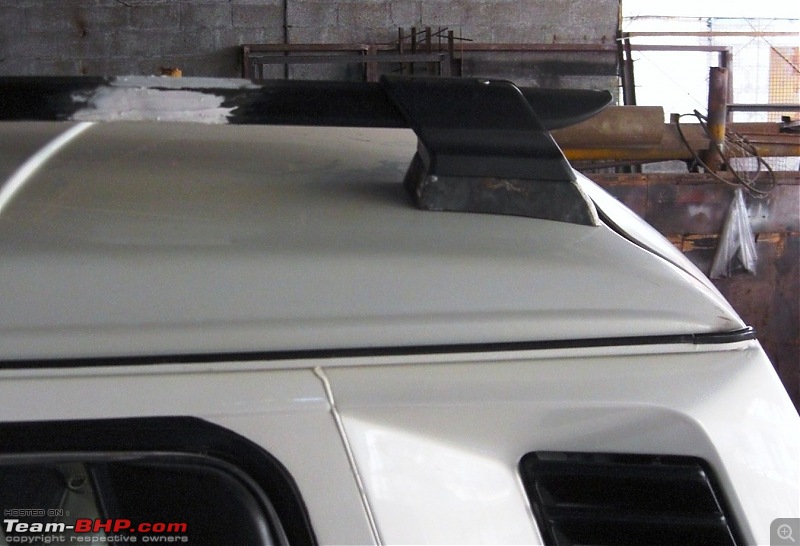
Railing with spacer placed on the roof.( Holes closed & putty applied.)
5. Close up.

Checked the level for the railings height. Spot on.

The semi finial look.


Now time to paint the spacer. My tinker wants it to be body colour. May look like extension of body. My inclination is towards black. Whats your opinion? Thanks.
Quote:
Originally Posted by narendra.vw
(Post 3299899)
Now time to paint the spacer. My tinker wants it to be body colour. May look like extension of body. My inclination is towards black. Whats your opinion? Thanks.
|
I suggest Black. Makes it look like the roof-rail is made for the van, a totally OE look
Thanks silversteed. let’s wait for few more opinion. If I don't then I will go for semi dual black.
Quote:
Originally Posted by silversteed
(Post 3299916)
I suggest Black. Makes it look like the roof-rail is made for the van, a totally OE look
|
Its Black for me as well.
Body colored would kind of merge it into the overall look
Regards.
Jimmy
Thanks Jimmy.
Black wins. I have told my painter to paint it semi duel black. Coming week photo of finial out come.
Quote:
Originally Posted by narendra.vw
(Post 3301331)
Thanks Jimmy.
Black wins. I have told my painter to paint it semi duel black. Coming week photo of finial out come.
|
Iam out of words , truly amazing. What amount of hard work would have went into this is unimaginable , however at the end of the day the finished product makes you feel happy & proud clap:. Honestly Iam very happy to see you living by your passion and for sure would be following your threads going forwards. Thanks for taking time for all those pictures and detailed explanation of the entire work carried on.
cheers,
pdma.
fabulous work, amazing patience and hats off to the quality of work as well, a very well thought execution.
Quote:
Originally Posted by pdma
(Post 3360159)
What amount of hard work would have went into this is unimaginable for sure would be following your threads going forwards. Thanks for taking time for all those pictures and detailed explanation led of the entire work carried on.
cheers,
pdma.
|
Thanks, for your observation. These kind of impression make me move forward.
If My explanation comes to help in some way to others, I am the most Happy Person.
| All times are GMT +5.5. The time now is 02:54. | |