| |||||||

| Search Forums |
| Advanced Search |
| Go to Page... |
 |
| Search this Thread |  16,946 views |
 20th November 2018, 10:43
| #1 |
| Distinguished - BHPian  Join Date: Dec 2012 Location: India
Posts: 4,844
Thanked: 14,764 Times
| DIY: Complete Master Cylinder & Caliper Rebuild And Reverse Bleeding Motorcycle Brakes Hello dear BHPians and readers, I completed this DIY yesterday and thought of sharing it with you guys. Let me put up the mandatory disclaimer that this is not a beginner level DIY and attempt only if you are confident of your skills. Also, brakes, of course are critical to safety and hence, be doubly sure of what you are doing. Brake fluids are nasty, use gloves when working with them. Due to lack of helping hands, I couldn't shoot as many pictures as I really wanted. Please post queries if any step needs elaboration. This post will have 3 sections: 1. Master Cylinder Rebuilding 2. Caliper Cleaning/ lubrication and rebuild by changing seals/ O-Rings 3. Reverse Bleeding Procedure. Indications: There was a certain dampness felt around the brake lever. Grabbing the lever hard was resulting in the lever sinking right down to the handlebar- indicating leak in the hydraulics. The reservoir needed a Dot-4 top-up every 20-25 days; the system definitely needed some attention. To some, it may be little unorthodox, but rather than working around the motorcycle, I decided to take out the entire brake assembly in one piece (including master cylinder, brake hose and brake caliper) and work it inside the comforts of my room.  Entire brake assembly taken out. Details: > Dismount the master cylinder secured by the bolts holding it to the handlebar. The entire assembly including the brake lever, reservoir (may be even the rear view mirror) will come out as a single unit. Remove the wires under the brake lever from the switch which actuates the brake lights. > Undo the fasteners securing the brake hose to the motorcycle frame right down to the caliper. In most motorcycles, there will be at least 2 such securing points. > Finally, dismount the brake caliper from the fork. For details on how to unmount the caliper, please refer to my older post here: https://www.team-bhp.com/forum/motor...isc-brake.html (DIY: Servicing your Motorcycle's disc brake) TIP: Consider loosening the brake hose a little from both ends (MC & Caliper end) and the bleeder valve before dismounting the assembly. It will be easier to loosen them while the assembly is locked on to the frame. Just loosen them, do not open them as you will need some hydraulic pressure to release the caliper pistons for cleaning. If you have pneumatic pressure back up to push the pistons out, then please be my guest. While removing the caliper, I noticed that one of the pistons had jammed and that meant a caliper rebuild was necessary as well. I took the entire assembly out as a unit and carried it to my work area. Last edited by saket77 : 21st November 2018 at 10:20. |

|  (10)
Thanks (10)
Thanks
|
| The following 10 BHPians Thank saket77 for this useful post: | adrian, ashwinprakas, audioholic, GTO, hgps, IndigoXLGrandDi, Leoshashi, SS-Traveller, tacho9000, timuseravan |
| |
|
20th November 2018, 15:08
| #2 |
| Distinguished - BHPian Join Date: Dec 2012 Location: India
Posts: 4,844
Thanked: 14,764 Times
| re: DIY: Complete Master Cylinder & Caliper Rebuild And Reverse Bleeding Motorcycle Brakes The Mastercylinder Rebuild: MC contains a piston, a spring and a couple of rubber seals; all secured inside the cylinder by a circlip lock. There's also a plunger with dust cap and spring on the outside which actuates the piston when brake lever is pressed. I bought this master cylinder rebuild kit for Rs. 260/- which included all these items. Insist on quality replacement spares as these are very critical to your safety. 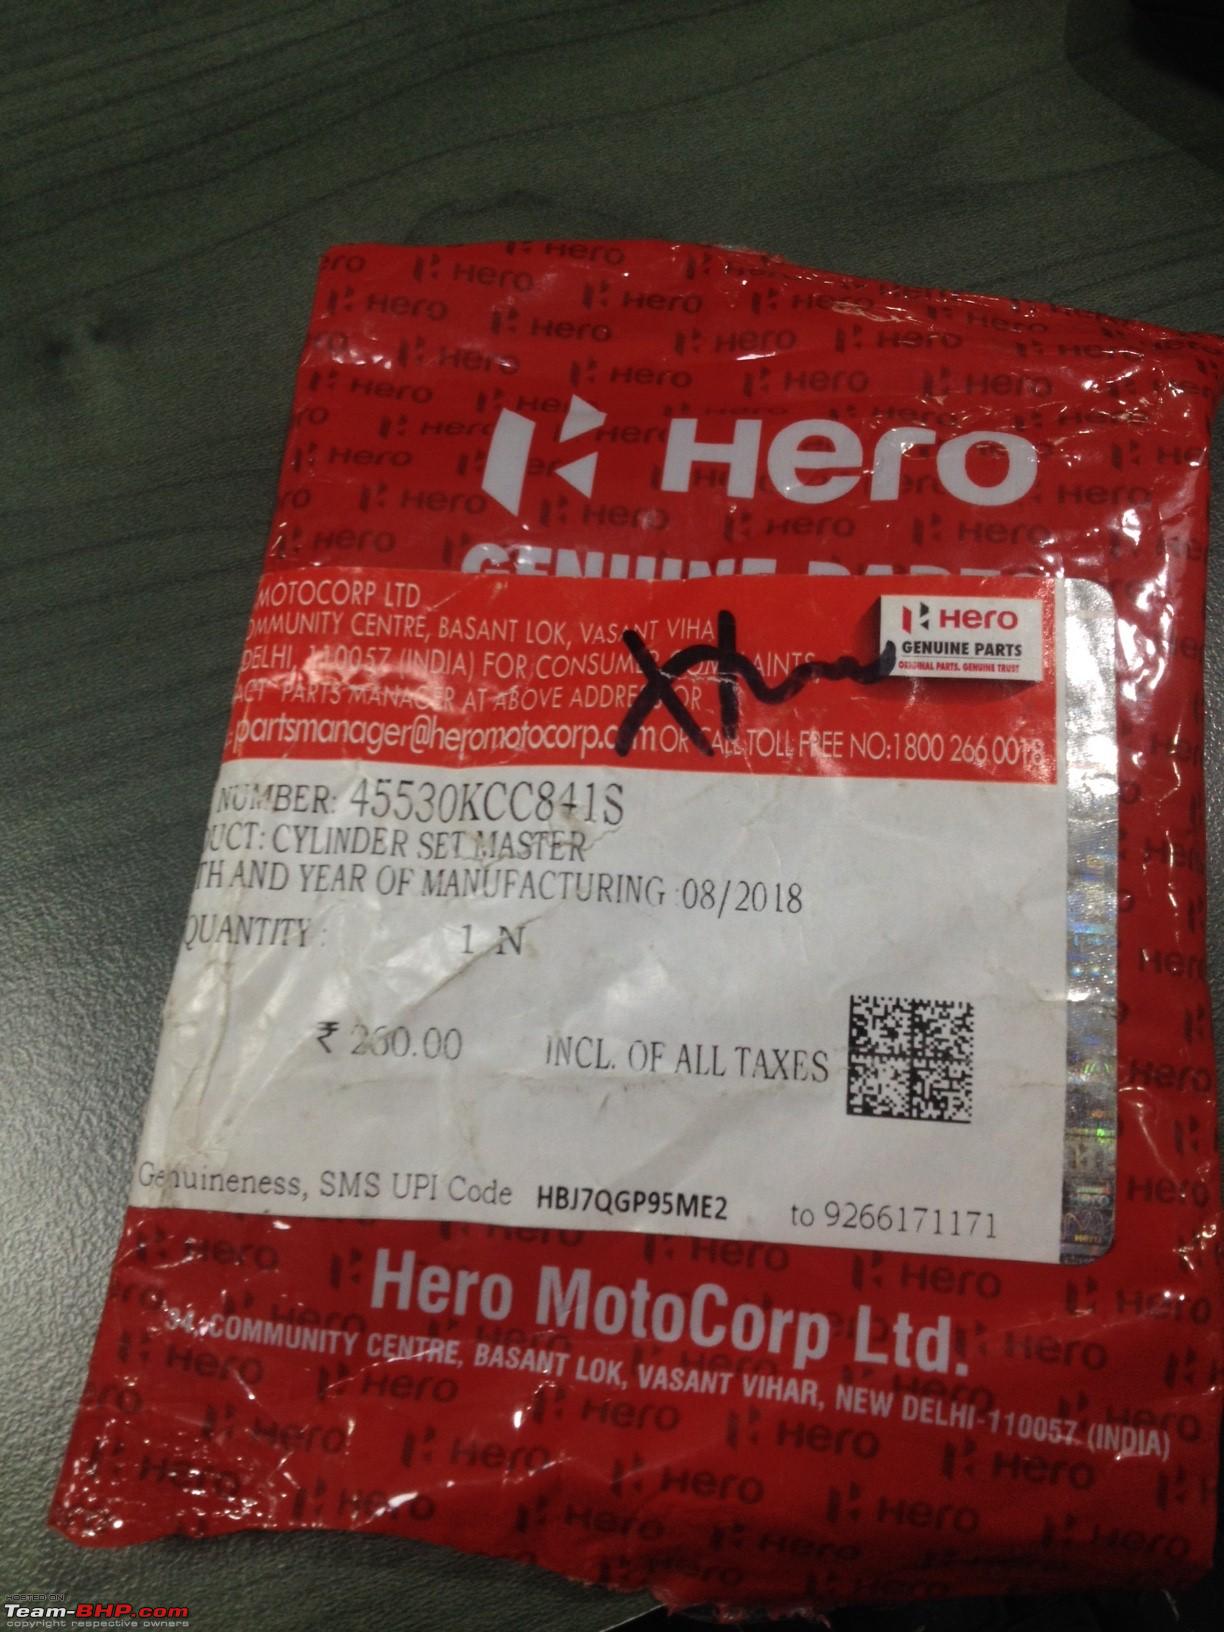 MC Rebuild Kit TIP: If you need to rebuild the caliper as well, then pump the brake lever and get the pistons of the caliper extended fully after removing the brake pads*. You will not be able to do it if you dismantle the MC since you will lose all the hydraulic power. If you have pneumatic power, you may use that to push the pistons out. Take your pick. *For removing brake pads and extending the caliper pistons: > Remove brake pads by sliding out the stud holding the pads at the bottom of the caliper. Also, you may refer to the link in the previous post on how to remove the pads. > Store the pads away from the oil & grease that you will be working with. > Pump the brake lever and the pistons should move out gradually. Coming back to the MC, start by opening the brake hose on the LHS and take it out completely. Keep the bolt and the washers safely. 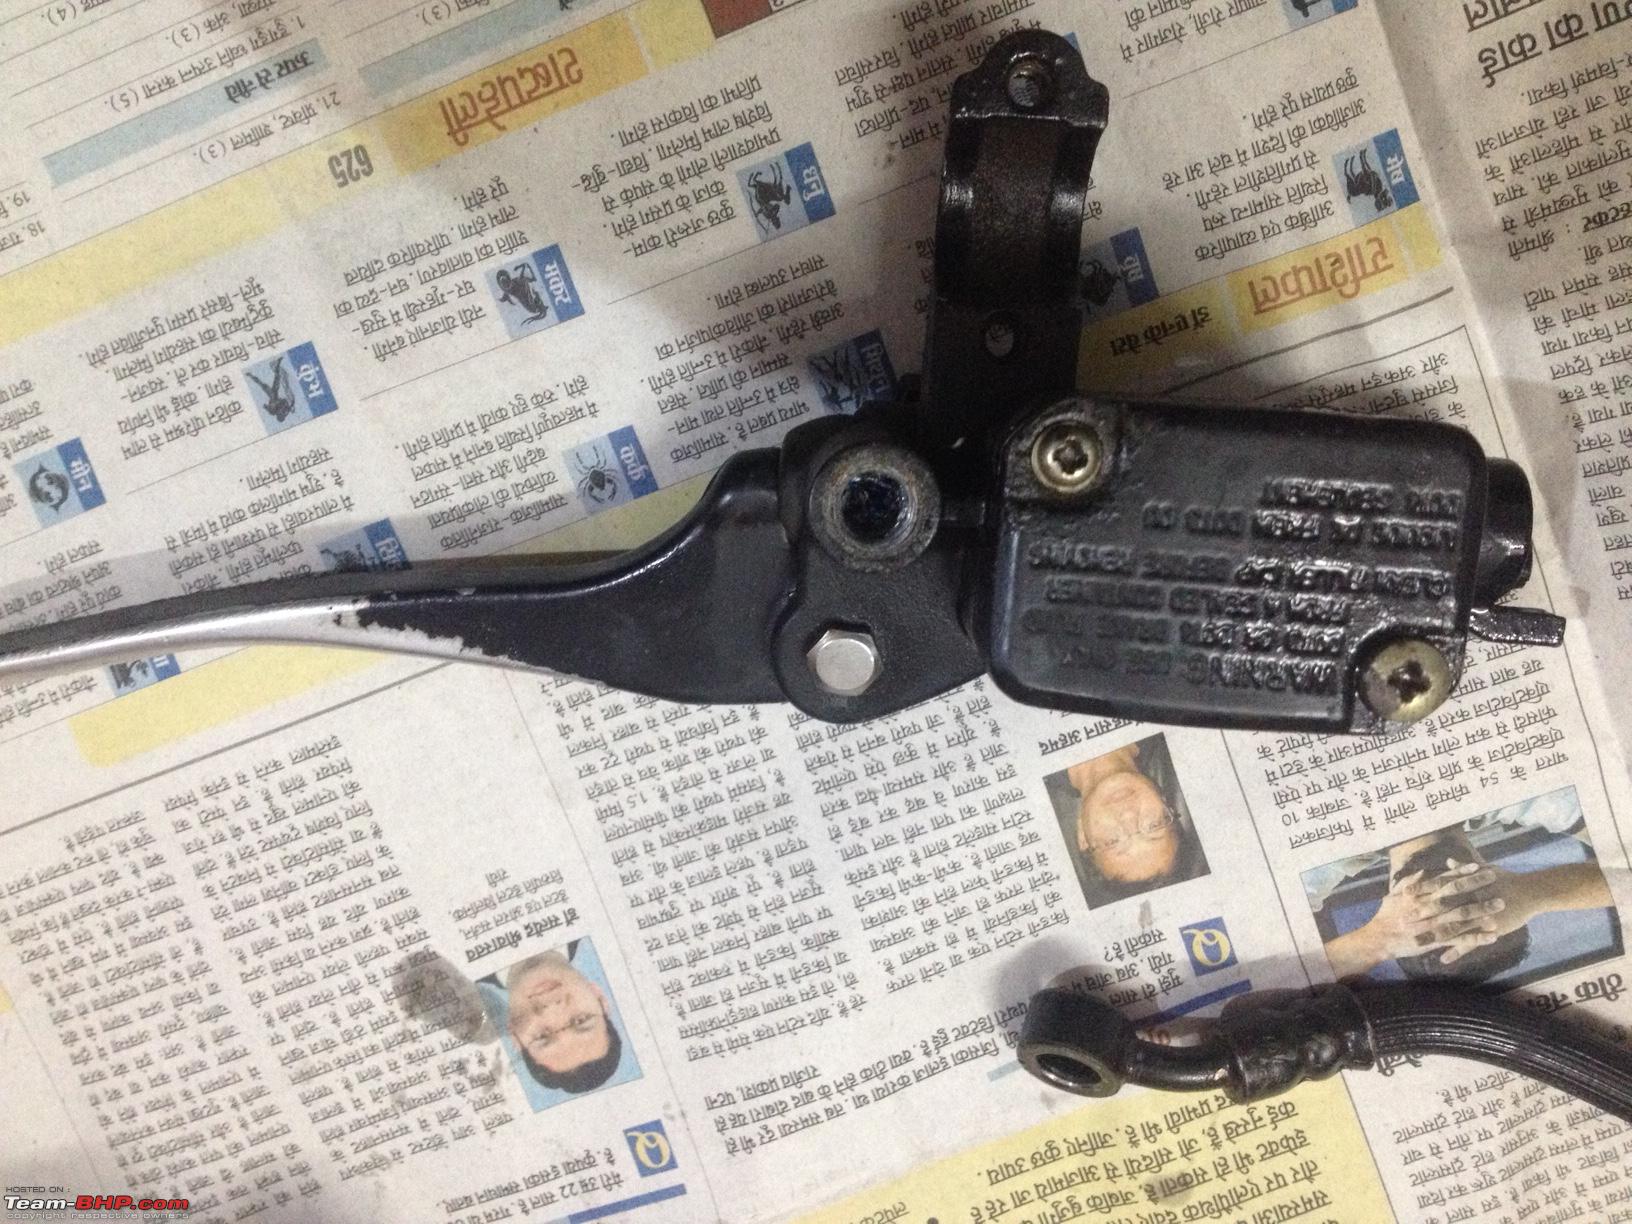 Open the filler cap on the reservoir and empty the old fluid in a container (later to be disposed off). Open the fastener holding the brake lever which also acts as pivot. 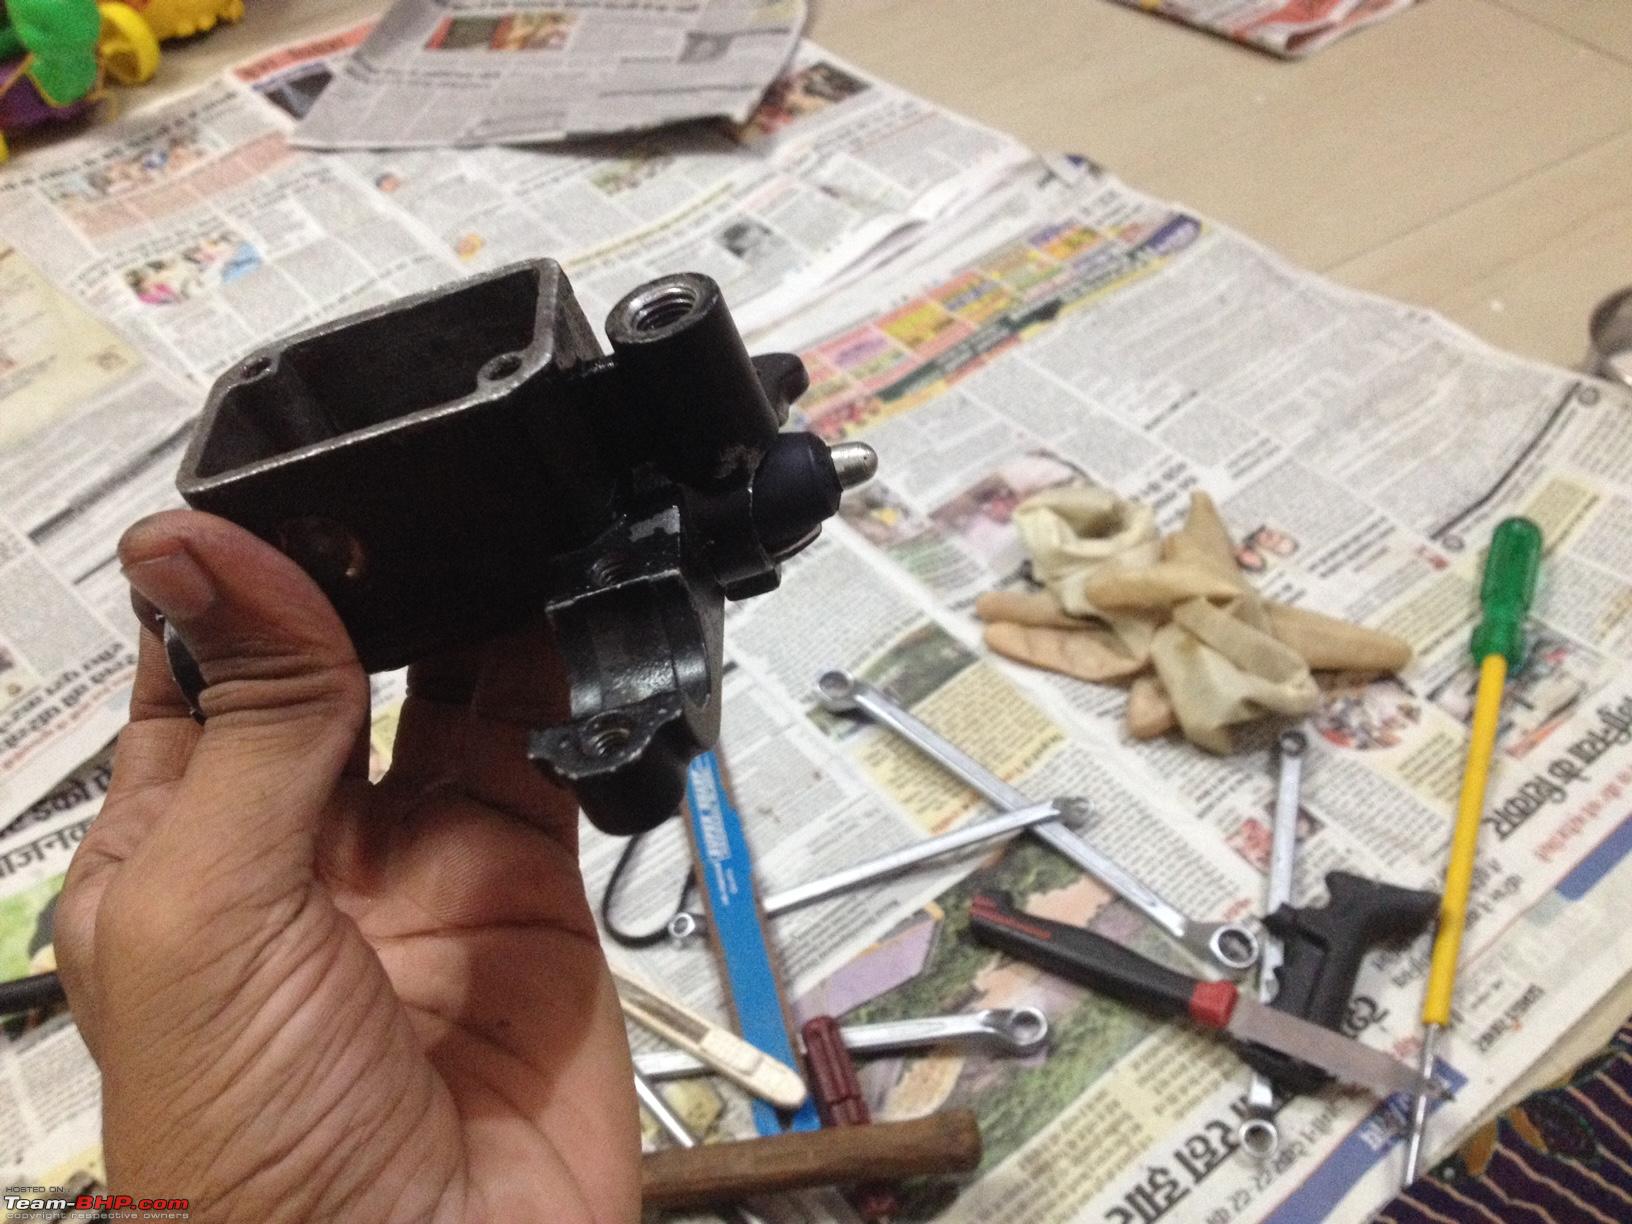 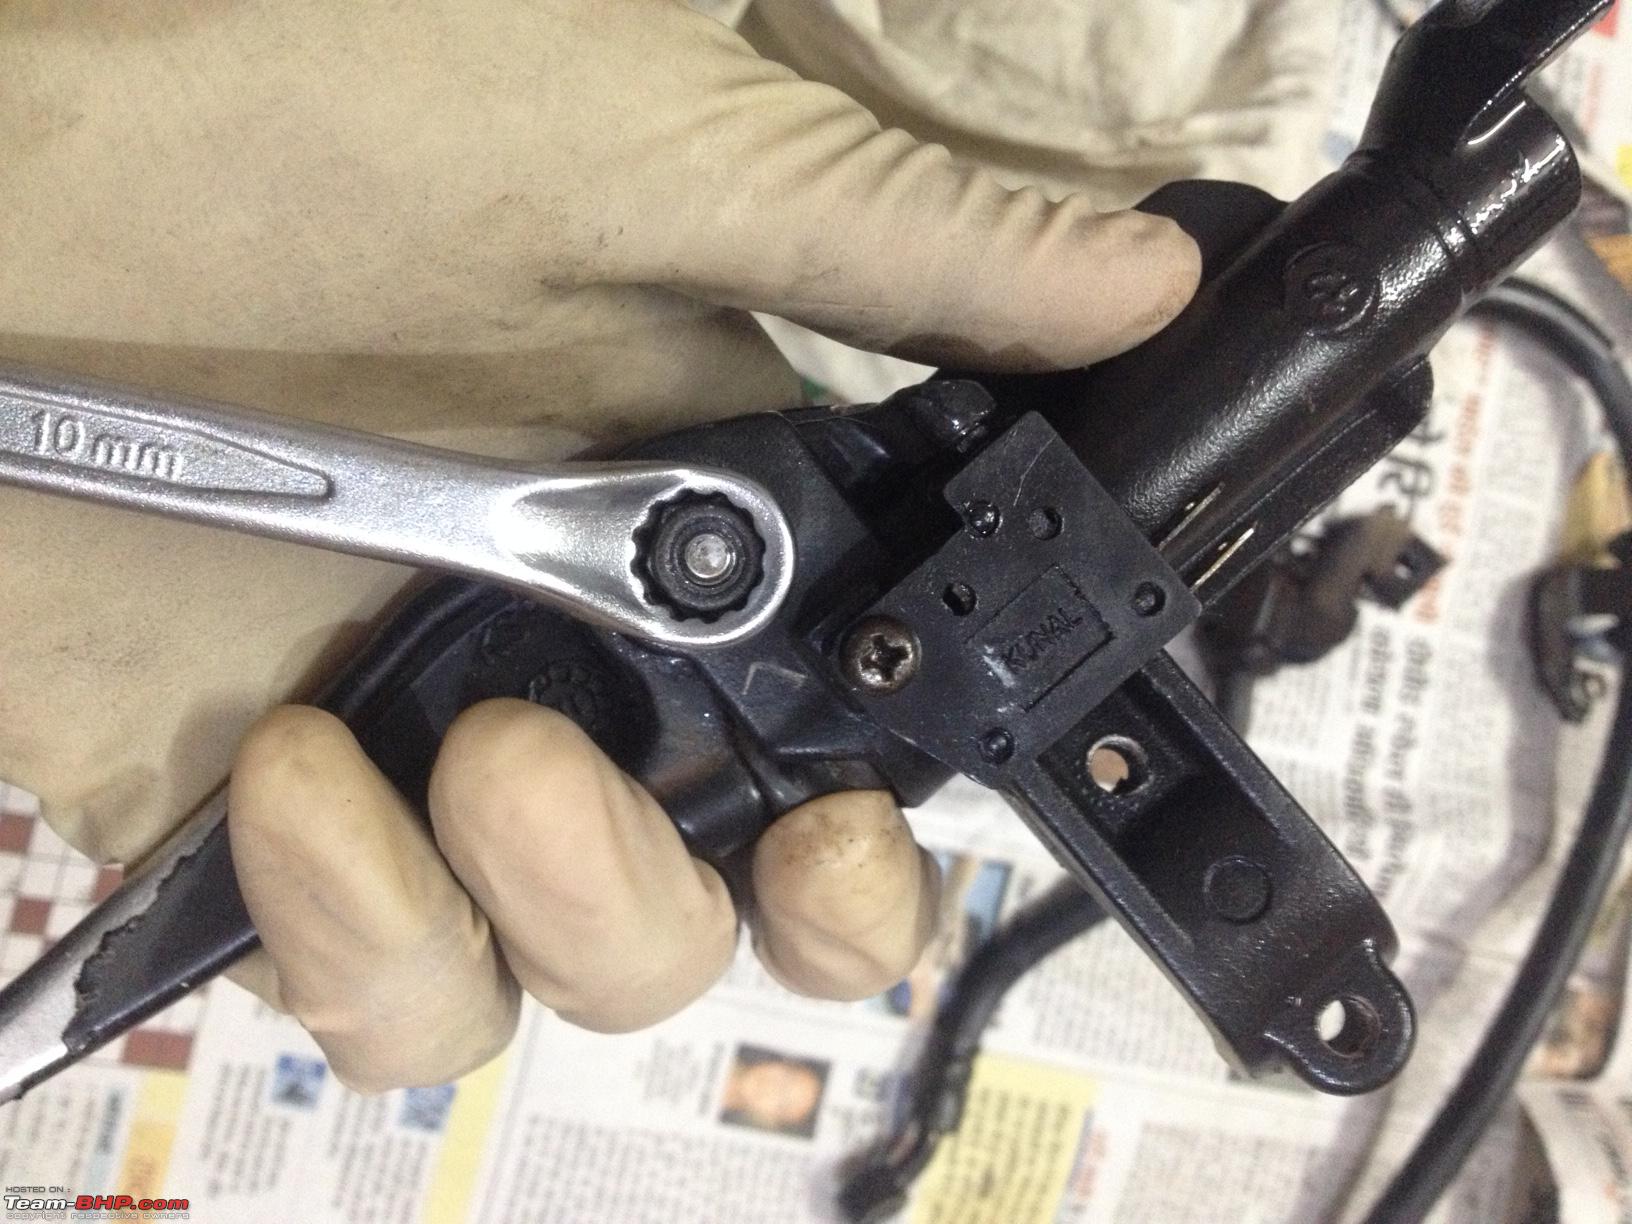 Also, take out the brake switch secured in place by a small four-head bolt located under the lever. 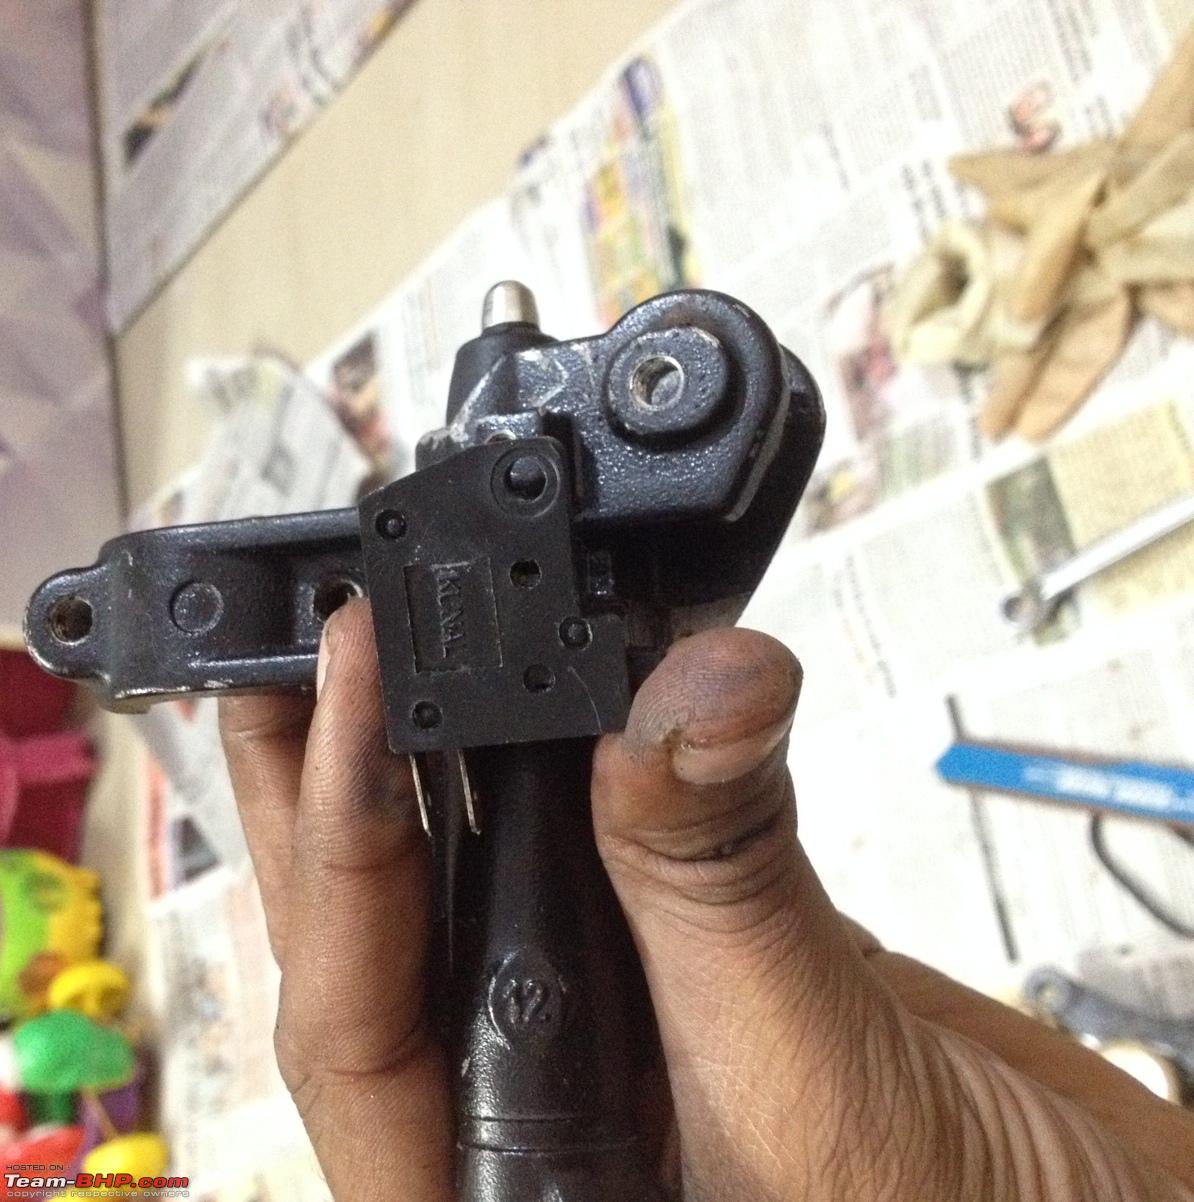 There was a lot of rust when I removed the lever and the plunger with rubber dust cap. The return spring was already broken due to corrosion which explained the enthusiastic brake lamp which wouldn't go off. To get the internals of the MC out, you need to first open the circlip lock for which a needle nose plier is the best tool. 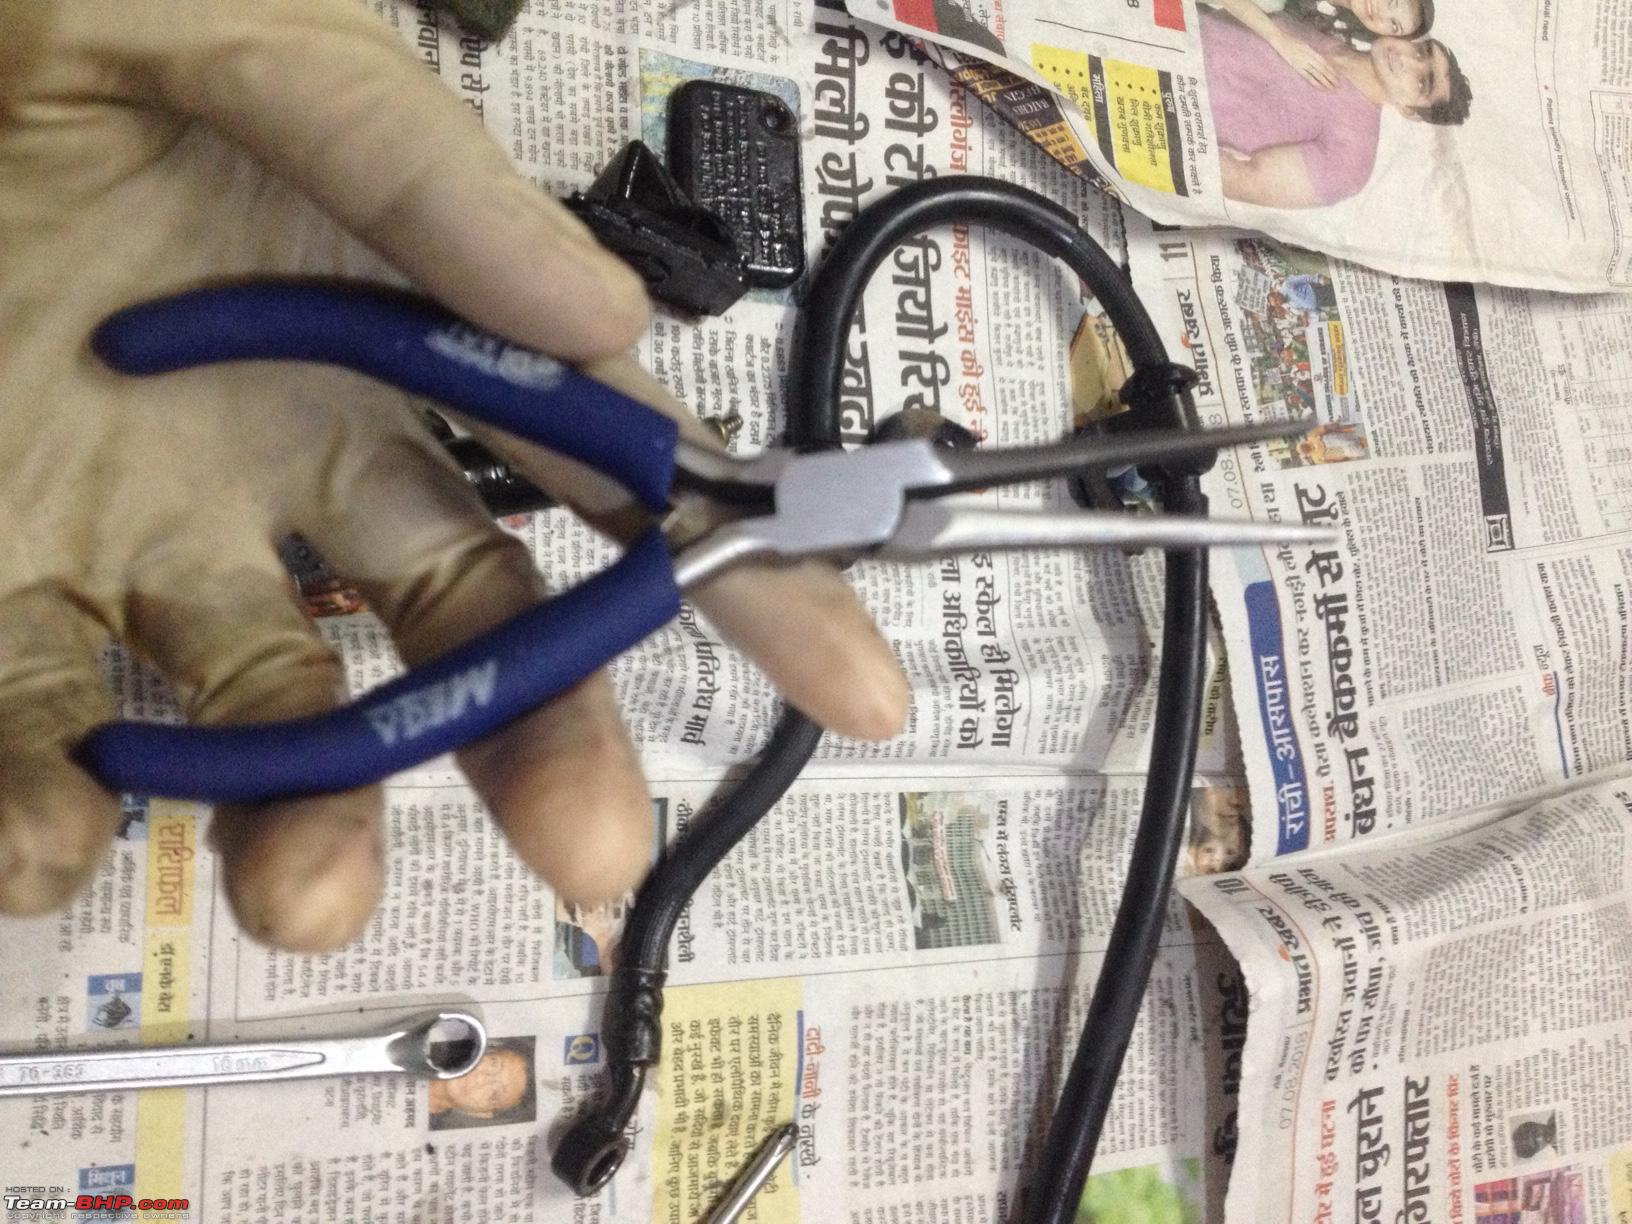 However, the circlip was badly corroded in this case and it broke the moment I squeezed it to take out. The next hour was spent wrestling to get that half broken lock out from its groove. 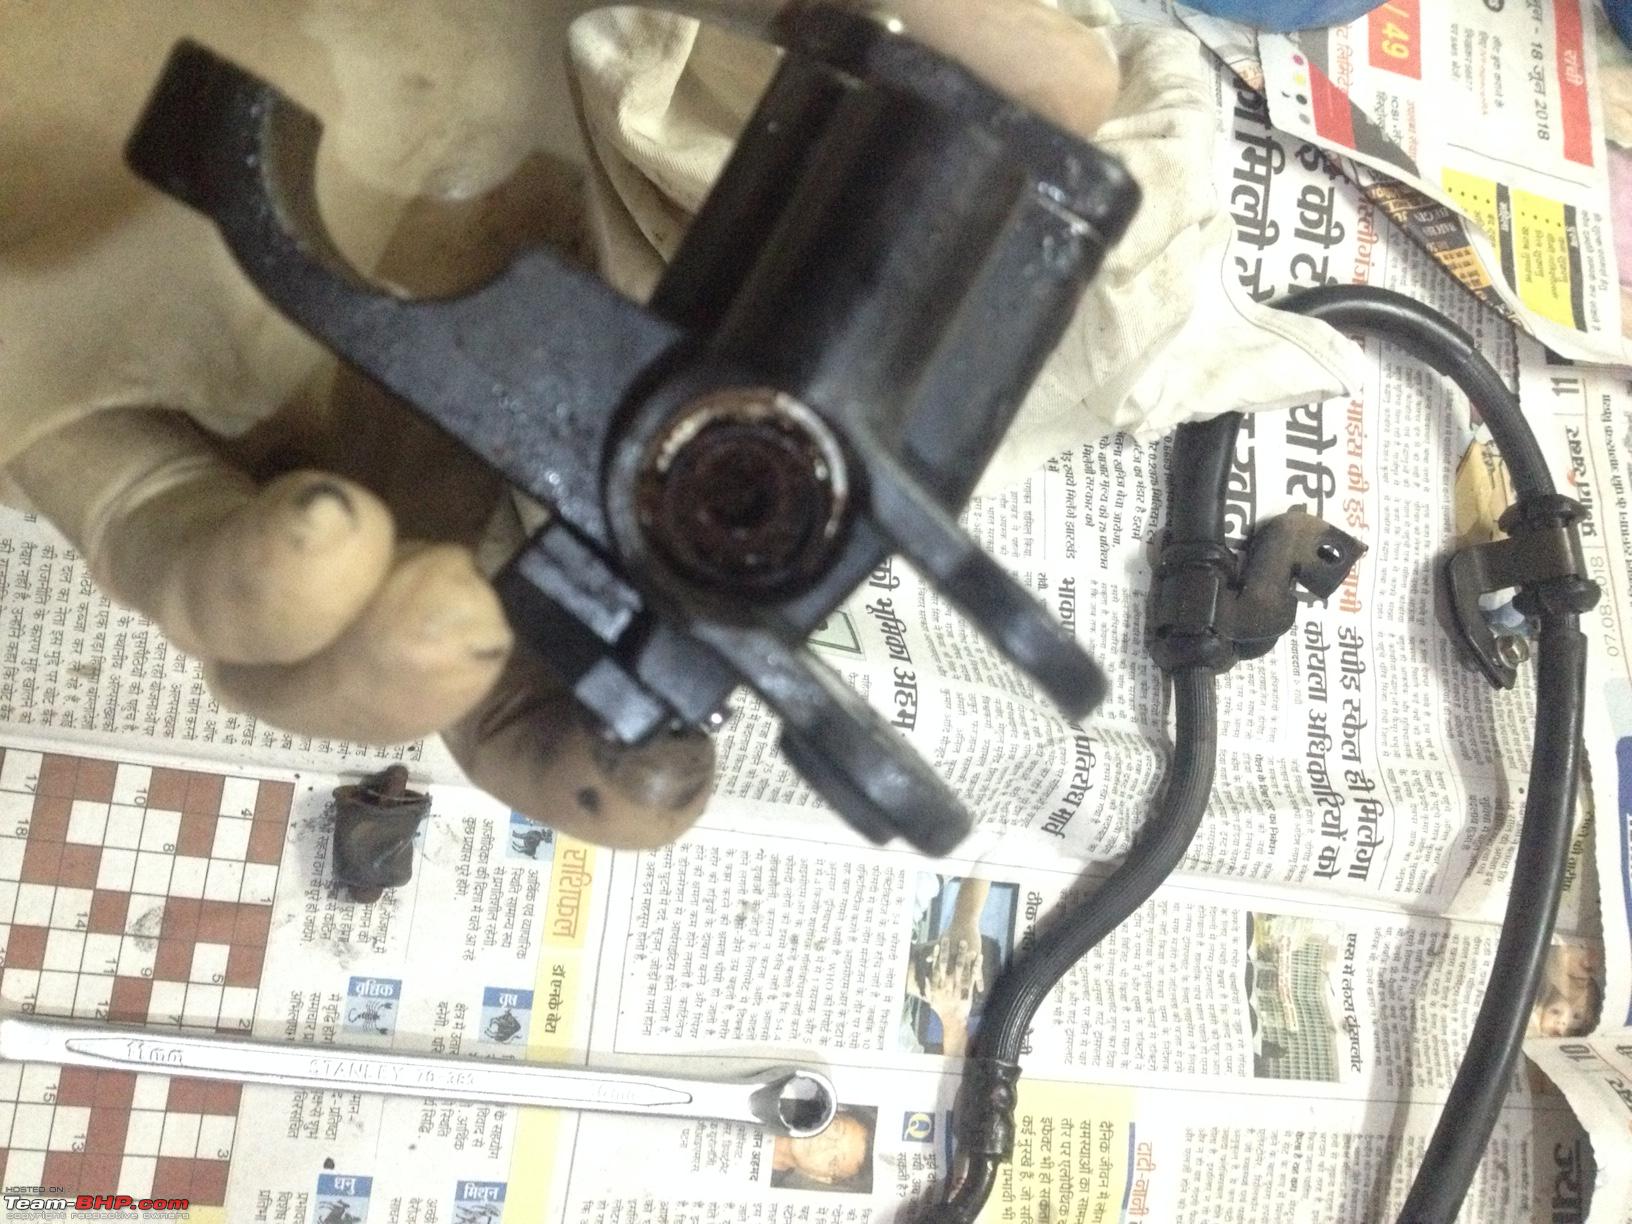 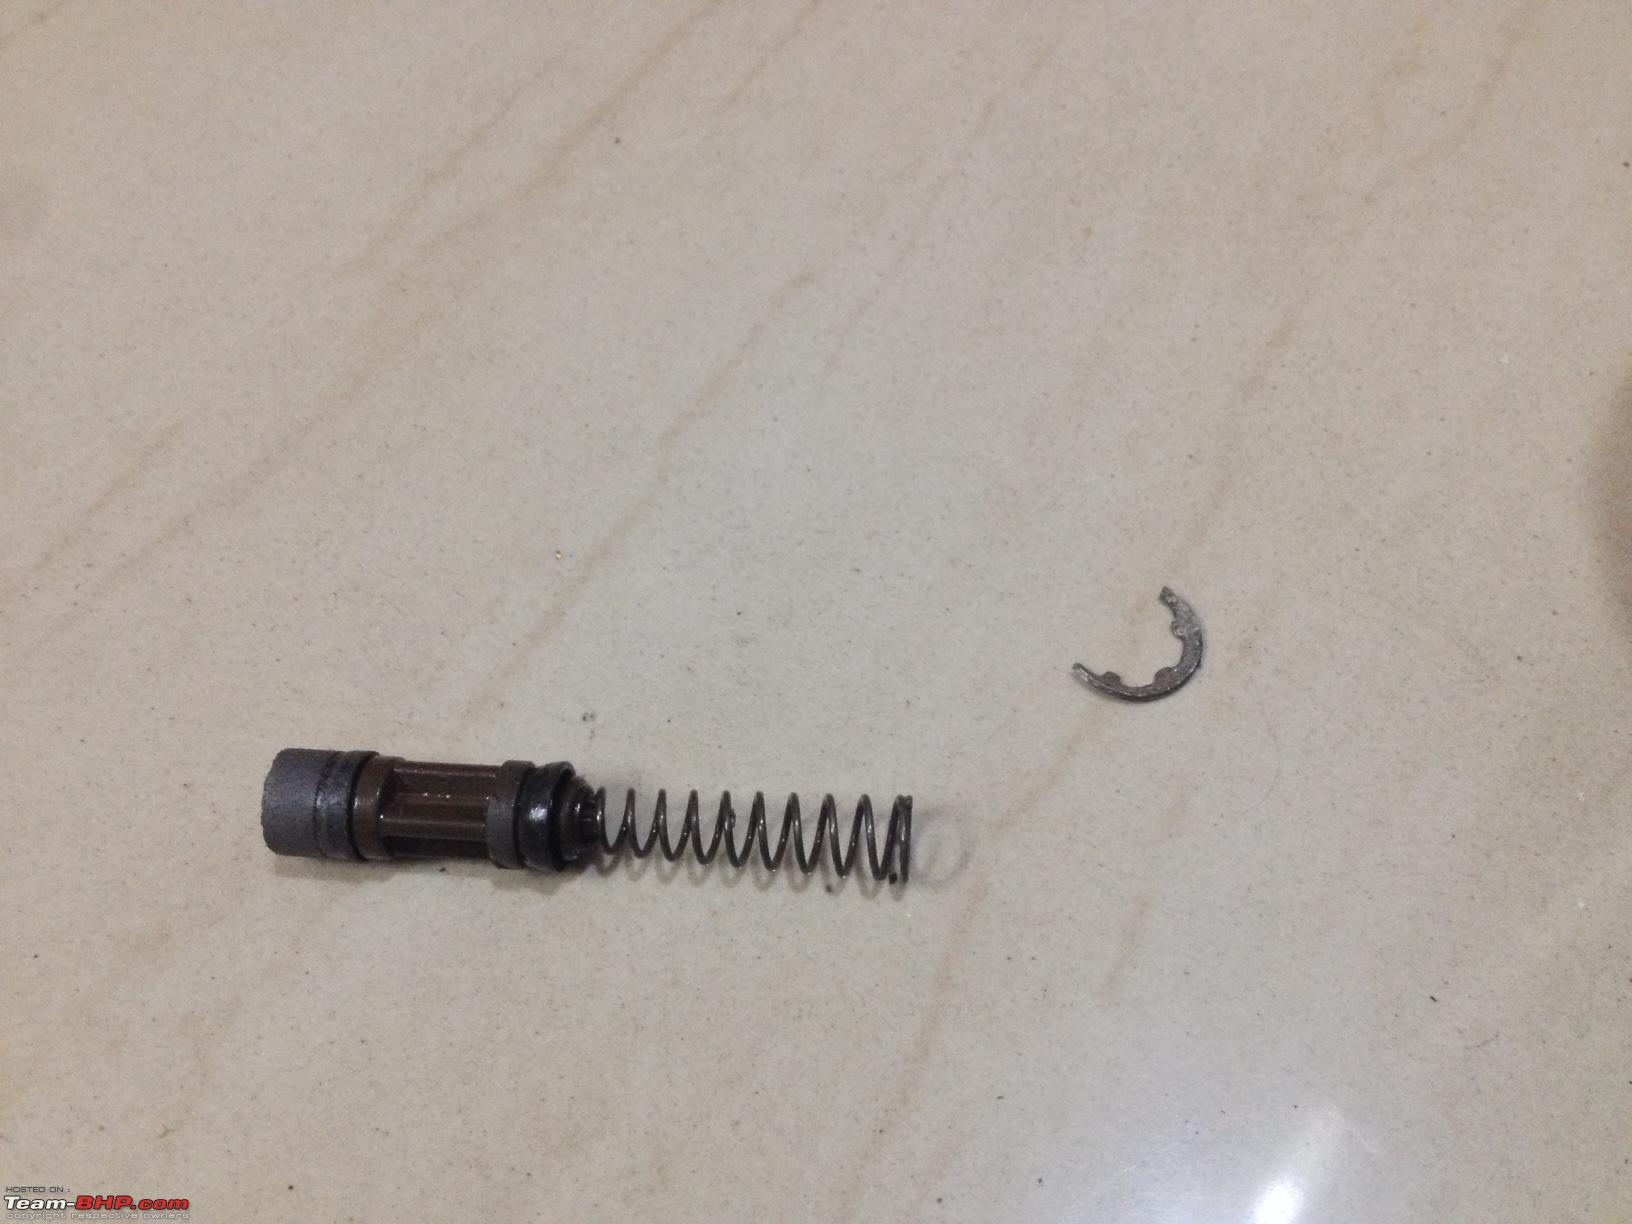 The Old piston and seals Once the circlip is out, the piston with the seals should come out of the cylinder through its own spring action. Be wary of this spring action; it may shoot out from the assembly, hence point the cylinder the other way while taking out this clip. If the spring action is not enough to eject the piston out, then push it out from the other end with a thin screw driver (from the brake hose outlet). The MC is now totally empty. Clean and wash all the muck & dirt inside with a brush and fresh brake fluid. Get the contents of the replacement kit and assemble the piston and the spring first. IMP: Spring fits snugly to the piston only at one end; the correct end.  The new kit. Put some fresh Dot-4 on the rubber seals of the new kit and slide it carefully inside the MC. Better if you do it with a circular action (like screwing it in) so as to avoid dislodging the seal from the piston. Push the piston completely inside and secure the contents with the circlip. Push the pistons to get the feel of the action (and reverse action) a couple of times. Don't pump too much as the seals are almost running dry at this time. Refit the plunger, spring and the dust cap and fasten the brake lever. 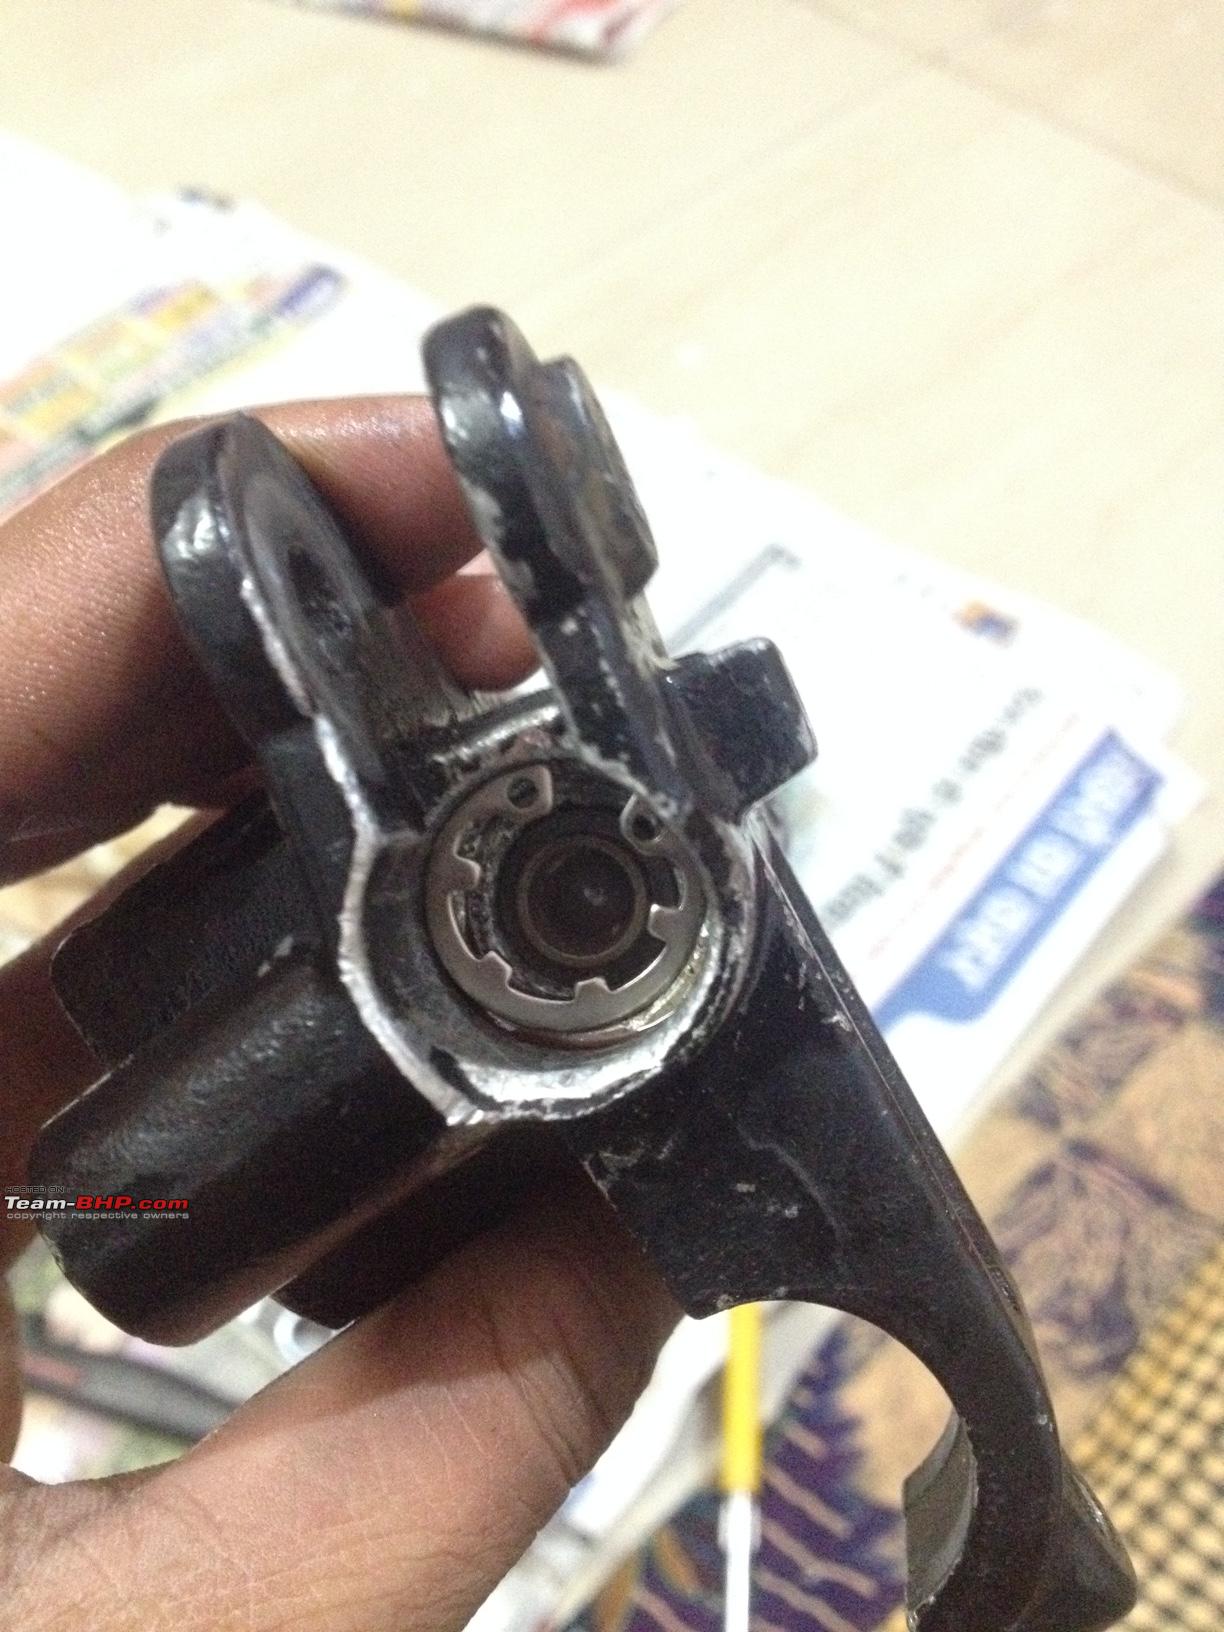 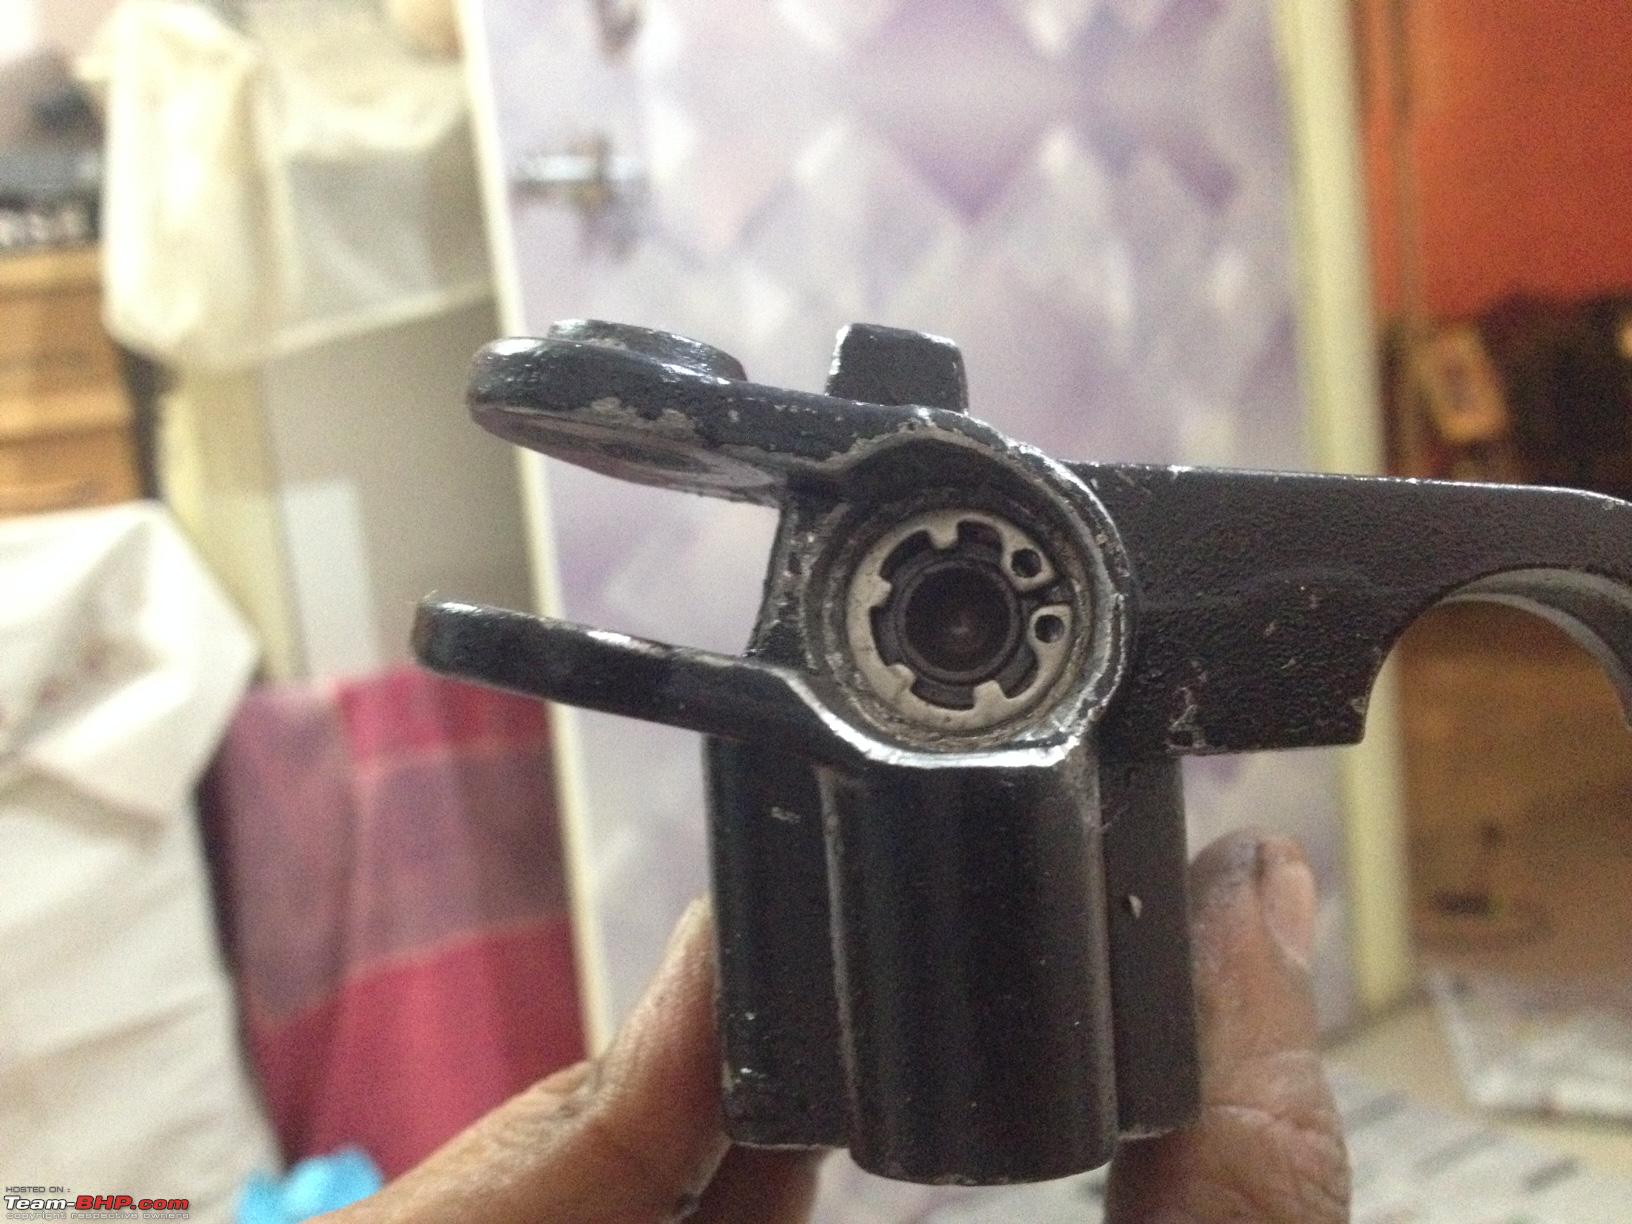 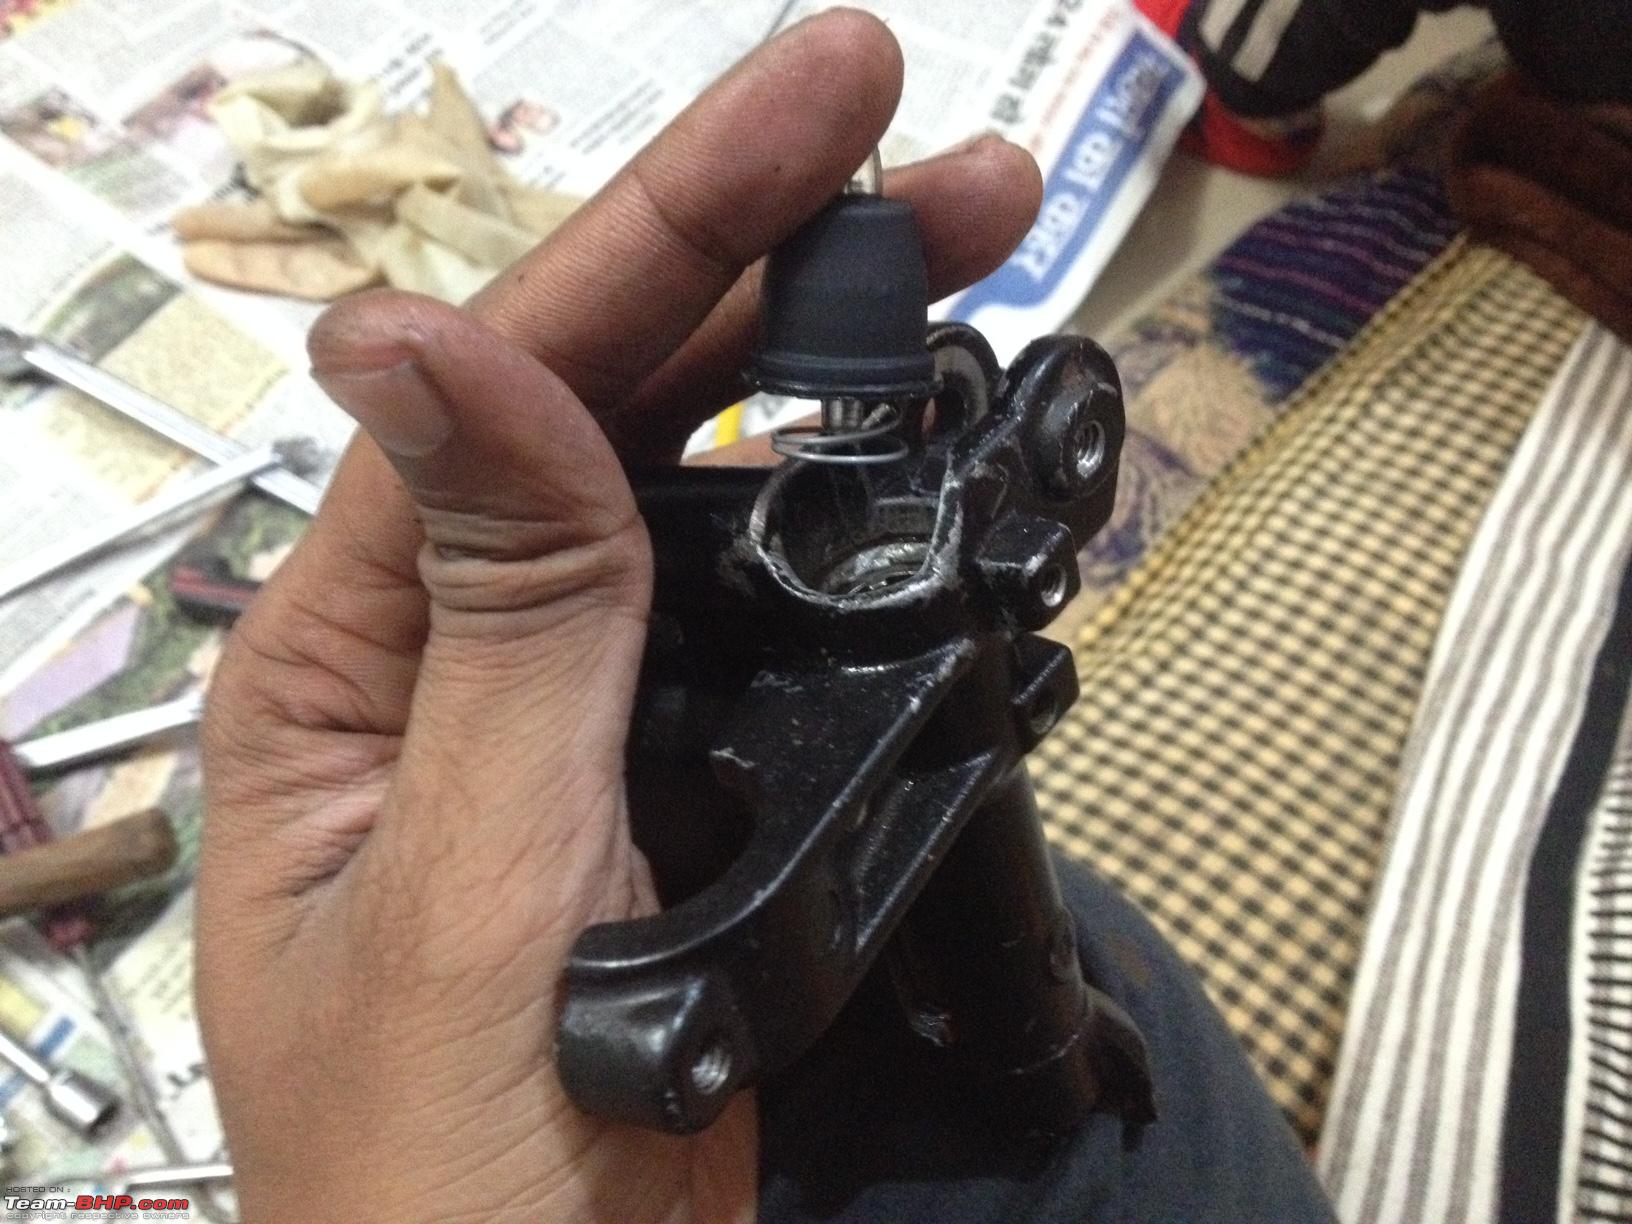 You can bench test the MC for pressure build up by filling some fluid in the reservoir. Just close the opening on the brake hose side with your finger and pump the brake lever a few times. You should see some fluid squirting out of the hole under pressure when you remove the finger. Indicates that the MC is building the required hydraulic pressure. Check for any leaks. Clean the filler cap and the rubber diaphragm thoroughly. Attach the hose. 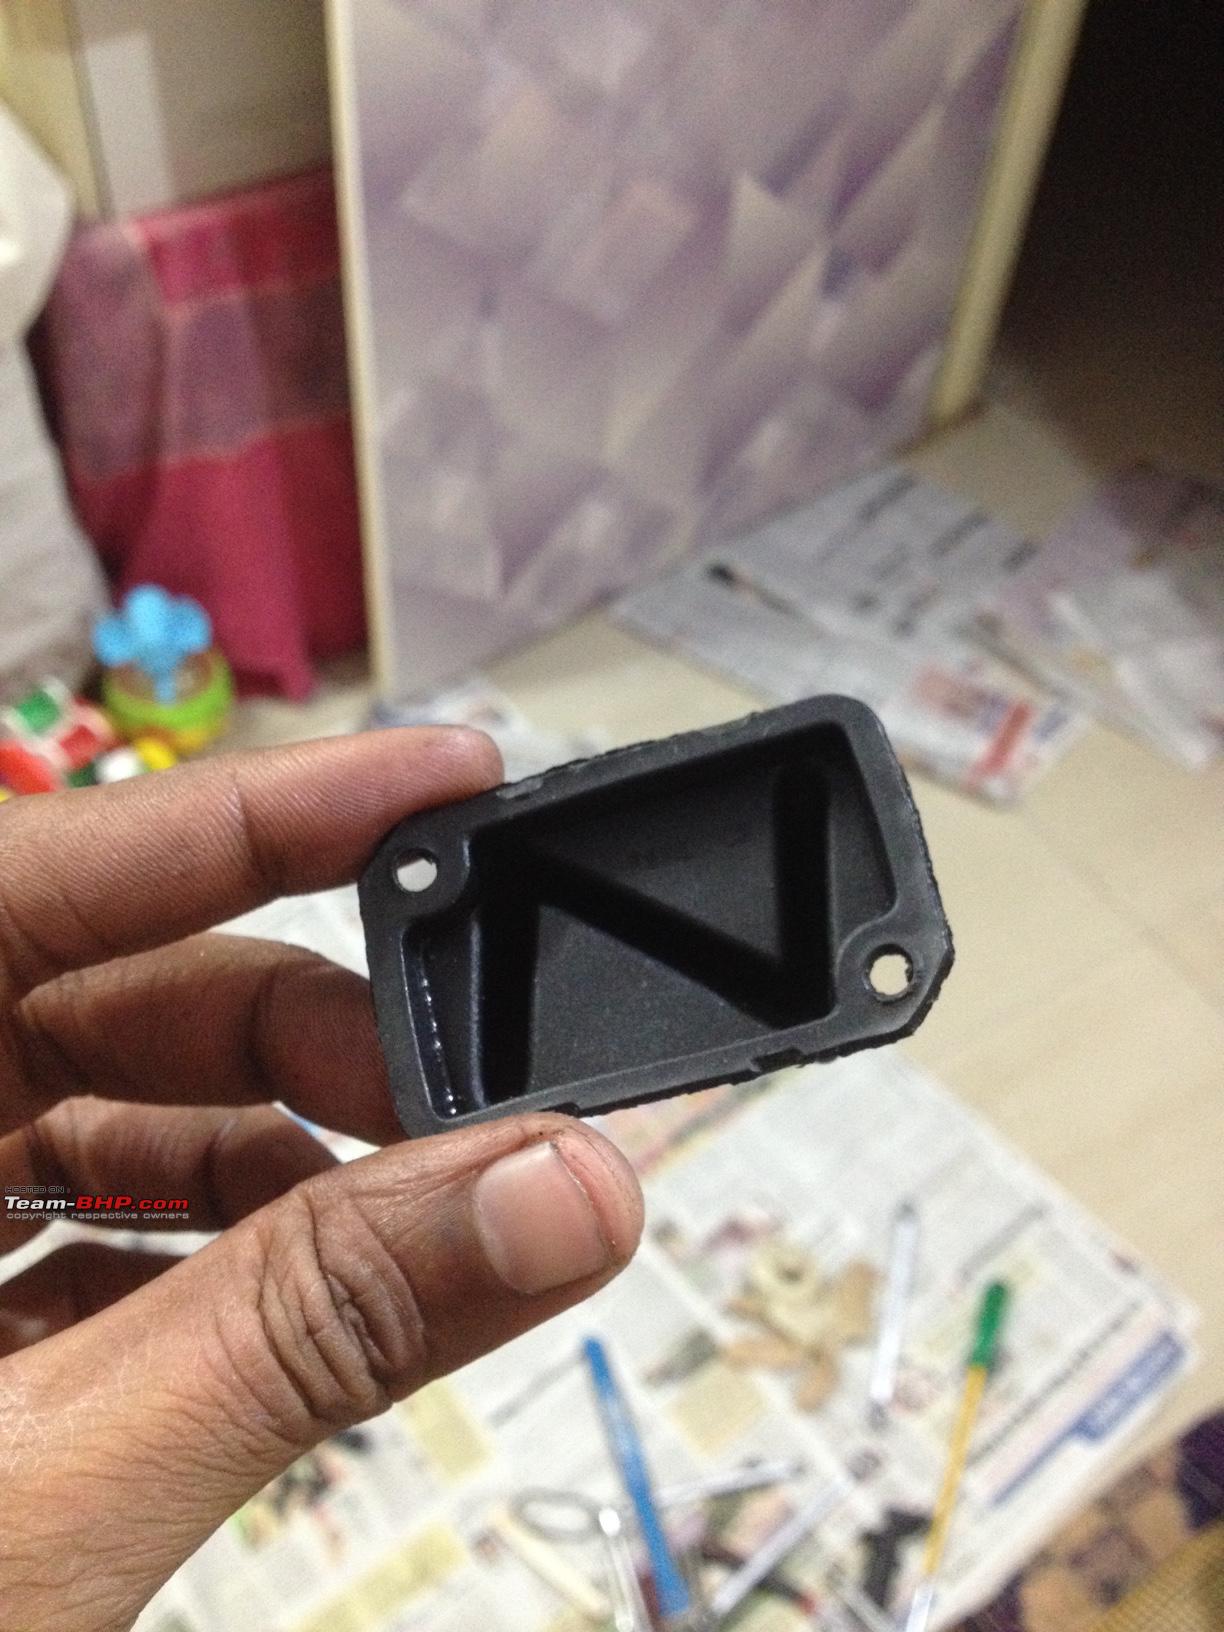  Rebuilding the caliper: I had tipped about extending the calipers fully before opening the pressure lines. To take out the pistons completely from the caliper, all you should need is a plier to pull them out. Just be careful not to scratch the pistons. When fully extended, the pistons should come out without much hassle. Take them out carefully and clean them with fresh brake fluid. Pull out the caliper pin assembly from the caliper body. On some models, they can simply be pulled out while on some others, you may need to undo a couple of fasteners, depending on the way calipers are mounted on the fork. Wash the entire assembly with fresh brake fluid inside out. You will be surprised with the muck that may come out from the unit. Take out the O-rings and seal from the caliper body's piston holes using a thin screw driver. Get quality replacement seals and seat them in the groove.  Brake Caliper Piston Seals (pic from internet)  Seated seals (pic from internet) Consider applying little bit of rubber grease or brake fluid on the seals before seating them. Apply some rubber grease on the pistons and push them in. Apply rubber grease on the caliper pins and put them back on. Slide them in-out and check for smooth action. Clean the brake pads to clear the brake dust in between the grooves. Make sure to not soil the pads with grease or brake fluid. Brake fluids getting into the pads can ruin them completely. Assembling the system back: Normally you can put on the brake hose on the caliper and the MC and loosen the bleeder valve. Fill up the master cylinder reservoir and place the assembly (which is now again in one piece) in a way where MC is sitting higher than the caliper body (like fitted on a motorcycle). Keep it that way & let gravity work for you. You should get fluid slowly dripping out from the loose bleeder valve in 10-15 mins. Bleed the system normally and you should see the pistons on the caliper extending again when you pump the lever.   Ensure the laws of gravity by placing stuff this way. However, the above will not work if there are some tricky or big air pockets in the system. I couldnt get it to work this way. So, I decided to reverse bleed the system, which might seem a little complex at first. Last edited by saket77 : 20th November 2018 at 18:02. |
|
| (11)
Thanks
|
| The following 11 BHPians Thank saket77 for this useful post: | adrian, ashwinprakas, audioholic, CrAzY dRiVeR, djoel99, GTO, Leoshashi, sukiwa, tacho9000, The_Outsider!, vaasu |
|
20th November 2018, 15:11
| #3 |
| Distinguished - BHPian Join Date: Dec 2012 Location: India
Posts: 4,844
Thanked: 14,764 Times
| re: DIY: Complete Master Cylinder & Caliper Rebuild And Reverse Bleeding Motorcycle Brakes Reverse bleeding: Bleeding by any method, I will suggest to perform only when the assembly is mounted on your motorcycle. I'm explaining the reverse bleed method with dismounted assembly for demonstration only (and for getting some pressure in the dry system to bench test the system). In this case, reverse bleeding was again properly done when I mounted the entire brake assembly on the bike. Coming to reverse bleeding, this method is among the best ways to bleed motorcycle brakes. In principle, air always rises up and using this method, you actually push the old fluid and trapped air up from the down caliper end to the master cylinder right at the top. This is precisely why I said that bleeding should be done with after mounting only as you don't want the air on top of the reservoir to get into the lines while carrying the assembly around. There are complete ready-made reverse bleeder kits available, but I didn’t have any, hence used the following method. For this, you will need a couple of syringes (bigger the better; at least 30 ml ones), a transparent pipe which fits on the syringe and bleeder valve opening and a few plastic zip ties. Secure the pipe on the syringe with the zipper tie as tightly as you can. You can use nose pliers to tighten the zip tie. Fill the entire pipe and syringe with fresh brake fluid. Attach the other end of the pipe to the bleeder valve and secure with the zip tie. 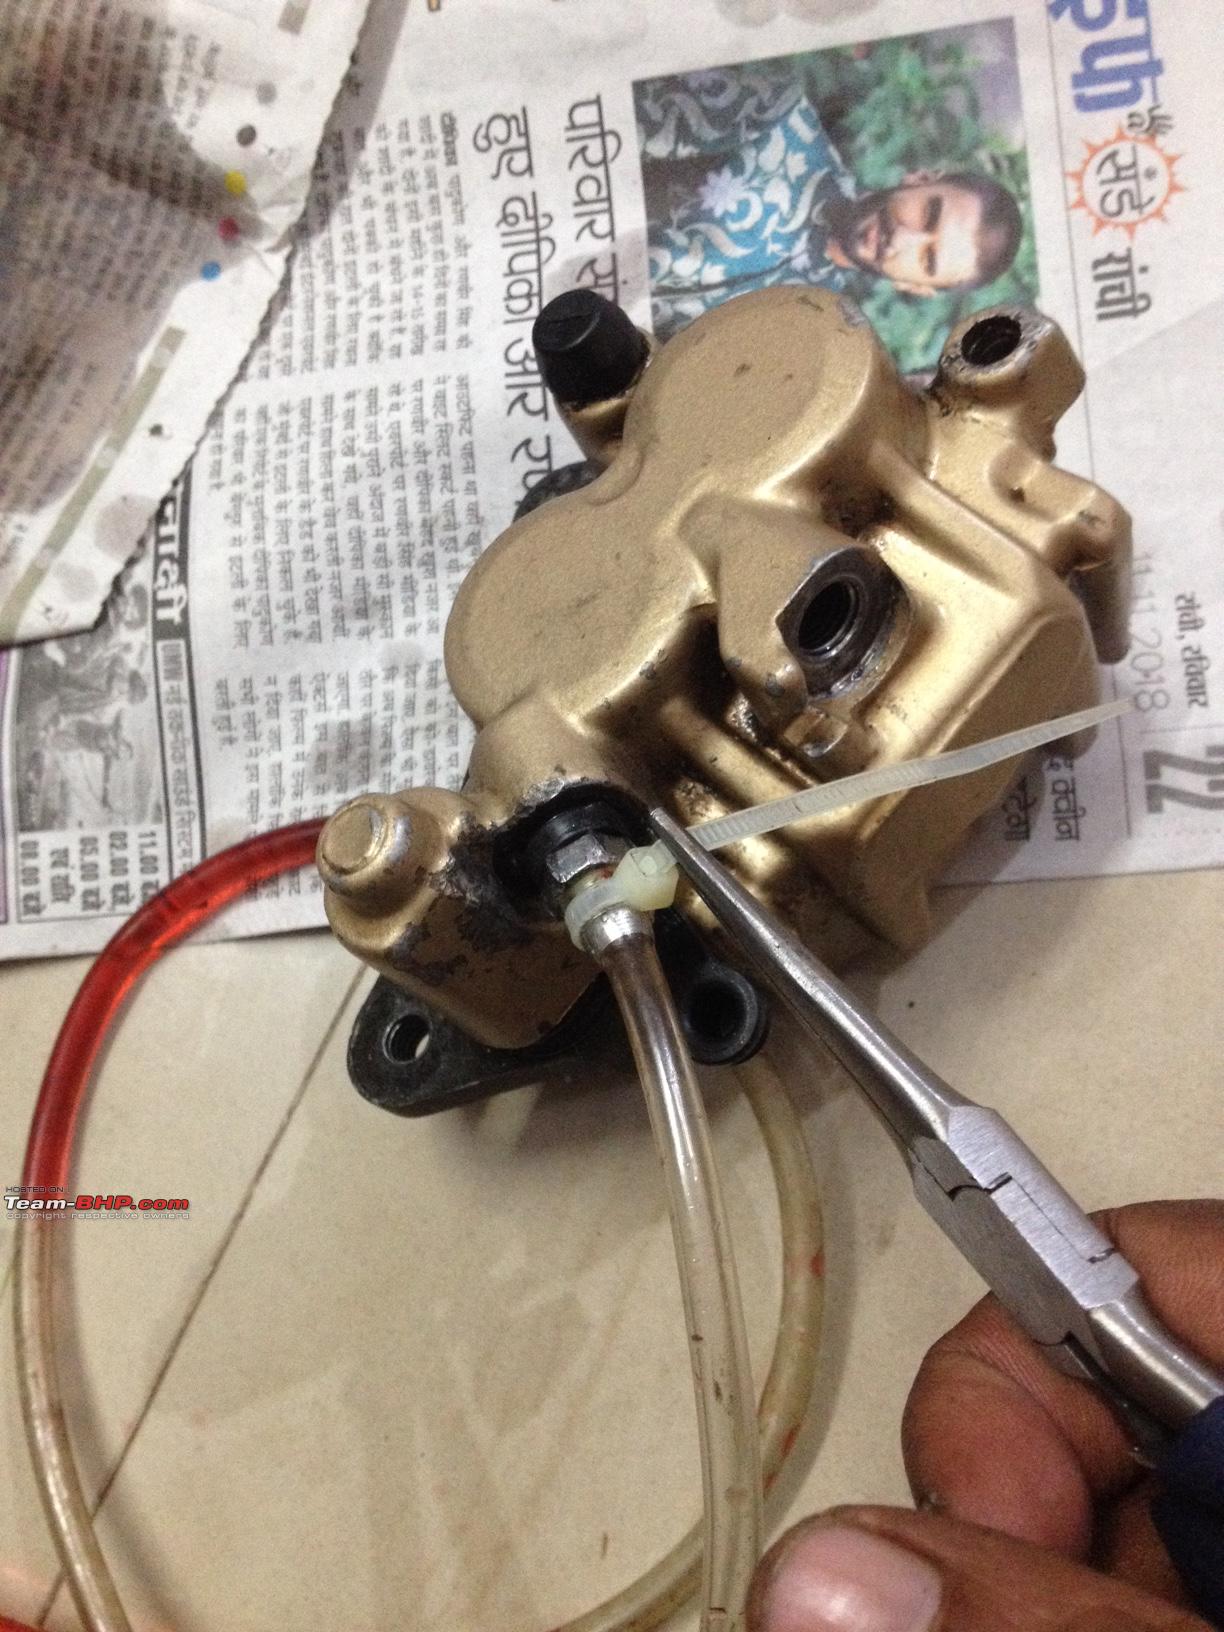 A general motorcycle will not take more than 70-80 ml of brake fluid, so bigger syringe (plus storage in pipes) save you the headache of refilling them in between the job. Empty the MC reservoir if there is any fluid in it and keep the filler cap open so that air can escape and you can monitor the levels. Start injecting the fluid via bleeder valve. It is important that the bleeder valve has been loosened and the caliper is at a much lower level than the MC. You may feel a little resistance in beginning but once you have dislodged the air pockets, it should rather be a smooth sail. You will hear air escaping from the MC while you keep injecting the fluid through the calipers.  The reservoir will slowly fill up. Suck out the fluid a couple of times with the other syringe. With fluid half way in the MC reservoir, shut the bleeder valve. Cut off the zip tie and remove the tube. Top up the fluid in reservoir and pump the brakes and observe for any tiny bubbles appear in the MC reservoir. If you find them, keep pumping slowly until they disappear. By now, the caliper pistons might be extended. Push them in and check for any leaks in the entire system including the calipers, particularly around the pistons. Pump and check piston action for a few times and press them back in. Use of C-Clamp will ease pushing the pistons. 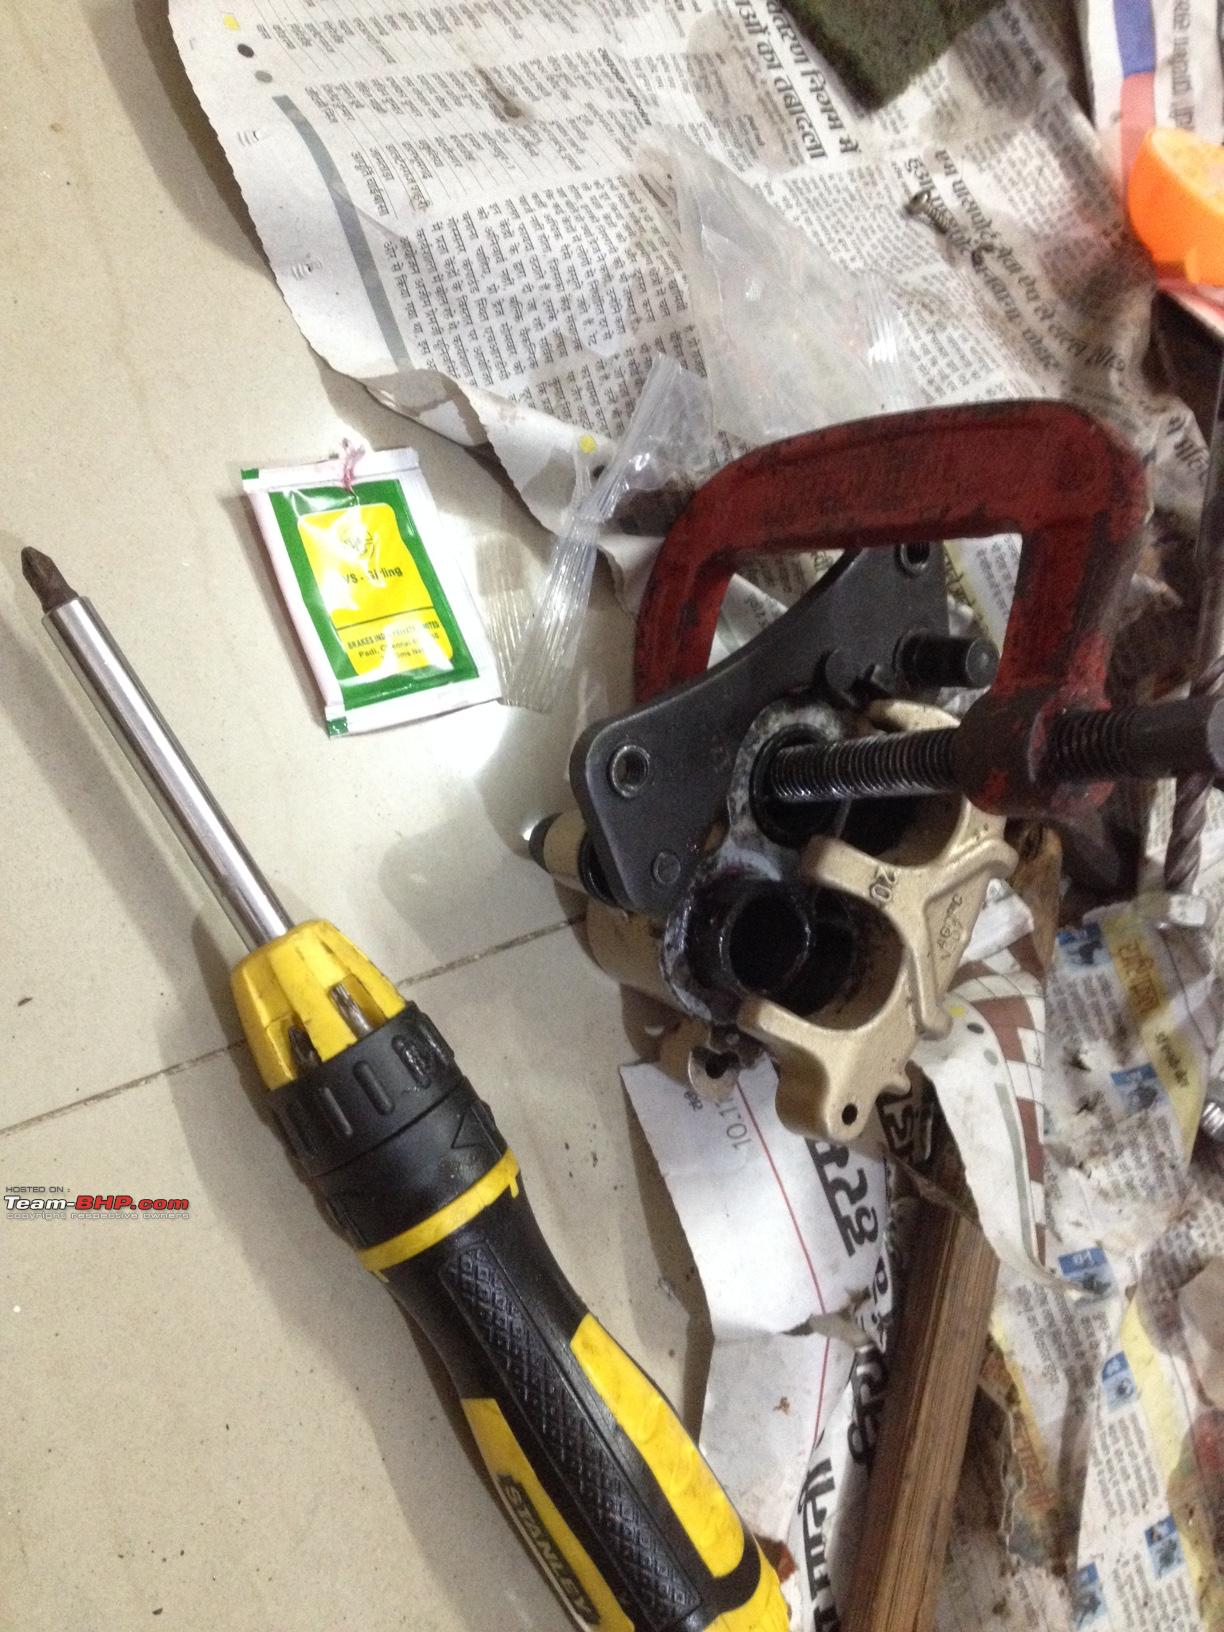  Clean everything with rags and fit the brake pads. Recheck and tighten the brake hoses and bleeder valve. Put the assembly back on the motorcycle. Once the entire assembly has been locked back to the frame, tighten the brake hose, filler cap and bleeder valve. Pump up the brakes a few times to adjust the piston w.r.t. brake pads until the brake lever hardens. Test brakes by rotating the wheel by hand. Also check for any brake drag. There should be none and the braking action should be strong. Test the brakes by riding in a safe area. Hope all went well. Shoot any queries or share your views and comments. Hope you enjoyed the DIY and the local news as well  After an oil change, scheduled today, the motorcycle will be back to munching miles as ever. After an oil change, scheduled today, the motorcycle will be back to munching miles as ever. Will love to end this thread by cherishing a few pictures of the machine itself. 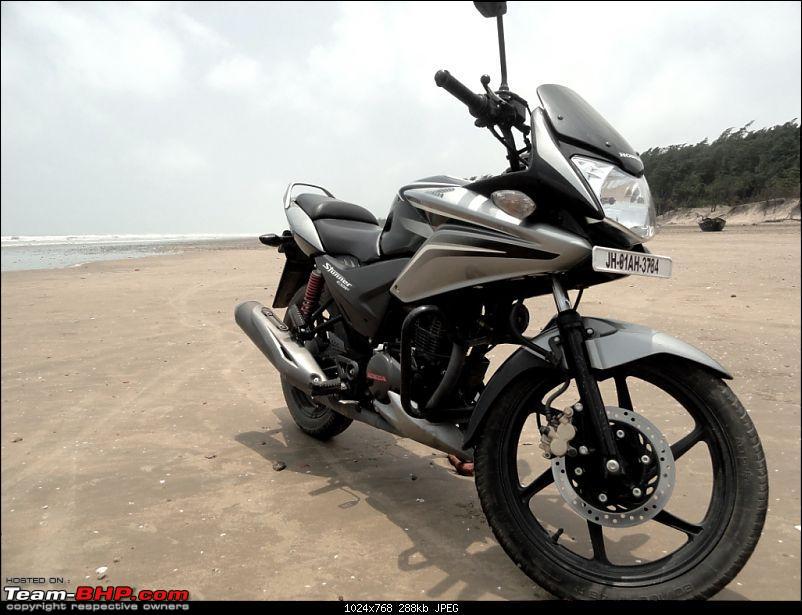 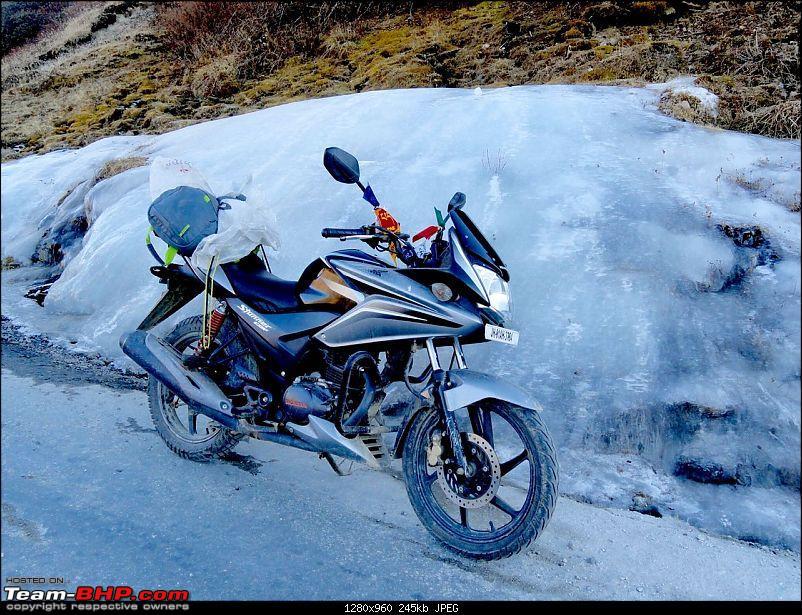  Thanks, Saket Last edited by saket77 : 21st November 2018 at 10:18. |
|
| (27)
Thanks
|
| The following 27 BHPians Thank saket77 for this useful post: | Added_flavor, adrian, anku94, anshumandun, ashwinprakas, audioholic, CrAzY dRiVeR, Dani7766, djoel99, francis_vaz, Geo_Ipe, GTO, gunin, hgps, Leoshashi, mallumowgli, Motard_Blr, motorpsycho, sagarpadaki, samschenker, siddarthab, SS-Traveller, sukiwa, tacho9000, The_Outsider!, timuseravan, Viju |
|
22nd November 2018, 07:23
| #4 |
| Team-BHP Support  | Re: DIY: Complete Master Cylinder & Caliper Rebuild And Reverse Bleeding Motorcycle Brakes Thread moved from the Assembly Line to the Motorcycle Section. Thanks for sharing! |
|
| (1)
Thanks
|
| The following BHPian Thanks GTO for this useful post: | saket77 |
|
22nd November 2018, 09:14
| #5 |
| BHPian Join Date: Sep 2009 Location: Trivandrum
Posts: 942
Thanked: 1,273 Times
| Re: DIY: Complete Master Cylinder & Caliper Rebuild And Reverse Bleeding Motorcycle Brakes May the DIY tribe increase in number  The most important thing that I have noticed while DIY-ing myself and watching others is the cleanliness of the job. While the FNG does the job in a dusty environment ( I have seen engines dismantled and dragged in dirt in the process at a now not existing RE service center in my Town), here Saket77 has chosen his computer room to perform his DIY. The result will be the longevity of the parts and the motorcycle itself. |
|
| (1)
Thanks
|
| The following BHPian Thanks adrian for this useful post: | saket77 |
|
22nd November 2018, 09:36
| #6 | |
| Team-BHP Support | Re: DIY: Complete Master Cylinder & Caliper Rebuild And Reverse Bleeding Motorcycle Brakes Quote:
. Had I kept a cable dripping with brake fluid on the floor tiles, pretty sure I would wake up in the hospital next.  Really glad to see the motorcycle forum picking up pace recently with some excellent DIY stuff. Will get back with my doubts after reading the full post. Last edited by CrAzY dRiVeR : 22nd November 2018 at 09:53. | |
|
| (5)
Thanks
|

| The following 5 BHPians Thank CrAzY dRiVeR for this useful post: | anku94, Crazy_cars_guy, parassoni, saket77, tacho9000 |
|
22nd November 2018, 10:17
| #7 |
| BANNED Join Date: Nov 2016 Location: Kollam
Posts: 2,018
Thanked: 6,658 Times
| Re: DIY: Complete Master Cylinder & Caliper Rebuild And Reverse Bleeding Motorcycle Brakes That's an awesome ride you got there, though Honda went berserk with the fibers the CBF125 is very engaging motorcycle with its short and tight gearing. It's about time to rebuild the system in my P220 as the motorcycle is at over 35k km's on the odo and the recommended interval to rebuild is 30k km's intervals. The reason I'm holding off is due not using the motorcycle much and because while the MC overhaul kit costs 240/- a new MC costs only 400/-, so confused on whether I should invest time or money to go about the rebuild. Since you were intending on going for a complete rebuild I'm curious to why you didn't consider replacing the brake line/hose? The recommended interval is 30k km's for the same. OEM comes at around 400 per hose, I'd suggest you go with Bajaj as the packing contains the copper washers and Banjo bolts as well. If interested in Steel Braided lines you can get them from Amazon for around 500ish. Mine came with Steel Braided lines as OEM but due to them costing 1100/- and because I needed a longer brake line to accommodate the new handlebar setup I'd gone for a longer OEM rubber hose from Bajaj which costs around 400/- as mentioned earlier, the difference in braking feedback is almost unnoticeable for my use. Also I see your MC cap screws are not in factory shape, do consider getting them replaced from Bajaj spares, costs only 6/- for 2 screws compared to what Honda charges i.e 100/- per screw if its a Japanese import. The screw is a universal part. Regaining pressure after a rebuild is a pain, due to not preferring my fluid to be exposed to the air due to hygroscopic nature of brake fluid, I go with the conventional method and once fluid starts coming out at a steady rate, I close the nut and replace the cover on the MC and zip-tie the brake lever to the handlebar all the way in, next morning I cut the zip tie and go with the conventional bleed a couple more times and the system works as good as new. A friend of mine whose a mechanic suggests tapping the banjo bolts with the end of a screw driver to get the air out sooner, though that didn't give the expected results in my case hence went with zip-tie method which is more or less fail-proof though time consuming. BTW, I know a xBhpian with a JH registered CBF125 in the same color named Ateesh, know him by any chance? Cheers, A.P. |
|
| (1)
Thanks
|
| The following BHPian Thanks ashwinprakas for this useful post: | saket77 |
|
22nd November 2018, 10:17
| #8 | |||||
| Distinguished - BHPian Join Date: Dec 2012 Location: India
Posts: 4,844
Thanked: 14,764 Times
| Re: DIY: Complete Master Cylinder & Caliper Rebuild And Reverse Bleeding Motorcycle Brakes Quote:
Thanks for your comments. Quote:
Quote:
Thank you. Yes, its a very reliable machine and has taken me to unbelievable places & terrains. Love the torquey nature, however, the gearing is short for highways. Probably something which can be solved by changing the cog/ sprocket, but I wasn't too keen. Quote:
I have used the 'zip-tying' the lever method as well; not very sure of the effectiveness but a lot of people out there swear by this method as well. Quote:
Regards, Saket Last edited by saket77 : 22nd November 2018 at 10:31. | |||||
|
| (3)
Thanks
|
| The following 3 BHPians Thank saket77 for this useful post: | adrian, ashwinprakas, InControl |
|
22nd November 2018, 12:17
| #9 | |
| Distinguished - BHPian | Re: DIY: Complete Master Cylinder & Caliper Rebuild And Reverse Bleeding Motorcycle Brakes Quote:
| |
|
| (4)
Thanks
|
| The following 4 BHPians Thank Leoshashi for this useful post: | ashwinprakas, InControl, sumitsinha0280, tacho9000 |
|
22nd November 2018, 20:50
| #10 | ||||
| BANNED Join Date: Nov 2016 Location: Kollam
Posts: 2,018
Thanked: 6,658 Times
| Re: DIY: Complete Master Cylinder & Caliper Rebuild And Reverse Bleeding Motorcycle Brakes Quote:
The funny part being that I was on my ZMA, which had around 100cc's more than the CBF125! Quote:
Though I'm confused about one thing, how would you prevent air from getting into the system when you temporarily remove the syringe to refill it? Asking as I doubt a single trip would be enough for motorcycles that use a longer brake line/hose. Quote:
Also if you have a weak seal and go with the Zip-tie method then you'll be greeted to a mess in the morning. Quote:
 During my GQ run I'd stopped at Durgapur, WB for the night and both Ateesh and Subham drove down from Kolkata to meet me and they were even kind enough to get me a couple of spares so that my ride was not affected hunting for the same. To think of it, t'is a funny world when you have a stronger bond with people you've met only once in your life compared to those who you see day in and day out. Last edited by ashwinprakas : 22nd November 2018 at 21:12. | ||||
|
| (4)
Thanks
|
| The following 4 BHPians Thank ashwinprakas for this useful post: | Leoshashi, saket77, sumitsinha0280, tacho9000 |
|
22nd November 2018, 21:15
| #11 |
| Senior - BHPian Join Date: Jul 2009 Location: Calcutta
Posts: 4,665
Thanked: 6,233 Times
| Re: DIY: Complete Master Cylinder & Caliper Rebuild And Reverse Bleeding Motorcycle Brakes Since you had taken off the whole system, you could have inverted the position of the MC and the caliper (ie say, caliper on the desk, MC on the floor), kept it overnight, and then bled it normally. Regards Sutripta |
|
| (1)
Thanks
|
| The following BHPian Thanks Sutripta for this useful post: | saket77 |
| |
|
22nd November 2018, 23:27
| #12 |
| Senior - BHPian Join Date: Aug 2011 Location: Phoenix, Ariz.
Posts: 1,200
Thanked: 2,845 Times
| Re: DIY: Complete Master Cylinder & Caliper Rebuild And Reverse Bleeding Motorcycle Brakes Just a word of caution for anyone who is rebuilding their brake system or for anyone who is just wanting to add a little brake fluid to their master-cylinder. You can use DOT 3 or DOT 4 brake fluid interchangeably but it's a good idea to use the type that is recommended by the maker of your motorcycle/scooter. You can also mix the two types without causing any harm. Under NO CIRCUMSTANCES should you ever use regular oils of any kind in your brake system. Motor oil or any other type of oil will destroy the rubber seals in the master cylinder and wheel cylinder(s) resulting in your having no brakes at all. Both DOT 3 and DOT 4 will almost instantly dissolve paint of all types. Be very careful and don't get even a small drip on a painted surface. If you do accidentally get some brake fluid on a painted surface, wipe it off immediately with a clean rag. It's a good idea to follow the wiping with a localized soap and water wash to make sure all traces of the fluid is gone. Although brake fluid is murder on painted surfaces it has no effect on chrome plating or other metal surfaces. Happy DIY. |
|
| (2)
Thanks
|
| The following 2 BHPians Thank ArizonaJim for this useful post: | Nitish.arnold, saket77 |
|
1st September 2019, 21:39
| #13 |
| BANNED Join Date: Nov 2016 Location: Kollam
Posts: 2,018
Thanked: 6,658 Times
| Re: DIY: Complete Master Cylinder & Caliper Rebuild And Reverse Bleeding Motorcycle Brakes Had changed MC and Brake Line and Overhauled Caliper, resorted to reverse bleeding and man! Its easier than gravity bleeding. I used a 50ML syringe(hard to source as Medical shops presumed me to be a drug user ) and a regular rubber fuel hose(brand new), the advantage of a fuel hose was that it would fit snug without the need of zip ties.Cheers, A.P. |
|
| ()
Thanks
|
|