| |||||||

| Search Forums |
| Advanced Search |
| Go to Page... |
 |
| Search this Thread |  33,043 views |
 7th December 2023, 22:58
| #16 |
| BHPian | Re: 2013 KTM Duke 390 - The Crypto Bike! Just to add to this, I replaced my MC with the latest Gen Duke 390's and replaced the pads with EBC sintered pads. You can feel the improvement in braking by miles. The new Gen Duke 390's sintered pads are a direct fit as well which you can check. I have been a fan of EBC pads, hence I always stick with those. |

|  (2)
Thanks (2)
Thanks
 |
| The following 2 BHPians Thank Tuisha110HP for this useful post: | b16h22, SunnyBoi |
| |
|
7th December 2023, 23:03
| #17 | |
| Senior - BHPian Join Date: Dec 2006 Location: Mysore / B'lore
Posts: 1,673
Thanked: 4,137 Times
| Re: 2013 KTM Duke 390 - The Crypto Bike! Quote:
| |
|
| (2)
Thanks
|

| The following 2 BHPians Thank SunnyBoi for this useful post: | Tuisha110HP, VijayAnand1 |
|
10th December 2023, 20:02
| #18 |
| Senior - BHPian Join Date: Dec 2006 Location: Mysore / B'lore
Posts: 1,673
Thanked: 4,137 Times
| Re: 2013 KTM Duke 390 - The Crypto Bike! The alloys had minor marks on them  Polished them out  Cleaned the sprocket carrier, looked so good when clean!  Alloys and sprocket carrier gets the ceramic treatment. This made maintaining the wheels way easier. The center of the wheels looks terrible in comparison, rusted rotors, bolts and all that filth in those nooks and crannies!  Old crusty screws on the side panels  Replaced with fresh Stainless Steel units 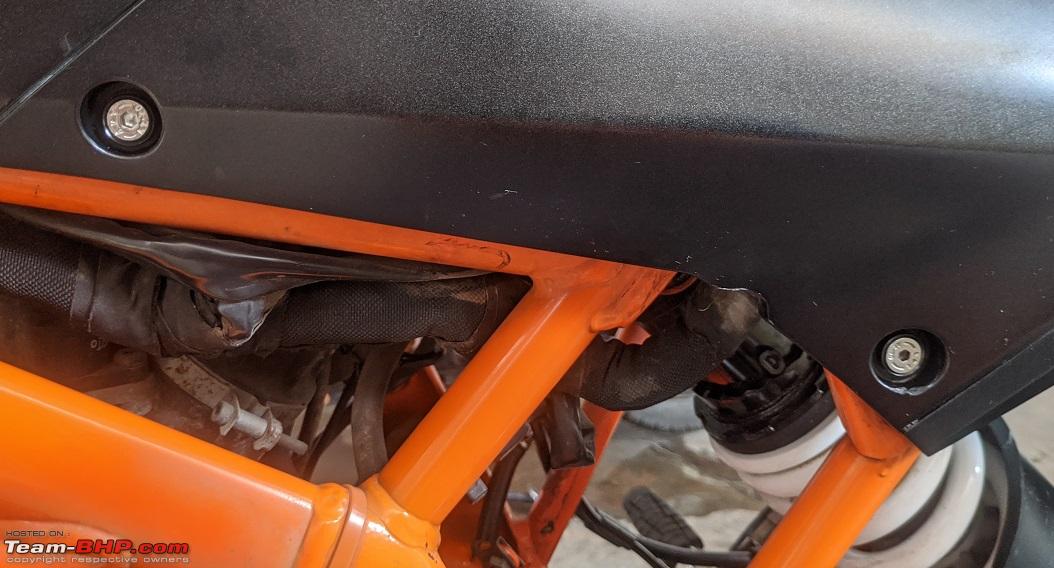 Grab handle painted and replaced  New parts for the duke : RH Fork Protector, Toolkit, ABS Rings and Rotor Bolts front and back, Apache RTR Handle grips, Side stand bolt and exhaust bushes  Exhaust is all put together with new dampers everywhere. Heatshield is held with new SS bolts with anti seize on them. The nut inside one of the bolts holding the heat shield broke inside, I had to take the exhaust again to the welder who cut a small portion, retrieved the broken bit and welded on a new M6 nut in it.  |
|
| (7)
Thanks
|
| The following 7 BHPians Thank SunnyBoi for this useful post: | anilp, arjpillai, chinmaypillay, hikozaru, Mrs&Mr_Shenu, Rahulkool, shyamg28 |
|
10th December 2023, 21:10
| #19 |
| Senior - BHPian Join Date: Dec 2006 Location: Mysore / B'lore
Posts: 1,673
Thanked: 4,137 Times
| Re: 2013 KTM Duke 390 - The Crypto Bike! This chapter starts off on a whim. The last maintenance checklist I hadn't ticked off is changing the coolant. One fine day I woke up and decided oh heck with it, lets just strip down everything cooling related anyway The radiator fan terminals also had the same gunk as the headlight plugs. I soon found out this is either grease or some dielectric compound. I left the residue as is.  I had to leave the hose from thermostat to the head in place as I could not get any of my pliers in to take off the clamp. I ran some water through the pipe to make sure I flushed the old coolant from the block.  Since the radiator was off, i could clean around the head and even better with just the exhaust off. It was promptly treated with some ceramic coat as well. I noticed the hose connecting T-pipe to the thermostat has been rubbing on the engine. not good.  There were some "brown chunks" stuck on the radiator cap that got me nervous 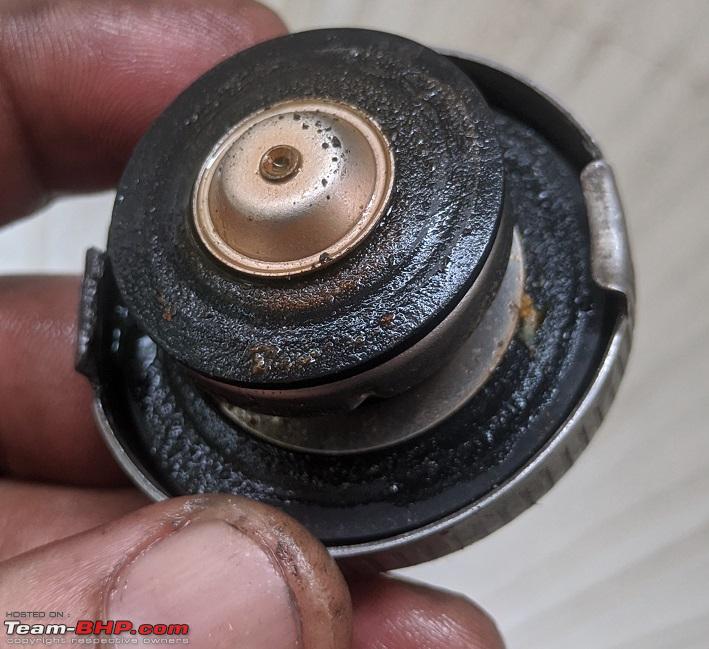 Inside of the radiator didn't look too bad for being almost 9 years old. I blocked off the holes with some self fusing tape, filled it with a mild acid and let it sit for couple of hours anyway and it helped...somewhat.  Worst among corrosion was actually the nipple that goes to the expansion tank. Inside of the pipe had some off cream pastey substance inside  While I got new handle grips, I should change the throttle cable as well , right? The clutch cable was also cahnged not too a while ago, the last remaining old cable would be good to be replaced as well. Throttle cable was very old stock, manufactured on July 2016. The 2014 came with a newer throttle cable and I made sure to get the right part for my 2013 bike. I also got a new water pump seal, O-ring for the T-pipe, new trim around the speedo which KTM calls it "the dashboard" and a new windscreen because it was cheap and my old one was scratched badly. I also got a new clutch release fork from newer dukes because it seemed it was longer and that would make the clutch easier to operate. New spring for it because the old one is rusted.  I then saw a crack on the water pump housing. I went through old pictures and the crack was present before. I could still thread a bolt but it wouldnt tighten anymore.  Time for a new water pump housing. New on top, old on bottom, the countersunk edges on the side  The coolant hose going from T piece to the thermostat had a deep gash, plus wear marks from rubbing against the engine all this time. You can see the part of the engine where paint has come off in the second picture on this thread.  While fiddling around the water pump side, I looked up, saw a sticker ont he fuel pump. I was made in dec-2020, which means it was changed recently! Yay, saved on a large-sh expense!  Come with a prospect of having to buy a new thermostat hose, off I went to the service center again and got a new pipe. I did not get an exact part match and instead got an "updated part" 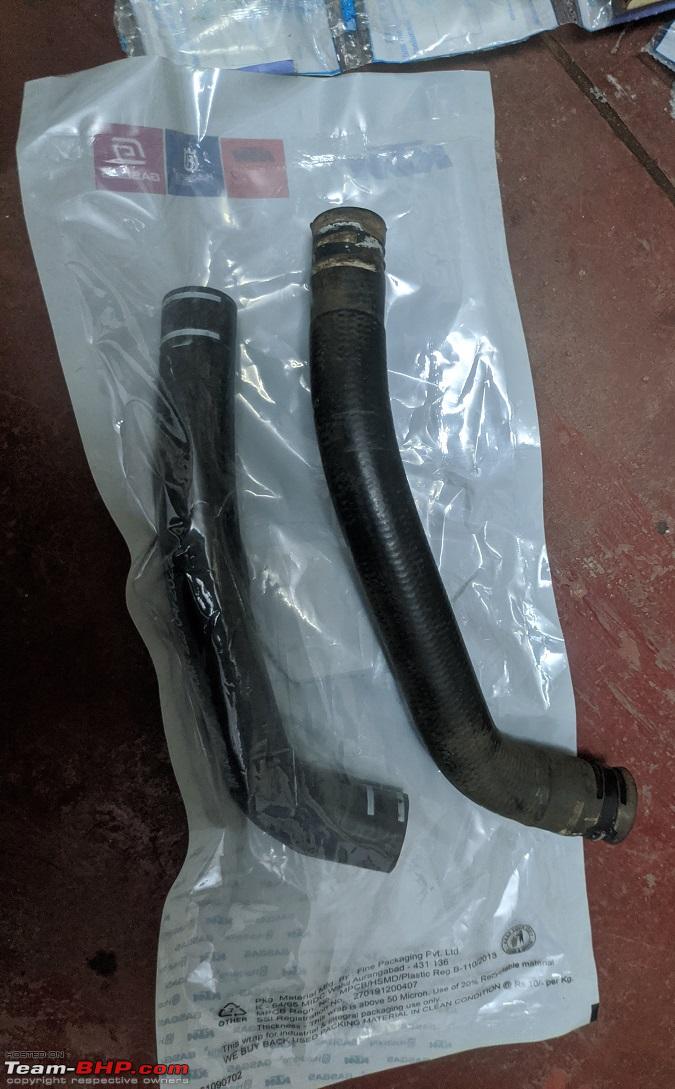 It seemed a tad smaller than the old one, which I saw it as a win since it wouldn't rub on the engine case anymore. So with the whole water pump cover saga behind me, it was time to install the new one. Oh no it wouldn't be that easy, sigh. The aligning dowels on the old cover were stuck on with some kind of glue and they just REFUSED to budge, not matter how many times I tried with pliers. Off I go to the service center who told me that don't have the part. none of the bajaj service centers had the part either. Stuck with a prospect of a non running bike, I thought of going to my welder guy, have him apply heat and remove the old dowels for me. On the way to the welder, I gave my mechanic a visit. I showed him the old cover, he used locking pliers was able to extract those ****ing dowel pins. PHEW now I can finally go back to putting together everything. While I was at the KTM service center asking for the dowel pins, I noticed a 2nd gen radiator fan in their junk pile. I asked them if I could have it as I wanted to transplant the shroud to my old 1st gen fan. They gave me the part since its trash for them anyway.  It looked straight forward to me, take off the 3 screws and swap over the shroud - the mounting holes all match up so it must be a direct fit, however it wasn't that simple. I had tot ake off the fan blades to swap over the shrouds - this meant destroying the blades. I could have carefully cut the old shroud around the motor, used it as sort of a "cap" on the working fan. This was again a bit complicated, I would have to make cuts to the frame of the working fan to make it work. I did not want to cut and paste something as critical as a radiator fan, however I may be sure that it would hold. So I let it go and use the old fan as is. Enough OnlyFans rant, lets continue with the rest. The overflow tank was cleaned inside with a bottle brush thoroughly, there was some orange debris inside.  When it came to put everything together, the radiator fan is held to the radiator with some weird screws with tabs. I unfortunately lost one in my garage, spent over 1.5 hours searching for it and couldn't find it. I found a screw with a low profile and wiiide head, similar to the screws used to secure the side shield of Yamaha RX. Thankfully this hack worked and the nut holding the radiator fan torqued up just fine. 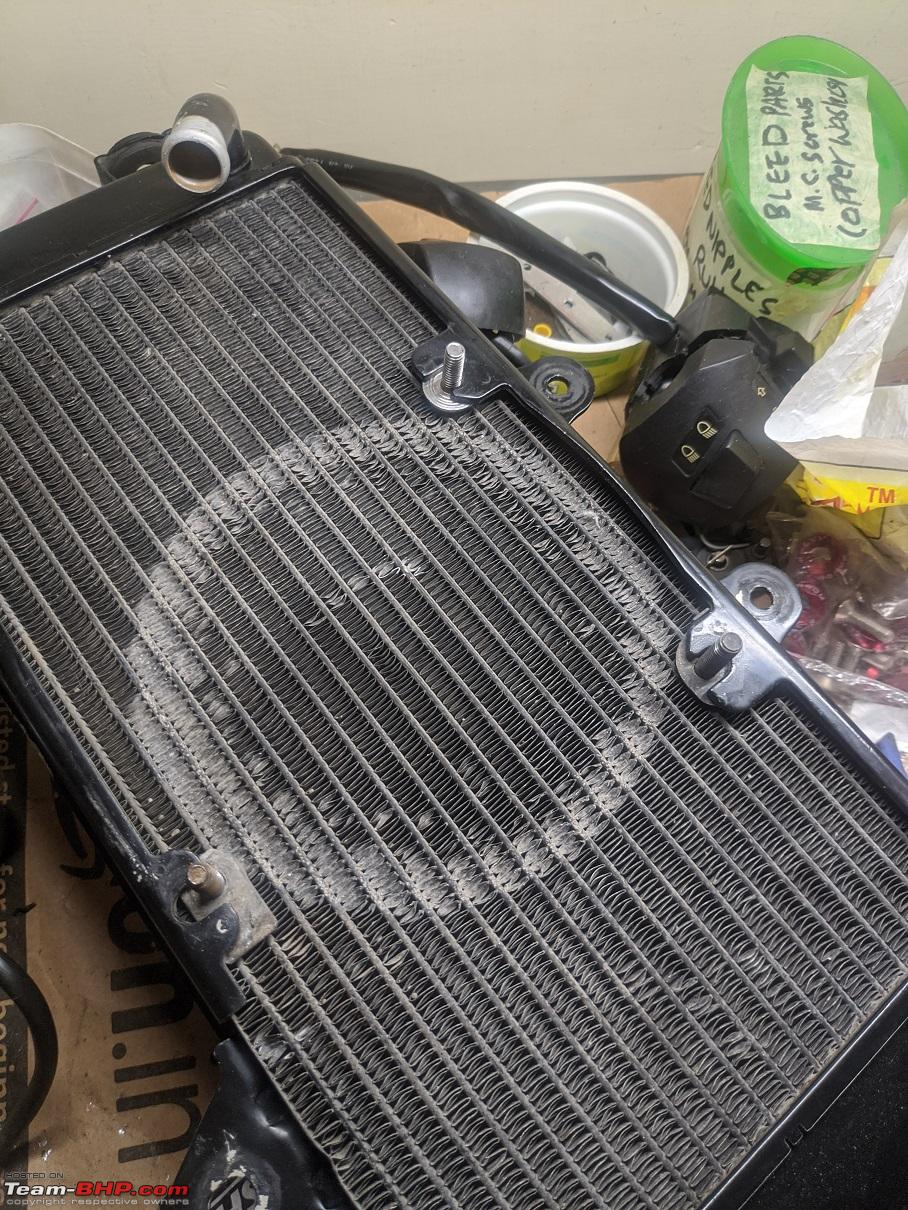 With these, all my cooling related problems would be solved, for now at least. I may have failed to convey how FRUSTRATING it was to get the cooling parts sorted - Day 1 - I take apart the cooling loop, go to the service center and get myself a new water pump seal and T pipe Oring Day 2 - I discover the broken water pump cover. Hop over to Service center again and get new cover Day 3 - Notice the damaged hose. Go to service center AGAIN and get it Day 4 - Stuck dowels. Go to service center and it isnt available. All these delays are because of my inexperience dealing with motorcycle cooling loops including inspecting all the parts at once and stop assuming other will not be other things wrong after finding one faulty part. However these delays gave me time to work on other parts just to keep myself busy and not drown in despair. One of these was refurbing everything on the handle. So I had purchased these handle grips from a TVS Apache RTR. It has the most supple grip out of ANY bike Ive tried, even better than the really expensive touring bikes out there. All my bikes are running grips from this bike. It comes with an accelerator pipe, however I did not check in advance if the orientation is the same and if it would work on the KTM. The moment of truth when I opened up the KTM right side switch, it will work!  However I celebrated too early. Thedre is an extra plastic section after the cable lock that would interfere with the throttle operation 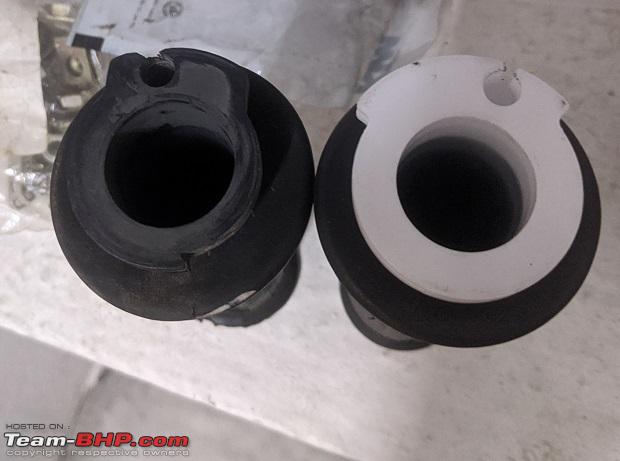 It only took me a minute to snip off the excess using my trusty side cutter  Handlebar and its holder got a fresh lick of paint  Handle bar switches had tons of muck and years of tired plastic on them  They were deep cleaned, I doused the electrical connectors inside with a considerable amount of iso propyl alcohol to make sure every little bit of water inside gets absorbed. The eventually got their ceramic coat as well.  As expected, the hand guards were touching the throttle grip when I tightened the bar end weights to the handle. Last time around, I trimmed the rubber on the grips but I did not want to this time. Instead I stacked on some washers till the two did not touch each other. 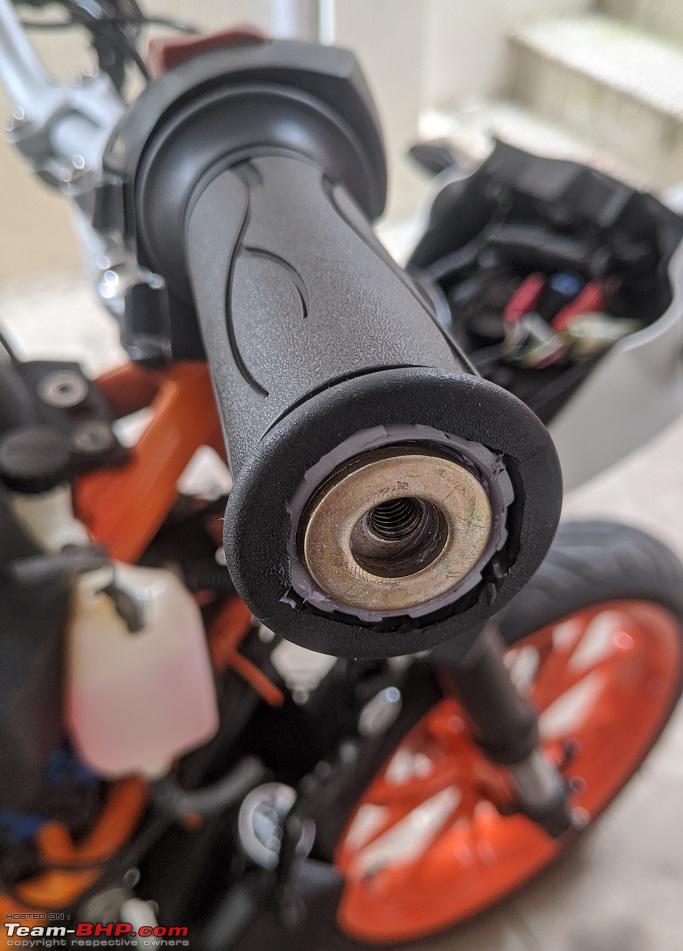 As for finishing touches, I replaced all the bolts and screws with SS allen bolts. They look nice!  With this done, I realised I put on the top portion upside down. I need to take it off, flip and put it back again. Ugh. Last edited by SunnyBoi : 10th December 2023 at 21:15. |
|
| (11)
Thanks
|
| The following 11 BHPians Thank SunnyBoi for this useful post: | anilp, arjpillai, b16h22, chinmaypillay, gischethans, hikozaru, Mrs&Mr_Shenu, Rahulkool, shyamg28, svsantosh, vaasu |
|
10th December 2023, 21:38
| #20 |
| Senior - BHPian Join Date: Dec 2006 Location: Mysore / B'lore
Posts: 1,673
Thanked: 4,137 Times
| Re: 2013 KTM Duke 390 - The Crypto Bike! Right, I had some more time with even more cooling delays so I decided to tackle the front end, which I had planned to do later on which involved taking off the wheels. But oh well. Filthy corners  Cleaned up. Every nook and cranny of the alloy, especially the rectangular pockets right behind the rotor were also cleaned. It was difficult witht he rotor in place but managed it. 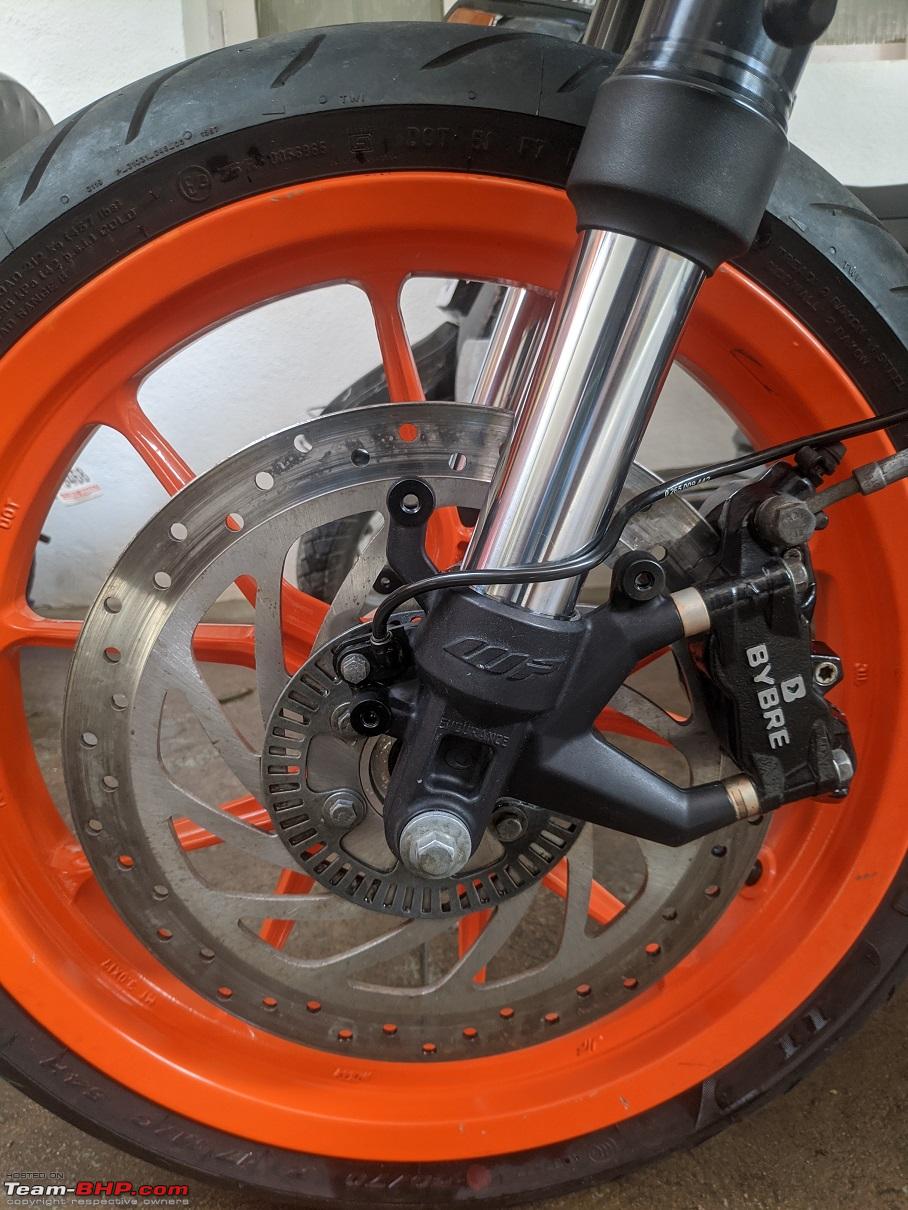 Insides of the front fender, before  and after 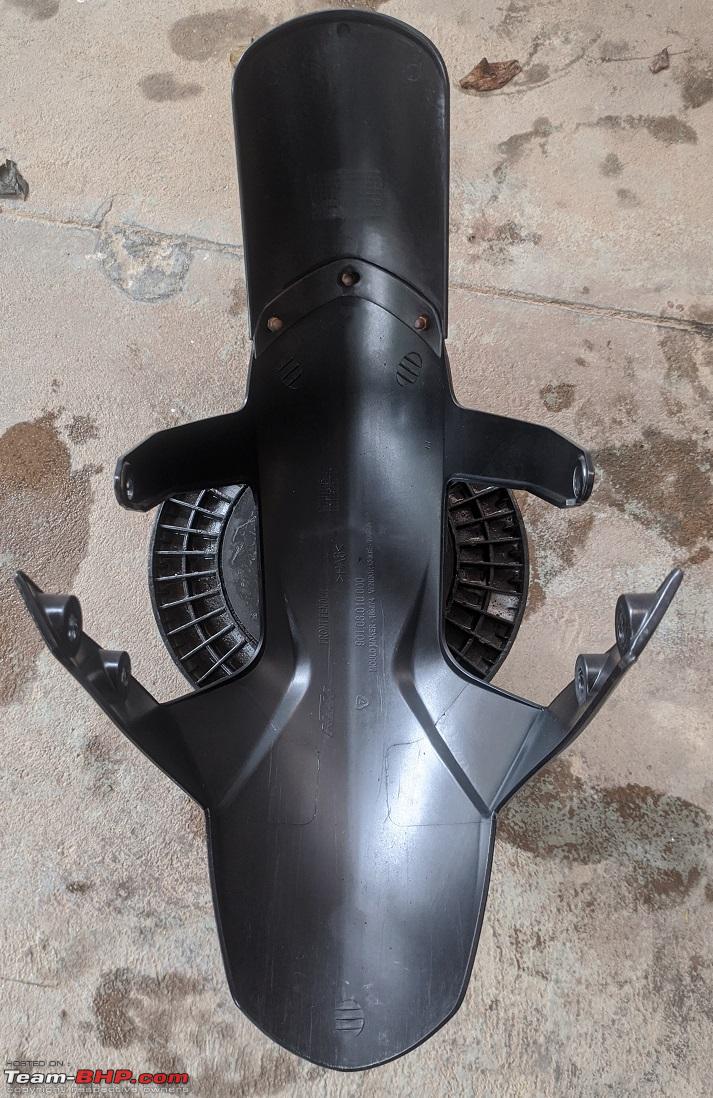 Front fender got a really good polish. It was ceramic coated along with remainder of the front end, including front alloy, caliper and fork legs.  I took off the rear foot rest, painted them and assembled them back with new Orings, SS washer and cotter pins. Took apart the gear lever and gave the same paint treatment.   At this point, I lost the screws to fix the fan to the radiator. I spent over an hour searching for it and just gave up. I luckily found an alternative I have posted about in my previous posts. But my headaches were not over yet. I had put in the end can of the exhaust into the bike and left it as is with the fresh rubbers. These new "rubbers" were much much stiffer than the perished remains that were before. This also meant the tab that was welded back did not fit at all. No matter how much shoving I could do, that hole would just not line up. I finally gave up, took the exhaust out. Went back to the welder, told him to cut the ear and extend it out by another 5mm. This also meant the paint and ceramic coat I had done on the exhaust would also go into the trash. I just wanted to put together the bike for now and worry about cosmetics later. Once I was back, I sanded the area that was welded and did a patch up job with the matte black paint. Once I got the old dowels out, I put in the new water pump gear and then rest of the pipes but one - the dreaded T pipe to thermostat which was shorter. Turns out it was too short.  With a lot of cursing, the pipe finally fit back on. I thought of putting the exhaust on before the radiator as it seemed easier. So went in the exhaust. Again things did not want to go in and it took me a lot of shaking and cursing before the bend pipe went into the end can. I let go a huge sigh of relief, buttoned up all the nuts and bolts then called it a day.  Come next morning, I was excited to finally put everything together and get the bike running. I slapped on the radiator and fan and prepared it for fillup. I went with distilled water + redline water wetter instead of regular coolant, prime reason being I like a pinkish/purple coolant. My PC is running on redline water wetter and car with Glysantin G30 for reference.  The radiator took around 1030ml before the bleed screw started to overflow. I topped up the overflow tank to the max. I was now very happy - The manual said 1100ml of coolant capacity and I got close to it! I was excited and put the tank cover on. I bolted on everything down to the last screw, then I found one of the rubbers which was mounted from inside of the wings, on the floor. FML. Took off the tank cover and this time I decided to put it on last. By this time I was pretty frustrated again. I cooled down then the hanging headlight irked me off. The insides were all dirty and dusty, the plastics around it were badly faded as well. So took them all off  Cleaned them all, I realised I missed coating few spots on the forks which were obstructed by the headlight. Promptly finished them all off. Fitted them back on once the coatings cured somewhat. With the bike prepped for start, I connected the OBD2 adaptor, fired up torque. Started the bike and it seemed to run just fine. I read somewhere about the 15 minute adaptation for idle and thought of letting it idle for 15 minutes. I was facing bad lumpy idle where idle RPM would see saw from 1500 and 2000 RPM. and I had nothing to lose while I use the time to monitor temperatures. I started with an ambient temperature of 26*C. The temperature touched 95*C and the fans kicked in, they shut down when temp went down to 90. I did some homework on this forum about temperatures when the fan comes on and off, this seemed to be in line. Fans kicked in again and turned off then the 15 minutes were up. The idle seemed to have somewhat stabilised and I wasn't convinced this worked. With the 15 minutes of running, the clear pipes started turning golden yellow. I'm glad the yellowing was even and no fingerprints could be found.  Come next morning, the tank cover got a round of polish and fitted on the bike  Finishing touches, the new tool kit goes under the seat. Belly pan was fitted back.  With this, the bike was fully put together   With the bike fully assembled, I went out on a shakedown trip, 60KMs to nearby paddy fields. I carried my toolkit and a liter of distilled water in case of any leaks etc. Started the bike, went well. let it warm up for couple of minutes. Gave it a bit of throttle and the bike died. So there is still something to be fixed. Nonetheless, I started again, gave a bit more throttle to prevent the engine dying and set off. The bike felt surprisingly smooth, smoother than before and less vibey. Was this the new comfy handle grips at play or was it placebo? I reached my destination without any issue whatsoever. Stopped to take some pictures     Condensation inside the meter again. AARGH  When I reached back home, the idle was more or less stable now, with 100rpm fluctuations instead of the earlier 500RPM. The power band had become smooth and linear, no longer peaky. Riding the bike in the city is now so so so much better and almost all knocking down below has disappeared. At this point, I'm not sure what made the bike better. Was it the new Motul 300V oil? Slipper Clutch? New O2 sensor? switch from 91 octane to 95 octane gas? But I'm loving the end result! |
|
| (17)
Thanks
|
| The following 17 BHPians Thank SunnyBoi for this useful post: | anilp, arjpillai, b16h22, chinmaypillay, Cyborg, gischethans, Gordon, hikozaru, keroo1099, Mrs&Mr_Shenu, Oppanna, Rahulkool, shyamg28, sole_rider, surjaonwheelz, vaasu, vattyboy |
|
10th December 2023, 23:26
| #21 |
| Senior - BHPian Join Date: Oct 2013 Location: Stickn' Around
Posts: 1,066
Thanked: 2,825 Times
| Re: 2013 KTM Duke 390 - The Crypto Bike! Sunny, that's a job well done, yes it hurts, but the satisfaction is simply priceless. Neat job with the ceramic coating. Believe it or not, I had a strong hunch the exhaust resonator crack/weld will turn out to be trouble when installing and reading through it did! Should have been a through bummer. Glad to see the bike getting much deserved TLC, looks like she's been neglected and abused. Allen keys all around does make it look upmarket and also glad to see top of the line items like Mothers Shine, JBWeld, WaterWetter, Permatex etc, shows the care. What is the ceramic spray or shiner you're using? Glysantin is simply the best (courtesy, my erstwhile Accent 1.6) than the exorbitantly priced Engine Ice. Wanted to try the LiquiMoly RAF12, turns out, it would just be another run of the mill expensive coolant. LiquiMoly seems to have increased prices across-the-board for their products, hmm... Whopping 30% increase from the prices I purchased them long back. Keep it coming. BTW, do share a link if you've posted something about your 1L7 and the Indian Fiero, would make a great read.  Cheers! VJ |
|
| (3)
Thanks
|
| The following 3 BHPians Thank VijayAnand1 for this useful post: | jopp4n, sole_rider, SunnyBoi |
|
11th December 2023, 13:33
| #22 |
| BHPian Join Date: Aug 2014 Location: City of Dreams
Posts: 338
Thanked: 390 Times
| Re: 2013 KTM Duke 390 - The Crypto Bike! After all this work, the bike looks even better than what it must have been like when it came off the plant floor in 2013  Thanks for sharing the efforts in detail. This was a wonderful read! |
|
| (1)
Thanks
|
| The following BHPian Thanks anilp for this useful post: | SunnyBoi |
|
11th December 2023, 15:34
| #23 | |
| BHPian Join Date: Feb 2015 Location: Thrissur
Posts: 352
Thanked: 661 Times
| Re: 2013 KTM Duke 390 - The Crypto Bike! Quote:
| |
|
| (2)
Thanks
|
| The following 2 BHPians Thank b16h22 for this useful post: | jopp4n, SunnyBoi |
|
11th December 2023, 23:15
| #24 |
| BHPian Join Date: Mar 2015 Location: Mumbai
Posts: 174
Thanked: 506 Times
| Re: 2013 KTM Duke 390 - The Crypto Bike! The pain and effort to get the bike to such a condition requires some dedication which in the end is satisfactory. Reading about the cooling system part, i can relate i had put an order with KTM for the entire hose set with the thermostat, after a week they called up and said the parts have arrived, reached the SVC on Saturday only to realize that half the parts haven't arrived, i lost my cool and filliped and got the parts in two days. The coolant overhaul is on my ownership review, it will become a long post if i type it here  . .Right now my focus is getting my Duke mechanically restored and looking at your bike, a spark has been ignited to get my bike detailed A - Z in the future. The bike grab eyeballs of the common folk and police, thinking the bike is new  . A well maintained and ridden by decent chap will always attract positive attention. . A well maintained and ridden by decent chap will always attract positive attention. The condensation in the instrument cluster is normal, happens to me also. On the clutch side, i have gotten used to the clutch on my bike, i change the clutch cable every service and want to maintain the 2014 period character of the bike as much as possible, i haven't even put adjustable levers, that is how dedicated i am. 41k on engine, that is a healthy engine, when i got mine 3 years ago it was at 13800 now it sits at 33K Cheers, Dhruv Shetty. Last edited by Dhruv Shetty : 11th December 2023 at 23:24. |
|
| (1)
Thanks
|
| The following BHPian Thanks Dhruv Shetty for this useful post: | SunnyBoi |
|
12th December 2023, 07:19
| #25 | ||
| Senior - BHPian Join Date: Dec 2006 Location: Mysore / B'lore
Posts: 1,673
Thanked: 4,137 Times
| Re: 2013 KTM Duke 390 - The Crypto Bike! Next up was restoring the footrests Taking off the left side foot rest was fairly easy. Taking the right footrest however was honestly, a bit scary. This involves removing the swing arm bolt and it will for sure separate out the swing arm from the chassis. I first took out the thinner M10 long bolt, then used it to drive out the swingarm, replacing it and stop the swingarm from falling out. This worked and I was able to take ouit the swingarm bolt and the right footrest while the whole thing was still intact. The left footrest was HORRIBLE on the inside, as expected because of all the chain lube gunk.. It took me a while but I managed to get it reasonably clean  Soon I cleaned all the parts to prep them for paint  I've had a sloppy side stand for a while, after inspecting the parts it looked like the bracket on which the side stand pivots had worn down. While replacing the bracket, I might as well replace the pivot bolt as well as the lock nut holding it. The spring was cheap enough so why not change that too for better looks? I got new swing arm nut and one for the long M10 bolt just because new shiny nuts.  One of my rubber foot rest had the grinding nut? missing on them. Getting new one of these would be next to impossible. I rummaged around the nuts and bolts with me and found couple of things that might work. I first put in an M6 grub screw into the foot rest  I then screwed in a M6 SS acorn nut. This looked so good, I took off the nut from the other foot rest and replace with the same  The side stand was painted. I added a thick M6 washer under the magnet for the side stand - I read about the side stand sensor being a factor with the bike dying when I press the clutch with the bike moving. This issue was driving me crazy and I was willing to try anything to fix it. With the washer added, my problem has gone off completely! My assumption is with the magnet closer to the sensor thanks to the washer, there would be less error. It still might be placebo but I am confident with the results on my bike that this indeed solved my problem.  While I was at the KTM service center, I picked out the rear hugger and chain cover from the RC390 too. I had a look at the RC and was pretty confident this will fit in perfectly onto our dukes.  Frames were also painted 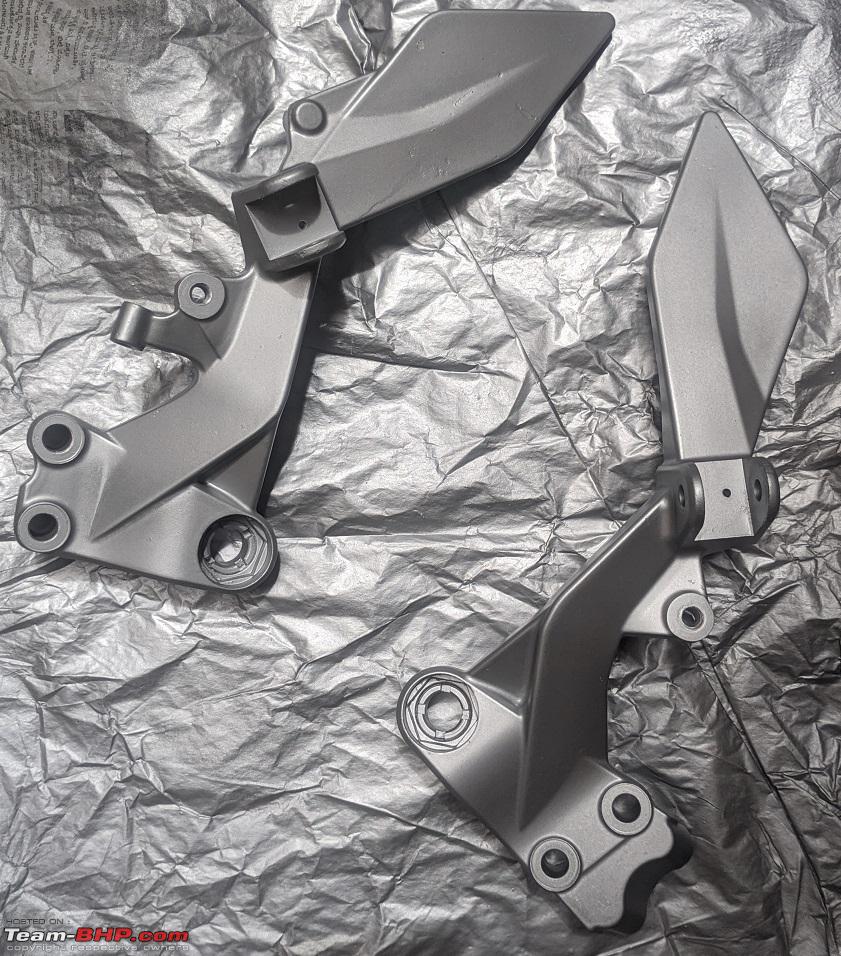 RC390 parts got a lick of ceramic coat inside out. New unused plastic parts need very little prep so I was super thankful. I've put in M6 captive nuts that I had with me since a while instead of buying new units from KTM themselves. Same goes with the bolts needed to secure the new covers. I had to reuse one self tapping screw from the old chain cover, rest of the hardware was new.  While the chain cover was out, I replaced the SS bolt with a new OEM KTM rear suspension bolt with the right grade. With this, I can confidently say the cosmetic restoration is now complete. Barring few things such as rotor bolts and ABS wheels which will be swapped when I get to the wheels, eventually.   While I was in Bangalore, I visited Khivraj and picked up these parts. New tank decals, so I can apply these properly without wrinkles New handle bar riser rubbers Couple of missing collars New brake/gear lever rubber. I wanted two to replace both but there was only one in stock New speedo connector rubber strap  Next up is wiring for my new Hella Black Pearl horns. Ive added a wire from the battery through a fuse box with a 10A fuse to the location of the old horn and put in a relay at that spot.  Relay was ziptied to secure it in place. Reused the stock horn connectors on to the relay 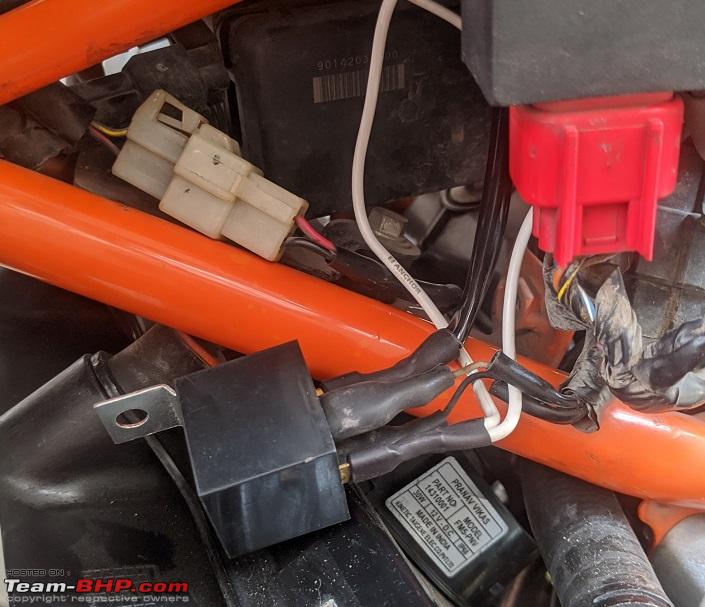 I took couple of angled metal brackets that are used to put up shelves on the walls - enlargened the holes, cut them to use and painted them black to hold the new horns in place 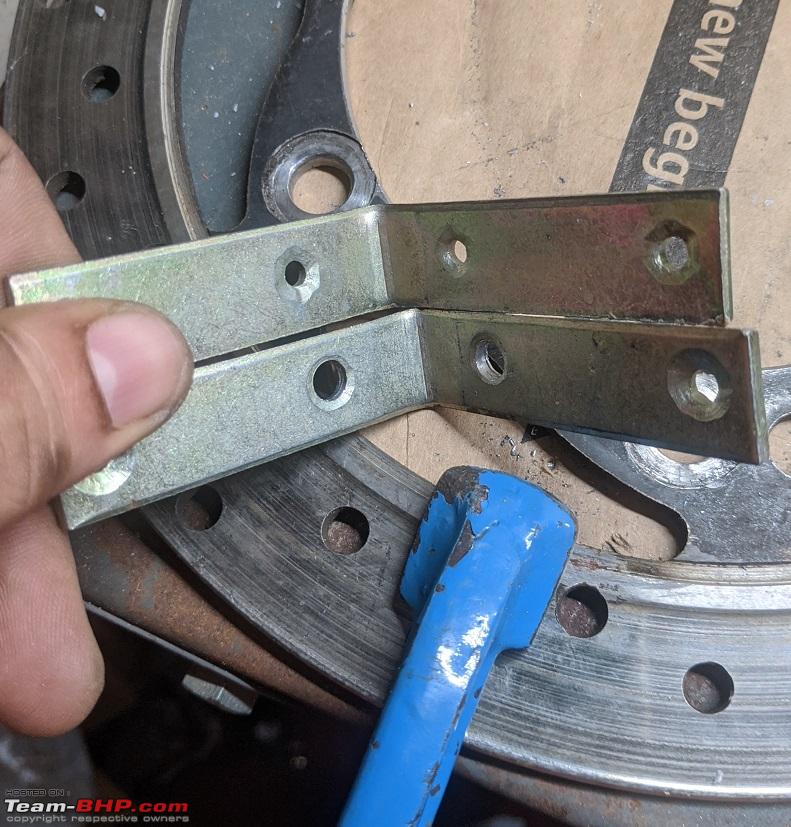 They're mounted and working! I'm proud of the wiring and routing, they pretty much disappear into the chassis with no trace, no matter what angle you look at them   Quote:
 New rubber strap to secure the speedometer connector 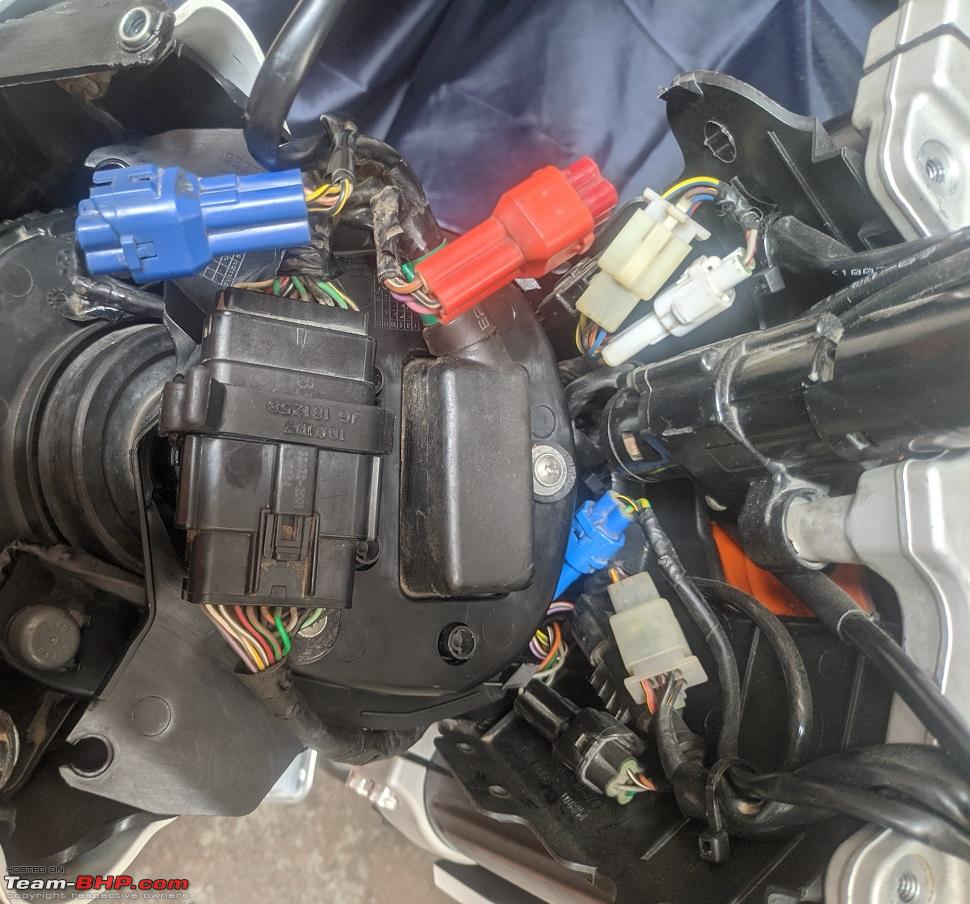 Missing collars where the headlight bolts onto the triple tree. Took out the lower handle support and painted them. Swapped out the old rubbers for a new set as the handle was actually moving forward on heavy braking. Turns out one of the bolts was loose and a simple tighten could fix it. I anyways had new rubbers so swapped them out anyway.  Disassembled the fuel cap and painted it too. I did not do a good job and it turned out lumpy. I'll redo it again in the near future. The dummy plastic allen bolt thingies are 10mm long, I'll replace them with M5x12 units with a nut underneath.  Soon the new meter shell arrived  Went on a ride to BR Hills   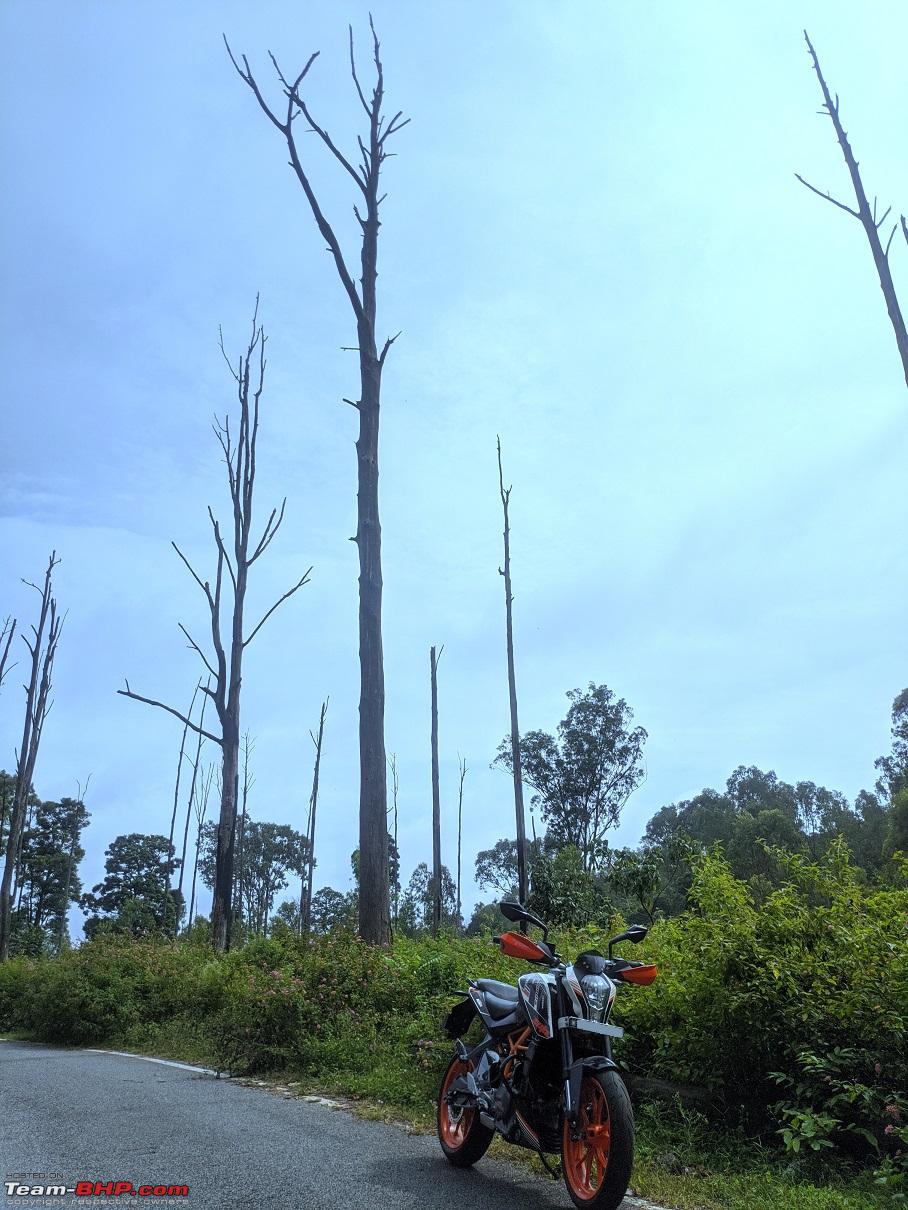  Ayudh Pooja 2022 Group photo 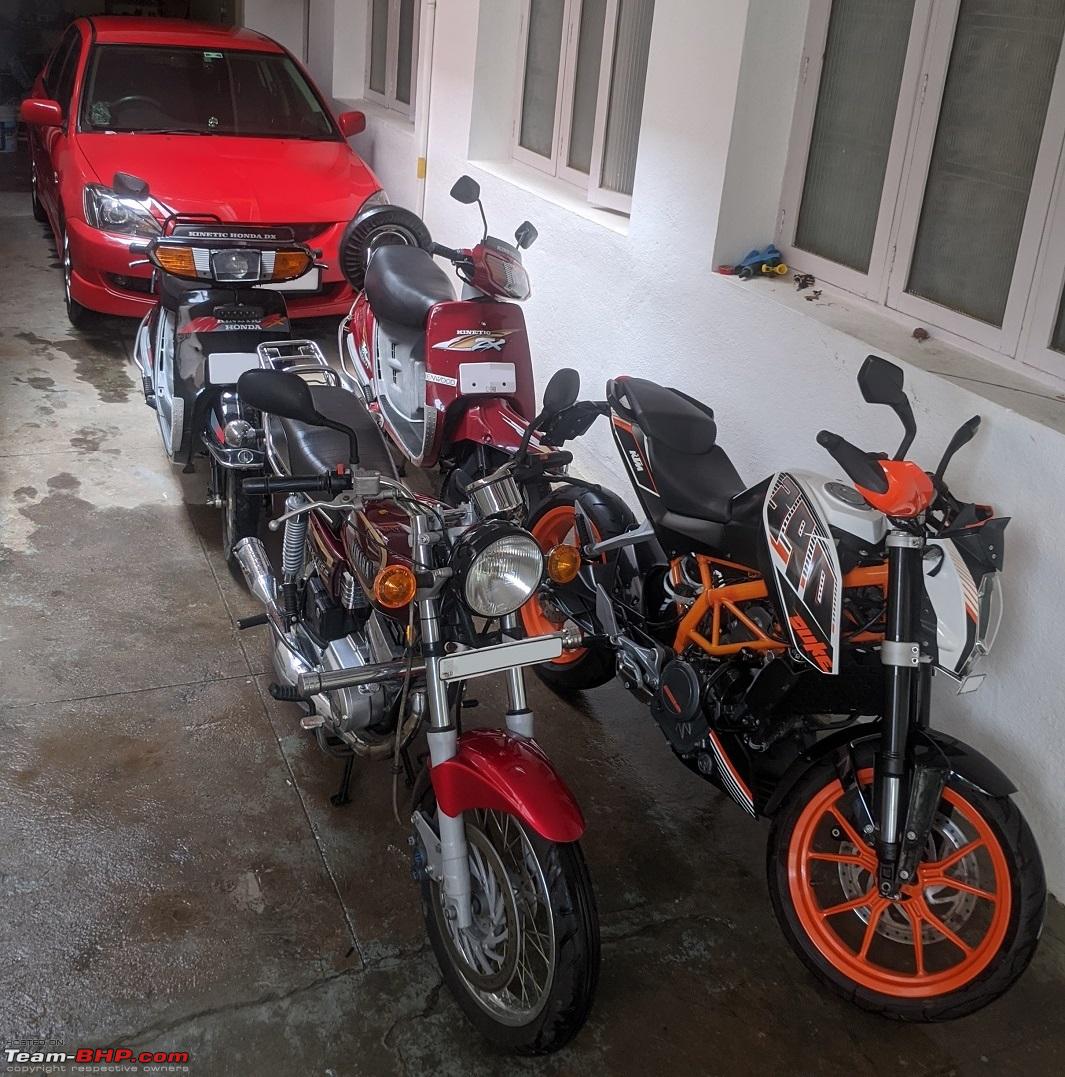 Last edited by SunnyBoi : 12th December 2023 at 07:32. | ||
|
| (25)
Thanks
|
| The following 25 BHPians Thank SunnyBoi for this useful post: | anilp, arjpillai, arroamle, Ashtoncastelino, b16h22, chinmaypillay, Dhruv Shetty, drrajasaravanan, fangface, gischethans, Gordon, hikozaru, JoshuaM, Mrs&Mr_Shenu, Rahulkool, Rshreyansh, sanjayrozario, Shonith, shyamg28, sole_rider, surjaonwheelz, svsantosh, Tassem, vaasu, VijayAnand1 |
|
13th December 2023, 07:40
| #26 |
| Senior - BHPian Join Date: Dec 2006 Location: Mysore / B'lore
Posts: 1,673
Thanked: 4,137 Times
| Re: 2013 KTM Duke 390 - The Crypto Bike! After the first outing, I realised there was too much play in the clutch level and it was moving up and down too much. So I put in a M6 washer of the right thickness under the lever and that made it reasonably tight. If I tightened it all the way, the lever would start binding, I had to back off half a turn after getting it fully tight.  This meant I ended up adjusting the clutch cable slack too, having a 19mm spanner made moving the clutch arm so easy.  Replaced all the fake bolts on the fuel cap with real ones. Used M5x12 Allen bolts with regular M5 nuts underneath to hold the fake ones in place. The 3 Allen bolts that held the gas cap needed M5x40mm long bolts. 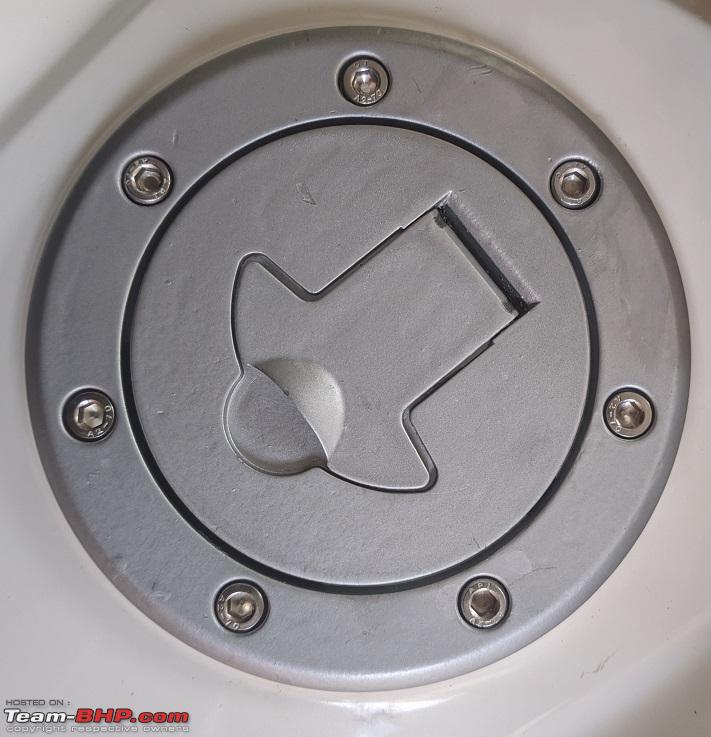 Fake bolts with nuts BARELY clear the underside. Its better to use thinner nuts if you get them.  The meter cover I received had a LOT of scratches on the transparent section. This was absolutely unacceptable for me 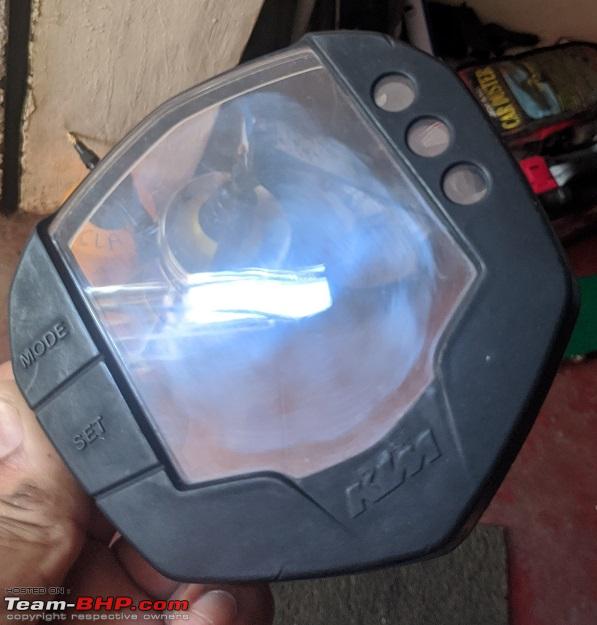 Some time spent with my rotary and a 2 inch pad, this was the end result. It isn't perfect but it will do just fine  Looks good and all set! 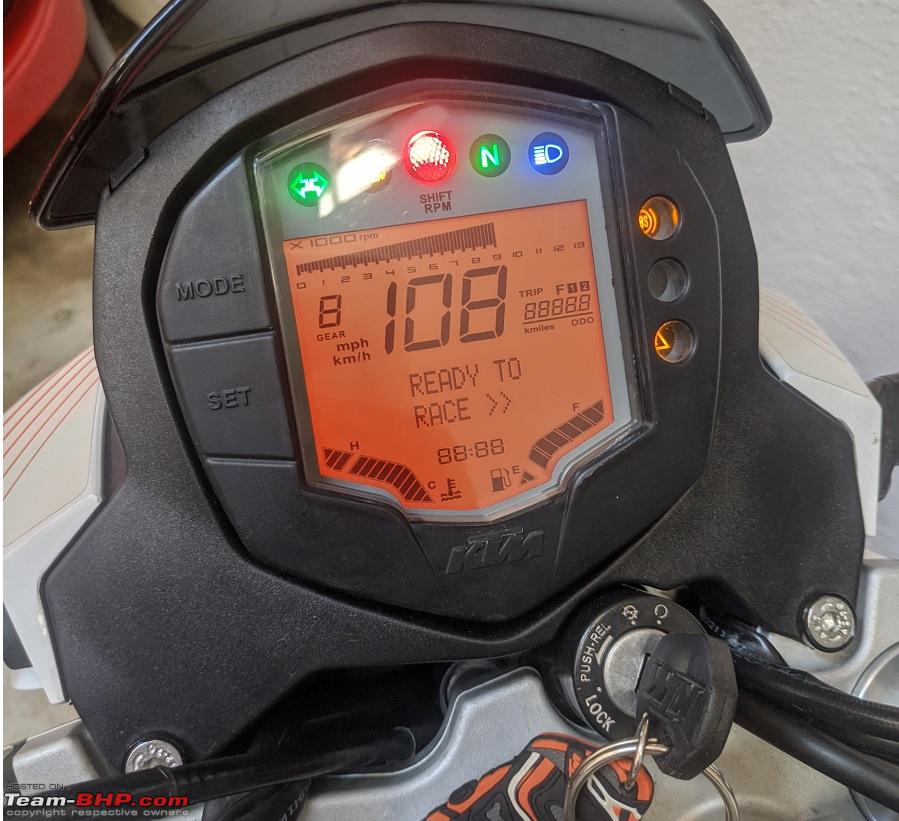 The low beam on the bike stopped working again. SIGH. This time the low-high beam swich was faulty Since the headlight was removed for swapping the meter cover, I took off the left switch assy as well. Disassembled the switch  Lo-Hi switch taken apart. There is a small spring not in the picture, between the triangular metal piece and the black plastic switch  I added a 3x1 o-ring o the base of the spring, so there is more tension and the triangular plate makes better contact. This worked! The switch is now slightly stiffer but its worked and keeps working after about 50 cycles.  The pass switch was feeling very rough, as if it was full of sand. Opoened it to clean and it indeed was. I used up some krytox 205 lube for the switch, it was leftover from another hobby of mine. Put back everything together and it feels muuch smoother. 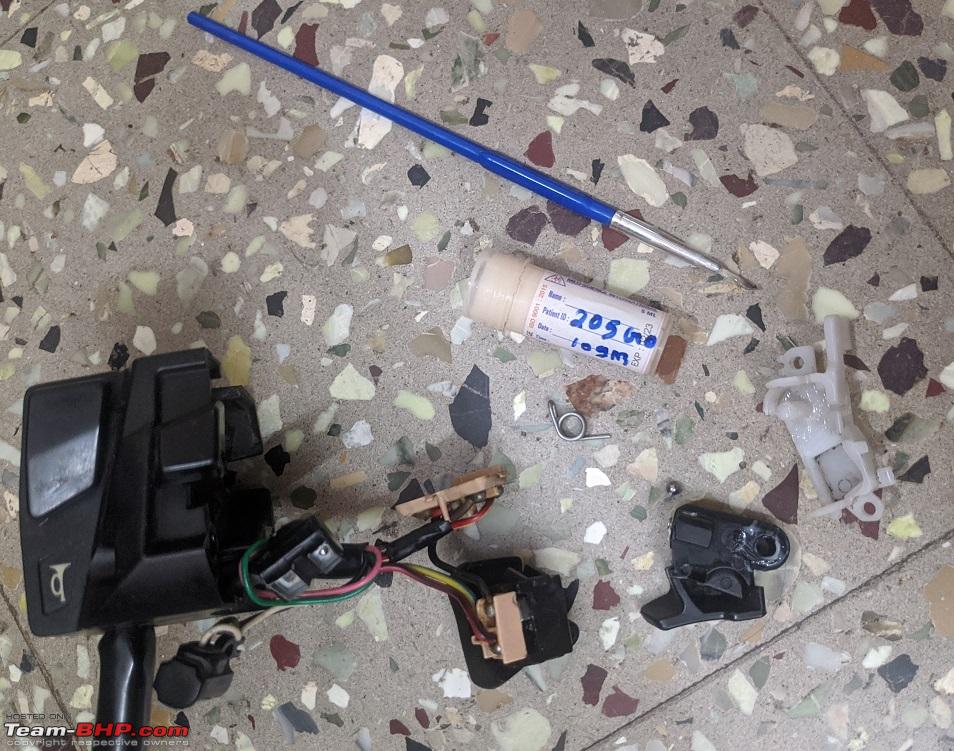 Next up, decided to tackle cleaning the throttle body. This was on top of the things to do when I first bought the bike, however I was put off because of the sheer number of things that needs to come off the bike just to take it out. I made up my mind and started early in the morning. Surprisingly it didn't take long to remove all the panels and then the airbox. I couldn't get the cable for the seat lock out despite removing the clip, so I kept the plastic piece on the chassis itself.  The throttle body, as expected, was caked up in carbon 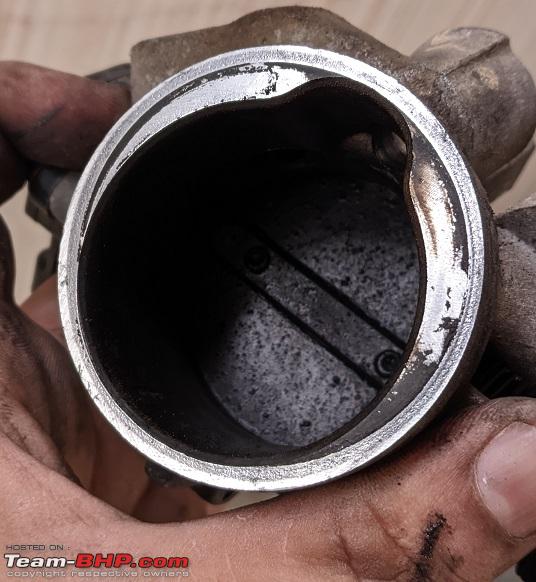  Even the holes for the IVAC and injector were full of carbon  Port for the MAP sensor had a layer of varnish in it 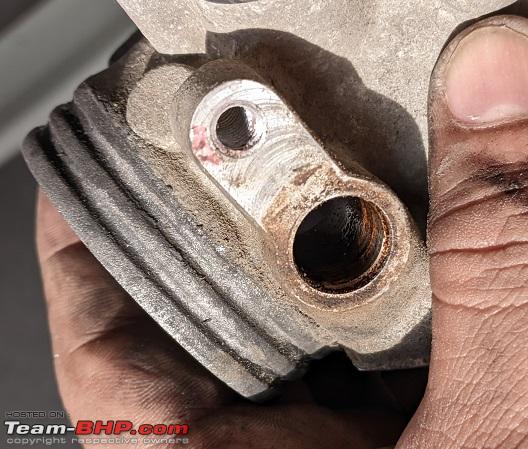 Intake ports looked excellent. No caked on residue anywhere. The exhaust ports looked similar when I had taken out the exhaust so I'm very happy about the way the engine is right now.  To begin with cleaning the throttle body, I took out the MAP sensor, IVAC stepper motor and the injector. I left the TPS on the throttle body - I took out the TPS from my car's TB few years ago and it was a royal pain to put it back together. Since any rubber/plastic parts around the throttle body were removed, I attacked the insides with Acetone. All the carbon on the venturi and throttle plate came off right away. I used some q tips to clean out the 2 passages that go into the stepper motor port, they came out very nice and shiny. Next, I cleaned the outside with some all purpose cleaner and water. Got the outside looking good, then I doused the insides with some 99% iso propyl alcohol - it has a propensity to absorb water so any water that went inside the TB passages when cleaning the exteriors will get absorbed by it. The results were excellent. See it for yourself! 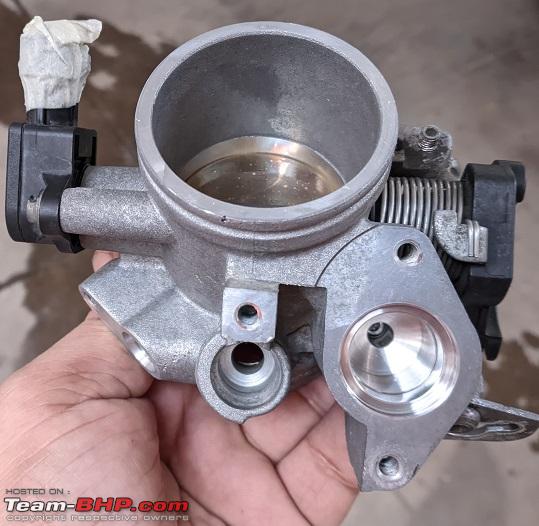   MAP sensor and stepper motor had a LOT of gunk on them 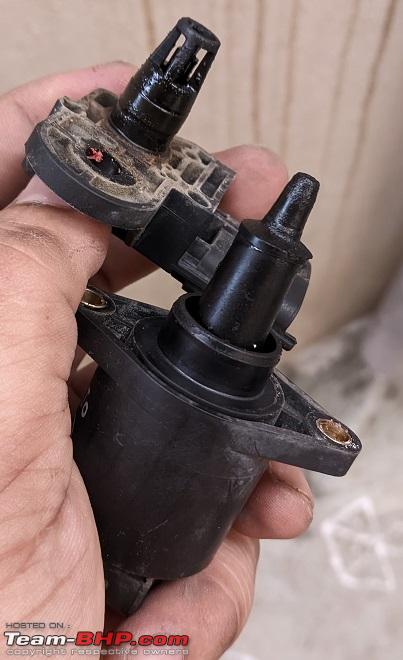 Cleaned them with IPA. I was careful not to touch the center portions of the MAP sensor, I just scrapped off all the carbon from the surrounding cage then sprayed IPA on the sensor few times 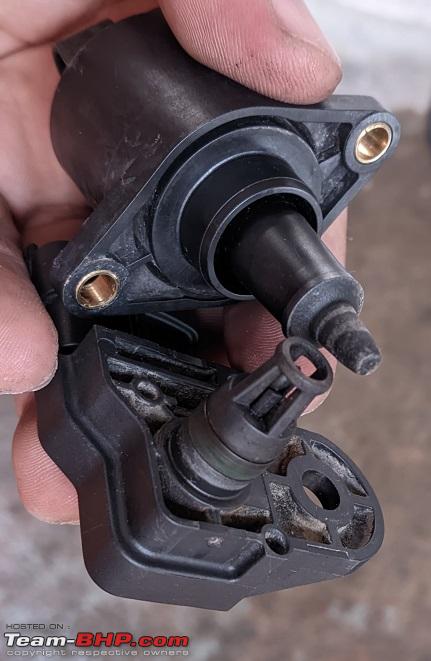 Used some Dow Corning grease to lubricate the o-rings on all the sensors and injector before putting them back into the throttle body. I left the injector alone this time.  With the throttle body done, my focus was back on the chassis. It had a lot of dust on it owing to the bike being 9 years old. SO this time I gave the entire chassis a good clean, every nook and cranny of the orange frame was cleaned in detail 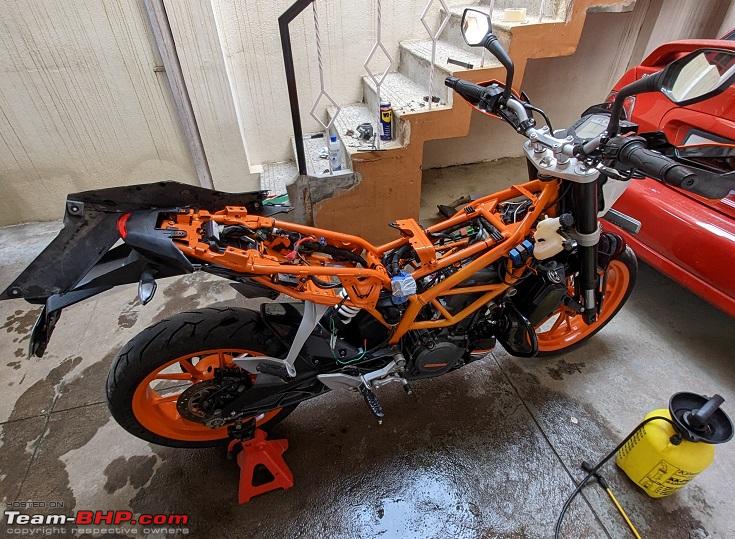 Lots of wiring harness tape had started to come off, the glue had gone bad.  Peeled off all the bad tape and I taped them back using Tesa 51036 Engine Loom tape. 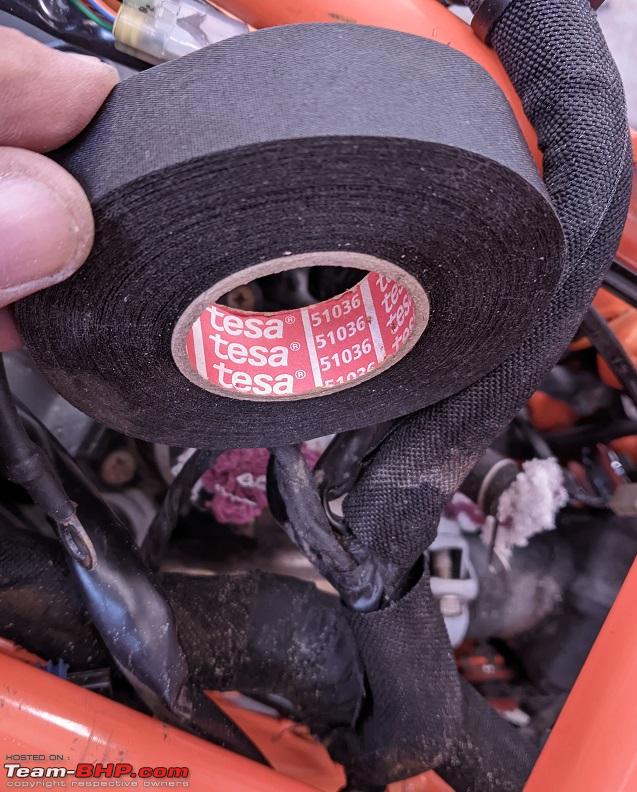 Scuffed up the ECU ground lugs so they make better contact. Need to do this for all grounds.  My focus the turned towards the airbox. It was very common for airboxes to crack - thankfully mine was crack free. There was some oil deposited below - another complaint. The seals below were all intact so I'm guessing the oil deposits were from the loose crankcase breather. I was having a look at the breathers and the insides had a bit of "milkshake". I doused the inside with IPA and some of it came out. I also noticed that the breathers for both crancase and head were connected? I also saw the markings on it ( B for head vent and D for crankcase vent ) and was feeling suspicious if this was some kind of simple air-oil separator for vapours coming from the head with oil draining back via crankcase breather? Oh well.  Soon I put back everything on the bike, primed the bike about 4 times and it immediately started up with no errors. The behaviour of the bike is pretty much unchanged from before, however the bike seems to start a fraction quicker - requiring less cranking. |
|
| (27)
Thanks
|
| The following 27 BHPians Thank SunnyBoi for this useful post: | anilp, arjpillai, b16h22, chinmaypillay, fangface, ferrarirules, gischethans, hikozaru, ike, jomson13, Joseph Jos, JoshuaM, Mrs&Mr_Shenu, mugen_pinaki27, Neo18, sagarpadaki, sanjayrozario, shyamg28, sole_rider, svsantosh, swe.desi, t3rm1n80r, theqca, vaasu, vishy76, Yash390, ynike99 |
| |
|
13th December 2023, 13:24
| #27 |
| Newbie Join Date: Jan 2023 Location: Hyderabad
Posts: 17
Thanked: 84 Times
| Re: 2013 KTM Duke 390 - The Crypto Bike! Such a detailed thread, feels like I am in your shoes while reading this. I too want to buy a used RC 390 and after reading your thread Im motivated to do all the repairs and maintenance for it myself. Do you have a checklist that you go through? Or just check and replace all the parts? After all the work has been completed on the bike can you show us how much it cost for everything you have done and the time it took to do it? Genuine question: how do you know your way through the bike? |
|
| (2)
Thanks
|
| The following 2 BHPians Thank v4run for this useful post: | arjpillai, SunnyBoi |
|
14th December 2023, 09:55
| #28 |
| BHPian Join Date: Feb 2013 Location: Bombay
Posts: 120
Thanked: 341 Times
| Re: 2013 KTM Duke 390 - The Crypto Bike! Thanks for sharing the restoration details. Looks like you are really happy with the duke. I used to own a similar 390 a few years ago and I wasnt aware about a solution to the weak front brakes. Those brakes and the uncomfortable seat were my main issues with the bike. |
|
| (1)
Thanks
|
| The following BHPian Thanks theqca for this useful post: | SunnyBoi |
|
14th December 2023, 15:52
| #29 | |
| Senior - BHPian | Re: 2013 KTM Duke 390 - The Crypto Bike! Quote:
| |
|
| (2)
Thanks
|
| The following 2 BHPians Thank svsantosh for this useful post: | SunnyBoi, wankelenergy |
|
14th December 2023, 18:45
| #30 |
| BHPian Join Date: Mar 2019 Location: Thane
Posts: 47
Thanked: 79 Times
| Re: 2013 KTM Duke 390 - The Crypto Bike! Amazing. That's one amazing restoration thread. I believe you can probably build a bike ground up and keep it looking like new even after 50K kms. I try and keep my Inty 650 sparkling clean but just don't seem to find time to do it (haven't been able to achieve even 1% of what you have done to your 390). Do you do bike restoration / cleaning - professionally or is this only for your garage (that's a very interesting one you got too) ? The KiHo's would probably the best maintained pair in the country. All the best. |
|
| (1)
Thanks
|
| The following BHPian Thanks ThePatientMan for this useful post: | SunnyBoi |
|