Team-BHP > Shifting gears
Register New Topics New Posts Top Thanked Team-BHP FAQ


Reply
  Search this Thread
14,770 views
Old 5th August 2013, 13:58   #1
BHPian
 
Join Date: Aug 2009
Location: BLR / NGO
Posts: 291
Thanked: 188 Times
Mini Cooper S Countryman (Scale Model) :: Build-off

I read numerous posts by members on this forum, who seem to have perfected the art of making scale models. My writeup may sound very

rookie'ish in comparison. Kindly Excuse.

Just few days back I posted about my scale model of Yamaha R1 made of paper.
I ended the post with a line that I would share the experience of building my Mini Cooper and so here it is.

I stumbled upon this kit at a store in Japan where, at the age of 30+, I became a child again.
Building a scale model was something that I always wanted to do and having given a crude shot at in 2006, the lure came rushing back to me.
At that point, it was decided that I would go ahead, come what may.
And so I ended up buying myself the Tamiya Kit of Mini Copper S Countryman All4.

My joy knew no bounds as I was sure I would sit 40 hours straight if required and would let it go only after completing it.
But when I opened the kit, I knew fate had something else in mind.
The kit was a complete DIY starting from cutting the plastic parts, painting, detailing and then the assembly.
This would take 3 months at least considering that I would be able to do it only after returning home from office.

Mini Cooper S Countryman (Scale Model) :: Build-off-img_7452.jpg

Mini Cooper S Countryman (Scale Model) :: Build-off-img_7453.jpg

Mini Cooper S Countryman (Scale Model) :: Build-off-img_7454.jpg

Mini Cooper S Countryman (Scale Model) :: Build-off-img_7455.jpg

Mini Cooper S Countryman (Scale Model) :: Build-off-img_7456.jpg

Mini Cooper S Countryman (Scale Model) :: Build-off-img_7457.jpg

Mini Cooper S Countryman (Scale Model) :: Build-off-img_7458.jpg

Mini Cooper S Countryman (Scale Model) :: Build-off-img_7459.jpg

Mini Cooper S Countryman (Scale Model) :: Build-off-img_7460.jpg

Mini Cooper S Countryman (Scale Model) :: Build-off-img_7461.jpg

Mini Cooper S Countryman (Scale Model) :: Build-off-img_7462.jpg

The next immediate step was to procure the various coloured paints required for this kit, brushes, Spray colours, Quick-dry Glue, Quick-dry Cement and Transparent Glue (for the clear parts like glass).
These all together costed me as much as the kit itself. (Not that it would have been a dampener if I had known it in the beginning).

And so on 29th March, when the world was thinking TGIF, I was all set to start my project.
With not much idea and help at hand, I was left at the sole mercy of that Japanese instruction sheet which looked more like a spilled packet of Top Ramen, printed on paper.
Some trials done without pasting and colouring and I got a hang of how to proceed.

Was surprised at one thing though that the instruction mentioned painting the outer body towards the end (Isn't assembly supposed to start with the body paint?).

First to get ready was the cabin. While the Cabin base plate was ready to undergo painting, the seats were getting assembled in parallel. Next to visit the paint booth were the gear lever knob and the pedals.

The dashboard itself was supposed to be painted in a total of 6 colours. 2 shades of black (Gloss & Matte) and 4 different shades of silver & metal finish.

This photo with the dashboard in my hand would give you an idea of its size. Sometimes I would have to hold my breath to make sure my breathing didn't disturb the brush. The wait periods between subsequent paints was getting painful as 1 round of paint meant that I had to wait until next day before I could resume work on that part.

The steering wheel with it's stalks and logo was the first frightening part. The "Mini" sticker on the steering was supposed to be wet with warm water and then slid onto the surface and pasted. But when I tried, it started floating all over that wet srface of 5mm and ended with an offset of 30deg. I was in sweat in the cold winter night of -5deg and somehow managed to get it almost in position to look acceptable. I pledged not to undertake any other stickering until all other parts were built.

By now, at office it was obvious that I was working on something at home as I landed in meetings and hand shakes with traces of black and silver paints smeared on my finger tips. One gentleman at lunch even suggested me that a thorough hand wash is a must before a meal. I just chuckled.

Mini Cooper S Countryman (Scale Model) :: Build-off-903668_10151594265684810_809564396_o.jpg

Last edited by karpusv : 15th August 2013 at 22:18. Reason: Added more content
karpusv is offline   (1) Thanks
Old 15th August 2013, 22:15   #2
BHPian
 
Join Date: Aug 2009
Location: BLR / NGO
Posts: 291
Thanked: 188 Times
Re: Mini Cooper S Countryman All4 :: Build-off

Gradually day after day, I moved ahead. Part by part, colour after colour.
Some pictures below to skip the long description.

Mini Cooper S Countryman (Scale Model) :: Build-off-903892_10151604266294810_582244782_o.jpg

Mini Cooper S Countryman (Scale Model) :: Build-off-12419_10151604265894810_375508644_n.jpg

Mini Cooper S Countryman (Scale Model) :: Build-off-555751_10151604265924810_877866596_n.jpg

Mini Cooper S Countryman (Scale Model) :: Build-off-882695_10151604266269810_342695588_o.jpg

Mini Cooper S Countryman (Scale Model) :: Build-off-882865_10151604266299810_1908711562_o.jpg

Mini Cooper S Countryman (Scale Model) :: Build-off-885313_10151594265449810_1270438018_o.jpg

Mini Cooper S Countryman (Scale Model) :: Build-off-886678_10151594265644810_842196374_o.jpg

Mini Cooper S Countryman (Scale Model) :: Build-off-892863_10151604266689810_849565743_o.jpg

Mini Cooper S Countryman (Scale Model) :: Build-off-901631_10151594265454810_2136343300_o.jpg

Mini Cooper S Countryman (Scale Model) :: Build-off-902286_10151594265489810_1394713377_o.jpg

Last edited by karpusv : 15th August 2013 at 22:46.
karpusv is offline  
Old 15th August 2013, 22:30   #3
BHPian
 
Join Date: Aug 2009
Location: BLR / NGO
Posts: 291
Thanked: 188 Times
Re: Mini Cooper S Countryman All4 :: Build-off

I had now entered the next phase of the build where I was supposed to get into a bit of detailing. This as I came to realise was not that easy, considering many parts were smaller that my fingertips.

Applying the silver garnishes (paint) on the parts was way too tedious for me. If I stuck the part before, accessing the nooks to paint was an issue. And if I painted before sticking, the paint would peel off once the glue was applied. A point in case was the gear shift lever. That stick inside the housing is a single part no bigger than the head of a wax matchstick.
More details were added in. The dashboard for instance has 5 shades of silver, varying in composition of silver & grey.

The door trims were the next with some thankfully simpler demands.

Mini Cooper S Countryman (Scale Model) :: Build-off-904335_10151604266654810_584232775_o.jpg

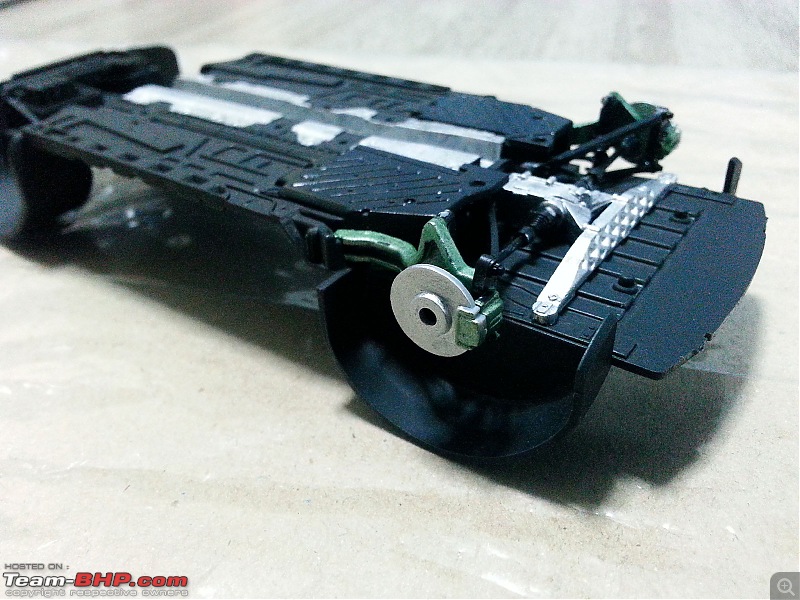
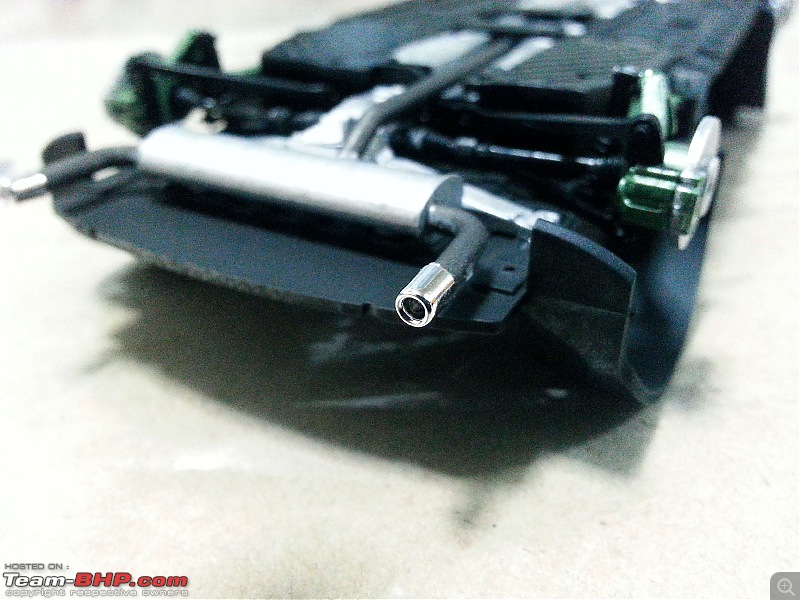
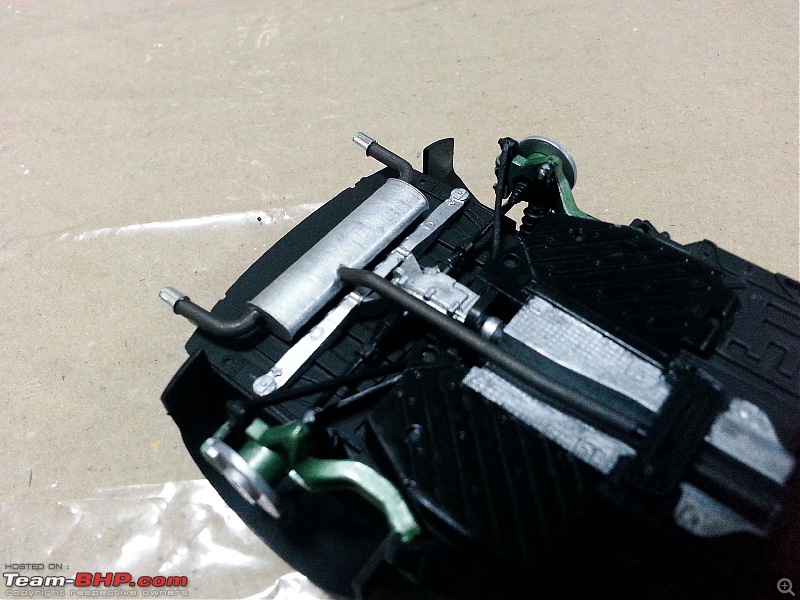
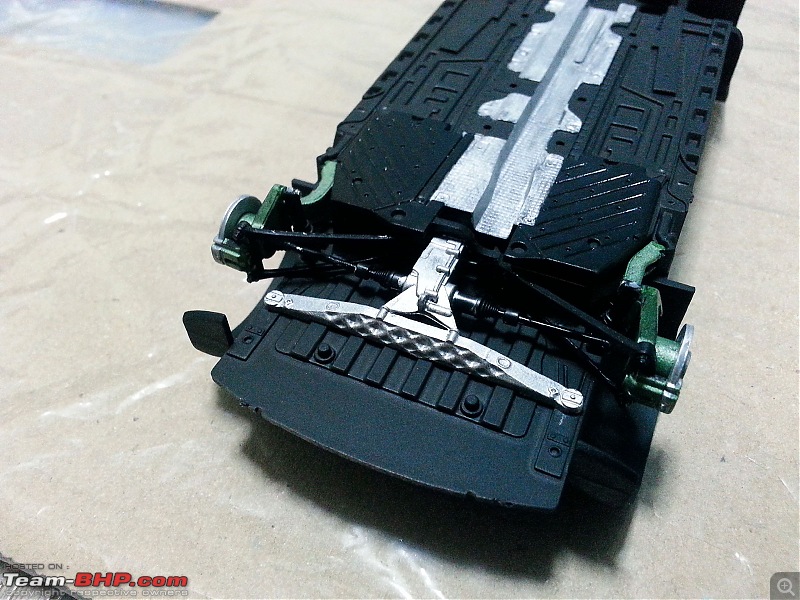
After this I next attacked the underbody. This was a whole grey area for me, in spite of being a mechanical engineer. Reading, understanding and explaining is one thing. But applying it to actual assembly, not quite. I'll leave it to the pictures again to do the talking.

Just a note, the rear axle and wheel hubs are fixed, while the front axle, suspension struts and steering tie rods are all live. They can be moved, though not linked to the steering wheel itself.

Mini Cooper S Countryman (Scale Model) :: Build-off-20130619_222323.jpg

Mini Cooper S Countryman (Scale Model) :: Build-off-20130619_222333.jpg

Mini Cooper S Countryman (Scale Model) :: Build-off-20130619_222343.jpg

Mini Cooper S Countryman (Scale Model) :: Build-off-20130620_220328.jpg

Mini Cooper S Countryman (Scale Model) :: Build-off-20130620_221001.jpg

Mini Cooper S Countryman (Scale Model) :: Build-off-20130620_221021.jpg

Mini Cooper S Countryman (Scale Model) :: Build-off-20130620_221028.jpg

Mini Cooper S Countryman (Scale Model) :: Build-off-20130620_221239.jpg

Mini Cooper S Countryman (Scale Model) :: Build-off-20130620_221537.jpg

Last edited by karpusv : 15th August 2013 at 22:47.
karpusv is offline  
Old 15th August 2013, 22:43   #4
BHPian
 
Join Date: Aug 2009
Location: BLR / NGO
Posts: 291
Thanked: 188 Times
Re: Mini Cooper S Countryman All4 :: Build-off

A good ride is nothing without proper shoes and the kit gave me 2 sets of these.
Standard Aluminium finish alloys wheels or Sporty Black Alloy wheels.

I stuck to the standard alloys for now. I'll keep the Black Alloys to celebrate the anniversary of this Build-off with a limited period show-off package maybe

Mini Cooper S Countryman (Scale Model) :: Build-off-20130620_222357.jpg

A good thing is that the place where the wheels are mounted on the hub have a provision to assemble rubber bushes. So, you can actually rotate the wheels in the hubs. It does not spin like a hot wheels, but I think it feels properly weighted with that rubbery resistance which we find in our actual cars.

Mini Cooper S Countryman (Scale Model) :: Build-off-20130620_222740.jpg

Mini Cooper S Countryman (Scale Model) :: Build-off-20130620_222747.jpg

A quick application of glue at the right places and a sort of buggy is ready. It looks more like a car from an old bygone era.

I mounted it on the chassis to see how it would sit and it seemed fine. With this assurance, I was a little confident of starting the body work.

Mini Cooper S Countryman (Scale Model) :: Build-off-20130620_222916.jpg

Mini Cooper S Countryman (Scale Model) :: Build-off-20130620_223018.jpg

Mini Cooper S Countryman (Scale Model) :: Build-off-20130620_223028.jpg

Last edited by karpusv : 15th August 2013 at 22:47.
karpusv is offline  
Old 15th August 2013, 23:01   #5
BHPian
 
Join Date: Aug 2009
Location: BLR / NGO
Posts: 291
Thanked: 188 Times
Re: Mini Cooper S Countryman All4 :: Build-off

It is common sense which we all know that a body is first painted before the assembly is started. However, in the kit that I bought, there was no mention about the paint, and the pictorial instruction asking me to proceed to assembly of parts.

I just followed the sheet and started the assembly.

I first painted the radiator grill matte black, with silver around the periphery. Then mounted it onto the body shell from inside. Then the same was done for the front air dam. and a check to see if they were in place.

Mini Cooper S Countryman (Scale Model) :: Build-off-20130622_001405.jpg

Mini Cooper S Countryman (Scale Model) :: Build-off-20130622_001437.jpg

Next was the headlight. The eyes and one of the most expressive parts in the mini.
The headlamp that you see below has 3 parts. Chrome shell, Projector HID Bulb (not glowing type) ad turn indicator (orange). The indicator has to be painted in transparent orange before fitting inside the main unit. And the HID bulb (acrylic piece separated from the mold) has to be painted silver on its back and then bonded using transparent gel glue. The barrel surrounding the HID has contrasting silver & black paint to highlight the grooves of the barrel (not clearly visible in pic)

Mini Cooper S Countryman (Scale Model) :: Build-off-20130622_020420.jpg

Fender garnishes also are made of 2 parts. The strip is one and the indicator is another. Here again the transparent orange has to be painted before sticking the bulb onto the strip and then it goes on the fender as an assembly.

Mini Cooper S Countryman (Scale Model) :: Build-off-20130622_020442.jpg

Mini Cooper S Countryman (Scale Model) :: Build-off-20130622_021223.jpg

Mini Cooper S Countryman (Scale Model) :: Build-off-20130622_021323.jpg

Mini Cooper S Countryman (Scale Model) :: Build-off-20130622_021340.jpg

Mini Cooper S Countryman (Scale Model) :: Build-off-20130622_022644.jpg

Mini Cooper S Countryman (Scale Model) :: Build-off-20130622_025448.jpg

Mini Cooper S Countryman (Scale Model) :: Build-off-20130622_025507.jpg
karpusv is offline  
Old 15th August 2013, 23:11   #6
BHPian
 
Join Date: Aug 2009
Location: BLR / NGO
Posts: 291
Thanked: 188 Times
Re: Mini Cooper S Countryman All4 :: Build-off

My patience was now wearing thin as I saw no visible hopes of an end to this project and so began long endless nights and days. My weekend would start on a Friday evening and run through till Saturday night with 2-3 breaks in between and the again till Sunday evening.
No wonder, I would end up sober in office on Mondays.

More pics to describe the story better.

Mini Cooper S Countryman (Scale Model) :: Build-off-20130622_025550.jpg

Mini Cooper S Countryman (Scale Model) :: Build-off-20130622_083418.jpg

Mini Cooper S Countryman (Scale Model) :: Build-off-20130622_111957.jpg

Mini Cooper S Countryman (Scale Model) :: Build-off-20130622_193623.jpg

Mini Cooper S Countryman (Scale Model) :: Build-off-20130622_193631.jpg

Mini Cooper S Countryman (Scale Model) :: Build-off-20130622_211119.jpg

Mini Cooper S Countryman (Scale Model) :: Build-off-20130622_230453.jpg

Mini Cooper S Countryman (Scale Model) :: Build-off-20130622_231015.jpg

Mini Cooper S Countryman (Scale Model) :: Build-off-20130622_231043.jpg

Mini Cooper S Countryman (Scale Model) :: Build-off-20130622_231053.jpg

Mini Cooper S Countryman (Scale Model) :: Build-off-20130622_231103.jpg

Mini Cooper S Countryman (Scale Model) :: Build-off-20130622_231125.jpg

Mini Cooper S Countryman (Scale Model) :: Build-off-20130623_001556.jpg
karpusv is offline  
Old 15th August 2013, 23:19   #7
BHPian
 
Join Date: Aug 2009
Location: BLR / NGO
Posts: 291
Thanked: 188 Times
Re: Mini Cooper S Countryman All4 :: Build-off

It was now time to add some kink to the Mini and what better than a 2 tone colour?
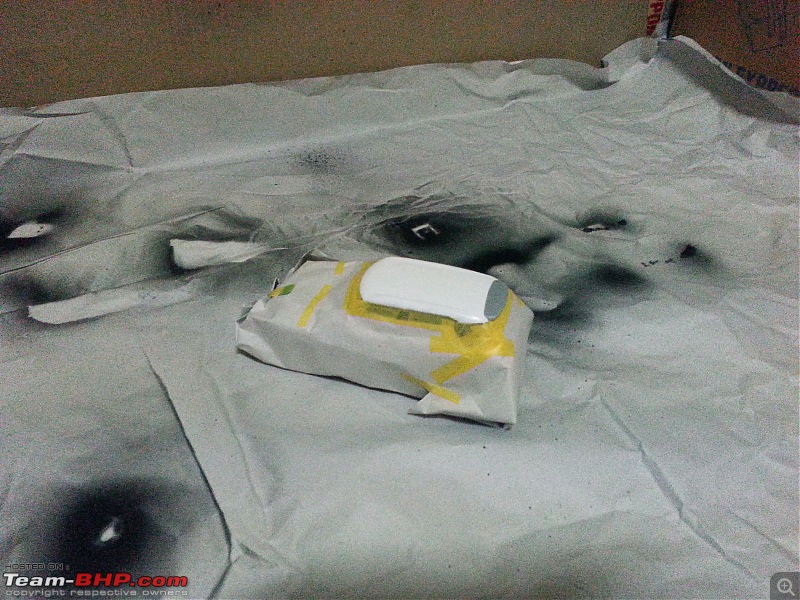
The masking was done and the roof went black. Boy! was it awesome when it emerged out the next day morning. I was in love with that black roof.


Mini Cooper S Countryman (Scale Model) :: Build-off-20130623_003315.jpg

Mini Cooper S Countryman (Scale Model) :: Build-off-20130623_003358.jpg

Mini Cooper S Countryman (Scale Model) :: Build-off-20130623_003447.jpg

Mini Cooper S Countryman (Scale Model) :: Build-off-20130623_094103.jpg

Mini Cooper S Countryman (Scale Model) :: Build-off-20130623_094329.jpg

Mini Cooper S Countryman (Scale Model) :: Build-off-20130623_104731.jpg

And then, the main body colour, "Off-White". This is where my worry began.
I had already put in too many things in place and masking them all to get the main body colour seemed a bit scary.

A little bit of paint leakage anywhere and I would be doomed.

Mini Cooper S Countryman (Scale Model) :: Build-off-20130623_140025.jpg

Mini Cooper S Countryman (Scale Model) :: Build-off-20130623_140356.jpg

Mini Cooper S Countryman (Scale Model) :: Build-off-20130623_140409.jpg
karpusv is offline  
Old 16th August 2013, 10:25   #8
BHPian
 
Join Date: Aug 2009
Location: BLR / NGO
Posts: 291
Thanked: 188 Times
Re: Mini Cooper S Countryman All4 :: Build-off

So after the painting was finished in the booth on a Sunday night, on Monday morning before leaving for office, I checked the output and I was devastated.

The off-white paint had leaked through the masking on some parts. That was still OK but the headlamps, Tail Lamps, Grill, Fender Garnish, Windscreen and Windows were oozing with the white paint.

Greatly disappointed, I had no choice but to go to office and sob over it all day.
In the evening, I just wished I had stuck to my instincts and painted the shell before itself. As they say, "No use crying over spilled milk". It was time for damage control.
So, off I went to the store again to get the pointed cotton stick swabs and began the cleaning process, all over.

The pictures below probably will do the job of explaining the pain I went through.

Mini Cooper S Countryman (Scale Model) :: Build-off-20130624_221935.jpg

Mini Cooper S Countryman (Scale Model) :: Build-off-20130630_121159.jpg

Mini Cooper S Countryman (Scale Model) :: Build-off-20130630_121212.jpg

Mini Cooper S Countryman (Scale Model) :: Build-off-20130630_195855.jpg

Mini Cooper S Countryman (Scale Model) :: Build-off-20130630_195913.jpg

Mini Cooper S Countryman (Scale Model) :: Build-off-20130630_195938.jpg

Mini Cooper S Countryman (Scale Model) :: Build-off-20130630_200014.jpg

Mini Cooper S Countryman (Scale Model) :: Build-off-20130630_200038.jpg

Mini Cooper S Countryman (Scale Model) :: Build-off-20130630_200107.jpg

Mini Cooper S Countryman (Scale Model) :: Build-off-20130630_225631.jpg
karpusv is offline  
Old 16th August 2013, 10:39   #9
BHPian
 
Join Date: Aug 2009
Location: BLR / NGO
Posts: 291
Thanked: 188 Times
Re: Mini Cooper S Countryman :: Build-off

While the model itself was finishing, there was dust accumulating and finding its way inside the cabin. So I decided to make the display box as well.

Just a check of the pending damages and we were good to go with the box preparation.

Mini Cooper S Countryman (Scale Model) :: Build-off-20130630_225707.jpg

Mini Cooper S Countryman (Scale Model) :: Build-off-20130630_225806.jpg

Mini Cooper S Countryman (Scale Model) :: Build-off-20130706_195636.jpg

The cutting board in the foreground (A4 size) will give you an idea of the Mini in the back.
Mini Cooper S Countryman (Scale Model) :: Build-off-20130706_210901.jpg

Mini Cooper S Countryman (Scale Model) :: Build-off-20130706_211026.jpg

Mini Cooper S Countryman (Scale Model) :: Build-off-20130706_211413.jpg

Mini Cooper S Countryman (Scale Model) :: Build-off-20130706_212310.jpg

Mini Cooper S Countryman (Scale Model) :: Build-off-20130706_225429.jpg

Mini Cooper S Countryman (Scale Model) :: Build-off-20130706_235138.jpg

Mini Cooper S Countryman (Scale Model) :: Build-off-20130707_004831.jpg
karpusv is offline  
Old 16th August 2013, 10:50   #10
BHPian
 
Join Date: Aug 2009
Location: BLR / NGO
Posts: 291
Thanked: 188 Times
Re: Mini Cooper S Countryman All4 :: Build-off

Initially I was not very happy with the "plex" material as the transparency seemed too low to my liking. But having spent the money, it had to be made. Pretty soon I saw that there was a protective sheet on the acrylic (could I get any more foolish than this? Of course, they are supposed to have them right?) While the box dried, I had completed the entire decals ad garnishes along the entire body.

Some interesting facts.

- The Mini logo on the front and back are also an assembly of 3 parts each. Chrome lining + Black dot + Winged decal.
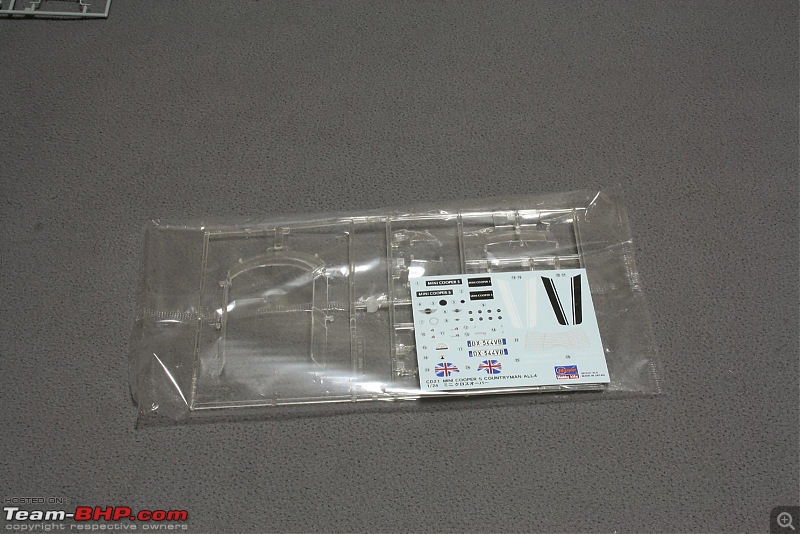
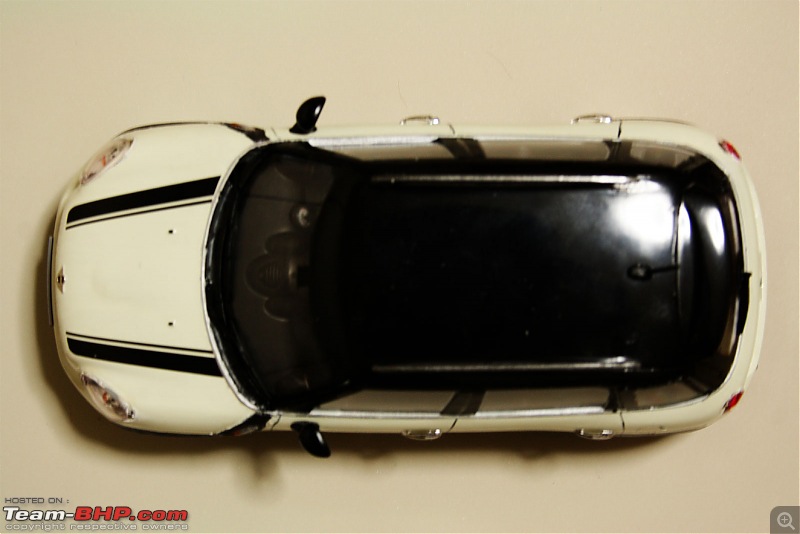
- The Stripes, Steering wheel Logos, Meter Console, Rear Defogger and Alloy wheel logos are all plastic cling sheets. You get only 1 chance to get them right. (Soak them in luke warm water and slide them onto the surface and press. Too hard and you tear it, too light and it wont stay).
- Since the initial Off-white colour leaked off, I had to redo the entire body paint using a brush. So, in that sense, it IS a custom painted Mini!!
- The kit also had the British flag add-ons for the Mirrors. But I've kept them for the Anniversary edition along with the Black Alloy Wheels.
- The ALL4 logos on the doors and the CooperS badge on the rear do not come with the red colour letter. That is another cling sheet that has to be put in place. Size? about 3mm.

Mini Cooper S Countryman (Scale Model) :: Build-off-20130707_005230.jpg

Mini Cooper S Countryman (Scale Model) :: Build-off-20130707_005248.jpg

Mini Cooper S Countryman (Scale Model) :: Build-off-20130707_005308.jpg

With the box ready, I felt that justice was not done to the underbody as people would not notice only the outward exteriors. So I used a jugaad to raise the platform.

Mini Cooper S Countryman (Scale Model) :: Build-off-20130707_012053.jpg

Mini Cooper S Countryman (Scale Model) :: Build-off-20130707_012139.jpg

Mini Cooper S Countryman (Scale Model) :: Build-off-20130707_012206.jpg

Mini Cooper S Countryman (Scale Model) :: Build-off-20130707_012227.jpg

Mini Cooper S Countryman (Scale Model) :: Build-off-20130707_012329.jpg

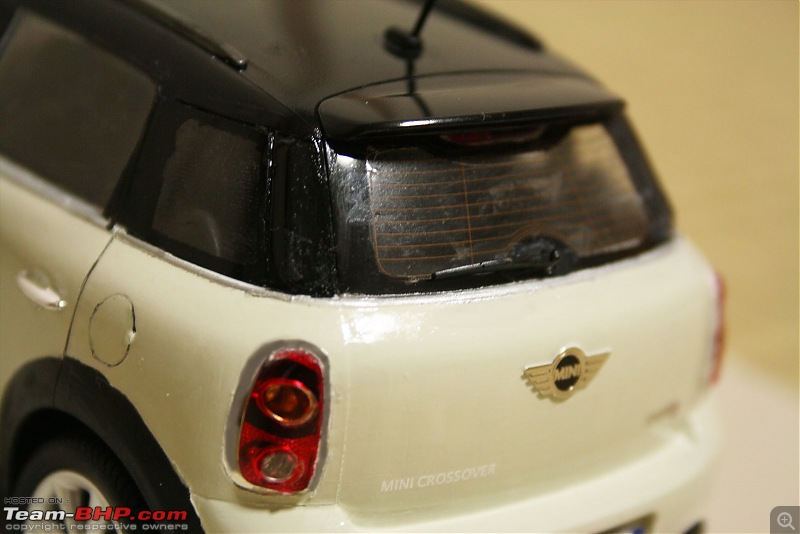
All done, there still are some evident giveaways of the disaster that my Mini went through. But I have not tried too hard to hide them as the paint had caked up and become too hard to chip. I can probably live with a little of the unfinished look.

Last edited by karpusv : 16th August 2013 at 11:09.
karpusv is offline  
Old 16th August 2013, 10:56   #11
BHPian
 
Join Date: Aug 2009
Location: BLR / NGO
Posts: 291
Thanked: 188 Times
Re: Mini Cooper S Countryman :: Build-off

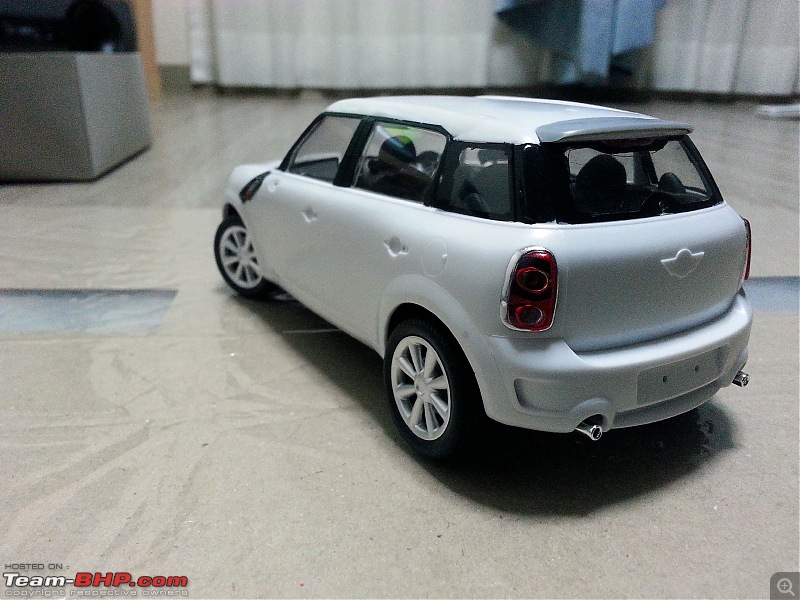
In the end, all that was remaining was a photoshoot, so out came my SLR for the Finale.

Mini Cooper S Countryman (Scale Model) :: Build-off-img_0033.jpg

Mini Cooper S Countryman (Scale Model) :: Build-off-img_0035.jpg

Mini Cooper S Countryman (Scale Model) :: Build-off-img_0037.jpg

Mini Cooper S Countryman (Scale Model) :: Build-off-img_0038.jpg

Mini Cooper S Countryman (Scale Model) :: Build-off-img_0039.jpg

Mini Cooper S Countryman (Scale Model) :: Build-off-img_0040.jpg

Mini Cooper S Countryman (Scale Model) :: Build-off-img_0043.jpg

Mini Cooper S Countryman (Scale Model) :: Build-off-img_0044.jpg

Mini Cooper S Countryman (Scale Model) :: Build-off-img_0046.jpg

Mini Cooper S Countryman (Scale Model) :: Build-off-img_0048.jpg

And my personal favourite.

Mini Cooper S Countryman (Scale Model) :: Build-off-img_0049.jpg

I have now set my sights on the 2010 Ford Mustang. Am yet to find the kit. But the build-off will not be before next year.

I've tried to make this build-off as detailed as possible so that others who are interested in taking up such projects will find it easy.
In that process, it's probably become a very long write-up. Sorry for the inconvenience.

All questions and advises are welcome as they will help me in my next project.

Last edited by karpusv : 16th August 2013 at 11:21.
karpusv is offline  
Old 16th August 2013, 14:48   #12
Senior - BHPian
 
Stratos's Avatar
 
Join Date: Mar 2004
Location: Belgium
Posts: 2,611
Thanked: 1,602 Times
Re: Mini Cooper S Countryman (Scale Model) :: Build-off

Thread moved from the Assembly Line to Travelogues. Thanks for sharing!
Stratos is offline  
Old 17th August 2013, 13:13   #13
Distinguished - BHPian
 
hemanth.anand's Avatar
 
Join Date: Jan 2010
Location: Bengaluru
Posts: 3,321
Thanked: 15,474 Times

karpusv
Let me be the first to congratulate you. Wonderful job mate.

Very neatly written and congratulations on completing the build.

I have one kit lying in my cupboard and I have not been able to start it. After your thread...I will do it soon.

Thanks for sharing.

I understand that painting it was a very tough especially the intricate parts. The shaking hands while painting is visible in some photos.
Especially the fender skirting. ..but for a starter this is a fantastic work.

The glass box is a nice final touch...all the best for your future builds.

Can you please PM the details of the paint you bought?

Last edited by hemanth.anand : 17th August 2013 at 13:20.
hemanth.anand is offline  
Old 17th August 2013, 20:46   #14
BHPian
 
Auto freak's Avatar
 
Join Date: Jan 2008
Location: Chennai
Posts: 316
Thanked: 358 Times

That's an awesome job done! Congrats!

Beautifully detailed pictures and writeup.
I could feel what you were going through at each stage and could relate to your happiness seeing the build complete!
I must admit you have inspired me to go about on a similar build
Auto freak is offline  
Old 18th August 2013, 10:01   #15
Senior - BHPian
 
Join Date: Jan 2012
Location: Bengaluru
Posts: 1,129
Thanked: 3,209 Times
Re: Mini Cooper S Countryman (Scale Model) :: Build-off

Great job, The final outcome is lovely.
I would advise you one point though. The jugaad for raising the car can be made at an angle and a mirror on the opposite would complement the bottom of the car. This way the car can be enjoyed from all the directions.
unk9ja is online now  
Reply

Most Viewed

Copyright ©2000 - 2025, Team-BHP.com
Proudly powered by E2E Networks