So one fine day our gardener who worked for many years call it quits and said he was unable to work anymore. It was sad to see him go, but it became like a main driver to setup something to take care of our small home garden. To get the wheels rolling I tried to chalk out our requirements:
- Drip irrigation to the planters and small trees
- Mini sprinkler for the small lawn
- Impact sprinklers for the larger lawn
- Automation/Smart controller for the above
- Automatic control of the miniature fountain
Like always my first pit stop was Amazon India and I did come across some good products to set things up. One of the suppliers went by the name "PepperAgro" based in Bangalore. I decided to call them and see if they can support me in brainstorming session. Luckily the guy was very good, I explained my requirements and he helped me prepare a shopping cart and also threw in some good discount. The stuff arrived like a week after and then it was experimenting time.
1. Drip Kit
The first installation was the drip kit.This was complete DIY. The parts were simple and easy to setup and it took like three hours to get it done. To power up the drip kit, a solenoid valve was installed to control the operation. The basic setup is like:
The basic blocks of the system are:

Now the attachment is simple, you punch a hole on the primary hose and attach the pin connector. To the pin connector the feeder hose is connected and finally on the other end attach the emitter which would be on the plant.

The complete network would look something like:

Points to note here are:
- The emitter can be adjusted to regulate flow.
- To make the system smart there are various options available. The site listed WiFi enabled water valves (more expensive).
- I chose to go with a solenoid valve which would be controlled via a smart switch. (saved some Rupees here surely)
- This system doesn't need a pump, works on normal overhead tank water. I didn't try with the pump but may be the higher pressure might break the network.
- Some plastic glue can be added on the pin connector and primary hose to have that perfect seal. I chose not too as the hose was running on ground so some drops there would irrigate the soil there.
2. Mini Sprinklers (for small lawn)
This was a basic sprinkler, full 360 degree coverage up to a radius of 3 ft. It also works on tap water but advisable to run it with a low power pump with valve to regulate the water flow.
This is the sprinkler. The stake keeps it in position in the ground. Full plastic construction. This was also bought from PepperAgro.

For installation, it is done with hose. Once done looks like this:
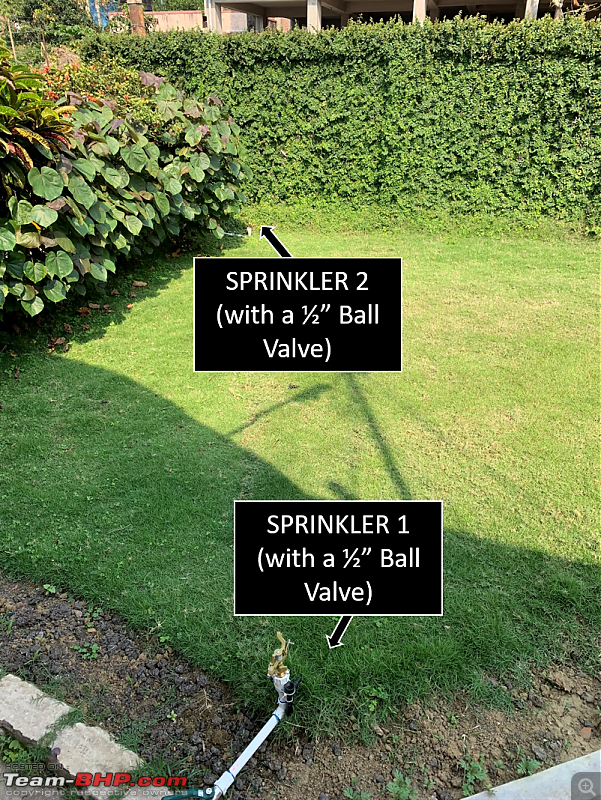
 3. Impact Sprinkler (for a bit bigger lawn)
This lawn has a bit of an odd shape so the placement and throw of the sprinklers were a bit dicey. After some scenarios, this the plan I went with. 2 sprinklers, with ability to adjust the flow and sweep area. (For the area outside the lawn, yes, the water goes out but there are walls and plants on 2 more sides so it's only wasted a bit on the walkway)

Now, the biggest problem I had. I just assumed a normal 0.5HP mono bloc should be able to feed these sprinklers and boy, how wrong I was!

After the setup I see the sprinklers working very erratically and pump grunting. So, if anyone is planning to install these, I'd recommend to make some basic pressure calculations.
- The sprinkler had a recommended operating pressure range which was noted. Is better to keep the unit in psi. Taking an example for the sprinkler I used the pressure required was about 45 psi. Next, with that data I used another tool to get the flow rate achievable from the sprinkler nozzles : http://irrigation.wsu.edu/Content/Ca...quirements.php . The obtained value was ~3.7 gpm. (The nozzle diameter can be measured, in my case was 0.1378 inch)
- With that add the approximate pressure drop on the piping (this is not too much actually). One can refer to the available resources on the net to find this, if not can be calculated manually by the Darcy-Weisbach equation. This the link I used. https://www.rainbird.com/professiona...on-loss-charts . My piping was around 80 ft so the pressure drop was around 6 psi. (With 1/2" Schedule 80 PVC pipe). Remember here that bends increase the pressure loss so it's good to keep a safety margin.
- Last add other height the pipe has to cover (like if is running via a pillar). Use the famous oilfield formula to calculate the head (Pressure psi = 0.052 * Height ft * Water Density lb/gal)
- Now we have all the pressure drop: (45 * 2) + 6 or 96 psi. Now to convert to water head again use the oilfield formula to find height. If you were following my numbers it should be 221ft or 68m and my flow rate was 3.7 gpm or 840 Liters/hour. That's all the data you need to buy the correct pump. The dealer would be able to advise the correct pump when this is mentioned, "840 L/H at 68m" . In my case it came in the form of a 1.5 HP mono bloc pump from V-Guard (Part Number: VSPAD-FH-180). It is always better to up size and keep a bypass valve on the pump discharge.
This is the picture of the sprinkler I installed. The bottom thread is 3/4". Got it off Amazon India for Rs. 500 per piece. Got one extra and I wasn't disappointed as one refused to turn properly.

The installation was done with help of a plumber who ran the 1/2" PVC Schedule 80 pipes from the pump to the respective points of the sprinklers. The installation looks like this:
 4. Smart System
In this post, will only cover the smart system which is controlling the drip system. I am awaiting on the other one which controls the larger sprinkler pump motor, which is delayed due to the nationwide lock down.
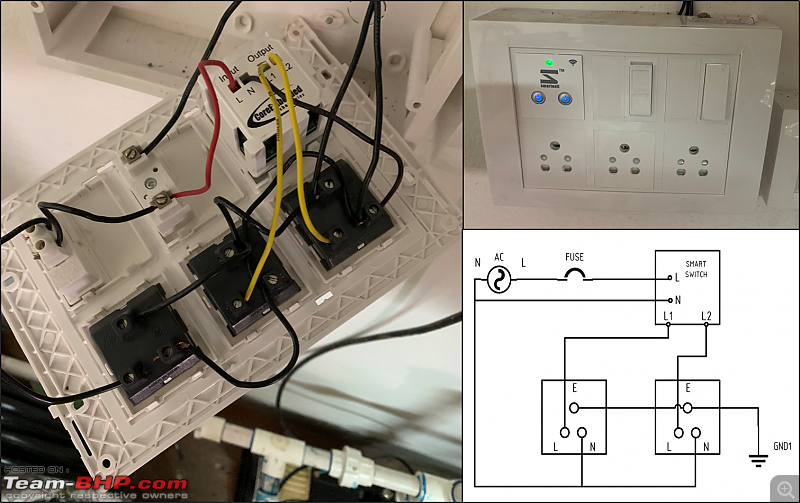
The prerequisite of installing this module is to have a modular switch board with 2 free gangs. The module is made by an
Indian company called
Smarteefi. The build may not look as good as the Chinese counterparts and then the price is also higher than them but these are reliable, have been using a set for over year in another room and they are stable and robust.
For the installation it is highly recommended a professional electrician as it deals with tinkering with the mains. Somehow I managed it albeit a small shock! The L and N cables go to the mains supply and L1 L2 go for the individual sockets on the board.
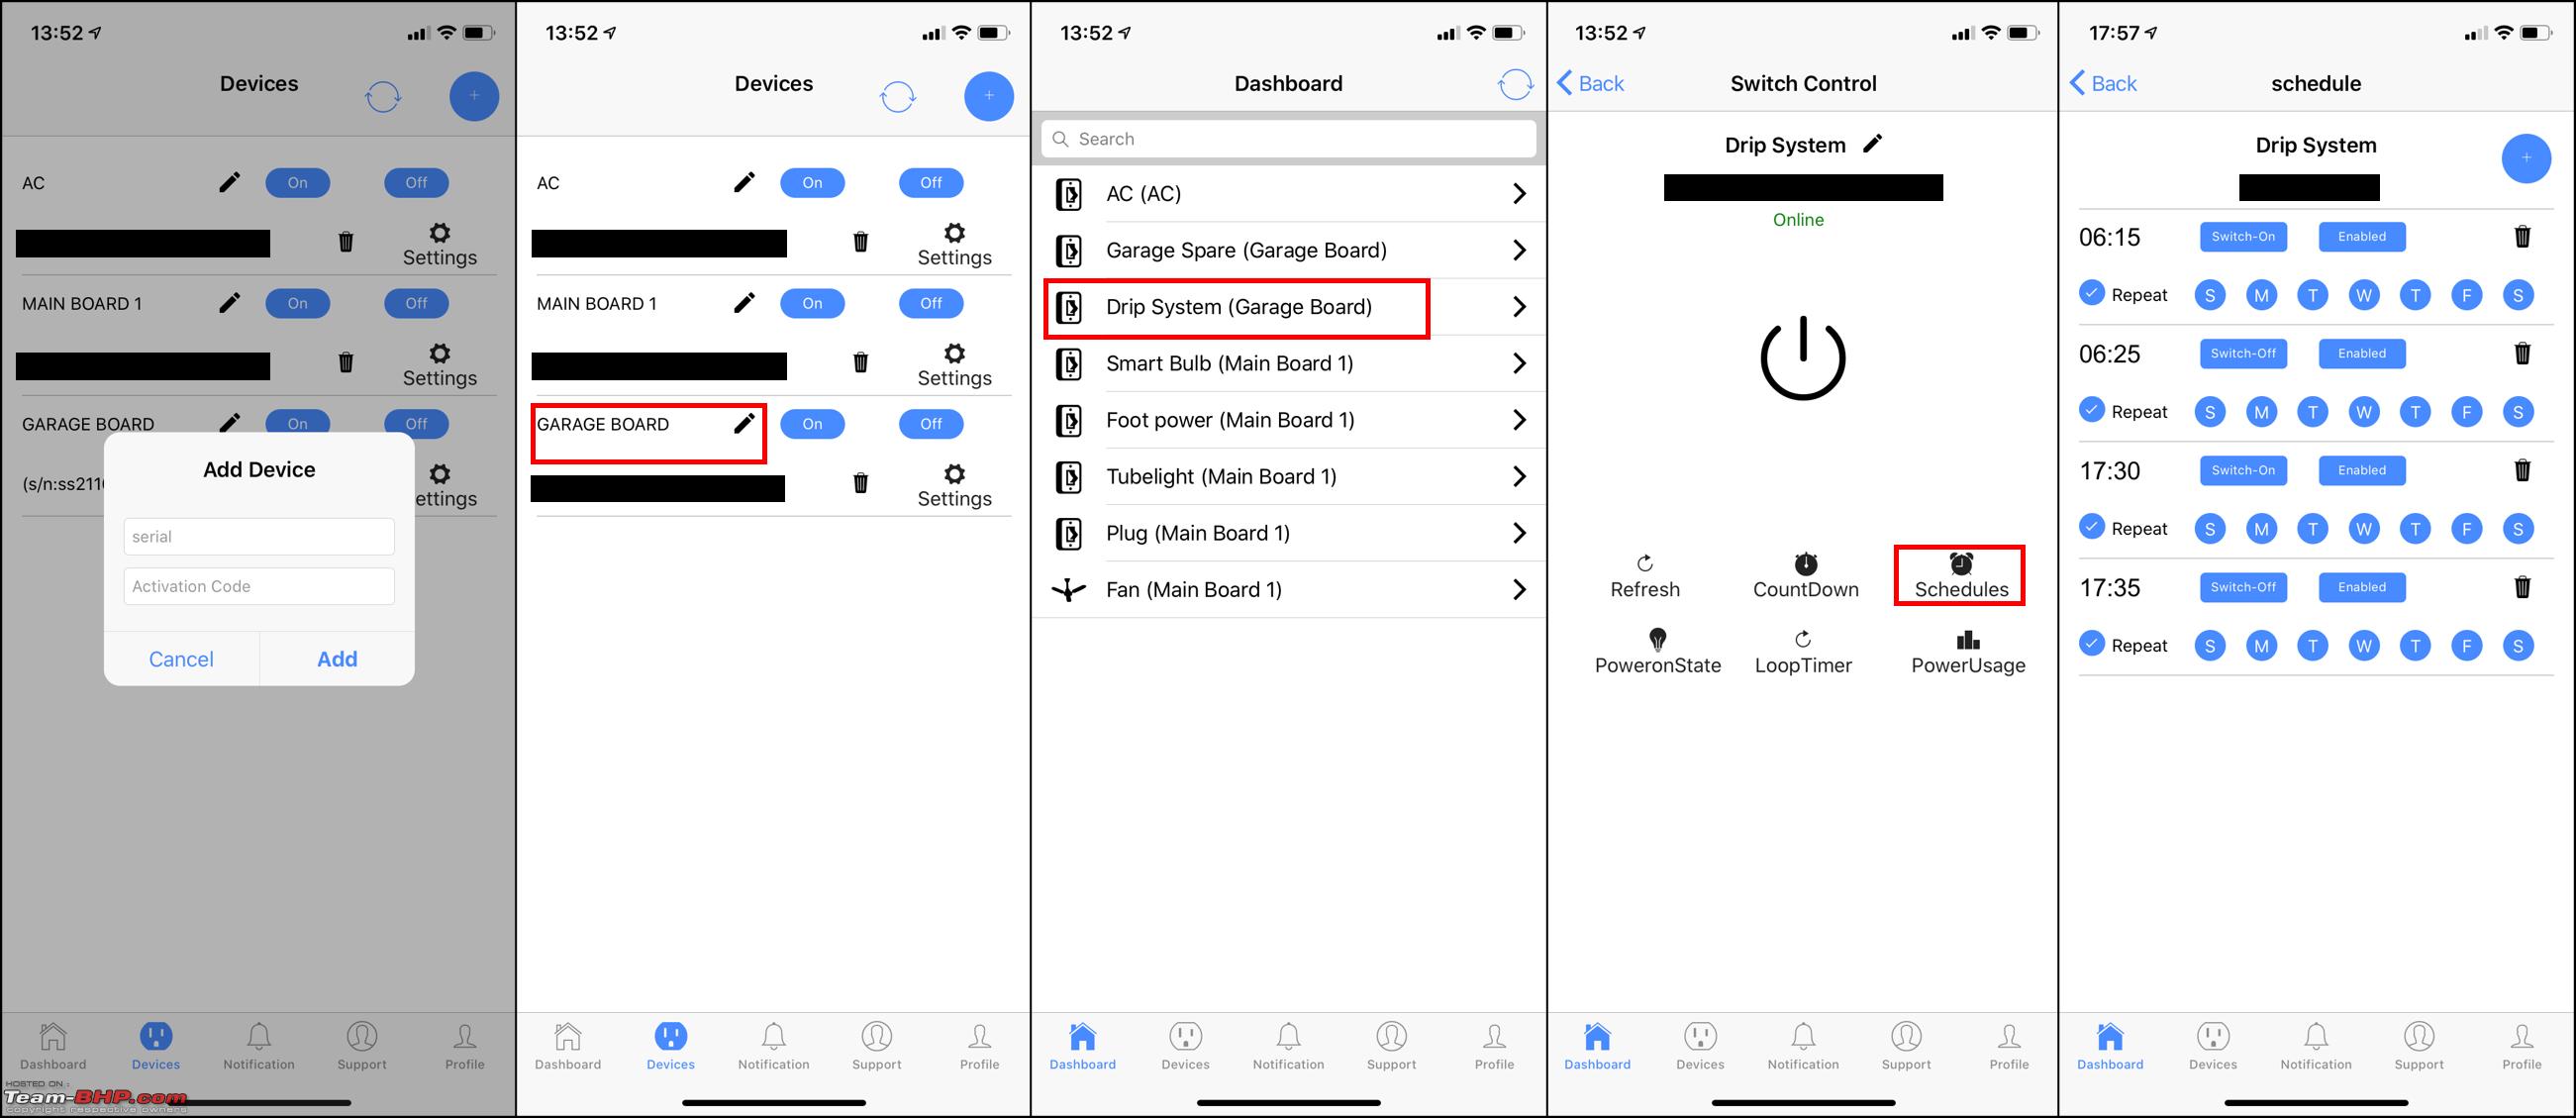
Once the module is powered up, we can use the app (Smarteefi) to add a new device. Once detected, the Wifi setup is done and it is ready to use, quite simple IMO. Now, whatever you name the devices are to be next added to Alexa so it can made made cooler -
"Alexa, please water my plants!". After these the scheduler option can be used to automate the whole process. I set it up to run everyday in early morning and evening without any intervention. The company claims the scheduling works even without internet. and The screenshot collage shows the integration process overview.
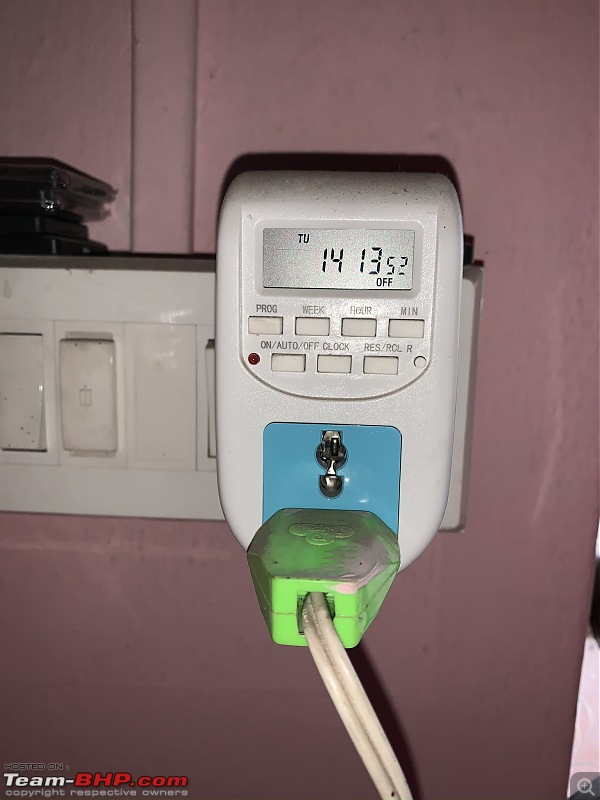
 5. Miniature Fountain Controller
This is not a smart controller and actually the wire is run to another place, so I didn't want to spend again on the smart controller so went for a cheaper option of a timed switch, also procured from Amazon. I set it to run for 30 mins everyday. It cannot be controlled via app or Alexa. It does have a internal battery to keep the scheduling in memory in case of power cuts.
The total setup cost around Rs. 30,000 with the following break-up:

Now for a walk through of the complete installation...
https://www.youtube.com/embed/_93AD2BySdM?start=1239

 21st March 2020, 16:43

 (50)
Thanks
(50)
Thanks


 , you've given, many of us, something to play with!


