Hello all.
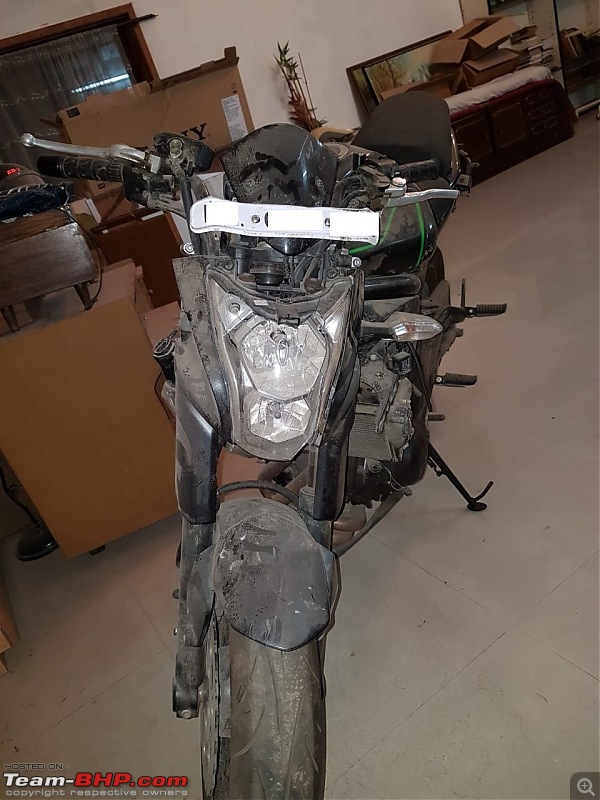
I purchased a Kawasaki ER-6n during the BS3->BS4 transition fire sale. Unfortunately I had an accident after 8 months of owning it, in October 2017. The insurance company refused my claim due to some technicalities and the bike was stuck without repair for 2 years.
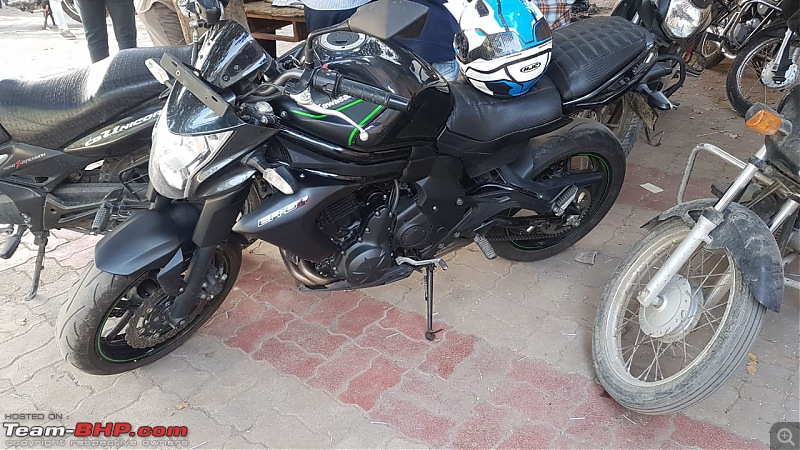
Just a few months ago I started repair myself and now the bike looks like new for a fraction of the cost of the ASC quoted repair cost. Even the bent chassis was straightened. And I'm back to riding after very long. This time I'm being extra careful. Check out the pictures of the bike before and after repairs, couldn't resist although its not what the thread is about.
This is my baby in December 2019.
Post repairs...
As we all know, or at least as all 650cc Kawa owners know, the stock brakes are pretty much mediocre when it comes to stopping power, especially the rear wheel. Most people upgrade to EBC pads well before the stock ones are worn, solely for this reason. After my bike was rebuilt, I felt as if the rear was barely working. It wouldn't even lock unless I applied very high pedal pressure. I bled the brakes and all but to no effect. I was thinking of getting EBC as well, until I enquired about Brembo pads and found that the difference in cost for 3 complete sets (2 front and 1 rear) came to less than Rs 2500 total. Hence I decided to go ahead with Brembo pads. I decided to replace the front ones too as they aren't too good either. There are very few reviews of these Brembo pads online that I can find so I thought of putting the review up myself for others.
The total cost including shipping came to Rs 11,175. I purchased them from Orion Motorsports Bangalore. The Brembo website is a bit confusing if you're looking to choose pads for your bike. Balaji from Orion was very helpful and friendly. The final pads I purchased were:
Front right: 07KA18.SA - Rs 3919
Front left: 07KA19.SA - Rs 3646
Rear: 07KA16.SP - Rs 3510
Pads from Brembo.
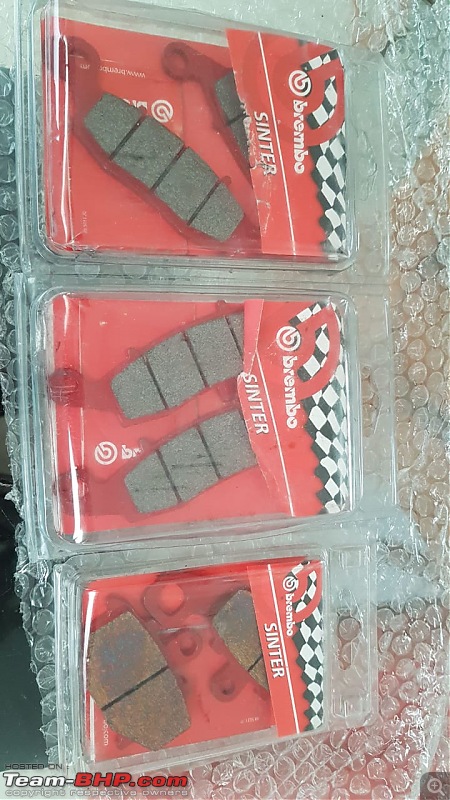
One of the pads came in slightly damaged condition. Actually the packing from Brembo is very poor - while Balaji had used bubble wrap and all on the outside, inside the plastic packaging itself the pads were free to move wherever. I had started doubting if the pads were genuine due to the packing alone, however sent a mail to Brembo and they confirmed that the pads are the real deal. It's a wonder that they made it from Italy to India without all being damaged. Kudos to Orion for shipping me a replacement set the very next day, no questions asked.
If you're looking to get a detailed idea on how to replace brake pads, you're better off watching videos on YouTube or buying a Haynes manual for your bike - I did both and the resources were incredibly helpful. I decided to replace the pads at the front and back, as my brakes at the back seemed particularly weak, I will rebuild the caliper if the pad replacement doesn't have the desired results. And so I started.
You'll need lots of brake fluid, a torque wrench with 12mm hex head and a 6mm Allen head (long), brake cleaner spray, a container for the drained brake fluid and a good amount of patience. Here's the basic steps to be followed for pad replacement.
-> Remove the caliper from the chassis (12 hex on the front and 6 Allen on the back). DO NOT operate the brake lever henceforth until the caliper is back on the chassis
-> Remove the R-clip (because it looks like an "R")
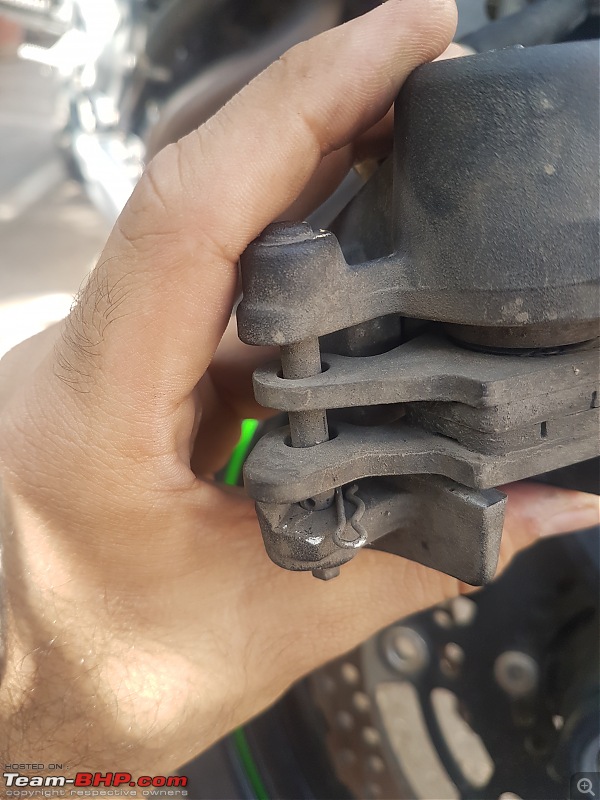
-> Remove the slider pin
-> Slide the outer pad off the caliper
-> Slide the inner pad off the caliper
Old pads have plenty of life.
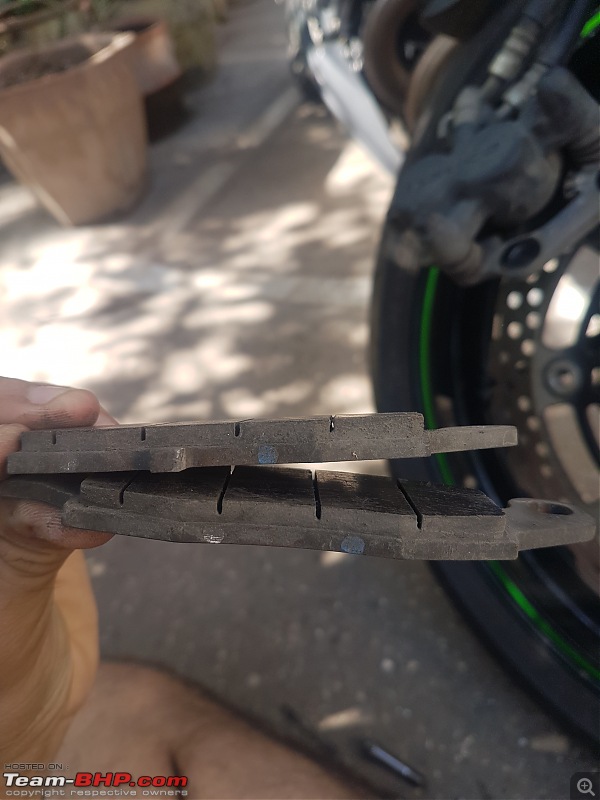
New pads with the old ones.

-> Clean the caliper and pin with brake cleaner spray
-> Apply grease on the slider pins and the back of the caliper, making VERY SURE not to get any grease on the friction material itself
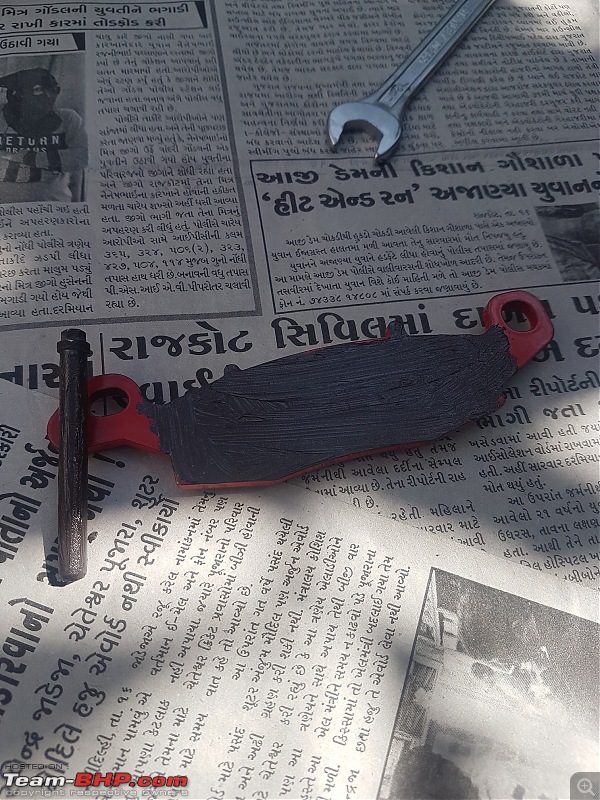
-> Put the inner pad back into the caliper (take care to see that the caliper spring clip is not deformed and that it hasn't shifted from its position)
-> Press down against the pad spring and slide the slider pin back in
-> Put the R-clip back on
-> Slide the caliper back onto the disc, align with the mounting bolts, tighten it to the specified torque (FYI front is 34Nm and rear is 25Nm)
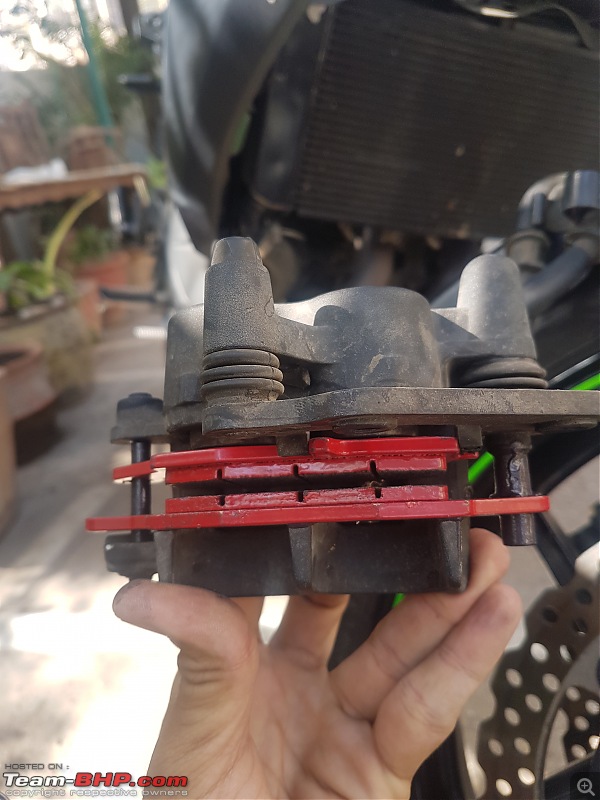
Ta-da! New pads are ready. Here's the fine print -
1. Brake systems are self compensating i.e. as the pad wears and gets thinner, the piston will keep pushing the pad further towards the disc and maintain constant braking performance. Due to this, when you replace the pads they may not go back on the disc because your older pads were thinner. One of my calipers slid right back on to the disc but two others didn't. So its advisable to push the pistons back into the caliper after opening the brake bleed valve. This is like a system reset.
2. Brake fluid can strip paint so make sure it doesn't get on to the bike. Personally speaking I've spilled brake fluid on the wheels many times, nothing happened, but why take a risk?
3. Using a torque wrench is highly recommended. Borrow one if you don't want to spend on a new one. (If you're a DIY guy like me, you'll find use for it somewhere)
SO after replacing the pads and taking the bike on a test ride, a few things came to light -
-> The bike seemed to be dragging a little (I had forced one of the front calipers onto the disc so maybe it was in constant contact rather than only when braking)
-> The rear braking performance hadn't improved at all, in fact it had worsened!
I had expected both problems to crop up, because forcing a caliper onto the disc isn't what you should do - I was just lazy as it was a lot of effort opening up the whole thing again just to push the piston back in. I confirmed this by touching both front discs after the test ride - one was a bit hot while the other one was scalding hot and couldn't be touched. And with respect to the rear brake, I had expected that as well, as I was prepared to rebuild the rear caliper as it seemed to be sticking. So, back to work.
Front: Removed the caliper, removed the pads, opened the brake bleed valve, pushed the piston out, mounted the pads, pushed it back onto the discs (easy this time, it was actually loose, there was a gap between the pads and the disc as the piston had been pushed back all the way.)
Rear: This is where I had to nip the problem in the bud. I had to open up the piston due to the sticking issue (or so I thought), replace the seals, inspect the piston for signs of wear, put everything back together and hope for the best. Here's what I did.
-> Remove the brake hose from the rear caliper (remove the banjo bolt). Haynes manual recommends one should replace the banjo washers upon removal but these were made of steel so I didn't bother. (Plus I hadn't ordered new ones from Kawasaki)
-> Drain the brake system - open the reservoir cap, put a bottle around the opened brake banjo so the leaking fluid doesn't spill, pump the rear brake and drain it
-> Remove the caliper, pads as earlier, but this time also removed the caliper frame off the caliper body
-> Pushed the piston out of the caliper through the hole where the brake banjo was. This was the hardest part and it seemed really stuck. It took a lot of effort and I was almost afraid of damage. Upon inspection, I did see traces of brake fluid leak as well.
-> Cleaned the piston thoroughly with clean brake fluid, and cleaned the opened caliper too with brake fluid (you can see the shiny cavity where the piston slides in and out). Replaced the seals with new spares from Kawasaki.
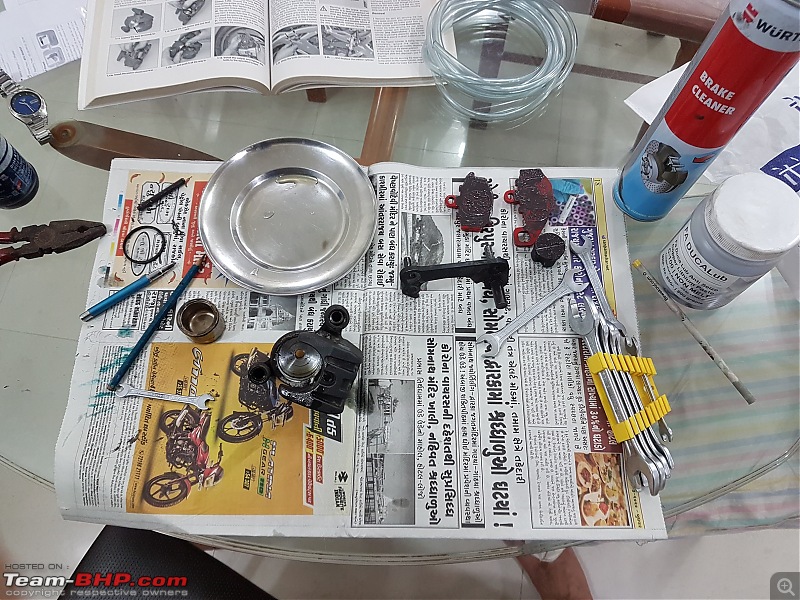
-> Carefully slide the piston back in, taking care not to displace the seals.
Rebuilt rear caliper
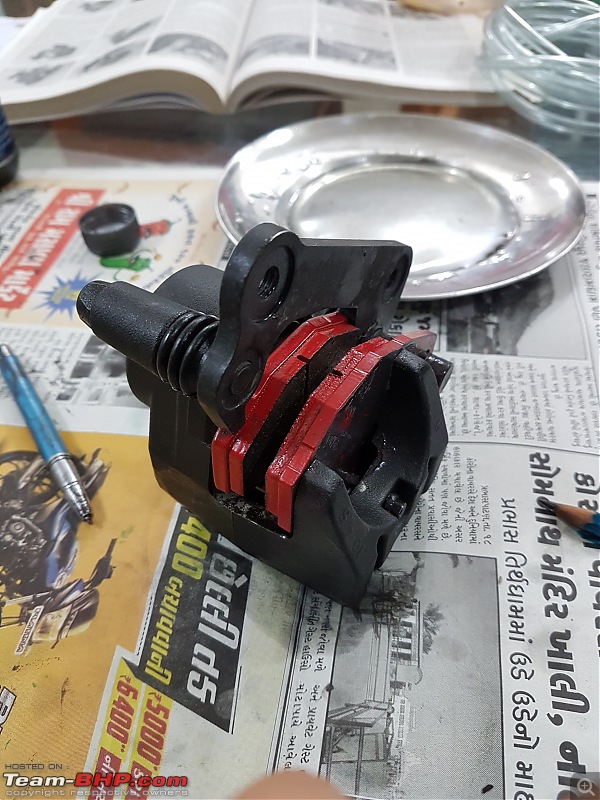
-> Put the entire caliper back together and back on the bike. Tighten both the Allen bolts that mount the caliper onto the chassis, and also the banjo bolt with a torque wrench (25Nm for both).
-> Fill up the brake system and bleed it properly to make sure it's free of air.
Went on a test ride again. The front was sorted and I noticed a drastic improvement in brake bite and response. Seriously this is miles ahead of the stock pads and I'm sure the performance will improve over the next 160km. I was actually afraid of braking hard with the front earlier because I could never tell if it was going to lock up due to lack of feel, however now it inspires a lot of confidence.
Rear - Basically hardly any performance improvement over the stock pads

I checked the system for leaks and there were none. It did lock up now, albeit with some effort. I'm now sure that this is the best the rear can be. All said and done, my friend who's into bike racing told me over and over that I should pretend the rear brake doesn't exist and brake only with the front! So I'm going to have to go in that direction now and learn new things.
Bottom line - Brembo pads for the front were definitely worth the money and I'm very glad to have made the purchase. However for the rear, swapping the pads didn't make much difference so unless the pads are worn, I suggest users to stick to the stock ones. Objectively I can't compare these to EBC pads since I've never ridden an ER-6n with those.
I'll take questions now if y'all have any!
 (24)
Thanks

 (1)
Thanks
 (4)
Thanks

 (3)
Thanks
 (1)
Thanks
 (4)
Thanks
 (1)
Thanks
 (4)
Thanks


 I checked the system for leaks and there were none. It did lock up now, albeit with some effort. I'm now sure that this is the best the rear can be. All said and done, my friend who's into bike racing told me over and over that I should pretend the rear brake doesn't exist and brake only with the front! So I'm going to have to go in that direction now and learn new things.


