Team-BHP
(
https://www.team-bhp.com/forum/)
-
4x4 Vehicles
(
https://www.team-bhp.com/forum/4x4-vehicles/)
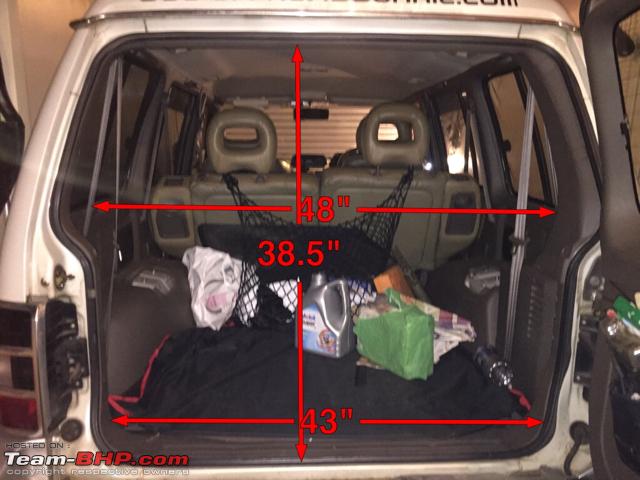
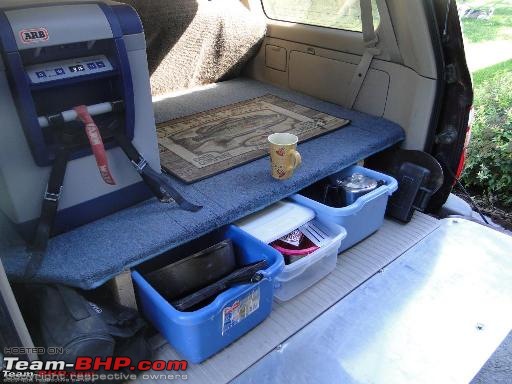
Yesterday, while i was packing for tomorrow's camping trip, i realised the extreme need for organised storage options at the back of the Pajero.
With stuff piling one on top of the other, it's a pain to access the stuff at the base.
I'm also planning to remove the last row seats. They have never been used since i have purchased the vehicle and eat away into a lot of real estate.
I want a low profile system on which i can still store bags and stuff. Plus the entire system will be designed to easily be removed in case i need to put the seats back.
Have already bought a bit of ancillary hardware for this project.
My uncle in ahmedabad has a factory that produces these new age plastic (acrylic?) sheets that are like regular plywood - same thickness at less than half the weight and same strength. Advantages would be: no issue with water, no need for finishing wooden strips ("leaping patti" as carpenters call it), no need to add extra laminates or paint/polish on it.
Thinking of going for that option instead of ply. Also exploring making an aluminium frame and using alubond type material to cover up the sides. Main aim is to keep weight as low as possible without compromising the strength.
The entire unit will be bolted to existing tie down points (remove those brackets and use same nut and bolts to fix this).
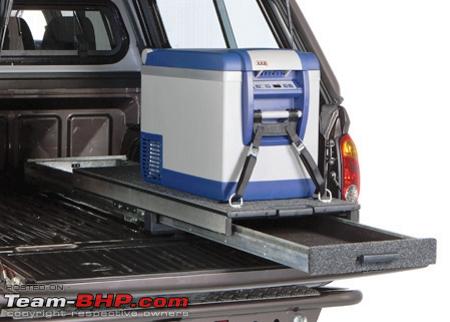
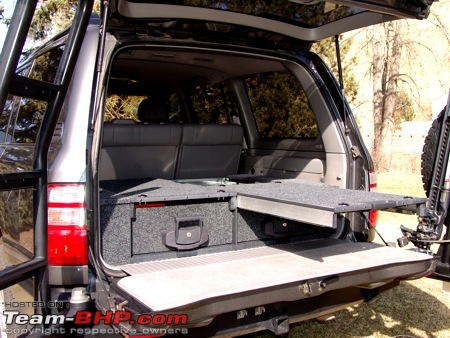
Googling has thrown up the following pics. Would love to hear opinions and ideas.


Quote:
Originally Posted by Tejas@perioimpl
(Post 4066310)
Yesterday, while i was packing for tomorrow's camping trip, i realised the extreme need for organised storage options at the back of the Pajero.
|
My vote goes for this...
Attachment 1560549
Leaves you ample space for utilization on top and smaller items can be carried into drawers, just make sure the size of drawers is on practical side.
Quote:
Originally Posted by Tejas@perioimpl
(Post 4066310)
With stuff piling one on top of the other, it's a pain to access the stuff at the base.
|
Agree, we realized it on our Ladakh trip.
Quote:
Originally Posted by Tejas@perioimpl
(Post 4066310)
I'm also planning to remove the last row seats. They have never been used since i have purchased the vehicle and eat away into a lot of real estate.
|
Same here. I also plan to remove last row seats in my Fortuner. Moreover, Toyota's solution for rear row is pathetic to say the least. The way these seats fold away and hung onto sides really restrict the usable space in the boot. :Frustrati
Having a chassis underneath in these body-on-frame SUVs makes the matter further worse (.anshuman has taken out rear seats in his XUV and it has freed up a lot of additional space since the floor is quite low, XUV being a Monocoque).
I have personally loved Montero's rear row for that matter where seats fold away in the floor neatly, leaving you plenty of space to use.
Quote:
Originally Posted by Ace F355
(Post 4066354)
...I have personally loved Montero's rear row for that matter where seats fold away in the floor neatly, leaving you plenty of space to use.
|
You can even remove this seat (it is a simple self lock mechanism) and have the space under the floor to store things. I store all my off road gear in that space, leaving the boot floor free and available for any other regular purpose.
Quote:
Originally Posted by ariesonu
(Post 4064215)
Caddy's in my TUV
|
Could you please post a link of its availability online? Desperately need that.
Tejas, the new polymer sheets are pretty strong. Go with them without a worry in world. I would go with the first design.
Wow. What a great way to make the SUV serve it's purpose. Haven't imagined one can transform pajero to this extent. It's really a capable outlander and now also seems like a mini RV. A tasteful mod sir.
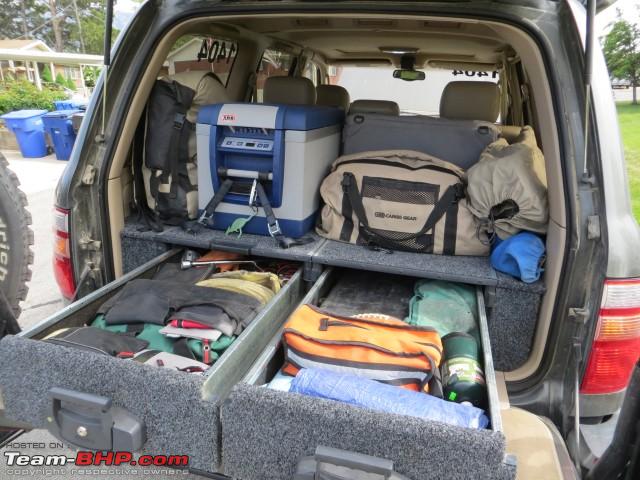
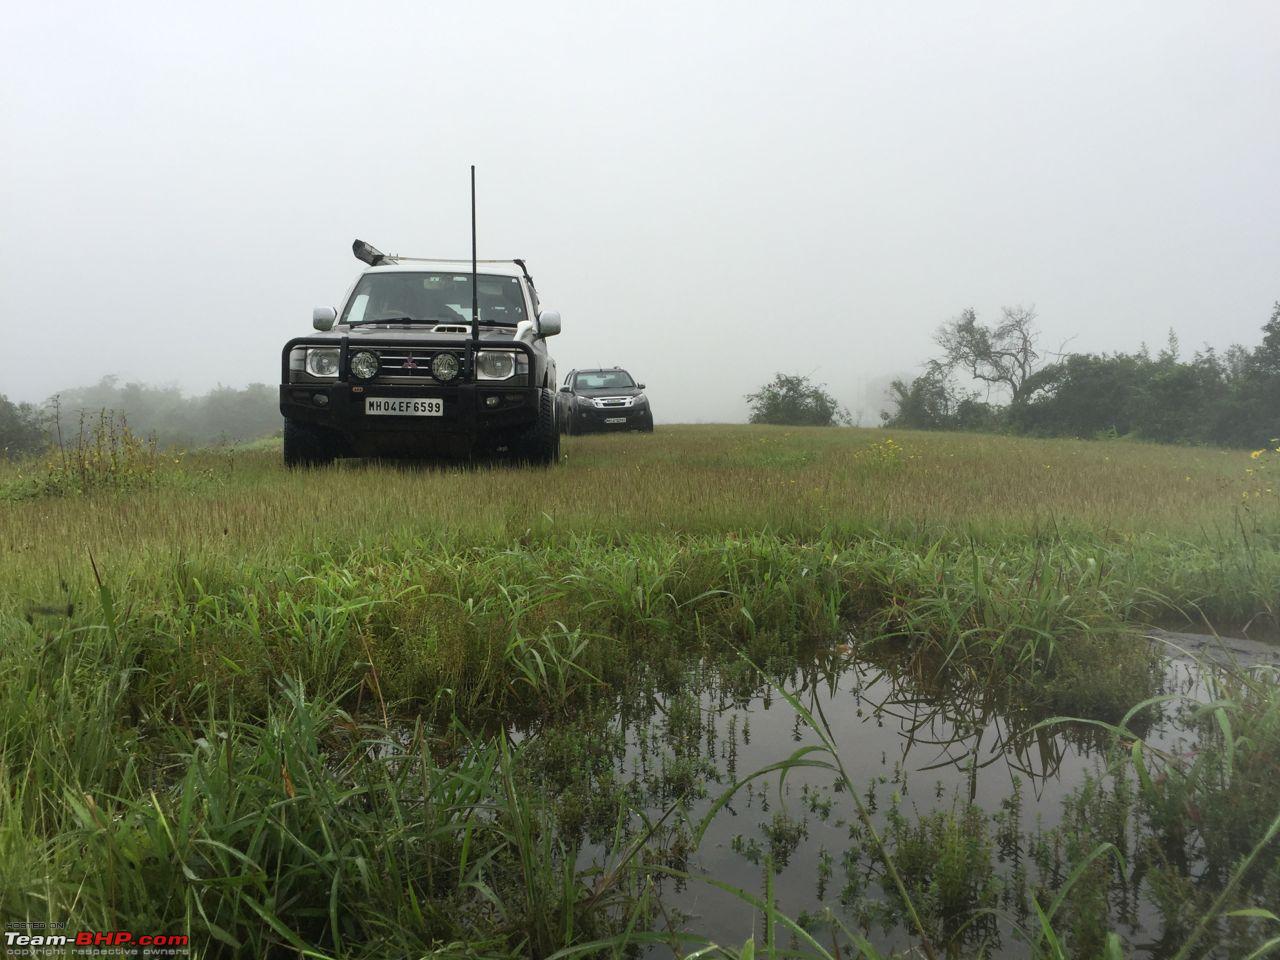
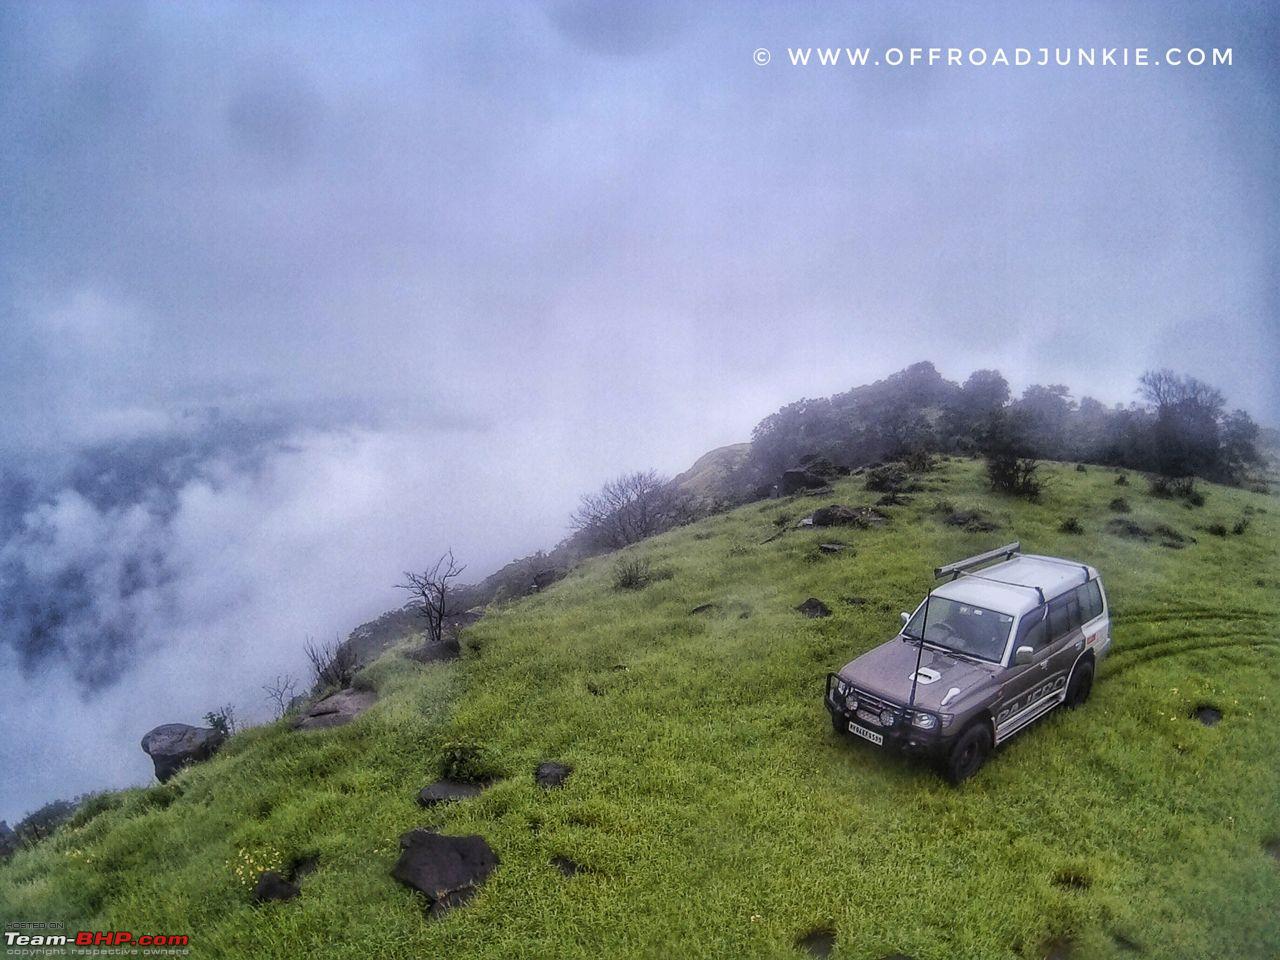
Last weekend we went for a camping trip.
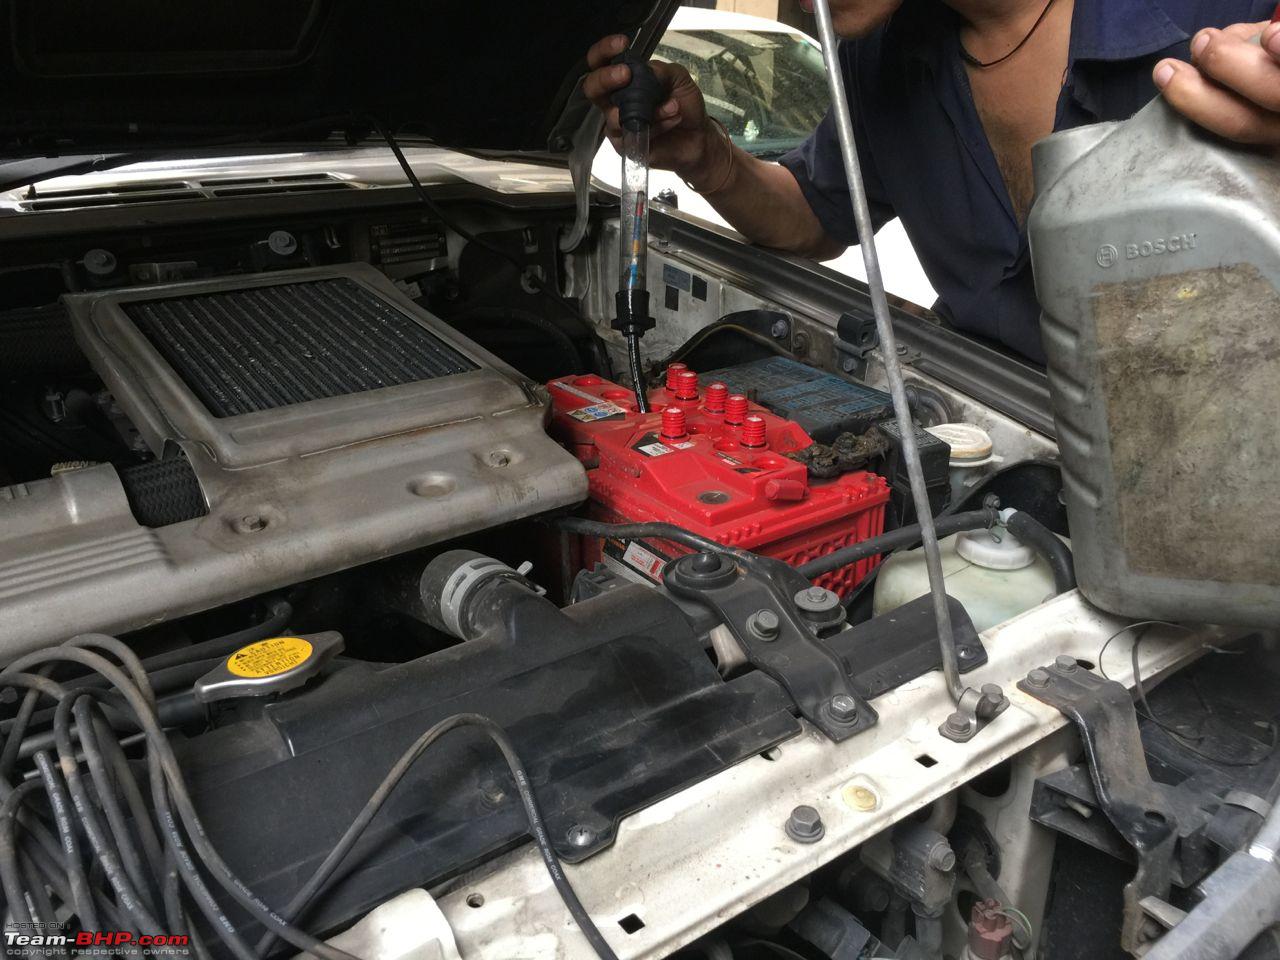
Before that got the battery serviced.

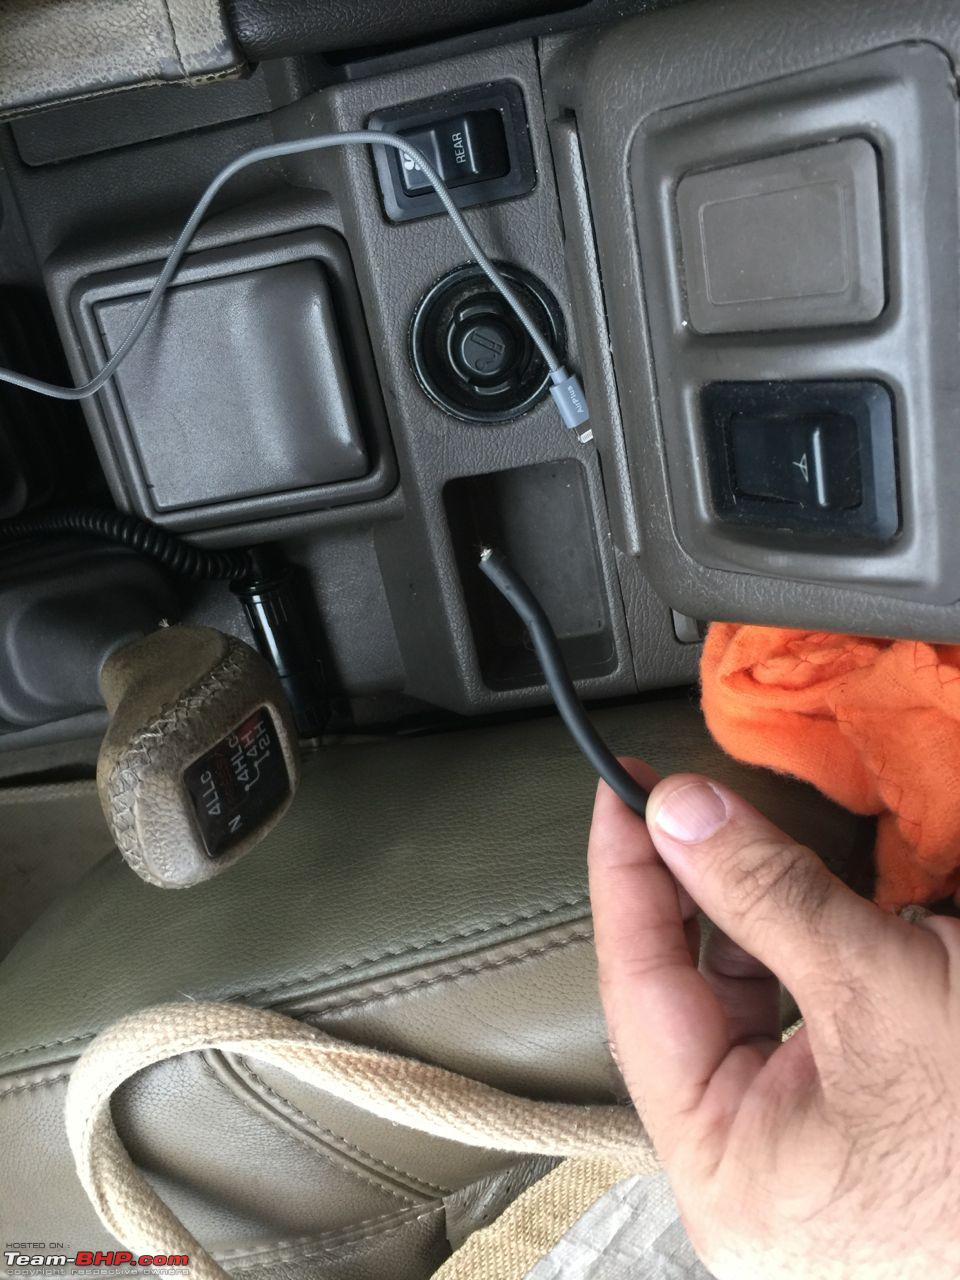
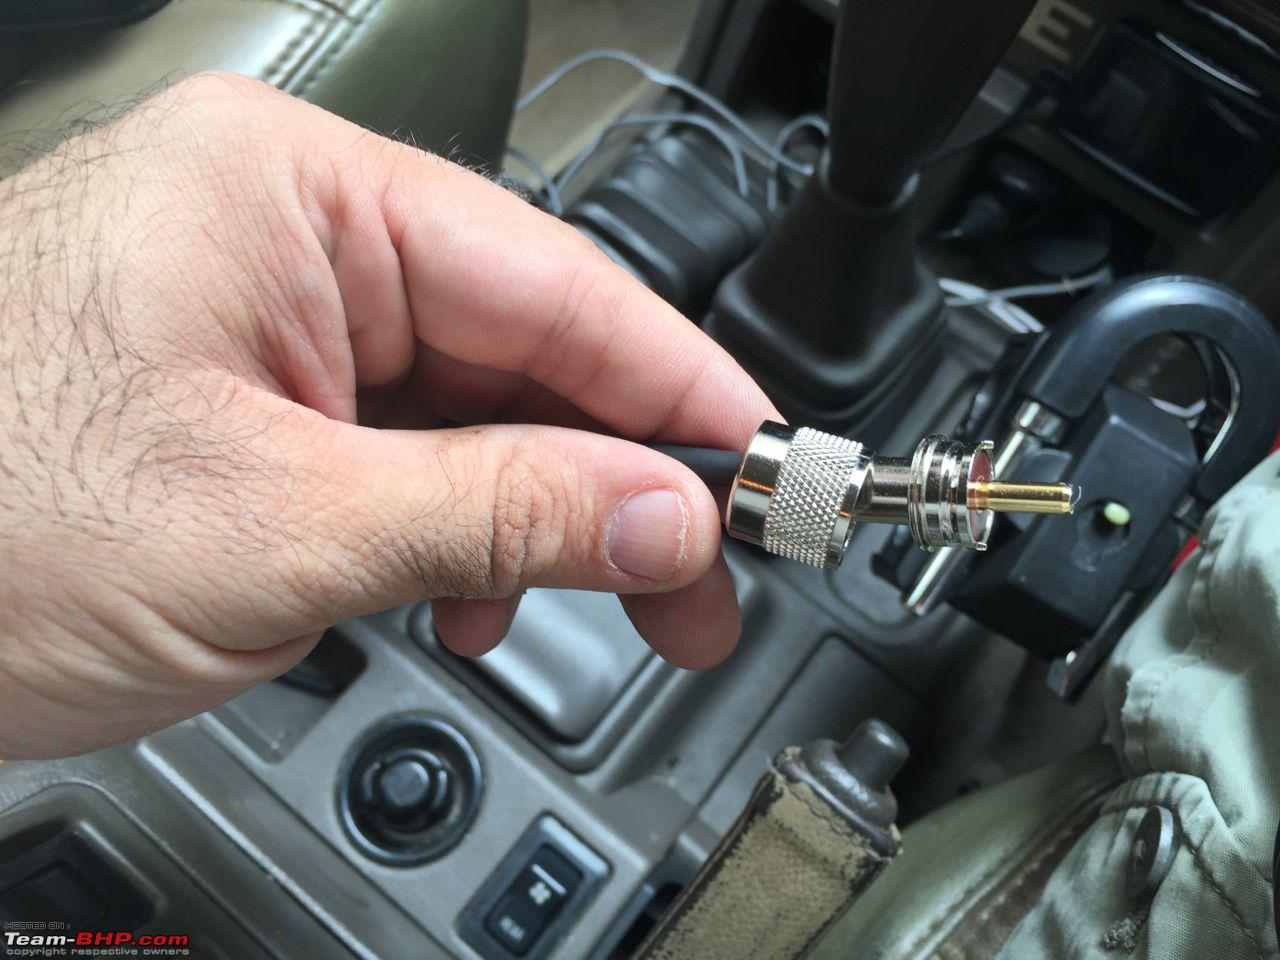
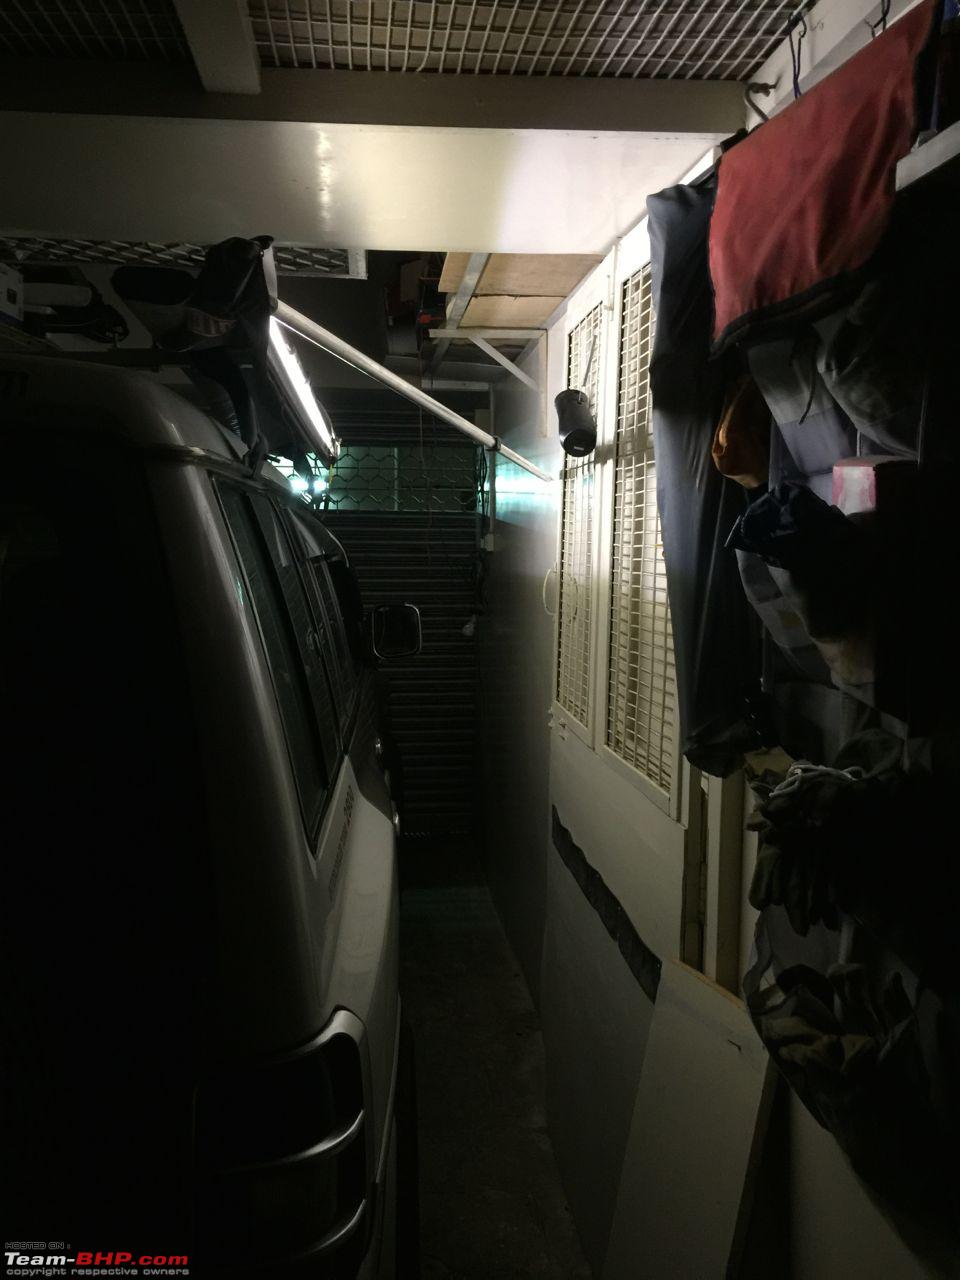
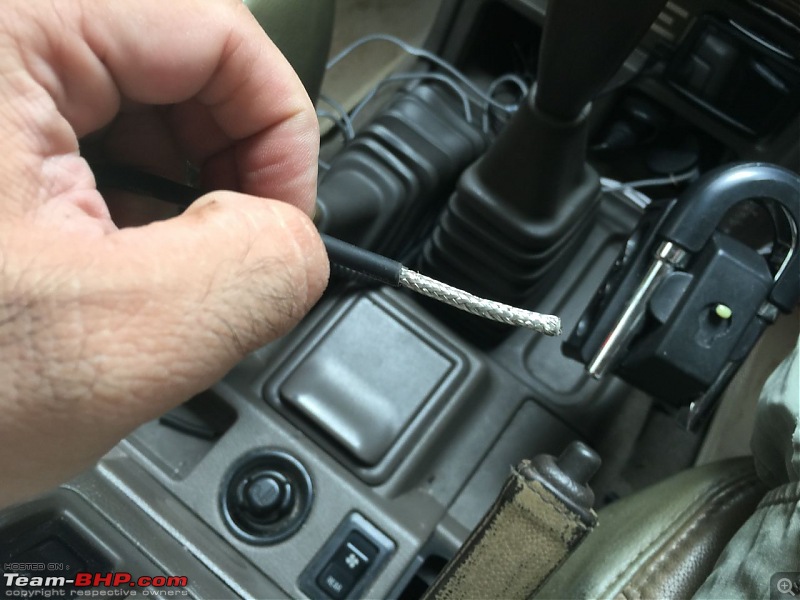
At that time, got the antenna cable passed through the firewall by my electrician:

Once home, i fit the socket to the coax cable and soldered the ends:


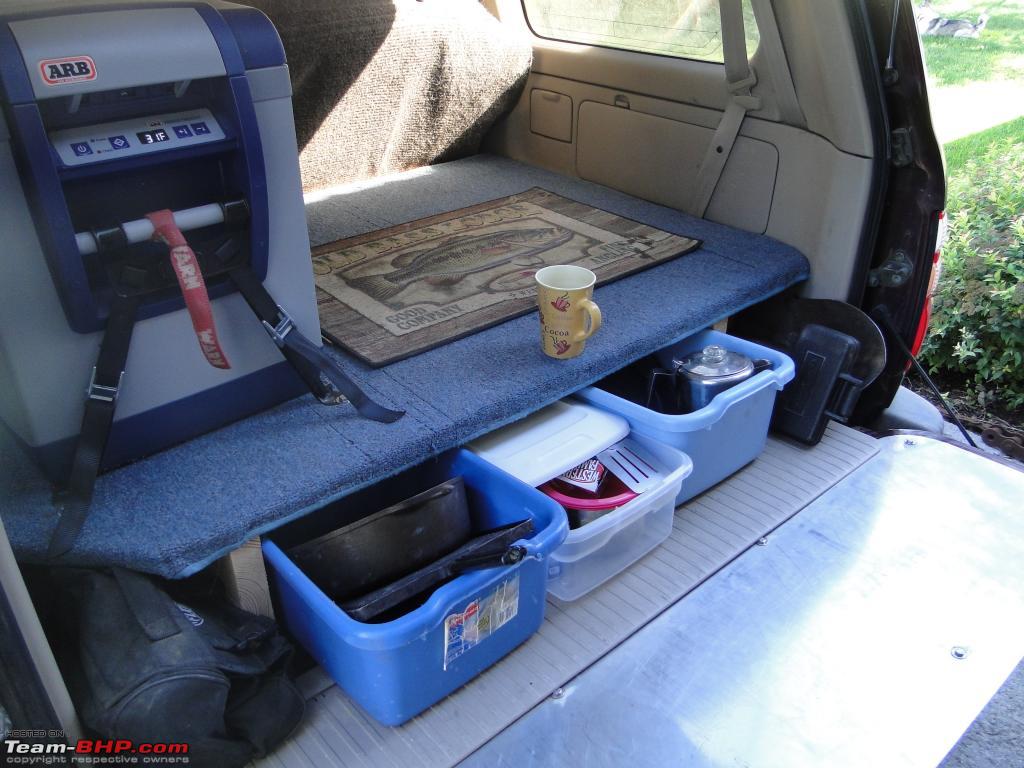
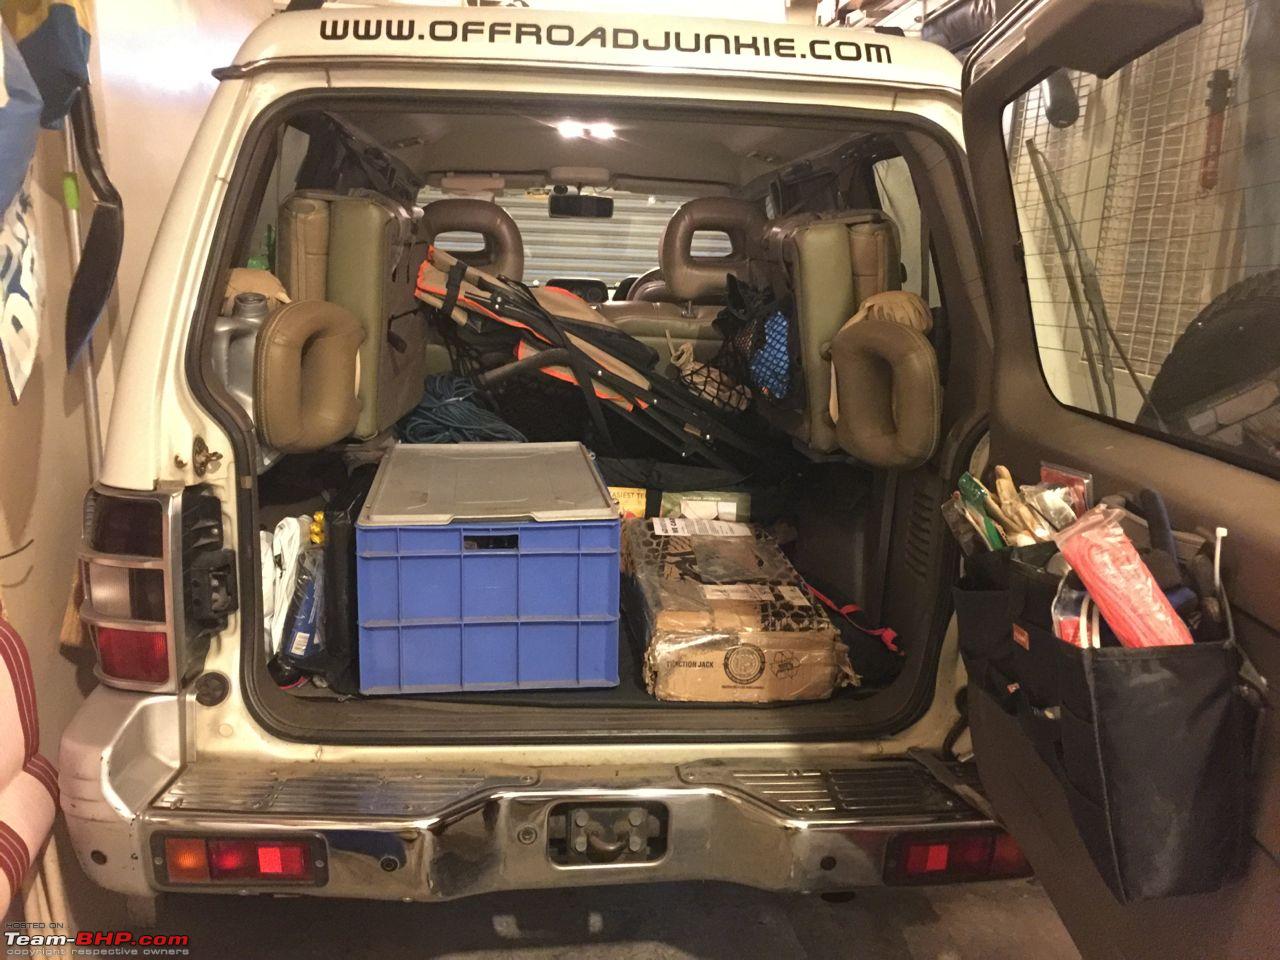
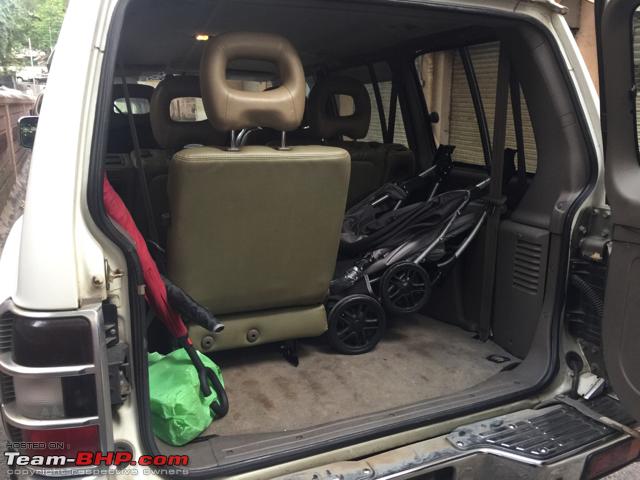
The boot is still a mess, and i need to get the storage solution sorted:

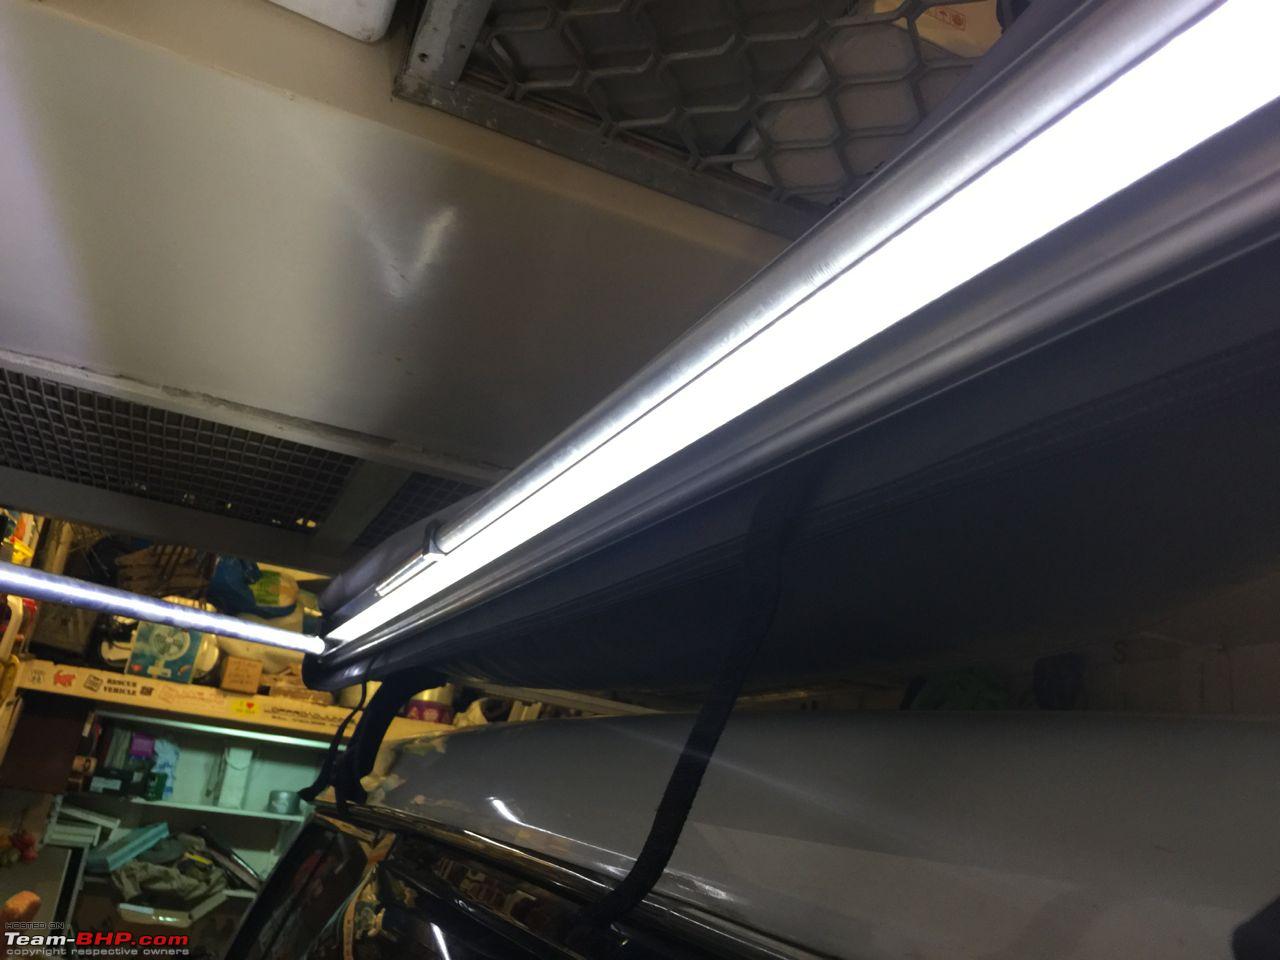
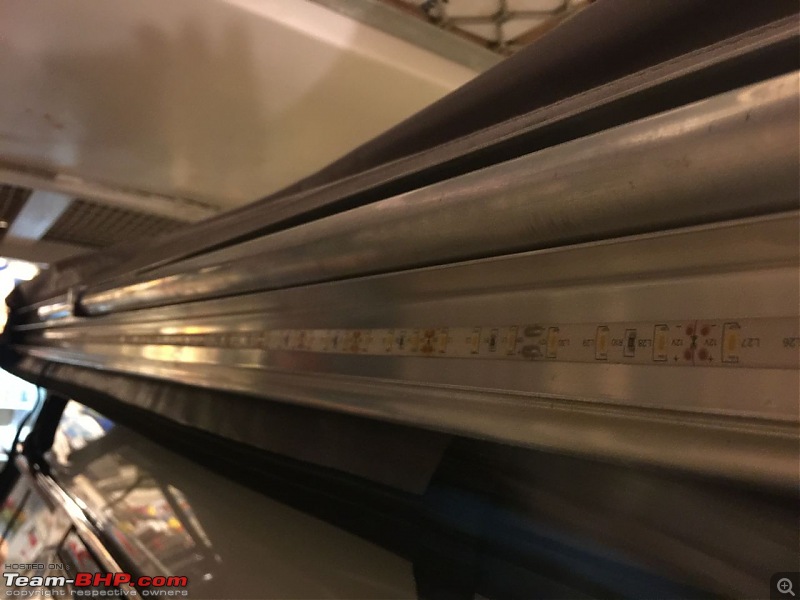
Fit LED lights to the awning. Currently has a waterproof connector bought from ali express. When in use, clip on the connector and attach to a cable running to the cig lighter socket.
The LEDs are waterproof type. 2m for Rs 150 from a local electrical shop at Luharchawl in Mumbai.
I'm waiting for my roof rack. Once that is in place, will do permanent wiring and fit dedicated switches.


The connector:

Link to buy:
https://www.aliexpress.com/item/New-...608.0.0.BlqPWK
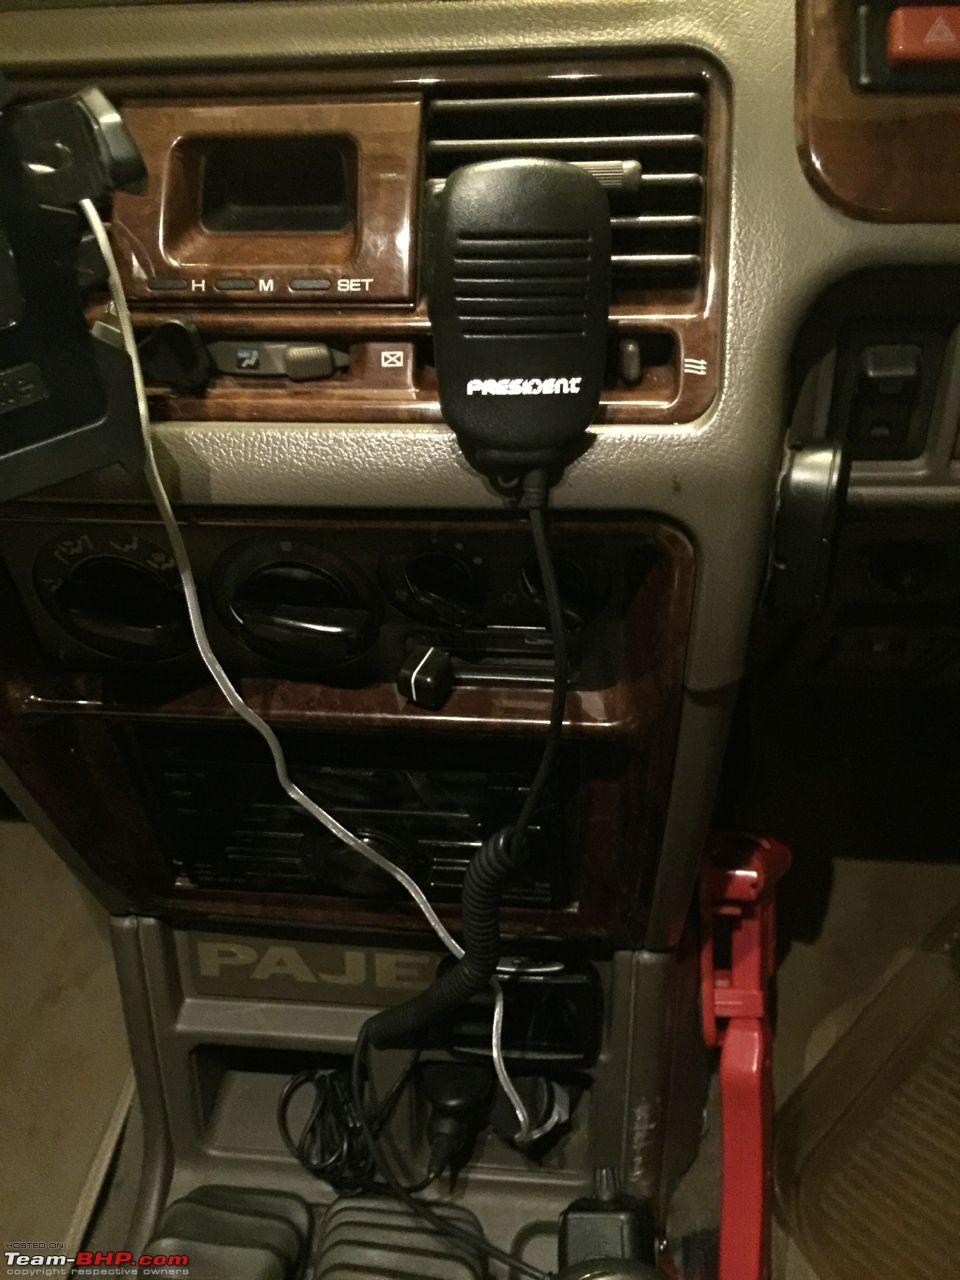
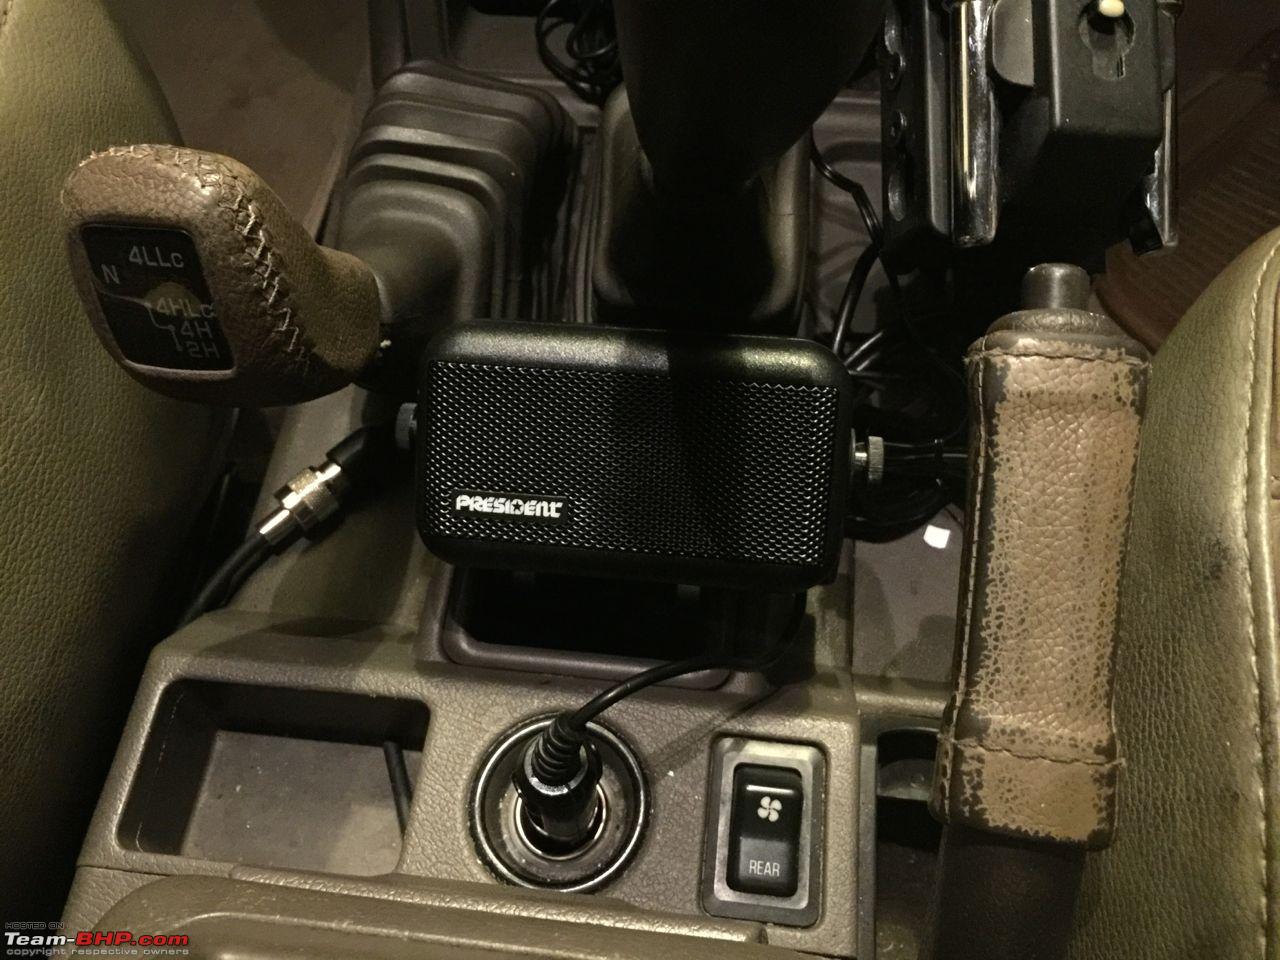
I currently use my handheld cb radio. Not invested in a fixed setup since the radio is also used in the jeep.
Bought a separate speaker and mic for the handheld. Using a dedicated car adapter for the President Randy II handheld, it converts it to a fixed unit.
The adapter goes to the battery compartment and has 'outs' for an external antenna and continuous power via the cig lighter socket.
The speaker is currently zip tied to the ash tray and the mic is on a magnetic mount to the AC vents. The CB clips to the underside of the gear lock and is out of the way.
Still experimenting with this setup till i find a permanent solution.


Quote:
Originally Posted by Sheel
(Post 4068081)
Could you please post a link of its availability online? Desperately need that. .
|
As requested:
https://www.flipkart.com/accessoreez...9f0650f0243722 http://www.amazon.in/Catchin24-Catch...ords=car+caddy
Just type Car Caddy in both portals and you would get more choices in quality & color.
#Tejas - I would go for this design:
1) It does not require mechanical drawer moving mechanism.
2) If you wish to remove the setup - the plastic containers can be easily stored in your Garage (which is already overflowing :D ) easily.
3) The whole drawer setup would be an additional extra weight.
4) With proper fit selection of plastic/Tin containers you can increase the storage space.
5) If some items require air-tight container, plastic containers are better.
Regards-Sonu
Sometimes it difficult to find time to do work so whenever I am back home early in the evenings, I try to squeeze in a few hours of work on the car.
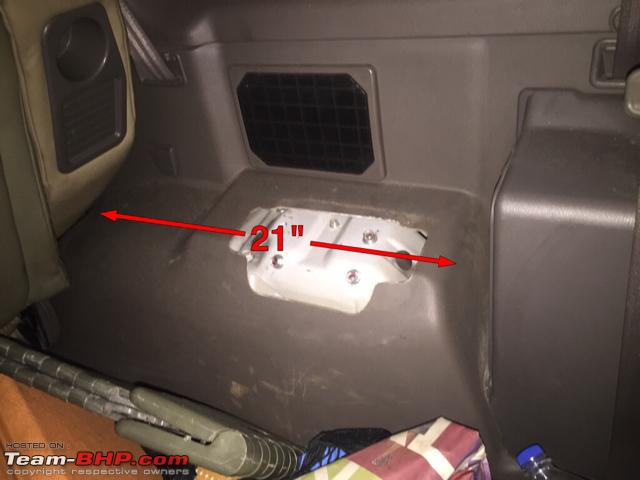
Today removed the seats and took measurements.

The bolts go back to their place to prevent them from being lost:

I use the Measures app on the iPhone a lot. Very useful.
Attaching the measurements (rough guide and not very exact) so that anyone can use them in the future:


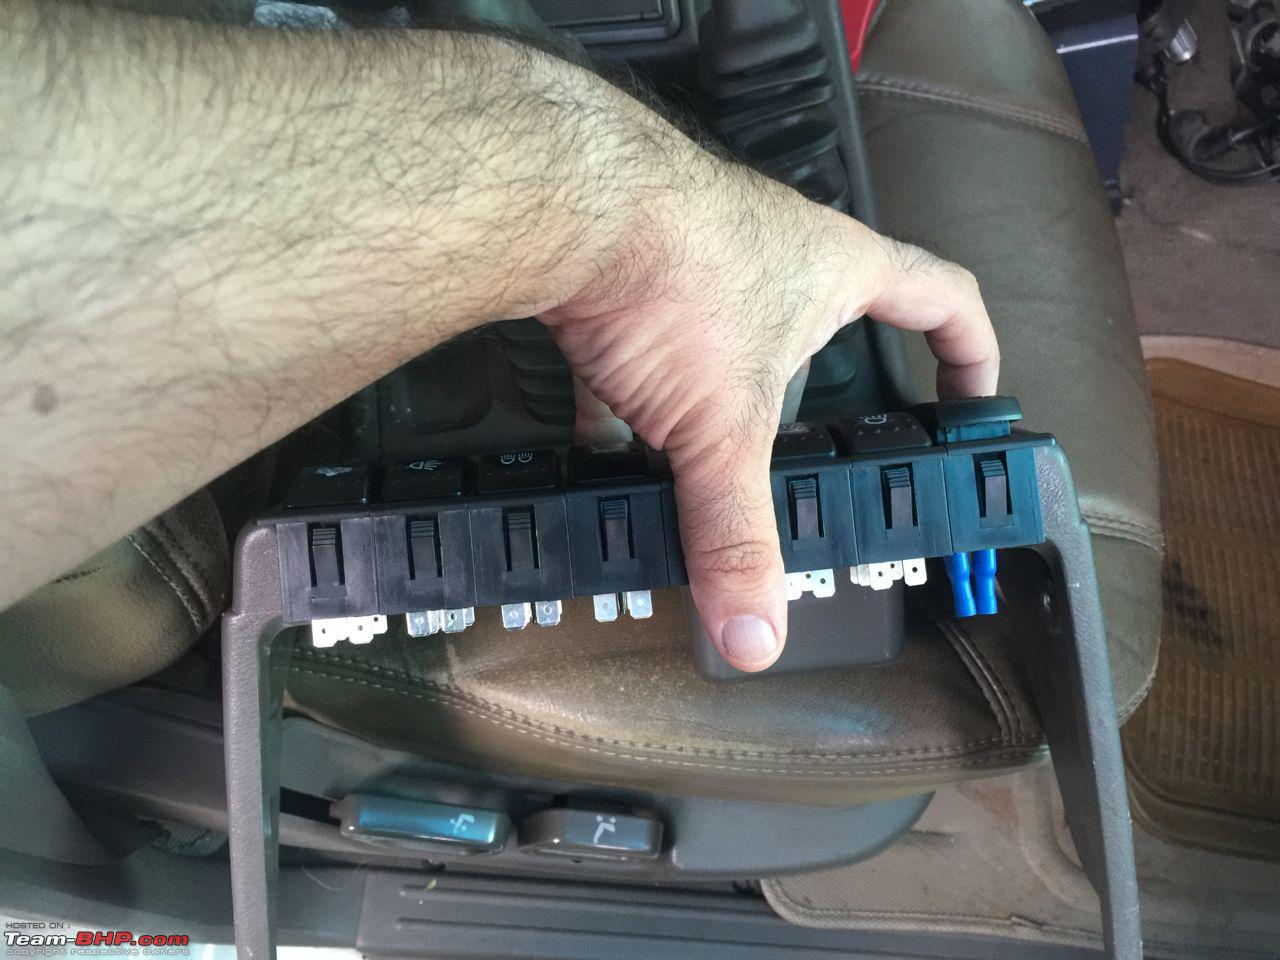
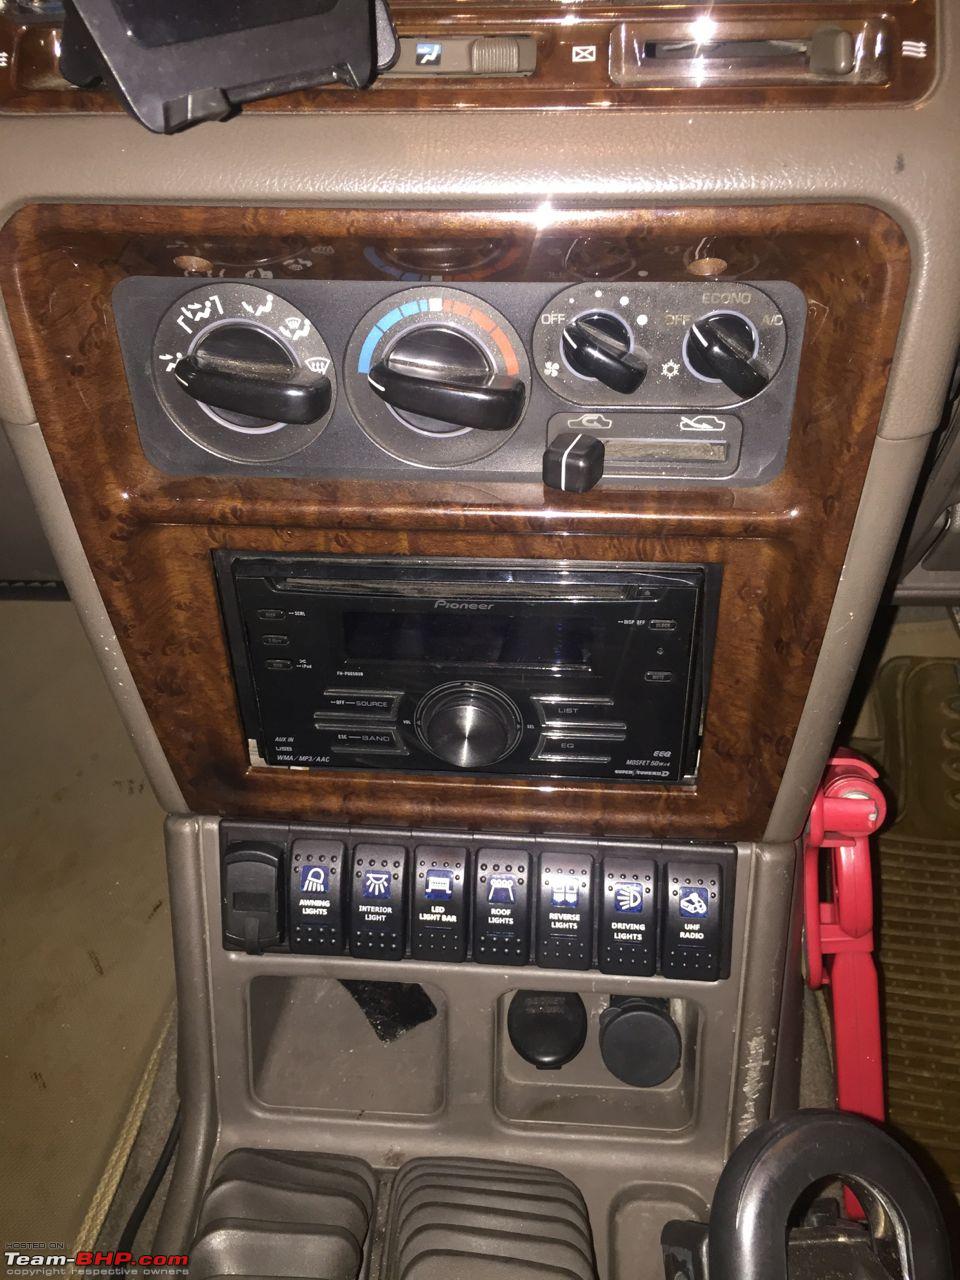
I've got a long list of electrical additions to the Pajero.
The pajero does come with blank options - approx 5 but they are spaced out and not together - 2 each on either side of the armrest and one below the music system.
I needed a proper panel to fit switches together.
So the search for positioning a panel started.
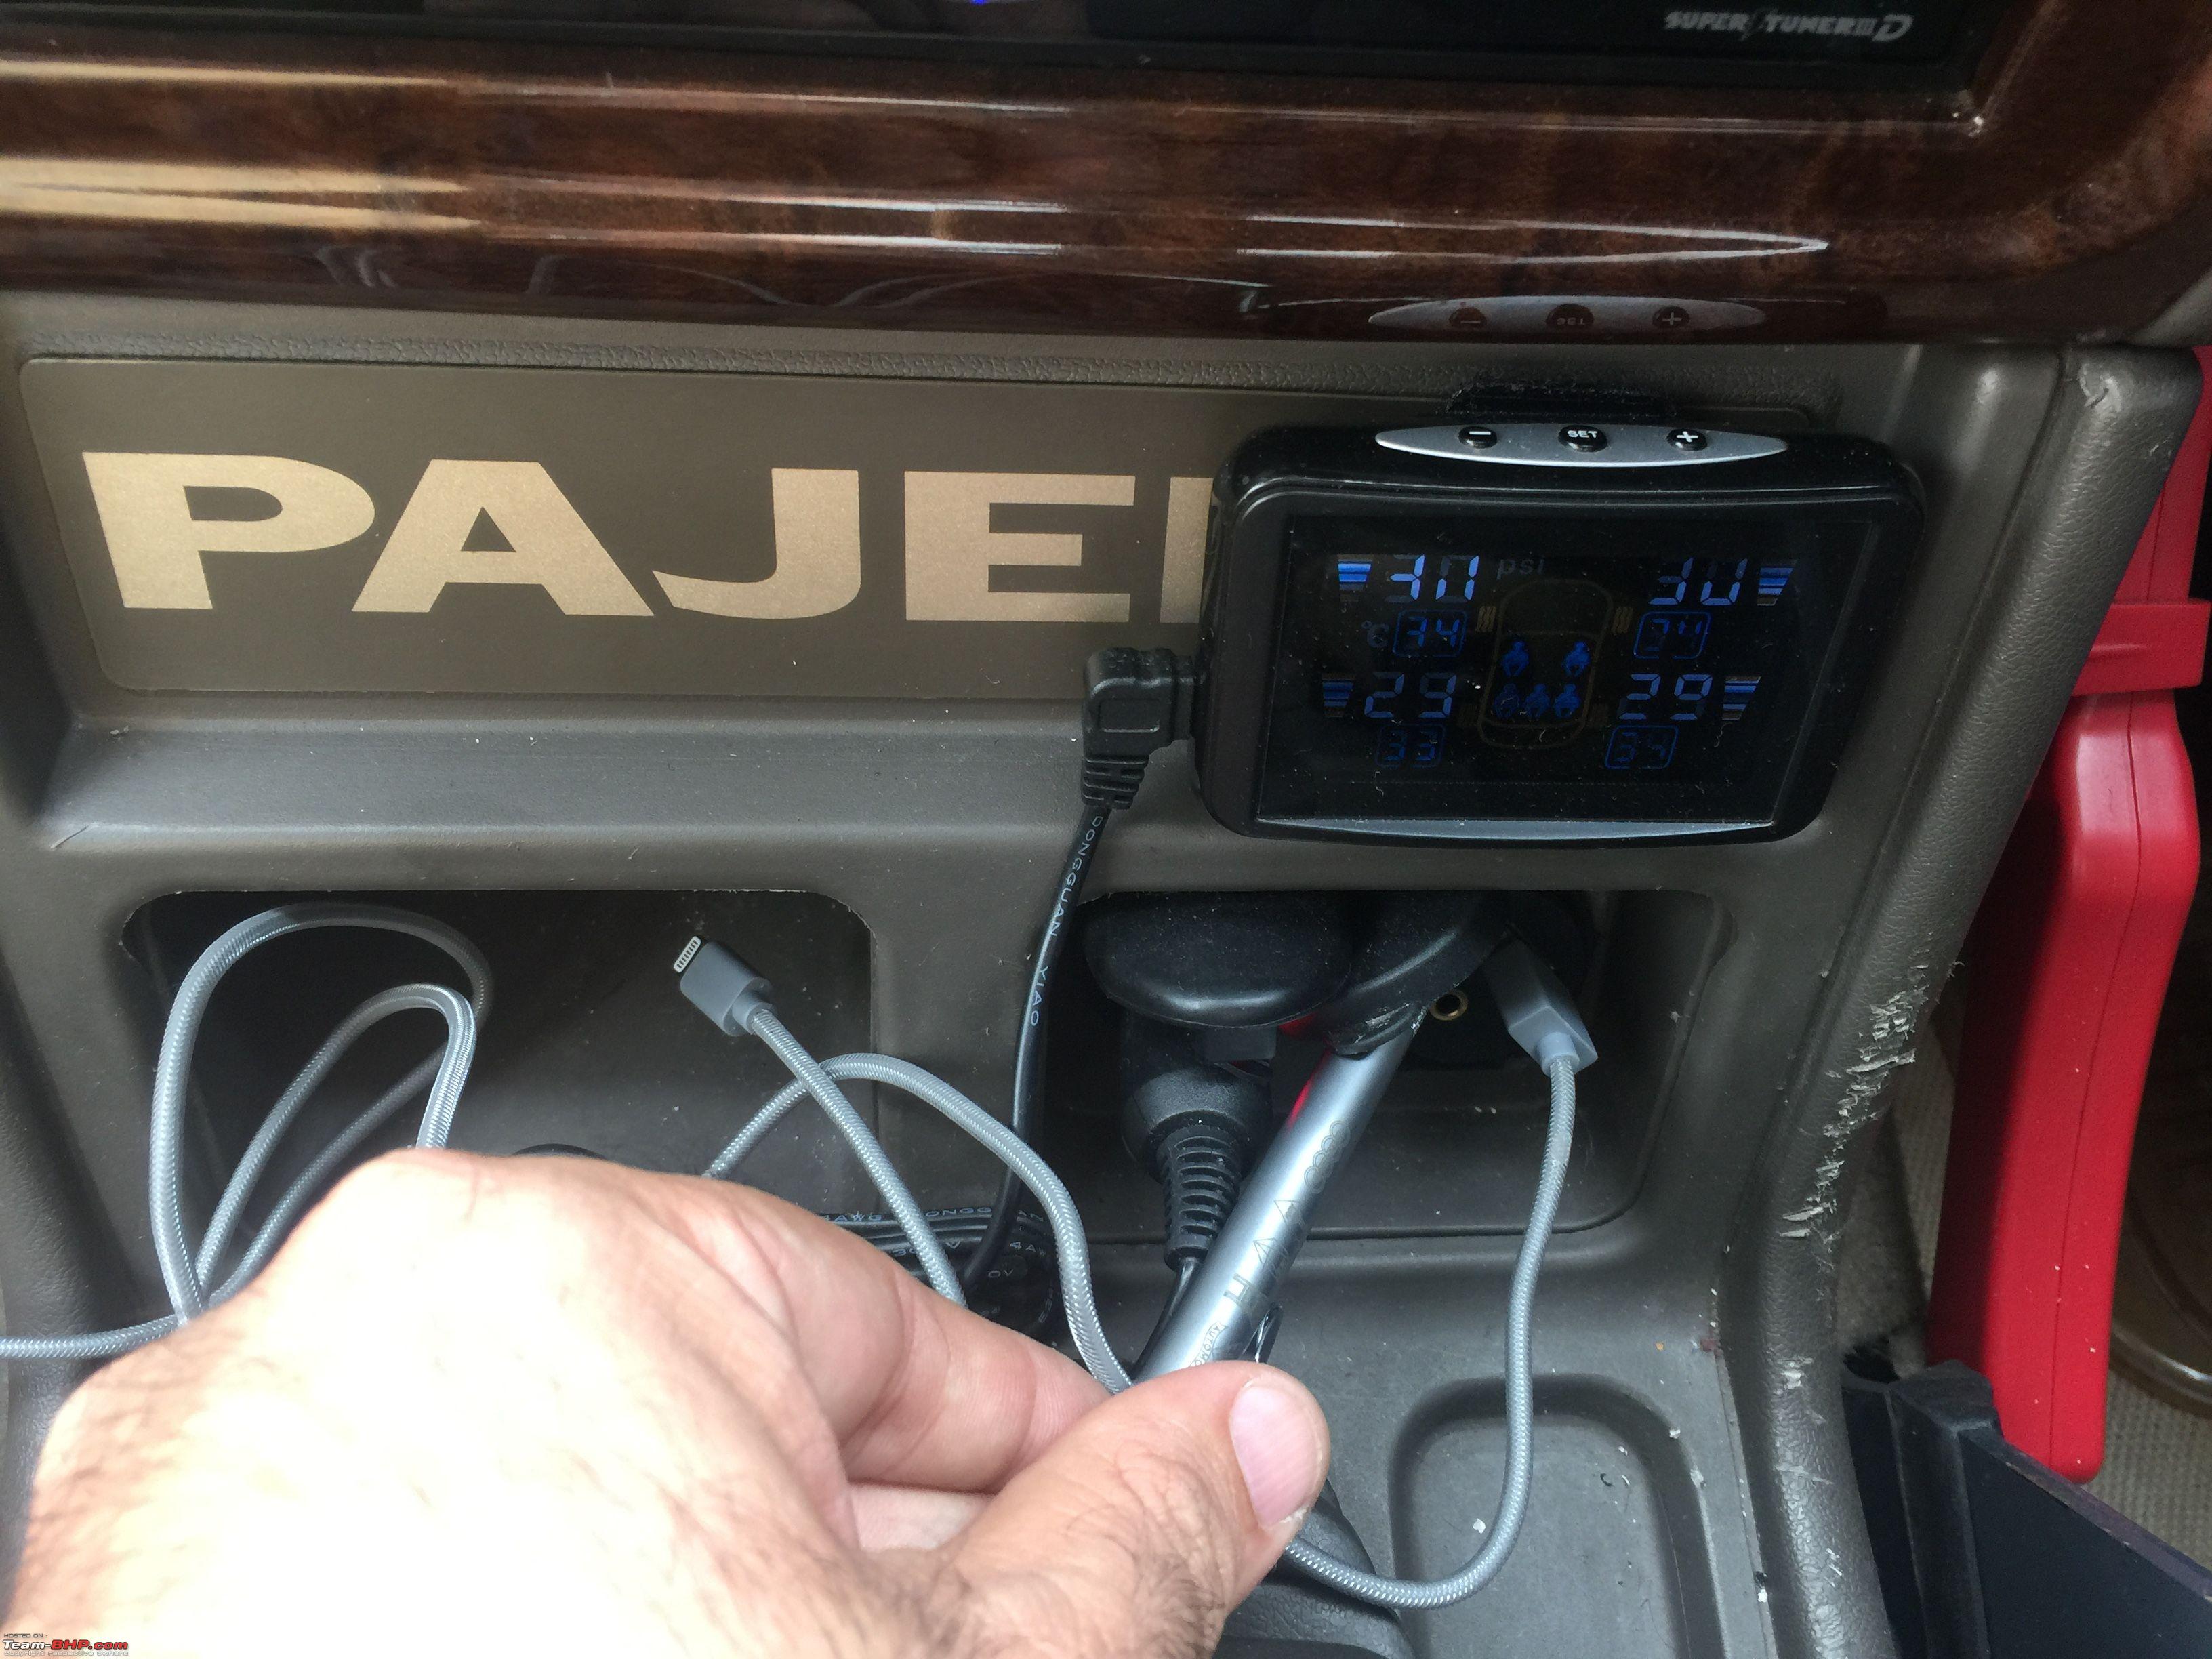
The only option available was here. The TPMS was in a temp location and will be relocated and the wiring will be direct:

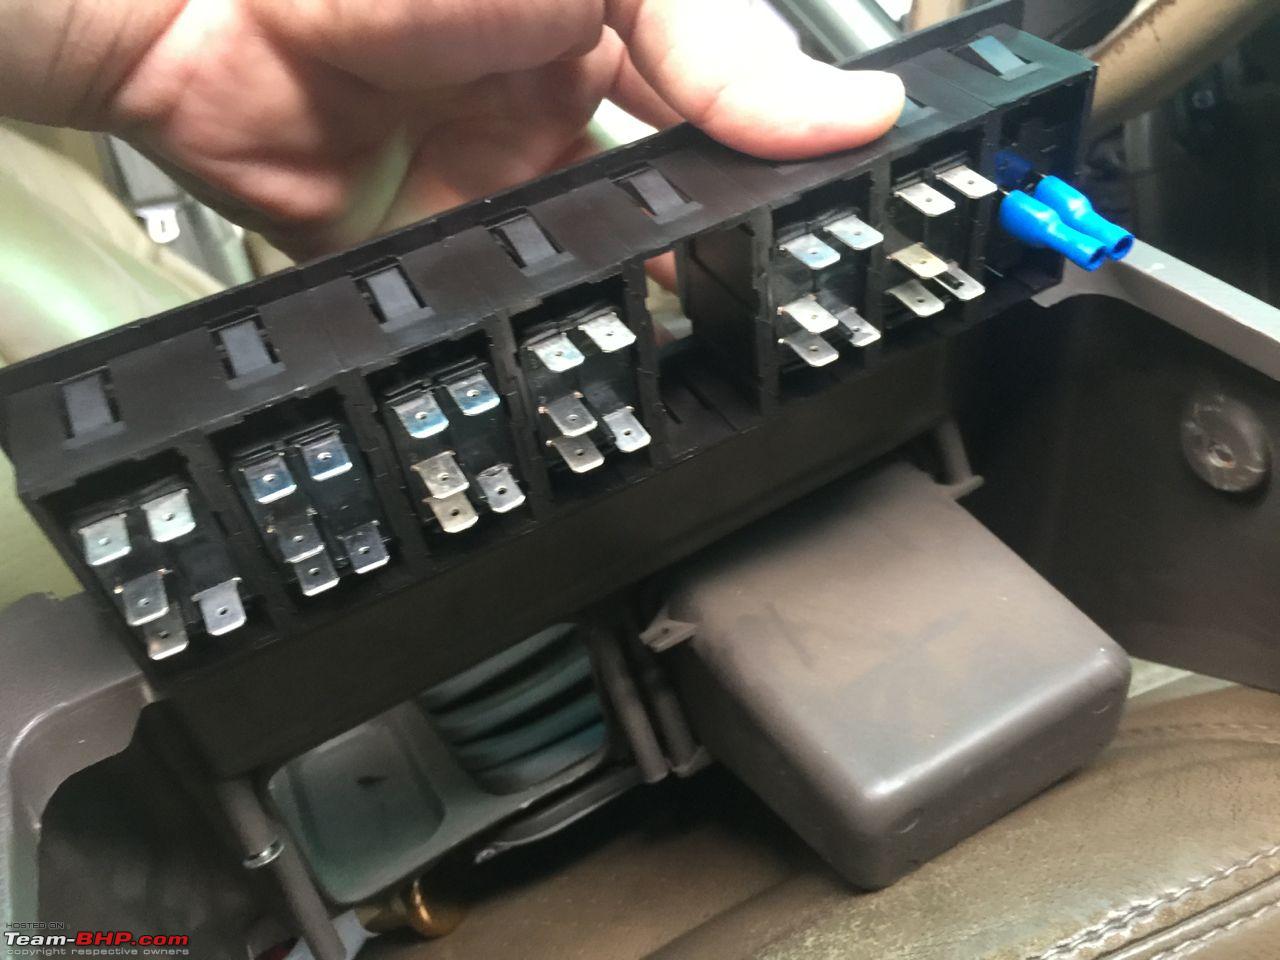
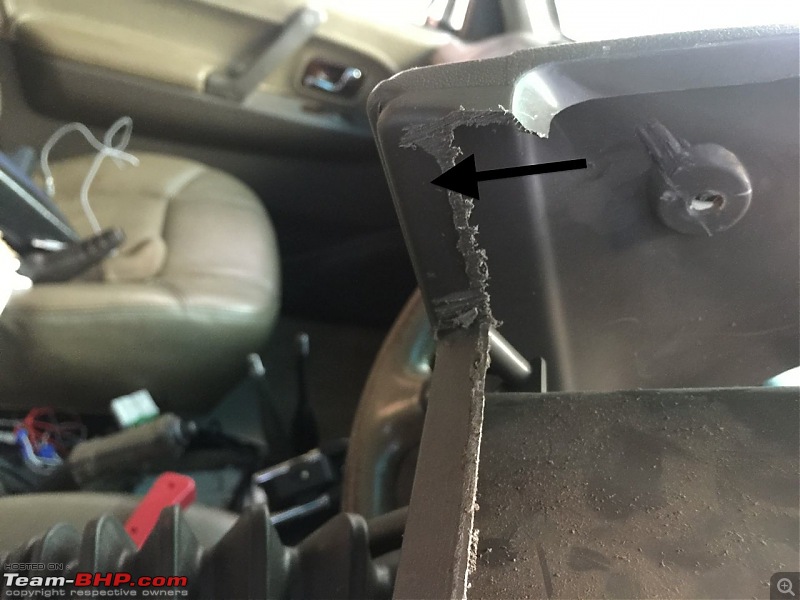
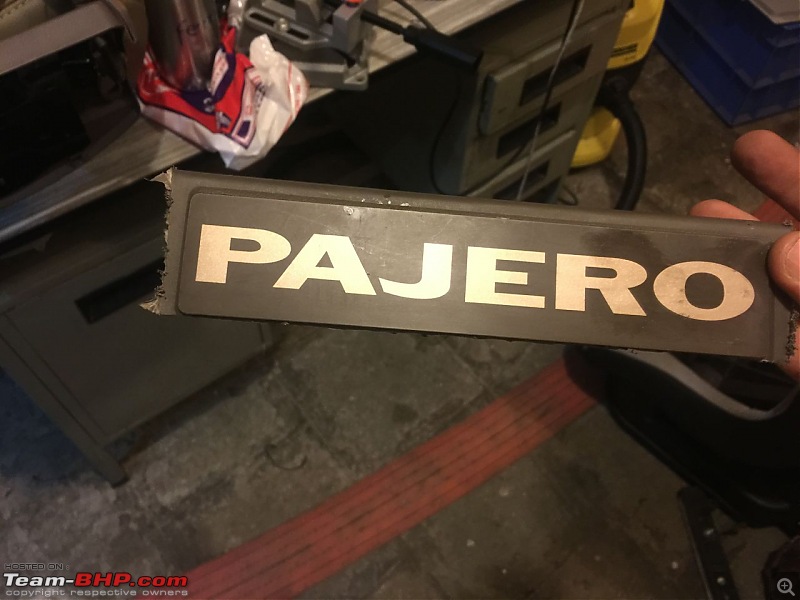
To fit the panel, i need to cut out the PAJERO written part.
I tried to remove the centre panel myself (it entails removing everything from the centre box till below the music system), but got stuck at finding one or two bolts.
So took it to a friends garage and his mechanic removed it for me.

I had taken my tools along so i could cut the slot and have the mechanic fit it back.
This is the positioning:


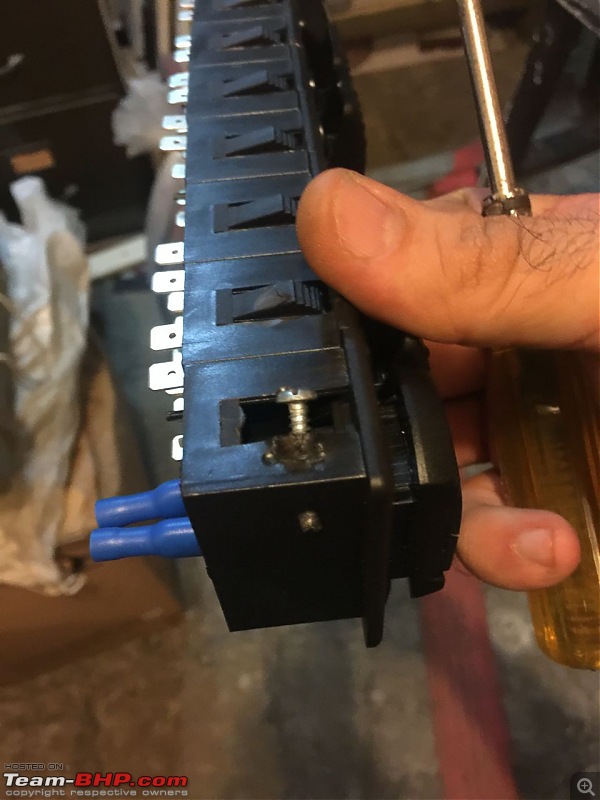
The switches and panel procured from aliexpress.
Using a hack saw i made the straight cuts and using a dremel type tool made the horizontal cut. Filed it smooth:


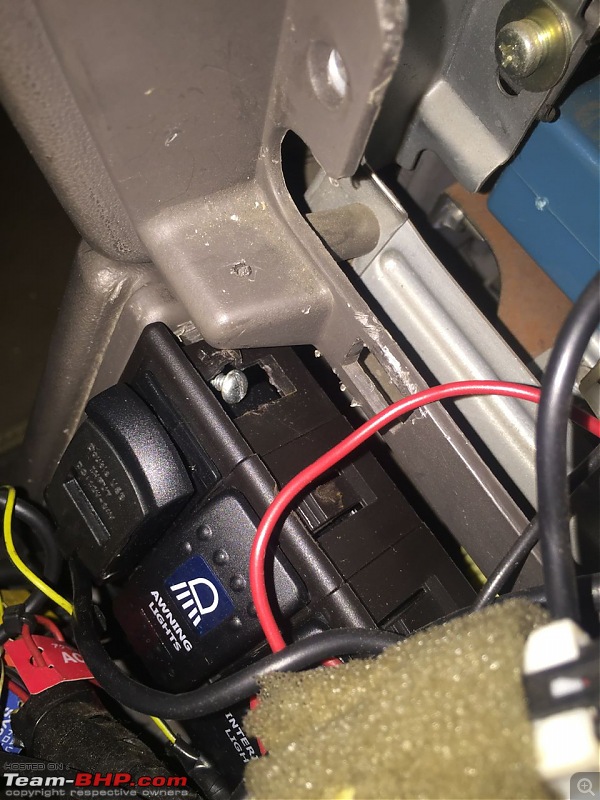
Switches fit nicely:

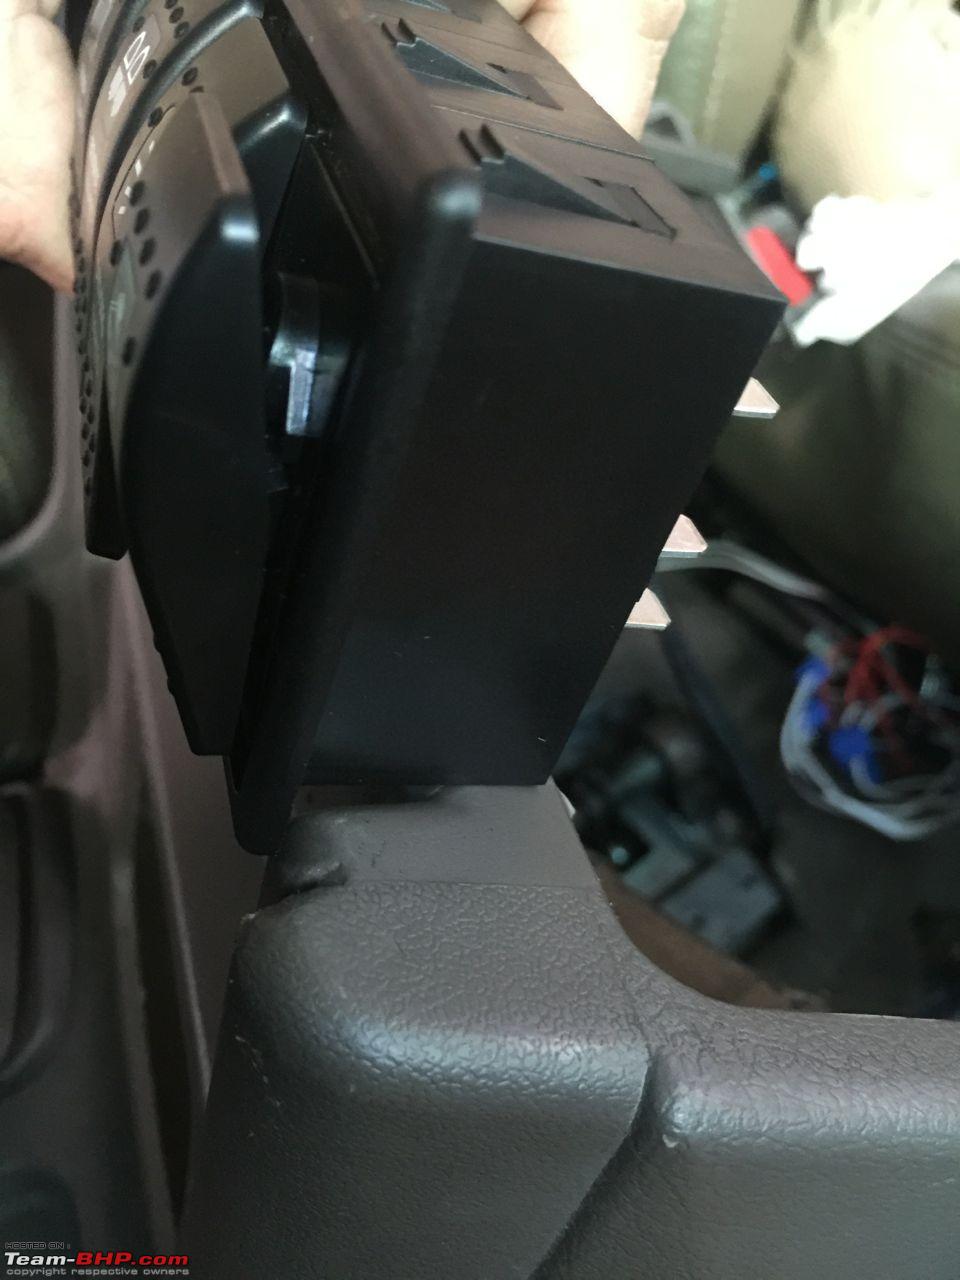
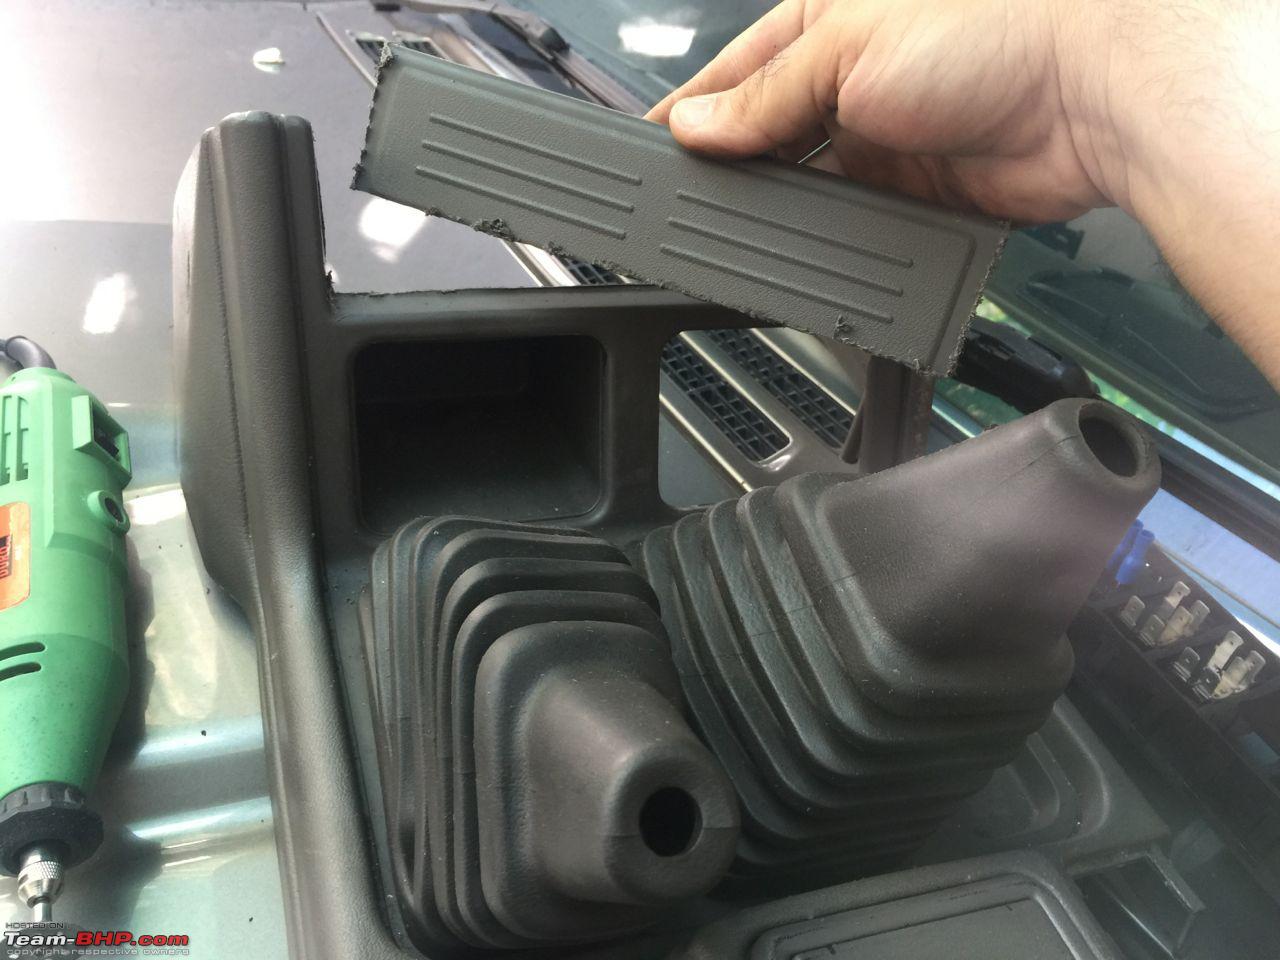
Now the next step is to secure the panel in such a way that it can be removed for wiring. Since i had to remove the top portion in the cut, there was no way to snap fit the panel. The panel only has snap clips on top and bottom but not on the sides.
I had the mechanic fit the fascia and decided to tackle that problem at home.
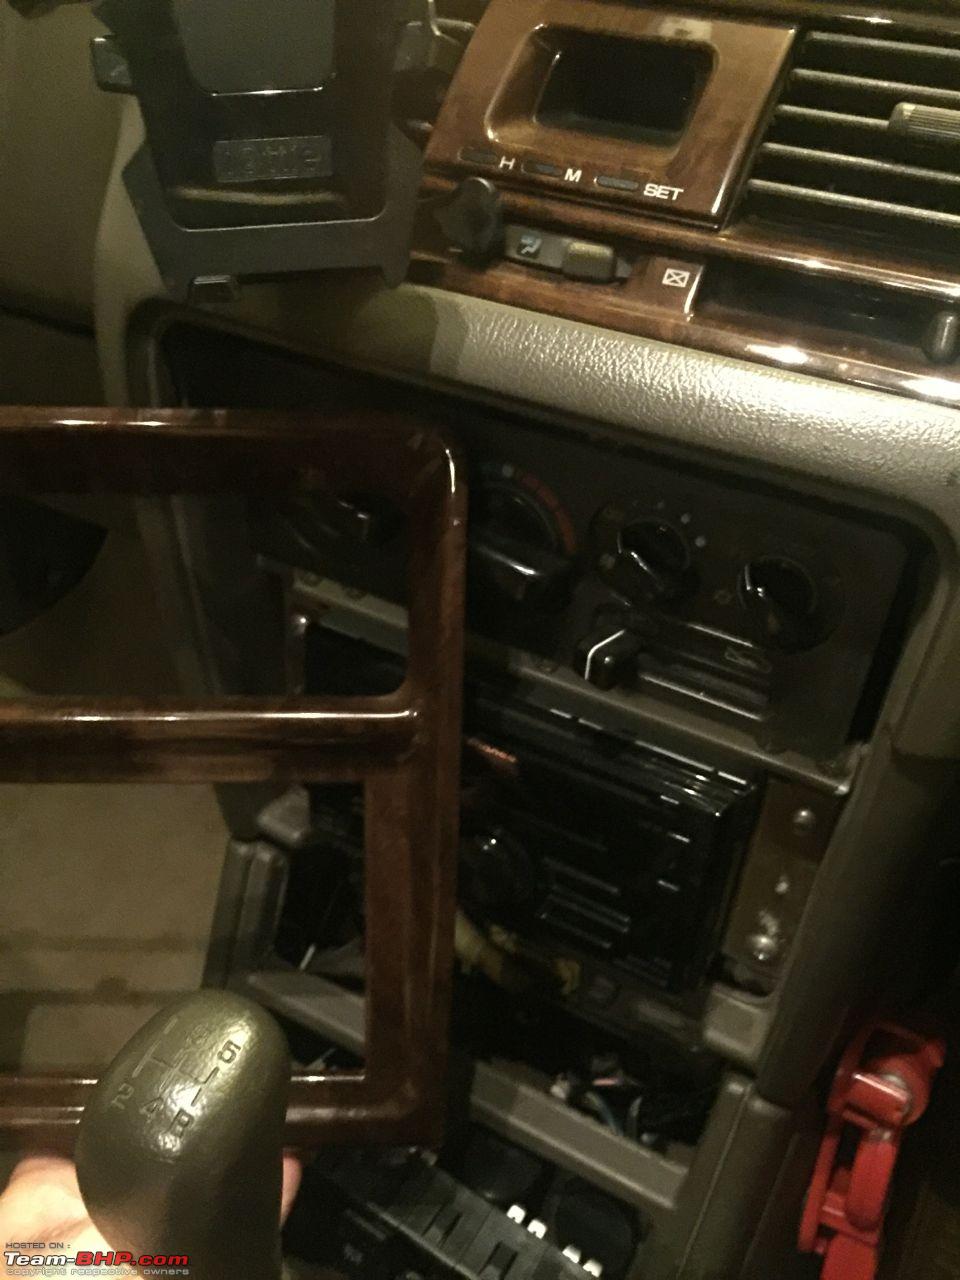
At home, in the garage, i removed the music system fascia:

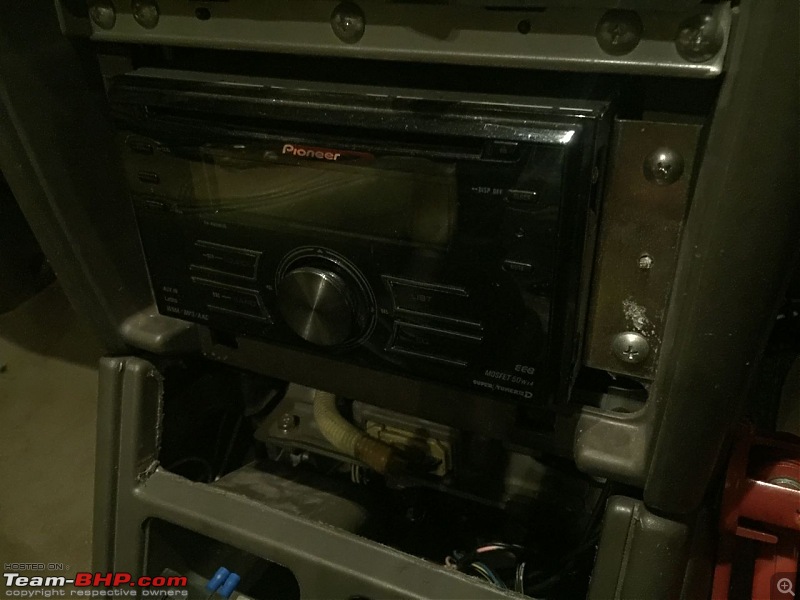
That left me with easy access to the switch panel.
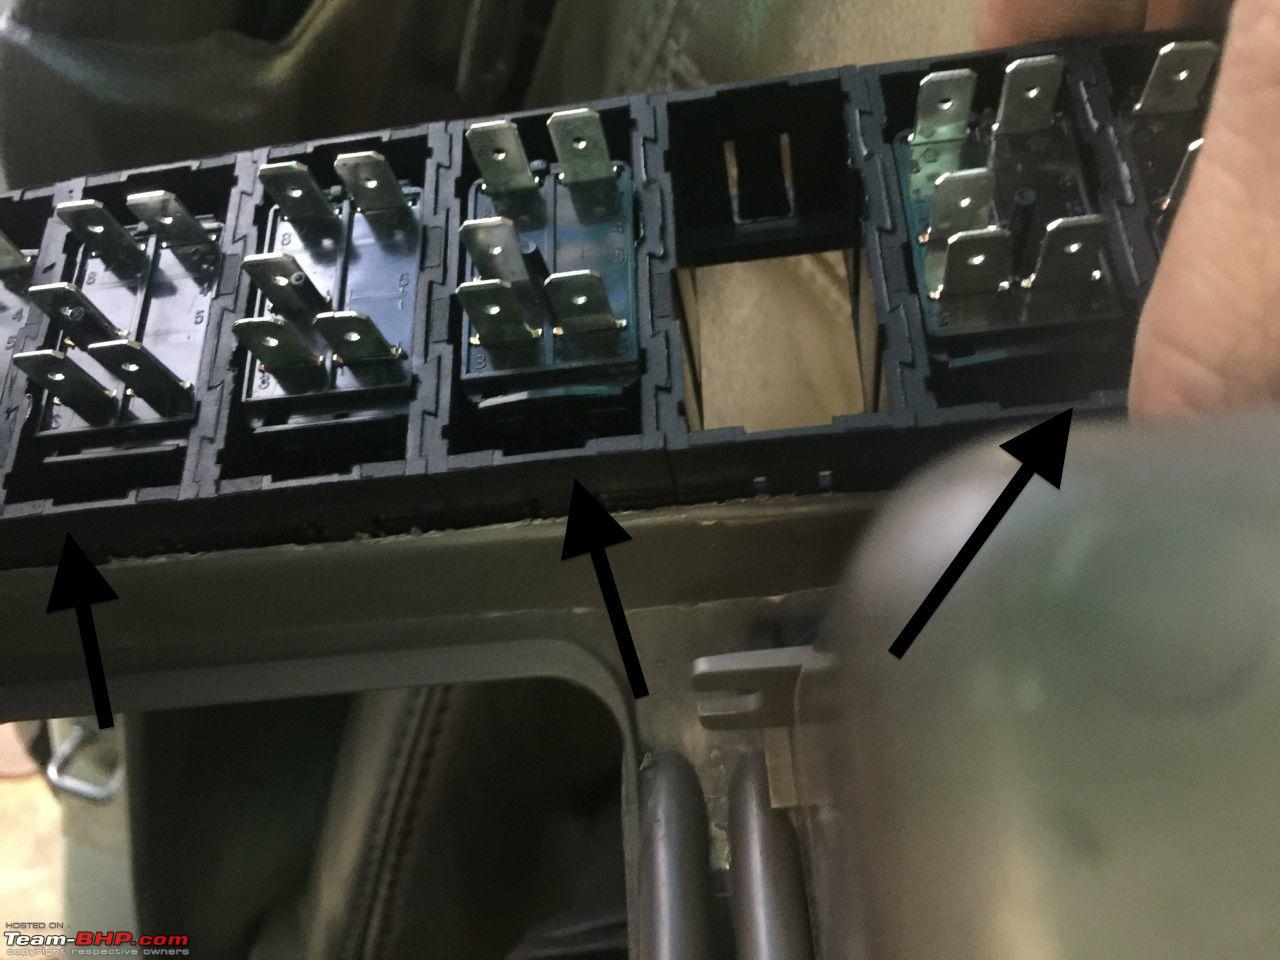
When the centre fascia was out at the mechanics, i had decided my plan of action. The lower part of the switch would have three small screws placed which would engage the lower half of the fascia as shown by the arrows:

I had marked the screw position when the fascia was out:

Using a drill stand, i made the holes and fit the screws:


As you notice, the screws are slightly out (not fully tightened). So you put the panel in raise it a bit and lower it so the screws engage the rear part of the fascia and get locked like a clip.
Now to tackle the top part which is more tricky.
The plan is to drill from the top of the panel side ways and engage the inner sides of the fascia as shown by the arrows:

For that you have to break the two side clips of the top and drill at an angle through the panel body without damaging the switch.
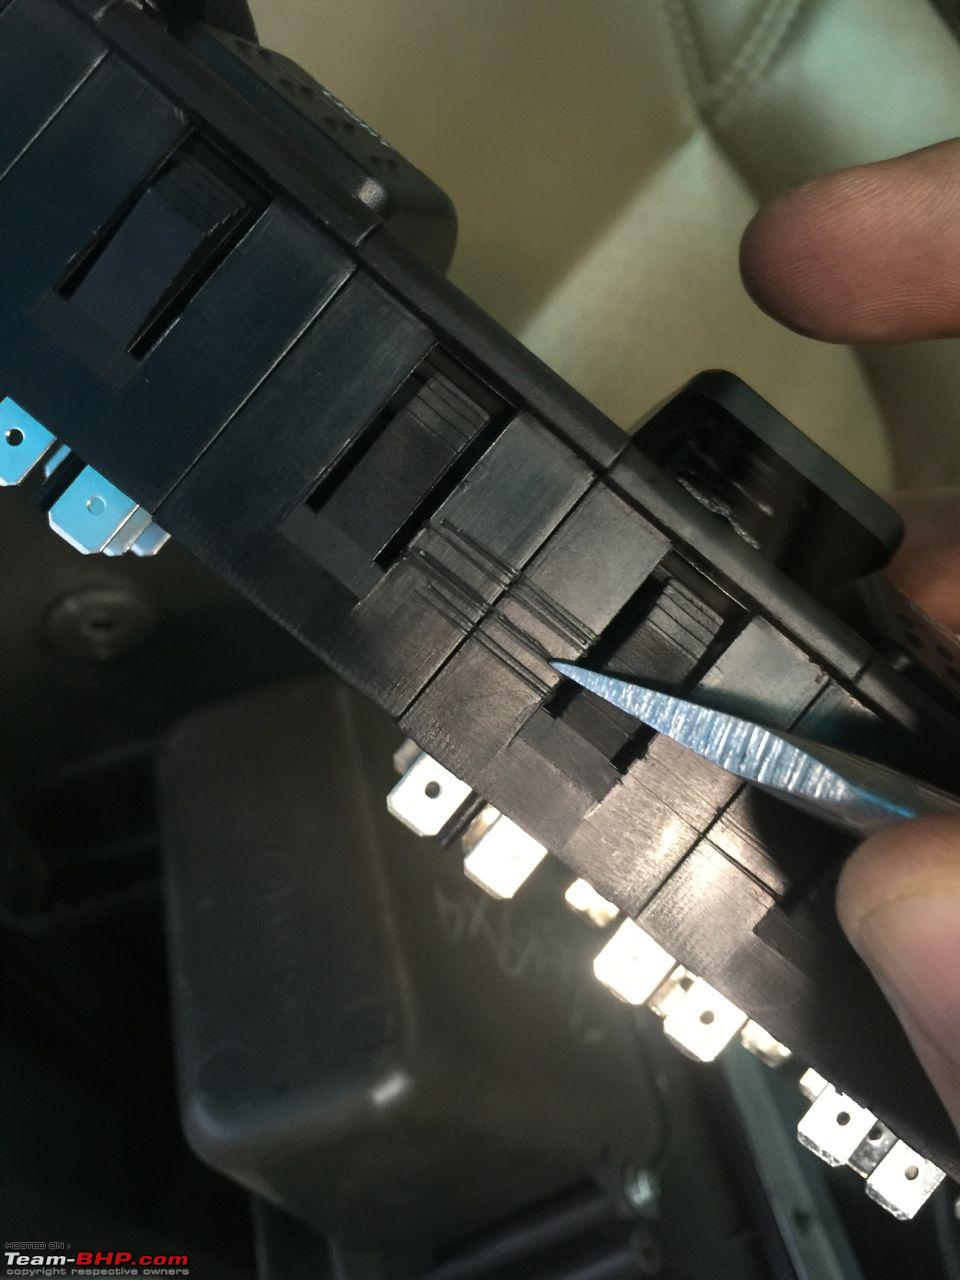
Use self cutting screws and engage the panel:

Now you have to remove the music system as well since you won't have space to tighten the screws. Once it is removed, position the panel, engage the lower screws and start tightening the screws on the sides. The self cutting screws will cut through. You don't need to fully tighten. Just enough to engage:

Now fit the music system back. See with the system fit, there is no space to tighten the screws:

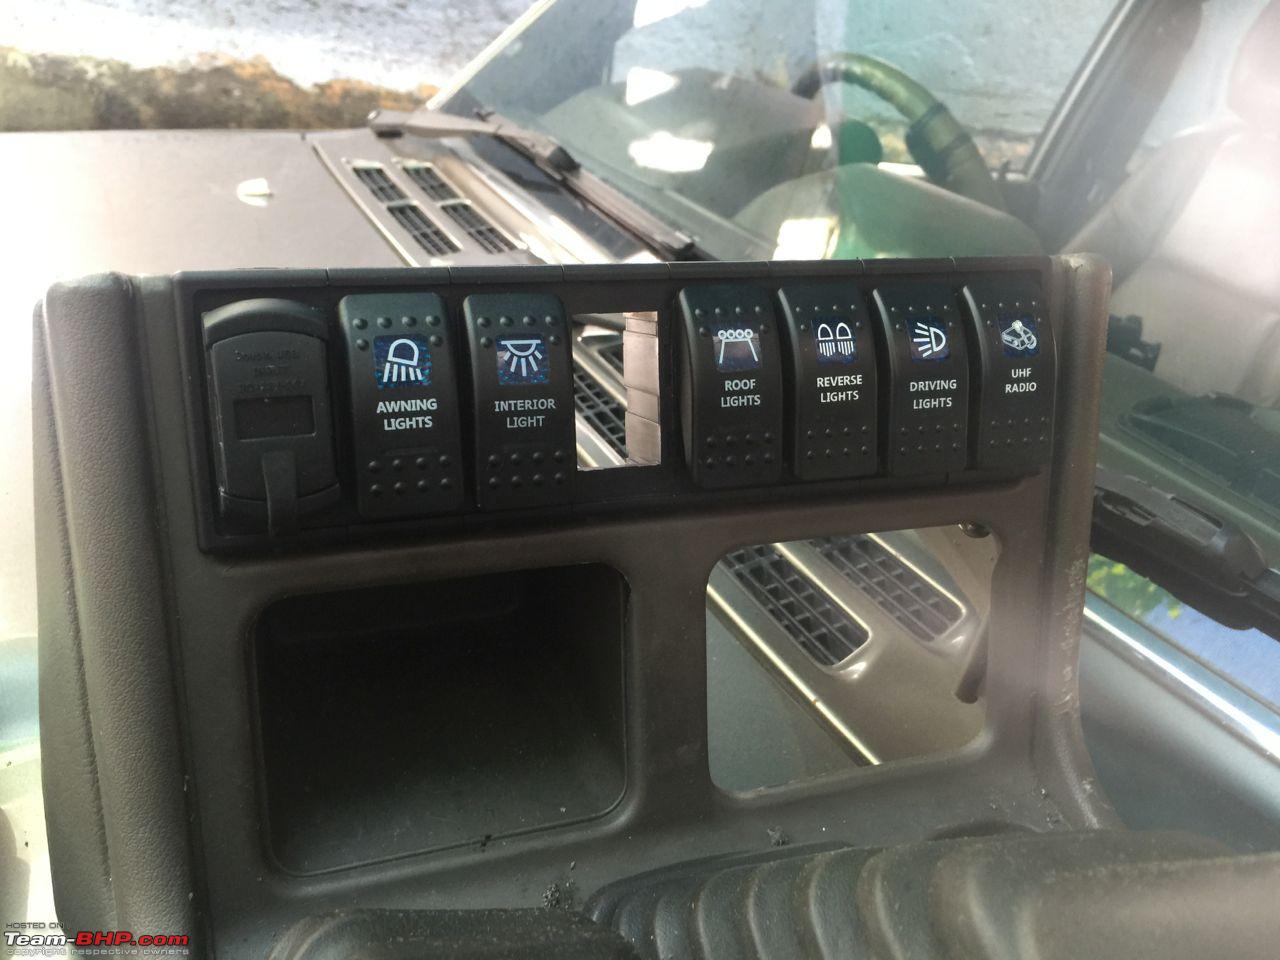
Fit everything back and your panel is ready and looks neat!


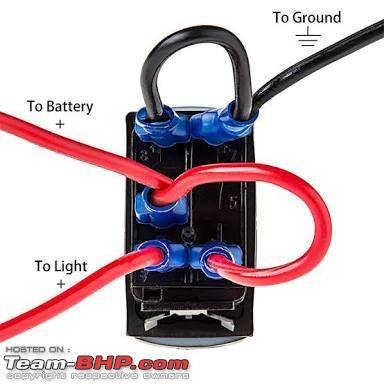
The wiring is going to be a long process. This is the line diagram to wire a five pin switch:

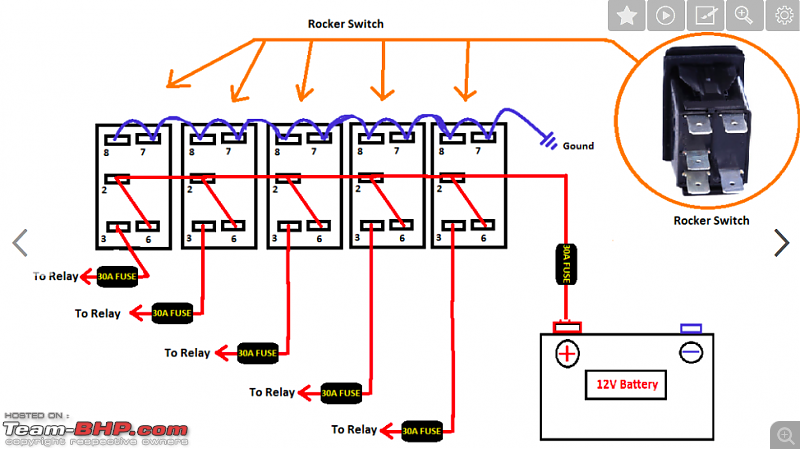
Wiring is a story for another day. Will need the help on an electrician for that.
Using a magentic mount, relocated the TPMS screen. I think this will be the final location.
The mount (given my a friend who had a spare). Mount clips onto the side vent:

Stuck the metal bit to behind the screen with 3M tissue tape (thin double sided incredibly strong tape - from amazon uk).
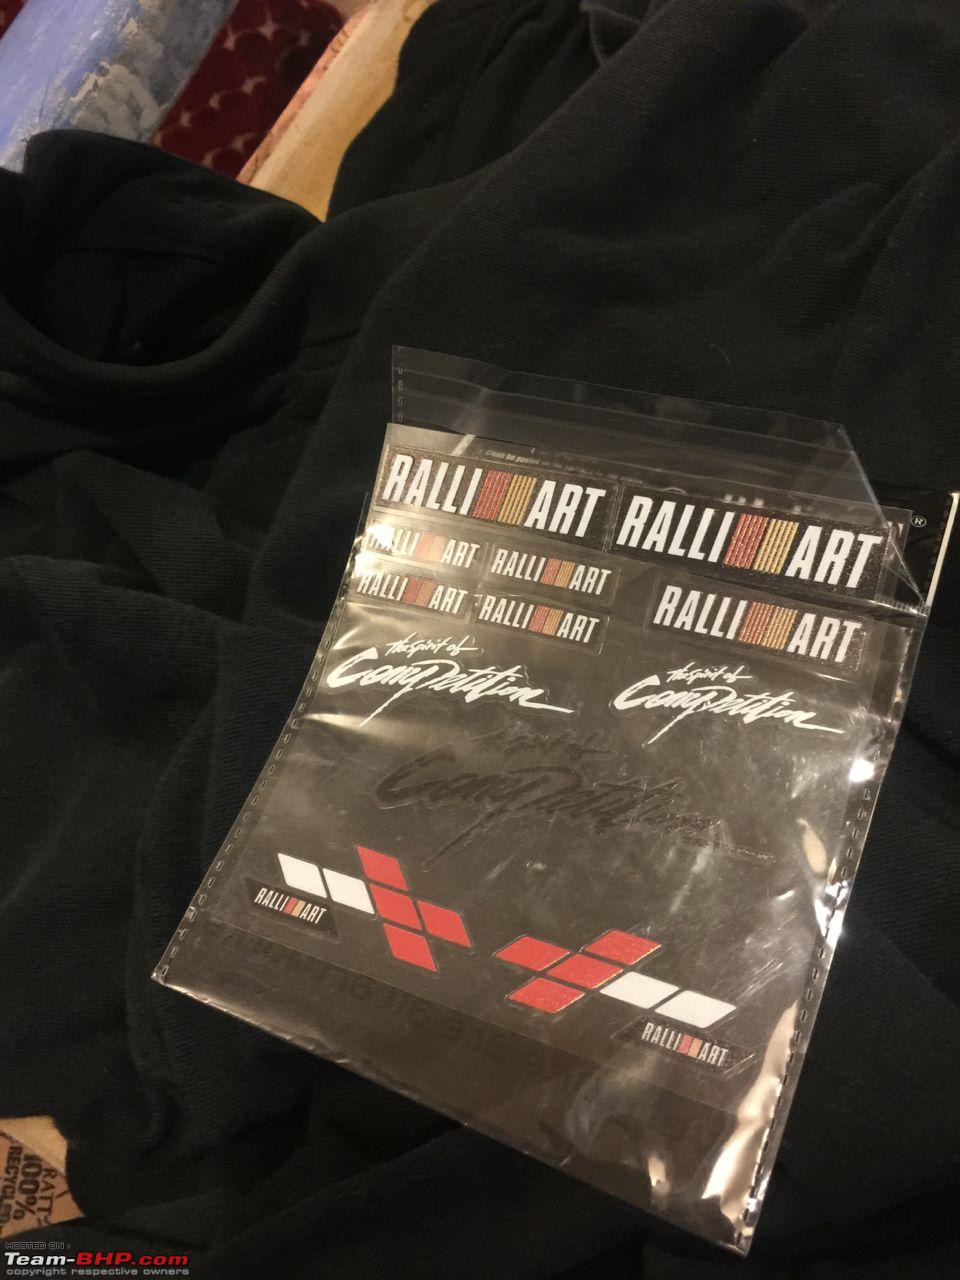
Had some stickers from aliexpress so stuck a Ralliart one at the bottom of the plain bit:

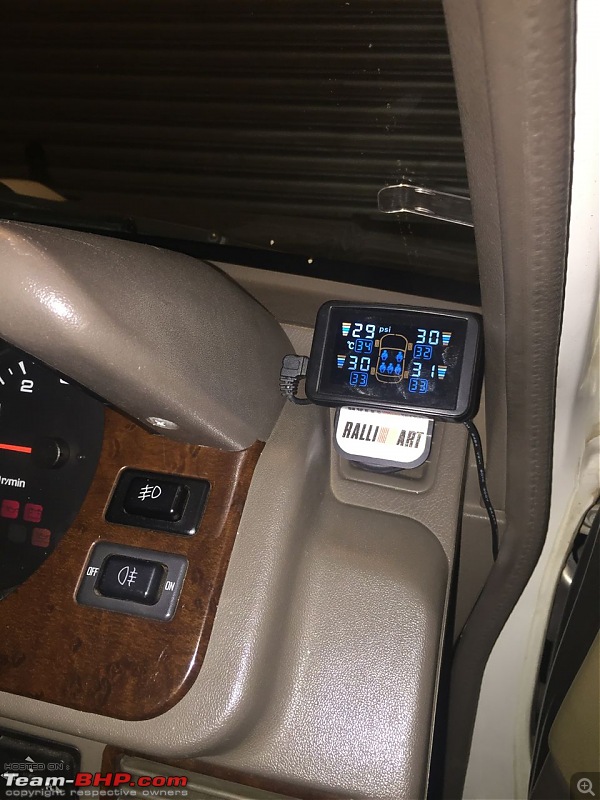
Ran the wiring from the beading to the cig lighter. Once the electricals are ready to be sorted, will make that direct too. Waiting for some more stuff to arrive from aliexpress.
This panel will be safely stored incase i need something somewhere:
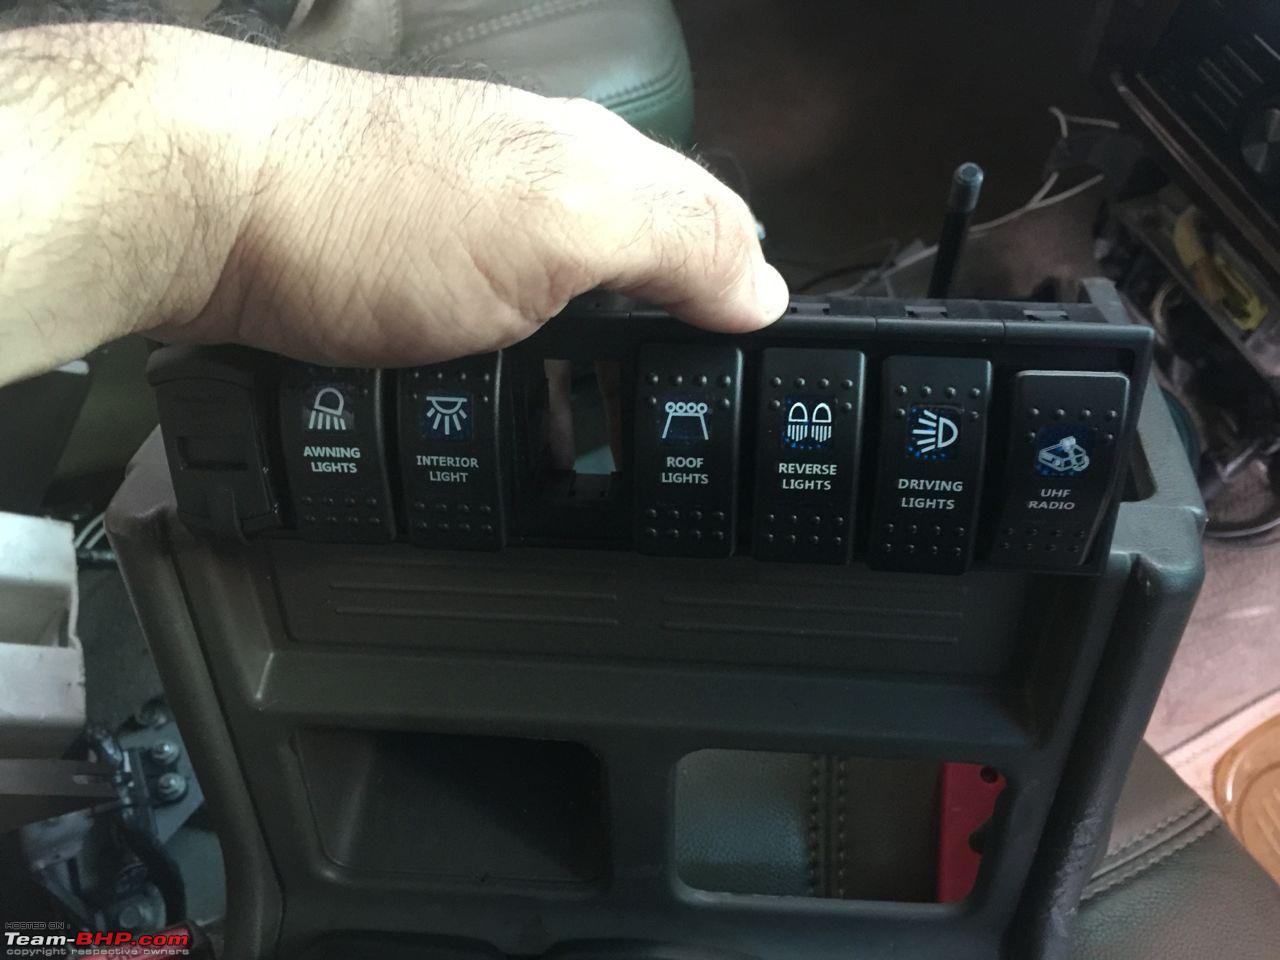
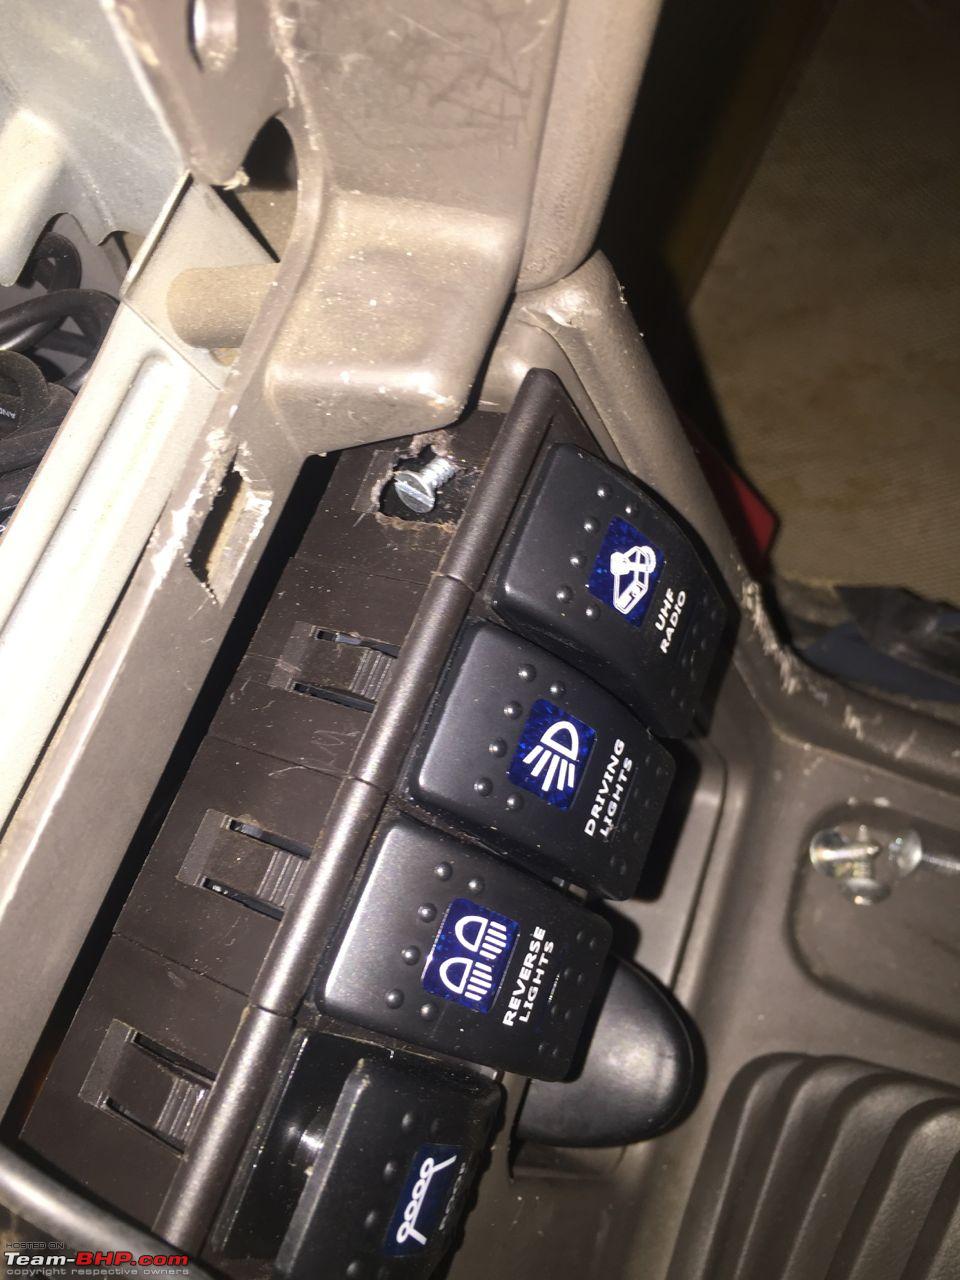
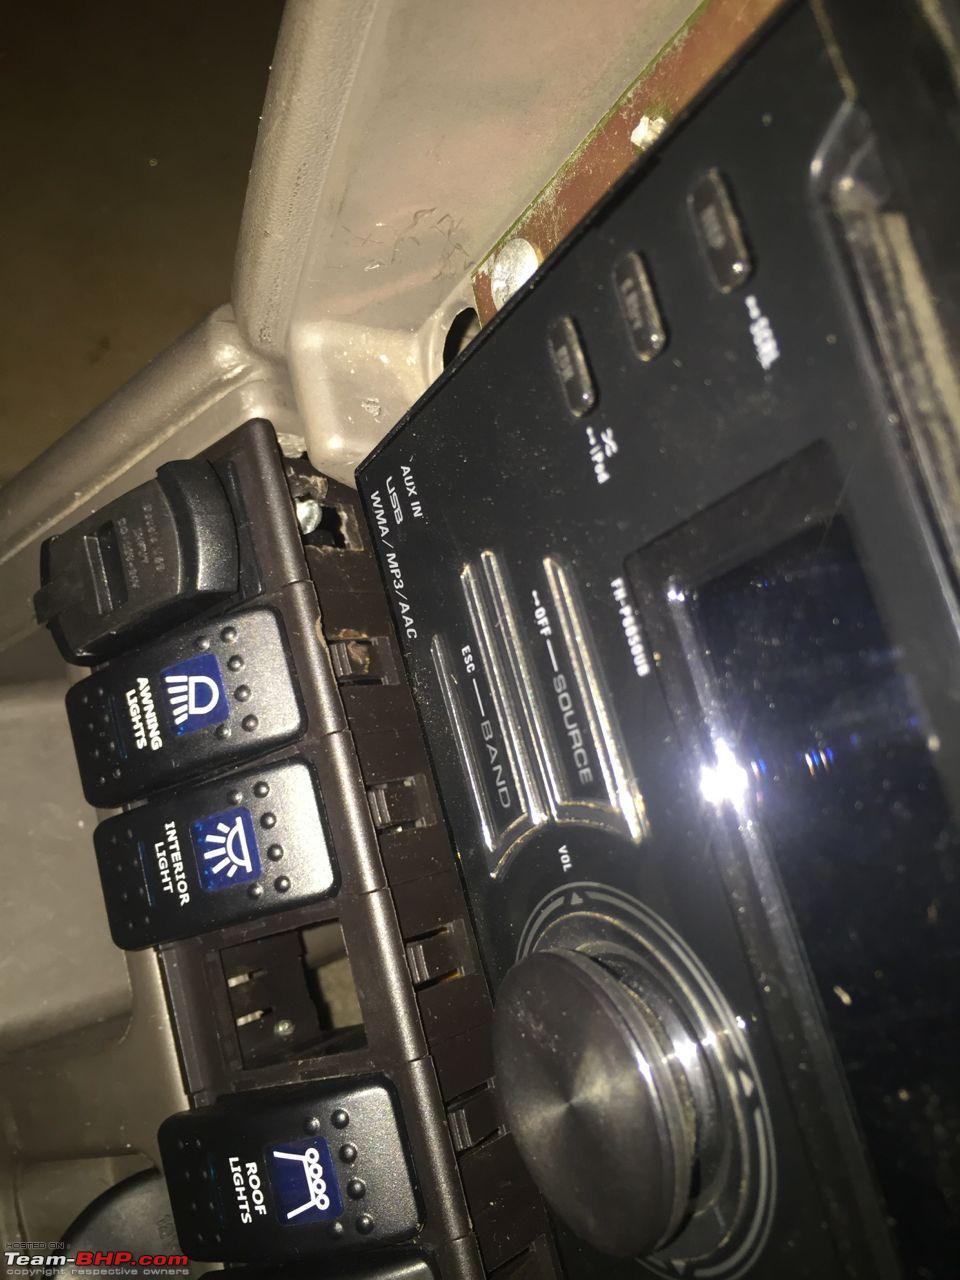
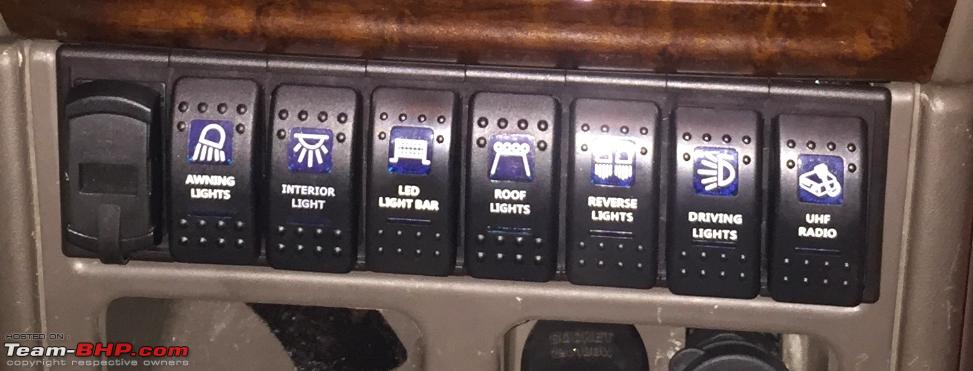
The switches explained:
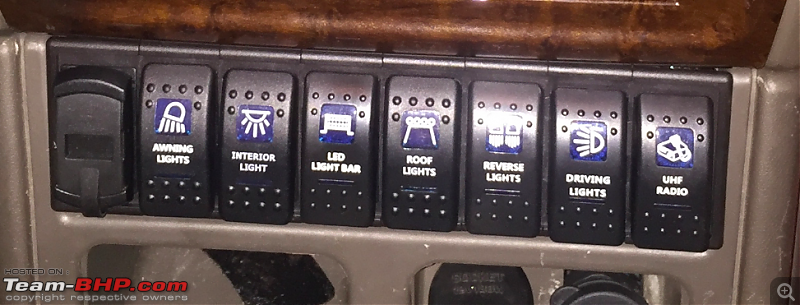
From left to right:
1. Dual USB charging point with inbuilt volt meter. The centre part gives a volt reading
2. Awning lights - fitting led shown earlier.
3. Interior lights - for the footwell lights as shown earlier.
4. LED Light bar - actually this is a dummy. Here i will have a front camera switch. Already procured a front camera and screen. Very useful while offroading. More on that later. Awaiting camera switch to arrive from China.
5. Roof lights - once the roof rack comes. If i put regular halogens then will use this switch, and if i put a light bar, then will use the LED switch. You can easily remove the top part of the switch and swap.
6. Reverse Lights - work lights to be mounted once roof rack is fit.
7. Driving Lights - for the front KC lights - already installed.
8. Radio - for the handheld radio's direct power adapter.
Murphy Strikes!
Not used the last row of seats since nearly two years. I removed them last week and the extended family decides to go for a trip together. Had to fix one seat back.

@Tejas@perioimpl.
Have a look at the mod in my Pajero GLX I had earlier made for the same purpose by installing a folding bed. Had long removed it, to be used when necessary, but seemed a good option without the draws.
http://www.team-bhp.com/forum/diy-do...ml#post3730517
Had even managed to spend some nights on it during travel, and I must say it was mighty comfy owing to the carpeting made. :)
Quote:
Originally Posted by Unavowed_X9
(Post 4074599)
@Tejas@perioimpl.
Have a look at the mod in my Pajero GLX I had earlier made for the same purpose by installing a folding bed. Had long removed it, to be used when necessary, but seemed a good option without the draws. http://www.team-bhp.com/forum/diy-do...ml#post3730517
Had even managed to spend some nights on it during travel, and I must say it was mighty comfy owing to the carpeting made. :)
|
I've seen it.
I have a nice Coleman 4 person tent (actually is good for 2) that i use.
Don't have a need for a in-car sleeping option currently.
Thank you :)
| All times are GMT +5.5. The time now is 14:29. | |