Team-BHP
(
https://www.team-bhp.com/forum/)
Cellphone, Tab, Dash Cam, Navigation Device, Bottle Warmer, Belkin -
Give me that socket, I want to get charged!.
Ultimately, its the survival of the weakest in this case and whichever device is dying gets the power. However, there have been times when all of them are losing charge on a super long journey.
The need:
Not just the Ertiga but in general, given the fact that we have just too many devices to charge while we are traveling, it makes sense to have an additional 12V accessories socket. While the socket splitter does come handy, its the dangling and tangled wires of these devices which irritates me when they attack the area in and around the gear lever console. Not to forget those cases where passengers are utter careless and connect a high wattage device to the splitter and add one more and fuse the circuit.
The deed:
So, here comes the DIY that I attempted this morning and successfully installed an additional accessory socket.
Buying the socket:
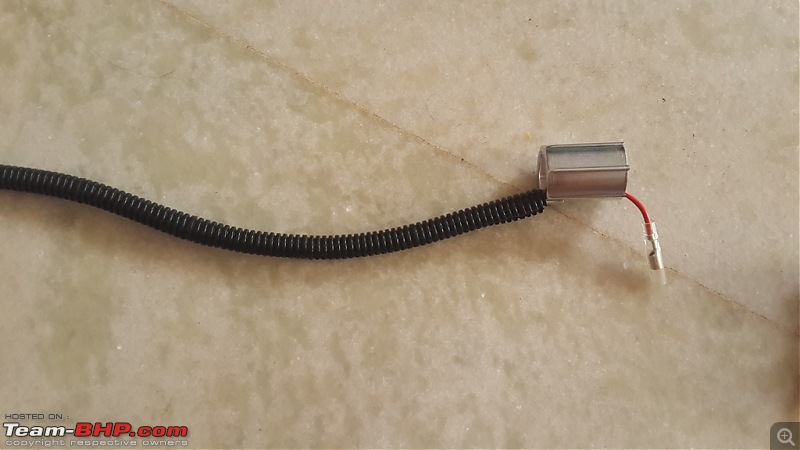
I was particular that the socket was of good quality and that should have a dust cap. This will complement the OE socket which also came with the dust cap and will look almost like a factory fitment. Ordered one from ebay (storeji) which was delivered in 3 working days from their Delhi store.
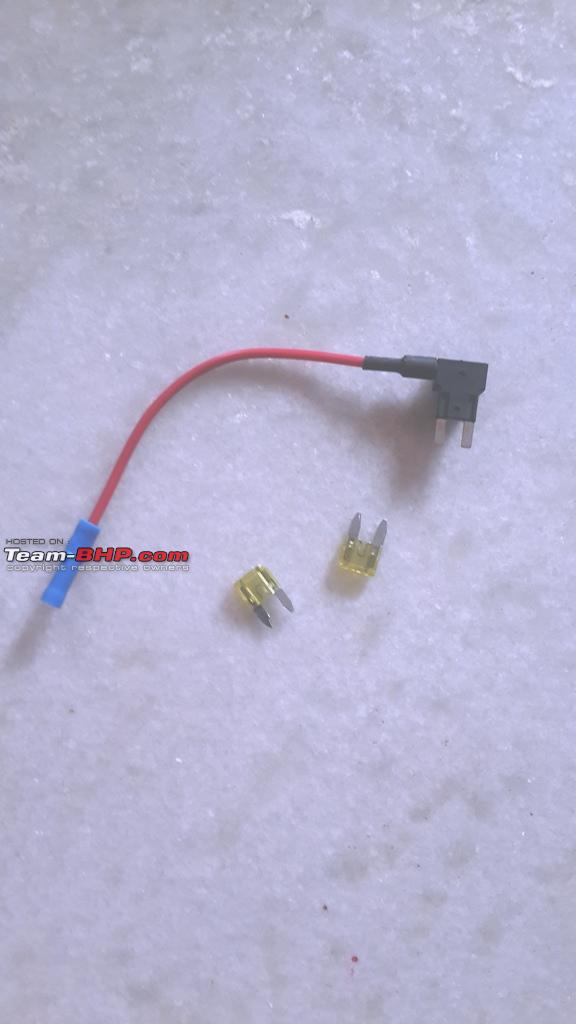
As you can see below, the socket also comes with 2 small wires for Power and Group and the necessary clips to secure the wires on the socket's end.
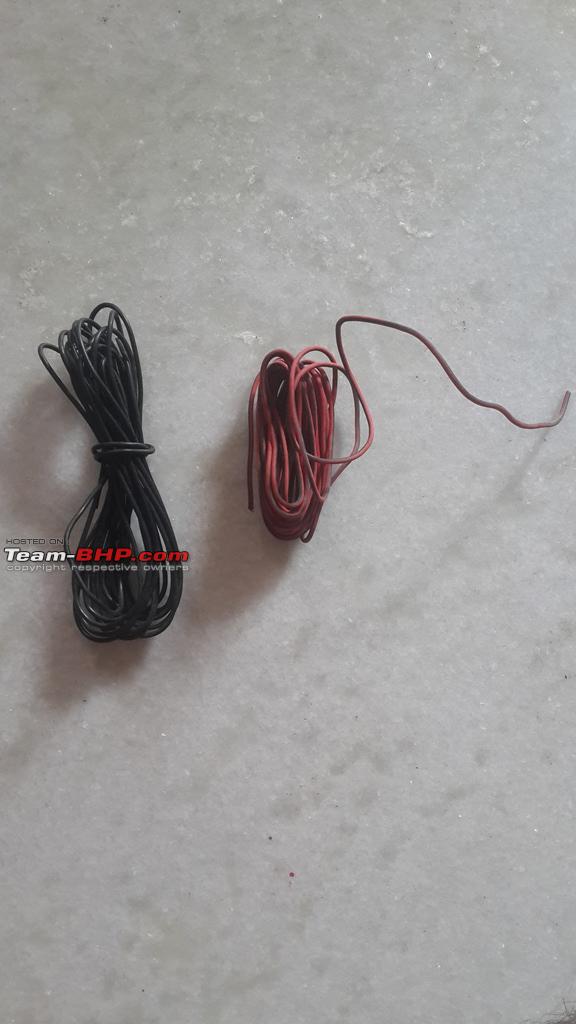
Wires and Cables:
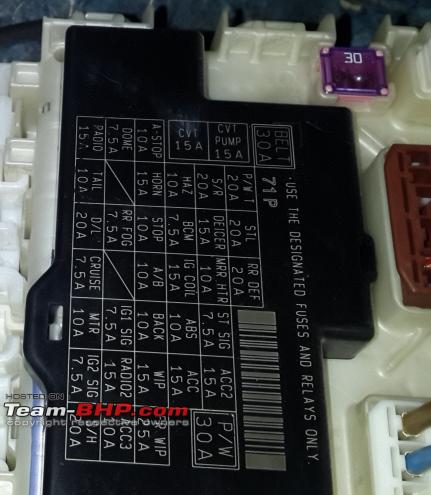
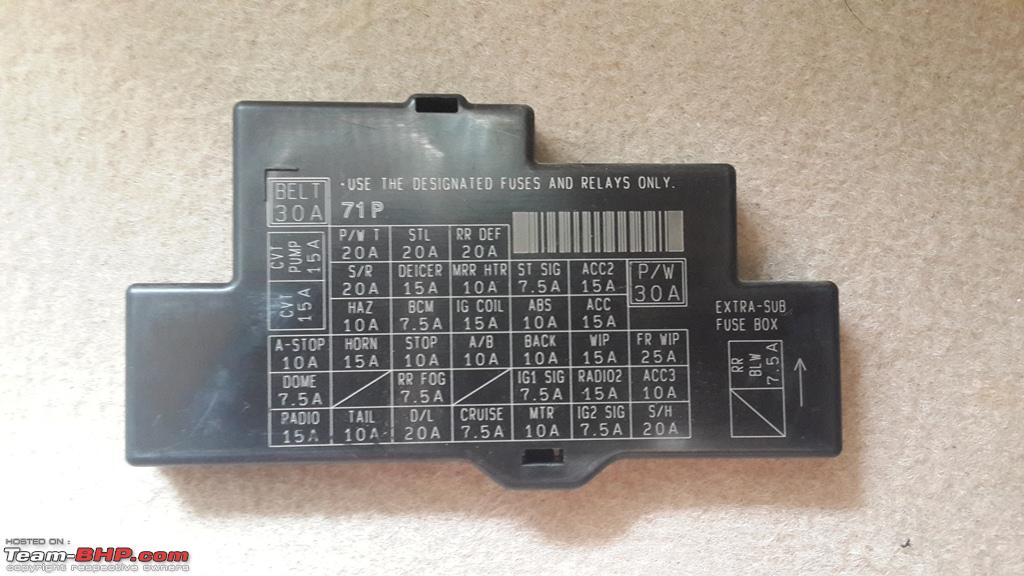
The Fuse box for the Ertiga like a typical Maruti is located on the right hand side of the Dashboard above where the Accelerator pedal is.
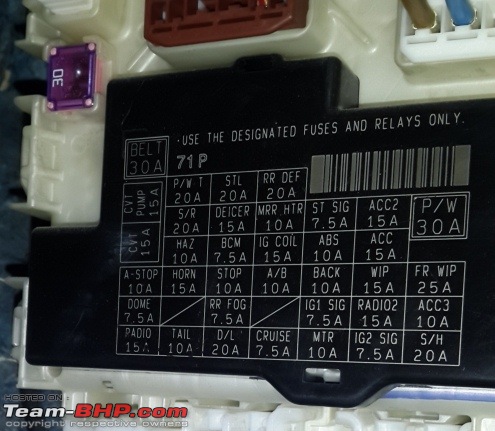 A closer look at the Fuse box cover with the label:
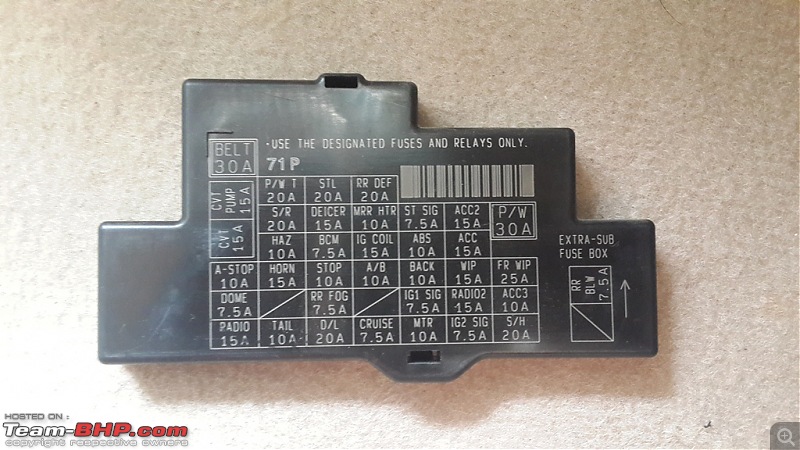
 Routing of Wires:
There was only one wire that had to be carefully route from the Fuse box as I could anyways find a point to ground at a much closer location where the socket is mounted.
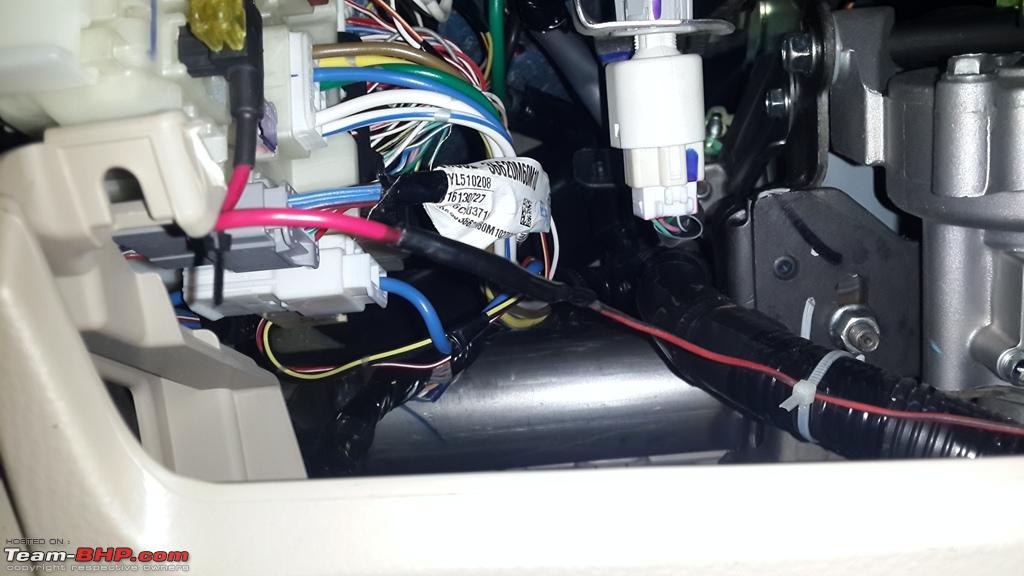
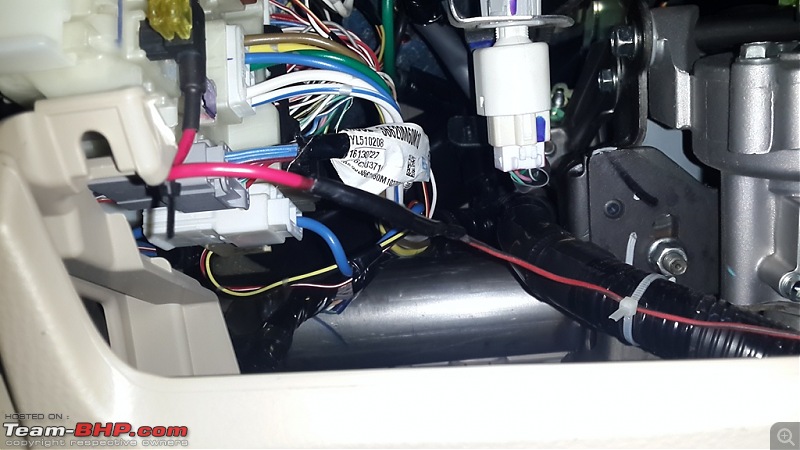 By effectively making use of the plastic zipper ties, I route the wires far away inside the dash such that it shouldn't come in contact with my feet. What you see in the below pic is the Power cable zip locked behind the steering wheel
  The cable then follows the path and reaches the waterfall console of the Dash board and gets a lock in place here as well
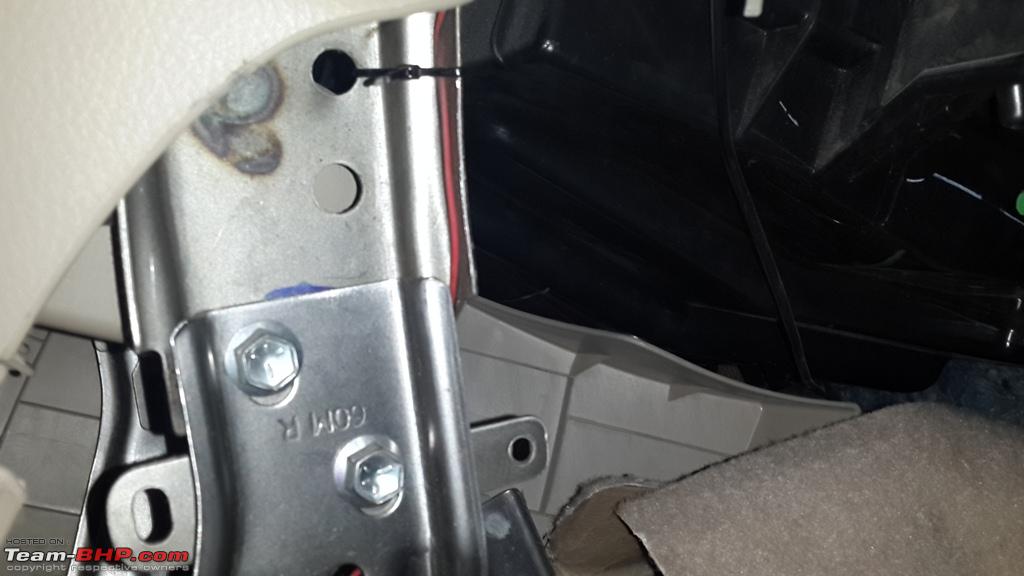
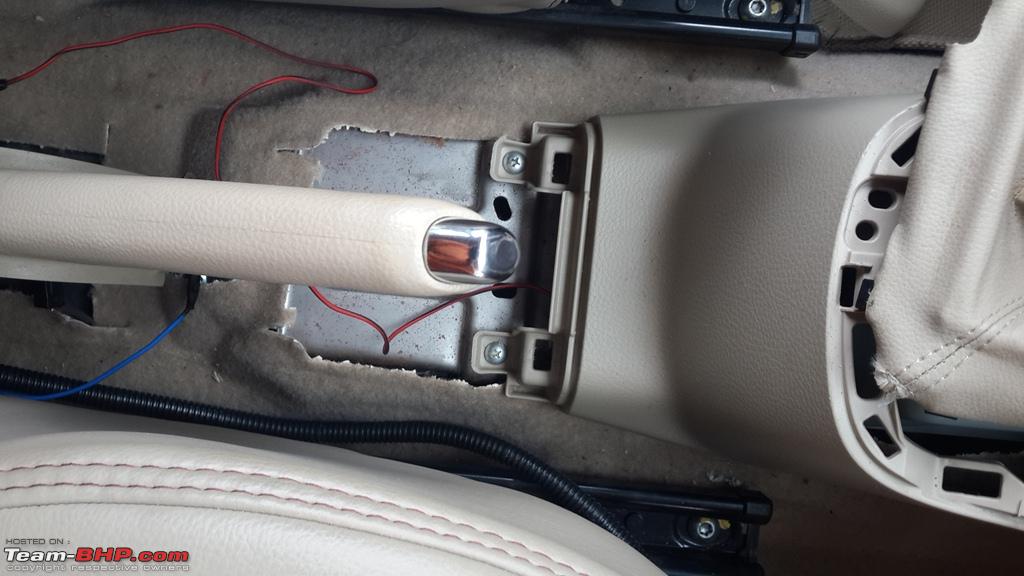
 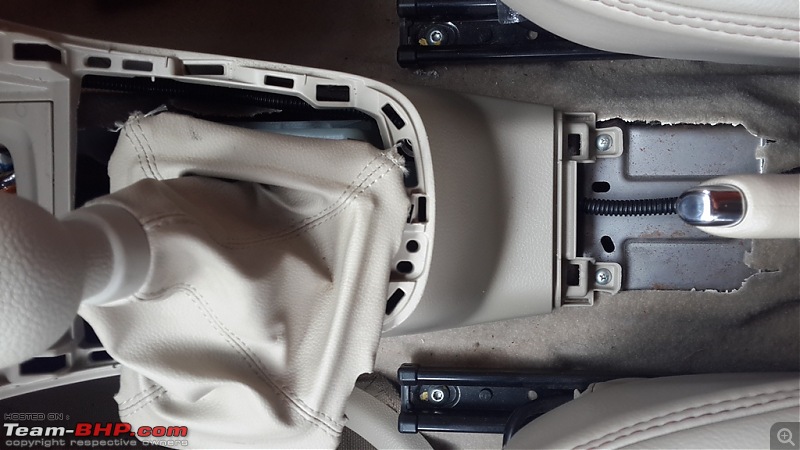 The final destination of the power cable is around the Hand Brake area where it will get connected to the accessory socket:
Now it was time for wrapping the cable with a ribbed plastic tubing as below:
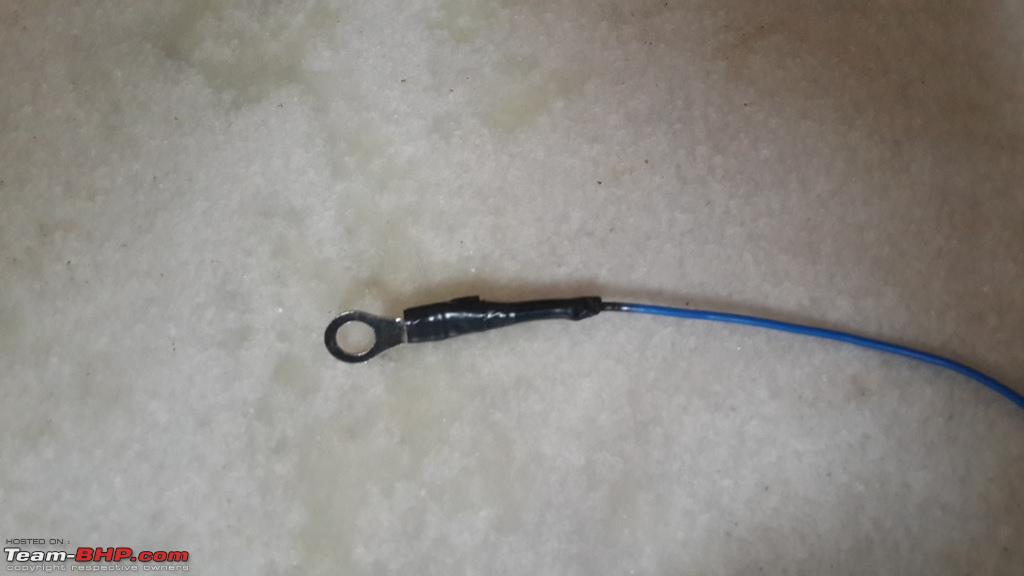
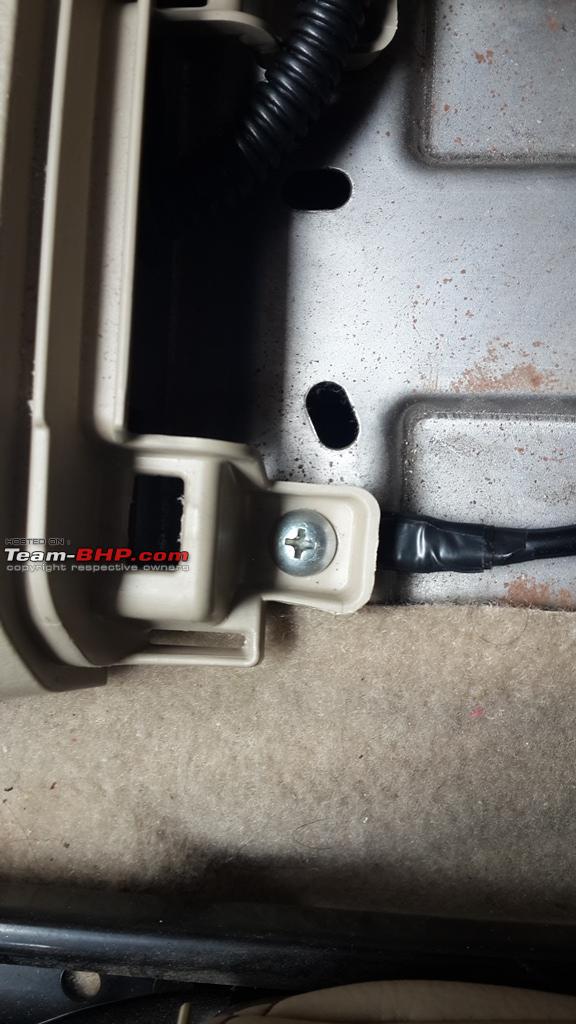
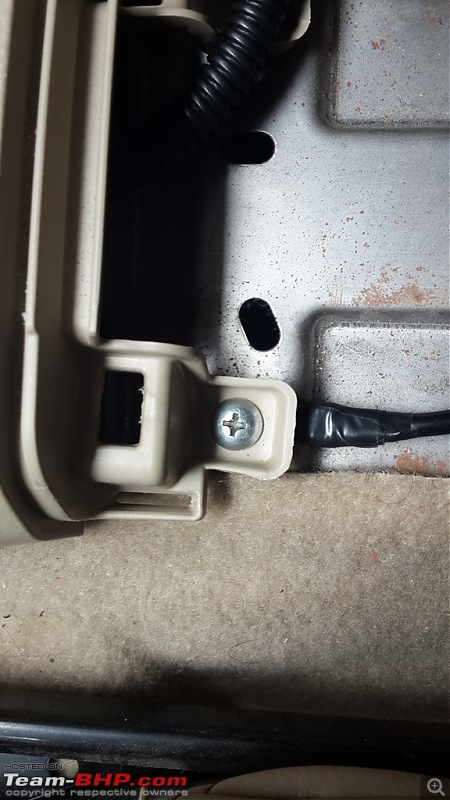
 The Plastic tubing follows the path all the way till the halfway mark. Grounding:
The Ground cable was shorter due to the fact that there were multiple options to pin it on the floor around the hand brake area. Ensured to connect a Ring on the other end, wrapped it with a heated sleeve and wound insulation tape above that.The ground point I used was a screw that was securing the center waterfall console of the dash and this is where the ground cable was secured:
 With both the Power and the Ground cables wrapped with the ribbed tubing, this is how things finally looked on the inside:
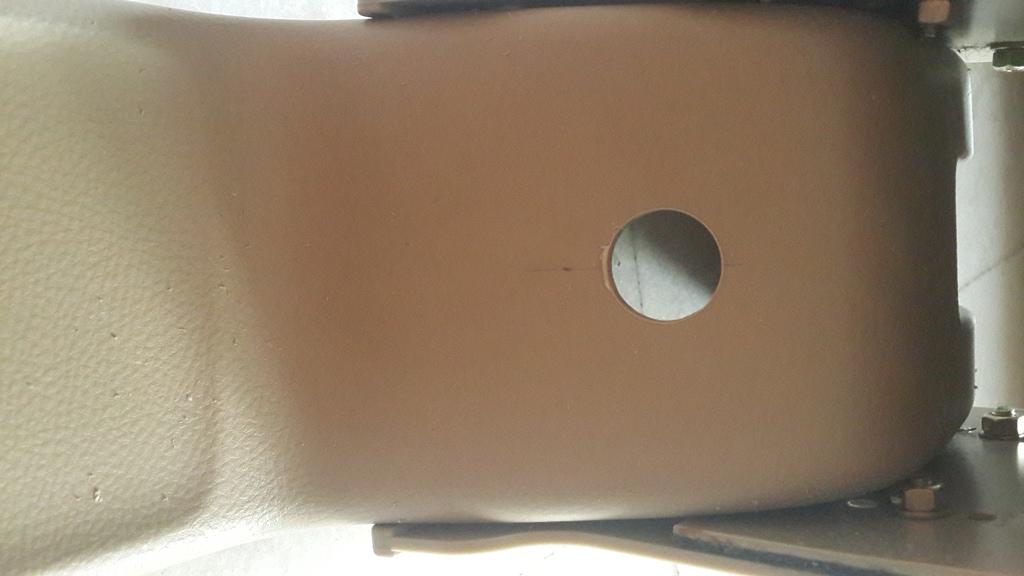
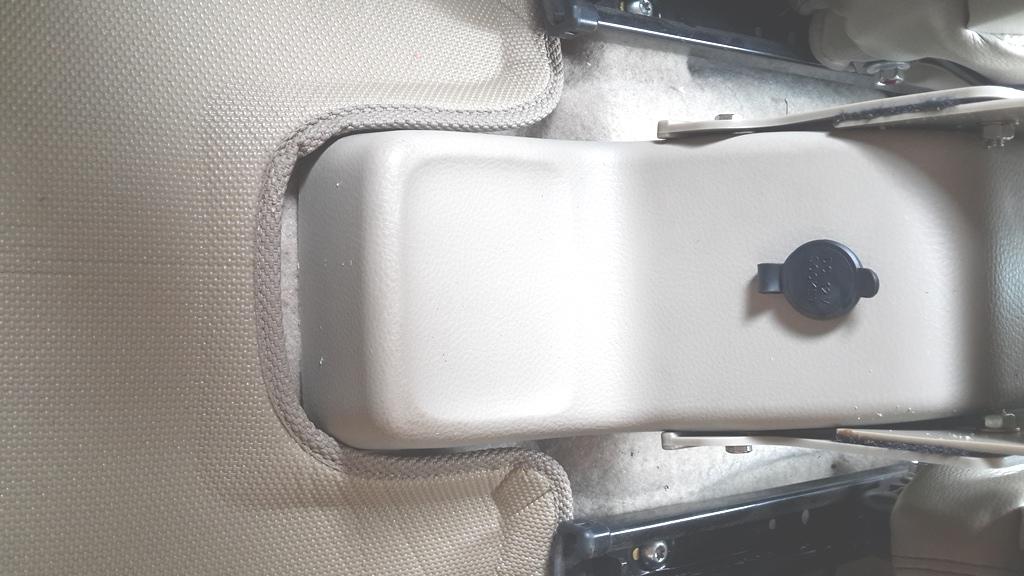
 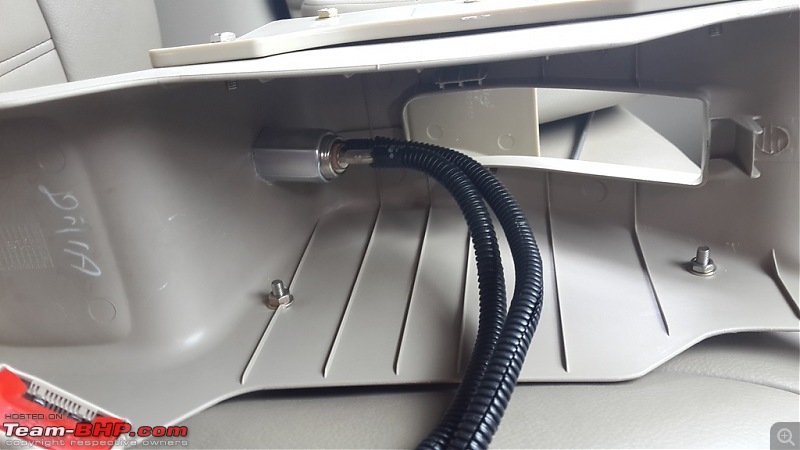 Fitted the Handbrake console (where the hole was made and socket installed) back in place:
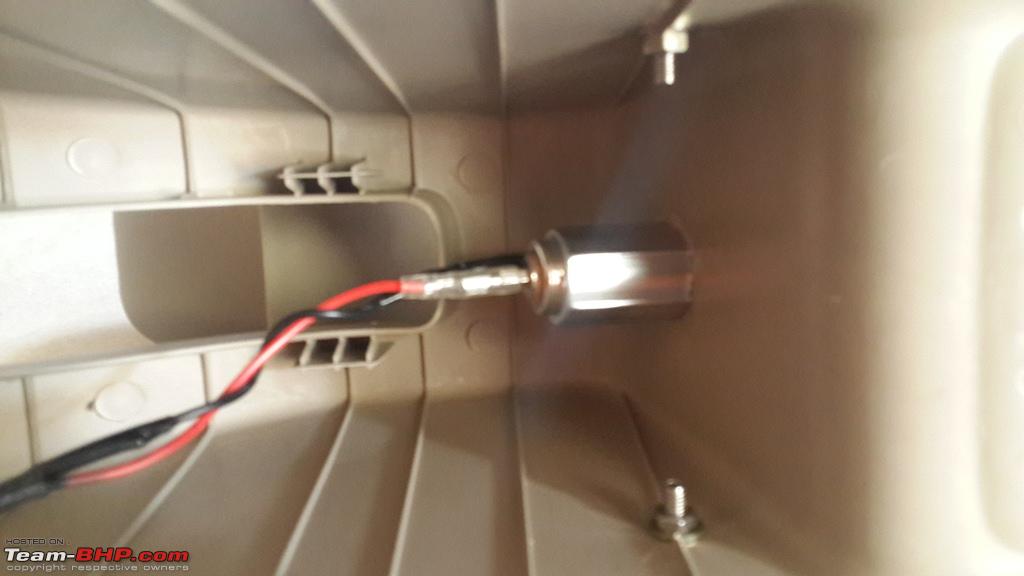
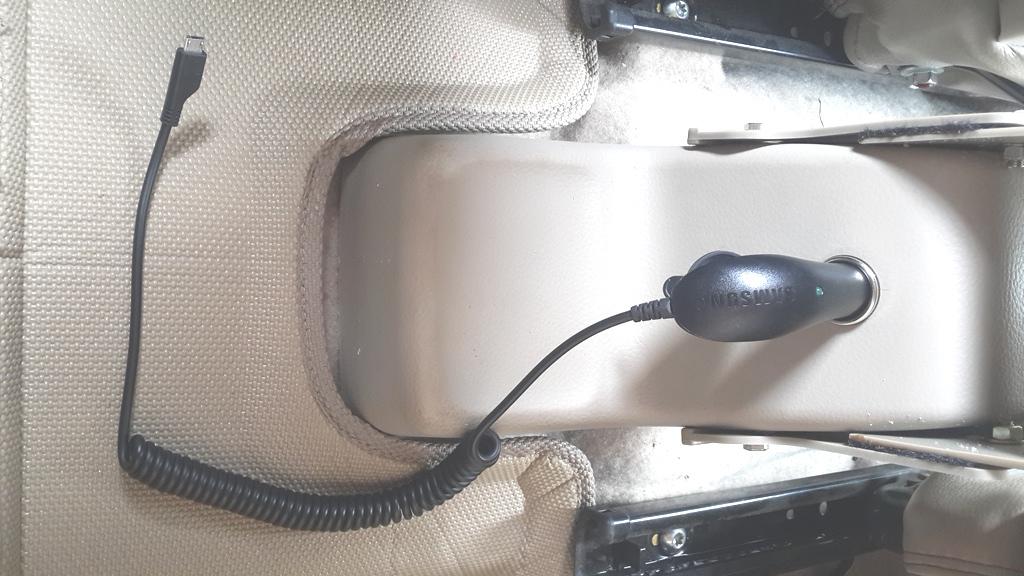
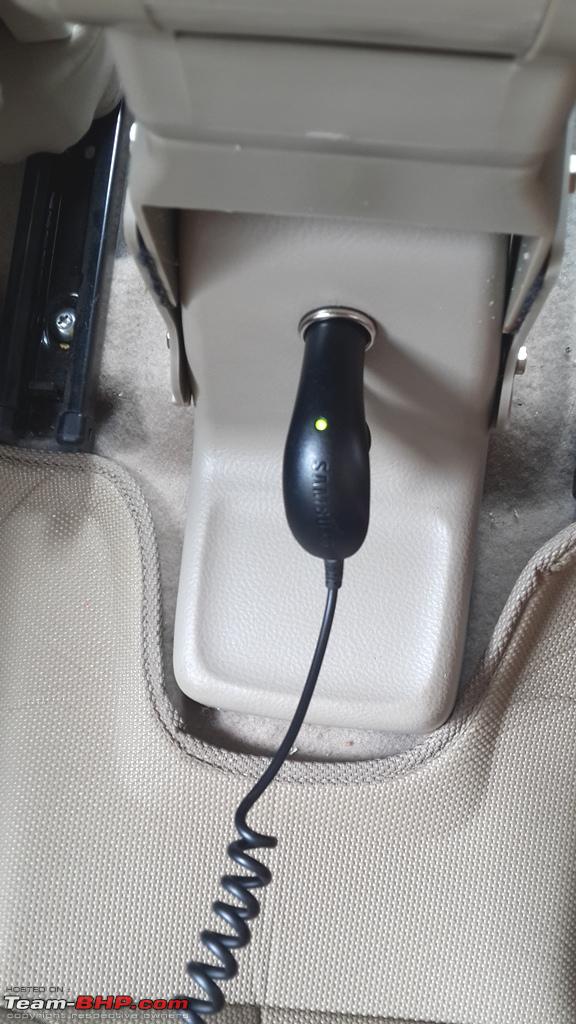
  Connected the Mobile charger:
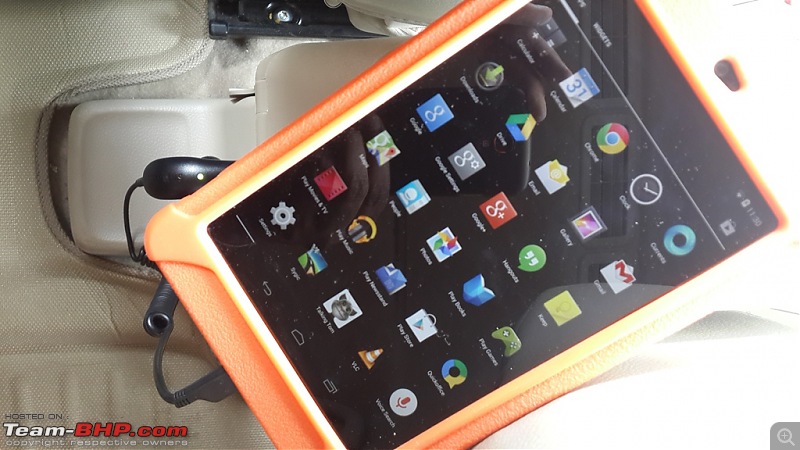
 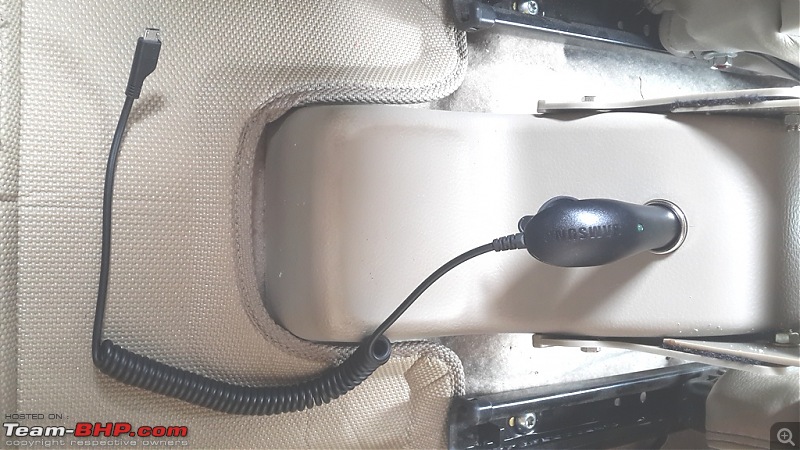 Connected the device and turned the key to ACC Position but nothing happened. Twisted the Key further to IG Position and the light came on Indicating that it has began to charge the device attached:
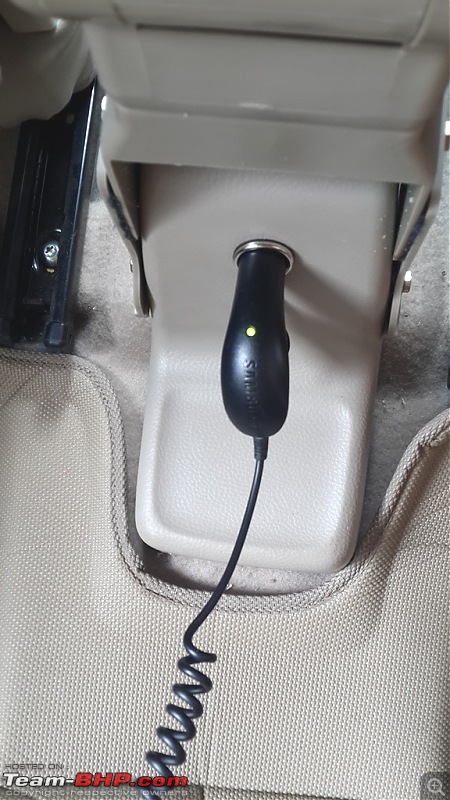
So this additional socket works only when the Key is in Ignition Position.
Does this interfere with the leg movements of the rear passenger?
It should not considering that there is an extra protrusion of the handbrake console where passengers normally won't rest their feet on it.
Some quick inputs at glance for this DIY:
Things you will need:
- Fuse Tap Cable
- 12V Accessory Socket
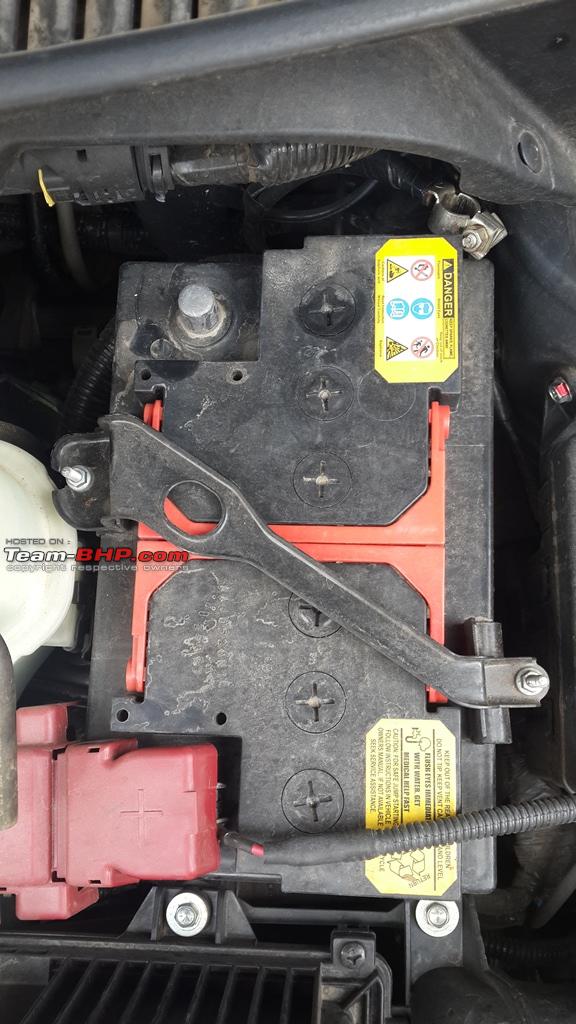
- Spanner/Socket to disconnect the negative terminal of the Battery
- Philips Screw Driver
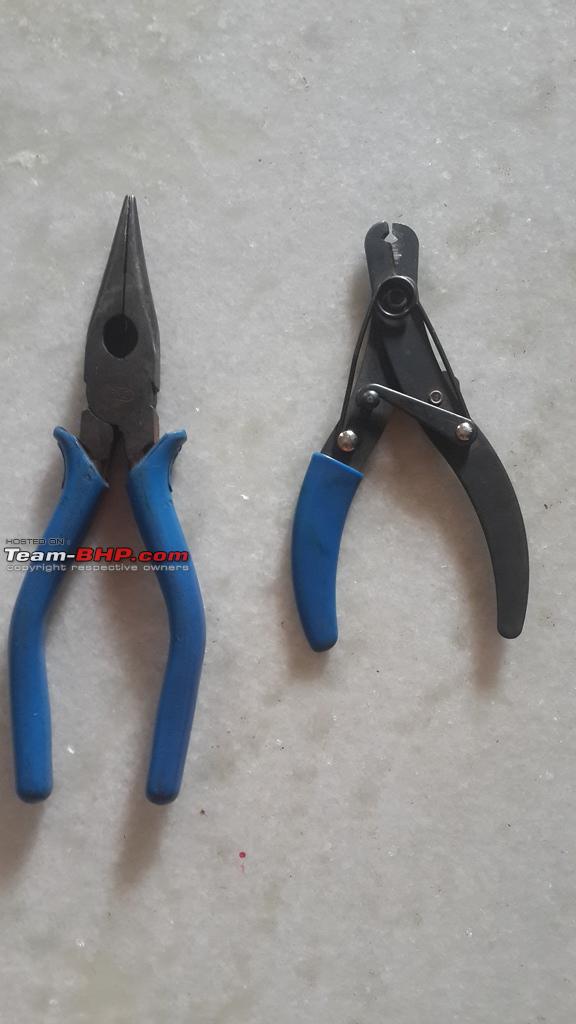
- Nose Plier and Wire skinner
- Automotive Gauge Wires for Ground and Power
- Rubber/Plastic Sleeves to insulate the joints
- Insulation Tape
- Soldering Iron and lead
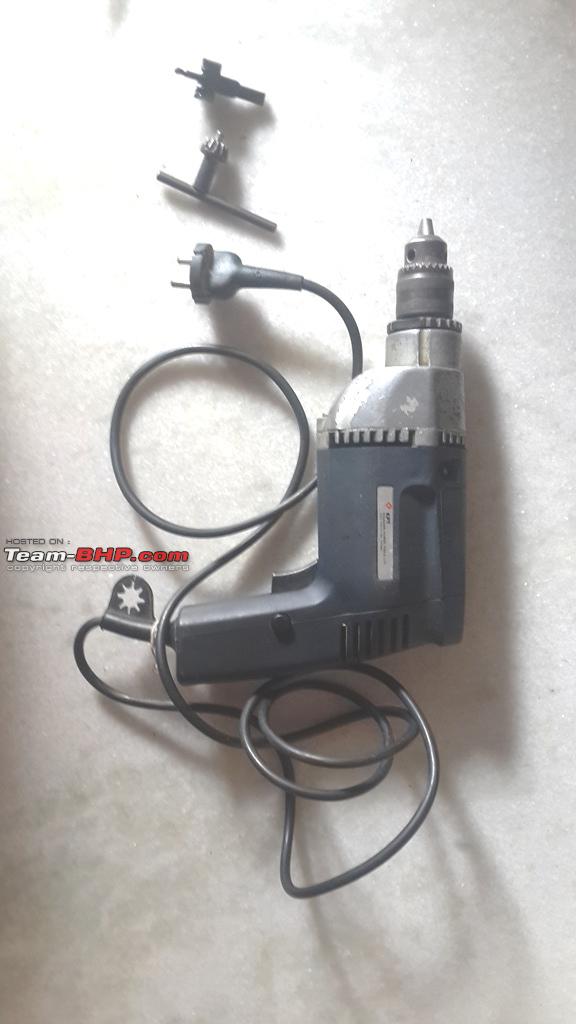
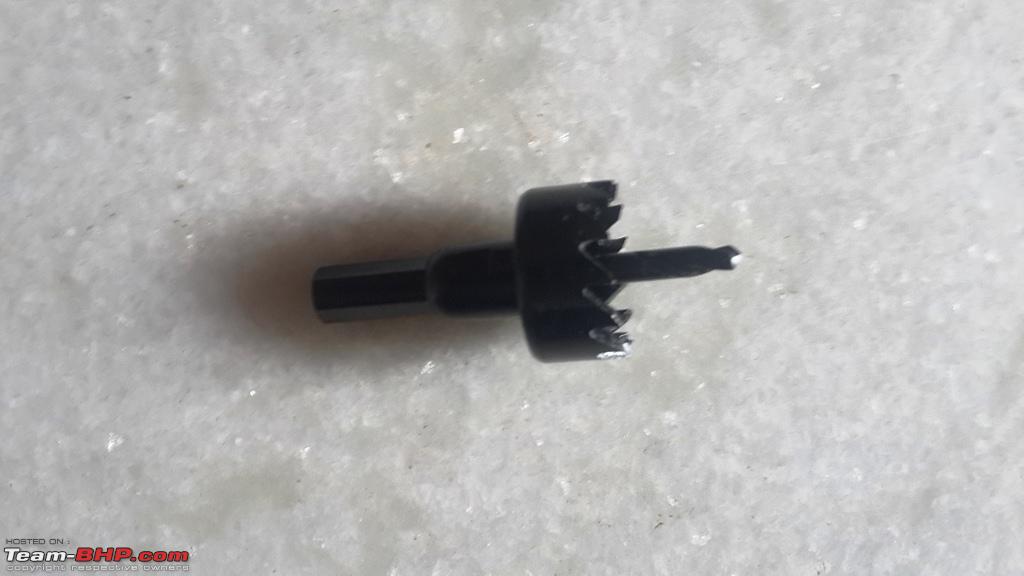
- Drilling Machine with a suitable drill Bit
- Plastic Zipper Ties for securing the wire(s)
- Ring Terminal to ground the cable to the chassis/body
The approach:
- Disconnect the negative terminal of the battery
- Identify the location where the socket needs to be mounted
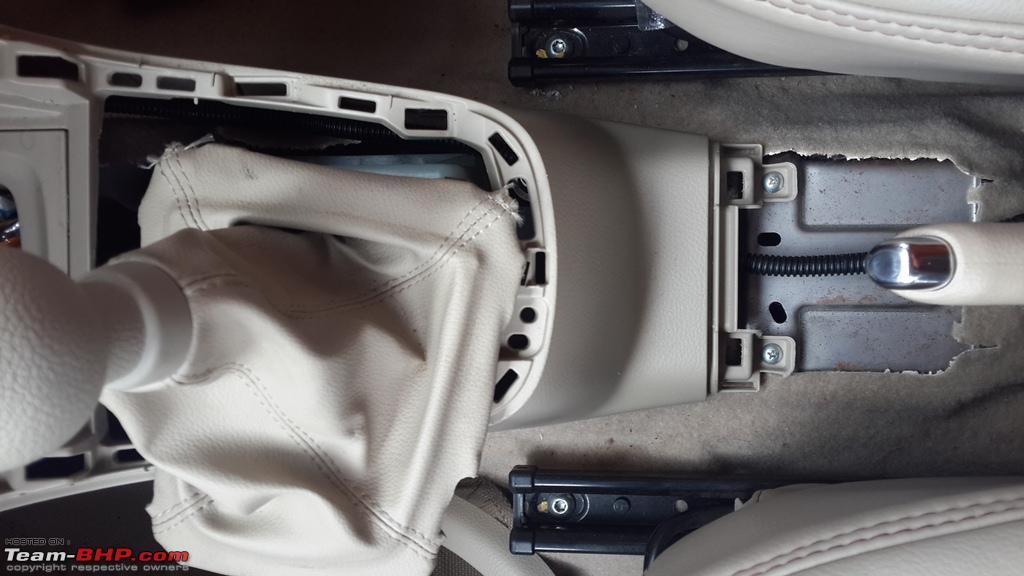
- Remove the Plastic housing around the Hand Brake. You just need to pull out the 2 plastic studs at the rear and lift it up
- Mark the location and drill a Hole (23mm Dia will be good enough)
- In my case, I removed the Handbrake console and drilled the hole
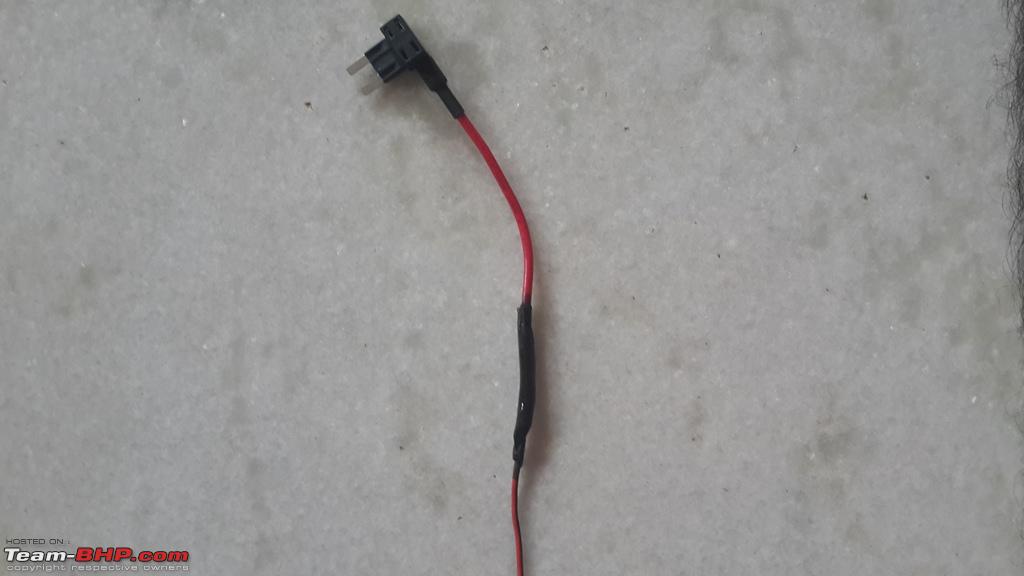
- Measure length of wire, cut it, skin and join(solder) with the Fuse Tap cable and sleeve it
- Identify a suitable ground point
- Identify the empty fuse - Refer owners' manual
- Before fitting ensure to test the working of the socket
- Do the final fitment making sure that the wires are routed in a manner that it doesn't interfere normal driving operation - Using all 3 Pedals, Steering and Gear lever
- To make the routing easier, you can pull the leather wrapped gear lever console and do the routing inside
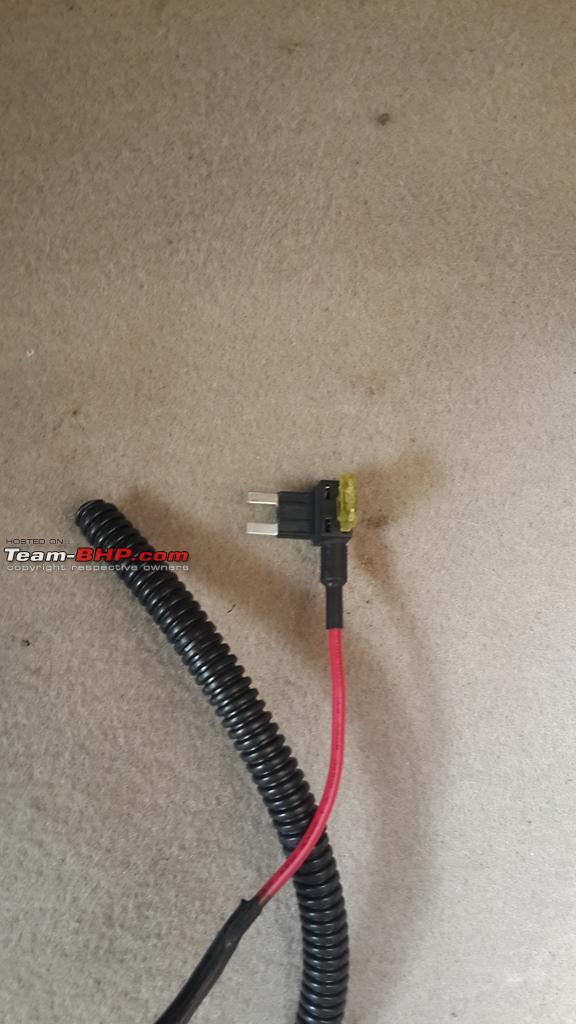
The Fuse Tap cable comes with 2 Fuses - One fuse holder to protect existing circuit, and a second fuse holder to protect new circuit.
Here's the picture illustrating where I have plugged the Fuse Tap for this DIY 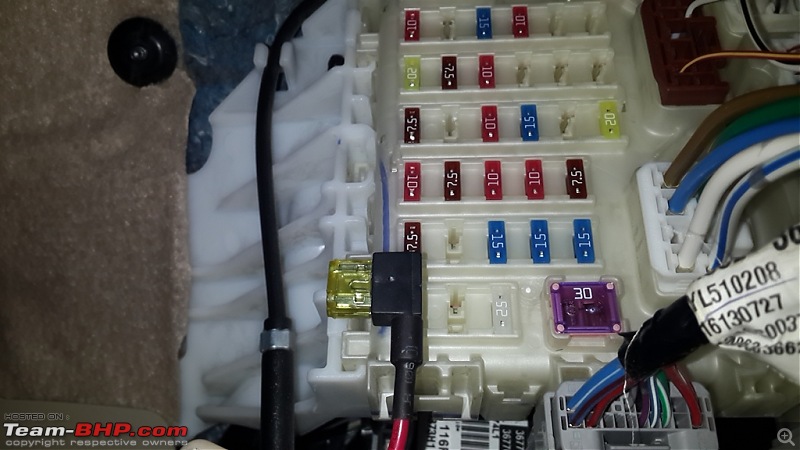
Thanks to
Gannu_1 for spoiling me with this Fuse Tap cable idea from his awesome DIYs.
Thread moved from the Assembly Line to Modifications and Accessories section. Thanks for sharing!
This is one of the cleanest ways to source power. The job is very well done Parag.
Thanks you for your kindness that you would do a similar thing on my Linea also :)
Quote:
Originally Posted by funkykar
(Post 3458776)
This is one of the cleanest ways to source power. The job is very well done Parag.
Thanks you for your kindness that you would do a similar thing on my Linea also :)
|
Yes, Cleanliness in executing such DIYs is what I always look for. Else, it simply looks ugly!
Decide the placement of the socket in your Linea, crank that Multijet and drive home on a weekend.
I already have the soft copy of the owner's manual for the LINEA and have done the home work :).
Good DIY Parag, but this will affect the warranty of your new Ertiga, right ?
Does the MASS do this as an optional fitment, for those wanting to preserve the warranty ?
Quote:
Originally Posted by sdp1975
(Post 3458828)
Good DIY Parag, but this will affect the warranty of your new Ertiga, right ?
Does the MASS do this as an optional fitment, for those wanting to preserve the warranty ?
|
MASS may do this but not sure if they will still protect warranty.
These fitments are best done as DIY for me:).
Even my tire upgrade from 185 to 205 profile is bound to affect the warranty in case I face steering and suspension issues in future.
This DIY doesn't fiddle with the existing electrical sources and merely uses the fuse box as to power up. Additionally you will notice that the Fuse Tap cable comes with 2 fuses - One to protect the source wiring (Fuse Box) and othe other to protect the load (at the socket end).
If the wiring is clean, load at the socket is sane, I don't see any reason why It would mess with the electrical system.
I have never claimed warranty in my other car as nothing failed and touchwood, this simple (and clean) DIY should not make me run to claim one too!
Nice DIY Parag.
A 12V socket in the rear of a car is a real boon especially with kids and tablets / smartphones spending the better part of the long drive together.
One question , could we not make a parallel connection to the existing 12V socket ? The current will split but then my guess is it would be enough for charging slowly but thats all. That would save a lot of drilling and wiring and tampering with the fuse box. Just a rant . You have put a lot of effort and done a really clean job but for those of us who are not so clean a simpler solution would be oh so helpful :D
Quote:
Originally Posted by ambivalent_98
(Post 3458856)
Nice DIY Parag.
A 12V socket in the rear of a car is a real boon especially with kids and tablets / smartphones spending the better part of the long drive together.
|
Indeed true & this was the primary reason. Tabs consume more power and with kids occupied watching movies and videos on the go, a separate socket was mandatory for me.
Quote:
One question , could we not make a parallel connection to the existing 12V socket ? The current will split but then my guess is it would be enough for charging slowly but thats all. That would save a lot of drilling and wiring and tampering with the fuse box. Just a rant . You have put a lot of effort and done a really clean job but for those of us who are not so clean a simpler solution would be oh so helpful :D
|
Easily possible & simpler too. I have done wiring in similar fashion for the WagonR but that is for installing a second Roof light at the rear and this works same way like the OE roof lamp when for ON-DOOR-OFF Positions.
However, in case of the accessory socket, I was particular that it gets an independent line for many reasons:
- At time we use Milk Warmer to keep Milk/Water bottle hot on the go
- We also use Belkin to charge the batteries of the camera
So there is no guarantee that sources with various wattage will not be used in parallel (A higher Amp fuse can still do the trick here)
There is enough chance that the fuse may go bonkers when all these devices are attached to a single line (Say a warmer in front and Belkin at rear).
It must also be noted that when the car is cranked, the voltage drops drastically and when these devices are connected, you may either damage the device itself or blow the fuse. After all, when you have ladies & Kids thinking that the car is home, you cannot expect them to connect these devices only when the engine is running:).
Lastly, most of the OE accessory sockets work in ACC position while this one works only in Start/Ignition position.
Hey Parag, this is great DIY and thanks a ton for the detailed write up! I guess, I would PM you and bother you to give me a crash course on how to do this on my SX4 :D
I always needed two extra sockets - one dedicated source for a dashcam and one that powers laptop or tablet or spouse's cell phone! These are two different sources I will need apart from the OEM cigar lighter - that is dedicated to my cell phone. I already have the LED and Projectors setup on the car that draw power from battery directly and not sure if this would add more complexity to the overall equation. But please advise.
And have you fitted the arm rest on your ertiga? Something like that I felt in the picture from first post where you have charge green light shown. Or Ertiga comes by default with arm rest? That is one great thing on long drives I must have.
Quote:
Originally Posted by abirnale
(Post 3458909)
Hey Parag, this is great DIY and thanks a ton for the detailed write up! I guess, I would PM you and bother you to give me a crash course on how to do this on my SX4 :D
|
Incidentally, I will install it on my friend's SX4 (
alokgunhal)sometime soon too. Have ordered the Fuse Tap cables and soon after they reach I will do the DIY and of course share the pictures:). You can simply refer that post when I am done with it in days to come.
Quote:
.... and not sure if this would add more complexity to the overall equation. But please advise.
|
Not really to be honest. You are essentially drawing power from the Fuse box socket which is empty (would otherwise get used for additional features for cars sold in other countries). There are 2 fuses to take care of both the Original Fuse Circuit as well as the load you plug on the other end. Its the DC-AC Convertors (Belkin etc) which require cautious handling as many folks I have noticed ruin the battery or even blow the fuse by keeping it ON even when the car is not running.
Primary thing to keep in mind is using appropriate gauge automotive wiring and ensuring every joint is protected from getting exposed.
Quote:
And have you fitted the arm rest on your ertiga? Something like that I felt in the picture from first post where you have charge green light shown. Or Ertiga comes by default with arm rest? That is one great thing on long drives I must have.
|
Yes I have and here is the link of that Install -
Arm Rest Install
I have already installed Armrest for another friend (
ACS) and will again do this for alokgunhal's SX4.
So when it comes to SX4 I am sure you just need to wait and watch as I work on these DIYs. Will try to PM you the album for the SX4 Armrest installation that's somewhere on FB.
Excellent. I have been considering this for some time now. Can you give a link to the item "Fuse Tap"? Also, we have been considering getting additional light(s) fitted in the middle and rear for passengers on the roof. Your views and ideas on this please.
Super DIY Parag. You are truly the DIY guru of the forum:D. All your DIYs are very detailed and very easy to understand.
In one of the pictures, I saw a mention of 'Cruise Control'. Have you ever thought about DIYing that to the Ertiga? Given the long distances your car does, I'm sure it would be a welcome addition.
Quote:
Originally Posted by funkykar
(Post 3458776)
This is one of the cleanest ways to source power. The job is very well done Parag.
Thanks you for your kindness that you would do a similar thing on my Linea also
|
Quote:
Originally Posted by paragsachania
(Post 3458808)
I already have the soft copy of the owner's manual for the LINEA and have done the home work .
|
Indeed, I too plan to thank your kindness too after you are done with funkykar's Linea (now that the warranty period for my Linea is over):D
Quote:
Originally Posted by latentpotential
(Post 3458939)
Can you give a link to the item "Fuse Tap"?
|
http://www.dx.com/p/add-a-circuit-bl...ll-size-117728
(Since its dx.com, I am sure you are aware of shipment time, product quality and the associated risks with customs etc. As this is a simple fuse tap cable, there is not much to worry)
Quote:
Also, we have been considering getting additional light(s) fitted in the middle and rear for passengers on the roof. Your views and ideas on this please.
|
Like I mentioned earlier, I did install such a roof light for the WagonR. The wiring was simple in this case as I had installed low power consuming LEDs for both these roof lamps.
There will be 3 wires to the OE Roof lamp:
- Ground 1 (For switch in ON Position)
- Ground 2 (For switch in DOOR Position)
- 12 V (To Supply the usual power)
Procedure:- Soldered 3 wires out from these 3 points on the OE Rooflamp console
- Marked position for mounting the additional roof lamp
- Cut the roof carpet (2cm X 2cm )
- Inserted a metal string from this hole and gently kept pushing till it reached out from the opening of roof carpet for the OE Lamp
- Soldered other ends (2nd lamp) to these 3 wires
- Fixed the Roof Lamp (screws or basis Fevicol SR adhesive will do)
How it functions:
It works same manner as the OE Lamp. Glows up along with OE lamp when in ON or DOOR (Open) position
Each lamp also works independently from each other. I can keep the main lamp in OFF and use the second light in ON or OFF position as well.
(I will post the pics of the second row light of the WagonR when its home today evening)
Quote:
Originally Posted by addyhemmige
(Post 3458961)
In one of the pictures, I saw a mention of 'Cruise Control'. Have you ever thought about DIYing that to the Ertiga? Given the long distances your car does, I'm sure it would be a welcome addition.
|
Cruise Control and getting the MID Display temperature (ZDi feature) by installing Temperature sensor is what I am planning as the next DIY. Just managed to lay my hands on some documentation for the same :).
Quote:
Indeed, I too plan to thank your kindness too after you are done with funkykar's Linea (now that the warranty period for my Linea is over):D
|
You are welcome anytime along with funkykar. Like I said, I have already made an assessment on where to fit the socket in the Linea!
| All times are GMT +5.5. The time now is 16:11. | |