| |||||||

| Search Forums |
| Advanced Search |
| Go to Page... |
 |
| Search this Thread |  49,067 views |
 21st May 2015, 00:43
| #1 |
| Senior - BHPian Join Date: Jan 2010 Location: Bangalore
Posts: 1,715
Thanked: 1,069 Times
| DIY: Maruti Suzuki Swift Bi-Xenon Projectors. Morimoto FX-R 3.0 Installation In my childhood days, I was a bit of a flashlight enthusiast, I had a reasonably large collection of flashlights/torches with me and would add 5-6 to my kitty every year. The only criterion to select one was, it HAS to be BRIGHT. I also had this crazy obsession of cleaning the clear lens, during highway drives, whenever we stopped for a break. Later, I'd sit at the back and appreciate myself for making them "brighter" with some vigorous rubbing. My dad would very kindly acknowledge that they're indeed "brighter now" whenever I would clean the lamps. However,somewhere along I lost interest in the hobby and most of my collection was given away. I think sometime in mid 2000's I remember seeing this magical thing called projectors on Octavia (vRs & L&k) and later bigger one's on Laura L&K too. I was blown away by how good it looked and the illumination on road. A friend took me for a long drive on a vRs sometime in 2006 and I said to myself whenever I'd buy a car i'll get projectors installed on it. So after a very long time (10 years or so after deciding), I retrofitted Morimoto Fx-R projectors on my Swift.  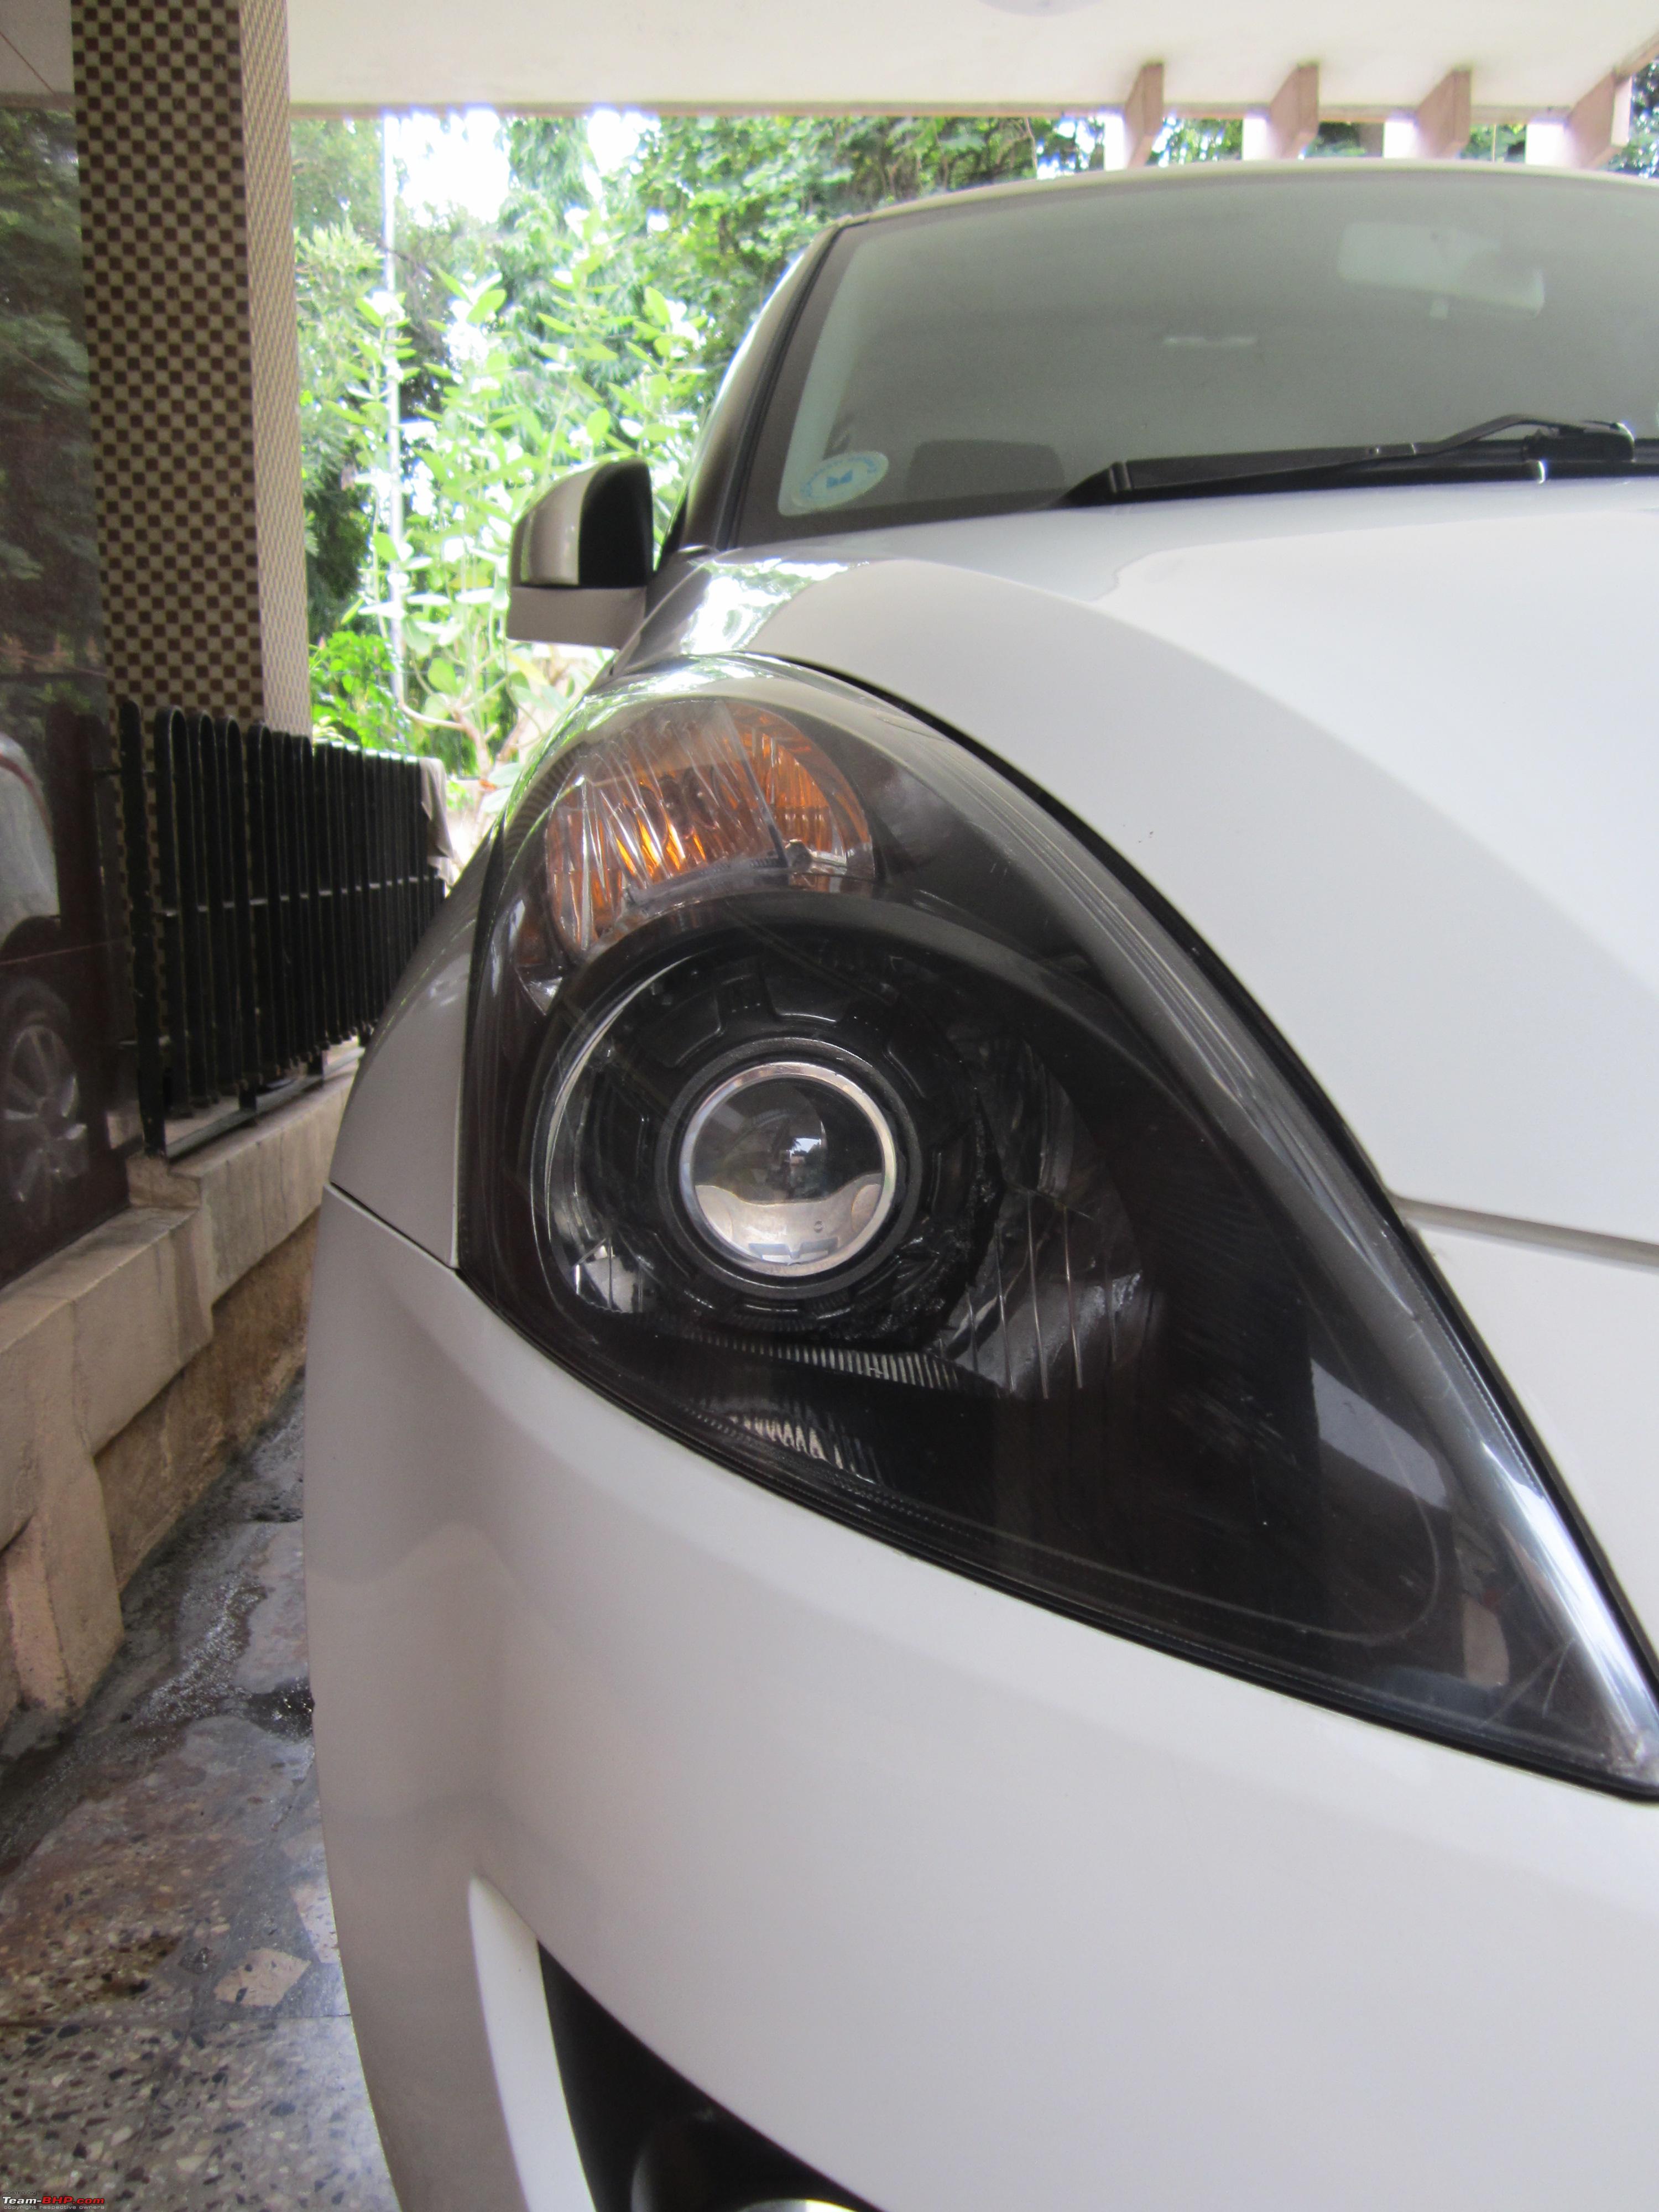 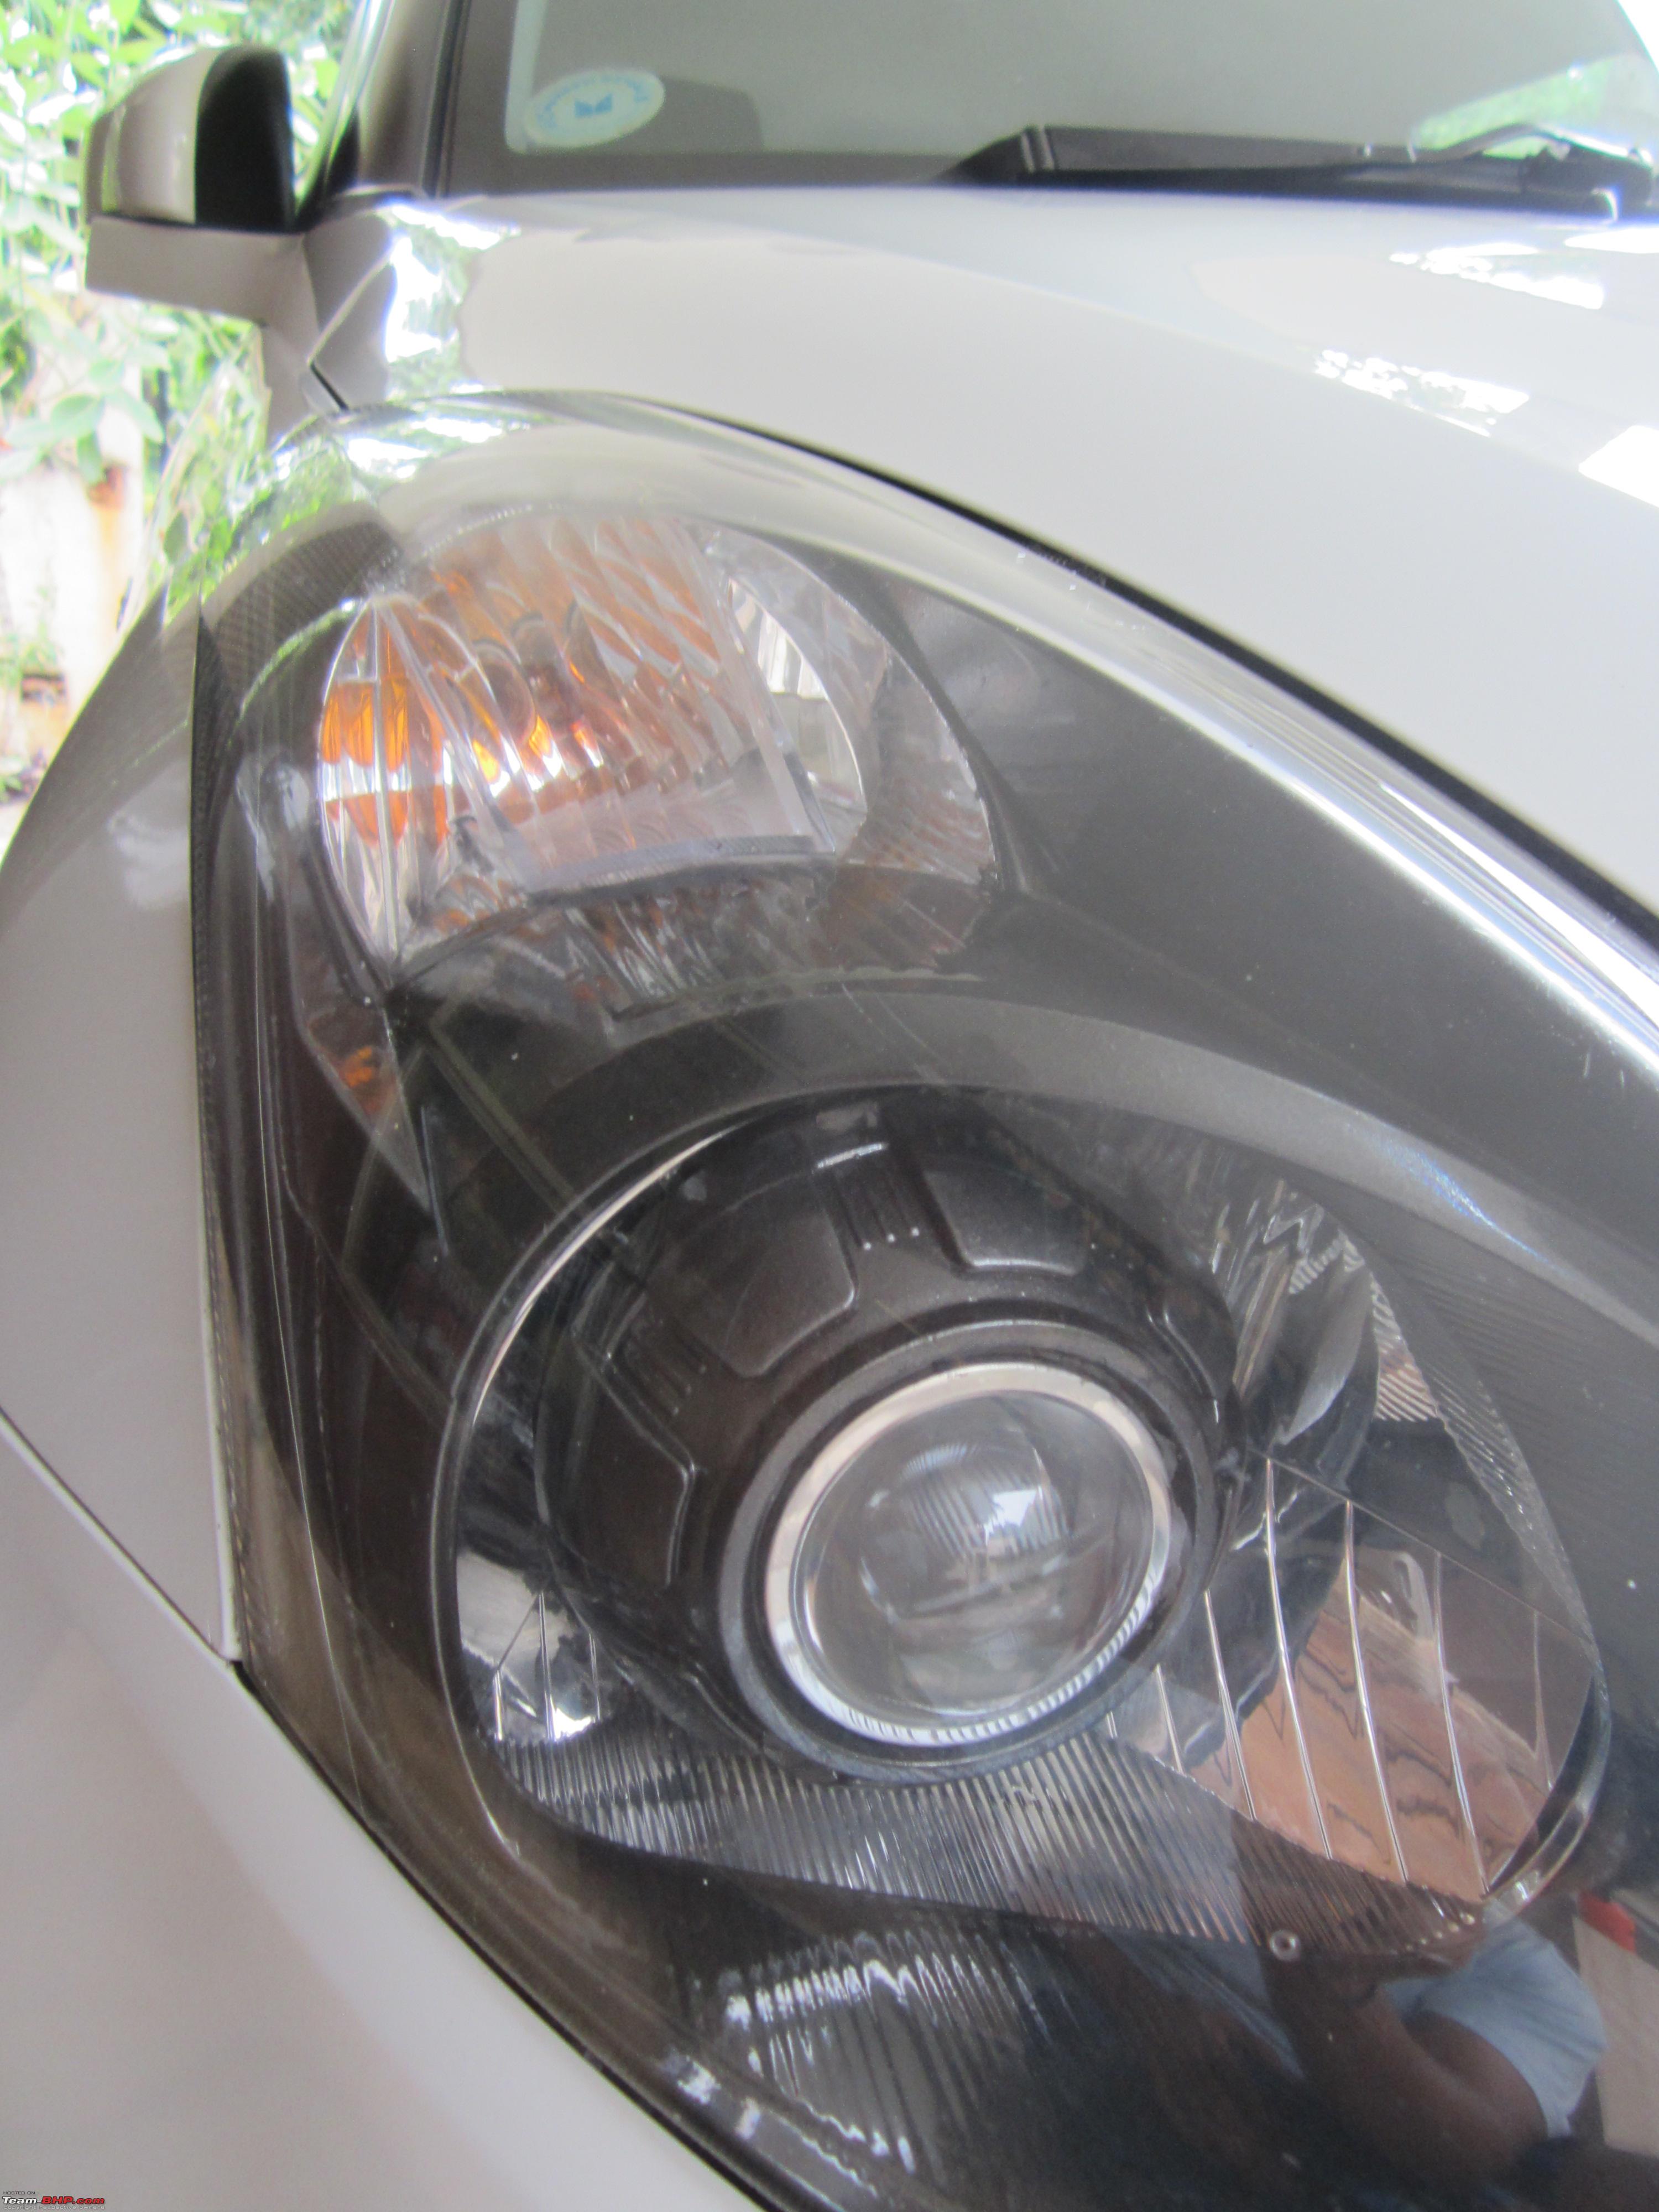 This was my very first DIY, so I'll try and document all the steps involved, precautions to take, challenges we faced and the overall DIY experience in detail to help anyone else who may want to do the same, so this is going to be one long read.   Note - This is a non-reversible modification. It involves cutting the reflectors and mounting projectors with M-seal. If you ever want to go back to stock setup,you'll have to buy new headlamp assembly which costs 6000 a piece. Last edited by Gannu_1 : 22nd June 2015 at 09:29. Reason: Formatting. |

|  (8)
Thanks (8)
Thanks
|
| The following 8 BHPians Thank shashank.nk for this useful post: | Divya Sharan, Gannu_1, GTO, JoseVijay, paragsachania, planet_rocker, sidhu_hs, Viju |
|
24th May 2015, 14:16
| #2 |
| Senior - BHPian Join Date: Jan 2010 Location: Bangalore
Posts: 1,715
Thanked: 1,069 Times
| re: DIY: Maruti Suzuki Swift Bi-Xenon Projectors. Morimoto FX-R 3.0 Installation Kit I purchased for the retrofit From The Retrofit Source: - Projectors - Morimoto Fx-R 2.5" RHD - Bulbs - Osram Xenarc Nightbreaker 35w - Shrouds - Orbit with centric rings - Wire Harness - Morimoto MotoControl H4/9003 From AVS Tuning: - Morimoto retrorubber butyl glue From Ebay.com - Ballasts - Hyluxtek 35 w slim ballast with blue ring - AMP to D2S converter I'm not a big fan of Angel eyes, DRL tubes etc so decided to skip them. If one's interested, you can consider the latest (May 2015) Morimoto XSB halo's which double up as indicators too. Alternatively, you could also consider using Denso/Mitsubishi ballasts ,these warm up in a few seconds and are OEM in Lexus/Infiniti/Mazda and the likes, the only problem is they're not waterproof so getting them potted (water proofing) will cost you another $100 or you could take a risk and place it where there's not a lot of water ingress. It was my first DIY and I didn't really have any tools with me, so bought the following: 1. Stanley 46 piece 1/4 drive metric socket set (link). This is a must have-it contains point, philips, hex sockets with ratchet spanner ,extensions you need to remove bumper, headlights, battery nut etc. 2. Nose plier (link) 3. Double-end spanner set (link) 4. Heat gun (link) - to open and reseal headlights. Miscellaneous: - Flat blade screwdriver - M-seal - Zip ties - Nut and bolts - Masking tape - Permanent marker - Working gloves - Fevi Kwik - Hacksaw blade with frame (buy the small one's too) - 3.5" PVC Pipe - Caulking Gun - Silicone Optional (for cutting reflectors & blackening them) Power tool like a Dremel, Bosch oscillation kit 2000 grit sandpaper Mr.Muscle Toliet & kitchen cleaner Meguiars Super degreaser-500ml Spray paint (I used Just Spray acrylic paint H-5 black) Last edited by Gannu_1 : 22nd June 2015 at 09:28. Reason: Formatting. |
|
| (6)
Thanks
|
| The following 6 BHPians Thank shashank.nk for this useful post: | Gannu_1, JoseVijay, paragsachania, planet_rocker, sidhu_hs, Viju |
|
28th May 2015, 15:24
| #3 |
| Senior - BHPian Join Date: Jan 2010 Location: Bangalore
Posts: 1,715
Thanked: 1,069 Times
| re: DIY: Maruti Suzuki Swift Bi-Xenon Projectors. Morimoto FX-R 3.0 Installation Alignment and marking Halogen cut off on a wall Before we open up the headlights,for the Fx-R install,its very important to get the stock headlamp cut-off as a reference for aiming the projectors later on. - Inflate your car tires to what you do normally. I set them at 32 psi. - Park your car atleast 25 feet from a wall,switch on the low beam and set the headlight leveller position at '0' - Now go to the wall and using a masking tape,mark cut-off of the existing halogen beam on the wall. This is really very important as it helps with vertical and horizontal alignment of the projectors later on, so ensure you do it right. This video should give you a good idea of what's required. Just to be on the safer side, I clicked pics of the beam and also marked with tape the wheel locations when parked. Ensure that the leveler isn't changed and remains at 0 when trying to mount projectors. Last edited by Gannu_1 : 22nd June 2015 at 09:24. |
|
| (6)
Thanks
|
| The following 6 BHPians Thank shashank.nk for this useful post: | Gannu_1, JoseVijay, paragsachania, sidhu_hs, Viju, vredesbyrd |
|
28th May 2015, 16:27
| #4 |
| Senior - BHPian Join Date: Jan 2010 Location: Bangalore
Posts: 1,715
Thanked: 1,069 Times
| re: DIY: Maruti Suzuki Swift Bi-Xenon Projectors. Morimoto FX-R 3.0 Installation DIY Oven Full credits to Gannu and the guys at retofitlab for this idea. Once done with marking the stock cut-off its now time to get the DIY oven ready. Swift headlight assembly is HUGE - 2.5 feet in length end to end! It needs a really big cardboard box to place it inside while we heat the headlamp. After trying various boxes, the only one that fit was an old AC compressor box which was lying around luckily. Its dimensions are 31"x21"x14". Make a hole at one end using a cutting knife or hacksaw blade and insert a cardboard tube into it (I just used some from an old tape roll) it was a snug fit but to be on the safer side I put m-seal and sealed it. 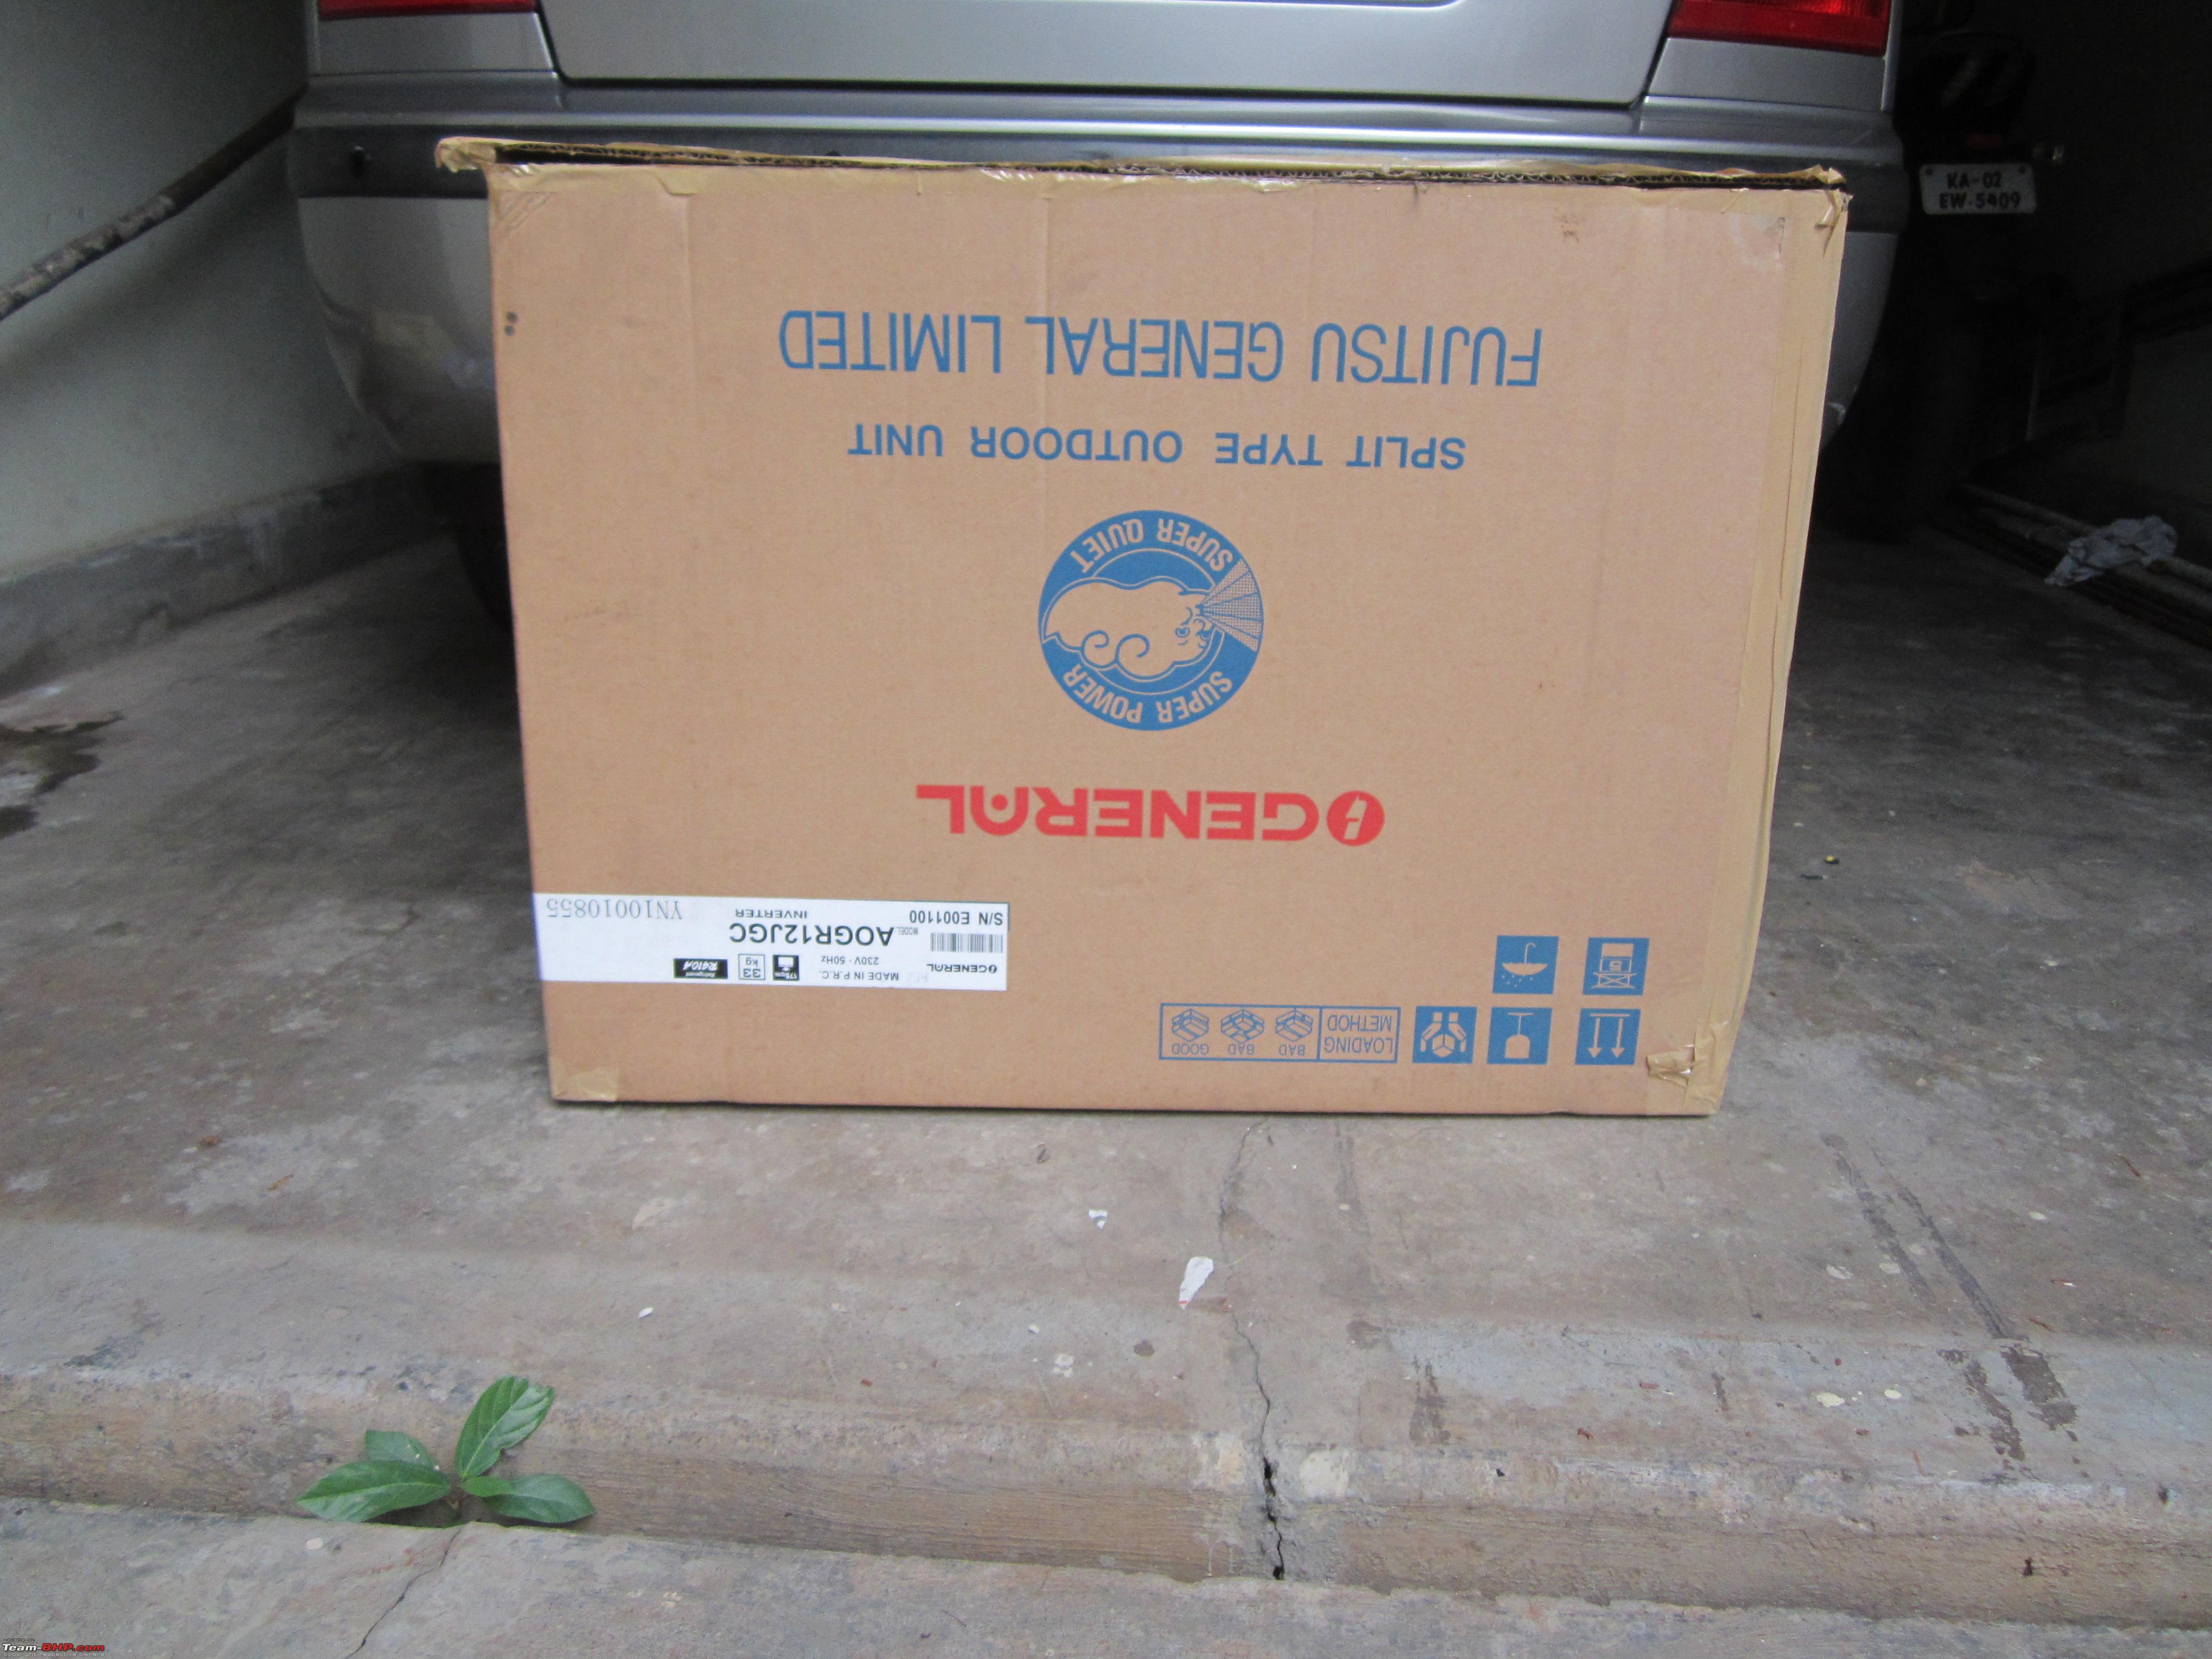  Next, find 3 (pic has one missing) small cardboard boxes, these help support the large headlight when placed within the oven.  Last edited by Gannu_1 : 22nd June 2015 at 09:32. Reason: Formatting + rotating second image. |
|
| (5)
Thanks
|
| The following 5 BHPians Thank shashank.nk for this useful post: | Gannu_1, JoseVijay, paragsachania, sidhu_hs, Viju |
|
28th May 2015, 17:52
| #5 |
| Senior - BHPian Join Date: Jan 2010 Location: Bangalore
Posts: 1,715
Thanked: 1,069 Times
| re: DIY: Maruti Suzuki Swift Bi-Xenon Projectors. Morimoto FX-R 3.0 Installation Removing Bumper and Headlights To remove the headlights, we have to remove the bumper. There's no way to remove the headlights without removing the bumper as two screws that hold headlights cannot be accessed without taking the bumper off. So to take the bumper off the car, first remove two screws at each sides of the bumper just above the front tyres. Its not a very clear pic but I hope it helps locate the screw.  Next take these four off:  then, get under the car and remove four screws under the bonnet that look like this.  At this step, you can get the bumper off the body completely, by removing a few more screws underneath and also by taking out the fog lamp connectors. I didn't do this since I had enough access to work. If you chose to not take the bumper off completely, take care not to put undue stress on the plastic fasteners at the bottom of the bumper, I placed a thick thermocol used for AC packaging under the bumper. Last edited by Gannu_1 : 22nd June 2015 at 09:33. Reason: Formatting |
|
| (5)
Thanks
|
| The following 5 BHPians Thank shashank.nk for this useful post: | Gannu_1, JoseVijay, paragsachania, sidhu_hs, Viju |
|
28th May 2015, 19:10
| #6 |
| Senior - BHPian Join Date: Jan 2010 Location: Bangalore
Posts: 1,715
Thanked: 1,069 Times
| re: DIY: Maruti Suzuki Swift Bi-Xenon Projectors. Morimoto FX-R 3.0 Installation Taking the headlights off and preparing it for lense separation To remove the headlights, we have 4 screws and 1 plastic fastener to unscrew. Unfortunately, I didn't have anyone to help click pics, so I've highlighted the areas where screws are located. Begin by taking off the screws at the sides:   Then proceed to remove two metal screws at the top and the plastic fastener:  For the plastic fastener, just insert a flat head into the tiny gap and turn it clockwise, it should pop right out. Carefully disconnect the following wires - Indicator bulb, leveler motor, parking light bulb and H4 bulb wire. Once done place your hand in this gap and give it a tug to get the headlight out.  Now place the headlight on a cardboard sheet/old rag so that you don't scratch the assembly and begin to remove the dust cap,indicator bulb,parking bulb,H4 bulb,H4 bulb retainer  For the indicator and parking bulb,rotate anticlockwise to remove them (use a plier if need be, but be gentle), H4 bulb, fastener and the small screw which holds it are not needed and can be discarded if need be (or you can use the H4 bulbs on some other car). Next pick a torx bit from the tool kit and begin to remove the screws holding assembly and clear lens together. We have 4 on the inner side:  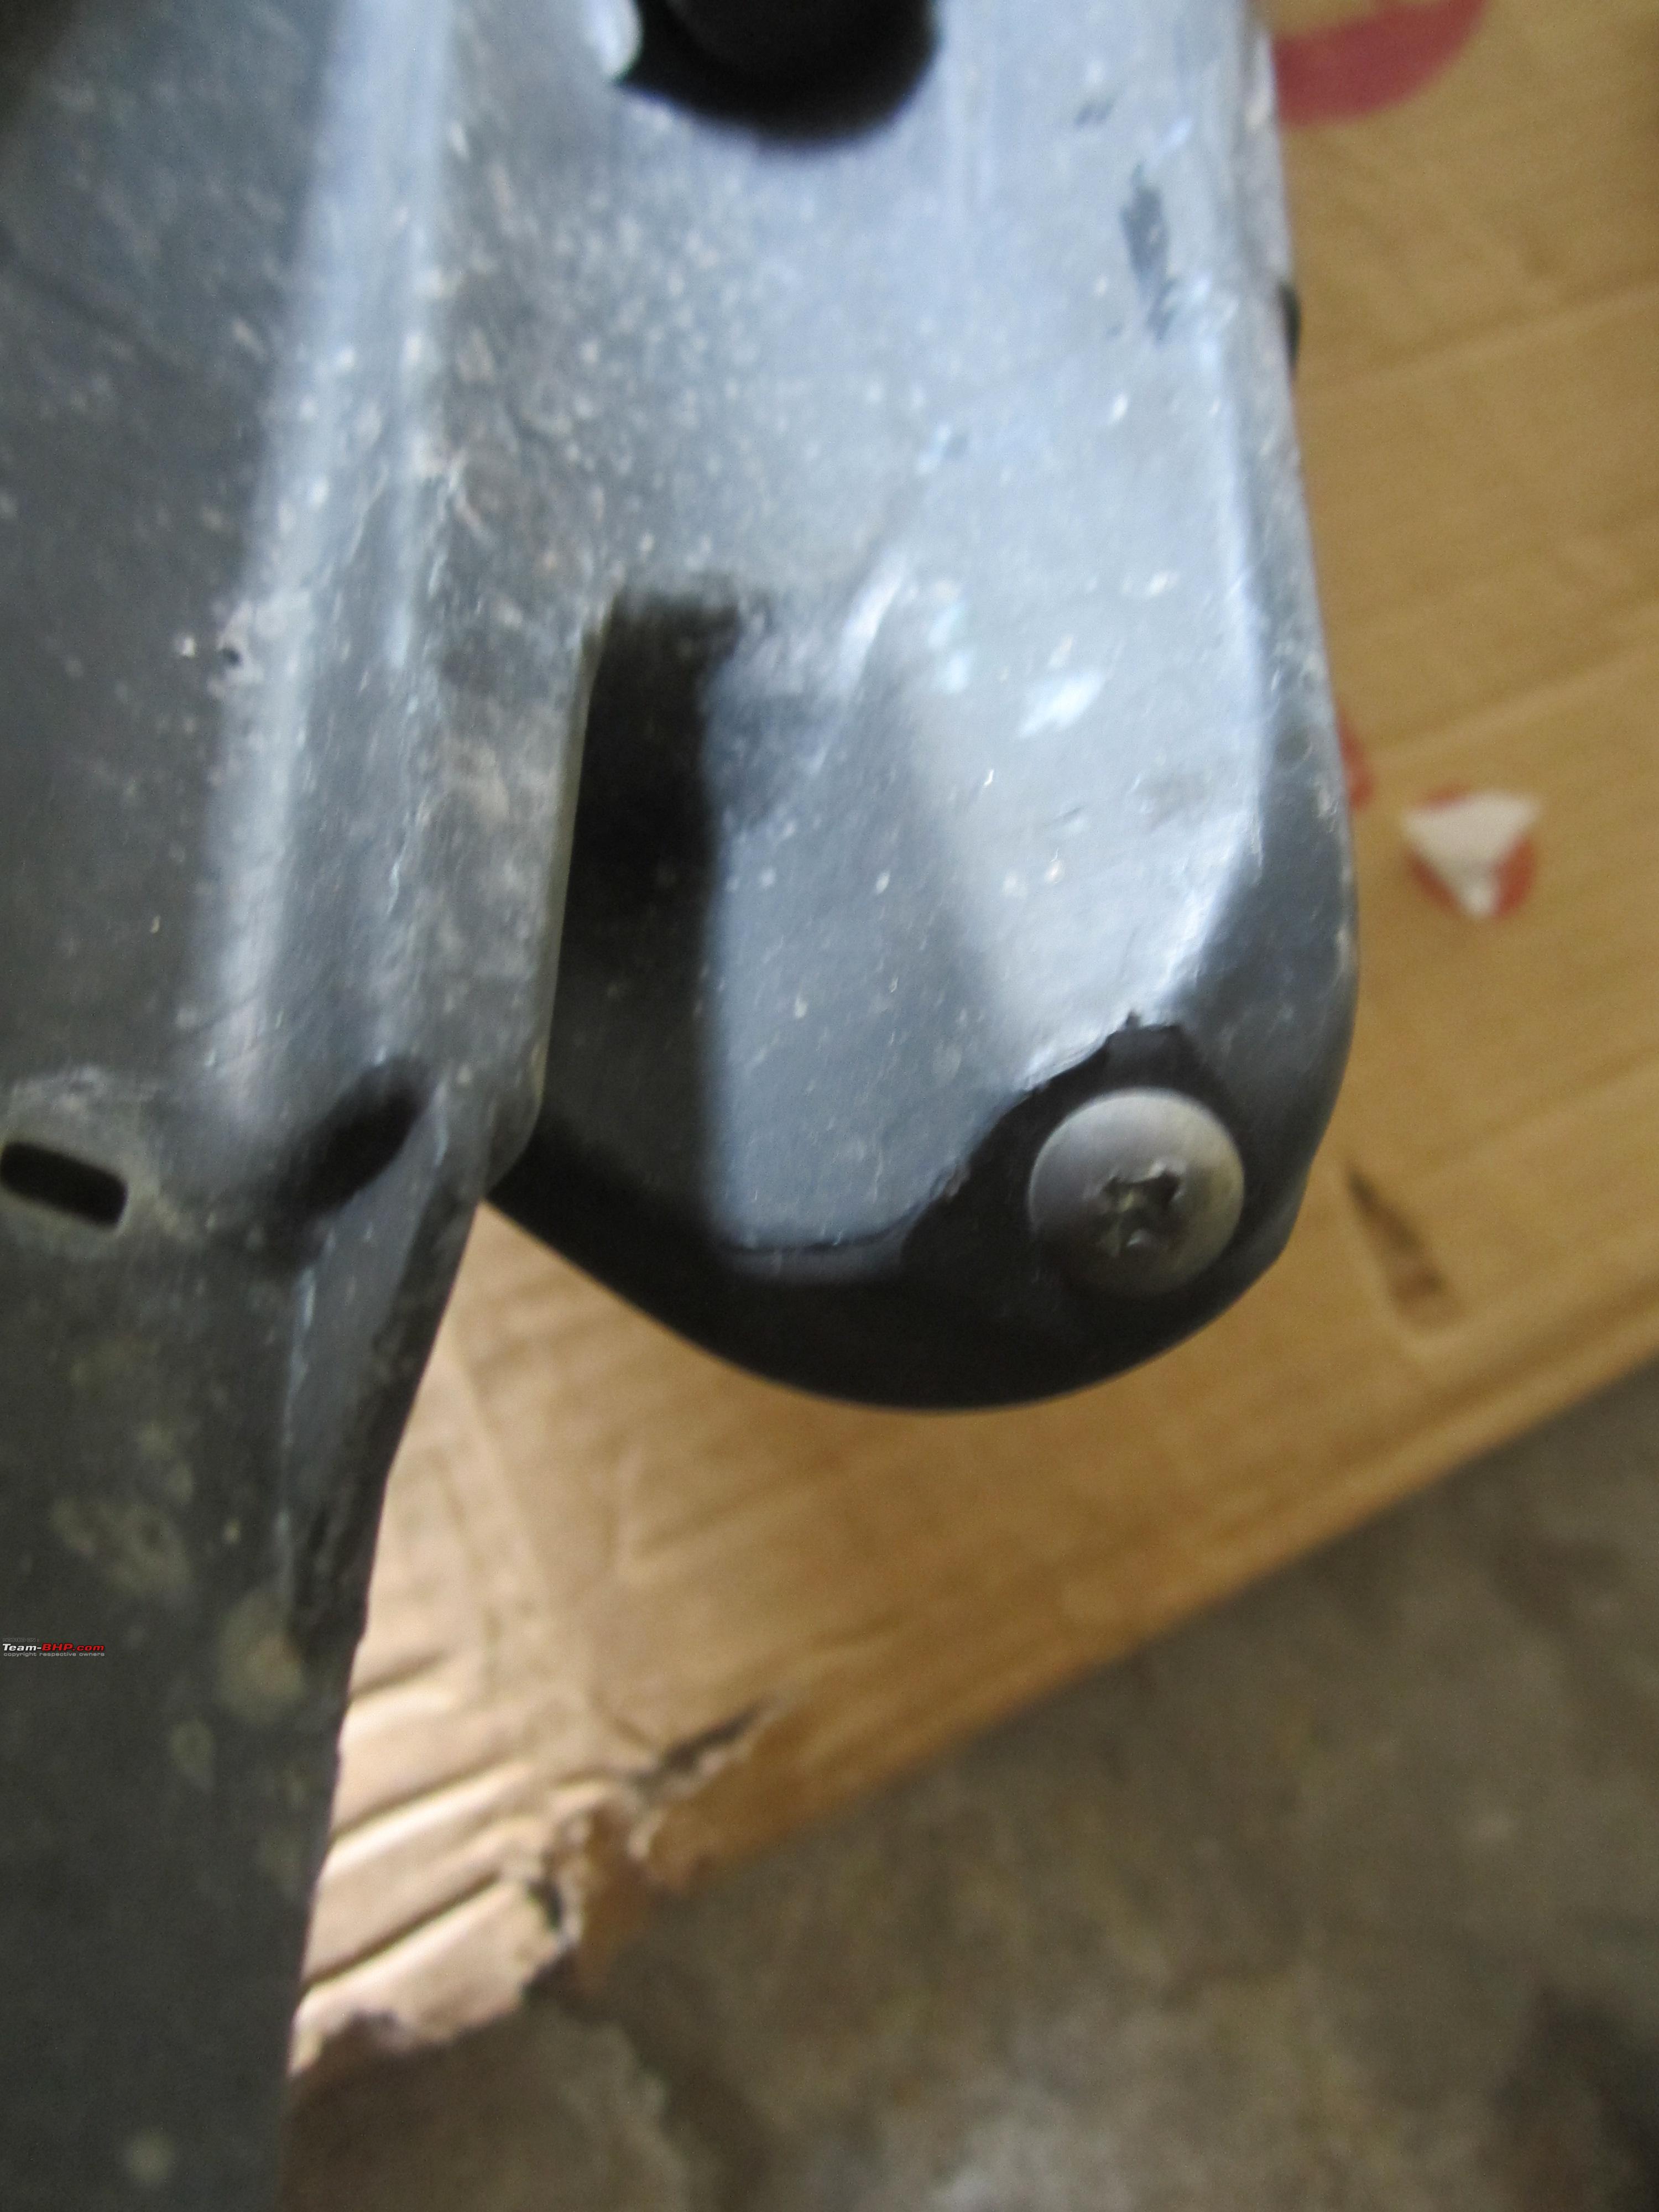 And three on the outer side:  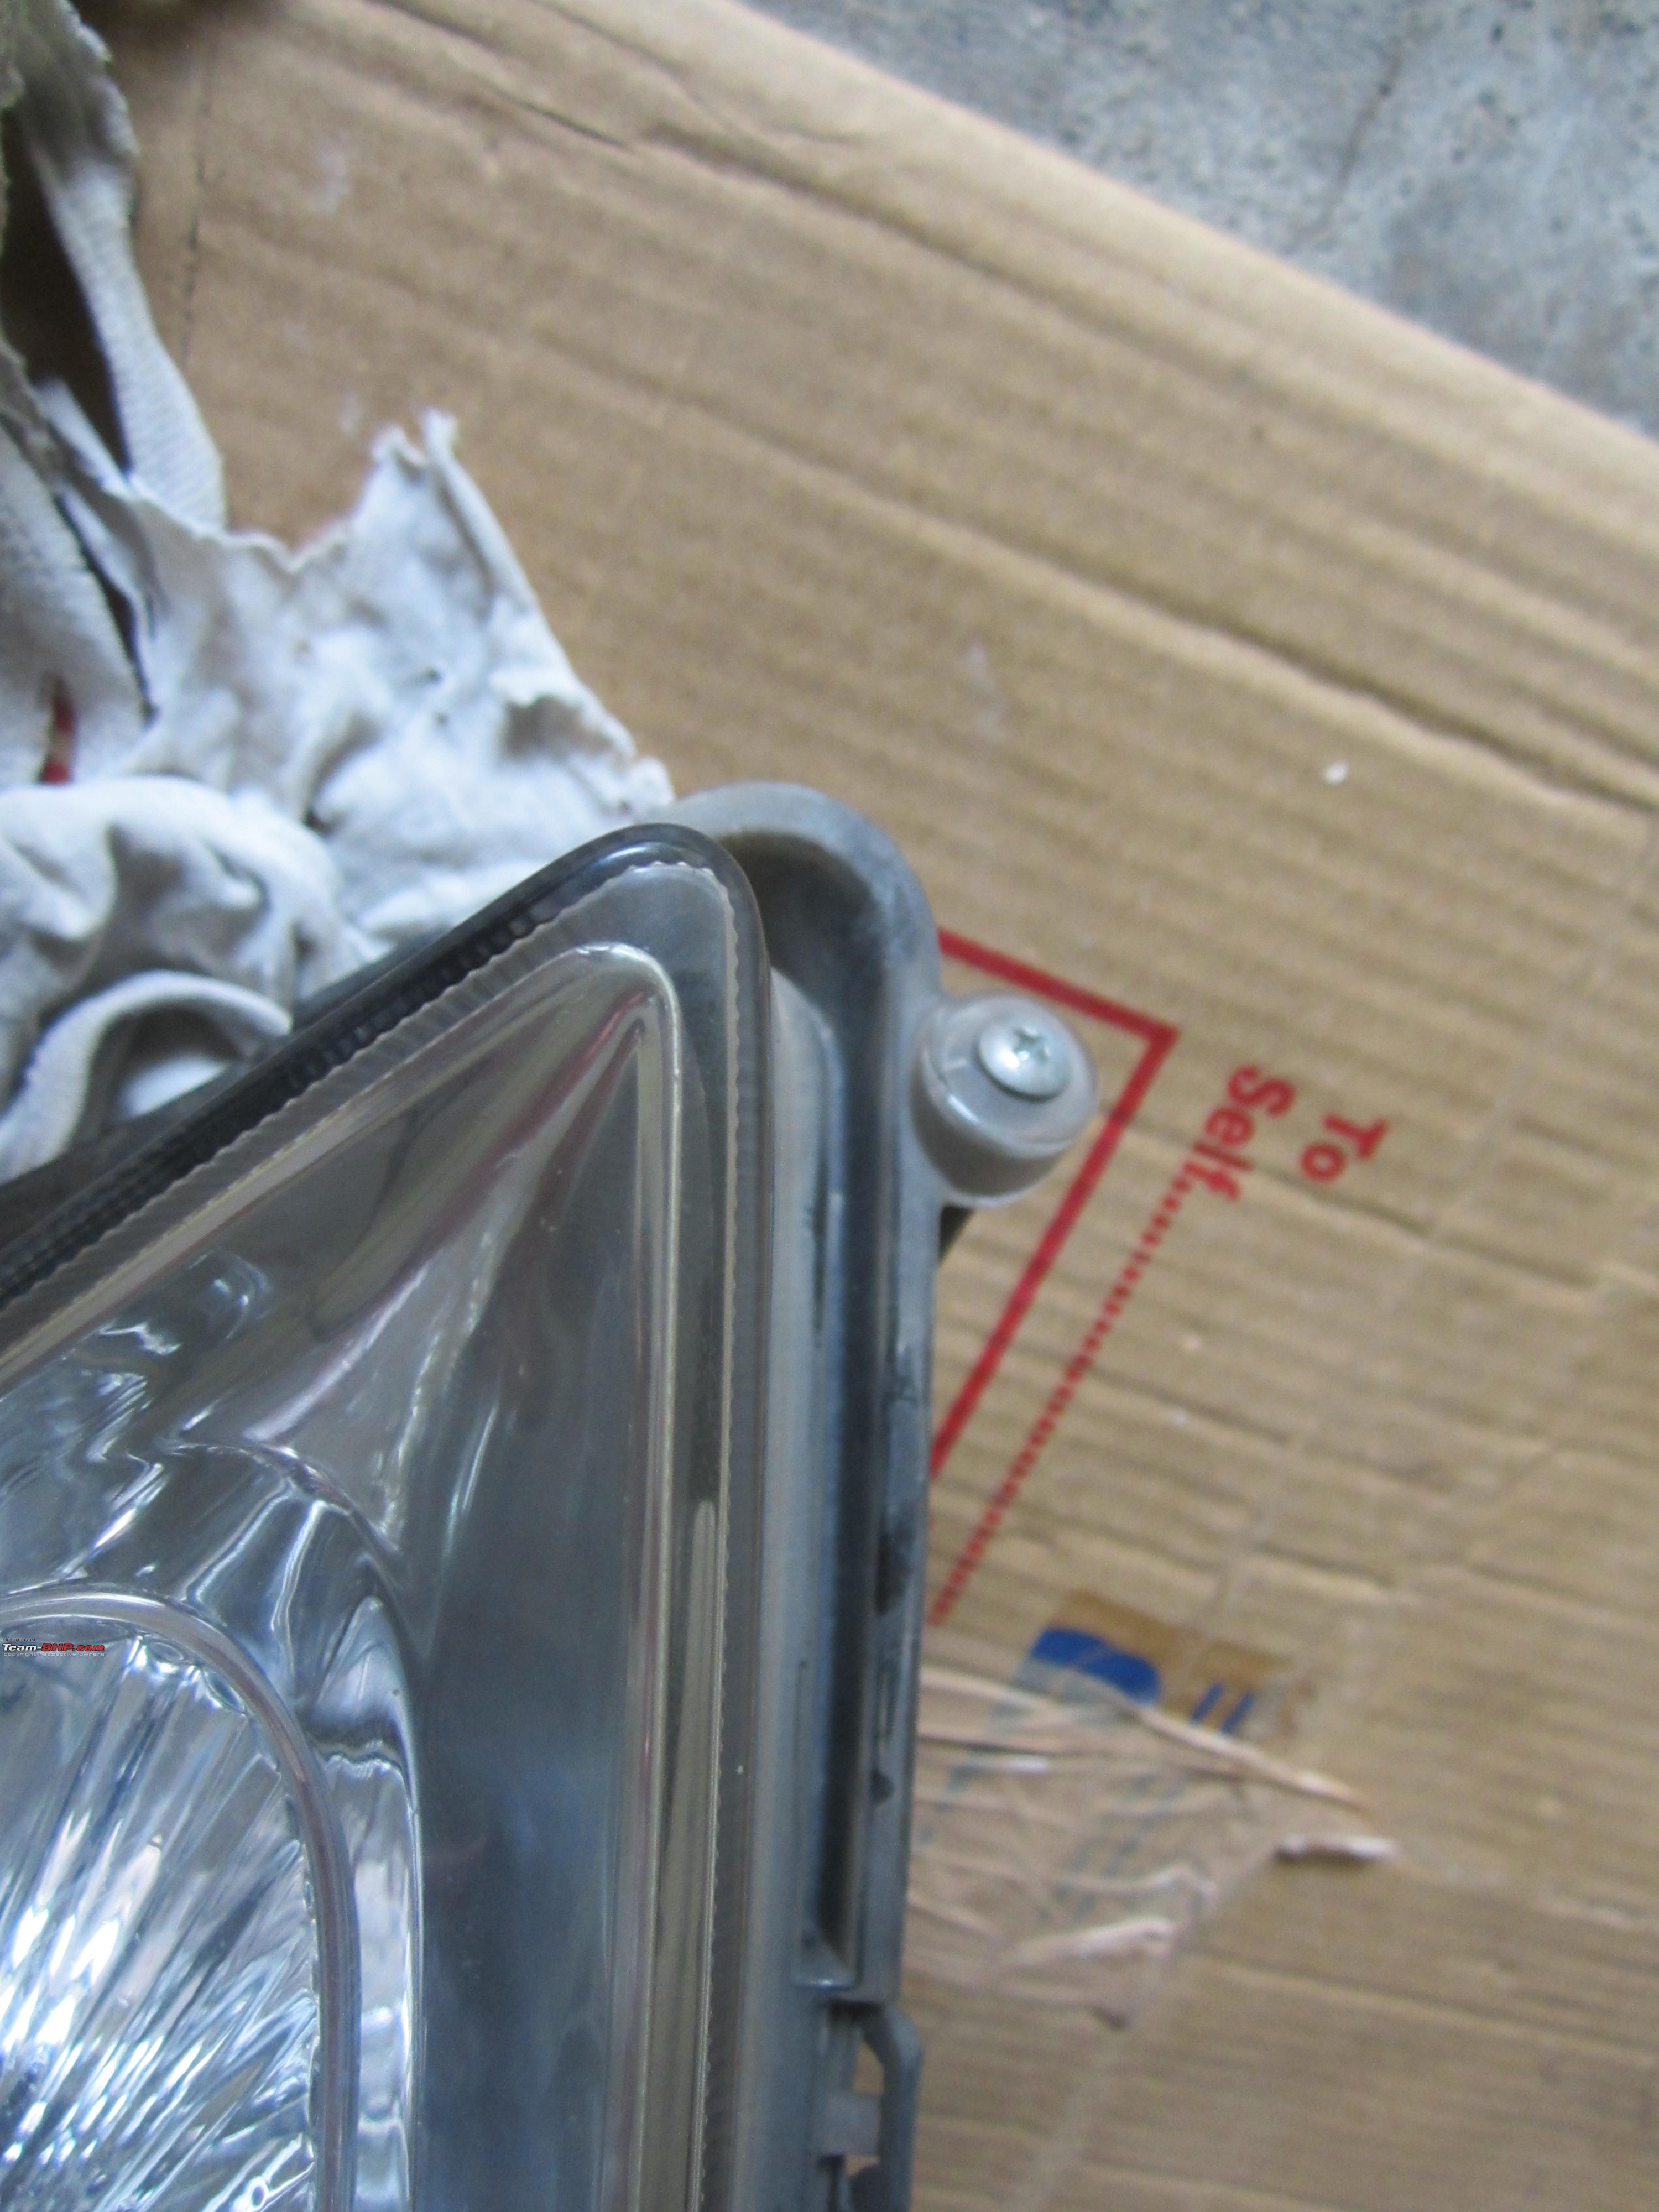 We're now ready to proceed to the next step - opening the headlights. Last edited by Gannu_1 : 22nd June 2015 at 09:35. Reason: Formatting |
|
| (6)
Thanks
|
| The following 6 BHPians Thank shashank.nk for this useful post: | Ashtoncastelino, Gannu_1, JoseVijay, paragsachania, sidhu_hs, Viju |
|
28th May 2015, 20:24
| #7 |
| Senior - BHPian Join Date: Jan 2010 Location: Bangalore
Posts: 1,715
Thanked: 1,069 Times
| re: DIY: Maruti Suzuki Swift Bi-Xenon Projectors. Morimoto FX-R 3.0 Installation Separating the Headlight Assembly & Clear Lens For me heating the assembly for 5 minutes with the heat gun set to low heat didn't work because the box was huge. I later tried heating it for 5 minutes at high heat and that yielded some results, but it wasn't enough to separate the assembly. I wasn't so sure of sticking with the oven here so decided to do as explained in this video: So I took the assembly out of the oven and went over one side at a time with heat gun in one hand and a flat head on the other. This yielded results however, some improper prying with the flat head left the channel too wide open which had to be compensated later with additional butyl glue. I've highlighted the 'safe' areas to try and pry open based on my learnings in green. I hope anyone who tries it out posts their experience here. 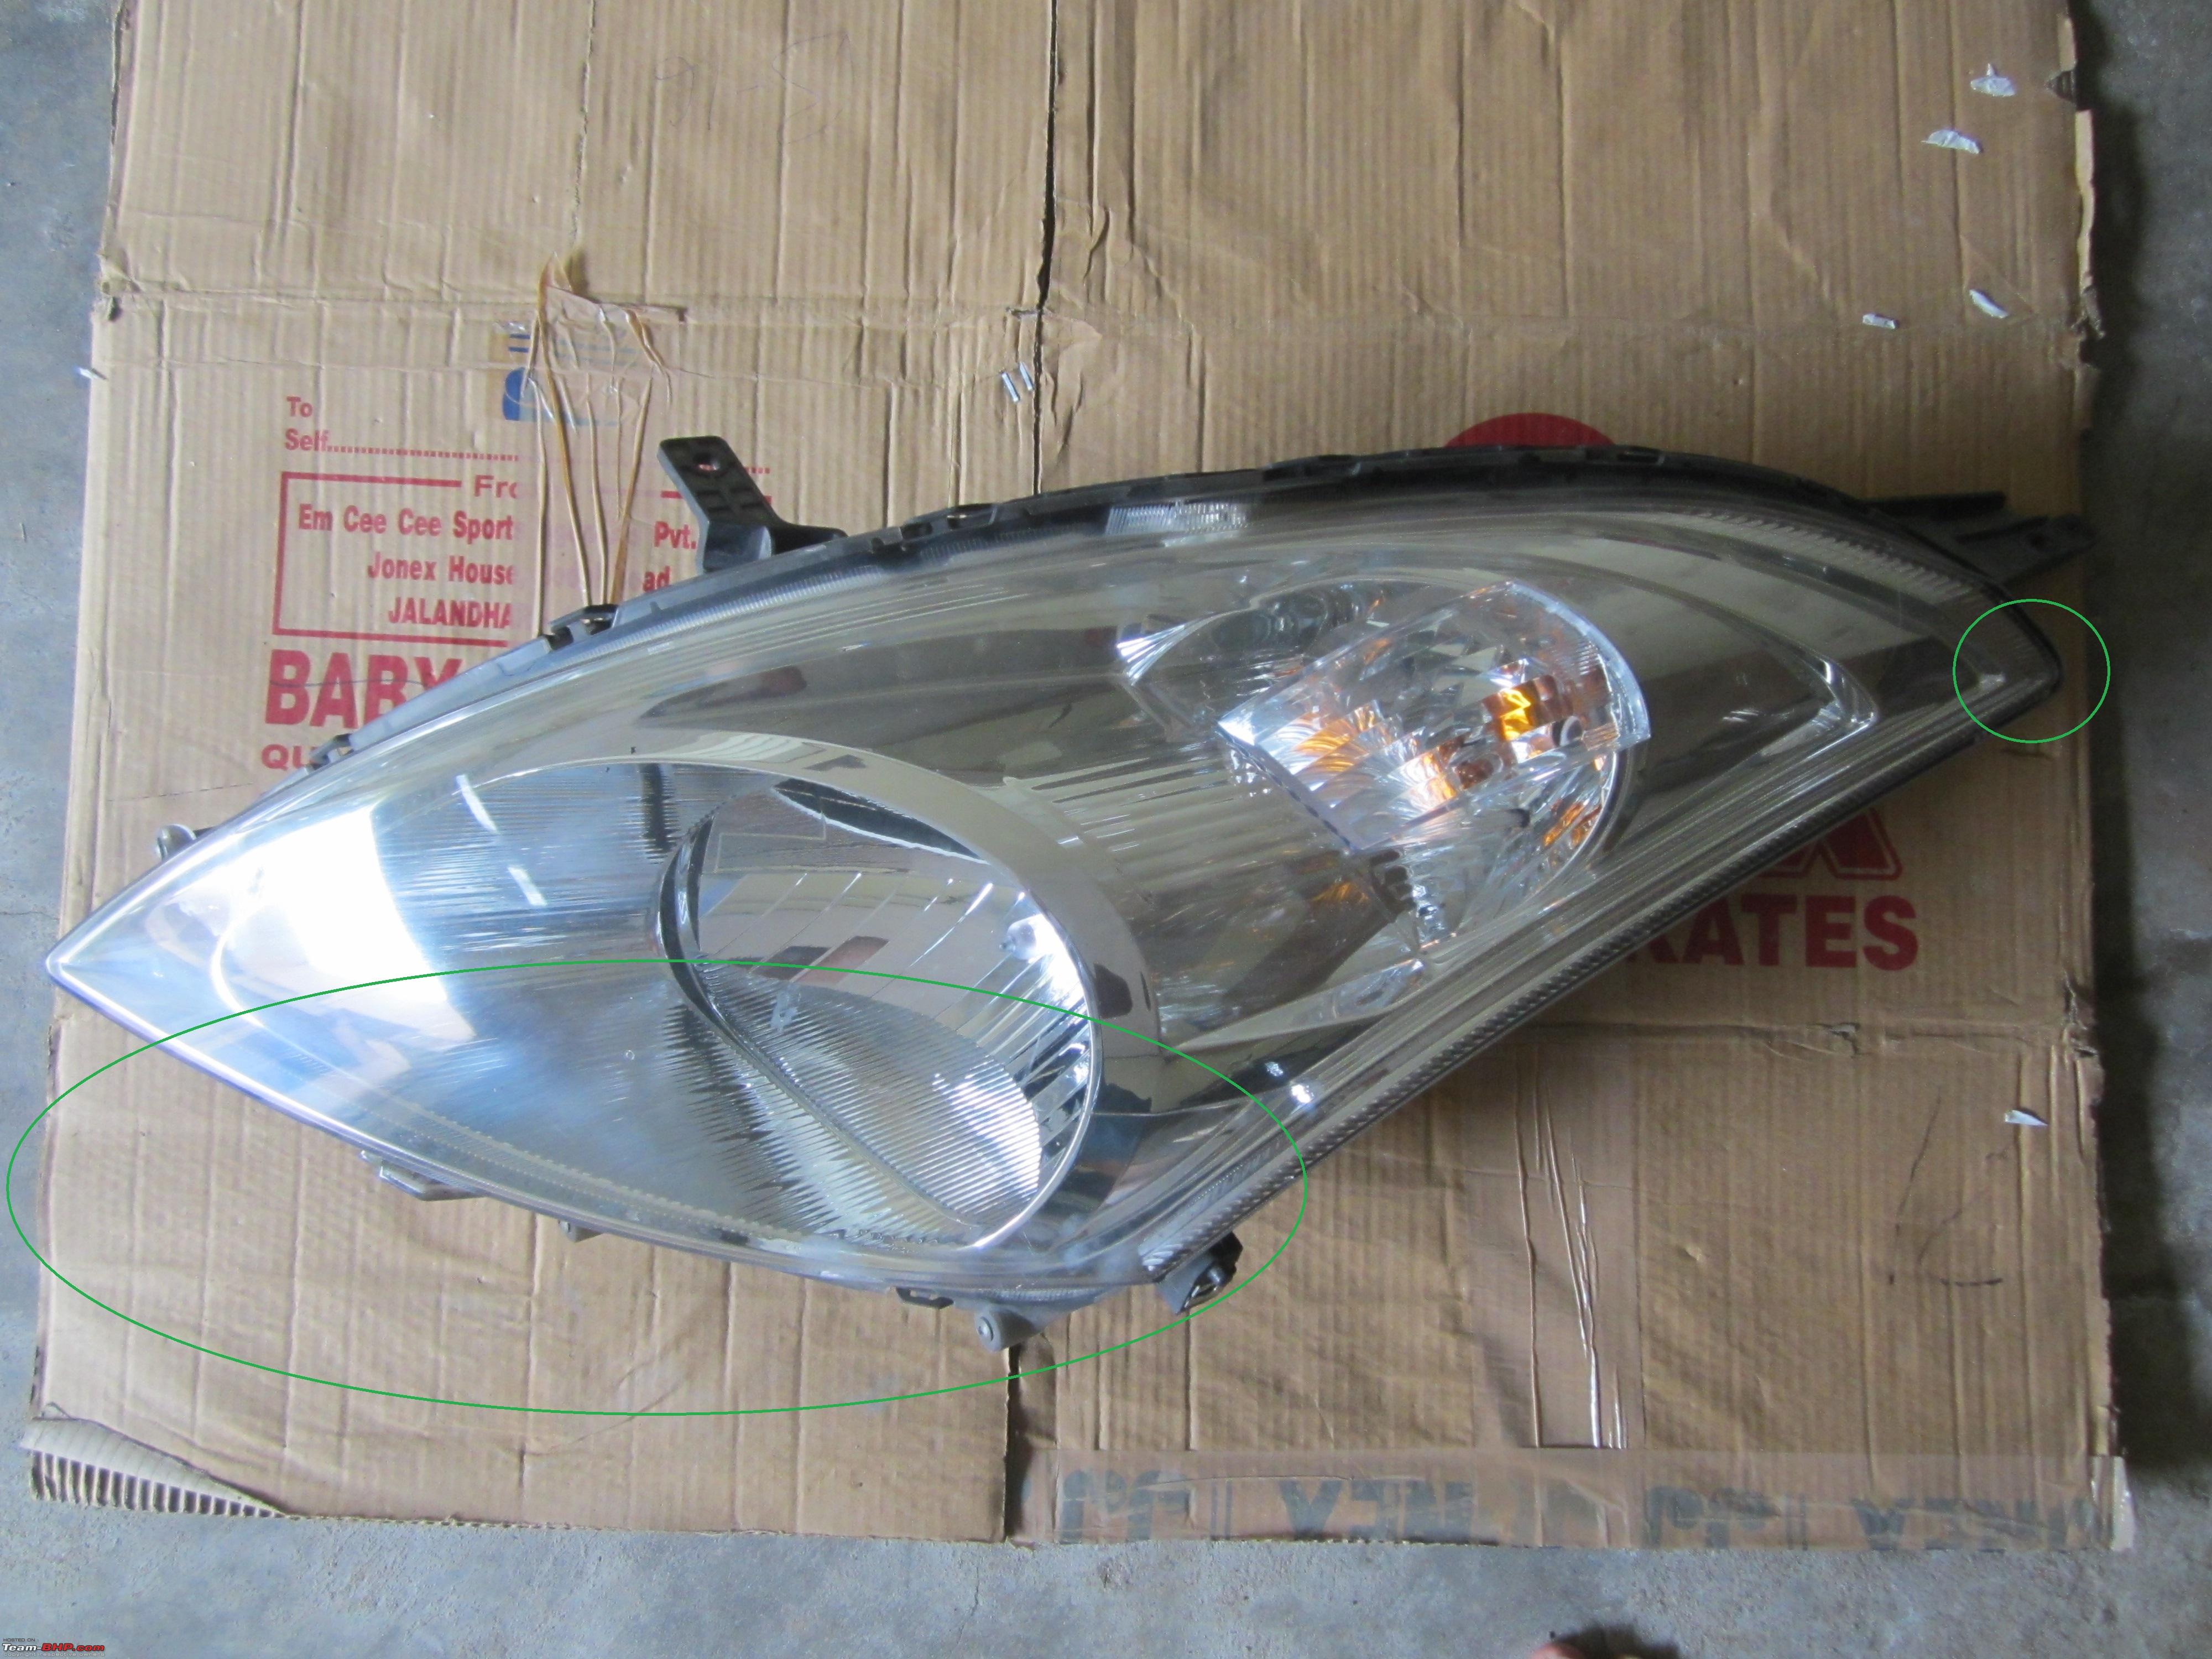 Once the assembly is separate from the clear lens, store it someplace safe. Applicable only if you're blackening the reflectors We need to separate reflector from the clear lens. So grab that torx bit again and take these three screws out.  Once done, ensure no butyl glue is coming in the way of the reflector and carefully pull it out. Now store the clear lens some place safe. Last edited by Gannu_1 : 22nd June 2015 at 09:35. Reason: Formatting |
|
| (5)
Thanks
|
| The following 5 BHPians Thank shashank.nk for this useful post: | Gannu_1, JoseVijay, paragsachania, sidhu_hs, Viju |
|
29th May 2015, 00:54
| #8 |
| Senior - BHPian Join Date: Jan 2010 Location: Bangalore
Posts: 1,715
Thanked: 1,069 Times
| re: DIY: Maruti Suzuki Swift Bi-Xenon Projectors. Morimoto FX-R 3.0 Installation Wiring Before we go into cutting the reflector to accommodate Fx-R projector, it's a good idea to finish wiring the harness, ballasts to ensure there's no connection issue when we're trying to aim the projectors. The Morimoto Moto control H4/9003 harness is what I used on my car and its very simple to wire it up. I found it much harder to find a place to bolt the ballasts and control unit safely since they get pretty hot and I didn't want them near any OEM wires or fuel lines. Moderator Gannu has come up with this brilliant diagram by adding small bits to make it more relevant for a H4 setup. So instead of writing a lot, I'll let the picture do the explaining. 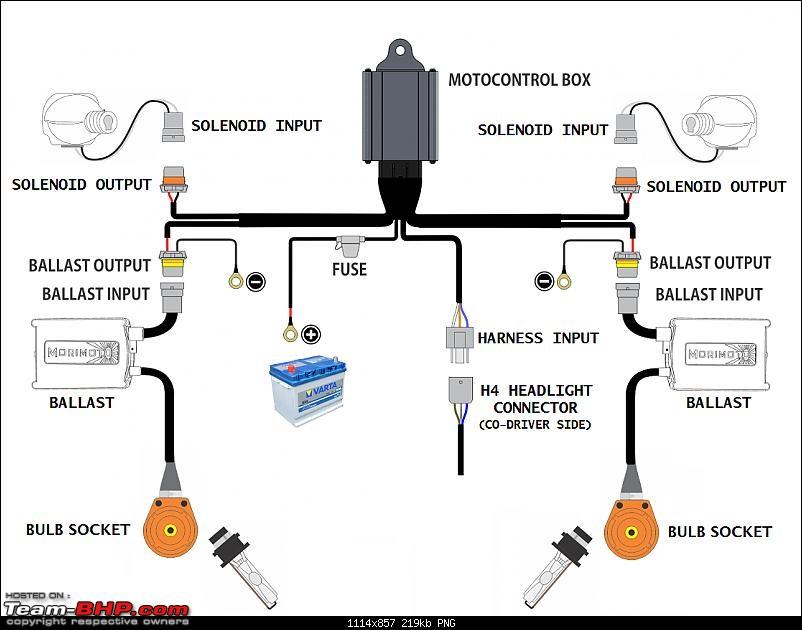 The only difference is, I used a Hylux A2088 ballast which has the igniter outside and we use AMP to D2S adapters to connect the igniter to the bulb. So plug the yellow ring end on ballast to white wire connector on the adapter and blue ring wire to yellow ring wire on adapter.   I routed the wiring through the front cross bar where the OEM horn wiring is present. Also notice the grounding points for the harness on both sides. It has a tag which reads 'Ground'. The left HL ballast and Moto Control module was placed like this:   The right HL ballast was placed on the black bar just next to the windshield washer tank like this:  Last edited by Gannu_1 : 22nd June 2015 at 09:37. Reason: Formatting. |
|
| (5)
Thanks
|
| The following 5 BHPians Thank shashank.nk for this useful post: | Gannu_1, JoseVijay, paragsachania, sidhu_hs, Viju |
|
29th May 2015, 01:38
| #9 |
| Senior - BHPian Join Date: Jan 2010 Location: Bangalore
Posts: 1,715
Thanked: 1,069 Times
| re: DIY: Maruti Suzuki Swift Bi-Xenon Projectors. Morimoto FX-R 3.0 Installation Modifying the reflector Once you separate the assembly and clear lens, the reflector which houses the H4 bulb remains attached to the assembly. This is retained by 3 screws out of which one is the range control motor. Its best to loosen all three by proceeding in an orderly manner, with equal no of turns (anti-clockwise) on each screw. It takes a while but keep at it. Once done the reflector is free to remove from the assembly.  Attachment 1376084   Once we have the reflector out we need to make a hole on the reflector to accommodate the large Fx-R projector. Start by making a rough marking,about an inch each side from the H4 bulb socket. I used an oscillating tool to cut the projector, you could use a dremel or may be a hacksaw blade also but the reflector plastic is sturdy not very easy to cut with a blade.  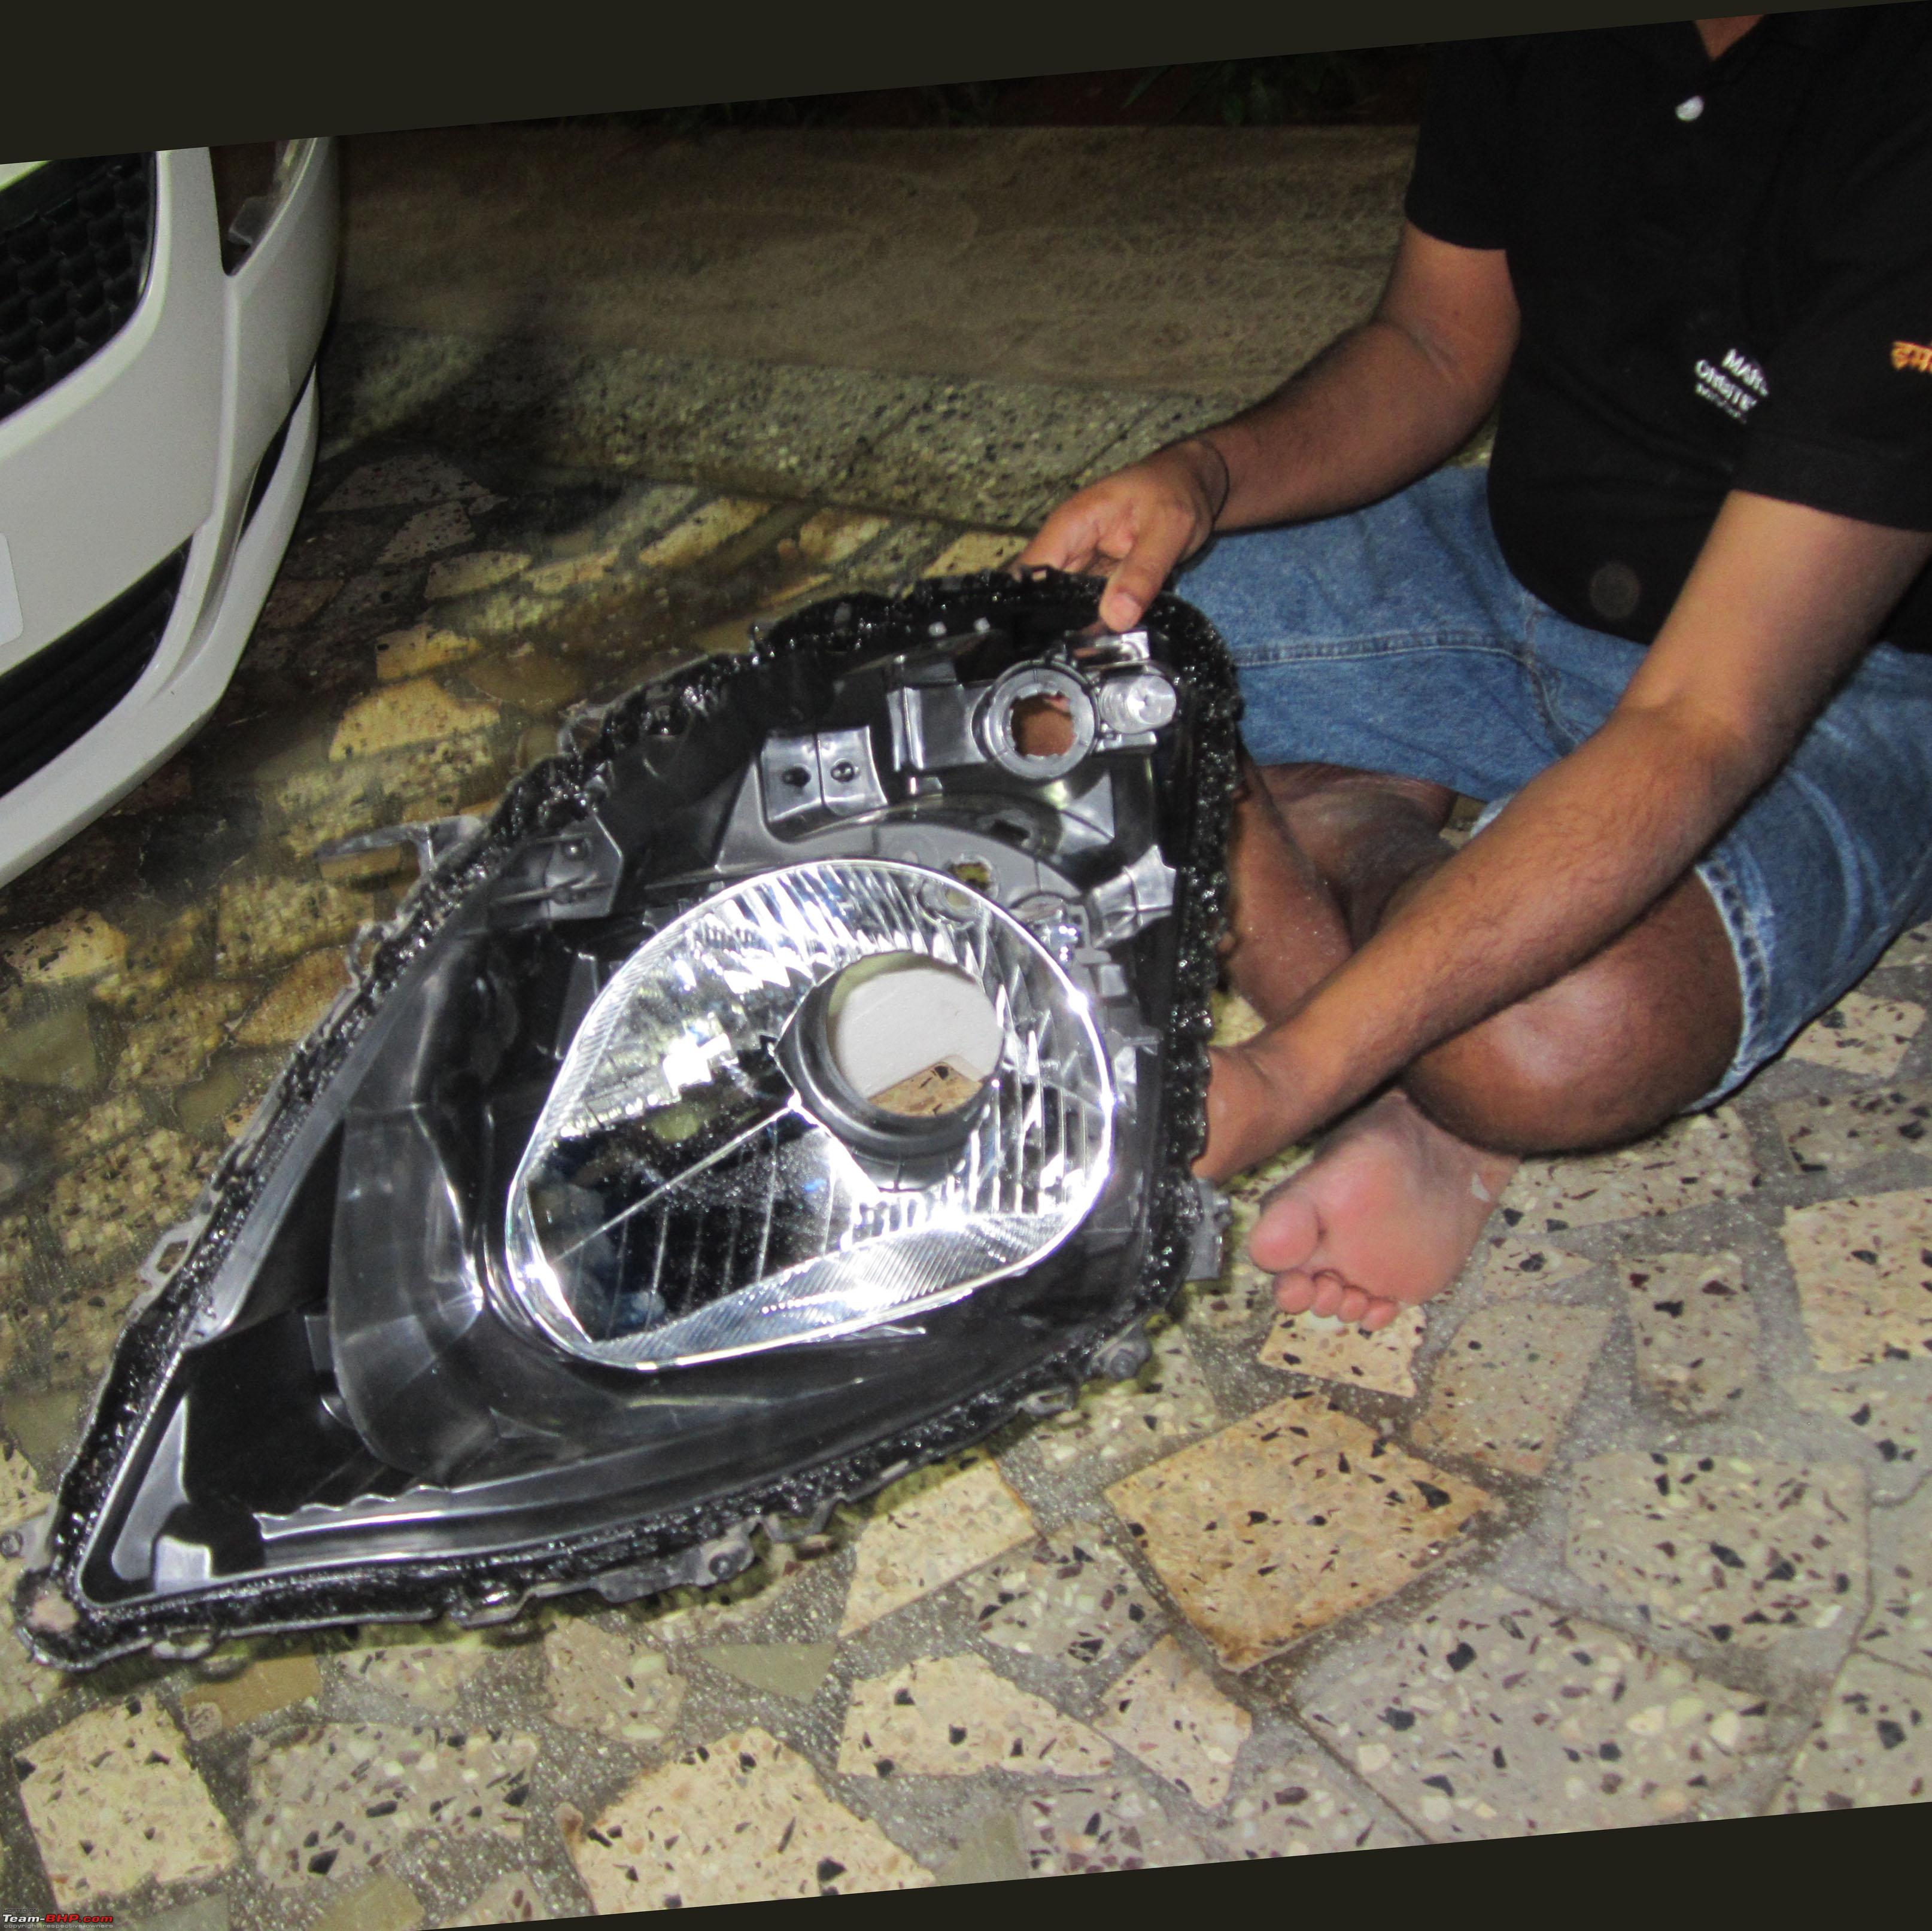   Test fit the projector, you could either cut till the solenoid motor (highlighted in red in pic) sits behind the reflector, or you could make a hole large enough only for the bulb mount (highlighted in yellow) to stick out.   I made a large hole since I preferred having the projector as close to the assembly as possible to give me good control over the beam alignment. The hole should be large enough to allow a few degrees of vertical and horizontal alignment. Last edited by Gannu_1 : 22nd June 2015 at 09:39. Reason: Formatting + inserting images in line. |
|
| (5)
Thanks
|
| The following 5 BHPians Thank shashank.nk for this useful post: | Gannu_1, JoseVijay, paragsachania, sidhu_hs, Viju |
|
30th May 2015, 00:02
| #10 |
| Senior - BHPian Join Date: Jan 2010 Location: Bangalore
Posts: 1,715
Thanked: 1,069 Times
| re: DIY: Maruti Suzuki Swift Bi-Xenon Projectors. Morimoto FX-R 3.0 Installation Mounting the projector and sealing it If you're happy with how the projector sits in the cut made, its time fit the projector, align it and seal it permanently. First, park the car exactly where you parked it when we marked the stock beam cut-off. Also ensure the headlamp leveler is set to '0'. Next, put the reflector back on the assembly by tightening the 3 adjustment screws that hold it (you could tighten them all the way or use stock adjustments). Once done, do a quick check to ensure ballasts, adapters, harness is wired right and functioning as they're supposed to. Its now time to mount the assembly (no clear lens) back on the car. Its advisable to put 4 screws (except plastic fastener) back on to ensure we're aligning the beam properly. Get the projector ready by installing the D2S bulb and plugging the solenoid wires into the connector provided so it looks like this.  Its best to have a helping hand for the next few steps. Mix up two packets of M-seal phataphat and make a bead about 0.5" in diameter. Put this bead all around the projector, taking care not to block these vents on top of the projector and also the solenoid motor at the bottom.  Wear gloves (projector gets hot after a while!) and push the projector into the reflector as far as possible and then ensure you get the beam parallel to the ground by rotating (clockwise or anti-clockwise) the projectors as needed. Focus on getting this right since no rotational adjustment is possible once M-seal sets. Its best to align the projectors exactly to the stock cut off pattern, this saves a lot of time later on as only minute adjustments will be needed when fine tuning the beam. When you're satisfied with the beam pattern on the wall, while continuing to hold the projector, ask your buddy to pack all gaps between the projector and reflector with m-seal, put more at the base of the projectors to support the projector's weight. However,only use as much is required and ensure it doesn't jut out too much from the projector bowl or the shrouds may not cover it! Hold the projector in place for about 5 mins, and then you can let go. Do keep testing once every 5 mins for the next 30 mins or so by turning the lights on to ensure the projector is held firmly by M-seal and doesn't sag due to weight. After 30 mins or so, M-seal would be hard enough and needs no monitoring. Its best to leave it overnight by when it would be rock hard! After you've left it overnight,take the reflector off the assembly and apply m-seal in the gap between projector and reflector to ensure stability and avoid any possible water ingress. I applied a little too much, you can apply only as much as is needed to seal the gap. 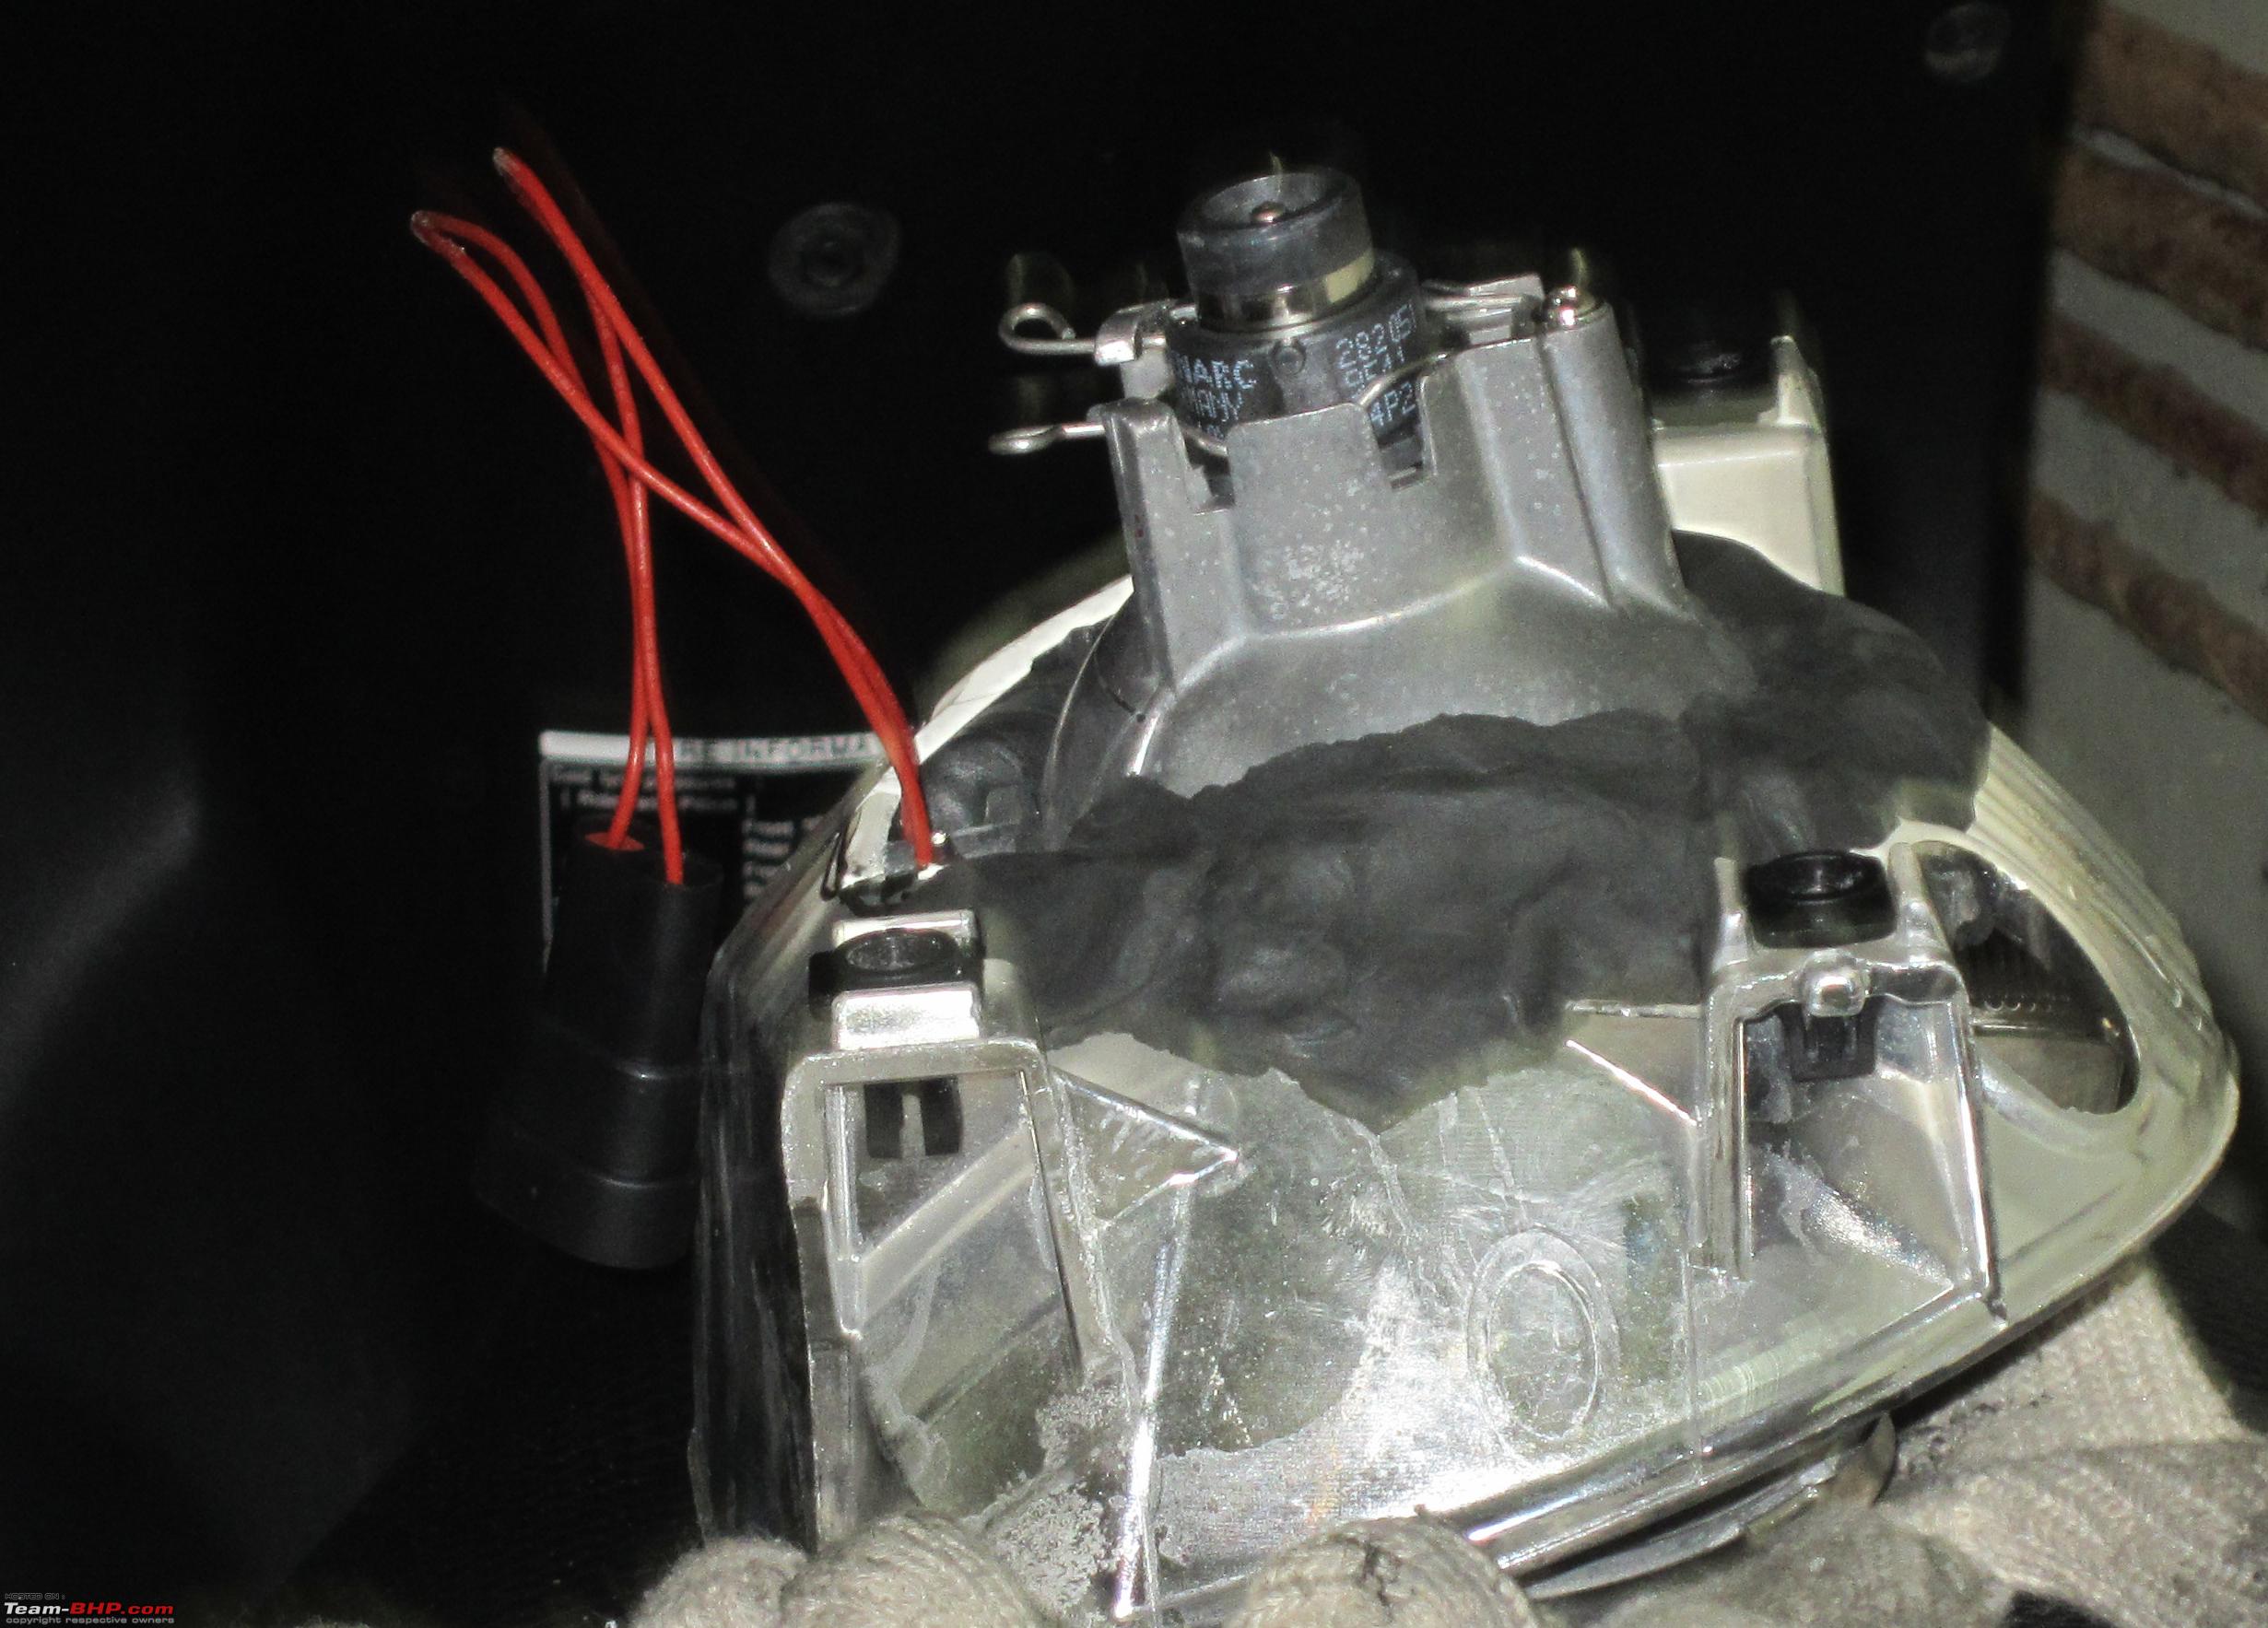 Last edited by Gannu_1 : 22nd June 2015 at 09:40. Reason: Formatting. |
|
| (5)
Thanks
|
| The following 5 BHPians Thank shashank.nk for this useful post: | Gannu_1, JoseVijay, paragsachania, sidhu_hs, Viju |
|
30th May 2015, 00:34
| #11 |
| Senior - BHPian Join Date: Jan 2010 Location: Bangalore
Posts: 1,715
Thanked: 1,069 Times
| re: DIY: Maruti Suzuki Swift Bi-Xenon Projectors. Morimoto FX-R 3.0 Installation Optional step:Blackening the headlight bezel While the M-seal hardens,we can leave the headlight bezel in a solution of: - Mr. Muscle Toilet cleaner (500 ml) - Mr. Muscle Kitchen Cleaner (500 ml) - Meguiars Super degreaser (250 ml) - Water (quantity as much needed to immerse the bezel till the indicator) Swift's headlamps are HUGE and so are the bezels, which means one has to find a large bucket and fill it with water to the brim to immerse bezel until the water level is just near the indicator bowl (immersing the bezel base first). Let it soak in the solution overnight,bring it out next morning and use a scotch bite scrub pad (works better than sandpaper) to remove all chrome off the bezel. Once done, sand the bezel using a fine sandpaper like 1500-2000 grit and its ready for painting. Repeat the same steps - soaking in concentrated solution overnight, scrub chrome off for the top portion of the headlight bezel and also for the shrouds if you decide to blacken them.  Cover the indicator bowl with masking tape and apply 2-3 coats of paint. I used Just Spray Acrylic H 5 Black shade.  Its not matte black but more ivory black shade, leaves a glossy finish but takes more than 36 hours to dry! So unless you're very particular about the shade, I suggest you use matte black which dries in 3-4 hours as I later found out. After 1 coat of paint (not an even application):  Last edited by Gannu_1 : 22nd June 2015 at 09:44. Reason: Formatting + rotating second image. |
|
| (6)
Thanks
|
| The following 6 BHPians Thank shashank.nk for this useful post: | Gannu_1, JoseVijay, paragsachania, sidhu_hs, sumantab20, Viju |
| |
|
19th June 2015, 20:49
| #12 |
| Senior - BHPian Join Date: Jan 2010 Location: Bangalore
Posts: 1,715
Thanked: 1,069 Times
| re: DIY: Maruti Suzuki Swift Bi-Xenon Projectors. Morimoto FX-R 3.0 Installation Putting it all back together Its time to seal the headlights and mount them back on the car. So first, start off by cleaning the channel and getting rid of any OEM glue. Alternatively you can just re-use the OEM glue and add glue as required but I chose to remove it and add fresh glue since I had a huge roll on hand and its cheap insurance to ensure there's no water seepage. You'll need a nose plier, some coconut or any other oil and a heat gun. Heat the channel to soften the glue, dip the plier in oil and pull out OEM glue. Repeat this till the entire assembly is done. This is how the channel looked after it was cleaned up:  Clean the insides i.e. near the indicator bulb, reflector and other parts well so that nothing looks dirt once sealed up. I also polished the clear lens as mine was hazed a little. I used gloss enhancing polish and it removed all small scratches/marring etc well and left a clear finish. Once done, its time to now mount the bezel onto the clear lens by slotting it into place and also fastening the 3 screws that hold it together.  Apply the Morimoto rubber inside the channel to cover the entire headlight. The bead on the roll is too thick to go into the channel, so stretch it out and only apply as much as needed. I used a heat gun to soften the glue before I put the clear lens on. If the clear lens doesn't sit properly, use a pump plier to push it in. Be careful not to use excessive force or you may scratch the clear lens. Once the clear lens sits, fasten the screws that hold it together (7 in all). While the glue hardens,you can fit the indicator bulb and parking bulb. The assembly is now almost ready to go on the car. However, the D2S adapter is huge and obstructs the dust cap from fitting properly. I did exactly as Gannu had done and mounted a PVC pipe 3.5" in diameter and 4" in length on the assembly using silicon and used the stock dust cap at the other end. A few pressure washes and some driving in rains, its been watertight so far. Last edited by Gannu_1 : 22nd June 2015 at 09:46. Reason: Formatting. |
|
| (5)
Thanks
|
| The following 5 BHPians Thank shashank.nk for this useful post: | Gannu_1, kutlee, paragsachania, sidhu_hs, Viju |
|
20th June 2015, 00:24
| #13 |
| Senior - BHPian Join Date: Jan 2010 Location: Bangalore
Posts: 1,715
Thanked: 1,069 Times
| re: DIY: Maruti Suzuki Swift Bi-Xenon Projectors. Morimoto FX-R 3.0 Installation Post retrofit alignment: This is a very very important step, probably right after getting the rotational alignment right. If you don't do this right you'll end up being unhappy with the light output. HID bulbs pump in a lot more lumens when compared to halogen bulbs so its very important we use that responsibly. A pair of improperly aligned lights can be dangerous, ineffective and also illegal. Once the headlight is sealed and is ready to go onto the car, its a good idea to just slot the headlight into its place (without any screws) and align the beam as required. This is how the beam looked when the headlight leveler was set to position '2' right after mounting the lights without screws, sorry for the out of focus pic  As you can see it was way too high and would have resulted in unnecessary glare to oncoming traffic and wouldn't have illuminated the road ahead either. So park the car 25 feet away (preferably in same position when we took halogen beam cut-off) from a wall and start by tightening/loosening the adjustment screws at the back of the assembly.  The top screws mainly help with horizontal alignment and the headlight leveler motor helps with the vertical alignment. Horizontal Alignment: As a thumb rule, the cut off of both projectors shouldn't be wider than the car. I measured the distance between both bulbs (taking centre of projector as reference) and its around ~4.5 feet in width 52.5" to be precise. First I ensured the RH cut-off is perfectly straight with not even a slight deviation to the left. Its important to ensure its staright so we have adequate illumination on the right hand side too. I'd initially set it slightly to the left and wasn't happy with the illumination, so went back to setting it dead straight. Then, its time to get the LH cut-off as close to the RH as possible. After some adjustments, the distance between the cut-offs was 50" which looked good on the road compared to keeping them at 54' which caused scattering. Vertical Alignment: Measure the distance from the ground to centre of projector, in case of Swift its 27.5". Walk upto a wall 25 feet away and mark 25.5" from the ground. This is the maximum height the projectors should get to, on low beam, with the leveler set to '0'. What we're doing here is, at 25 feet there's a 2 inch drop in height, so with the leveler set to '0' the throw is upto 312.5 feet i.e. 2 inch drop for every 25 feet (25/2*25). I found this to be adequate, though as per ECE guidelines we should have a 3 inch drop every 25 feet thereby having a maximum throw of 208 feet. Those interested in gaining more knowledge on aligning headlights may refer this link. Some WIP pictures:     I'm not very happy with the horizontal alignment but have left it for now, will have to open it up sometime and fine tune it. Last edited by Gannu_1 : 22nd June 2015 at 09:49. Reason: Formatting. |
|
| (8)
Thanks
|
| The following 8 BHPians Thank shashank.nk for this useful post: | Akib Khan, Gannu_1, graaja, JoseVijay, paragsachania, sidhu_hs, Viju, vredesbyrd |
|
21st June 2015, 17:42
| #14 |
| Senior - BHPian Join Date: Jan 2010 Location: Bangalore
Posts: 1,715
Thanked: 1,069 Times
| re: DIY: Maruti Suzuki Swift Bi-Xenon Projectors. Morimoto FX-R 3.0 Installation How's the light on-road? I drove close to 2000 kms post installation (which is why this thread took a month) to get a good idea of how the lights are. It included four-laned roads,single/dual-carriageways and some ghat driving too. I drove some distance within the city and in rains too. Whatever be the road/weather conditions,the illumination from the projectors is more than adequate. When incoming traffic doesn't dip their beams too,the RHD pattern helps see the left side very clearly as the beam doesn't fade away even if oncoming vehicles are using very powerful halogens. In addition,the beam width of Fx-R projectors ensures you see any hazard on the periphery clearly and well in advance. It takes a lot of stress out of night driving since there's no visibility issues and you can easily maintain speeds ranging from 80-120 if its safe to do so. I set the leveler in position 3 or 4 so I don't blind anybody on the road. Almost no one flashed their lights within city asking me to switchover to low beam and even on the highways (i.e single-carriageways) nobody seems to be glared by these lights. I rarely use high beams these days since low beam illuminated everything perfectly. The only thing that remains to be tested is how they fare in challenging conditions like fog and night driving with rains on single-carriageways. Note of thanks: This DIY wouldn't have been possible with help from the following: manjubp - Thank you for joining me and helping me out with everything-from cutting reflectors,wiring to putting it all back. This DIY wouldn't have been possible without your help. Shyam & Rajat - With vast experience in retrofitting projectors, your inputs helped me fine tune and get the best from my DIY. I would've been very unhappy if I'd left it like that. You've also tempted me to consider upgrading to better OEM projectors Gannu - Your DIY thread was like a bible. I lost count of how many times I've read it. It made so many of my steps easy since you'd already found a fix to most problems that may arise when retrofitting projectors. rbp - Thanks for the OEM bulbs suggestion. If not for you I would've wasted money on aftermarket stuff only to regret later. Last edited by Gannu_1 : 22nd June 2015 at 09:47. Reason: Formatting. |
|
| (11)
Thanks
|
| The following 11 BHPians Thank shashank.nk for this useful post: | Ashtoncastelino, Divya Sharan, Gannu_1, graaja, JoseVijay, paragsachania, rbp, shyamhegde, sidhu_hs, sudeepg, Viju |
|
22nd June 2015, 09:55
| #15 |
| Team-BHP Support  Join Date: Apr 2013 Location: Madras
Posts: 7,339
Thanked: 20,688 Times
| Re: DIY: Maruti Suzuki Swift Bi-Xenon Projectors. Morimoto FX-R 3.0 Installation Thread moved out from the Assembly Line section. Awesome work Shashank! And the results speak for themselves. The horizontal alignment seems a wee bit off but you can always correct it at your leisure. You have logged all the steps painstakingly. Thank you so much! Rating the thread a well deserved 5 stars.  |
|
| (2)
Thanks
|
| The following 2 BHPians Thank Gannu_1 for this useful post: | Ashtoncastelino, shashank.nk |
|