Team-BHP
(
https://www.team-bhp.com/forum/)
This thread is a quick product review and process for 'dipping your wheels'! While in no way comprehensive, maybe the stuff I learned along the way would help you if you are planning a similar enterprise. I had been looking for a plastidip alternative in India for the last couple of years now. The change in a vehicle's character was quite astounding with just a change in the color of the wheels. Plus, the ability to go back to stock so easily was just too great to pass up.
I had done quite a bit of research couple of years ago but then life caught up and it got shelved momentarily. I had even gotten in touch with Cosmotech in Mumbai--the Plastidip dealer--who offered the product in limited quantities, however, I could never finalize the purchase, either I got caught up with something else or em...life got in the way! Finally, about 2 months ago, I found a similar rubberised paint from Rustoleum on Amazon and being the online shopping fiend that I am, I ordered about 6 cans of it. I was not sure if the product was as good as Plastidip or the others but hey I'm a fan of online shopping so I ordered it!!
So the paint arrived, all 6 cans of it, and it sat around. And then it sat around some more. And then some more...I am hoping someone can relate! Finally my wife got tired of seeing it collect dust, and being artistically inclined herself, decided to boot my bum. So I started re-learning and refreshing my information about "dipping your wheels" and the kind. I had already decided that it was going to be only the wheels for now. And maybe some other artifacts...Hehe!!
So the information below details everything I went through to 'dip my wheels'. Funny phrase that, but oh well, we've got to move with the times. I know I'm rambling but bear with me and I promise a surprise at the end. You can complete the entire process in about 6-8 hours if you have 'everything' but if you are anything like me, it'll prolly take you 2 days with actual hours spread out between them. We aren't sacrificing cold beverages on a hot day and consequent breaks, eh!
*Note that the Amazon links are for indicative products. Everyone will usually have all this stuff around the house or will be able to get it from stores locally. But, if there is someone truly as lazy as me, I've saved you the effort, buddy! :)
There are mainly 2 ways you can do this.
Paint the Alloys on the Vehicle:
This is the easier method. You can paint the wheels on the car. As long as you mask the interior components well, there is absolutely no reason to not go down this route. However, this will mean that the painting process is subject to environmental factors of dust, wind, people and other distractions.
Or
Paint Each Alloy after Removal from the Vehicle
This is the more painful method and I ain't Fonzie--no muscles, no tight shirt! However, this method allows you to remove each wheel and paint it in a relatively quieter place. But, and this can a big one, this involves removing each wheel, moving it to your painting area and then fitting it back. And that's the tip of the iceberg. let me explain.
As may be evident, I chose the latter approach. I live in a high-rise gated society. I have a single parking for this vehicle with scant space on either side. However, I also live in the penthouse of the building with access to my own Terrace and Balconies. These provided far more space and peace of mind to be able to complete this without someone asking me every 10 minutes what I was up to!! But, it also meant that I had to carry up five ruddy 30 kilo tyres, up 6 flights by lift, and then another 2 on my back!! Bloody bleeding painful!! And I chose to do 2 tyres at a time!!
Now the smarter ones among us would be hopping around with 'Whaaa! You got one jack, how did you lift 2 wheels in the air?'. Justifiable question, this. Painful, but justifiable. So, the process I went with is: I jacked up one wheel, removed it, replaced it with the spare, lowered it, removed the jack, moved to the next wheel, jacked it up, removed the wheel and...I had 2 wheels to paint. I went with both the front tyres first and then the back tyres but I suppose you can do this in different configurations, depending on your vehicle and jack.
I could have asked my FNG for a couple of lift stands but being me, I was just too lazy to get about it. I would seriously recommend using this option if you can.
So after I had trudged those last 2 flights of stairs, I finally got down to cleaning. Boy let me tell you, it takes a lot to scrub off all the gunk thats been accumulated.
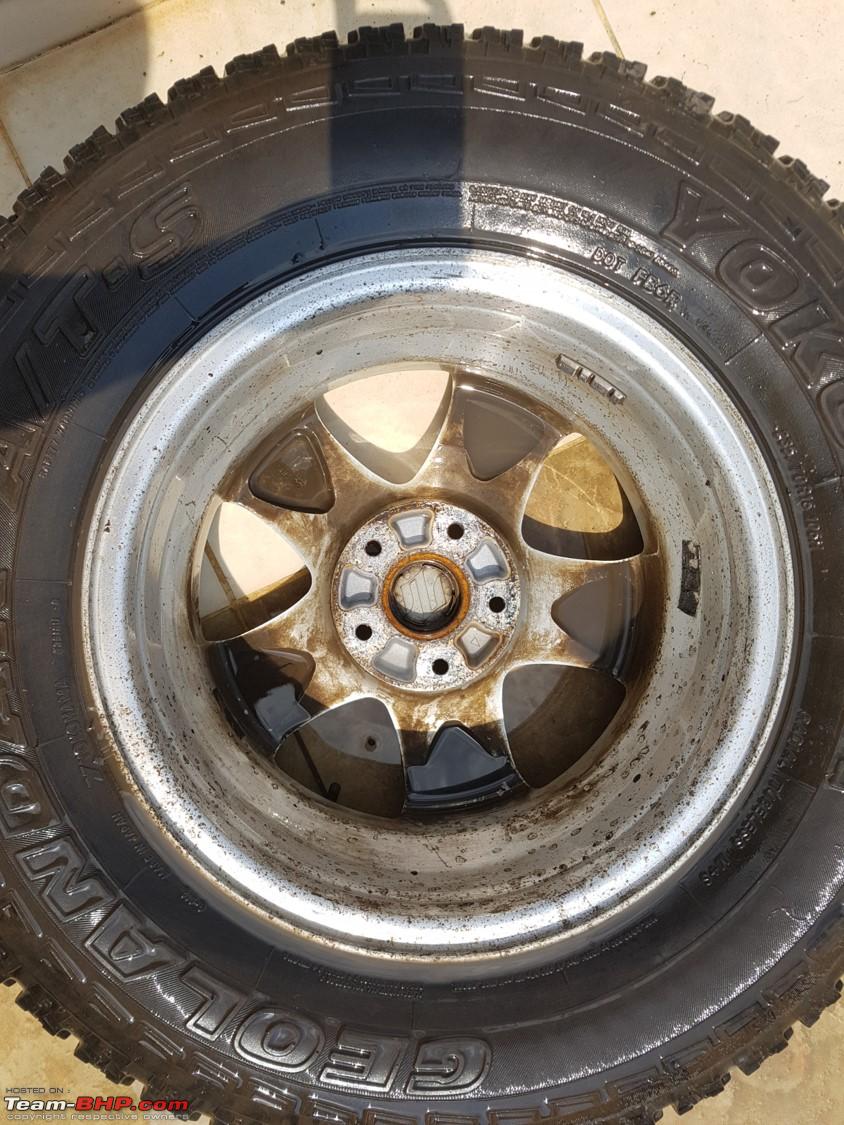
Here is an interesting picture. This vehicle was pressured washed and properly scrubbed One week ago.

This is after the third wash. Notice 2 scrubbers!! Alright, alright, thats the missus scrubbing away. I did the tyres and she did the alloys..Happy!! Grumble, Mumble...

And another one, of the inside. Again, this is after a significant amount of scrubbing. Unless you plan on painting the inside, there could be no reason to clean it. But, since it was removed, we decided to just clean it all. Do note that there is and will be a lot of dirt on the inside of wheel, no matter how many pressure washes it's gone through.

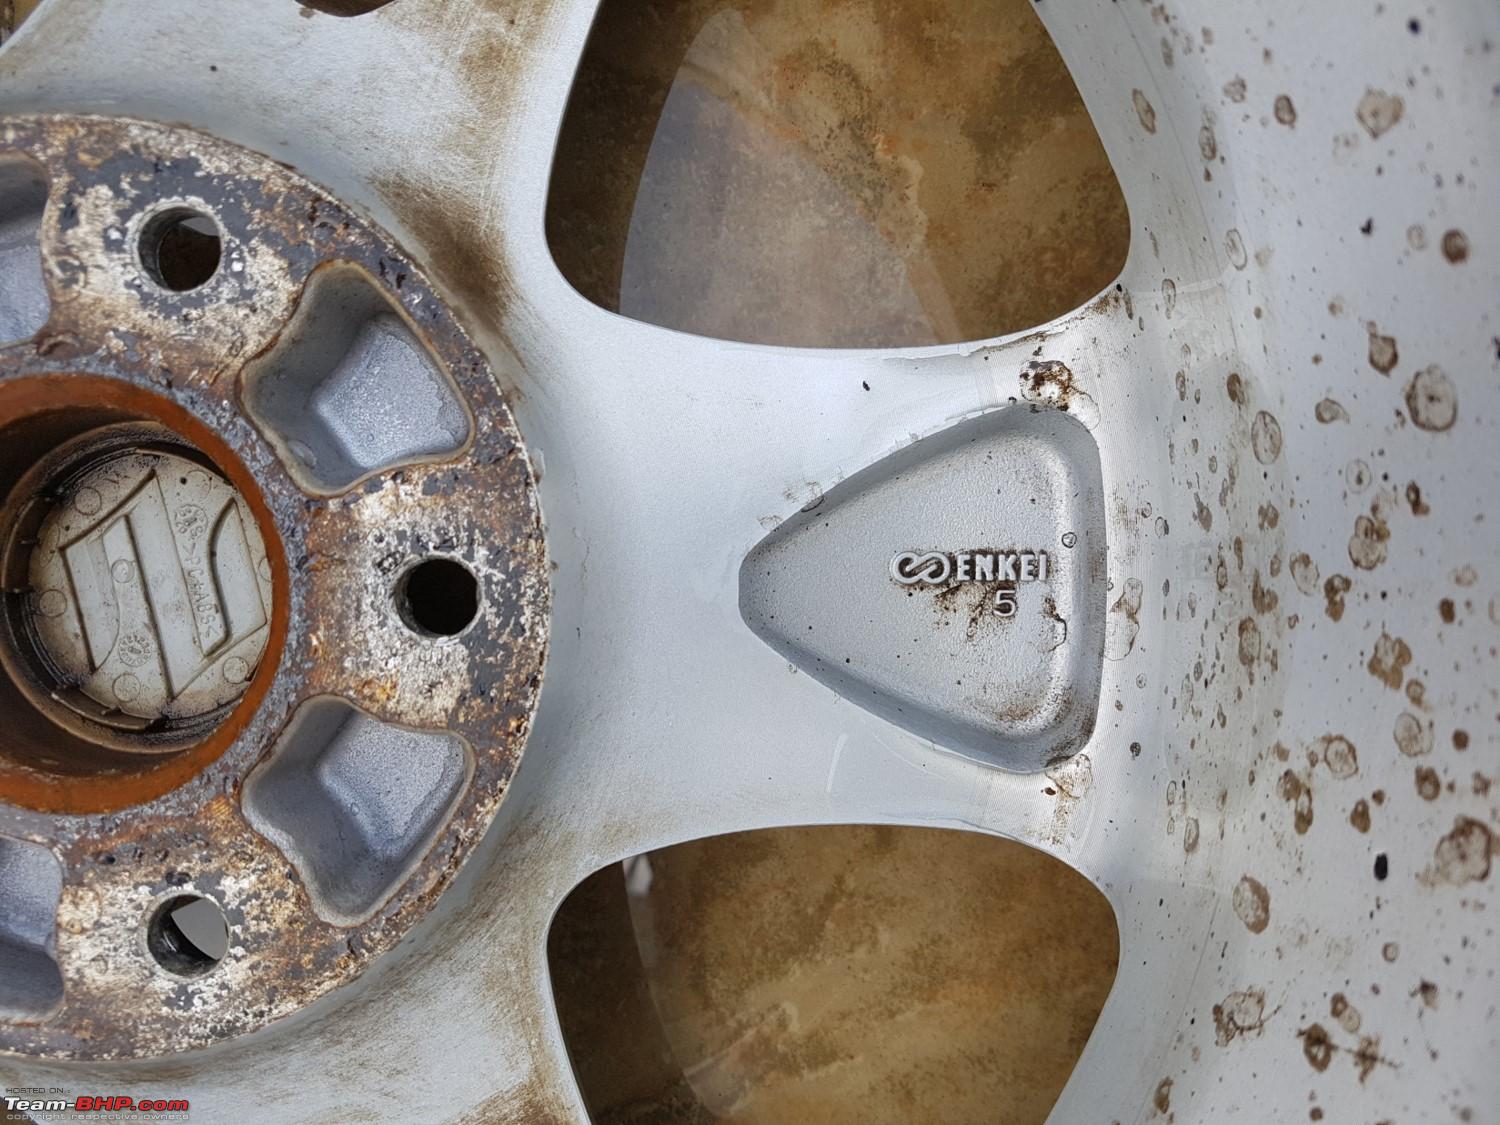
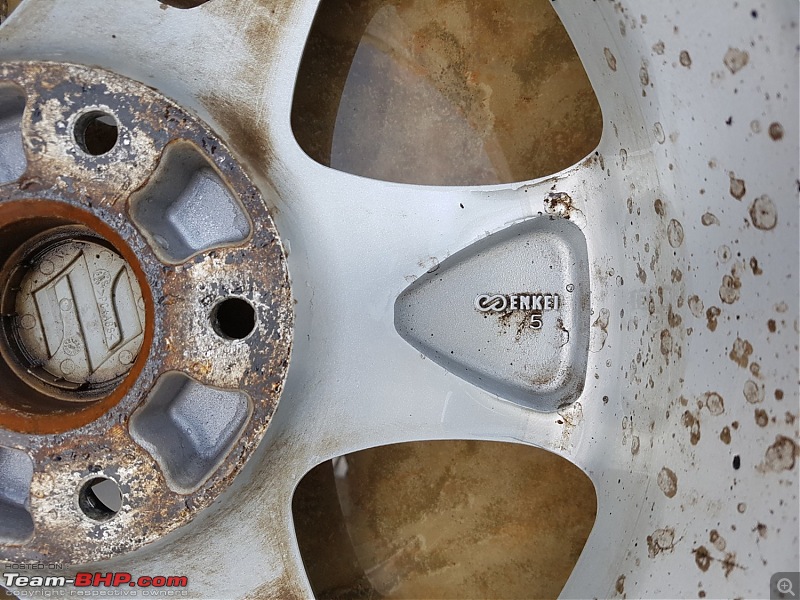
I discovered something to keep me happy in this process of cleaning. Enkei Alloys! Impressed!!!
So finally, we got down to painting the alloys. After all the rambling, this is the good stuff. A critical factor, you DO NOT need to be a painting expert to do this. Anyone can paint!
But as usual, some thoughts:
- Before you begin, make sure your painting surface is free of oil, water, dust, etc. I cannot stress this enough.
- Instead of using the default nozzle on the can, if you can get a spray nozzle specifically for this kind of paint, I would recommend it. It allows for a more uniform spread of paint, apparently.
- Irrespective of external temperature, ensure your paint has been warmed up enough by leaving it in a bucket of warm water for 15-20 minutes...No, no, don't use a heat gun! Or do, just don't blow yourself up, you'll waste a fair bit of paint.
- Once the can is warm to the touch, ensure you shake it thoroughly and mix the paint. Again, because of the consistency of the paint type, you need to ensure it is properly mixed. I usually turned it upside down and shook it like my life depended on it.
- Do more than a couple of test sprays to ensure the nozzle and spray pattern.
- Remember that this is rubber based paint and is not meant to be completely dry between coats. Be aware of temperatures and consequent drying times.
- Consequently, there are no absolute drying times. I went from 15 minutes of drying, to 10 minutes, to 8 minutes by the third coat. Look for the top coat looking smooth and uniform. That's when its time for the next round of spraying.
- Pick an inside line till where the paint must be uniform. This is usually what is visible from the outside.
- Finally, go with low density coats and a higher number of coats. Like Fonzie says, dont worry if you don't get it full coverage in one coat. You'll get it in the next one. And dont forget to mask the air nozzle on the wheel.
And with all that ado, here are the pictures. These are pictures from the first set that I did so there are some early errors but I pretty much followed the same process for all five tyres and you can see the result. I am no expert when it comes to painting strokes and that does reflect in my initial coats.
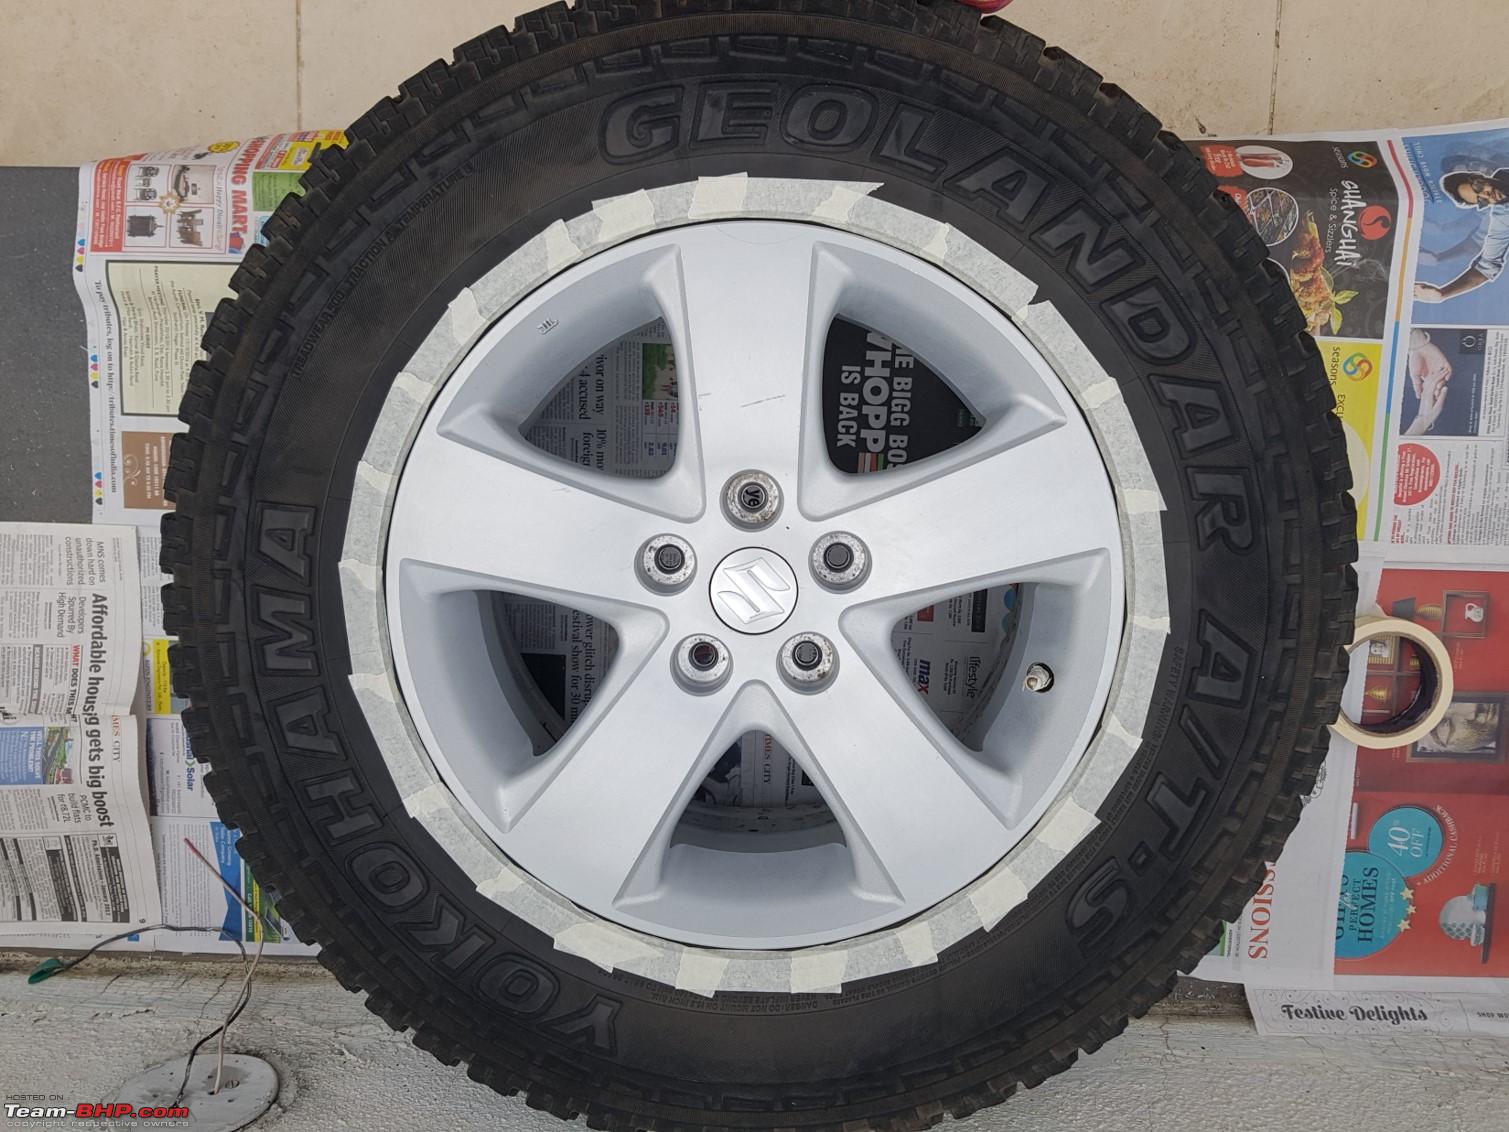
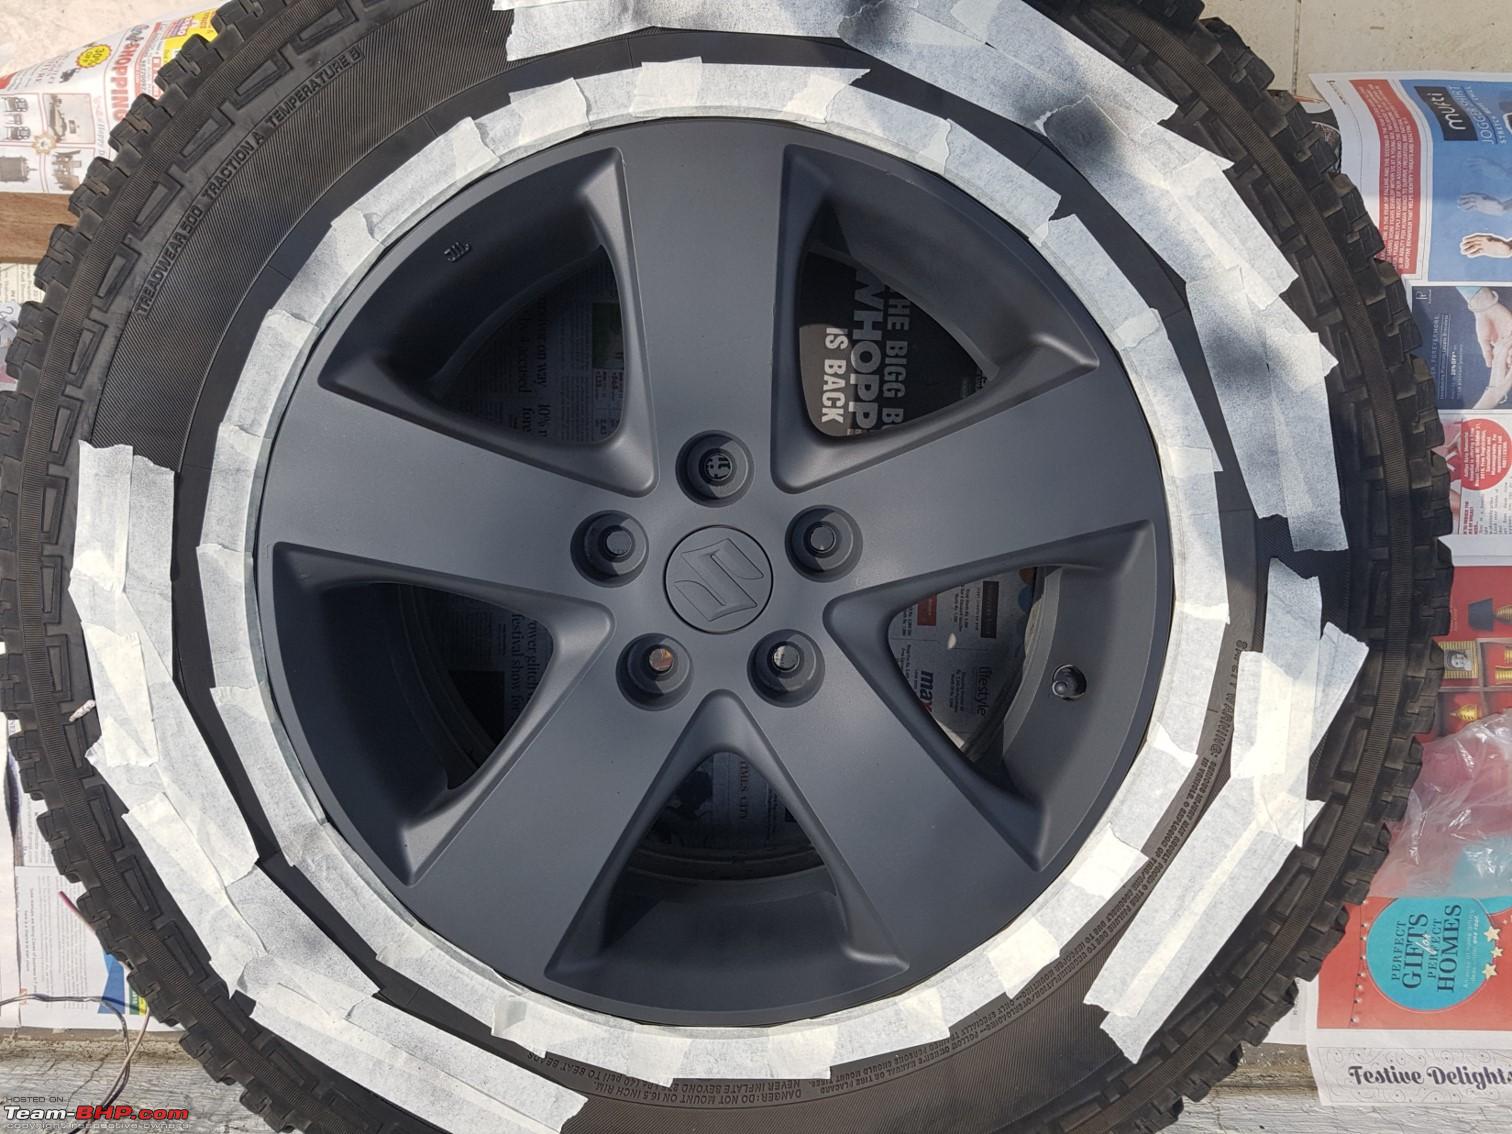
1. Preliminary Masking. This was only for the first alloy. I did not do this for subsequent ones.

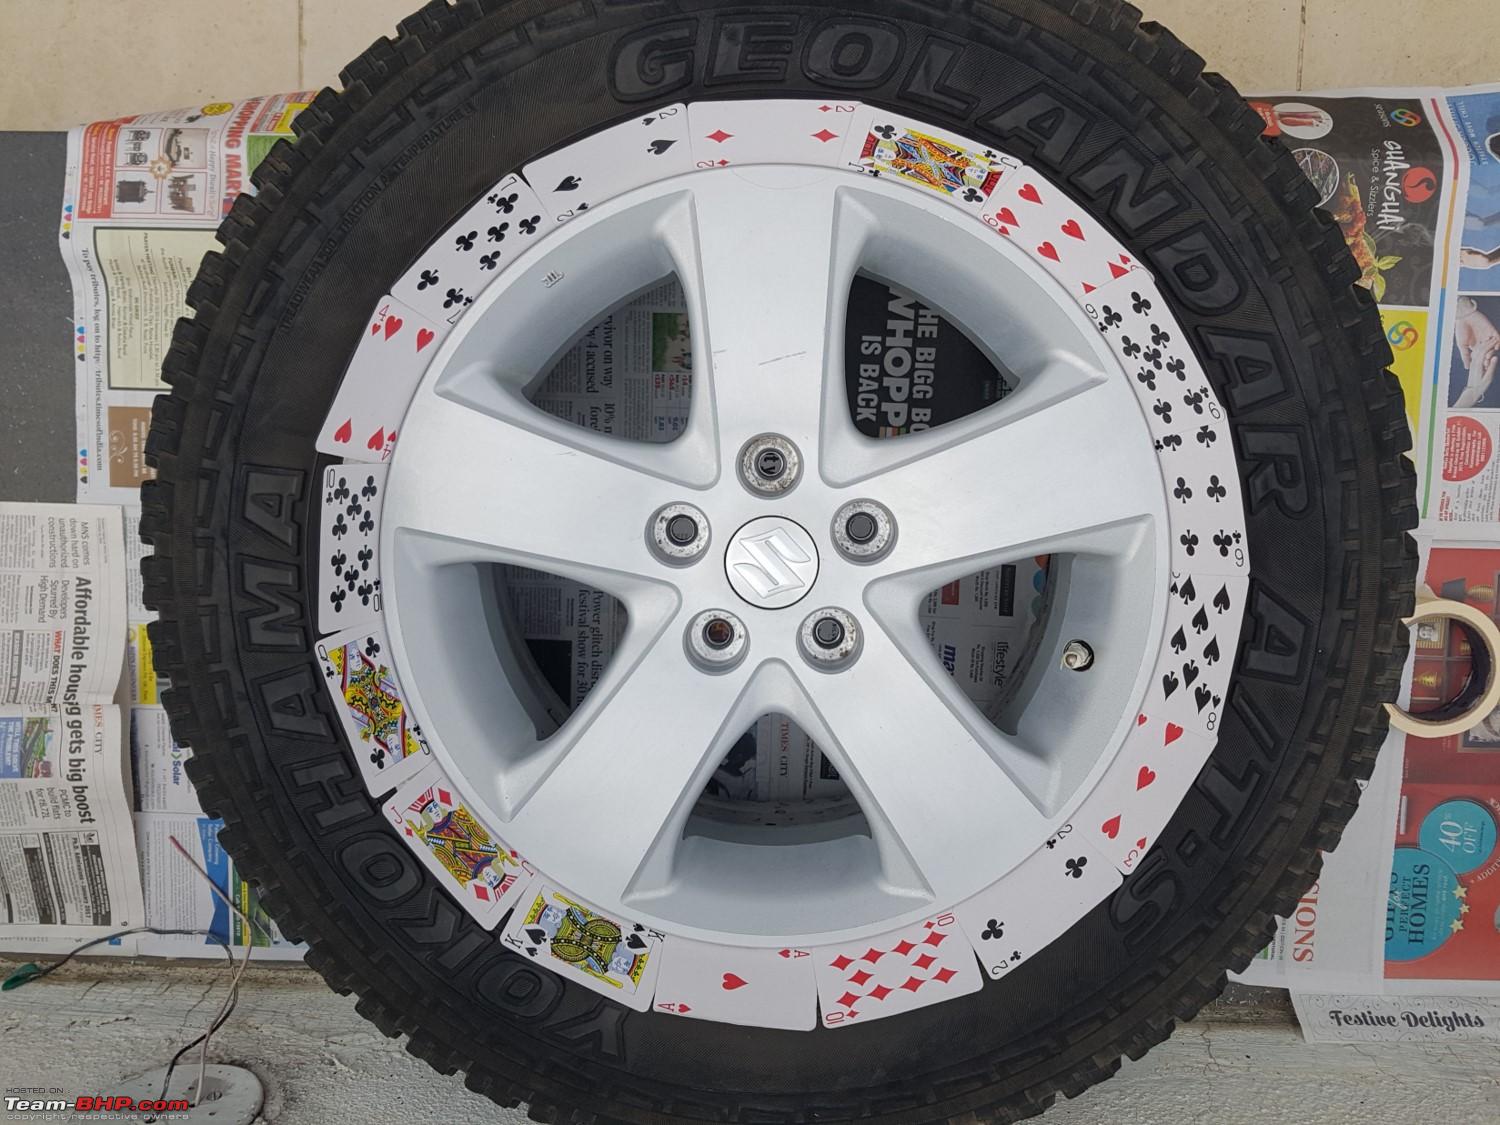
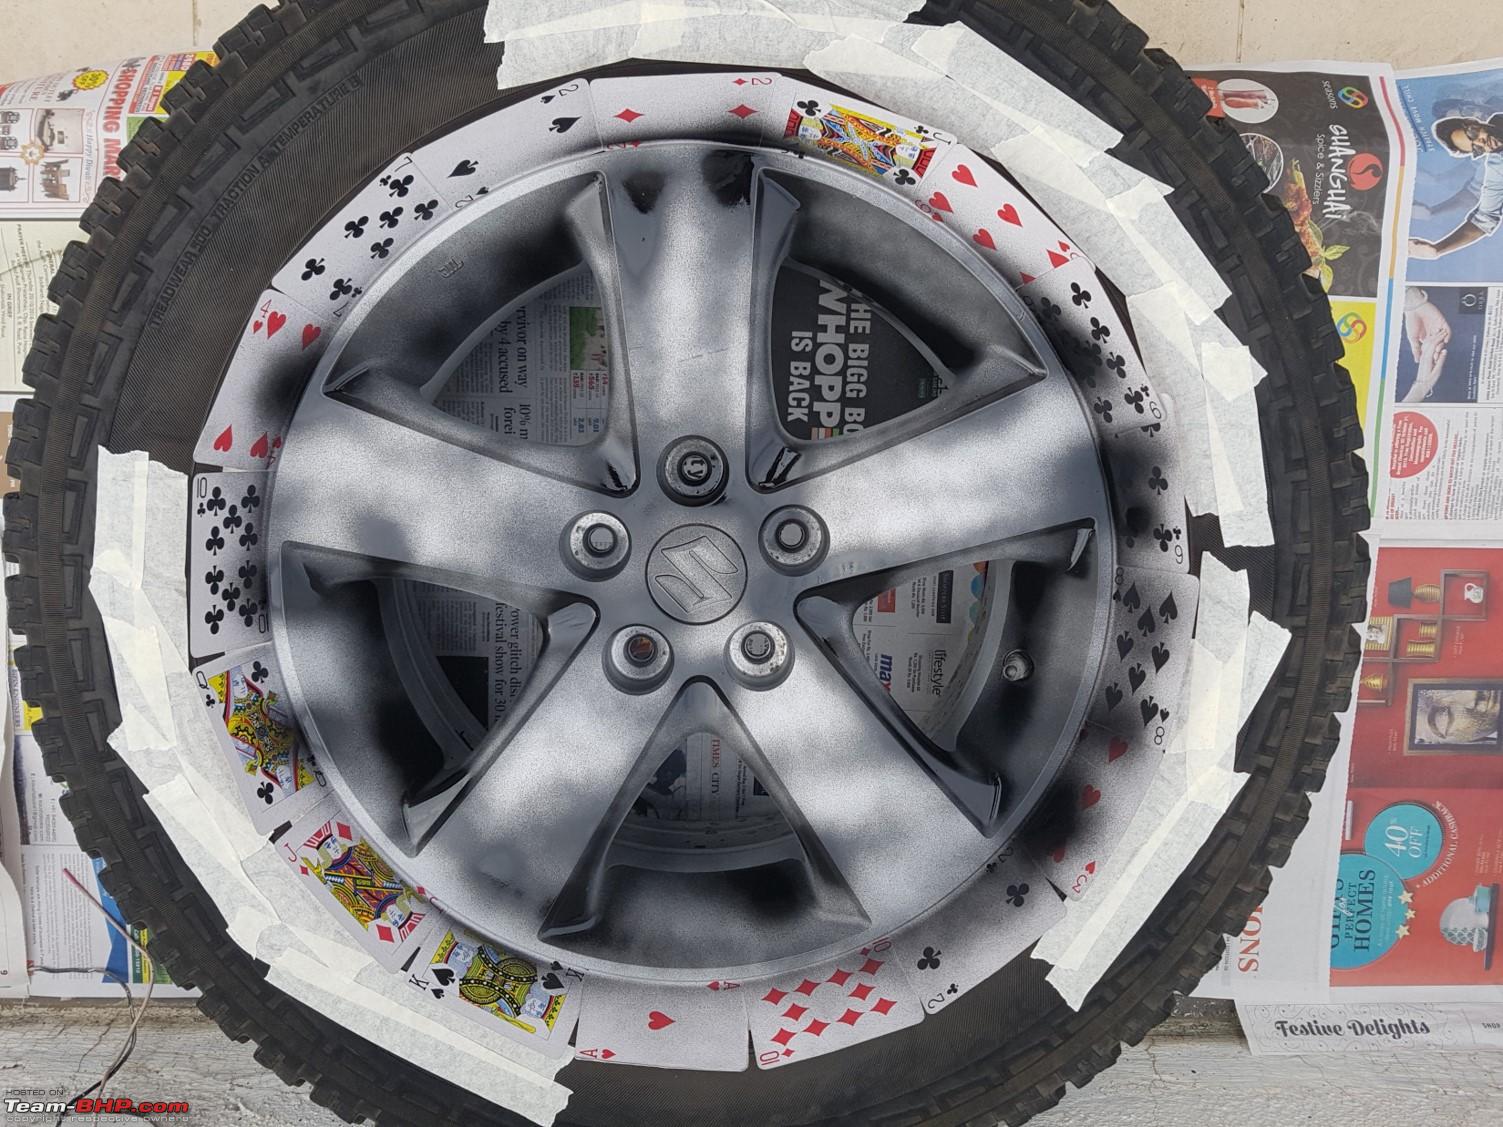
2. Cards Inserted. This is really all that is required.
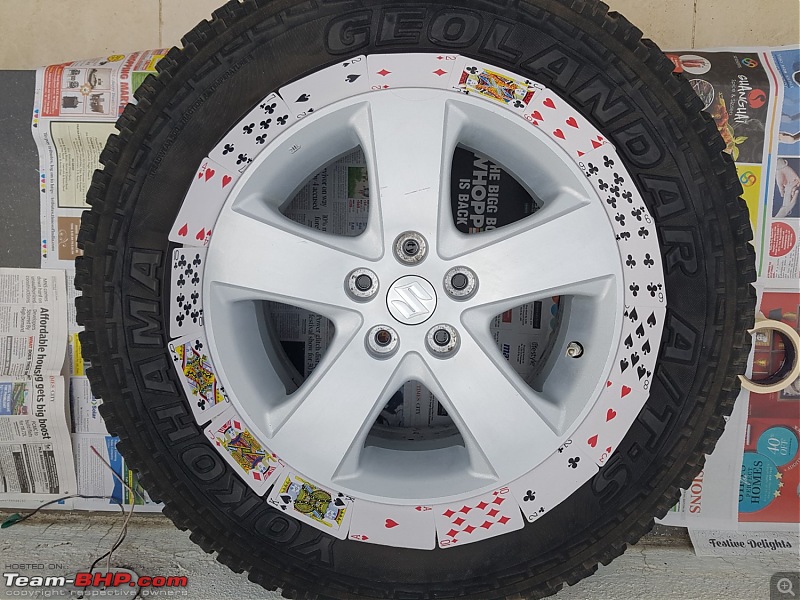
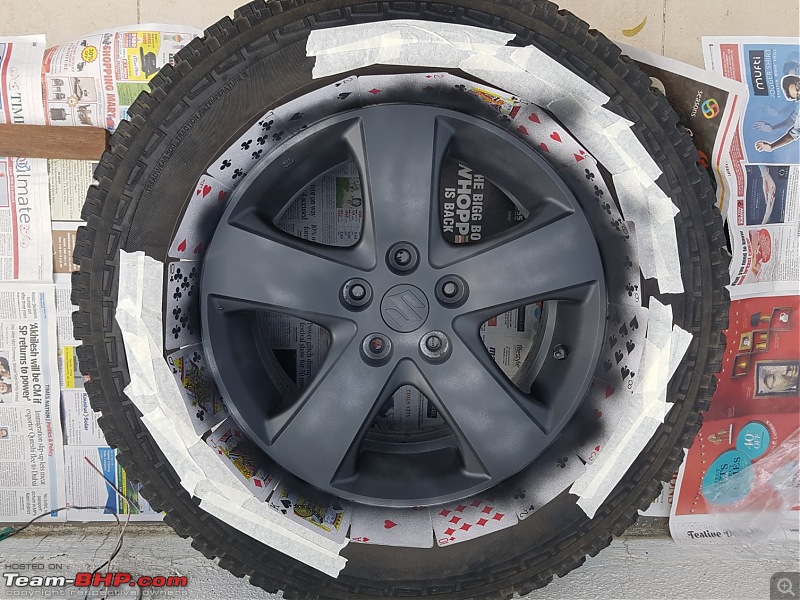
3. Coat 1. You might get some thick bits if you are an amateur like me but don't worry about it. It'll smoothen out in the later coats.

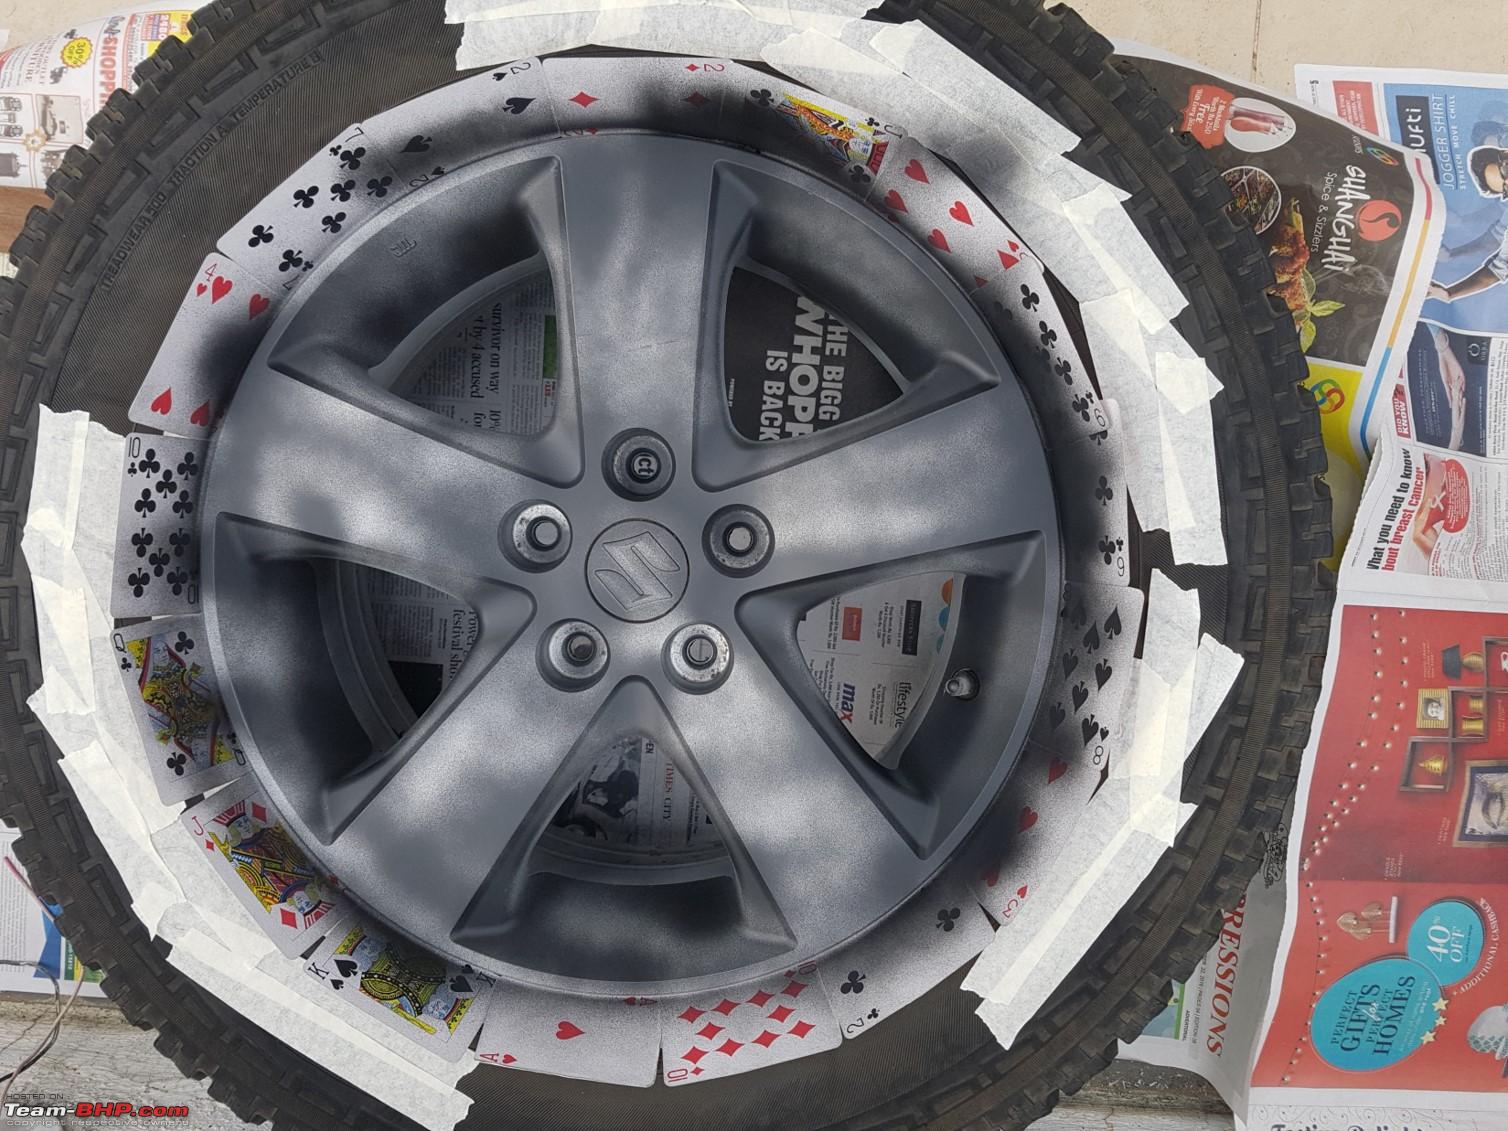
4. Coat 2

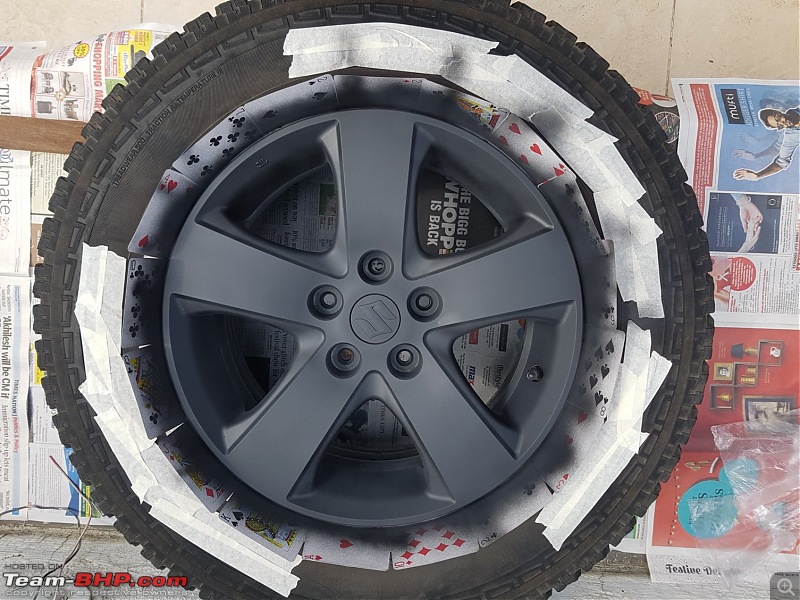
5. Coat 3
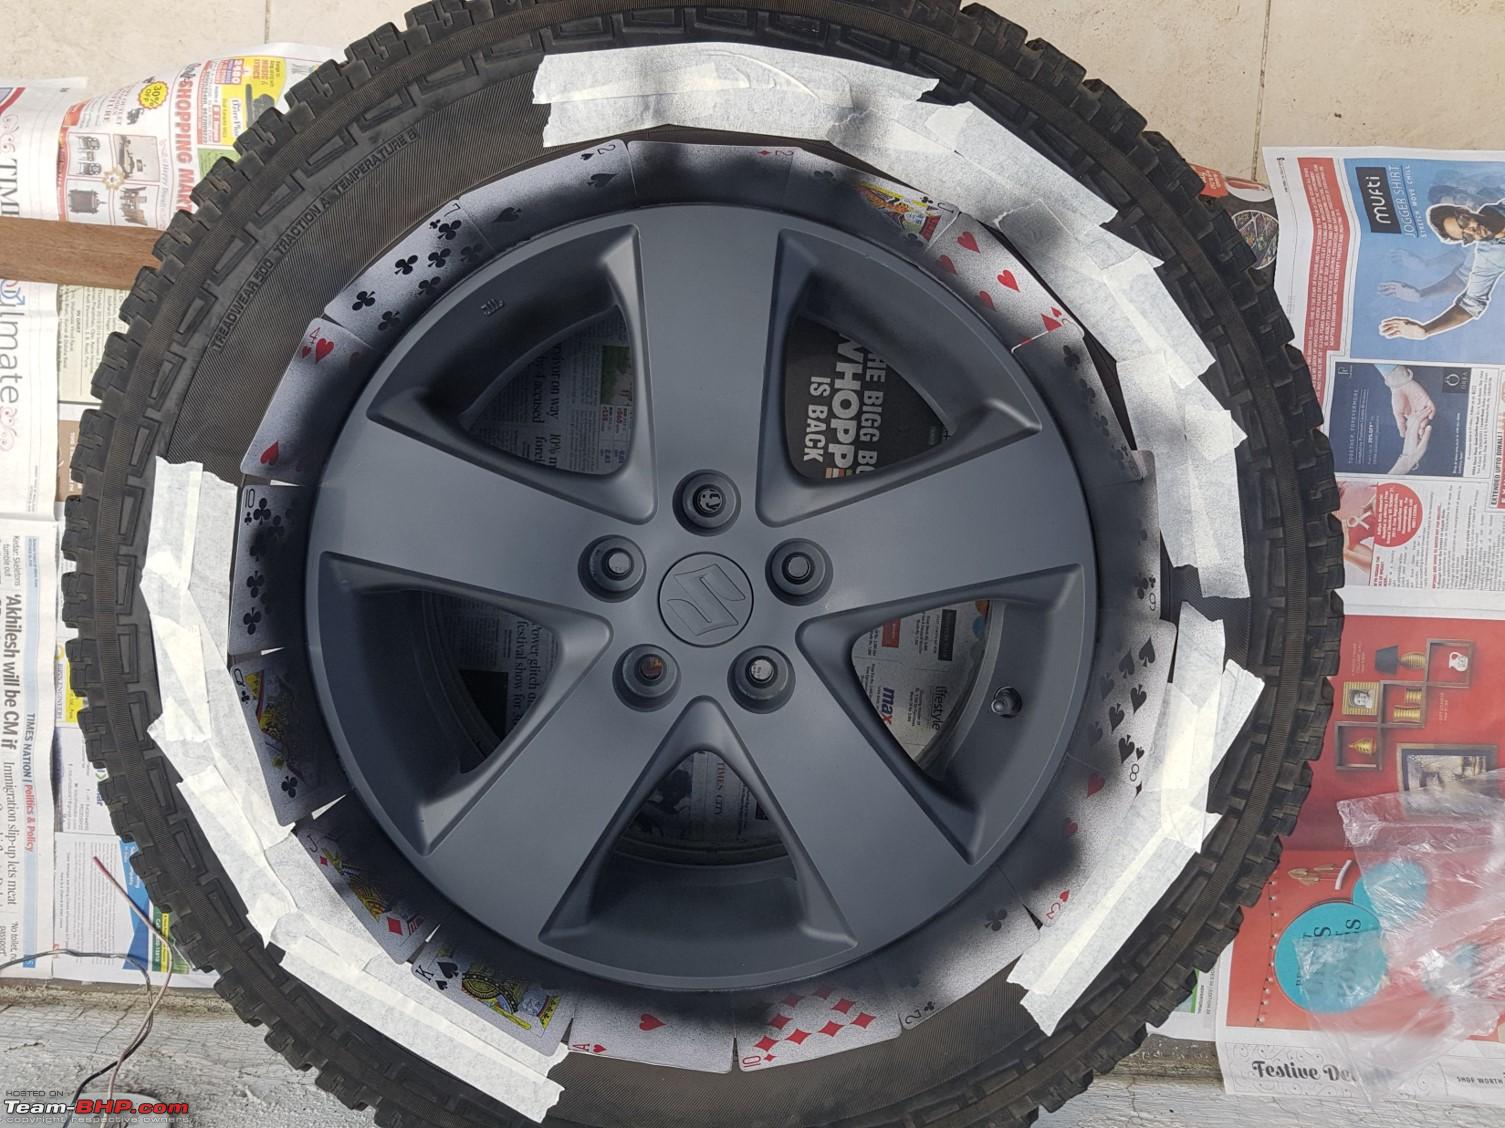
6. Coat 4

7. Coat 5
8. Coat 6
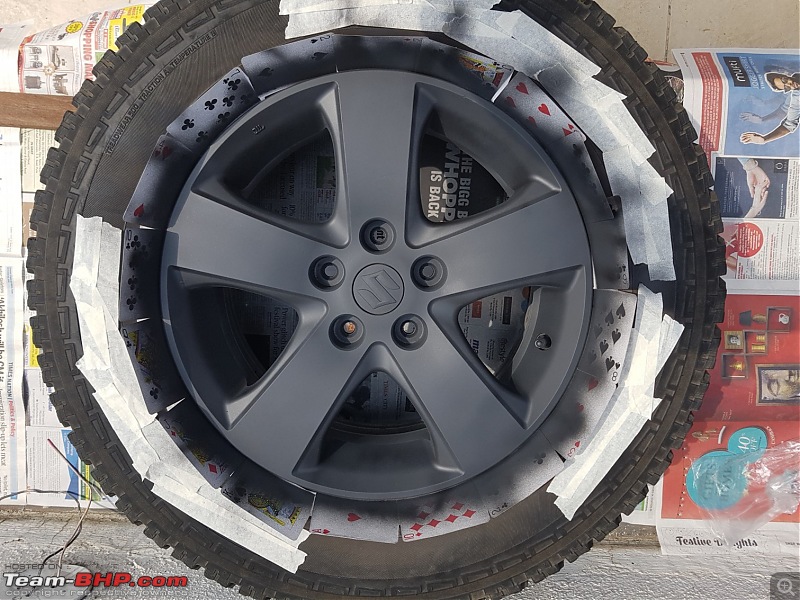
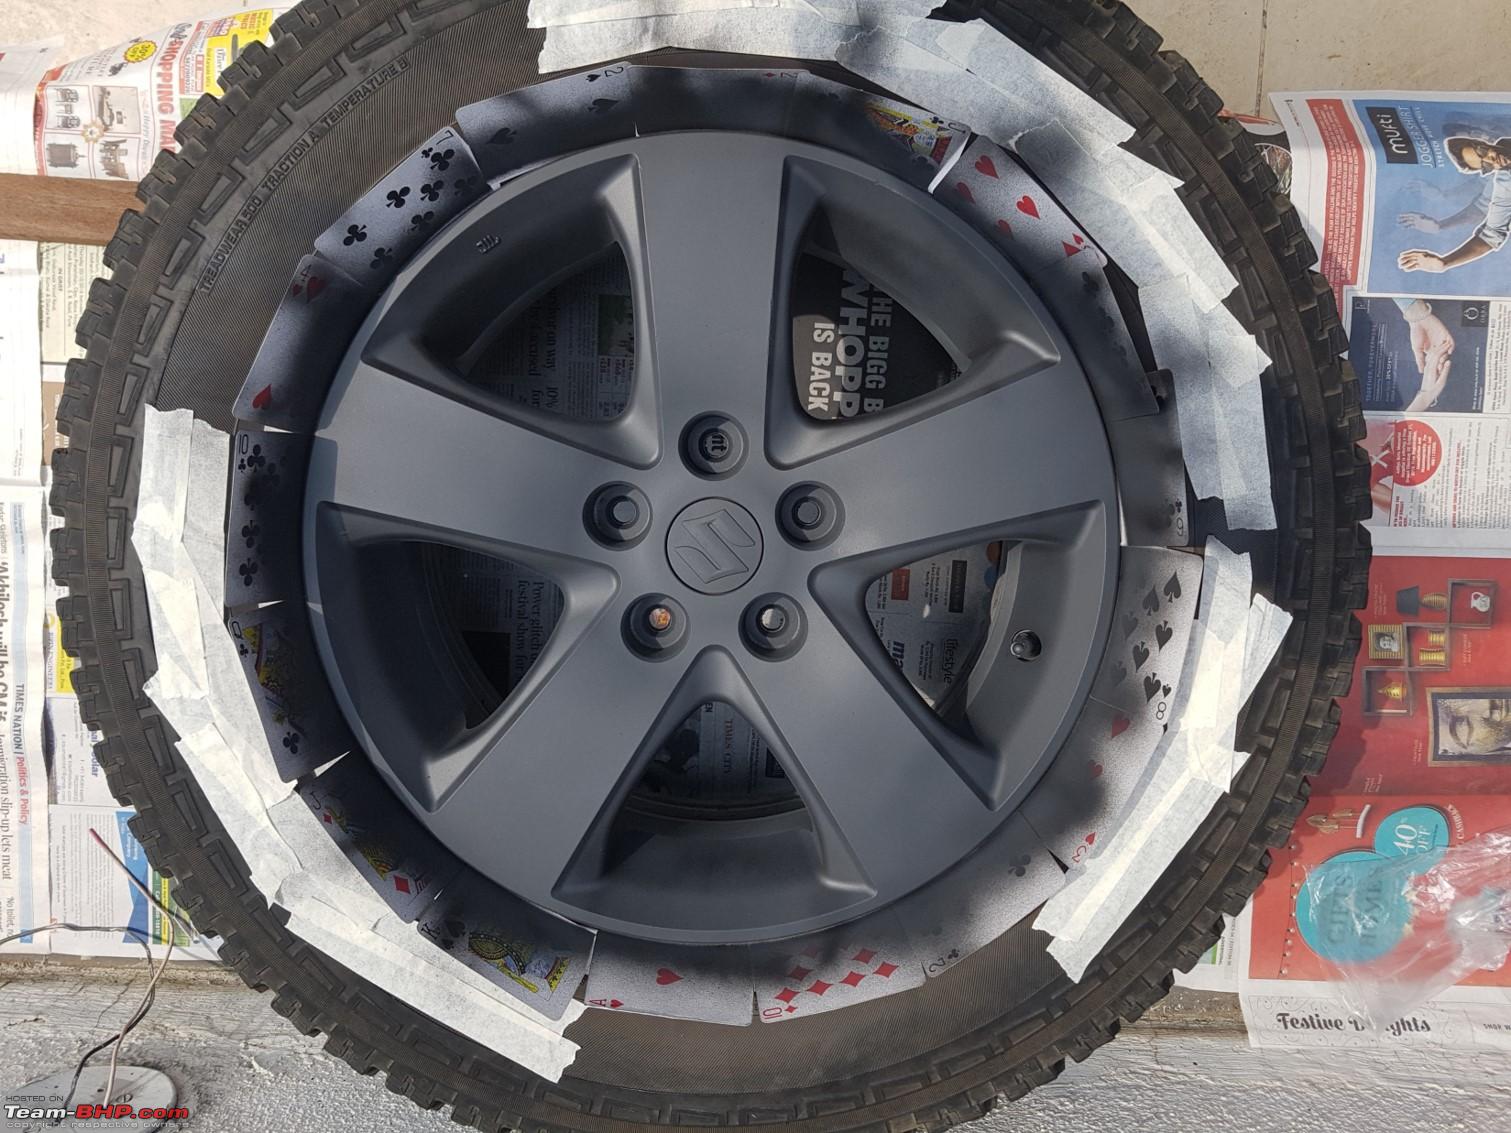
9. Coat 7 and Cards Removed

10. All Masking Removed

After all this, I let it bake for about 3 hours in the sunlight. The paint was quite set and not going anywhere so I left it where it was because I need a break really. Despite wearing a mask, the paint fumes were getting to me and I needed to clear my throat with something dark and cool...which really took 3 hours to clear!
Finally once we were ready to get back to the exercise, there was just one last thing to do.
What You'll Need:
1.
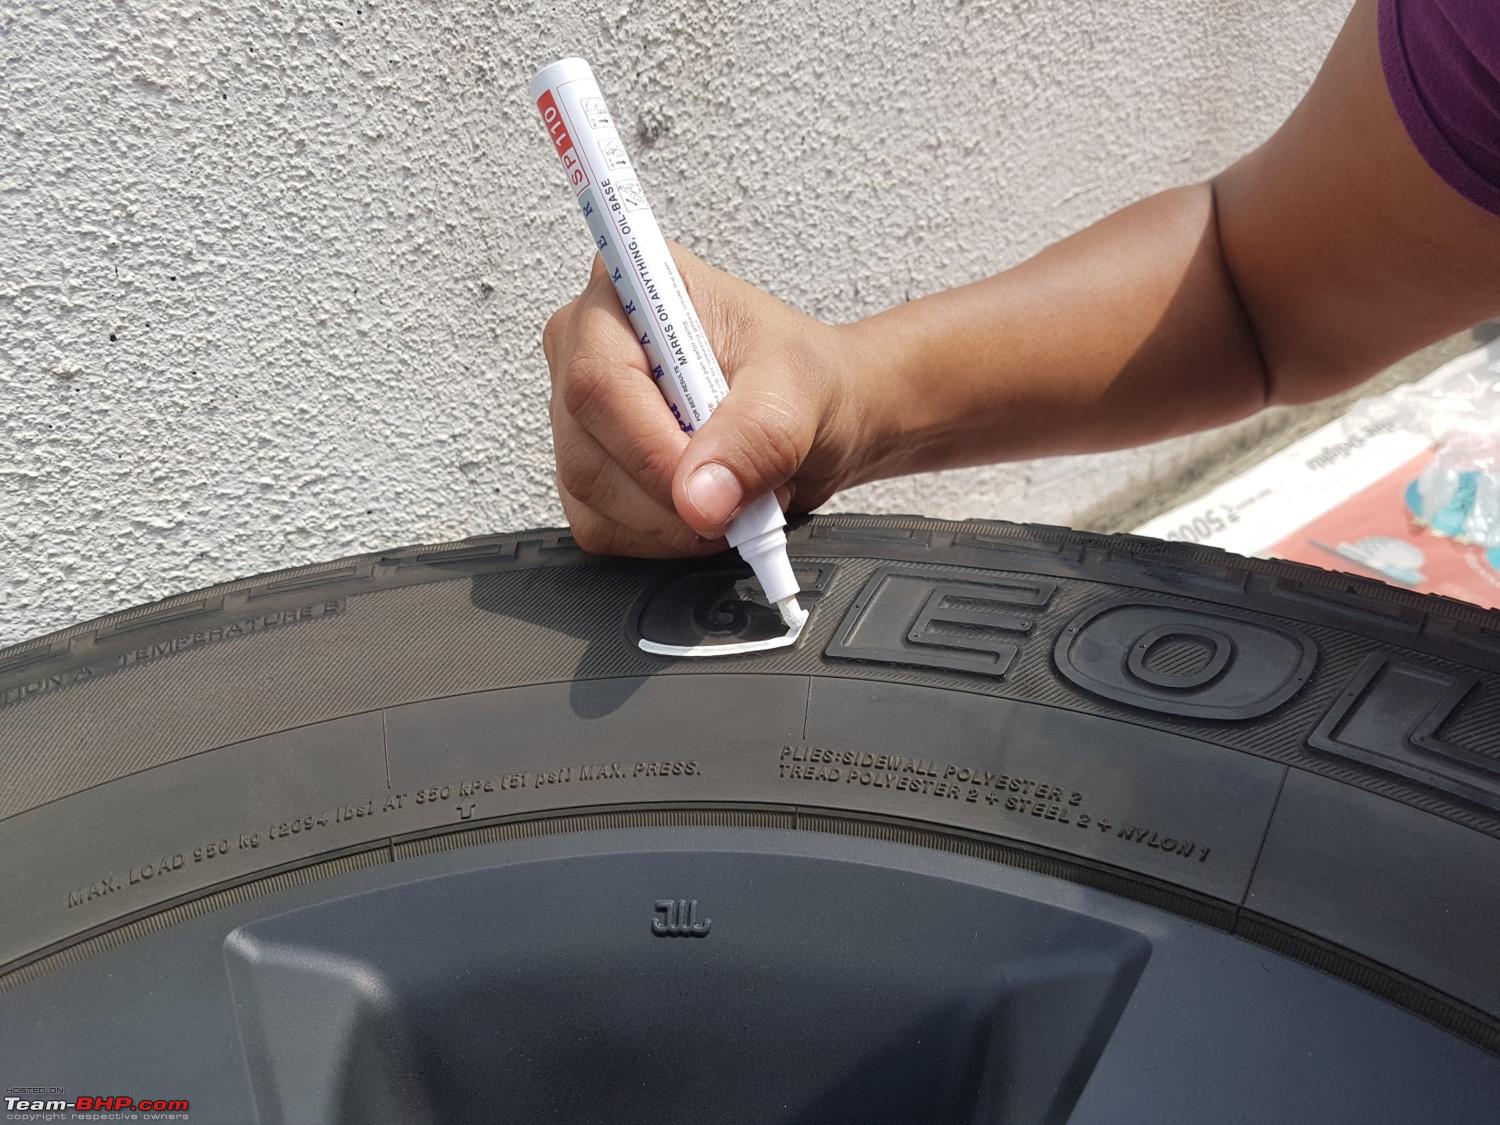
Tyre Marker Pen:
http://www.amazon.in/Permanent-Paint...ilpage_o00_s00
2.
A Really Steady Hand: Couldn't find one readily, I thank my personal Wonder Woman! Although I wouldn't say that to her.
And Onwards:
Detailing at Work:

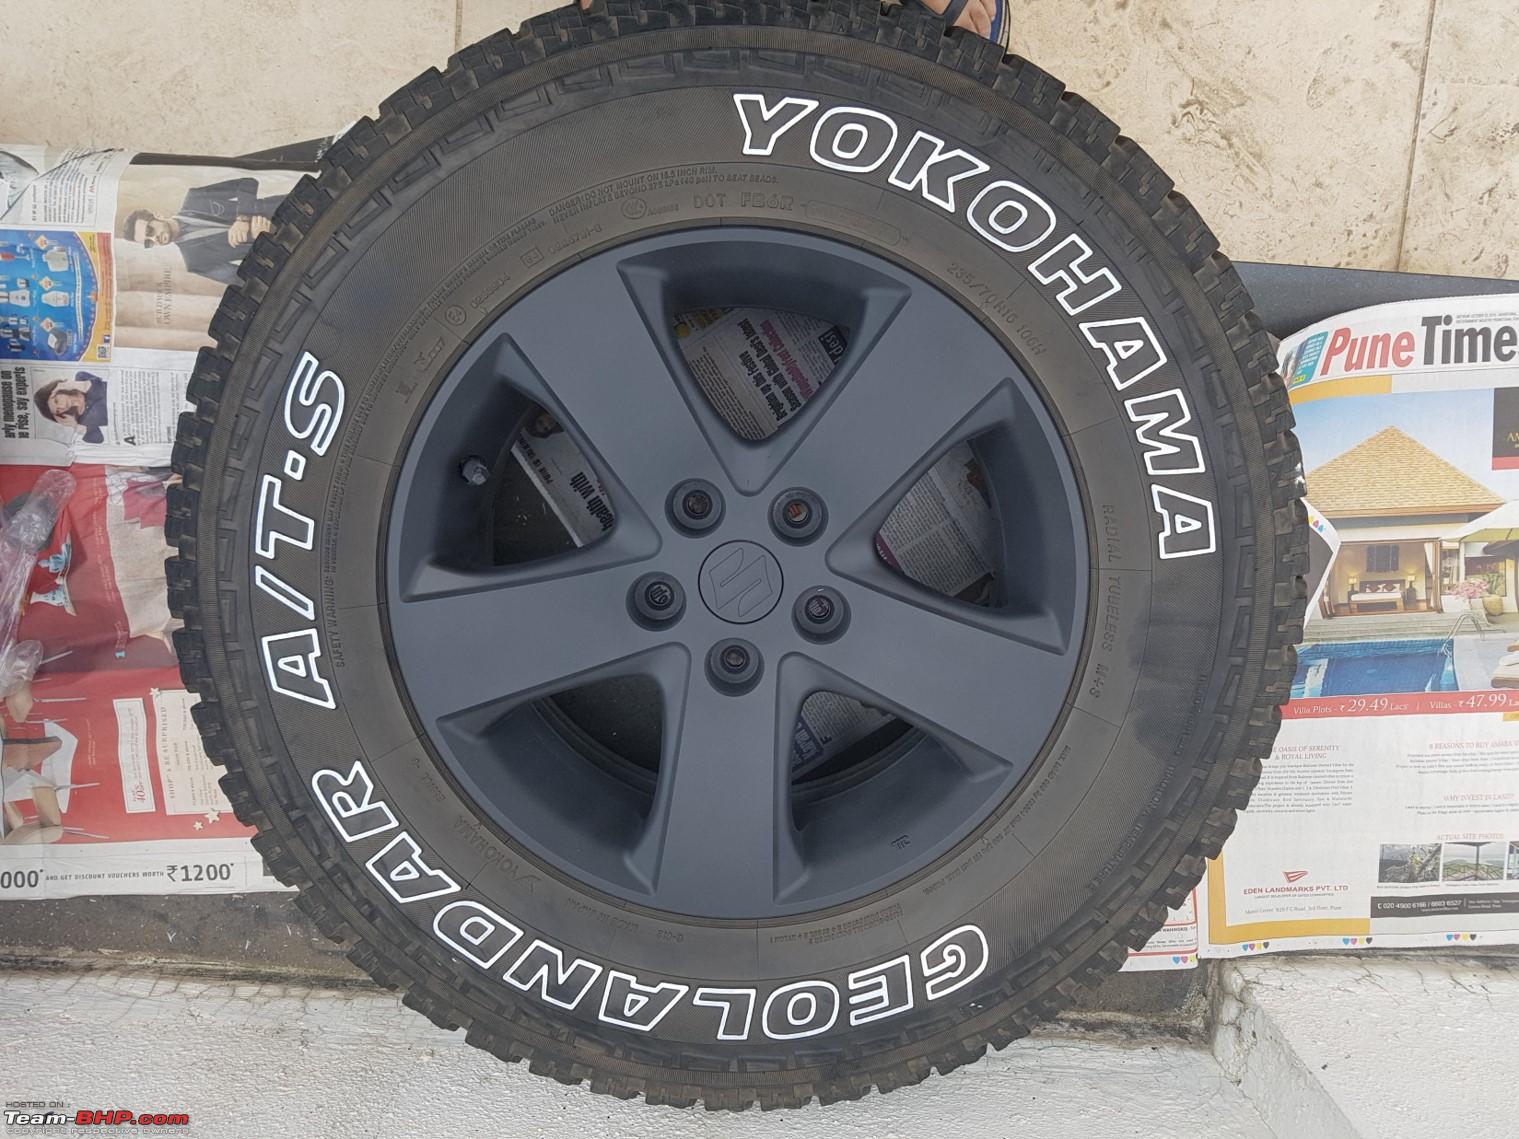
The End Result:

Hell naws, them wheels ain't dirty brother, I washed them mahsulf!! You wanna go, man!!
Note that all these observations are from my experience. One who is not an expert on rubber-based paints nor on the painting process.
About Rustoleum:
- Its a decent product. I do not have a comparative wrt. Plastidip or others but this does the job pretty well from what I can see of the output.
- It is priced quite well. I bought it for 610/- INR per can from Amazon. I did not check locally.
- All 5 tyres took all of 5 cans plus one pen for lettering. Total cost was about 6300/- INR which is not bad at all. The pen is about half way but I intend on doing another coat on all tyres soon.
- Life of either product is really a guesstimate now. I suppose it does depend on driving styles and areas. Rustoleum says their product should last 3 months, however, I see it lasting much beyond that, given that we are not quite going to be banging our rims every chance we get.
- It's great for covering up minor road rash.
- There are a number of colors available, from matt black to graphite to Gold, to Silver to Matt Greens, Pink, Oranges, Reds, Whites, and Yellows!
About the Painting Process:
- Having a steady hand with a consistent pattern is awesome. I would suggest practicing on a bit of discard and then moving on to the actual surface to be painted.
- The key to painting rubberised paint is to keep it consistent and lay one layer before the previous one has dried. This should also protect the paint from minor scuffles.
- Furthermore, forget about the number of layers you may have painted. Its ok to have 9 layers if you must, but try and keep it even and reduce over-spraying. I used about 1 can per wheel and that's what I recommend. Each can is marked 312 gms.
- If you do get some dinks and dings, Naphtha is your saviour. Use a small quantity to liquidize the paint, then smoothen it over with your finger and repaint that area before it dries.
- Considering you are adding weight to your alloy, should you get it re-balanced? I don't know yet but mine is due for alignment soon, so i'll get it balanced and update this thread in time.
- Important note about the lug nuts. I choose to paint these too to get a uniform look. You guys can imagine that when the wheels are being tightened back on the car, they will bear nasty abrasion marks from the wheel spanner. Simple solution to that, paint the tip of the wheel spanner in 5-6 thick coats and it will not cause any abrasion marks. Additionally, there are some lug nut covers available on Aliexpress, and I expect other sites, in various colors which may help.
Time for final pictures! :D
Thread moved from the Assembly Line to the DIY Section. Thanks for sharing!
I've been wondering ever since I saw that white tyre pen on Amazon sometime back. This video from Ammo suggests that letters tend to change colors over time if you paint directly and that kinda discouraged me.
I suppose if you give a new coat every once in a while it will keep looking great. Would love to see how this pen fares in a few months time. Thanks for sharing!
https://www.youtube.com/watch?v=Kvd0uRljLmg
That's some neat work there. I loved the tyre letters more than the alloy paint! :D
I know there are lots of fans for the white & black combination, somehow it doesn't appeal to me so much. I personally think white alloy wheels hotter on a white car - but that could be a bit too loud for many.
If it were me, I'd have tried to add a bit of contrast to the alloy wheel too - I love such things a bit loud.
Fantastic DIY and a weekend well spent.
Nice pics of your prep-work and painting technique.
I have been following Fonzi and his youtube channel for a long time now and have myself tried few DIYs to dip the car's logos and model details.
My results were nowhere as good as yours but still I am impressed with such dips since these transform the character of the car totally.
You said it costed INR6300 in total whereas your BOM says 6 cans @ 610 and a marker pen @ 350 - so approx cost = INR4000.
Any other inventory in the BOM like gloss spray or clear coats etc - please...:D
Is this safe for chrome bits on the car?
Yes absolutely, we did a lot of cars in between as we had started this venture sometime back. We then had to close down because of other commitments.
I still have it on my bike and it has held on well, though you need to keep polishing them a bit as they lose sheen over the time. We had a website too, but it is not active anymore, for some of our work you can look us up on Facebook, search for transmodders.
PS: Mods please delete if it comes across as advertisement, but since we are no more in business i guess members can check some of the work done and finish achieved.
| All times are GMT +5.5. The time now is 04:38. | |