Team-BHP
(
https://www.team-bhp.com/forum/)
Since I had decided that I would buy the S-Cross 1.6L Alpha as the replacement car for my Swift, I was reading through all reviews, reading discussions in the groups plus read posts on our forum plus other forums too where owners were complaining on low/poor output from the OE projectors (Bi-Xenon 25W) given in the Alpha variant.
This made me think on getting some way to solve this without spending much and by not doing any changes to OE setup. First thing was to get better projectors from Morimoto but for that the headlight cluster needs to be opened. This was a deterrent for me since I was not comfortable on touching the OE unit because of two reasons, One is the cost of the headlight if I need to buy it again and second was how good the re-sealing of the headlight would be done so that there are no condensation issues. Searches on forums were helping me boost my confidence so started looking around which is when I found the thread by
Dr. Naren on XP Micros that are Bi-Xenon Fog projectors that fit in place of the OE fog lamps and would help in better visibility in addition to the OE projectors.
Going through his thread I got to know that he had the
2.5 inch variant installed on his car and the photos plus live videos that he sent me made me fall in love with the projectors and I started saving money to get the projectors for the Swift and I could use the same on S-Cross. I had saved for the projectors almost long time back by Jan'17 but I didn’t buy it because of the gap it created around the fog lamp covers making it feel incomplete and non-OE type. Plan dropped and postponed (No offence to you buddy).
One day while discussing with him on WhatsApp, I came to know that there are chances of Xenon Planet launching the XP Micro in the
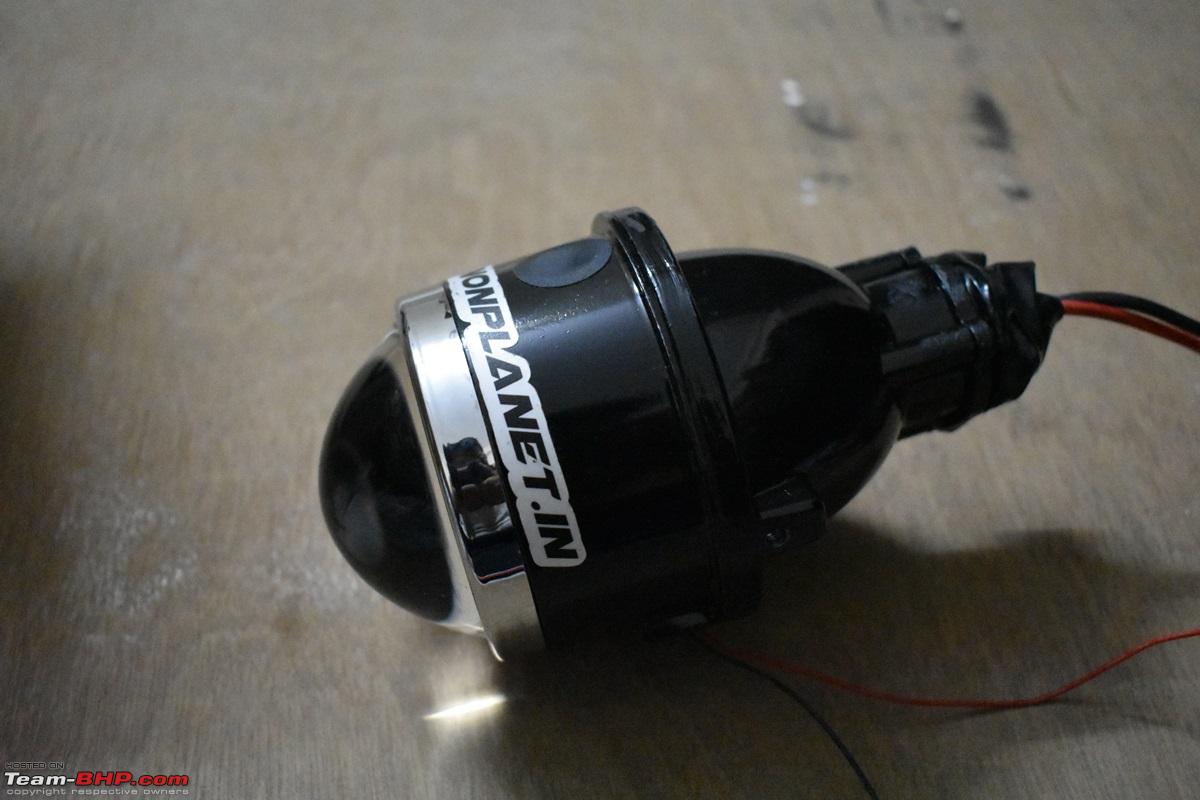
3 inch variant keeping the rest specifics same just as in the 2.5 inch one. I was elated and waited for that day to happen. Once it did, went ahead with the purchase as it would be straight fit and also impart an OE feel just like how I wanted. Paid the amount and collected it from their Hyderabad dealer directly rather than waiting and getting it shipped from Chandigarh.
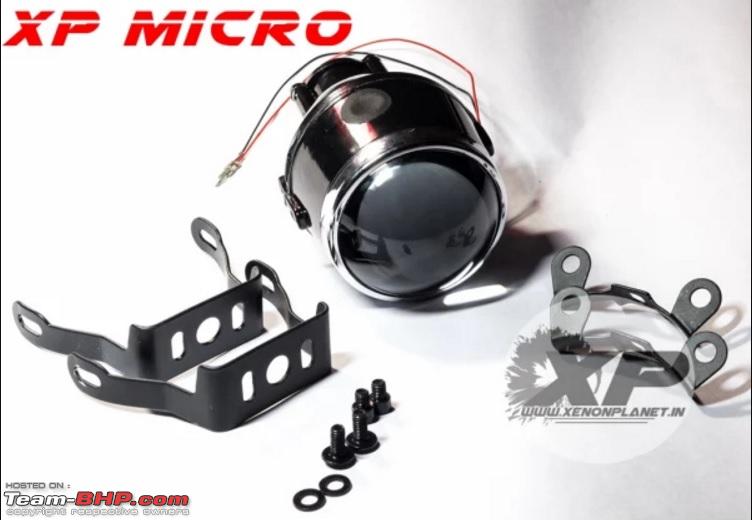
Here's the projector as advertised on their website:
Link to Product: 3" XP Micro Bi-Xenon Projector
The XP Micro can be put to work in two ways as mentioned below
Connection Choice 1: Connect the Low beam of the XP micro to the OE Fog light switch which is the main source for its power. And the high beam wiring can be connected to the headlight wiring harness which will make the high beam of the XP Micro dependent on the headlight stalk position i.e when the pilot lamps are ON and fog light switch is pressed the XP Micro will come ON in low beam. For activating the high beam, one would need to switch on the headlight in high beam using the stalk which would also activate the high beam of the XP Micro.
I was very particular on how the connections would happen and I did NOT like the connection system in Choice 1 so had to think of an alternative.
Connection Choice 2: Connect the low beam wiring to the OE fog lamps that serve as the main wiring to the circuit and then get a new fog light switch and wire the XP Micro high beam to that switch independently so it is not connected to the headlight stalk.
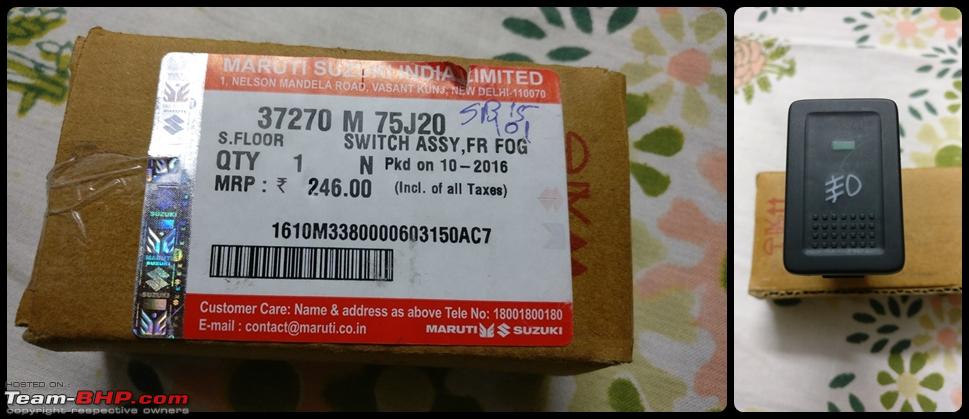
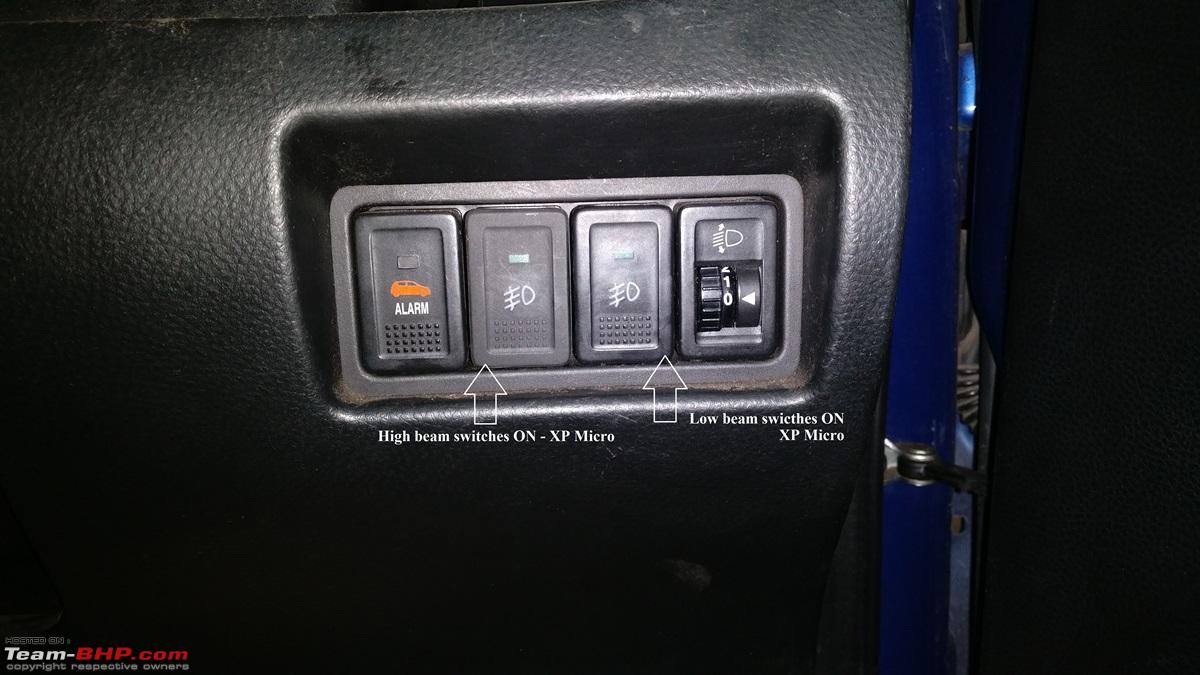
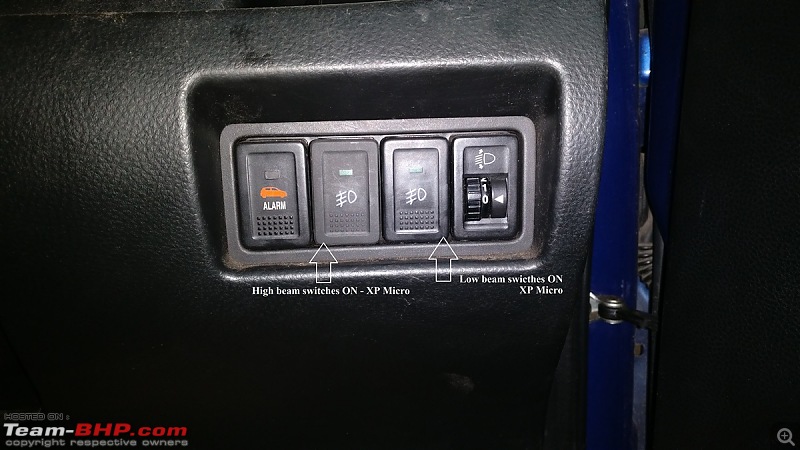
>> The high beam of the XP Micro will be operated individually irrespective of the headlight stalk position. Since I wanted the OE look to be retained, got another OE Fog light switch and wired it to activate the high beam of the XP Micro.
Working of my setup as per Connection Choice 2
Parking Lamps ON + First OE Fog lamp Switch = XP Micro Low beam
Parking Lamps ON + First OE Fog lamp Switch + Second OE Fog lamp Switch = XP Micro High beam
*********************************************
Basic process of fitment
Step – 1: Disconnect the negative (–ve) terminal of the battery so that the circuit is protected in case of a short.
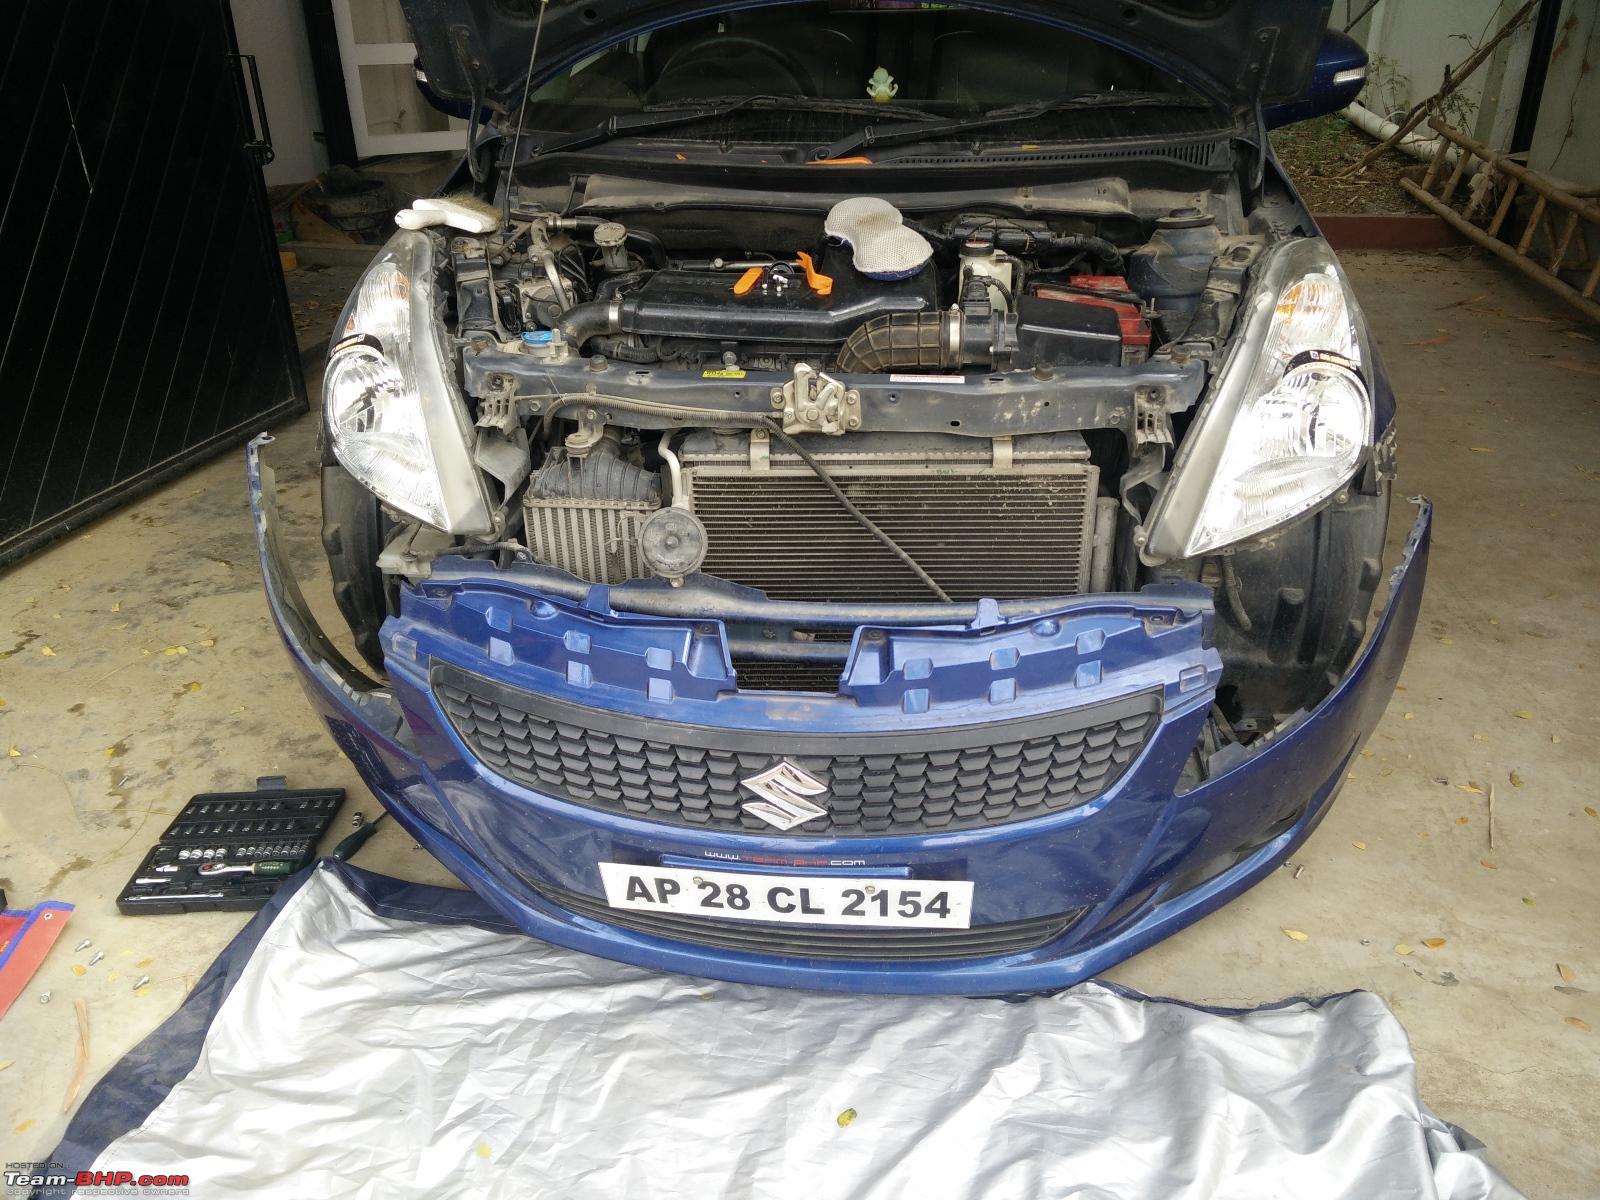
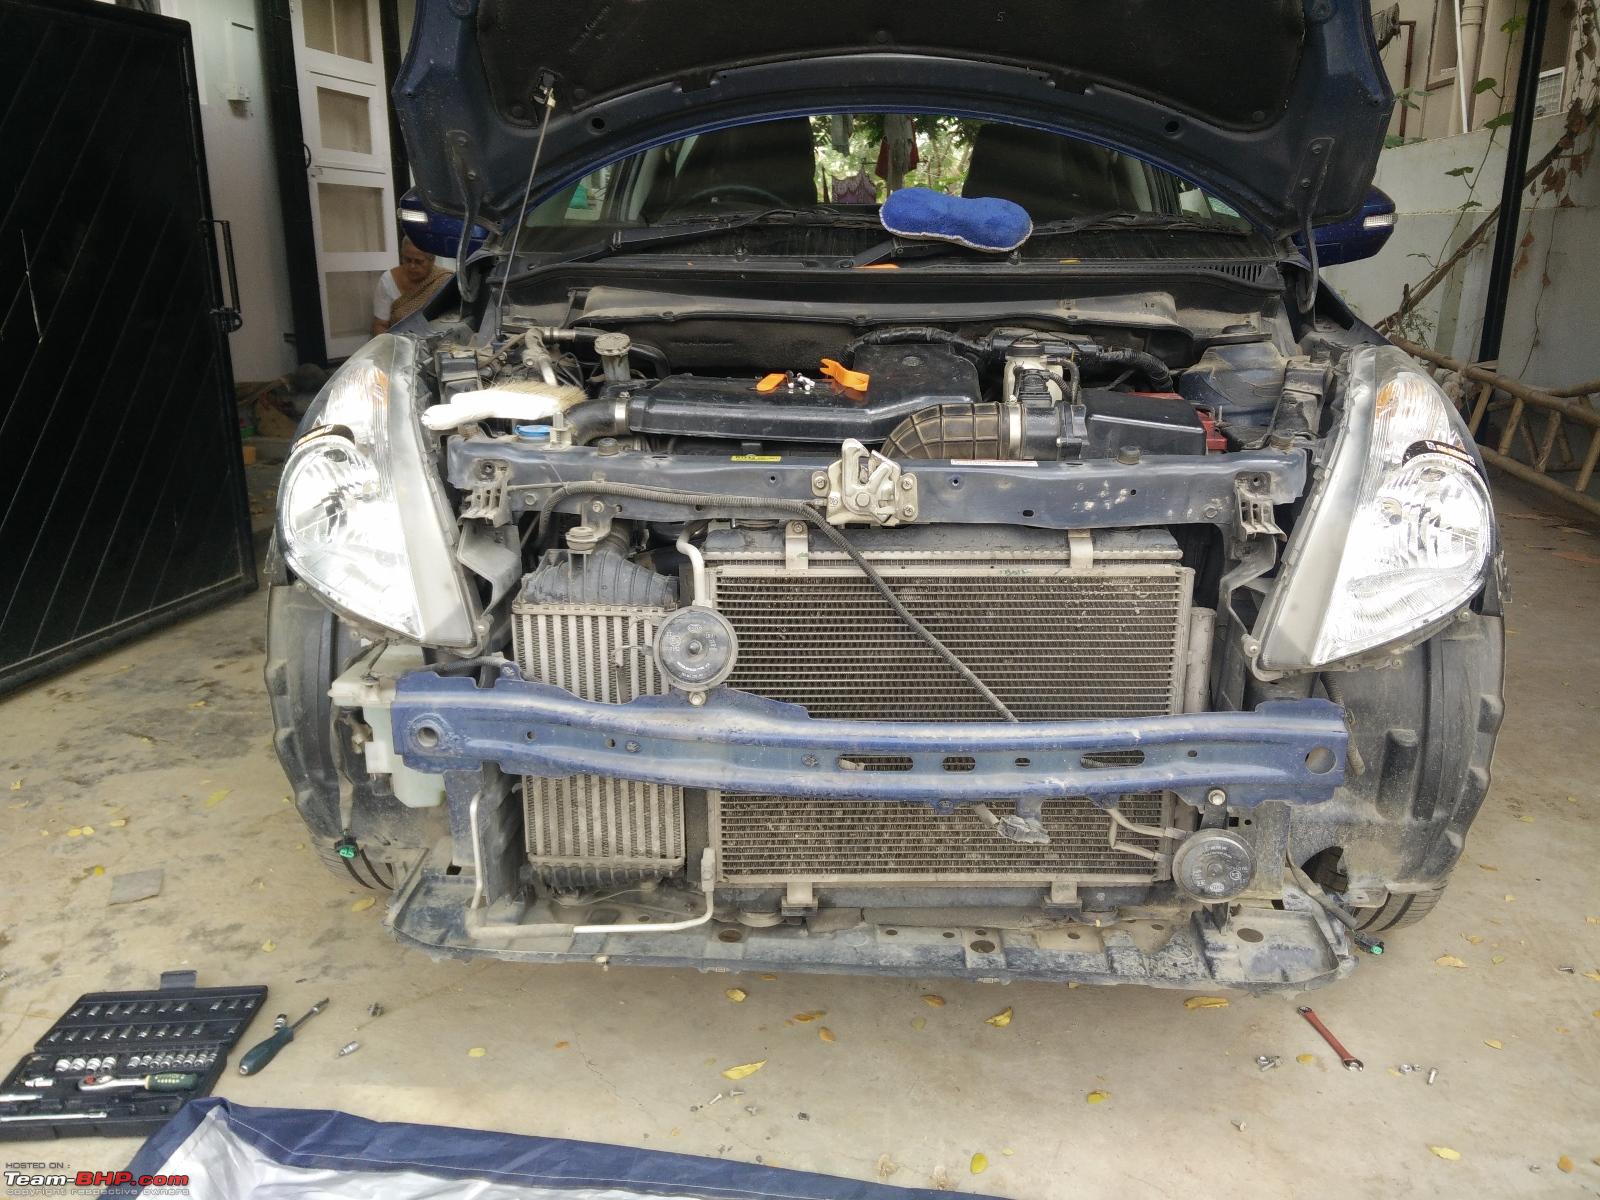
Step – 2: Jack the car up and open the front bumper and placed it down so working is better.
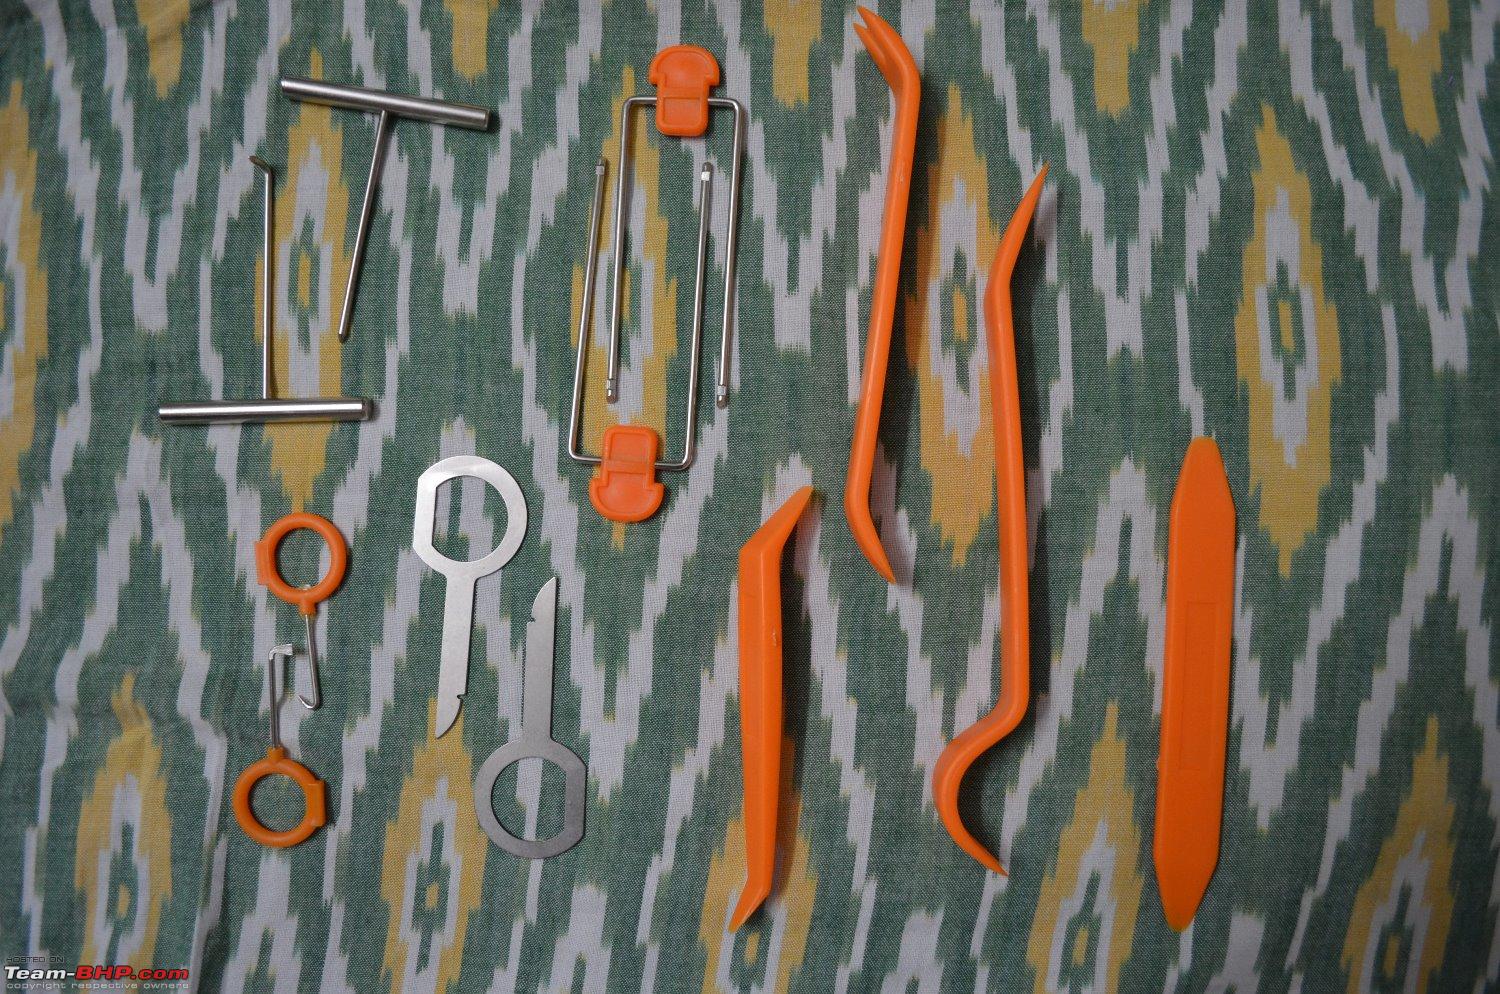
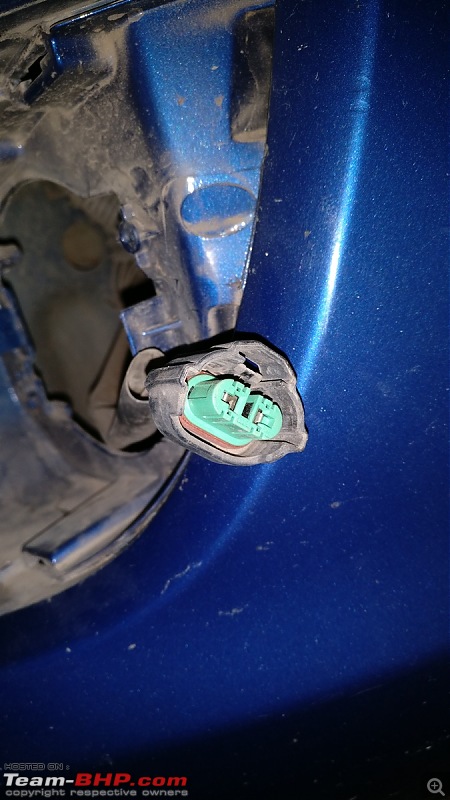
Step – 3: Open the fog lamp cover using trim opening kit. Using a star screw driver, remove the three screws that hold the OEM fog lamp. Disconnect the coupler from the bulb.
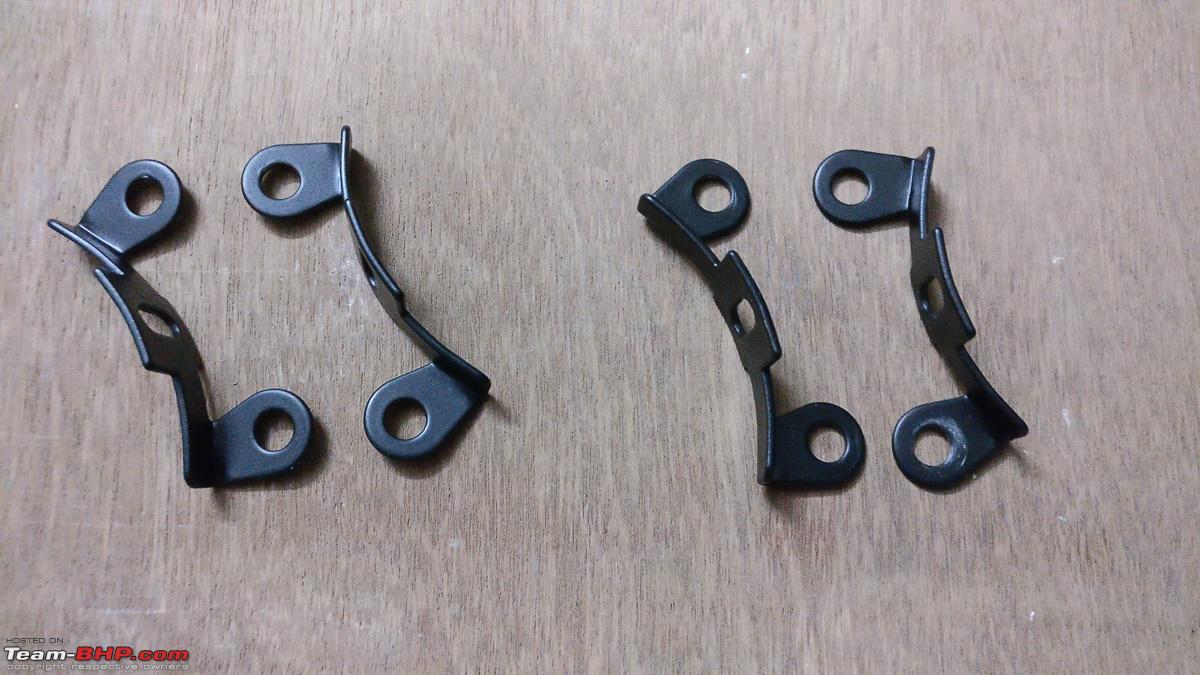
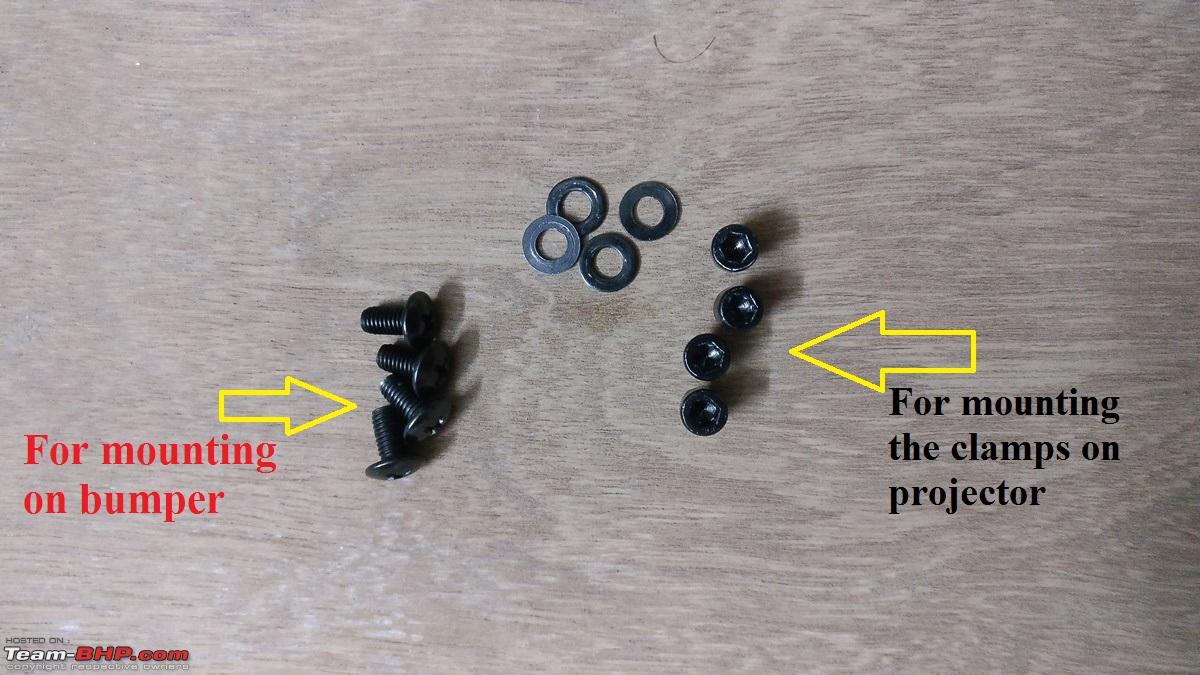
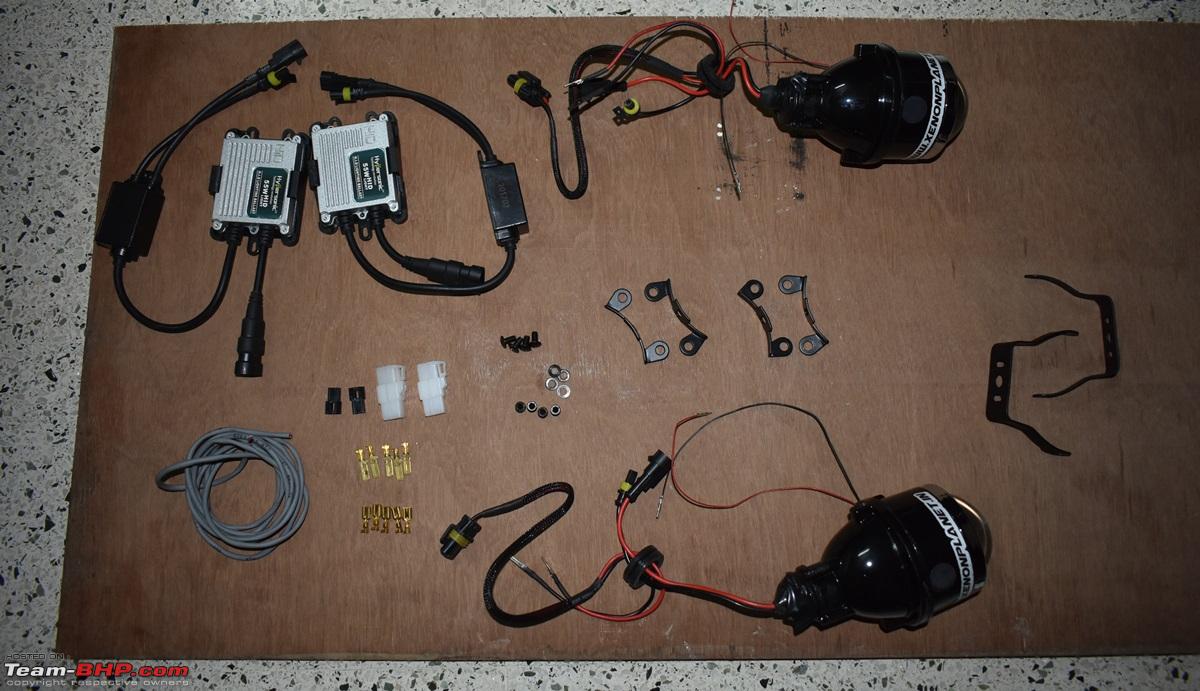
Step – 4: Using the provided clamps in the kit (choose the ones suitable for your car) fix them on the projector unit. Mount them in place of the OE fog lamps either by using the screws provided in the kit or one can use the OE screws that held the fogs in place. Plug-in the low beam wires to the OE fog lamp coupler.
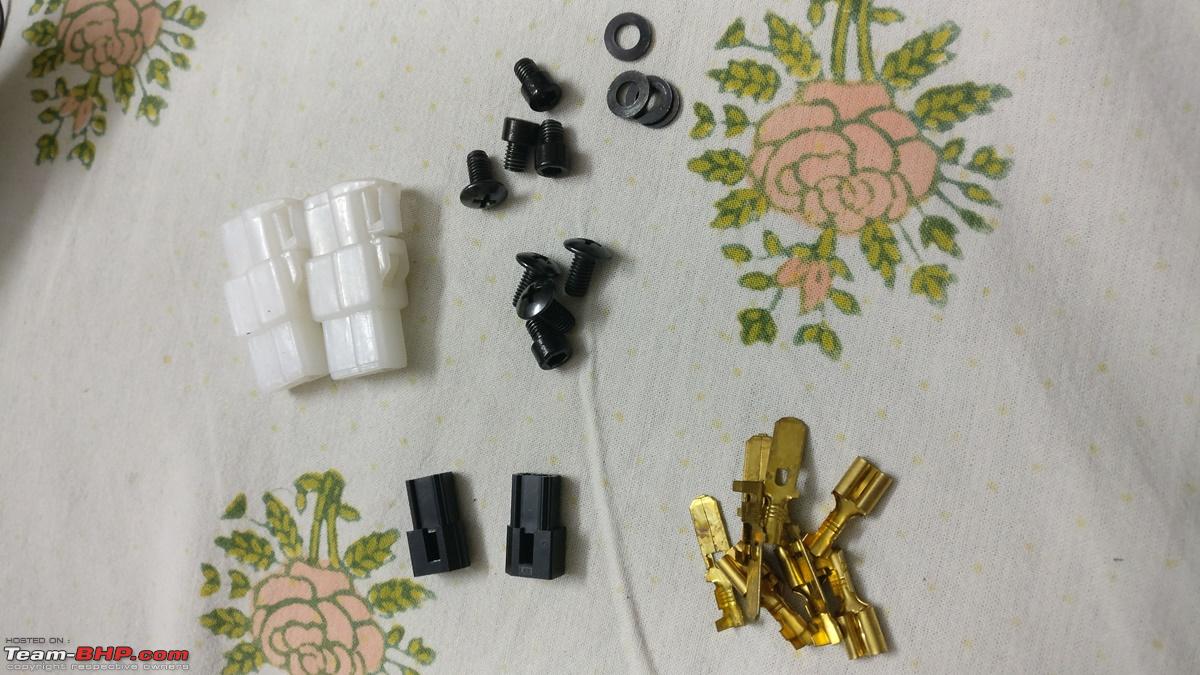
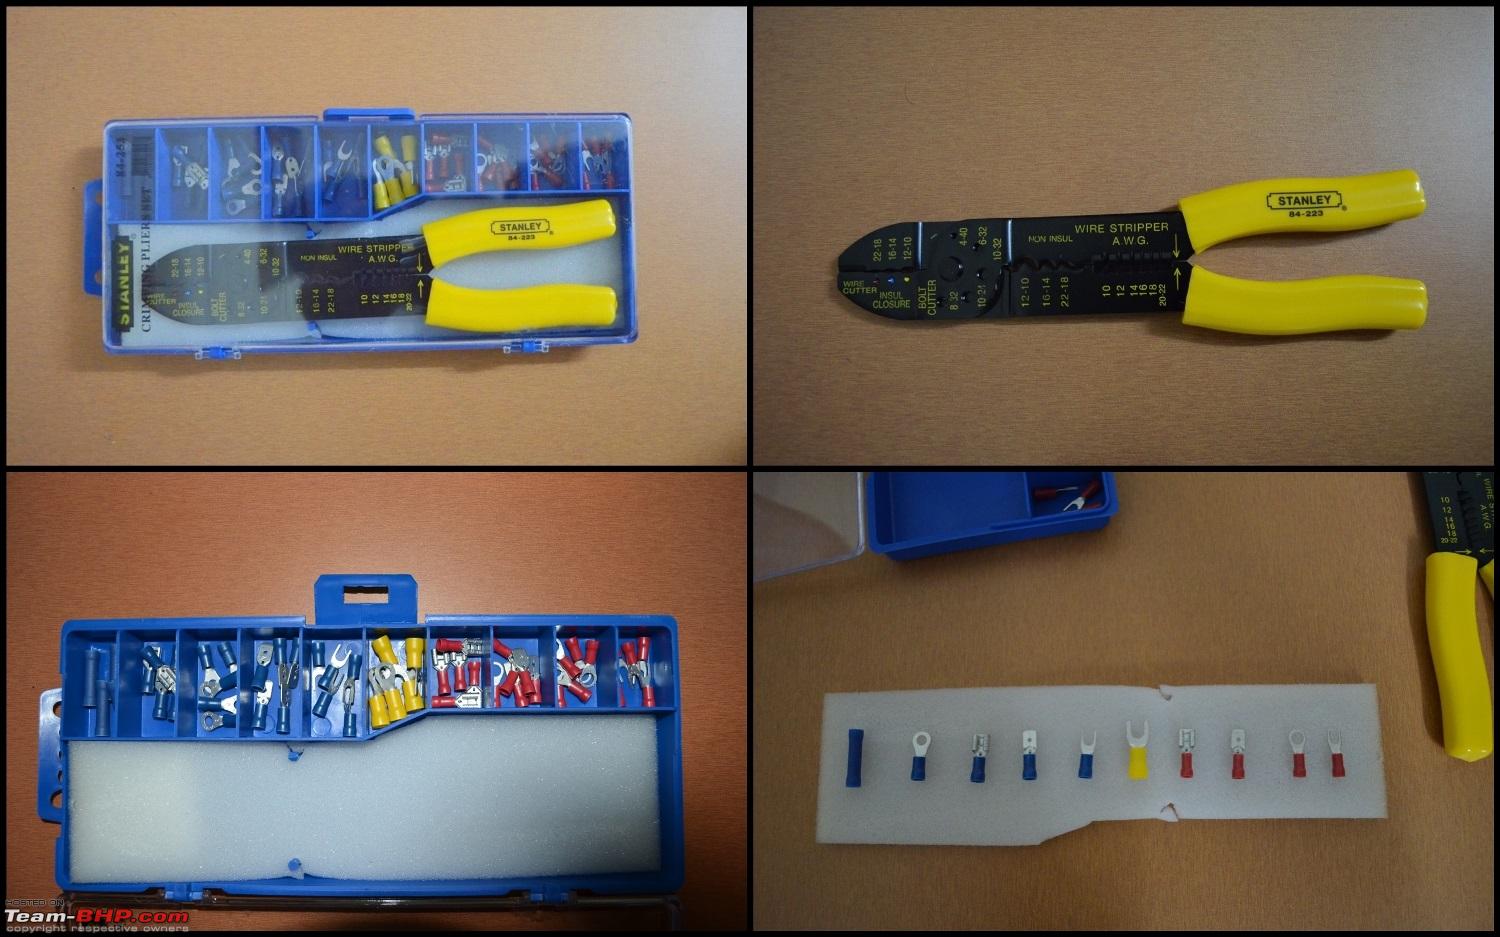
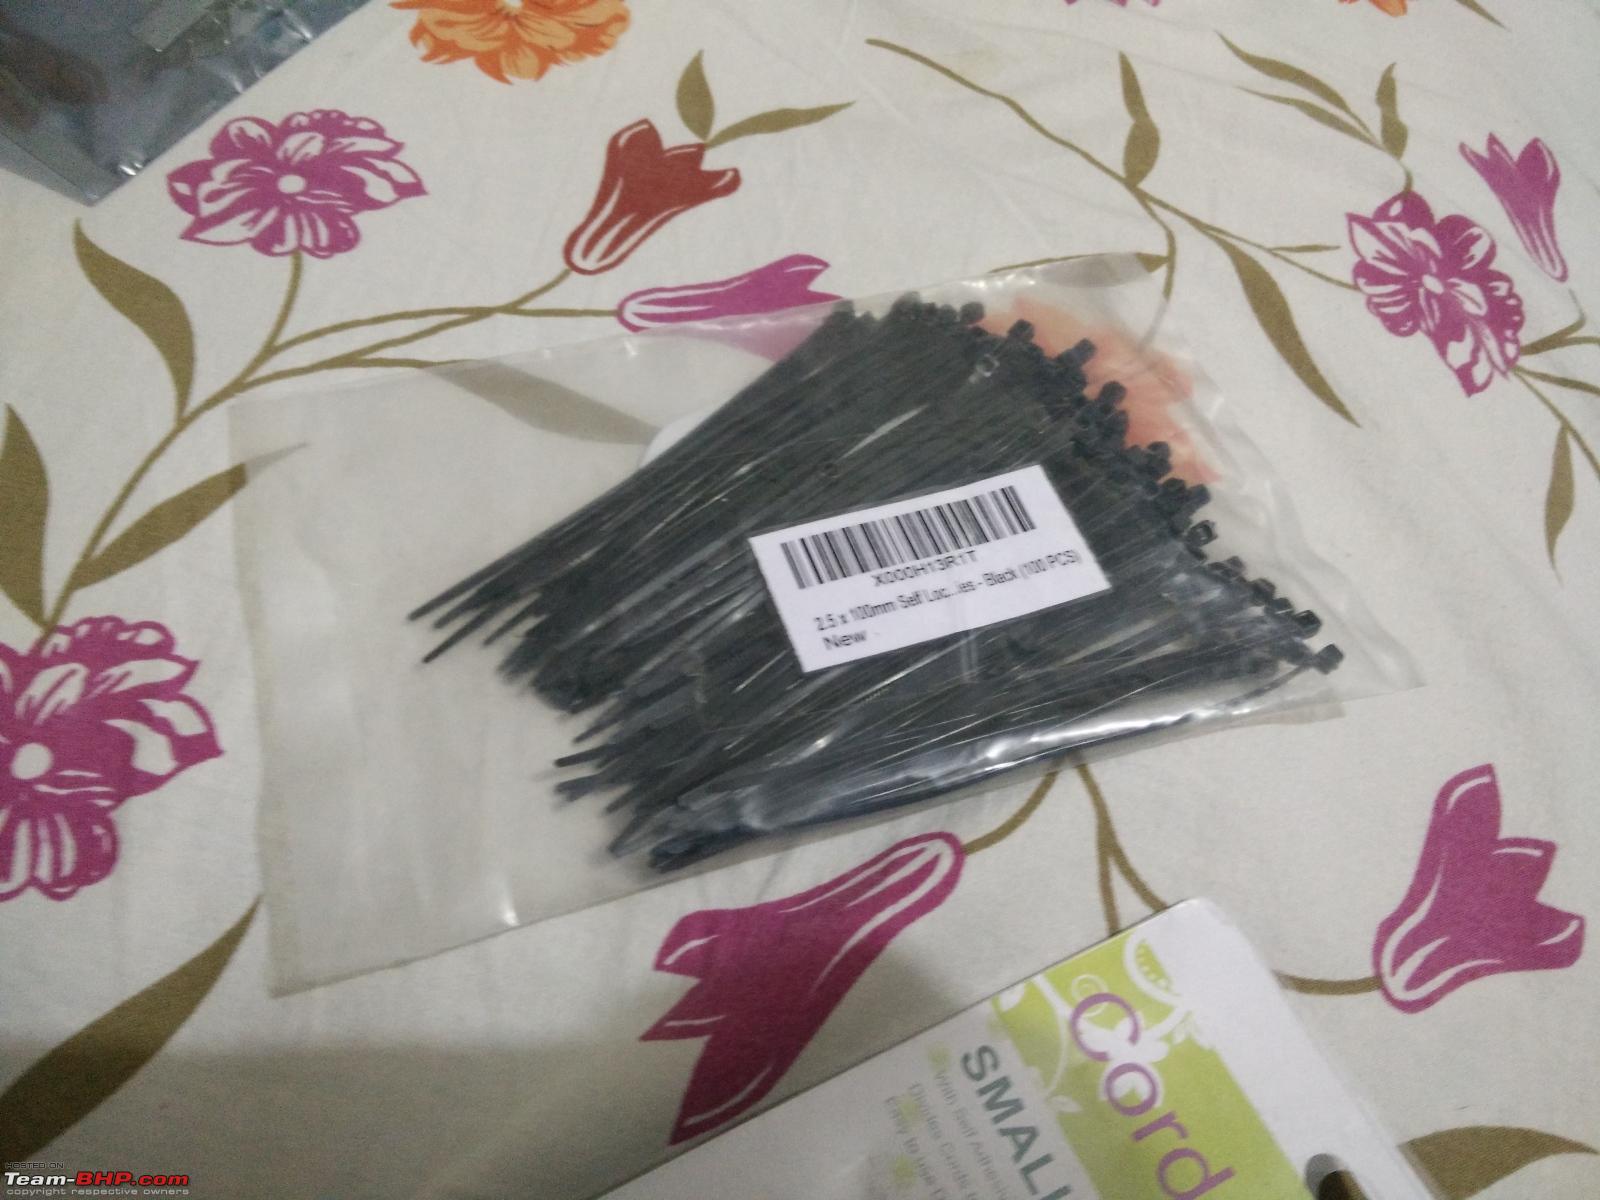
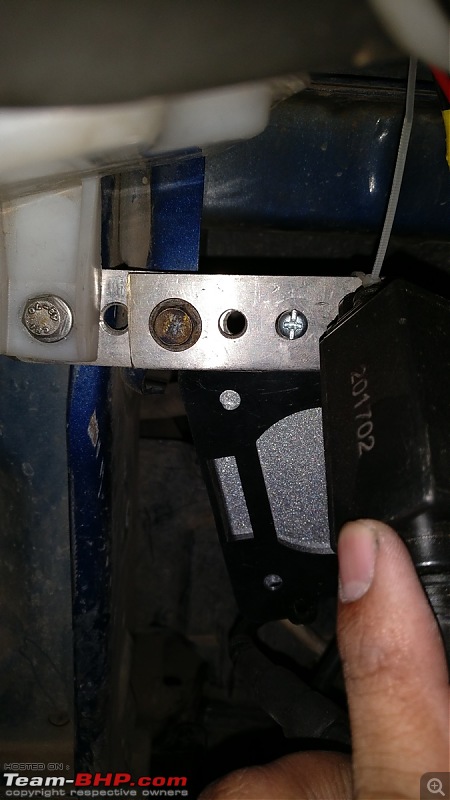
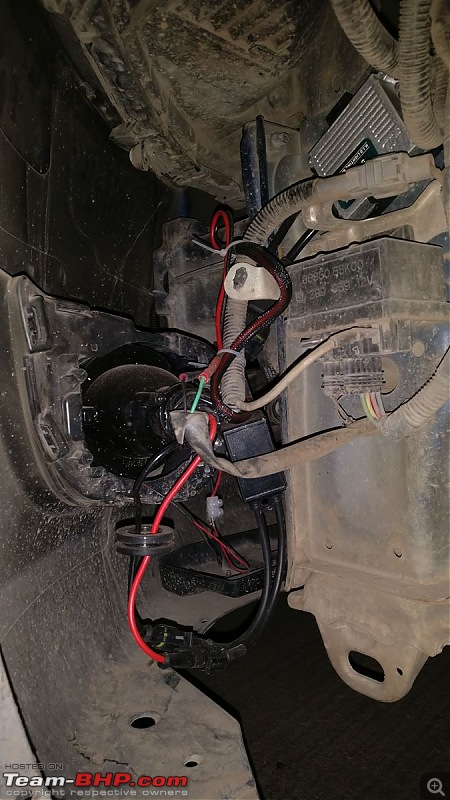
Step – 5: Route the dual core wire provided in the kit from passenger compartment to the engine bay. Secure the Ballast on each side (use Zip ties for secure install).
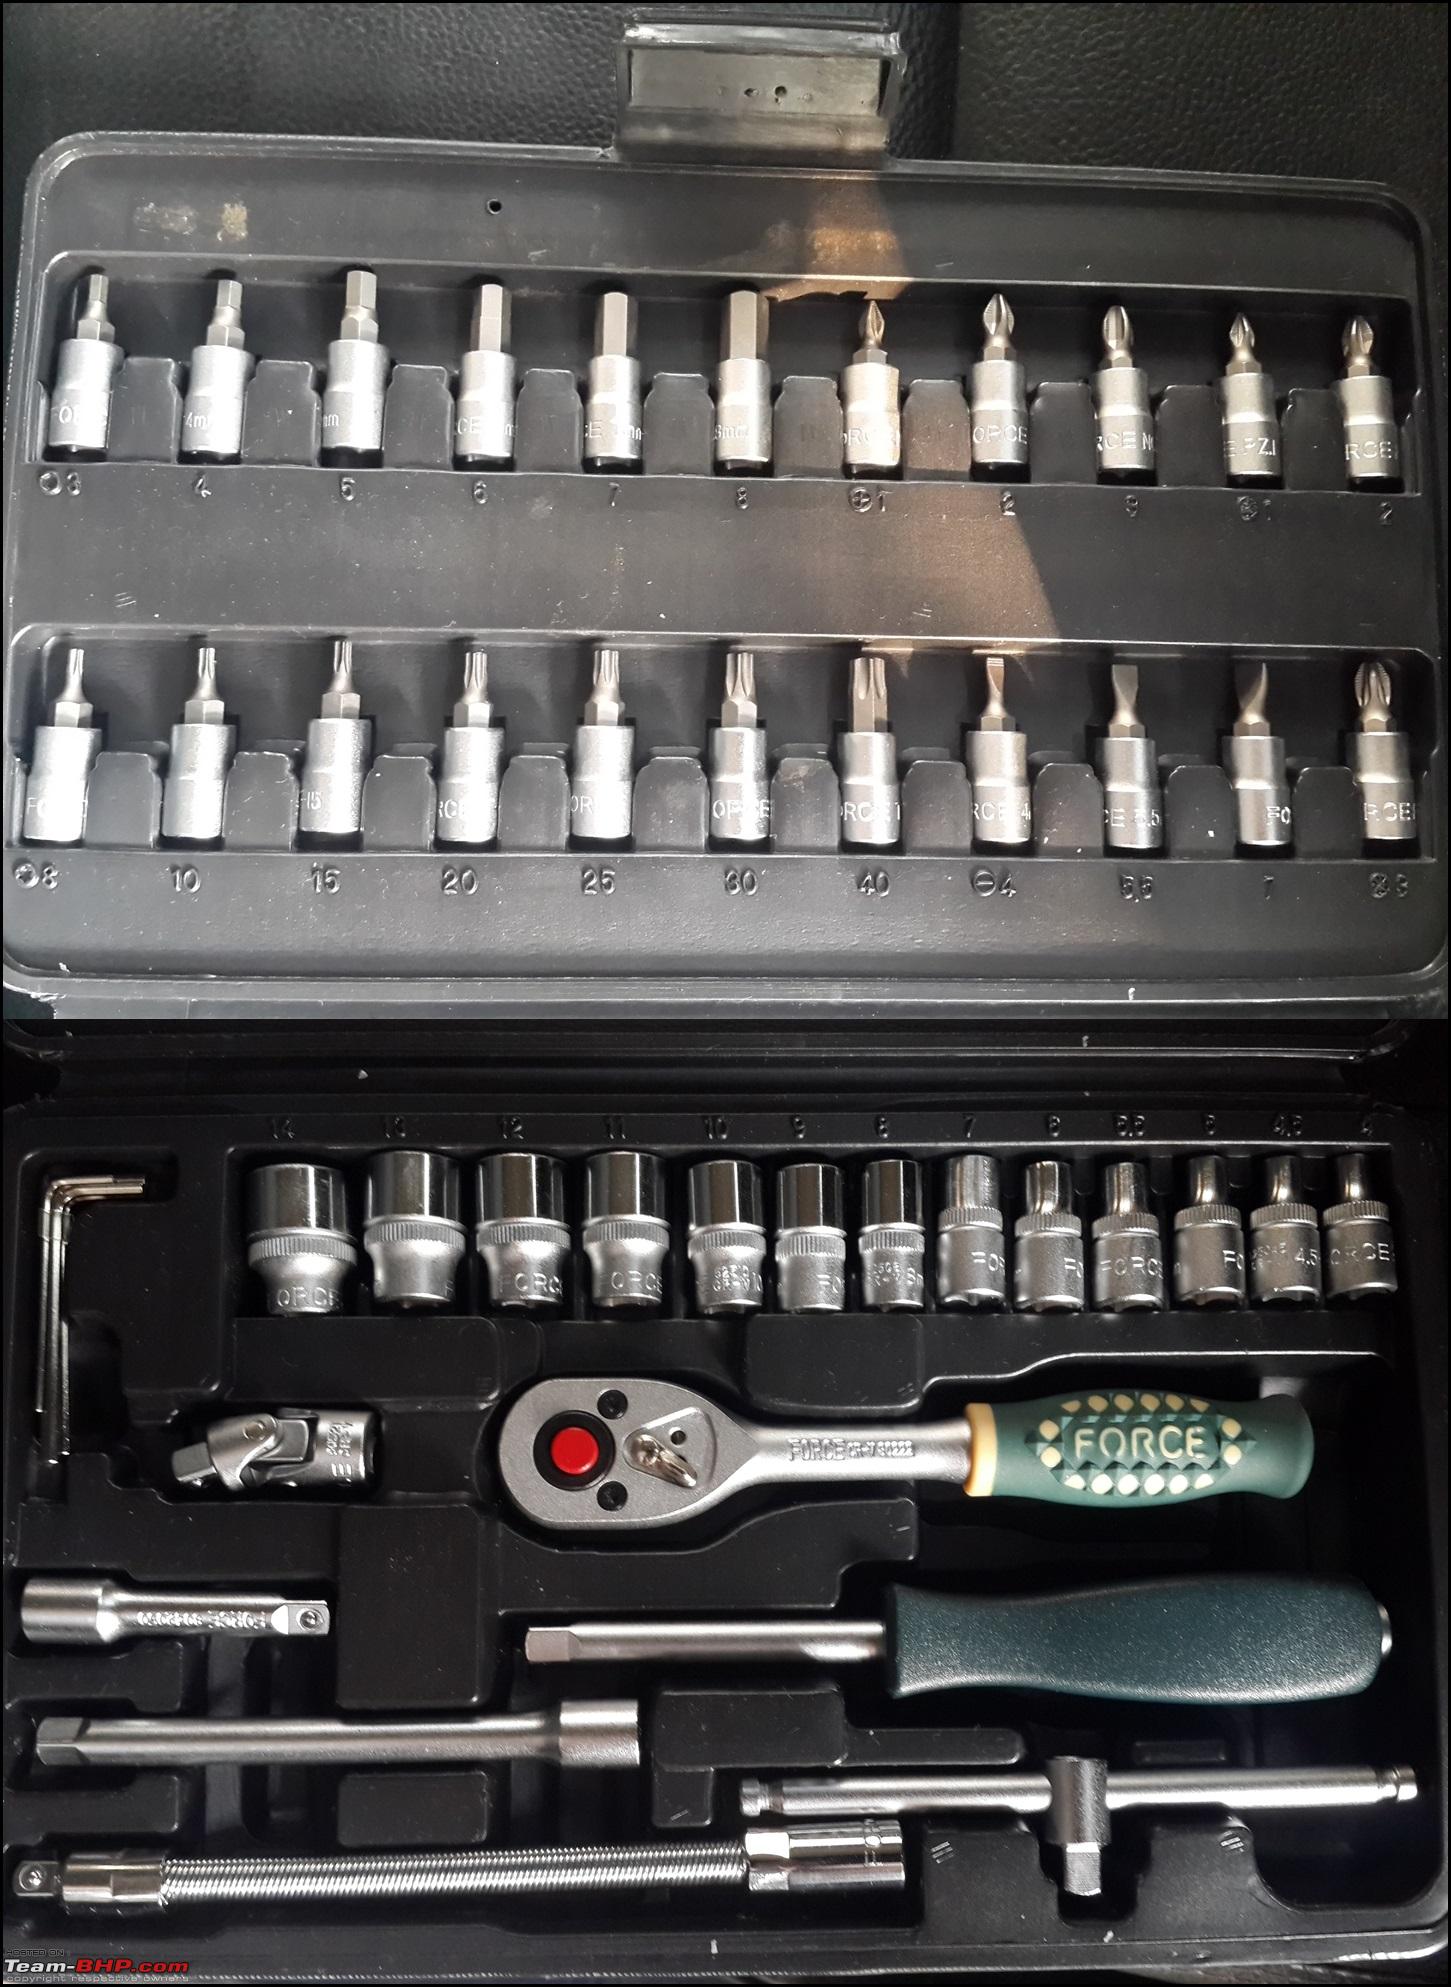
Step – 6: Crimp the connections and prepare the wiring beforehand so things move faster. Connect the high beam wiring on each projector to the dual core wire provided and connect to the switch placed in the passenger compartment for the high beam activation.
Step – 7: Once the wires and ballasts are connected to the projectors, check all the terminals for tightness of fitting.
Step – 8: Connect the negative (–ve) terminal of the battery and test the functioning of the low beam as well as the high beam of the projector.
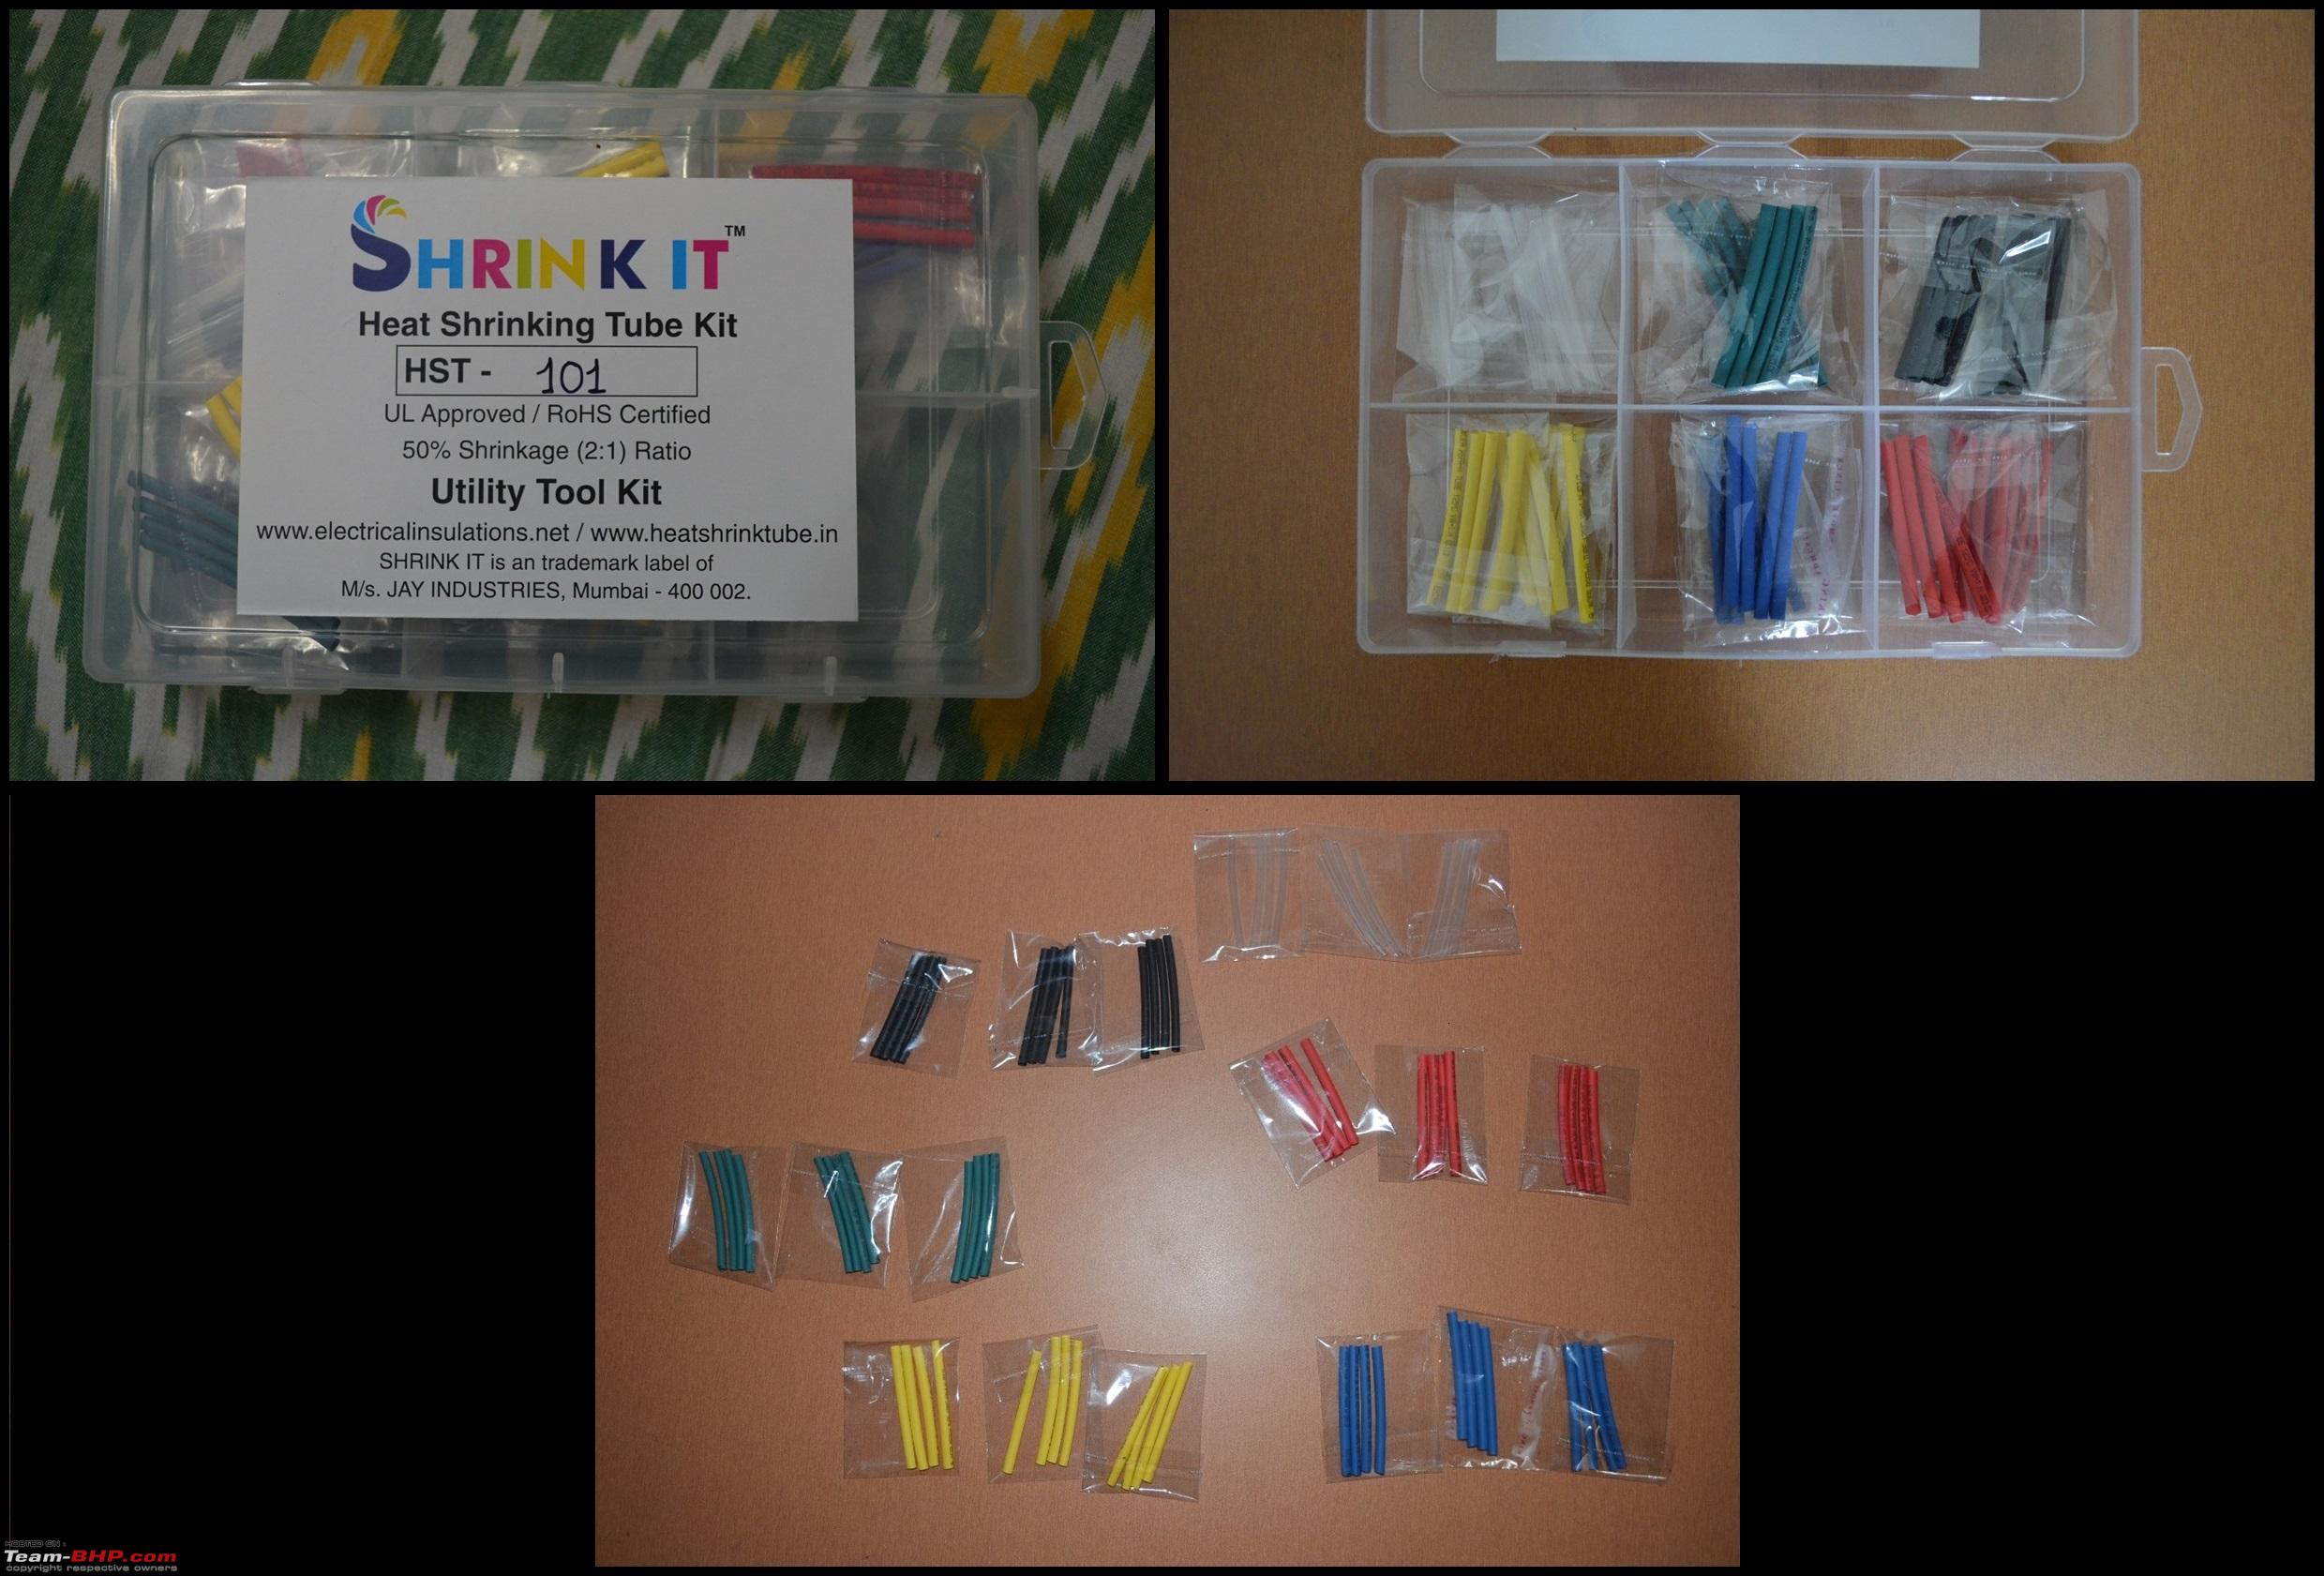
Step – 9: Once it is established that the functioning is as it should, using the heat gun, shrink all heat shrink tubes and tidy up the extra or loose wires using extra zip ties so it is secure and reliable.
Step – 10: Re-install the bumper and check the functioning again.
We are not done yet. A very important and main part of the install is awaiting for us - Alignment of the Projectors
_________________________________________________
Alignment of the Projectors
Step – 1: Wait for nightfall :D and once that happens, park the car on flat ground pointing towards a wall (preferably white) with a distance of approximately 10-15 feet.
Step – 2: Set the headlight level on level 1 using the leveler switch. This is lower than Level 0 that I use regularly. Mark the Level 1 point on the wall and switch OFF the headlight.
Step – 3: Switch ON the projectors in low beam and align the projector's low beam cut off line on the same point as marked on the wall in Point 2. Do the same for both sides and tighten the alignment screw so the projector is fixed and doesn’t move around.
Step – 4: Once tightened, re-install the fog lamp covers and recheck if the alignment hasn't been disturbed or not. If all okay, set the headlight level to Level 0 and check the beam pattern.
This will ensure that the low beam will not affect the oncoming vehicles since it is set at a level lower than the OE Low beam of the headlight.
Re-check everything and we are done & ready to drive!
Issues faced during the install
As and when I proceeded step by step, I came across 4 issues that slowed down the installation process plus irritated me thinking that I currently have the wrong car for the 3 inch XP Micro's :D
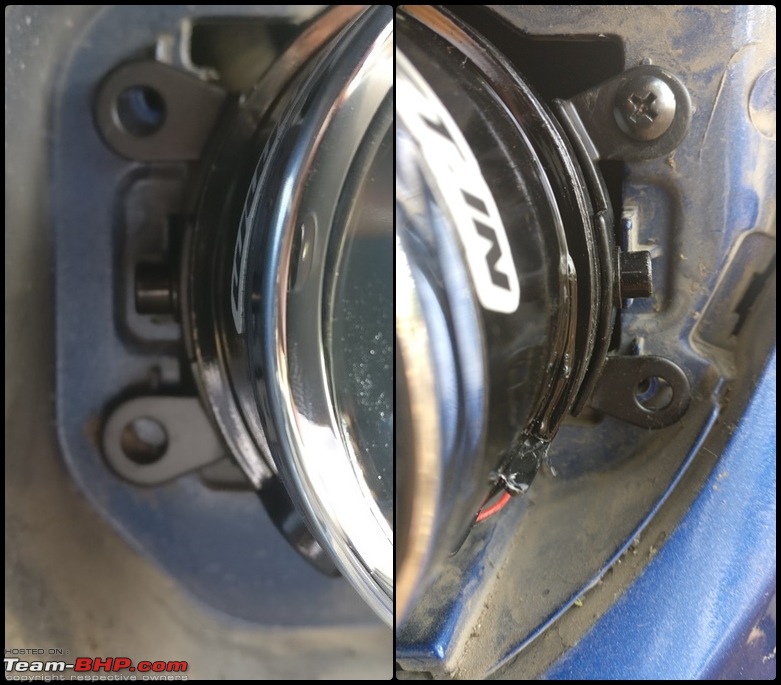
Issue No. 1: Fog lamp covers are of same Size as the projector unit. This was not letting the cover re-fit in place post fixing and aligning of the projector.
Fog lamp covers not fitting when projectors in-place (Issue No. 1)
 Solution:
 I had to grind/shave the cover so as to make room for it to fit in its place without disturbing the projector alignment that was set.
RHS Cover
LHS Cover

-x-x-x-x-x-x-x-x-x-x-x-x-x-x-x-x-x-x-x-
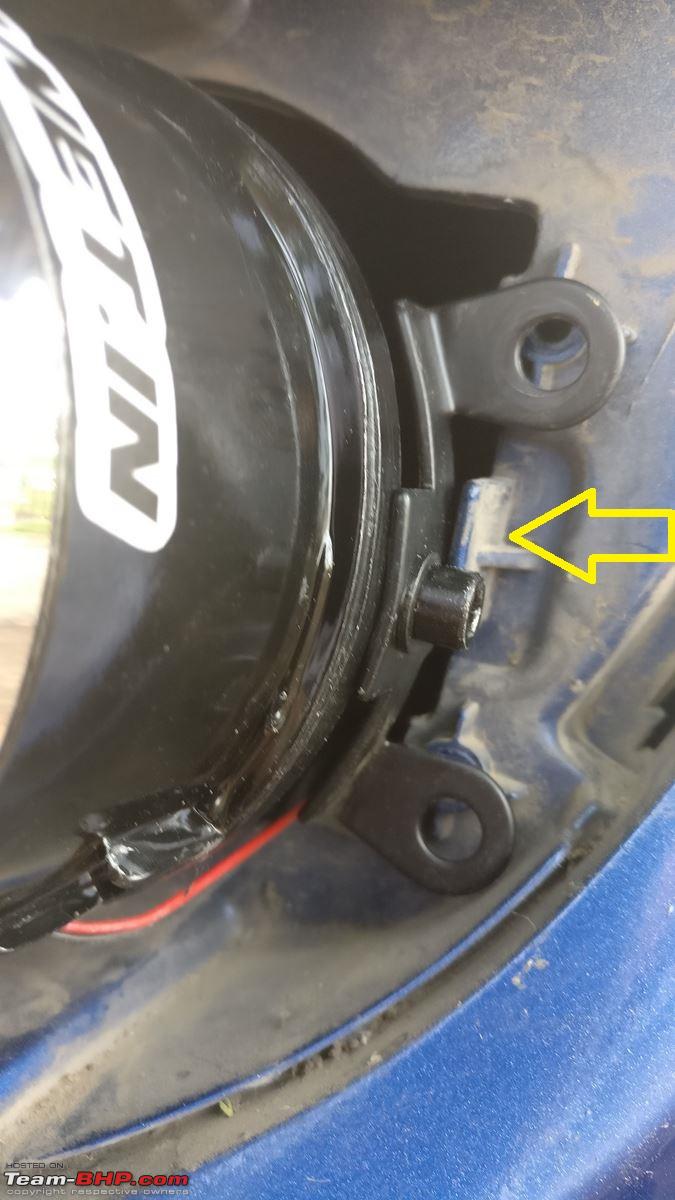
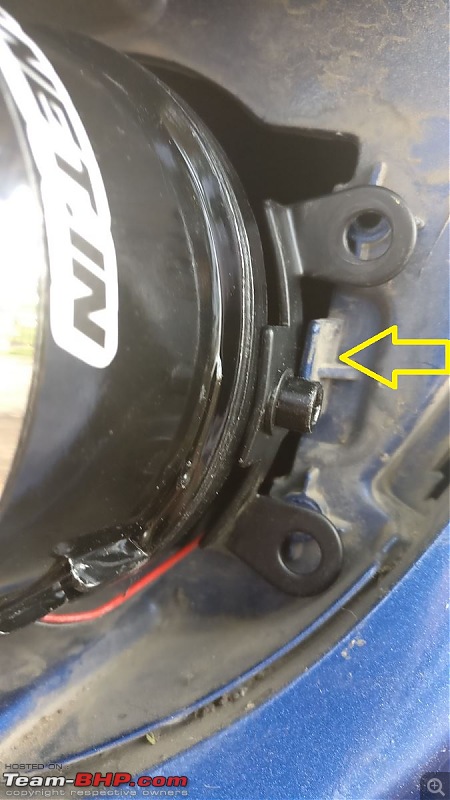
Issue No. 2: OE fog lamp holding plastic slat. The hindrance here was the OE fog lamp is held by 3 screws and also a plastic slat that slides into the bracket of the OE fog lamp. This slat was not letting the projector to be moved inwards by obstructing the alignment screw.
Trim obstructing projector fitment
 Solution:
 Had to cut that slat so the projector could move inwards for an easier install and partial solution to Issue No. 1.
Trim cut
Projector installed post cut

-x-x-x-x-x-x-x-x-x-x-x-x-x-x-x-x-x-x-x-
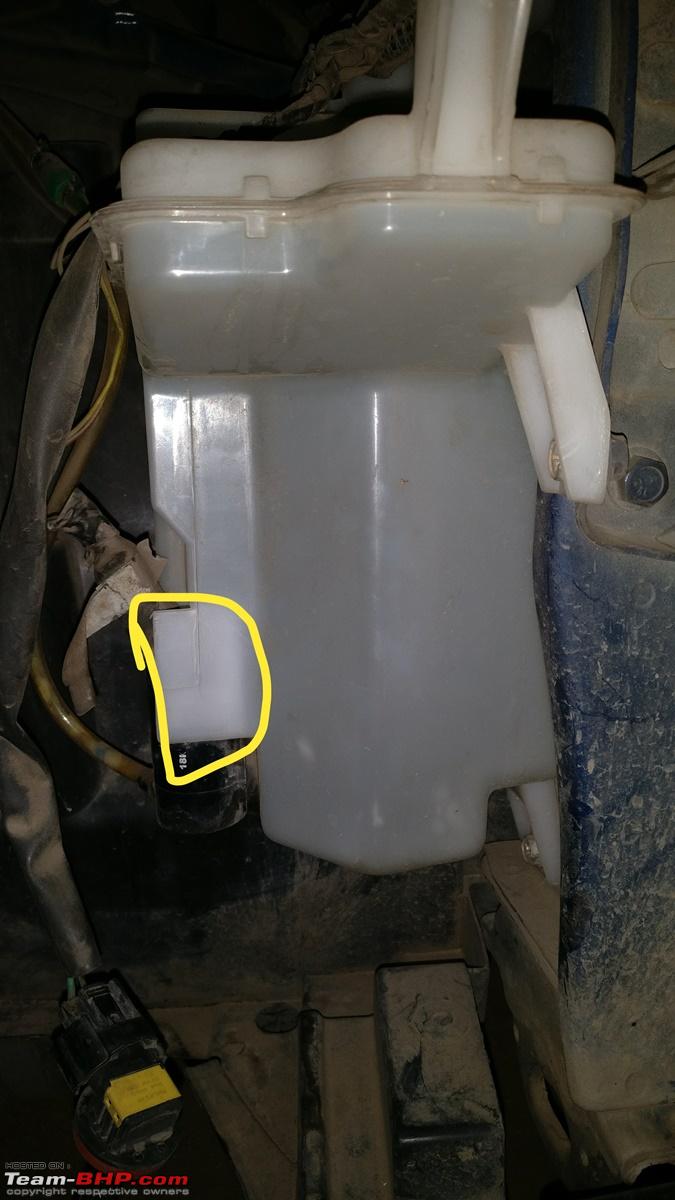
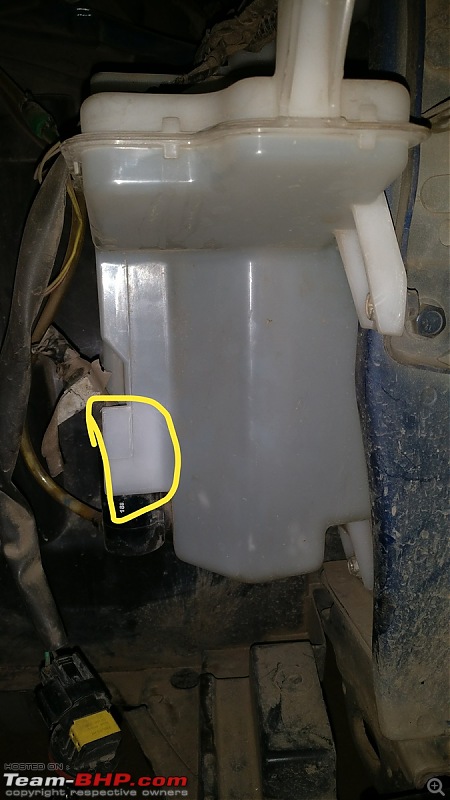
Issue No. 3: The left side fitment was easy and straightforward but when I tried to fit the projector on the right side, the hindrance came in the form of windshield washer tank. This is located just behind the right side OE fog lamp.
Washer Tank obstructing

Part of the washer tank obstructing
 Let me explain what I am trying to say
Mine being a ‘Z’ variant, my car comes with the rear wiper and washer so the motor that sends water to the rear windshield nozzle is located at the front end of the washer tank that is just opposite the fog lamp. Also there is a plastic trim on the tank that is designed to protect the pump. This issue is there because of the difference in length between the OE fog lamp and the XP Micro. The bulb and wiring part was coming in contact with the rear washer motor and that plastic part (Circled in the image attached).
Solution: To this I had thought of 2 possible ways:
S1: Move the tank backwards by 1 to 1.5 inch so it frees up space for the projector to fit in correctly as planned.
S2: Get a ‘V’ variant washer tank and fit it in place as this variant doesn’t get the rear washer so the cavity where the rear motor is located is empty and I can cut that plastic trim a bit to generate more space for a cleaner fit.
'V' Variant tank as seen in another Swift (VDi variant)

Downside to this solution is I won’t be able to use the rear washer and wiper. I am not comfortable with this so tried exploring possibility on Solution No. 1.
What I did finally?
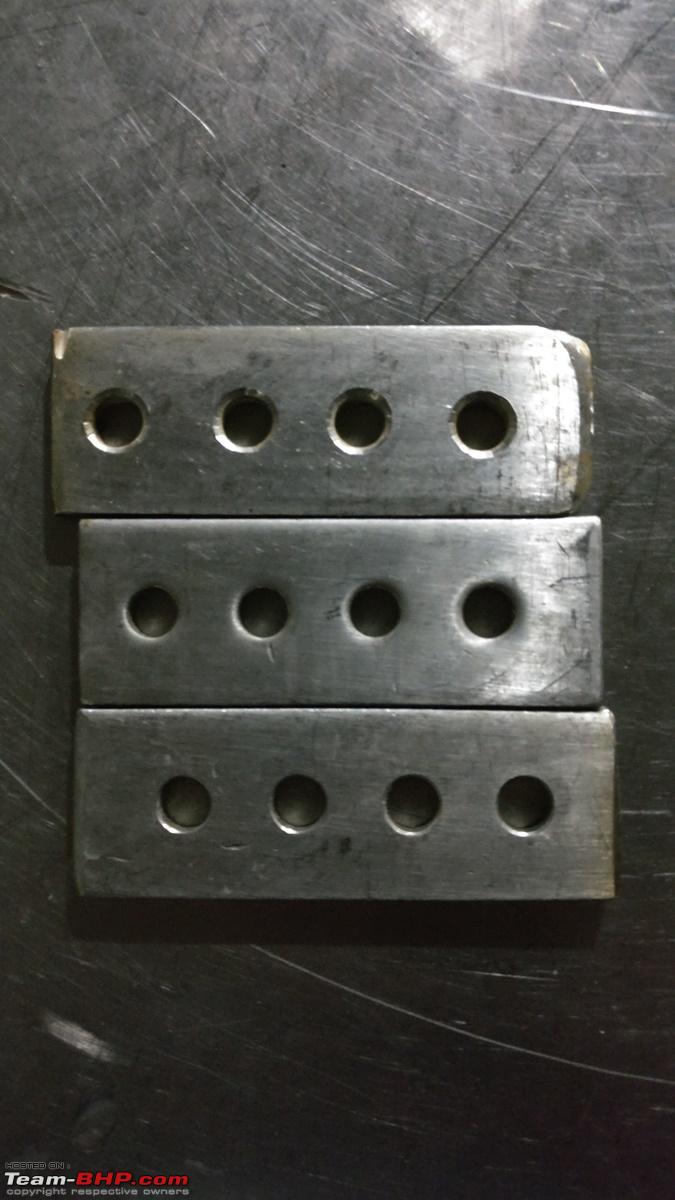
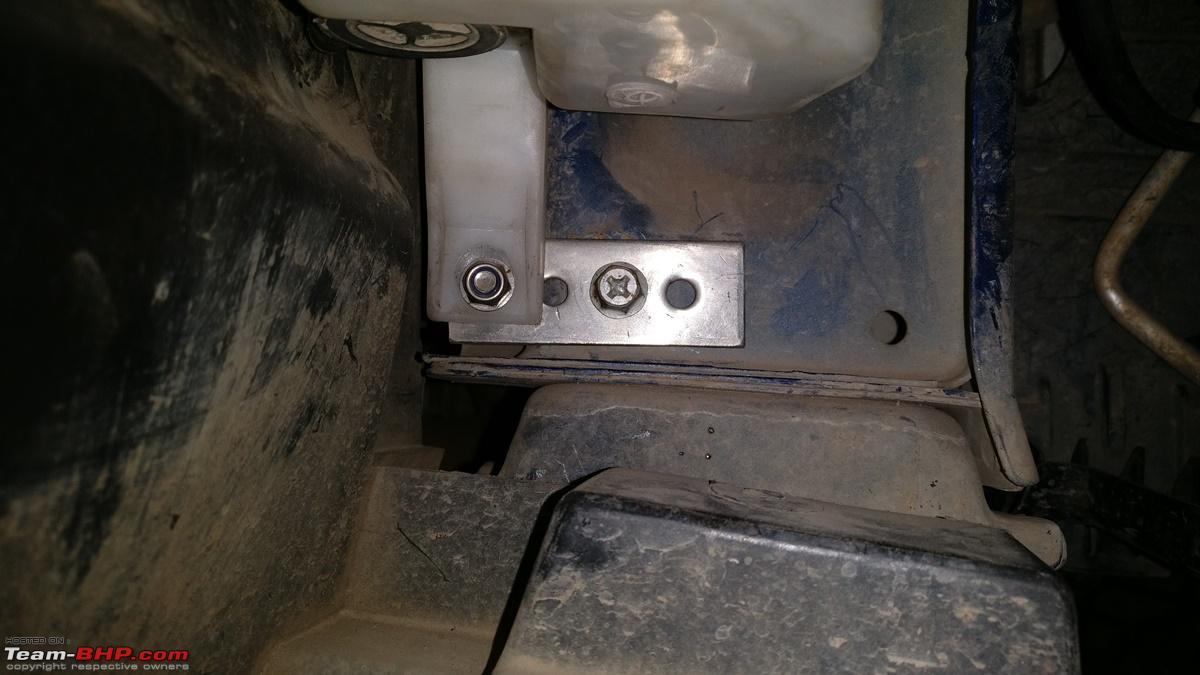
I chose Solution No. 1. I got a set of custom brackets made of SS 316 with holes to mount the washer tank so it could be moved backwards for the projector to fit.
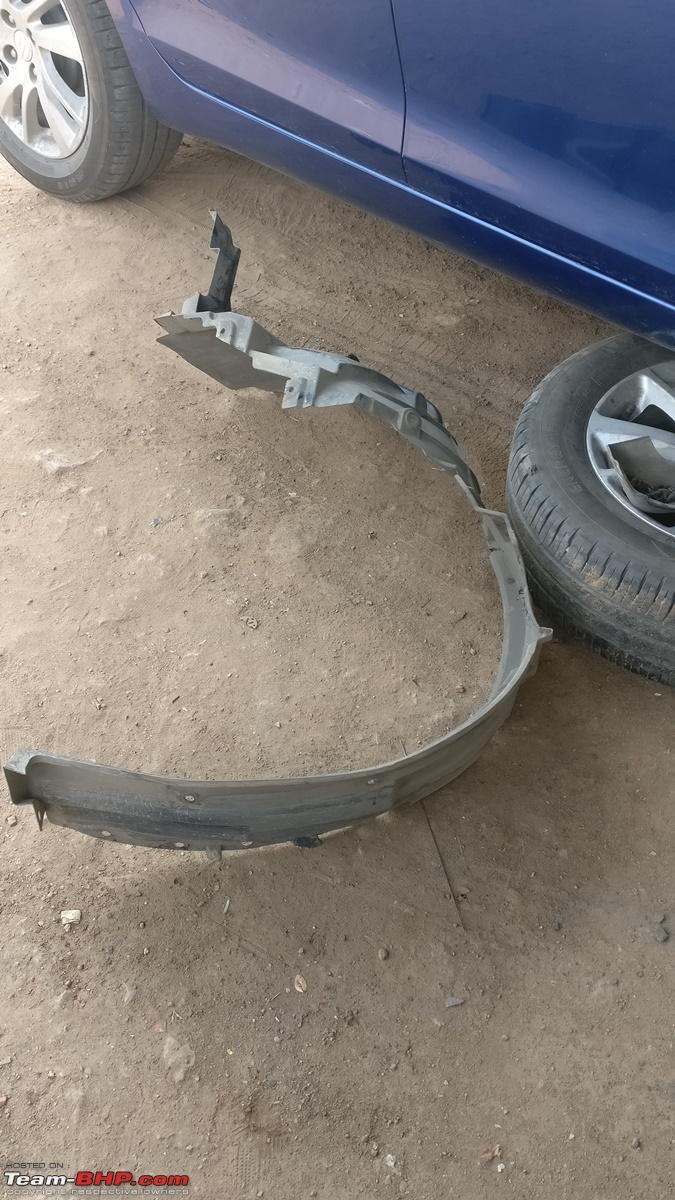
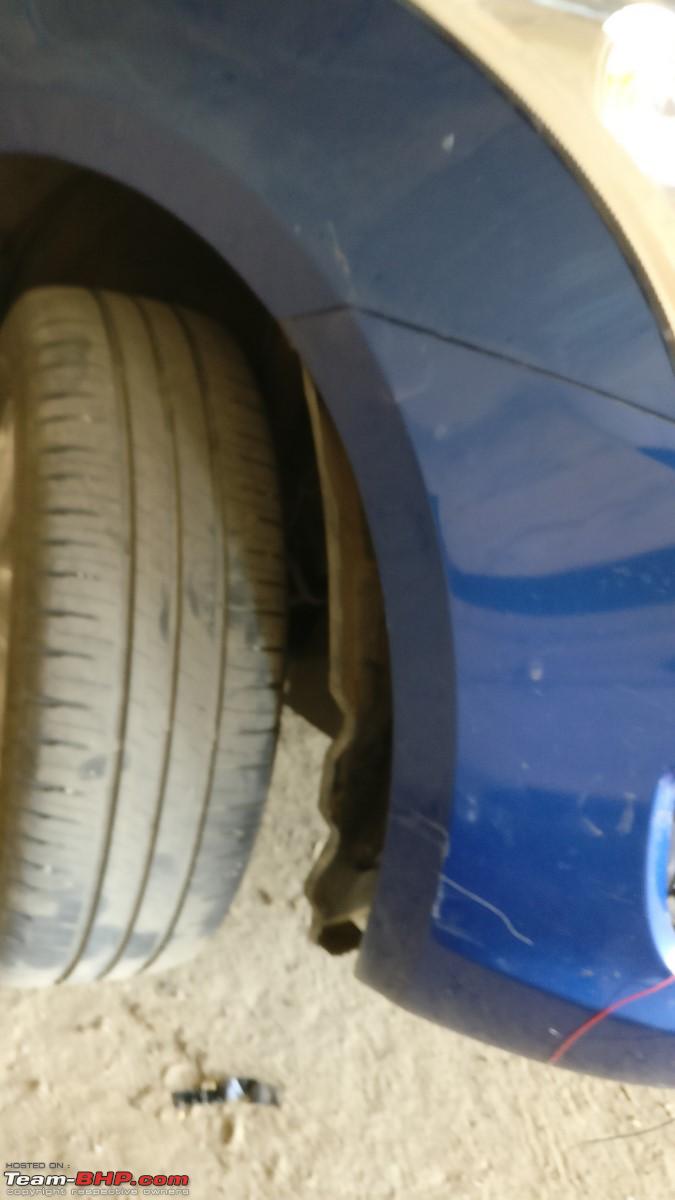
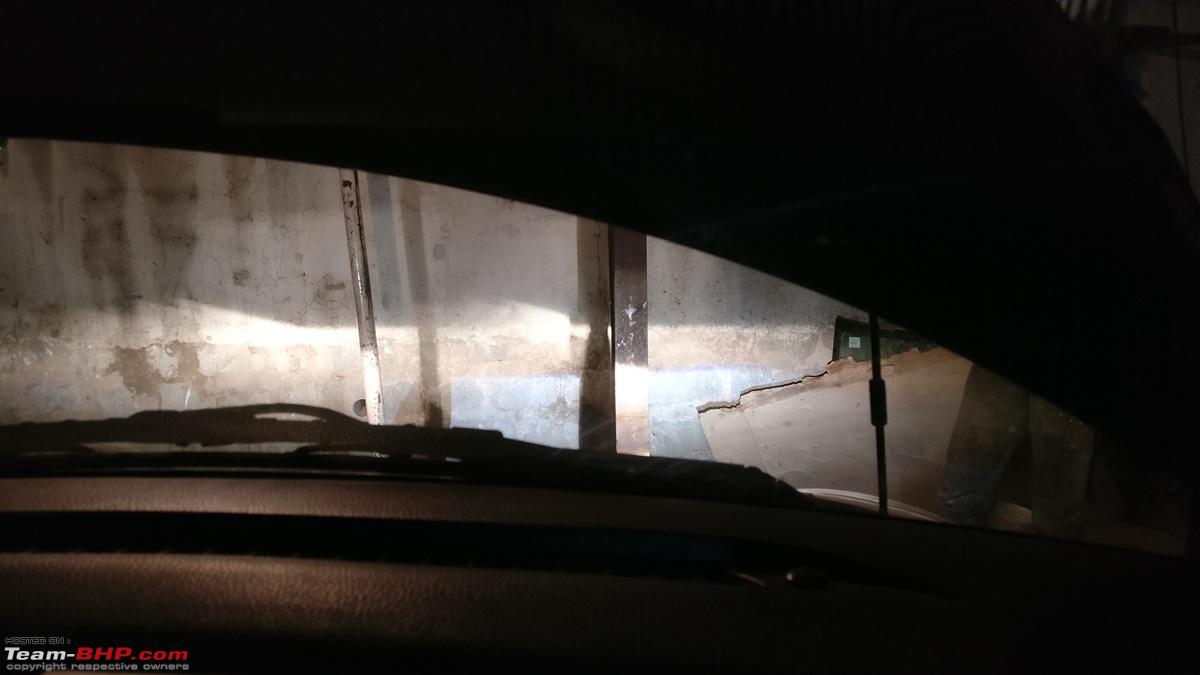
I had to remove the right side tyre, fender lining to get clear access to the windshield washer tank. Secured the tank by the three mounts and tightened everything and checked if the projector doesn’t get hindered by the washer tank. After found all to be okay, refit the fender lining and the tyre.
Washer tank as seen from side (when pumper removed)
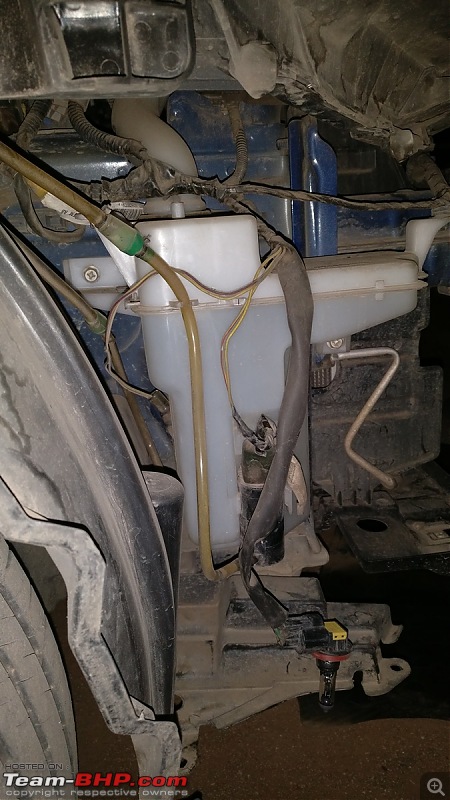
Tank moved backwards by almost an inch

Fender lining removed to move tank backwards

With the new clamp fixed, new mounting point 1

New Mounting point 2
If the tank is moved back fully by 2.5 inches the fender lining doesn't close

-x-x-x-x-x-x-x-x-x-x-x-x-x-x-x-x-x-x-x-
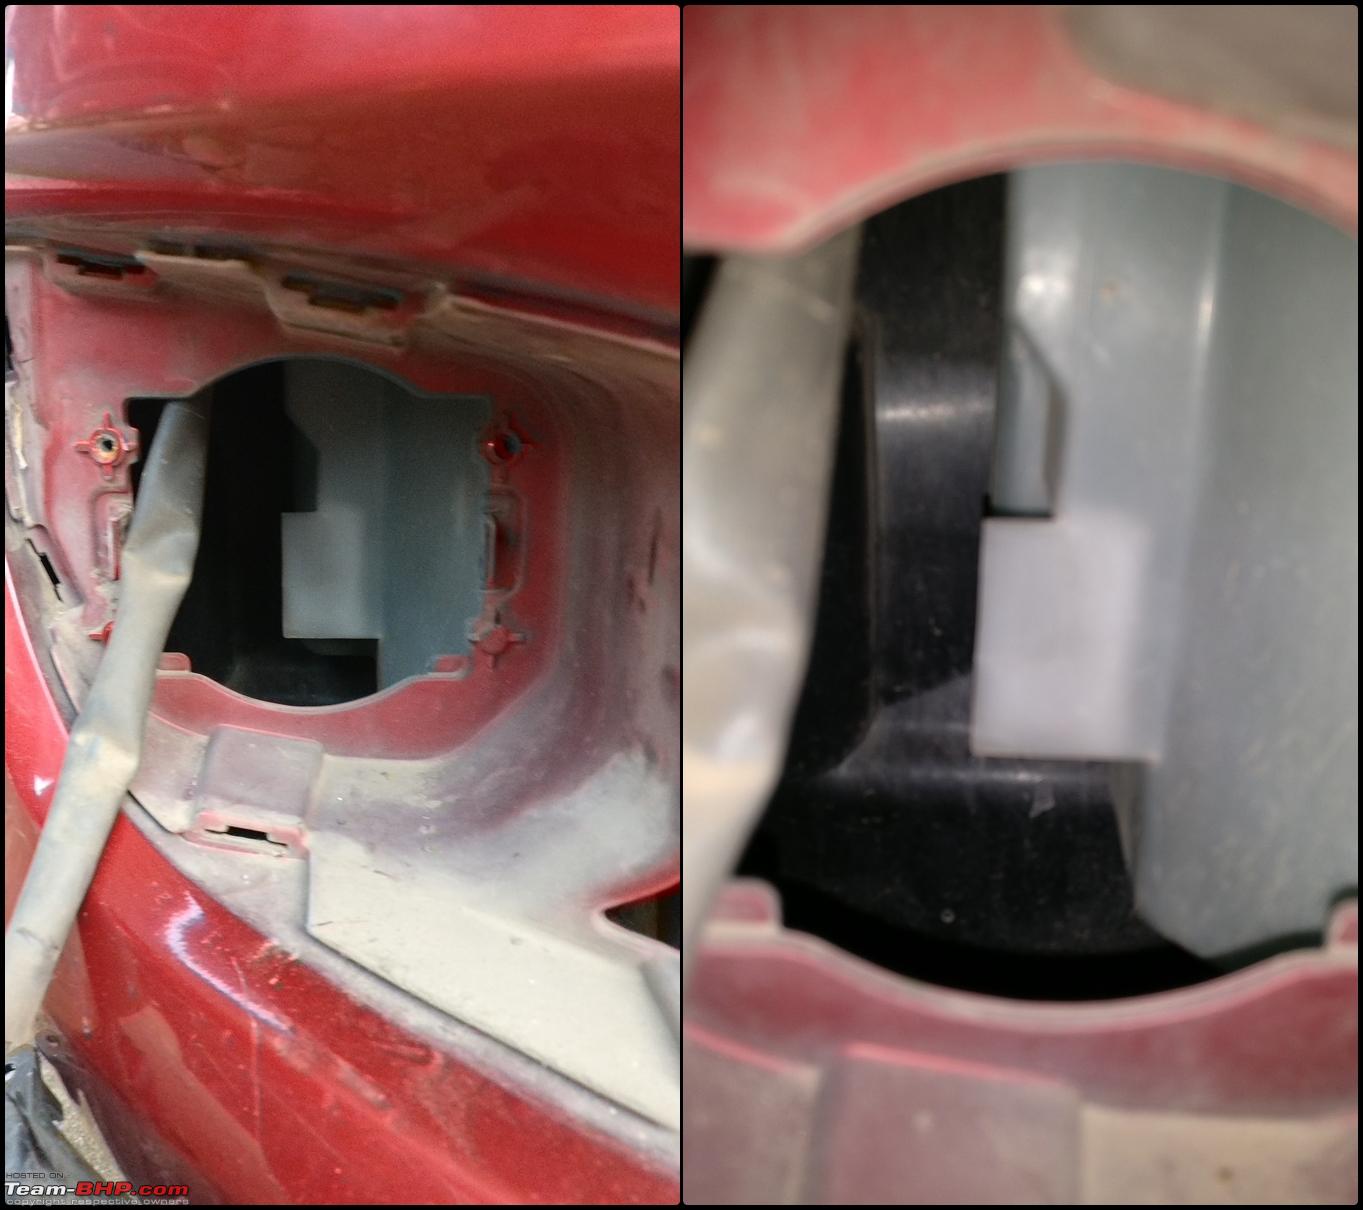
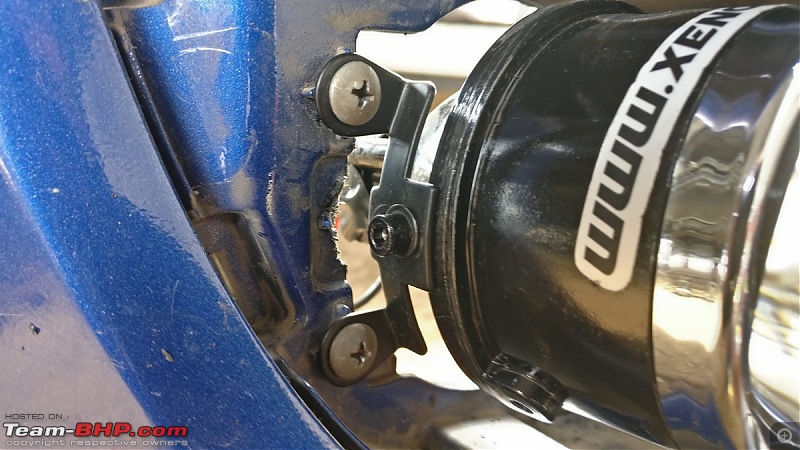
Issue No. 4: Holes not matching of the clamp visa-vis holes on the bumper that held the OE fog lamps in place.
Holes not matching with clamps provided in the kit
 Solution:
 Using the soldering gun, I made the existing holes larger so they match with the clamps on the projector.
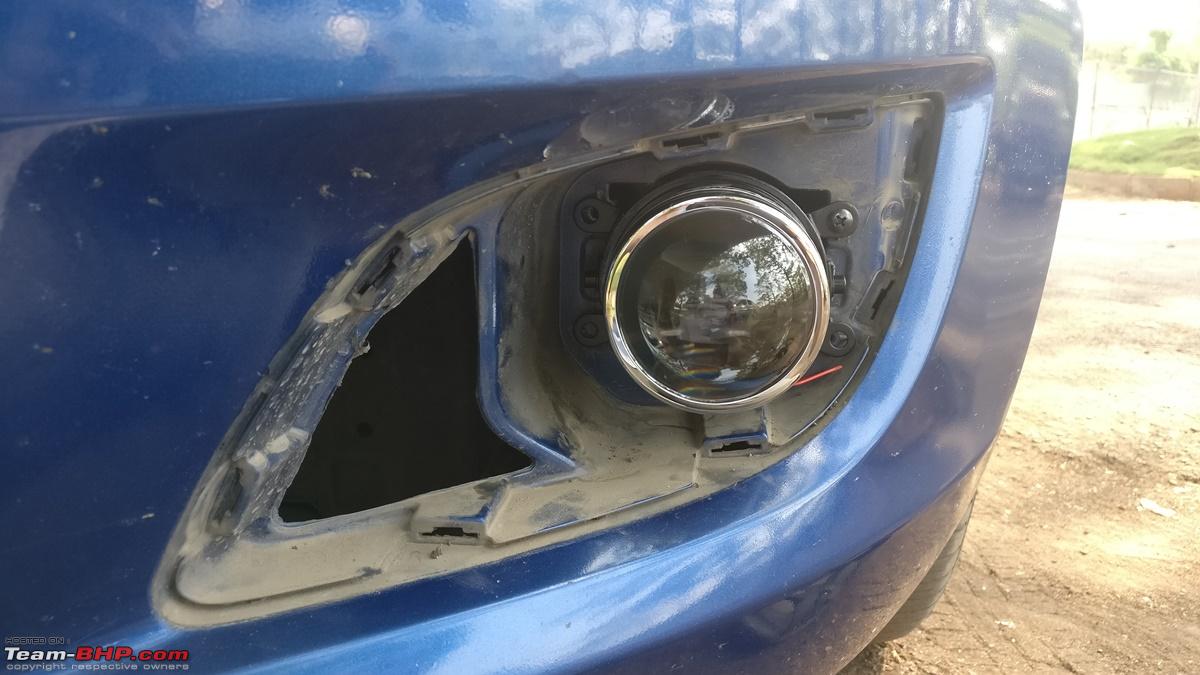
Projector installed post matching holes
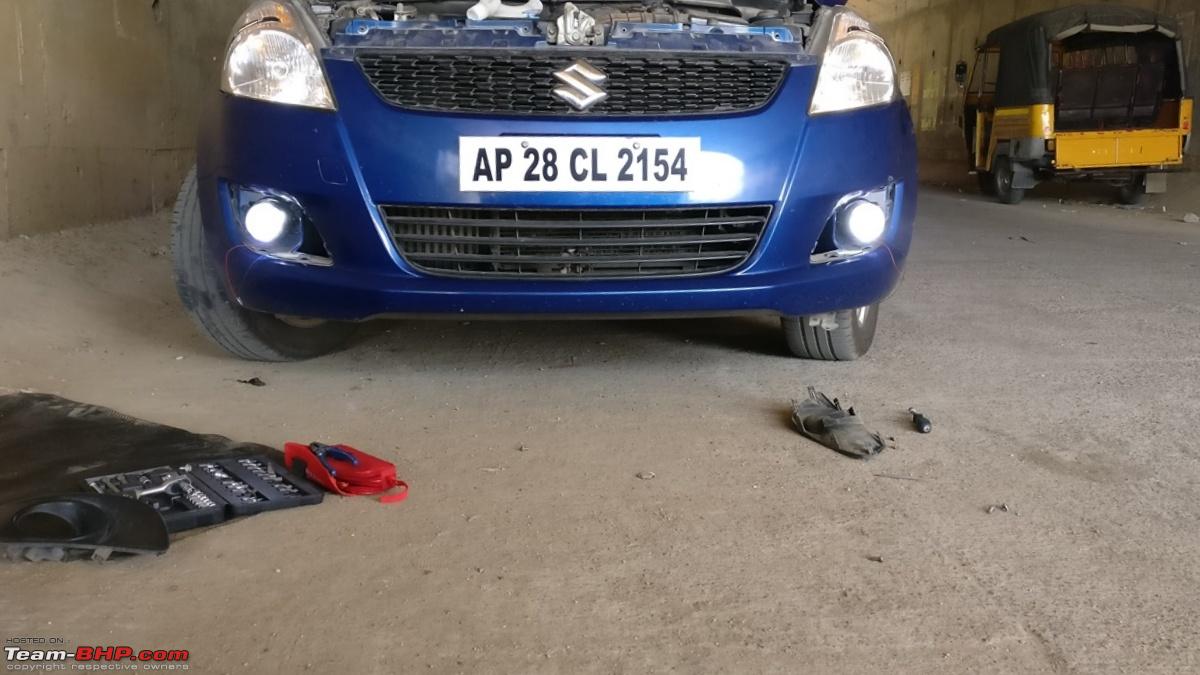
Some installation Images Bumper removal...
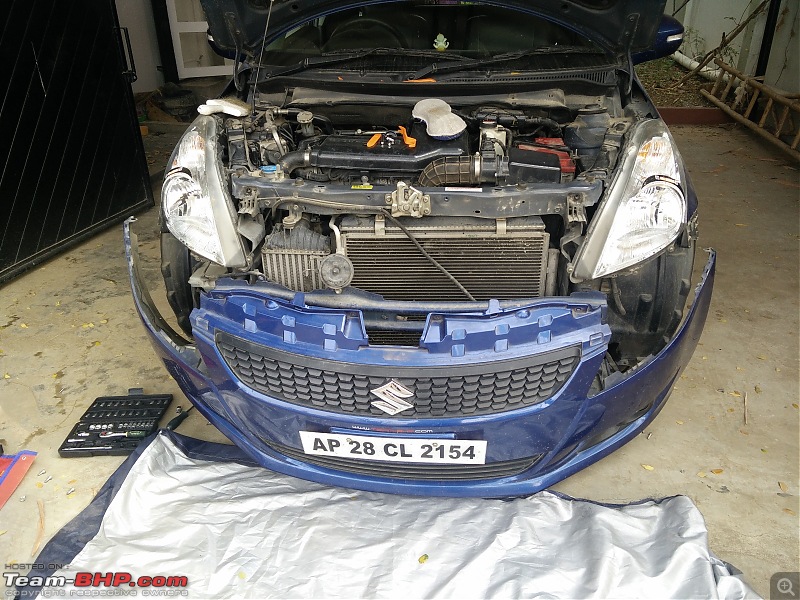
...removed

Removing fog light cover

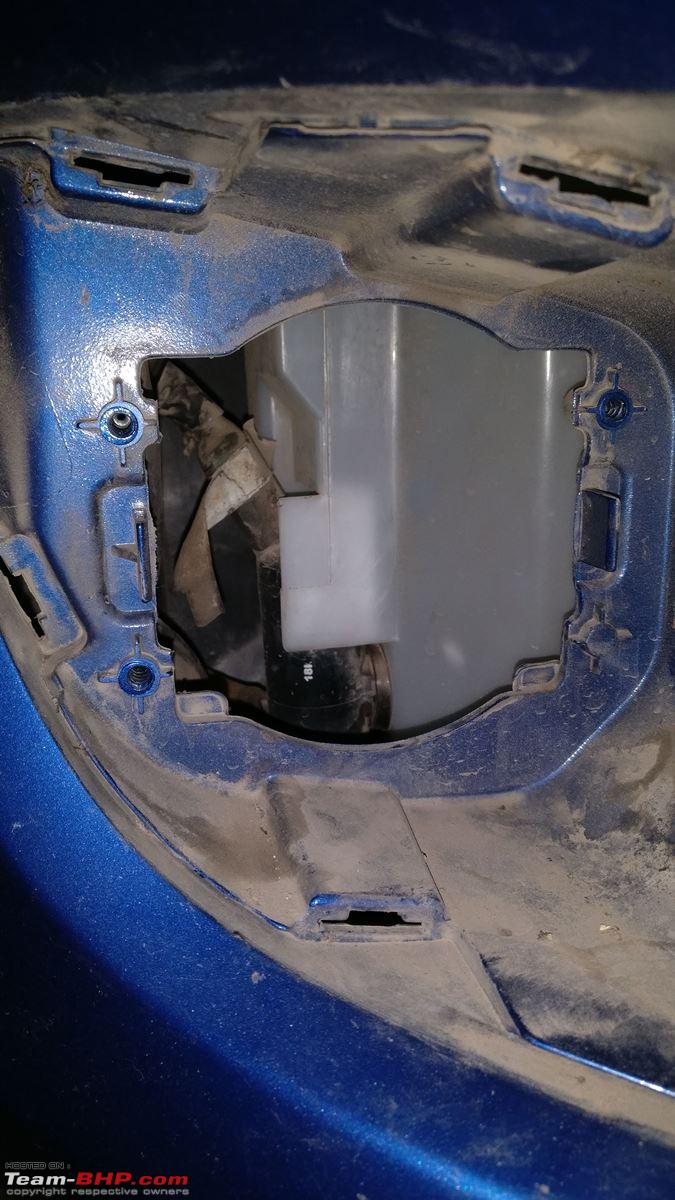
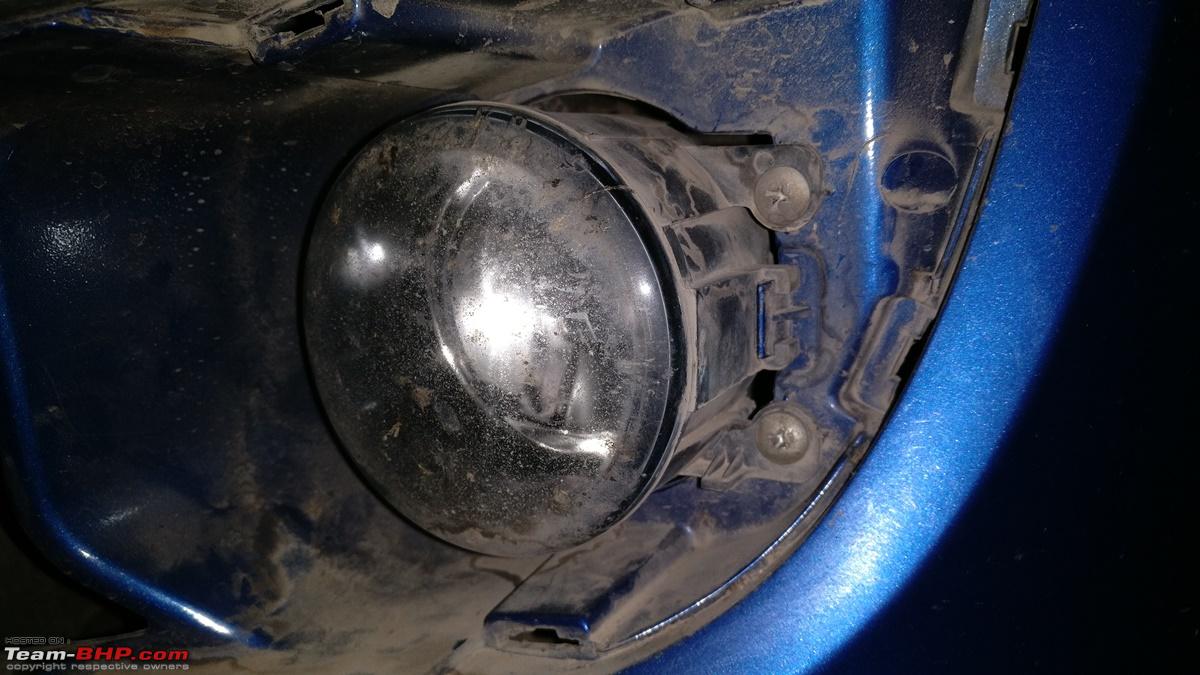
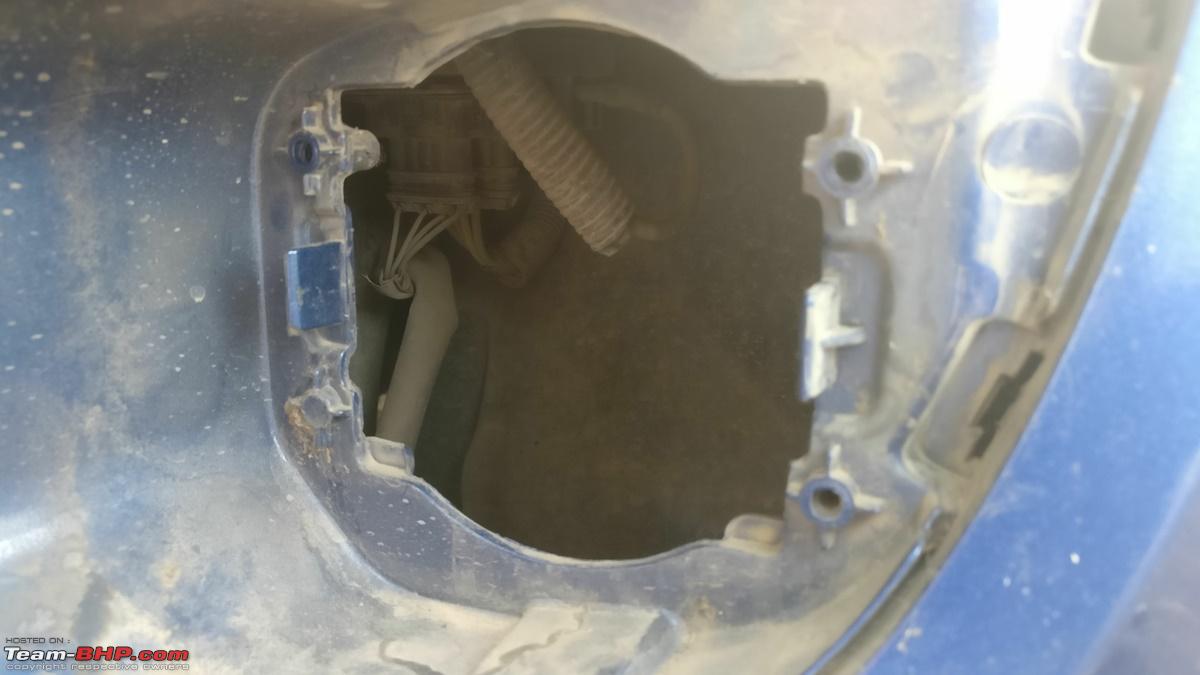
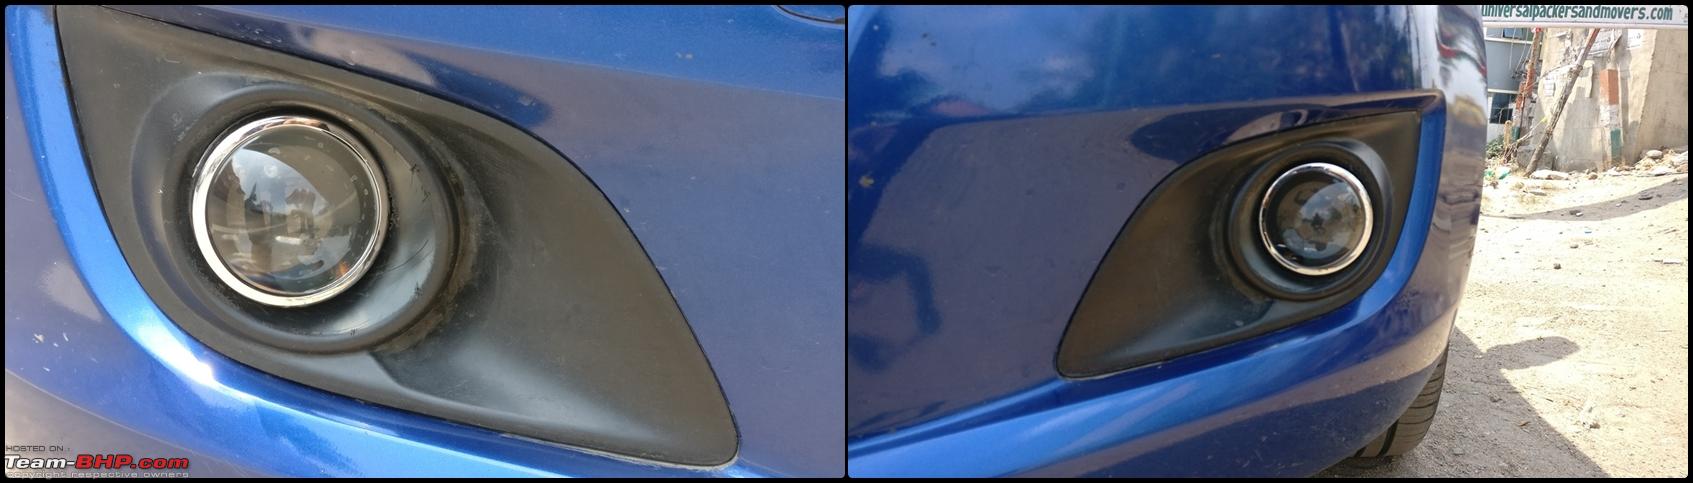
OE Fog lamp when seen after removing the fog lamp cover
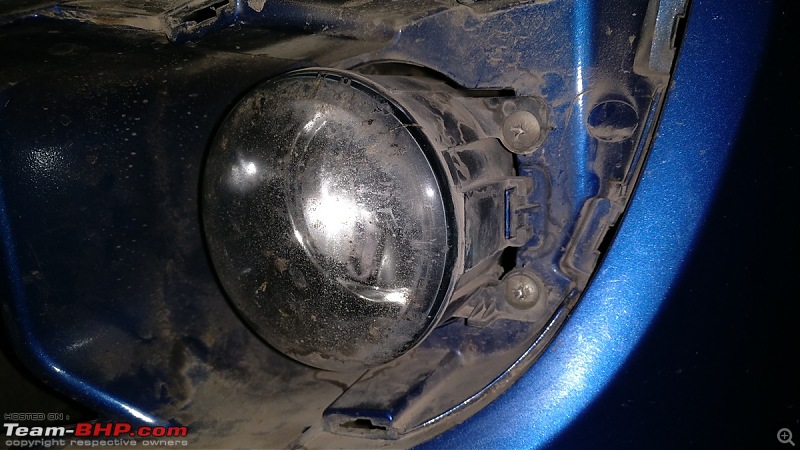
OE fog lamp removed
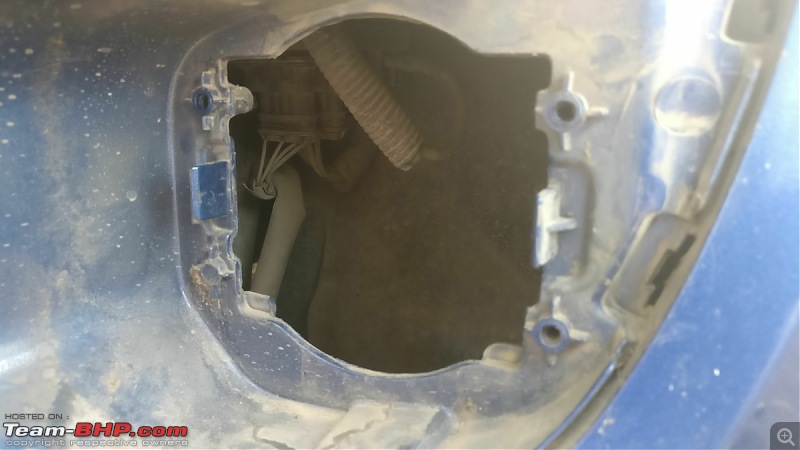
Difference in length between the OE fog lamp vs Projector unit
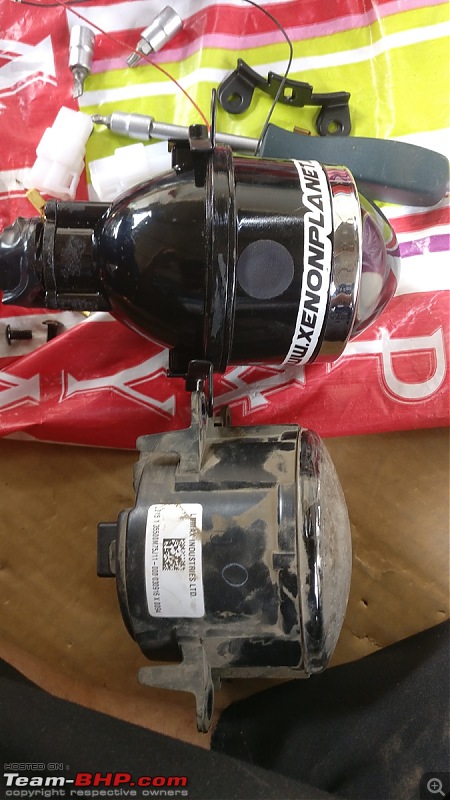
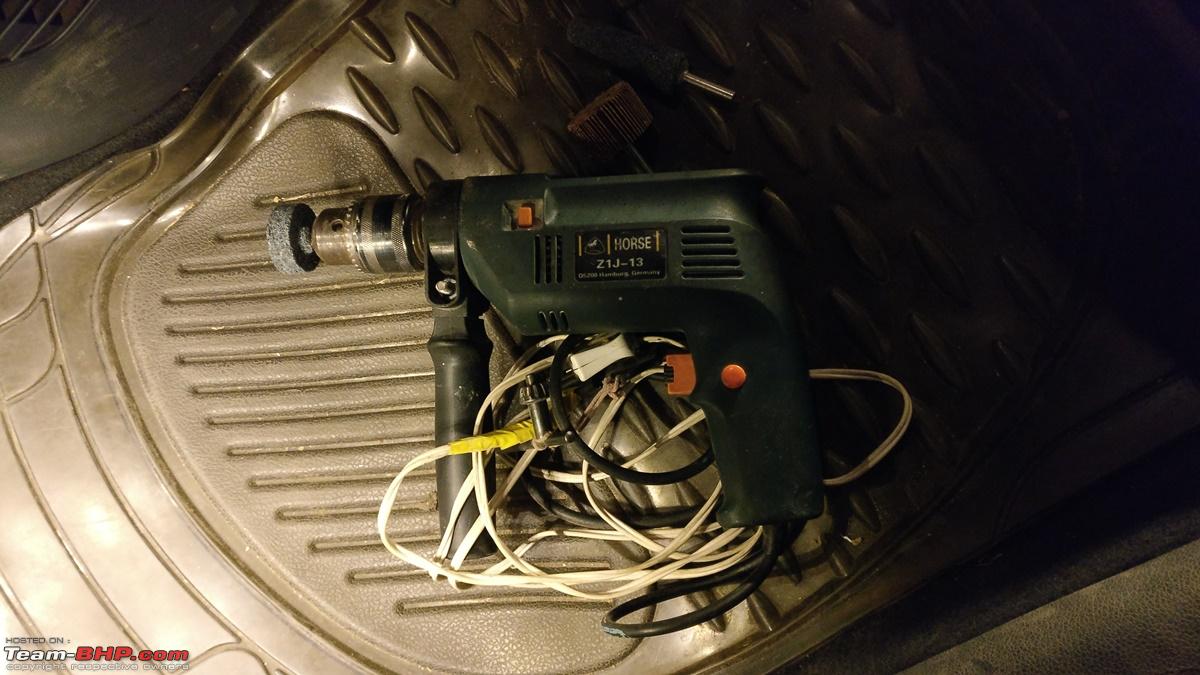
Bits used to cut/trim the fog light cover

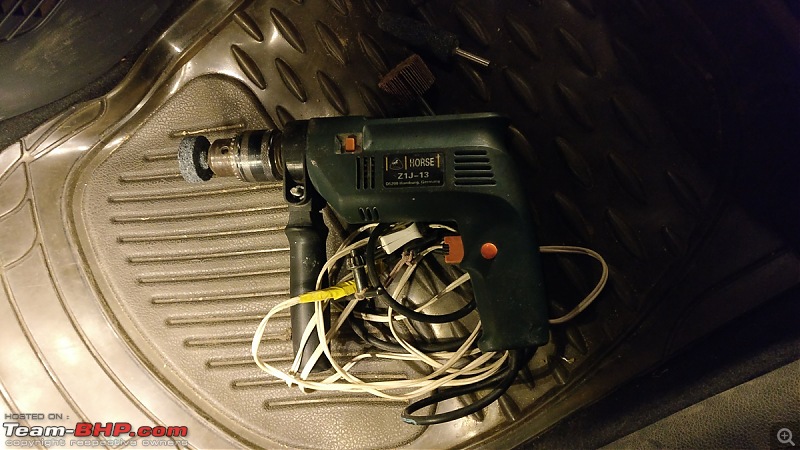
Drill machine with the bit fixed
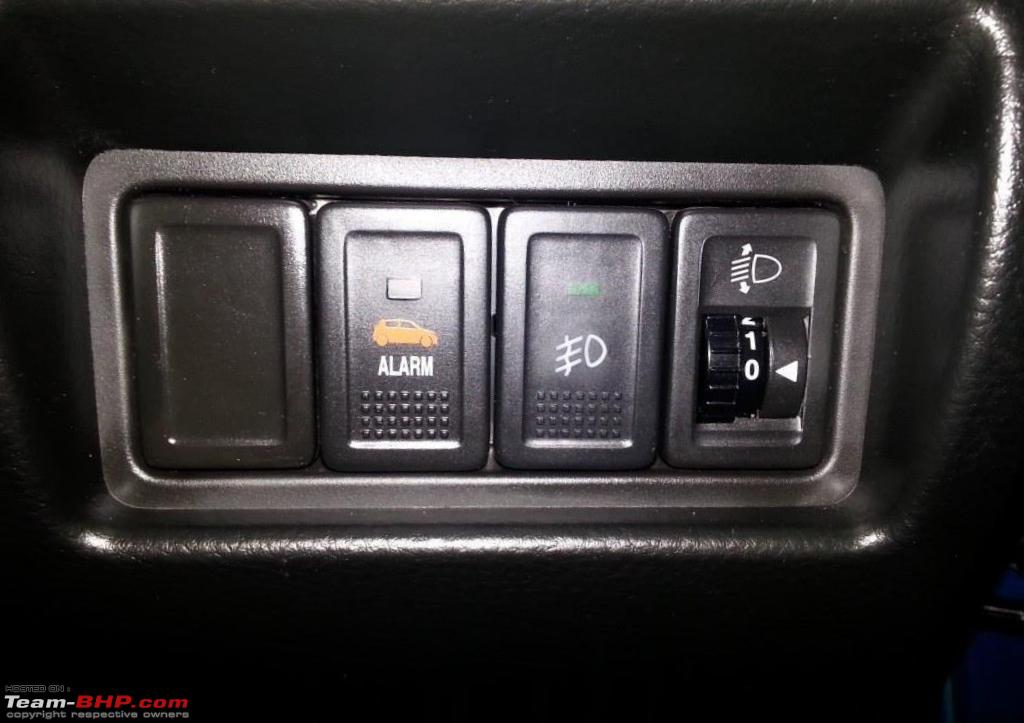
Original orientation of the switch panel

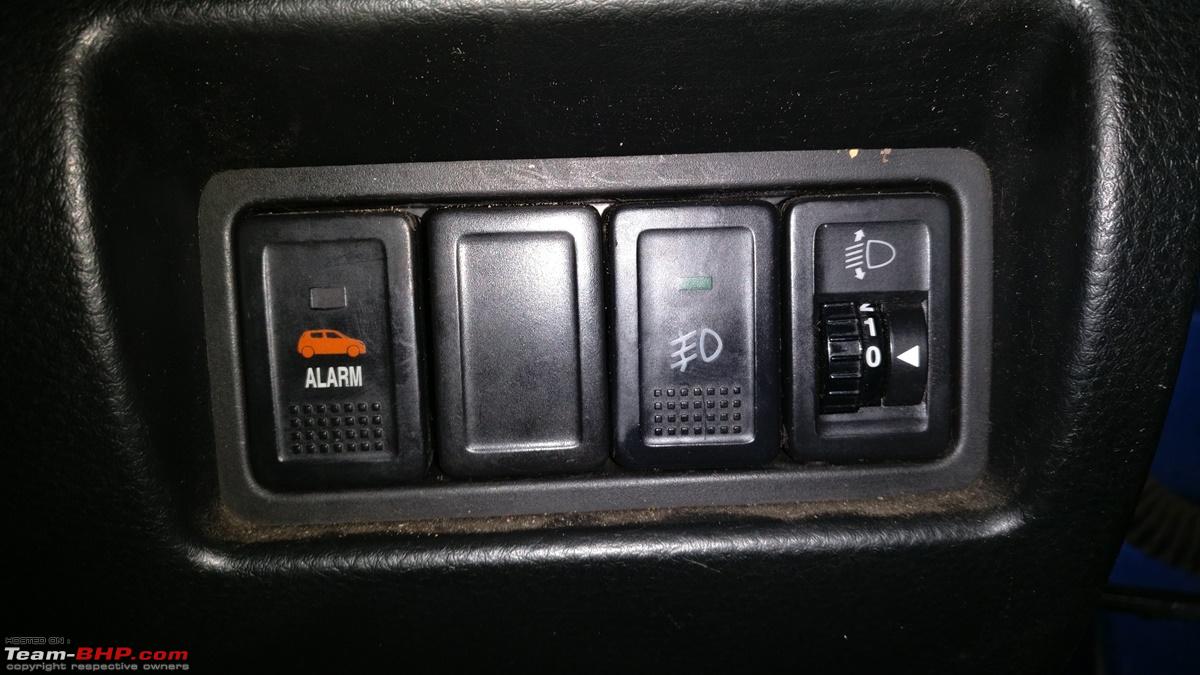
Moved the Blank to the right side and Alarm switch to the left
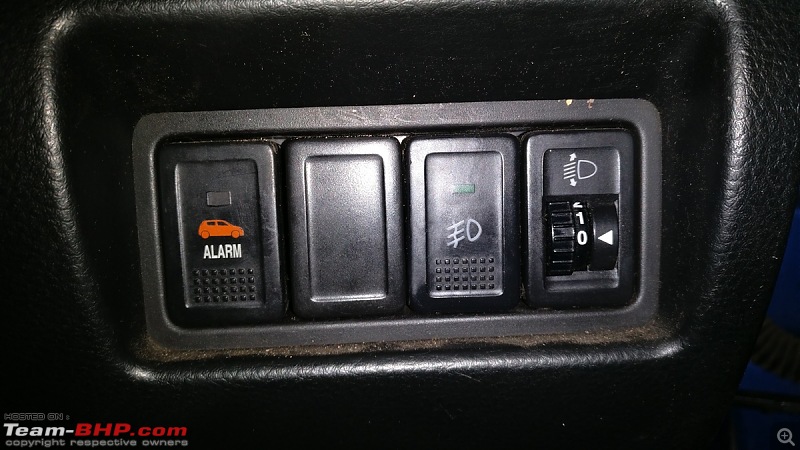
Both the Switches fixed in place
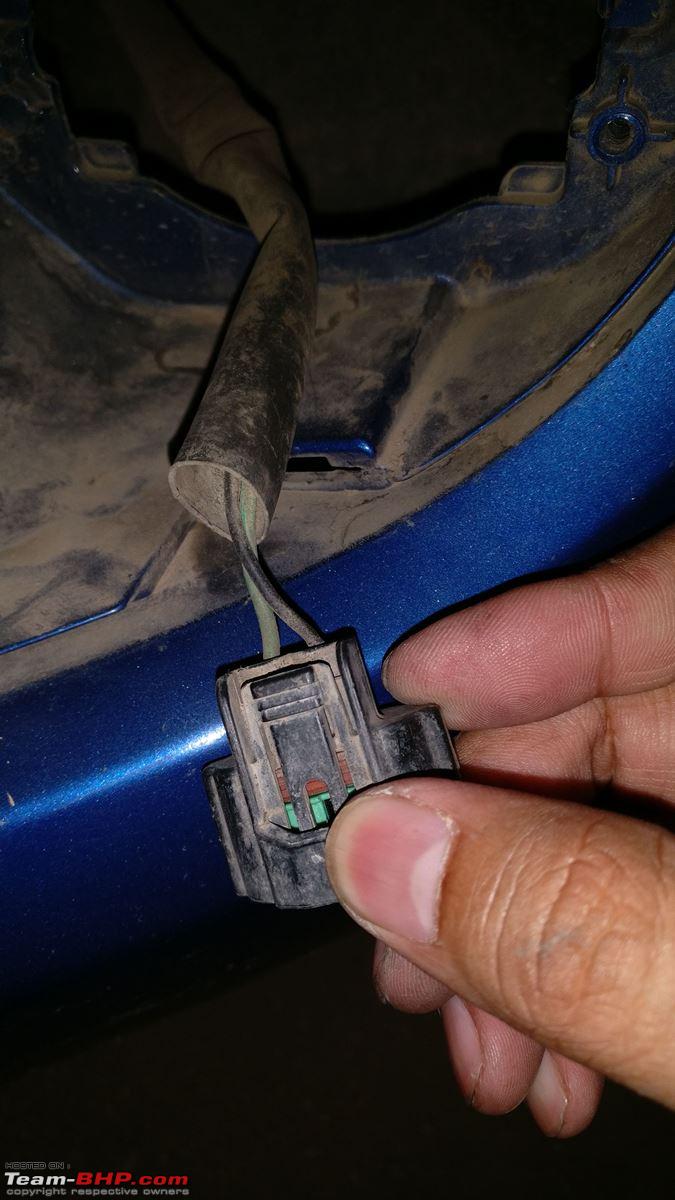
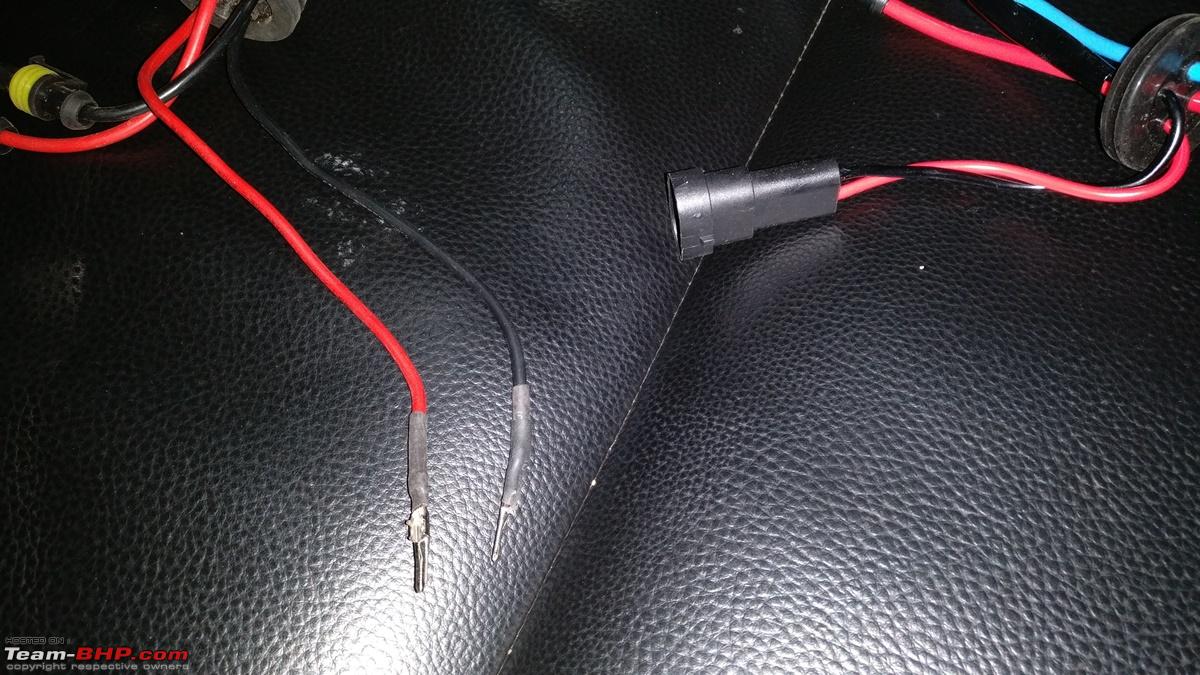
Fog lamp wiring (Green is +ve and Black is -ve)

OE Fog lamp connector (H8)
Left Side XP Micro Trial done

Right Side XP Micro Trial done

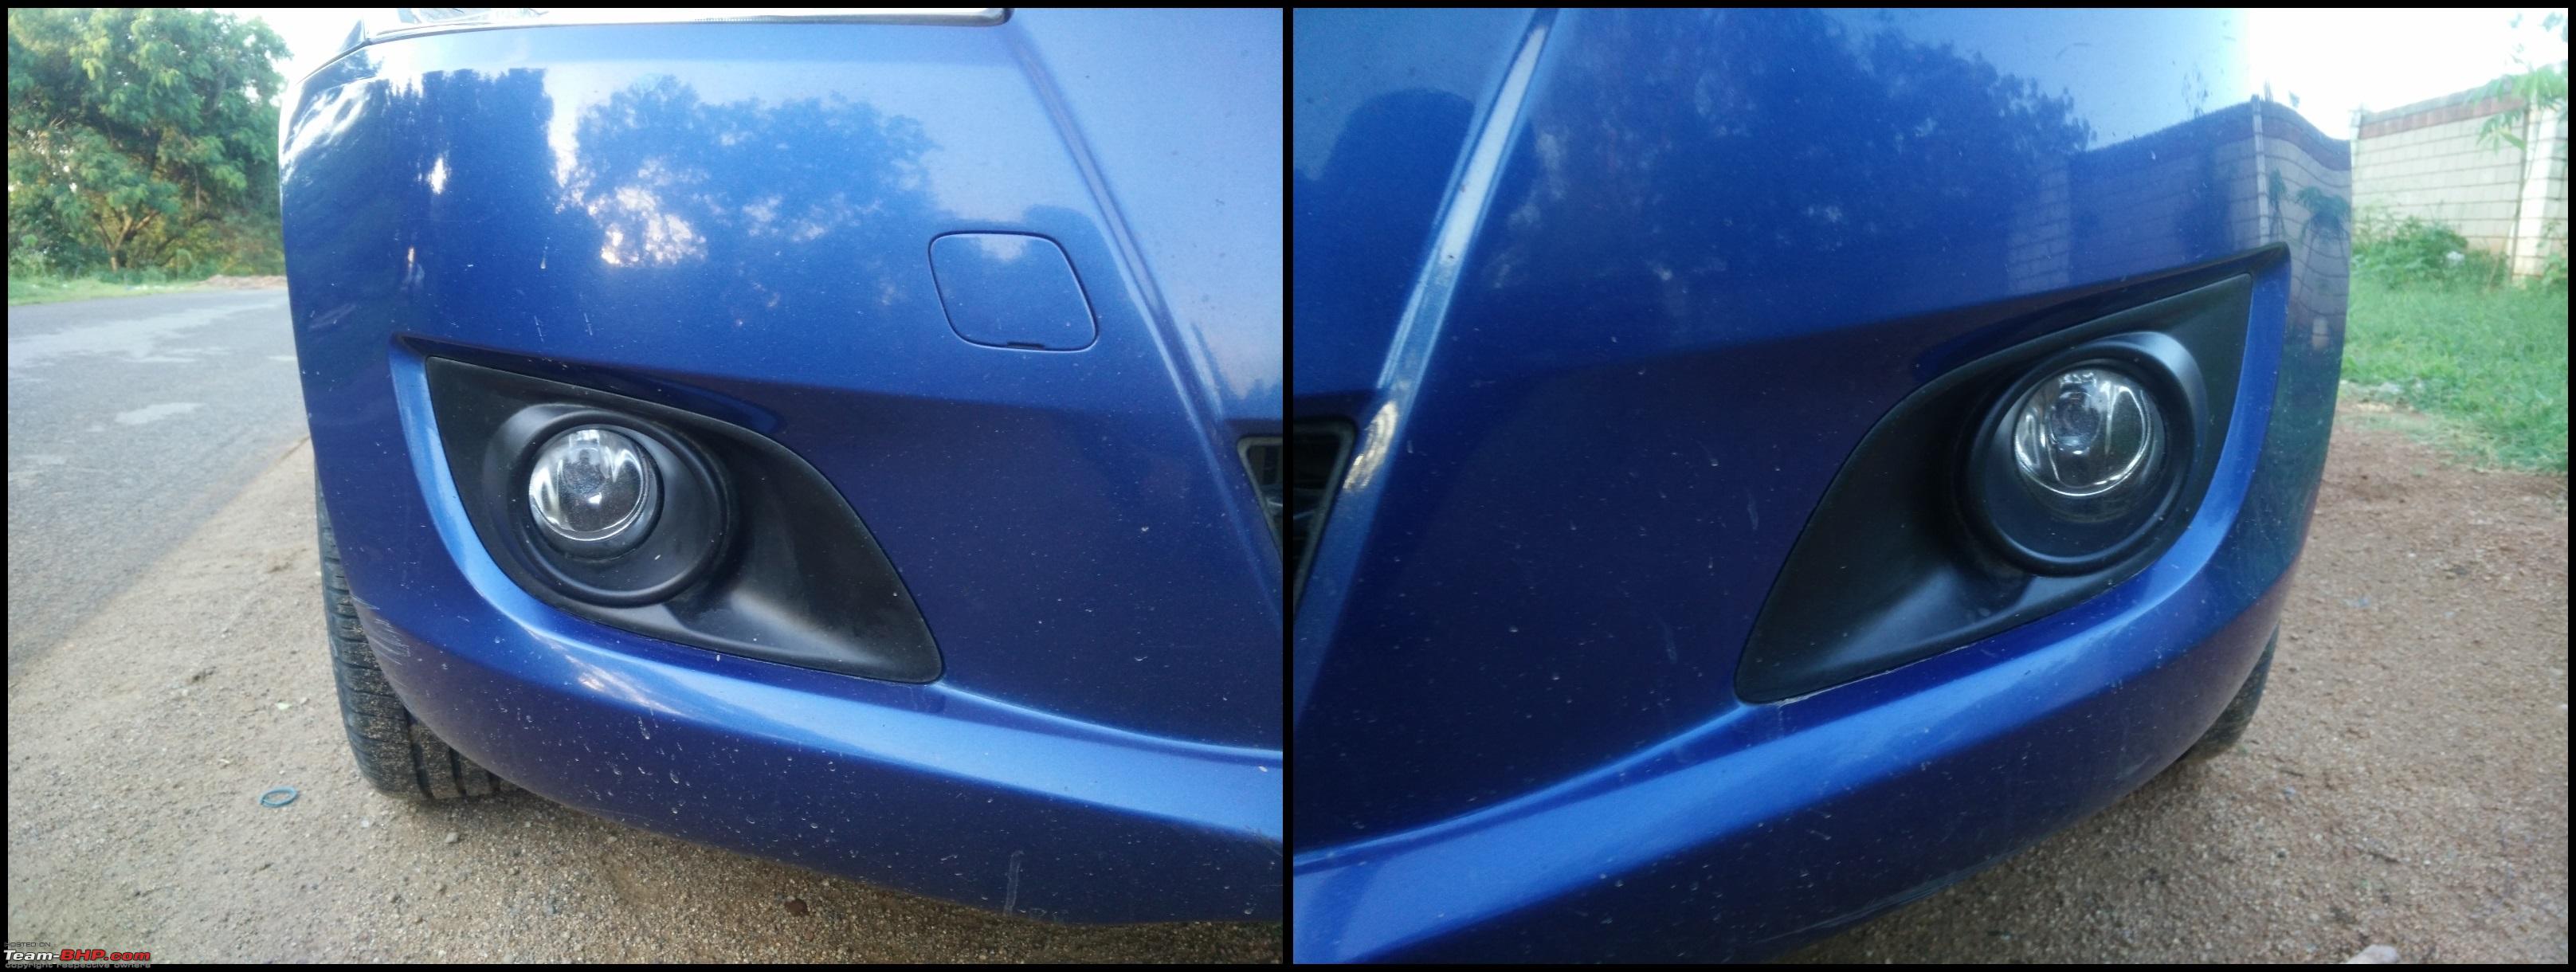
Both the OE Fog lights

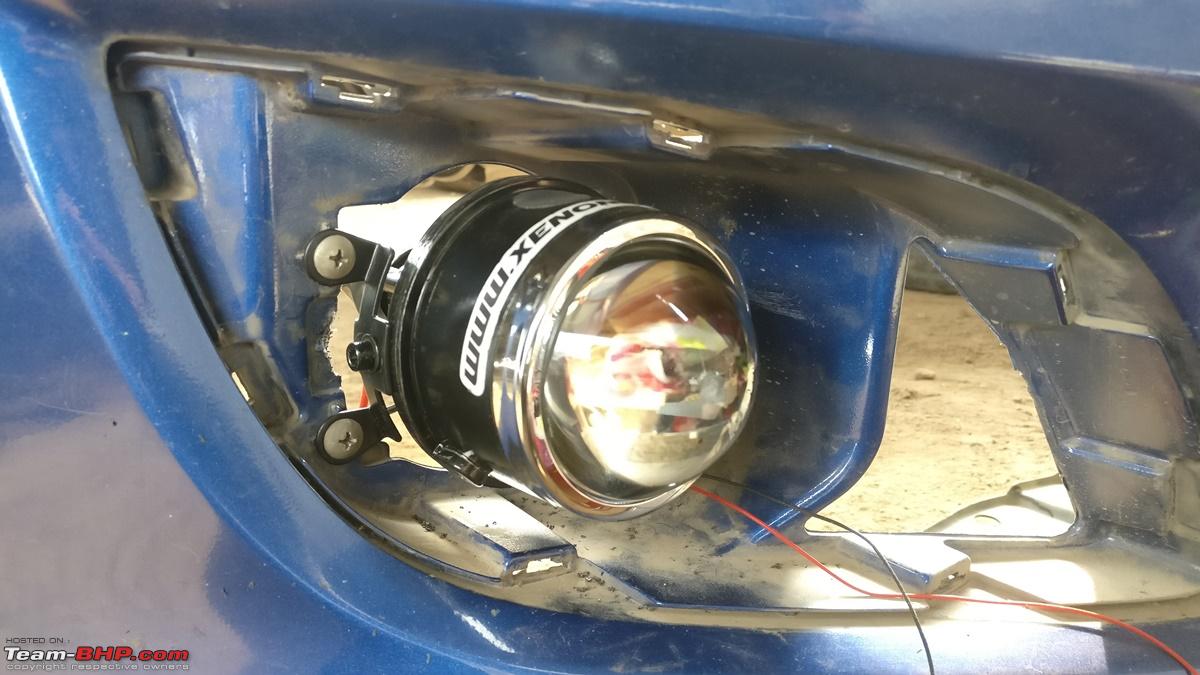
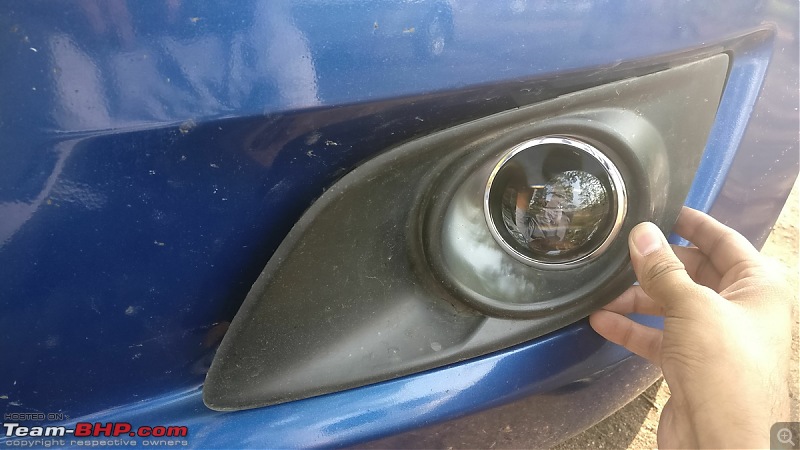
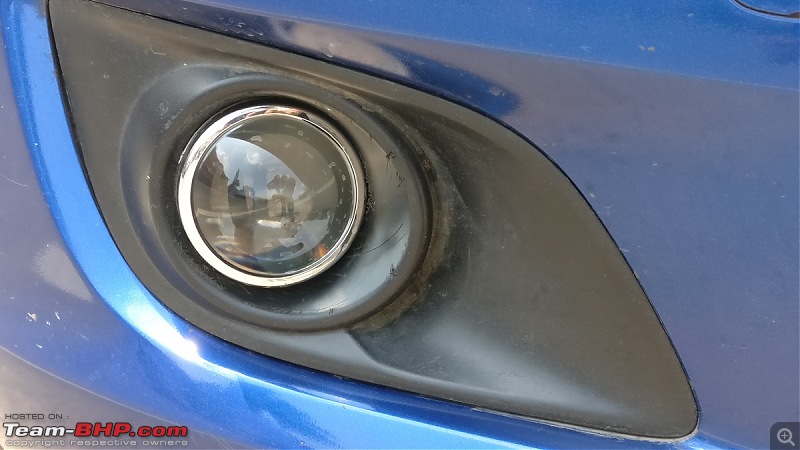
Both the XP Micro Projectors fit

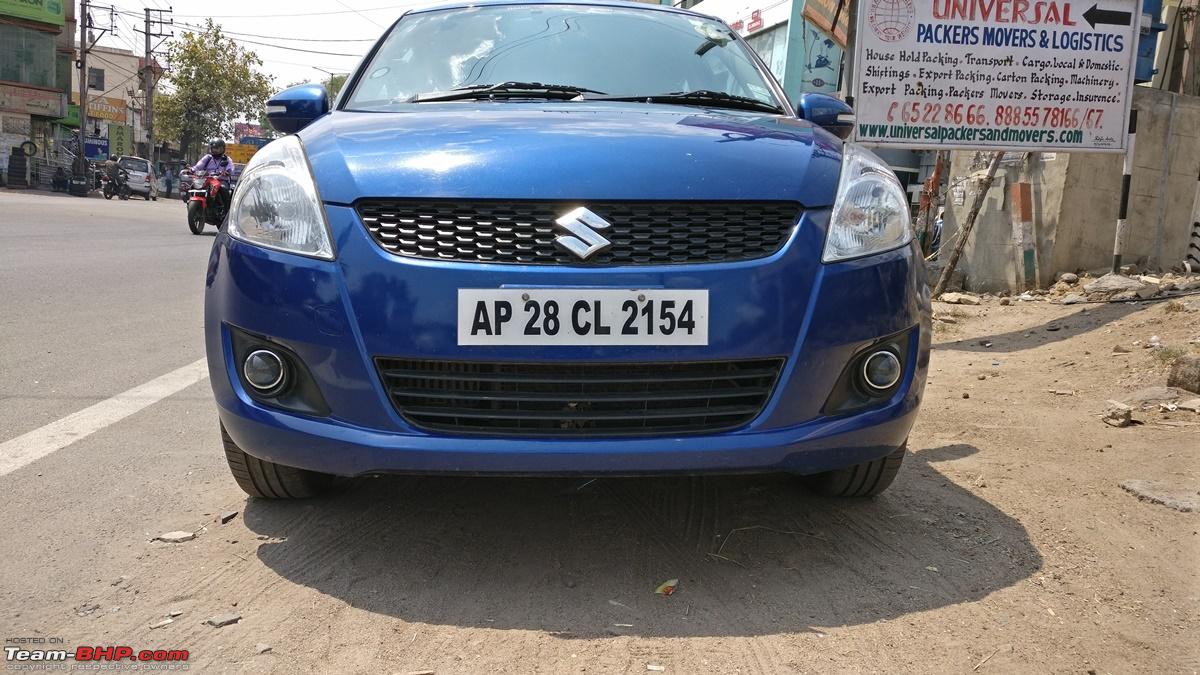
View of the projectors from side
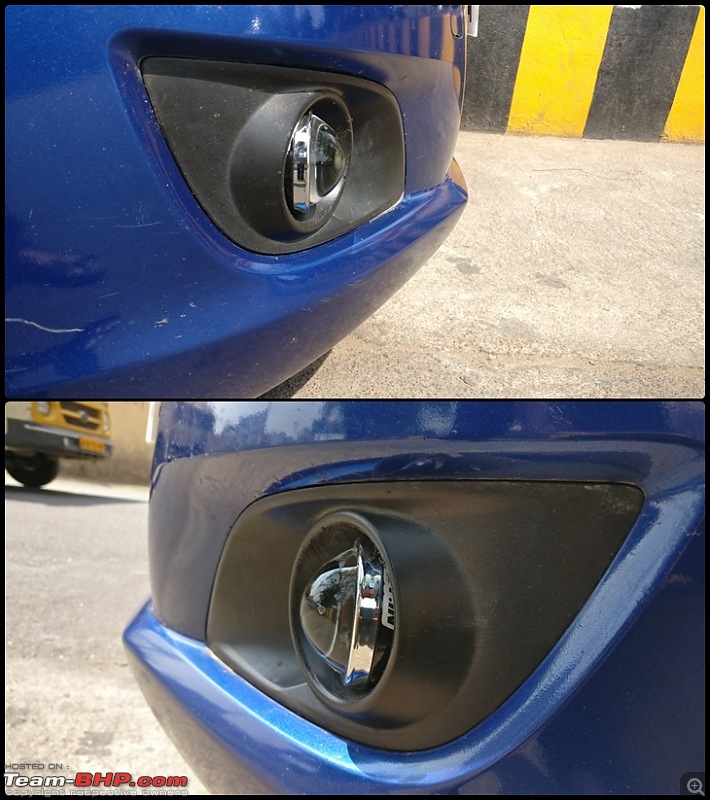
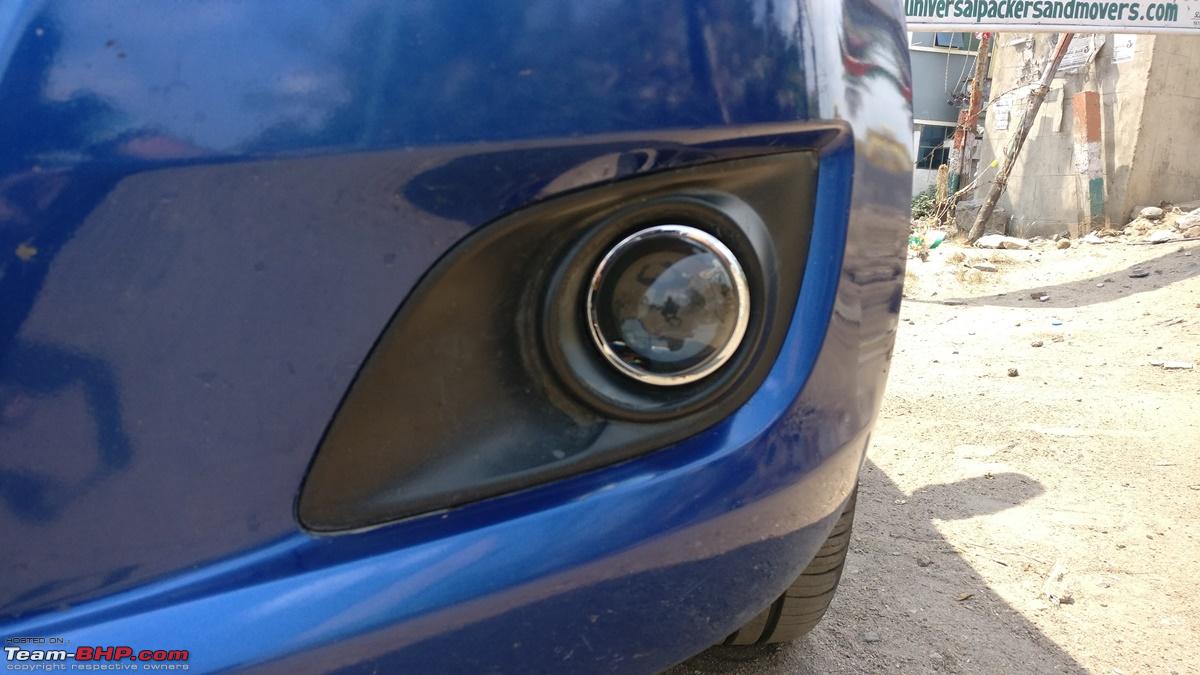
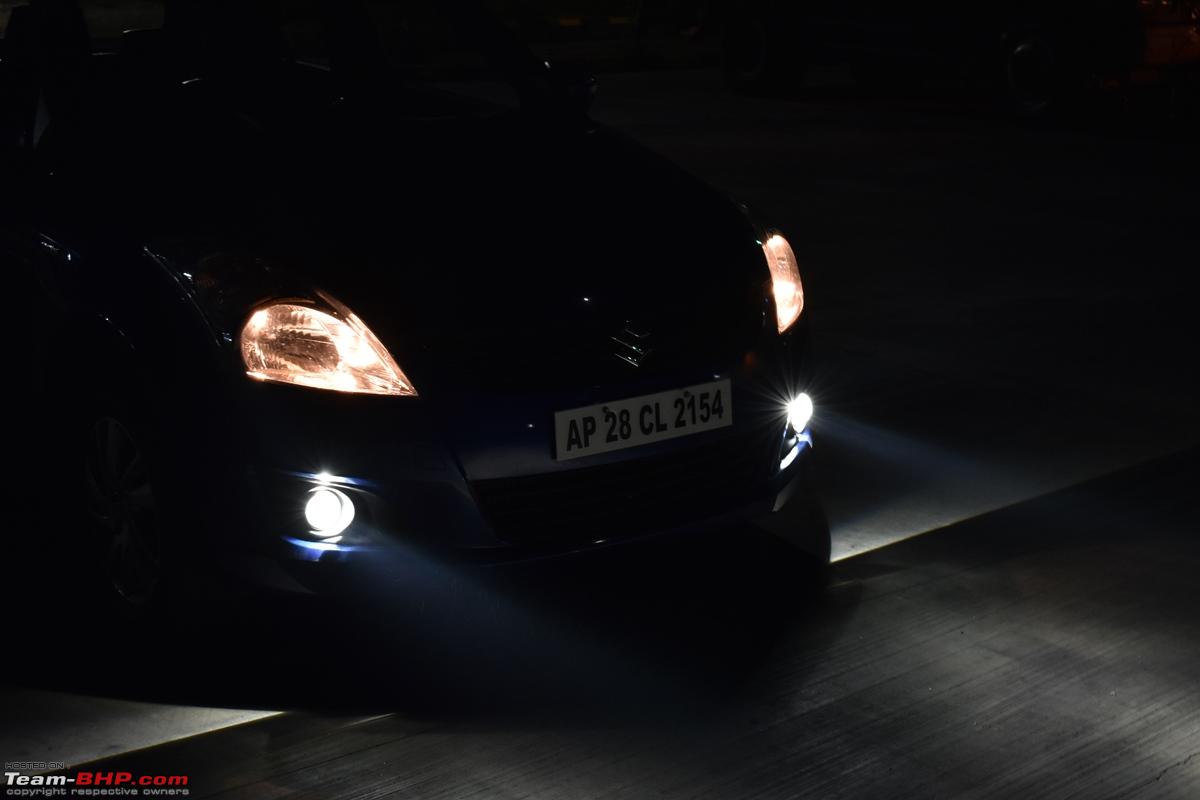
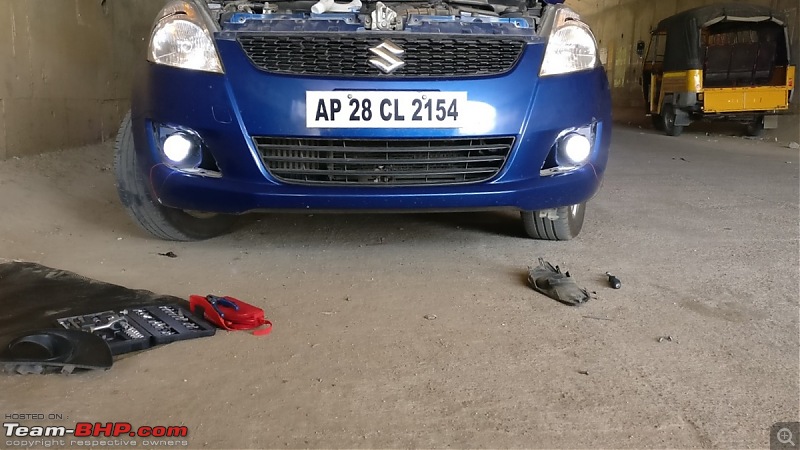
When seen head-on, looks OE

View when seen from behind after removing wheel lining
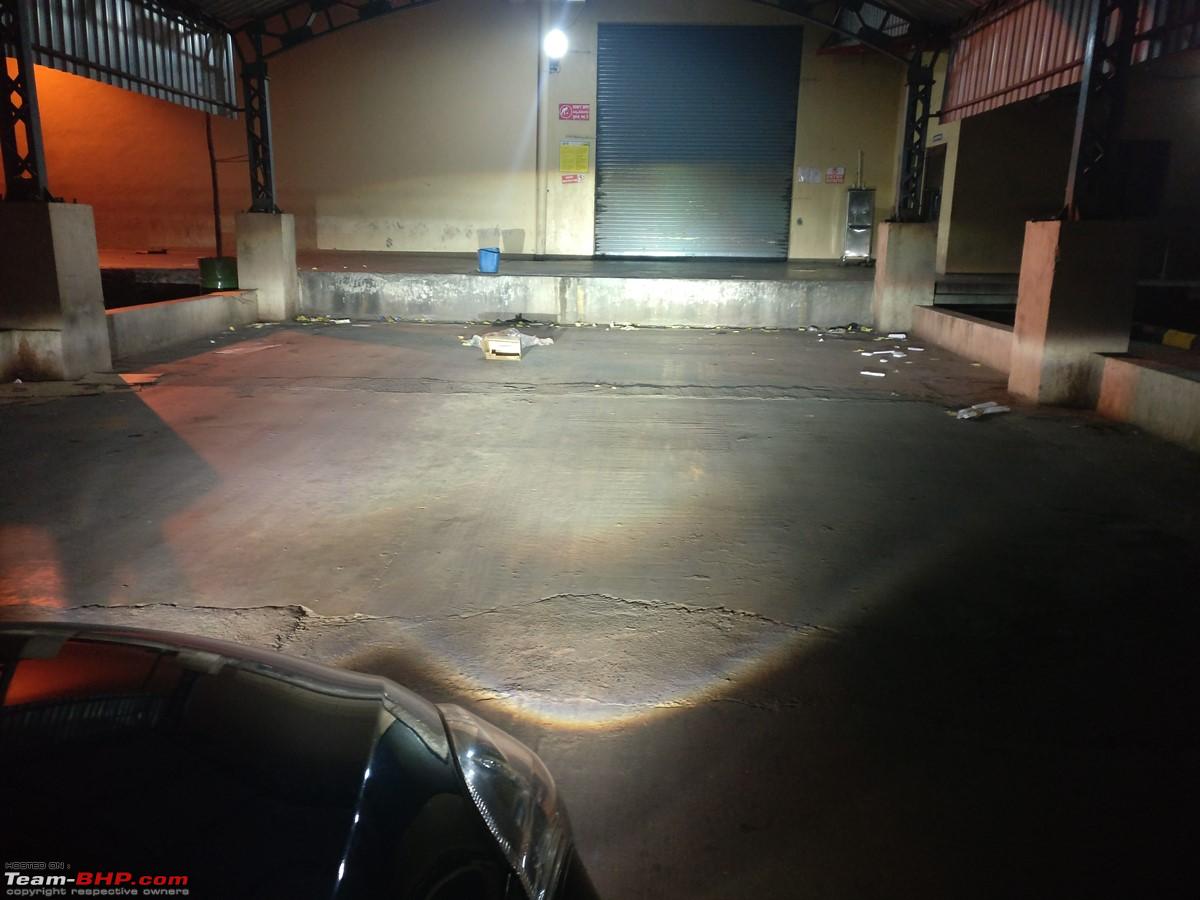
Both XP Micros trial done

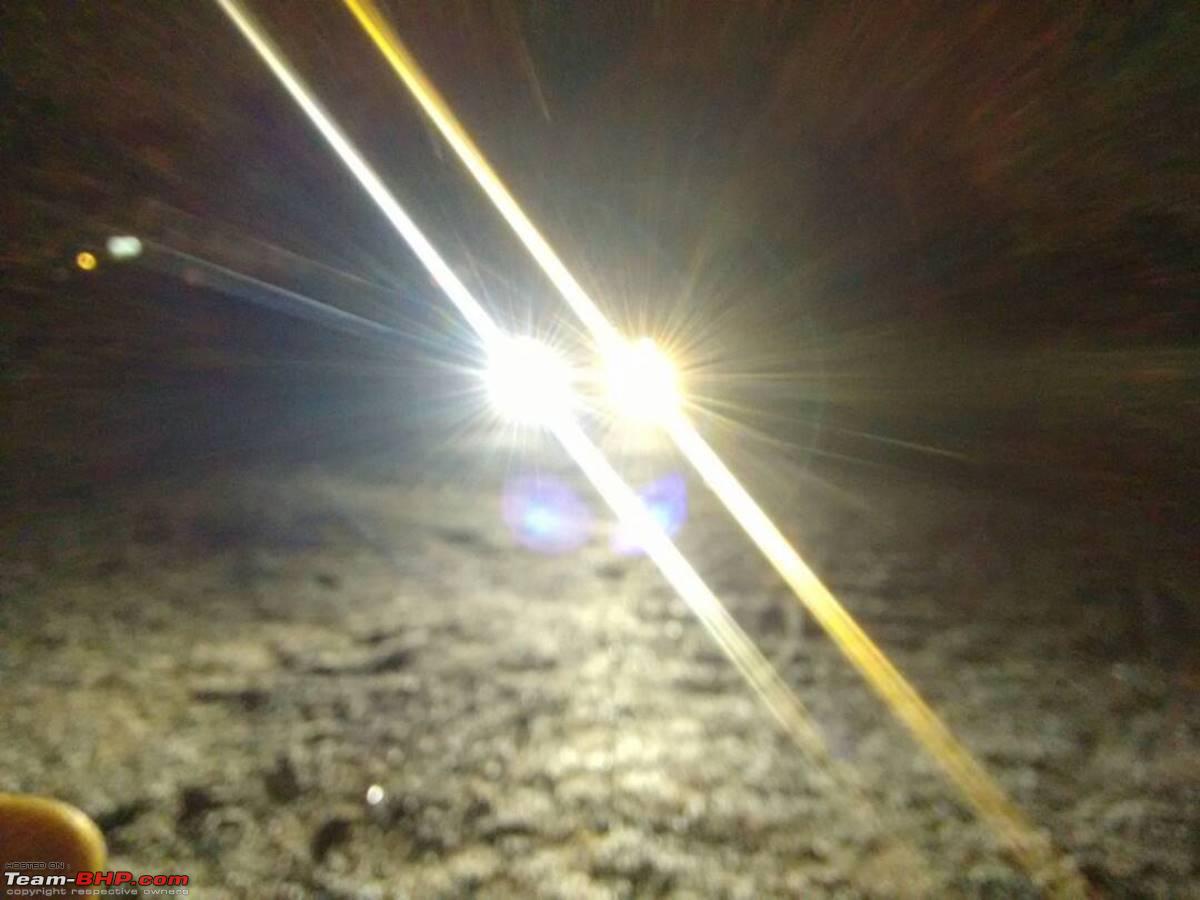
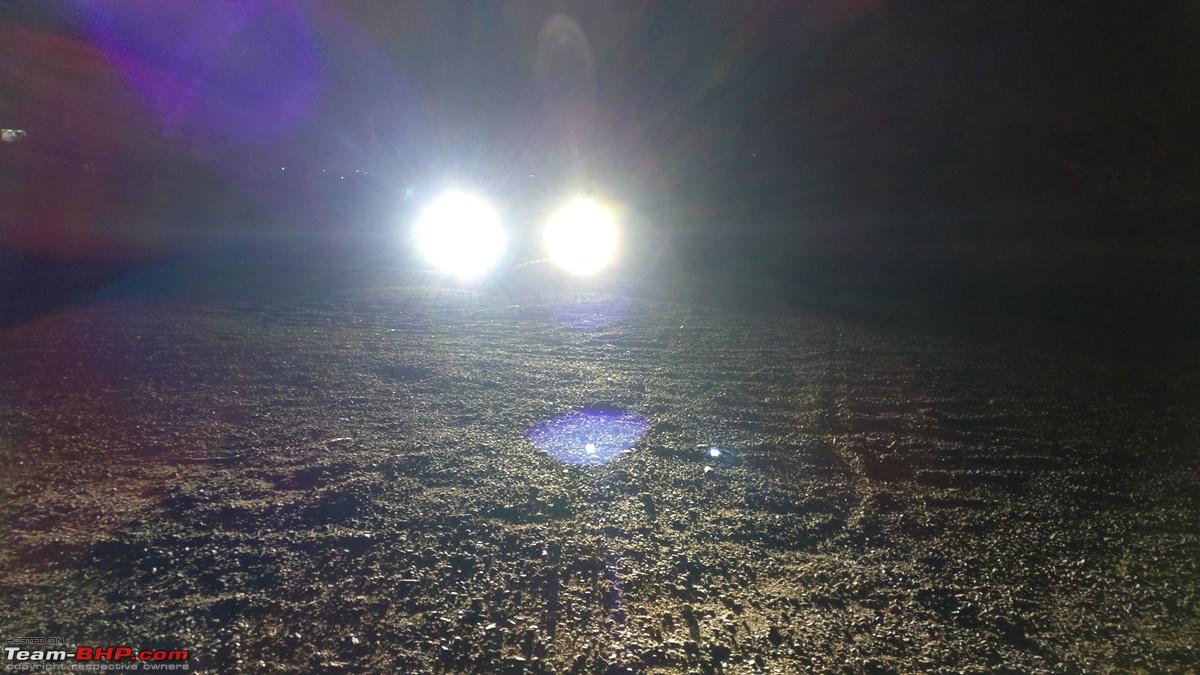
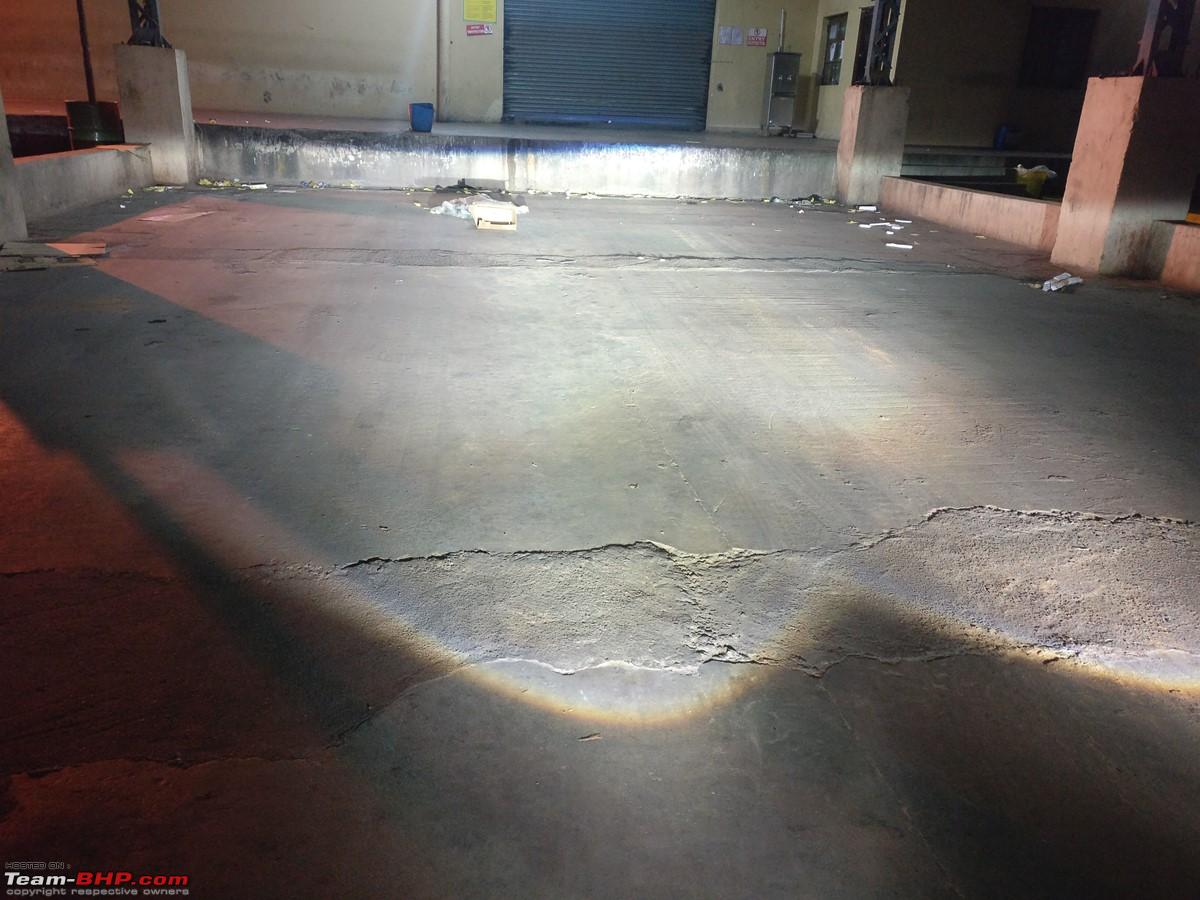
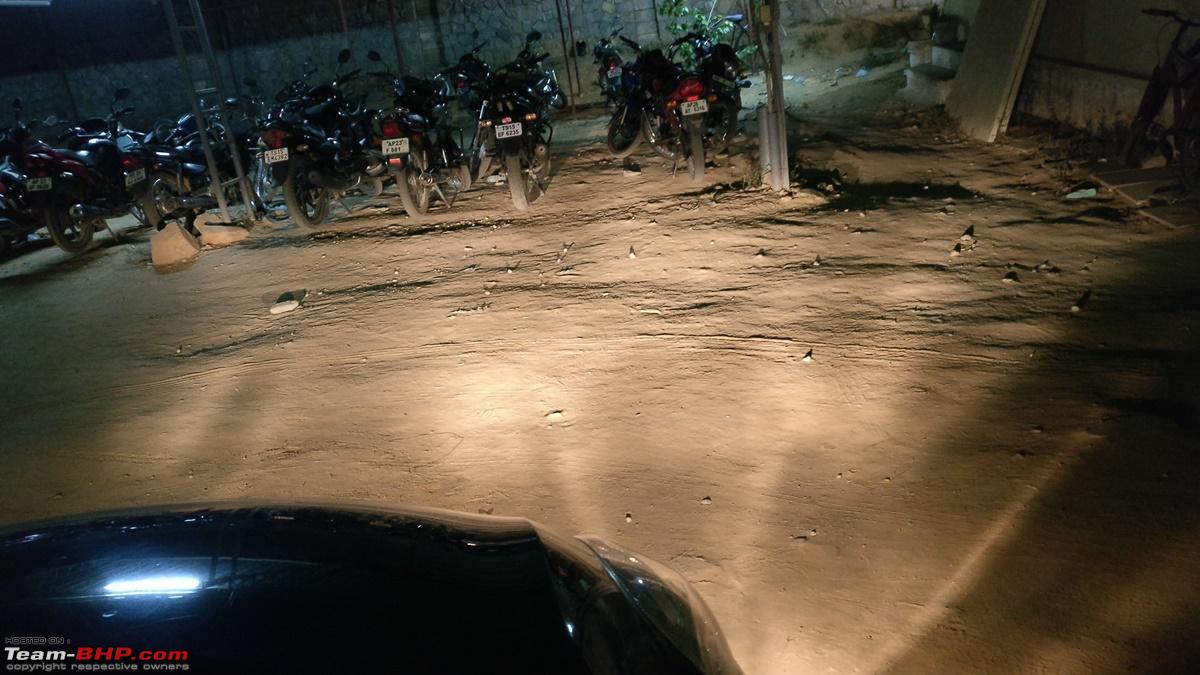
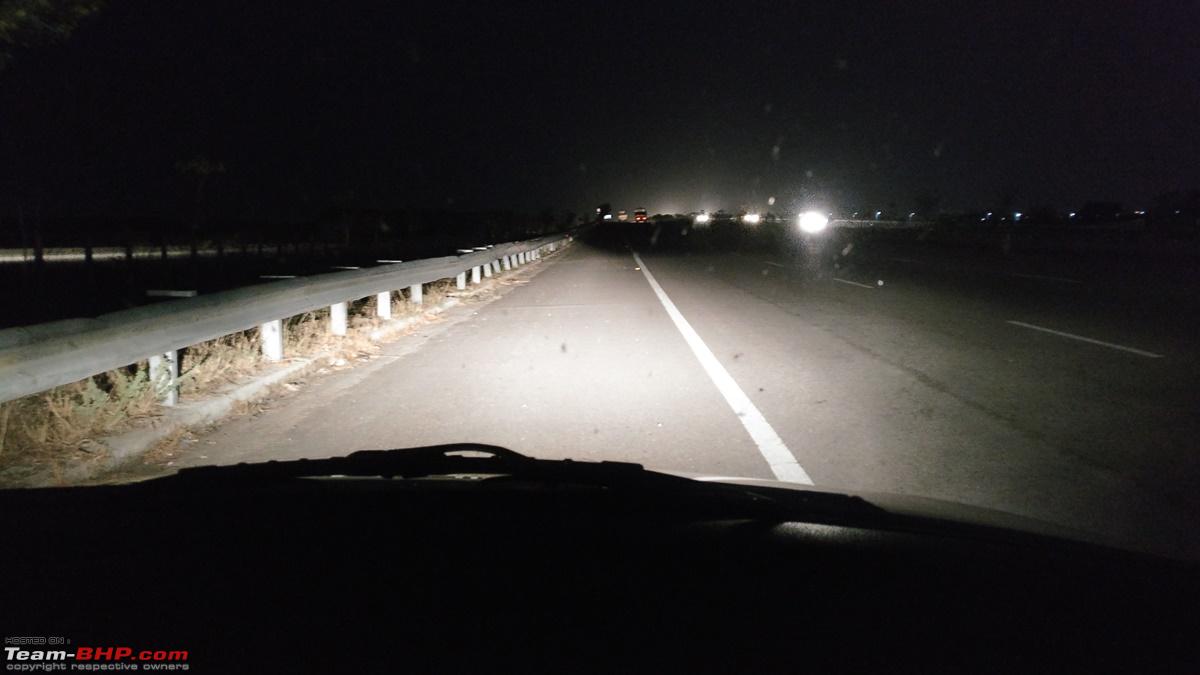
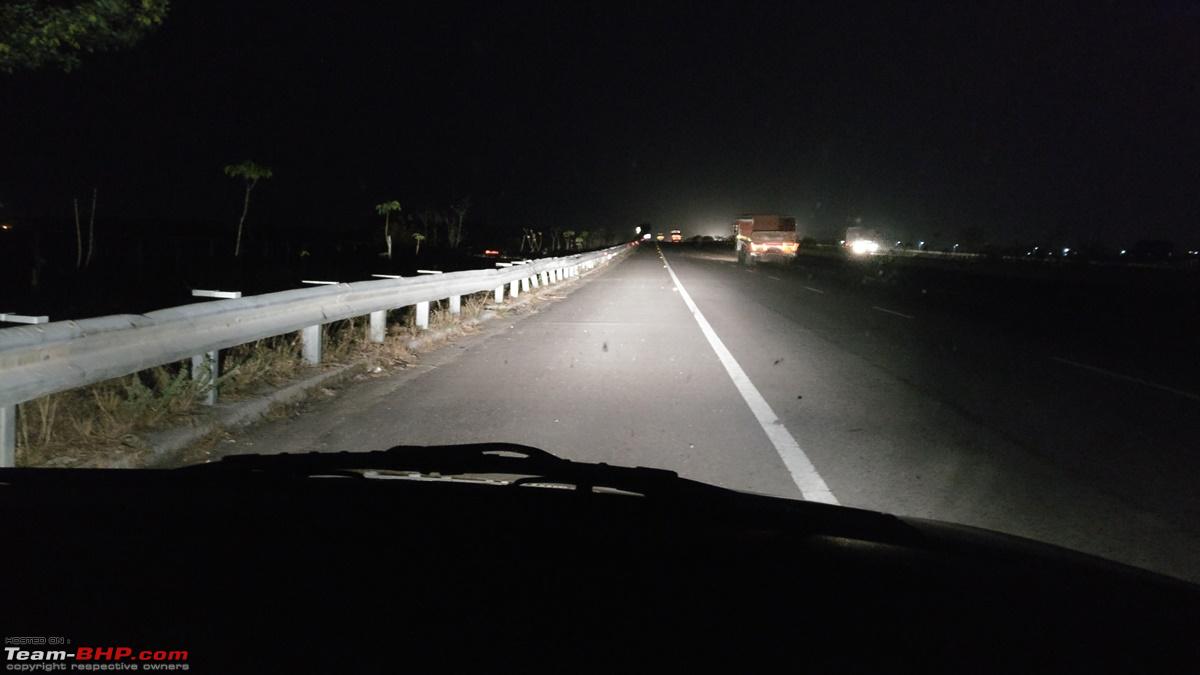
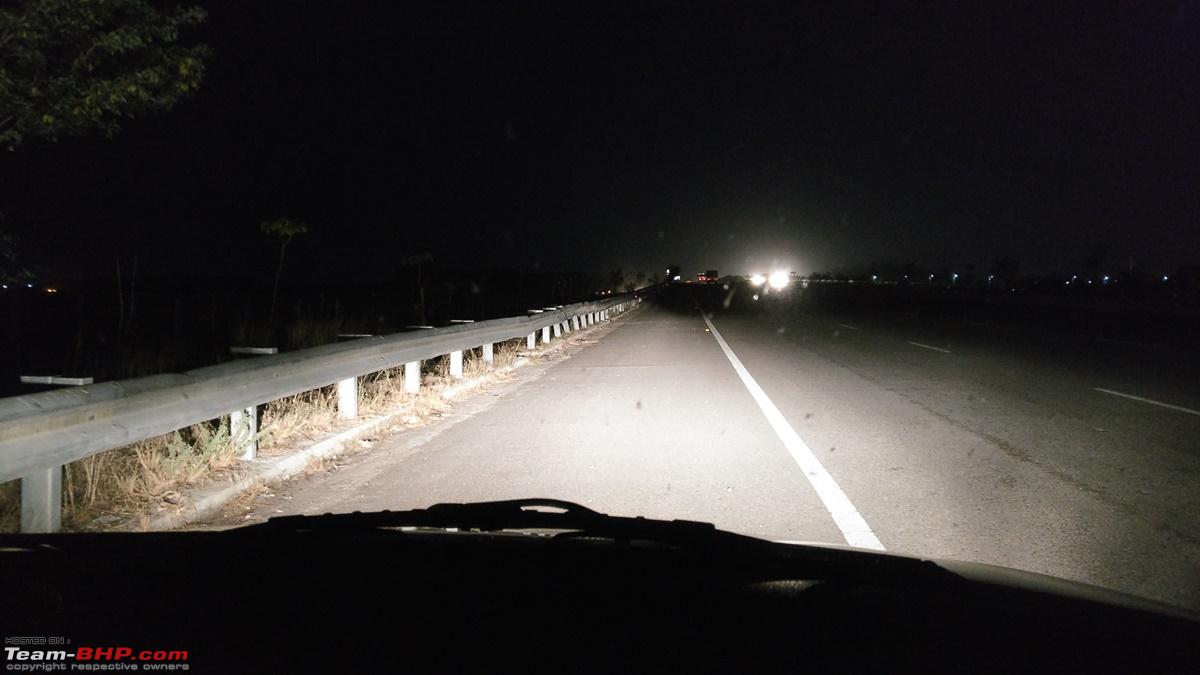
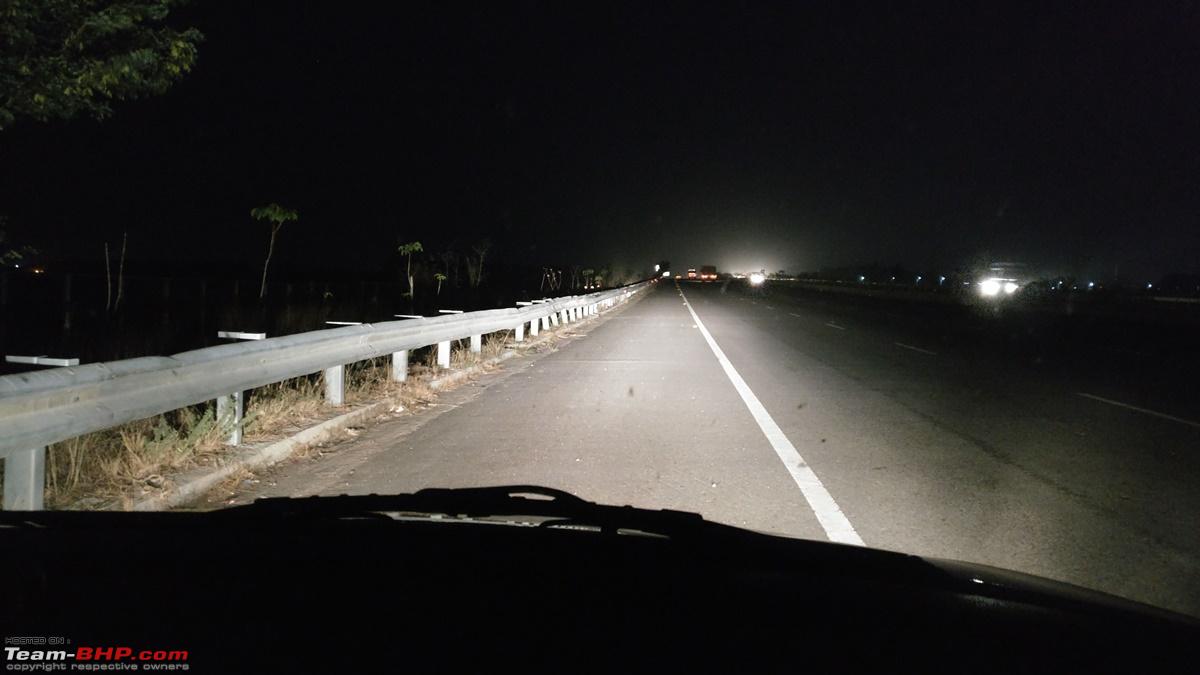
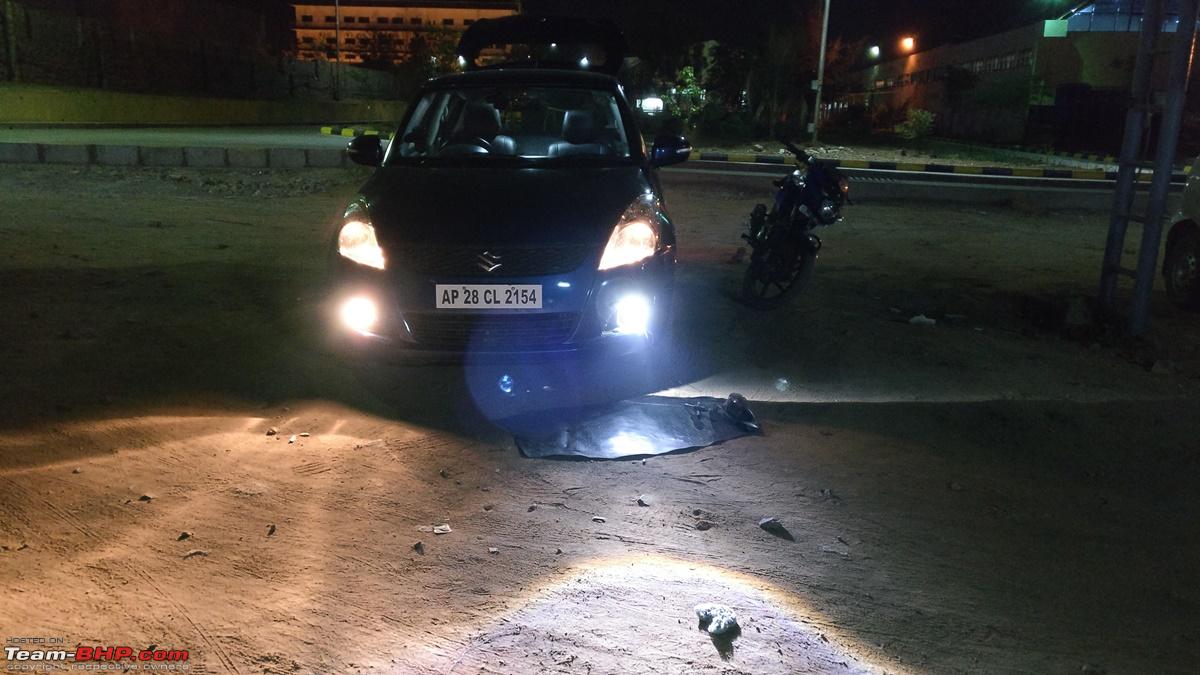
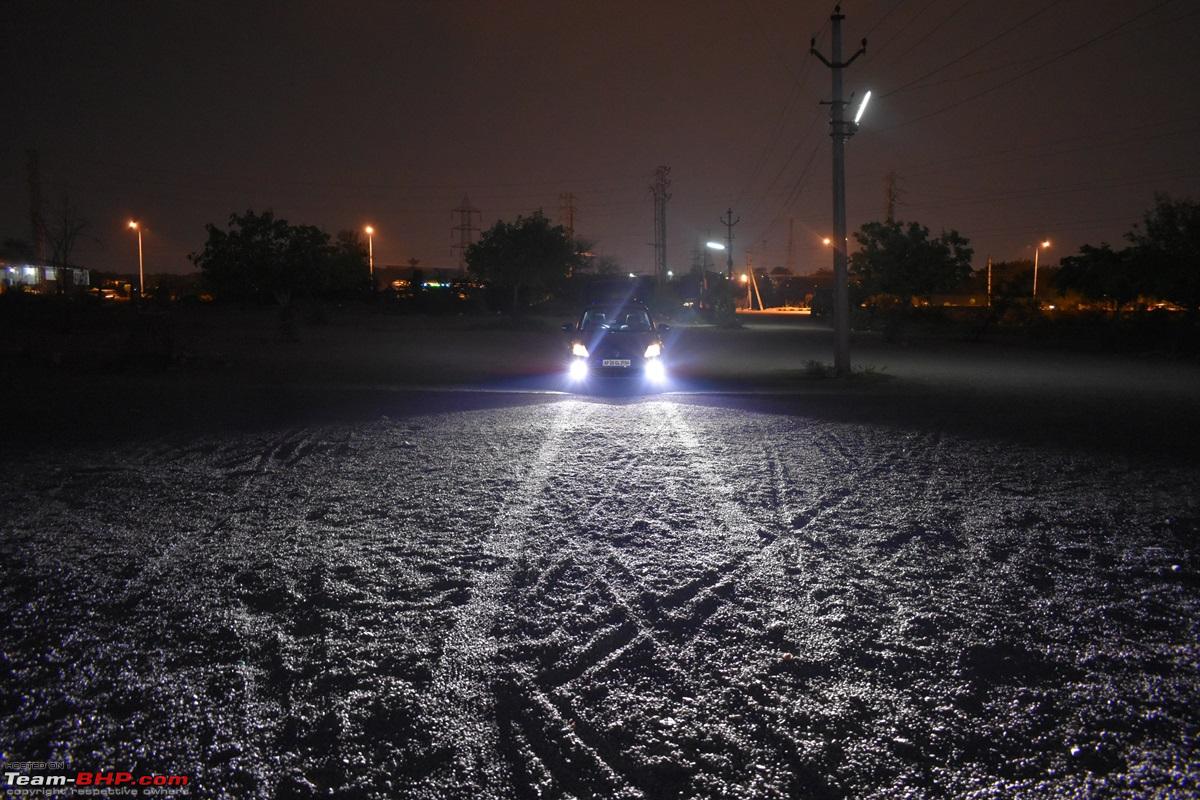
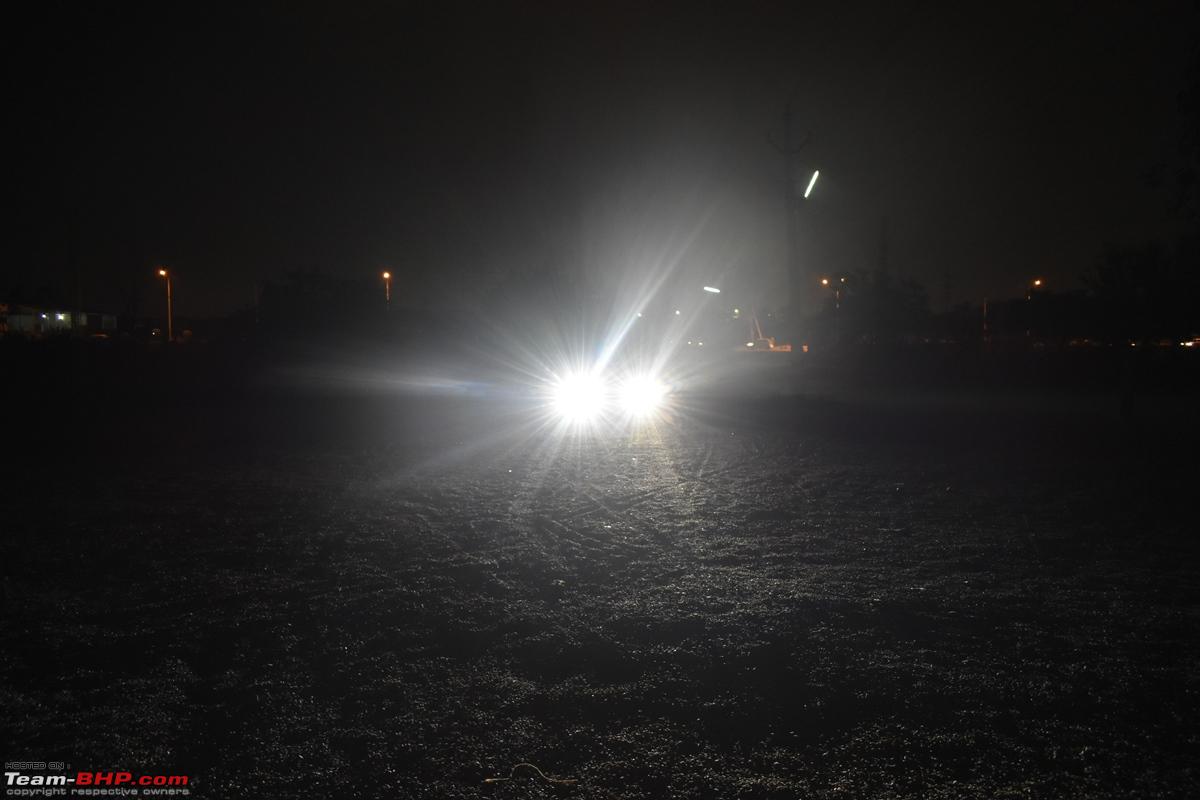
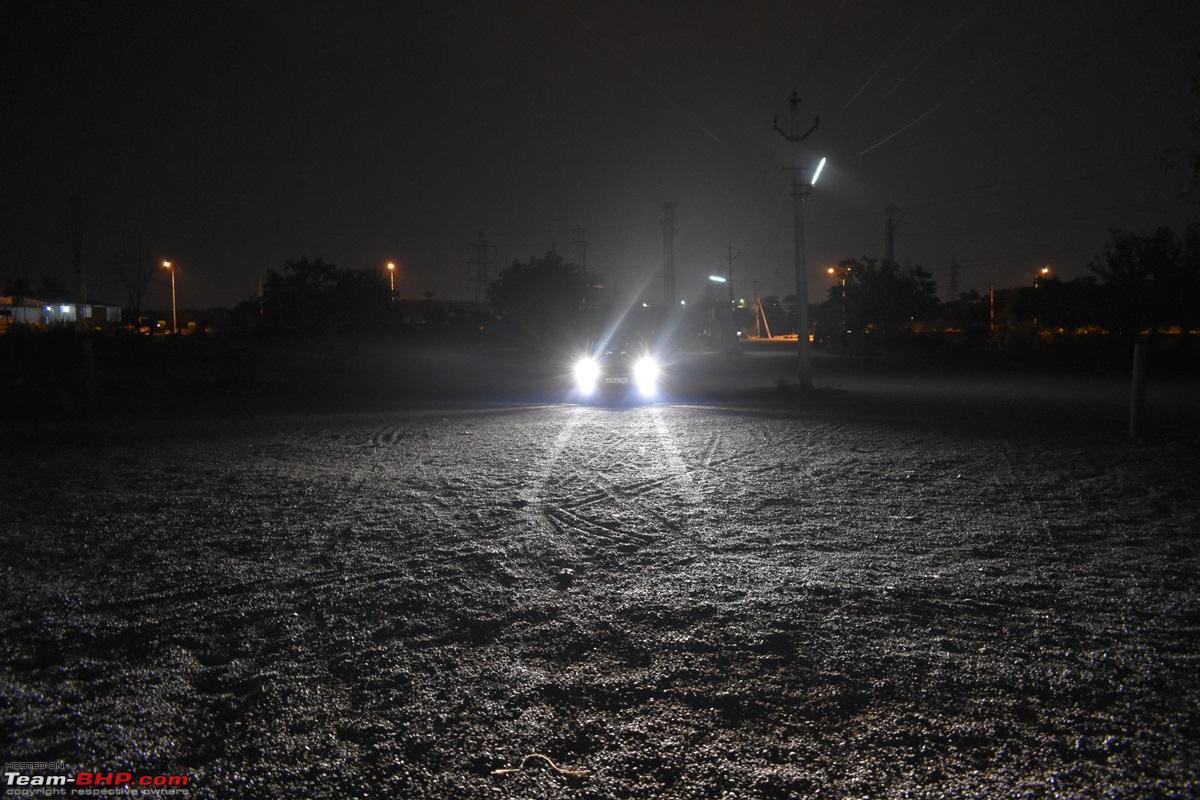
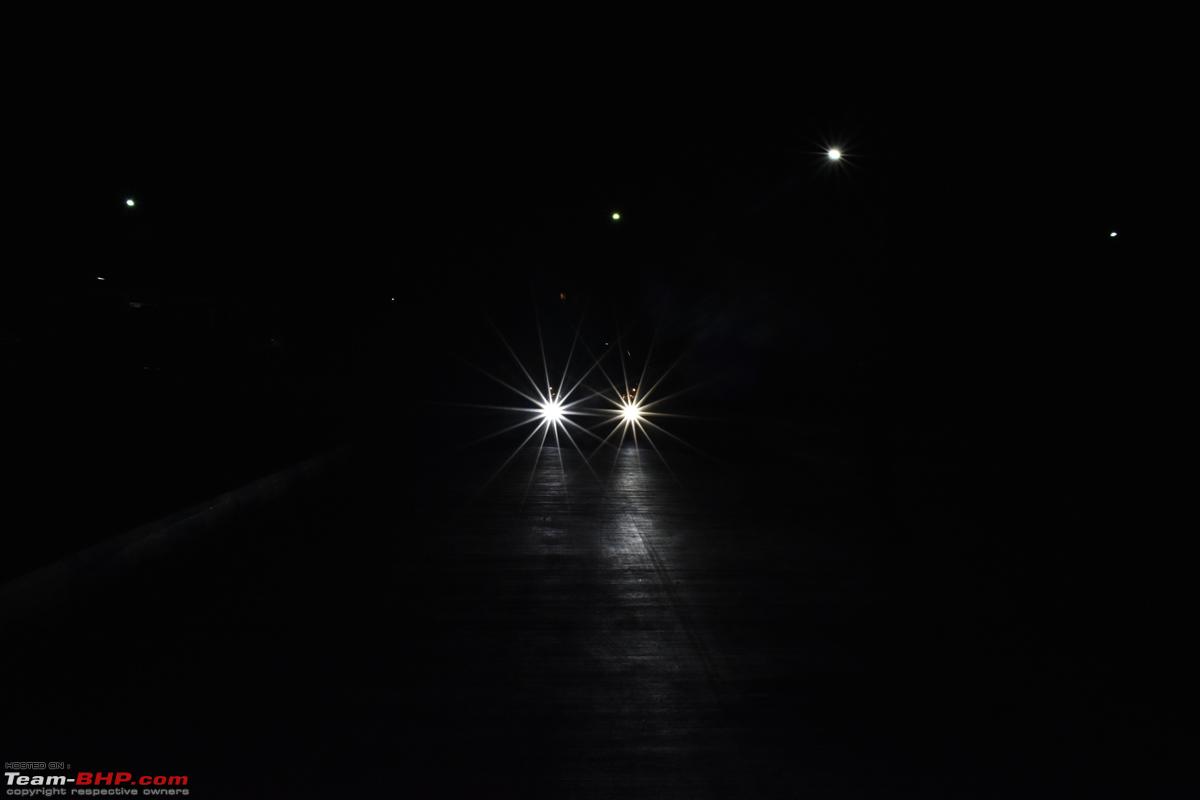
As seen from distance (XP Micro low beam)
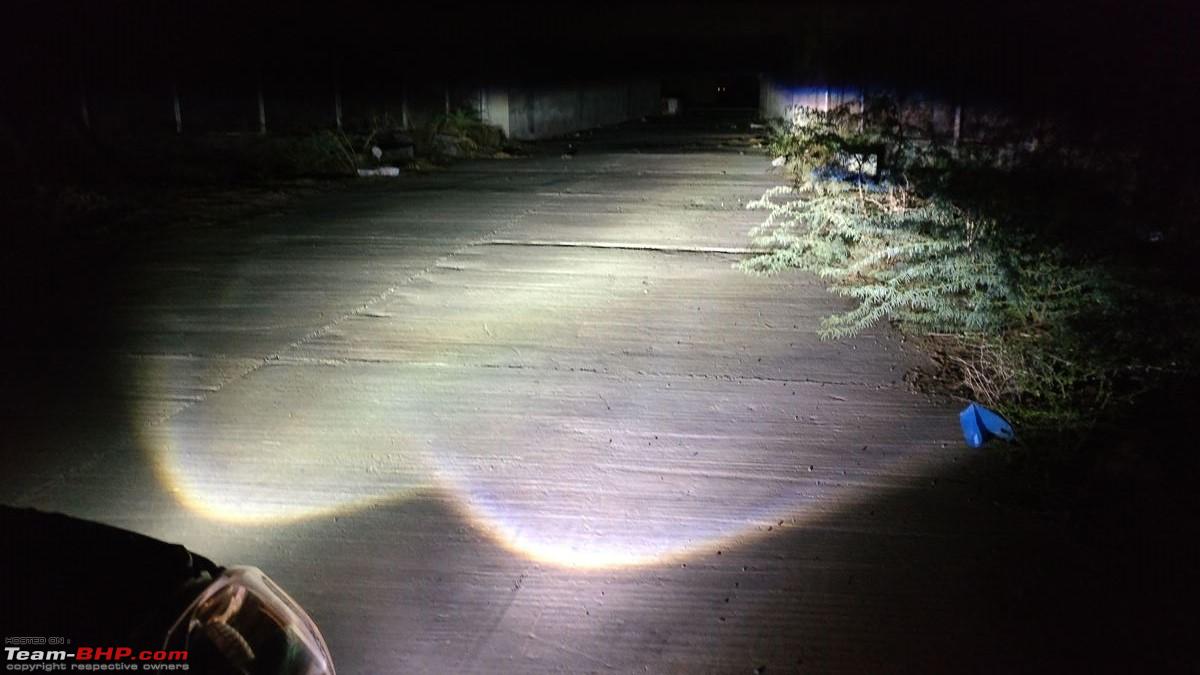
Low beam trial of Right side

High beam trial of Right side

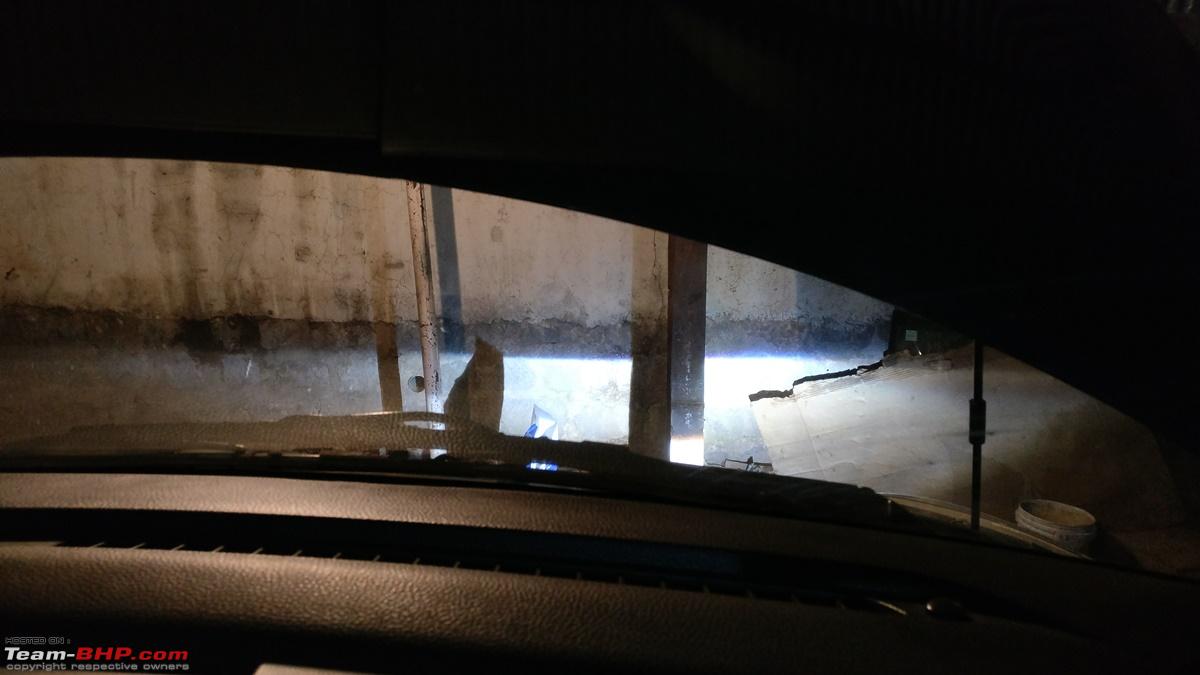
Headlight Low beam + XP Micro Low beam trial (Headlight low beam is on Level 0 and XP Micro low beam is on Level 1 (See difference in height) 
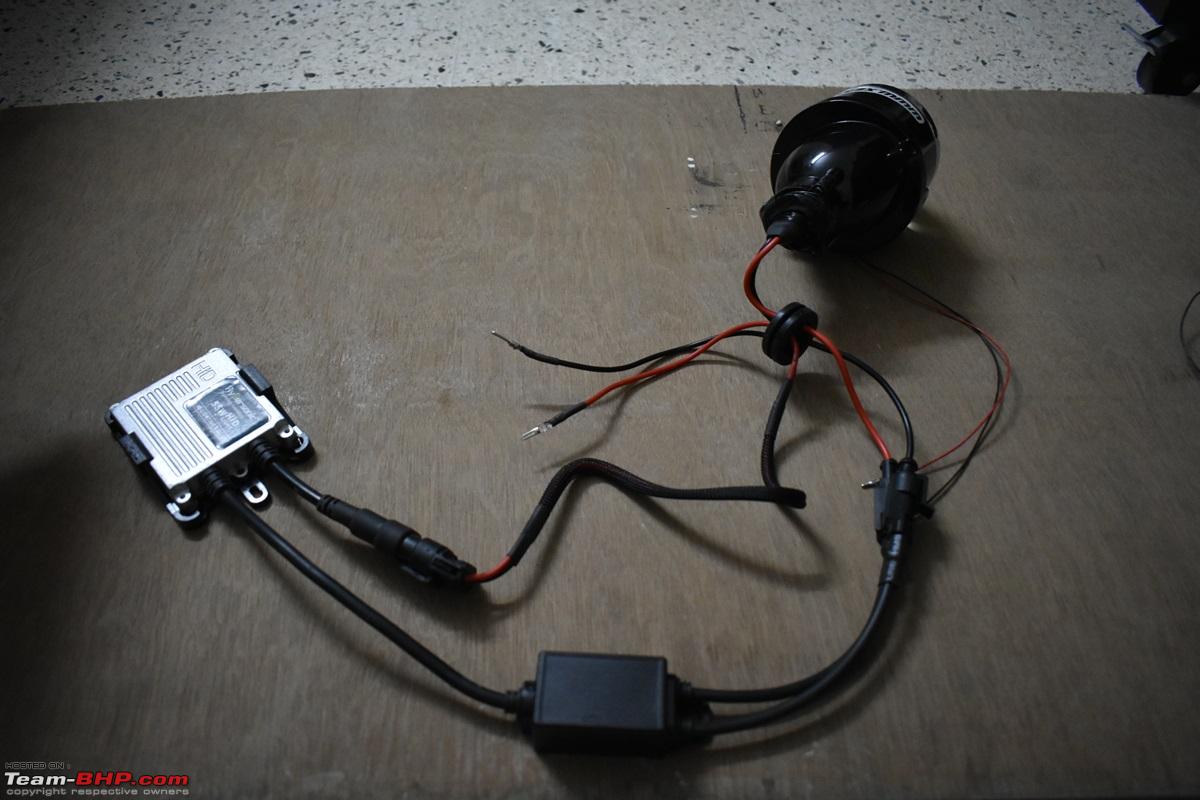
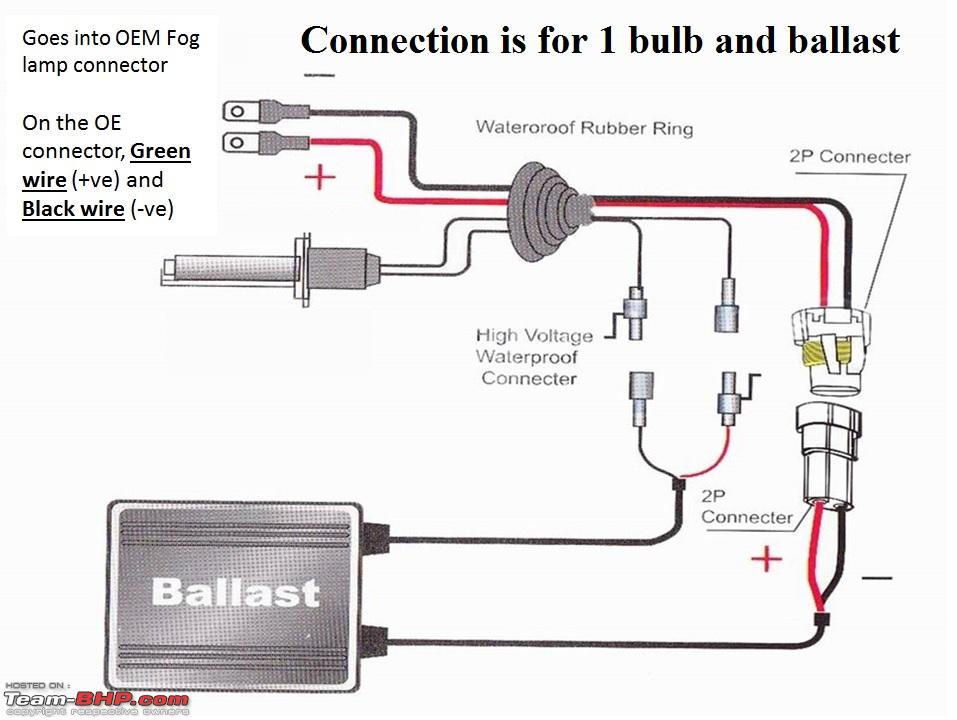
Wiring schematics for this install Here's the basic wiring of connecting the HID bulb to its ballast 
(
Source: Google Images)
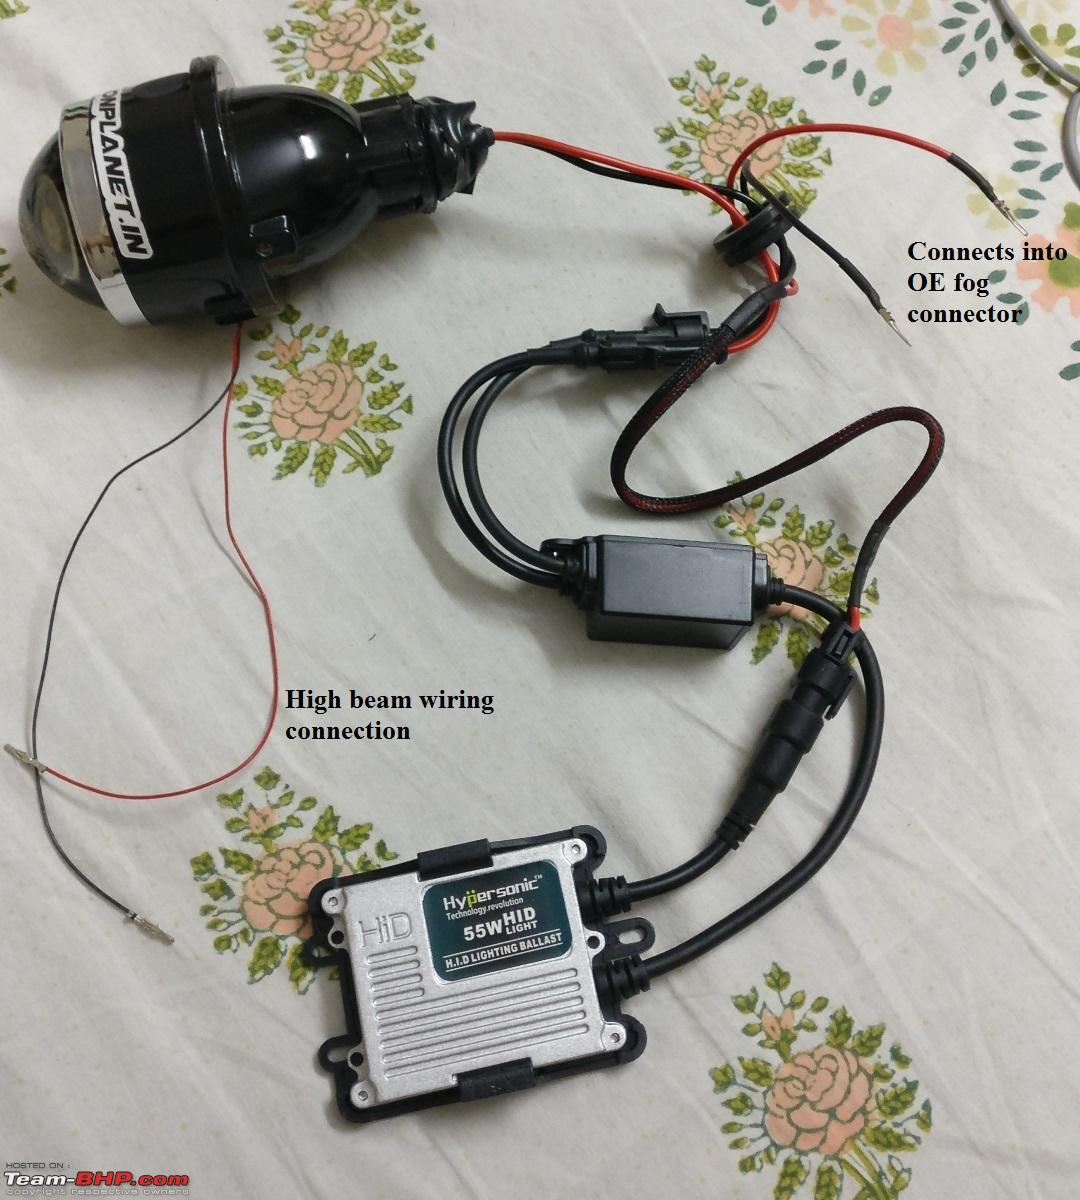
How it looks in reality  Wiring done to connect the high beam of the XP Micro
As mentioned in the post No. 4 of this thread, I have wired the High beam of the XP Micro separately and totally independent of the headlight stalk so for that I purchased an OE fog light switch and placed it beside the current fog light so using it is easier when I do which is very very rare conditions. In all these days post install, it is only for shooting videos and images I have used the high beam of the XP Micro.
Pending work: Work left in the wiring section is to get the back light to the switch and the green light when the switch is pressed to indicate that the connection is being used.
Videos of the output XP Micro vs OE Fog lights
Video shows the difference in lighting between OE Fogs lights and XP Micro bi-xenon fogs (gives a view on how they work on startup)
-----x-x-x-x-x-x-----
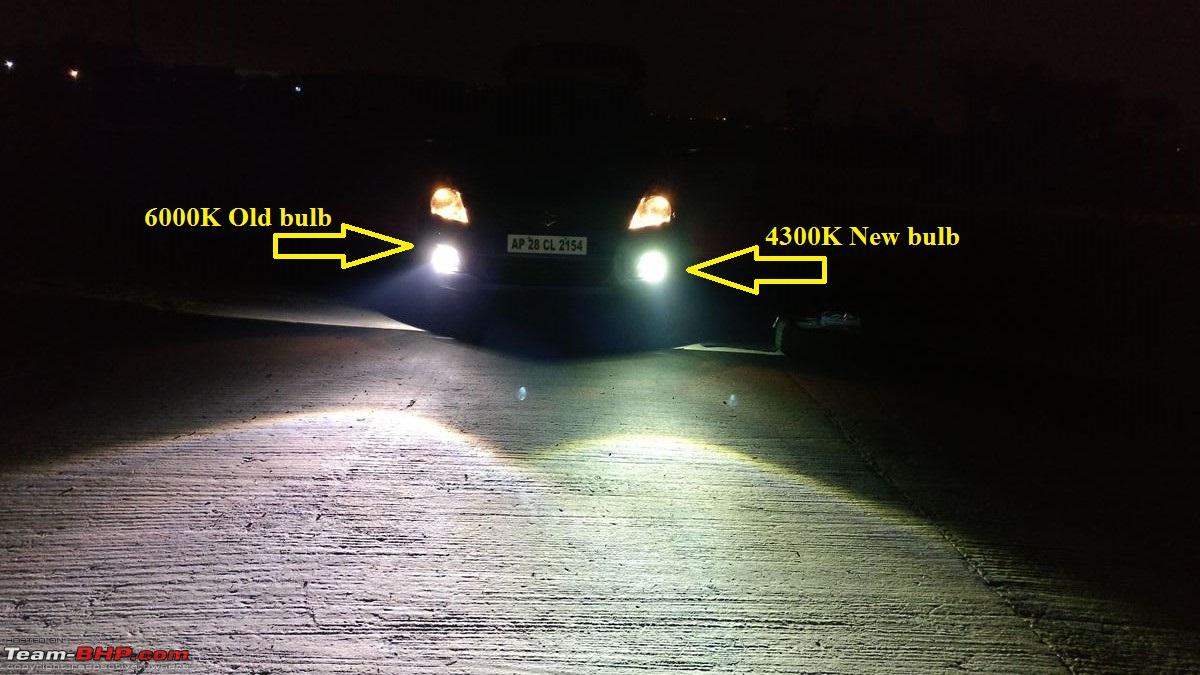
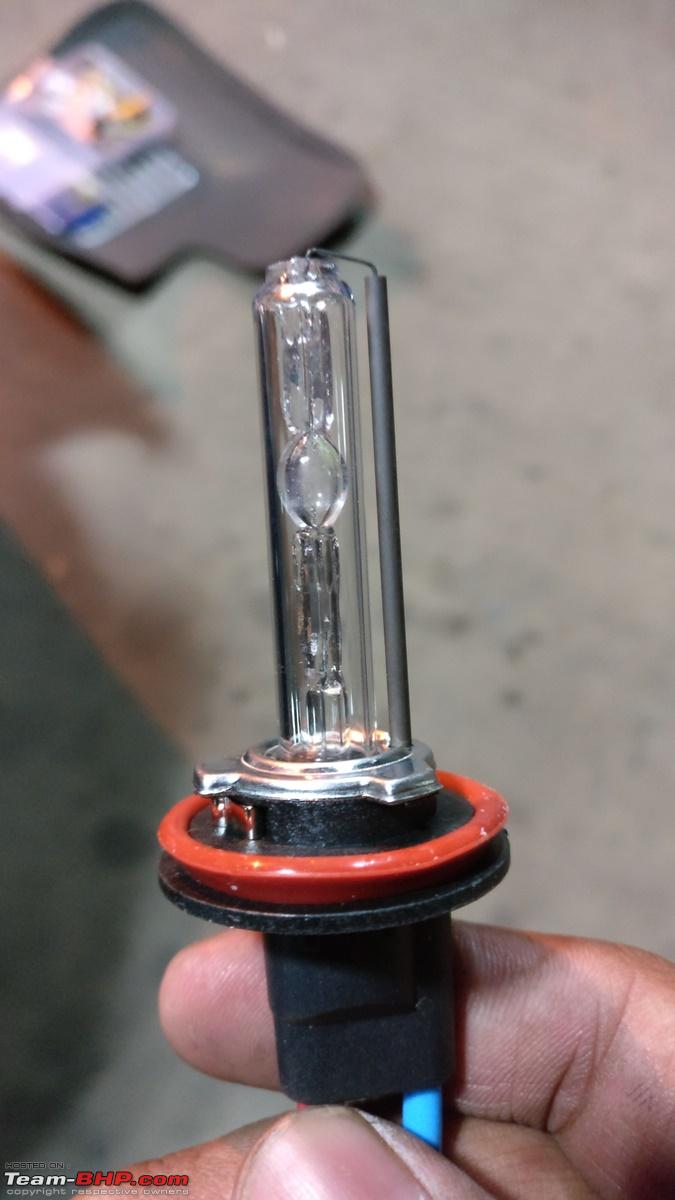
XP Micro with Old bulbs (6000K)
Video shows the output from both my headlights and XP Micro. This was shot just after completing the DIY so the bulbs are the older ones rated at 6000K.
-----x-x-x-x-x-x-----
XP Micro - All Lighting combinations @ 6000K bulb in the fogs
This video gives out all combinations of lighting output with headlight beam but the bulbs in the XP Micro were older ones i.e. 6000K
-----x-x-x-x-x-x-----
XP Micro - All Lighting combinations @ 4300K bulb in the fogs
This video gives out all combinations of lighting output with headlight beams and the bulbs in the XP Micro are newer premium ones i.e 4300K as desired.
_________________________________________________
Now that I have completed writing, uploading and posting all the data, images and videos that I had, one last part is left in this thread. It is time for Credits giving.
- Sincere thanks to Mr. Shoeb a.k.a interc00led for being around and helping me in the DIY during wiring and aligning the XP Micro. Without him, I would have given the XP Micro off back to Mr Mayur on the account of them not actually fitting in the car. Can't thank him enough for encouraging me to go ahead.
- Mr. Karan Soni from Delhi (XP Micro guy @ Delhi) who helped me offline with all possible ways to get the XP Micro installed on the car. I have pestered him a lot offline on WhatsApp with all my doubts and he patiently answered and helped me with all the possibilities for the installation.
- Thanks to Dr. Naren for injecting the XP Micro awareness and love in us by regularly sending images and live videos. IIRC he is the first to post regarding the XP Micro whereby he had installed it in his S-Cross (Link to his thread).
- Last but not the least Mr. Audioholic for the wiring help that I got from him directly and his DIY Celerio DRL installation thread.
PS: I am not associated with Xenon Planet or any of their in-charges. Just posting my experience.
I'll be updating the thread in terms of durability, long term reliability and functioning as days pass by with usage. I am fully aware and assure it that I do NOT use the high beams of both the XP Micro and my headlight in city roads. I switch to high beam only on my headlights when on the highway without presence of any oncoming vehicle or situations that demand high beam of the headlight. In any case, the high beam of the XP Micro will not be used much.
Plus I'll be updating the thread once again when I carry this whole setup to my next car (
Maruti Suzuki S-Cross) whenever it comes. :)
Thread moved from the Assembly Line to the DIY Section. Thanks for sharing!
That's a very neat install there. Helpful for Maruti owners who find the headlamps inadequate. clap:
Additionally, tinkering with the fogs is easier than destroying a sealed headlamp unit. I have heard many rants about the inadequate light throw of the S-cross on the official review thread and even Dr. Naren has done a similar mod on his car. The Swift is also a victim of poor headlamps I guess.
The results are very satisfying for the efforts put in. One question,
Is the wiring the exact same and is it easy to revert back to the original setup once you sell the car off?
Regards,
vishy
Excellent thread buddy!! I used to get many PMs regarding XP Micro, now I can send the link of this thread :D. The output is really good and significant upgrade over OE fogs.
OT : Do get 1.6 S-Cross soon :) ( Unconfirmed sources are saying 1.6 would be discontinued)
Outstanding work sir. I remember the countless conversations around this and the pain of getting it right. Many thanks for making the additional effort to pen down this wonderful report.
Quote:
Originally Posted by vishy76
(Post 4199311)
The Swift is also a victim of poor headlamps I guess.
|
No buddy. I love the headlamps and are brilliant in my Swift. I have no complaints. You can see the output from headlights only.
Quote:
Originally Posted by vishy76
(Post 4199311)
Is the wiring the exact same and is it easy to revert back to the original setup once you sell the car off?
|
Yes Sir, I have wired it that so I can revert to stock.
PS: All my DIY's and MODS are totally reversible and I have planned it that way to remove all and sell the car in stock. Have kept all the OE parts to my put back at time of selling.
Quote:
Originally Posted by Dr.Naren
(Post 4199336)
Excellent thread buddy!!
Do get 1.6 S-Cross soon ( Unconfirmed sources are saying 1.6 would be discontinued)
|
Thanks Dr Naren. I hope the 1.6L stays till March 2018. Let it get discontinued post that. I'll mail Maruti to keep the engine live and kicking till March 2018. :D
Quote:
Originally Posted by sudeepg
(Post 4199358)
Outstanding work sir. I remember the countless conversations around this and the pain of getting it right. Many thanks for making the additional effort to pen down this wonderful report.
|
Thank you Sir. Thanks to your help by sending me that crimping tool.
Happy that the thread is of use to many.
| All times are GMT +5.5. The time now is 17:43. | |