Foreword -
This is not a hi-tech D-I-Y. Rather, just a cosmetic cum mechanical care for an old car.
Quote:
Originally Posted by vrprabhu  I had to change my battery yesterday....
BTW, the old battery lasted a little over five years in my car.... |
Further details are available here - https://www.team-bhp.com/forum/techn...ml#post4430275 (Palio Battery options DIN50/DIN55 and manufacturers) This D-I-Y happened because the battery died suddenly, which led to a brand new battery sitting in a pretty old car. I guess the new battery sort of makes my car look dilapidated? :-(

Buying a new battery and fitting it was easy enough, but there is more to it than what meets the eye!
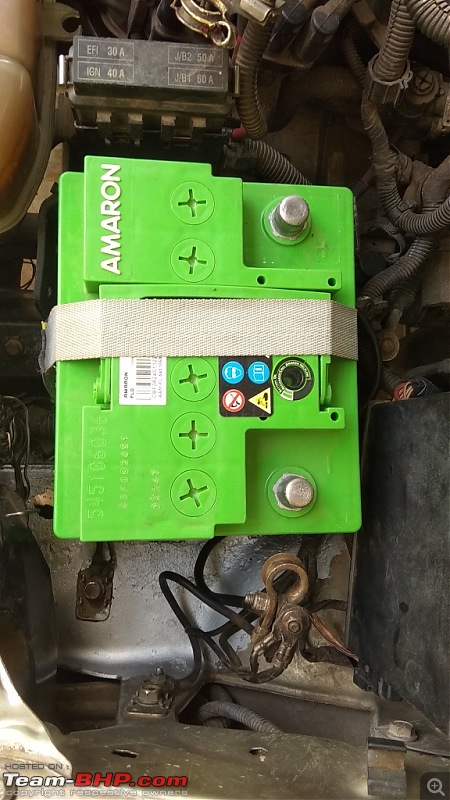
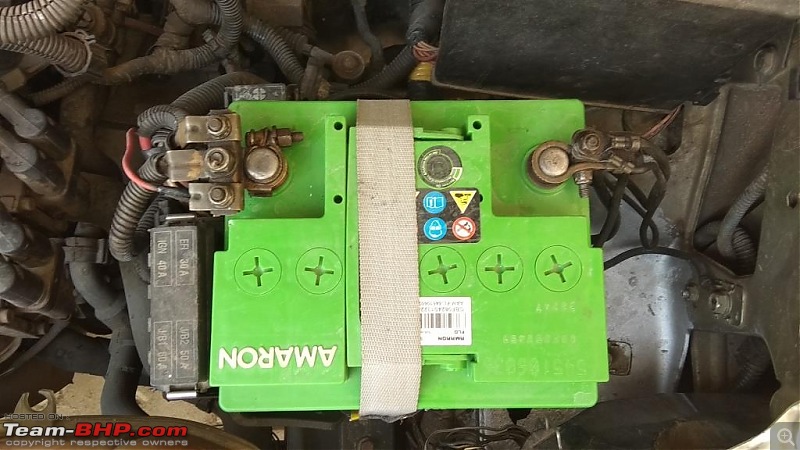
The cable tie used to keep the fuses in place, is a 'jugaad' because the (original) battery tray's condition was like this -

So, rest assured, just like any other bhpian who is ready to get his hands dirty, planned to fix it on my own and bring it back to ship shape!
Which was through this new battery tray. Take a look and now you know what exactly I mean....

Doesn't that make a pretty 'before' and 'after' picture?
a la weight gain treatments? 
Eagle eyed readers would have also observed that the strap securing the battery is also wounded!!. The tray had outlived its life, I guess!
Palio owners would know that the battery tray has a couple of holders to secure two fuse boxes. In my case, the car being old, the tray was was practically breaking into pieces, and these fuse carriers were dangling loose (and hence the cable tie).

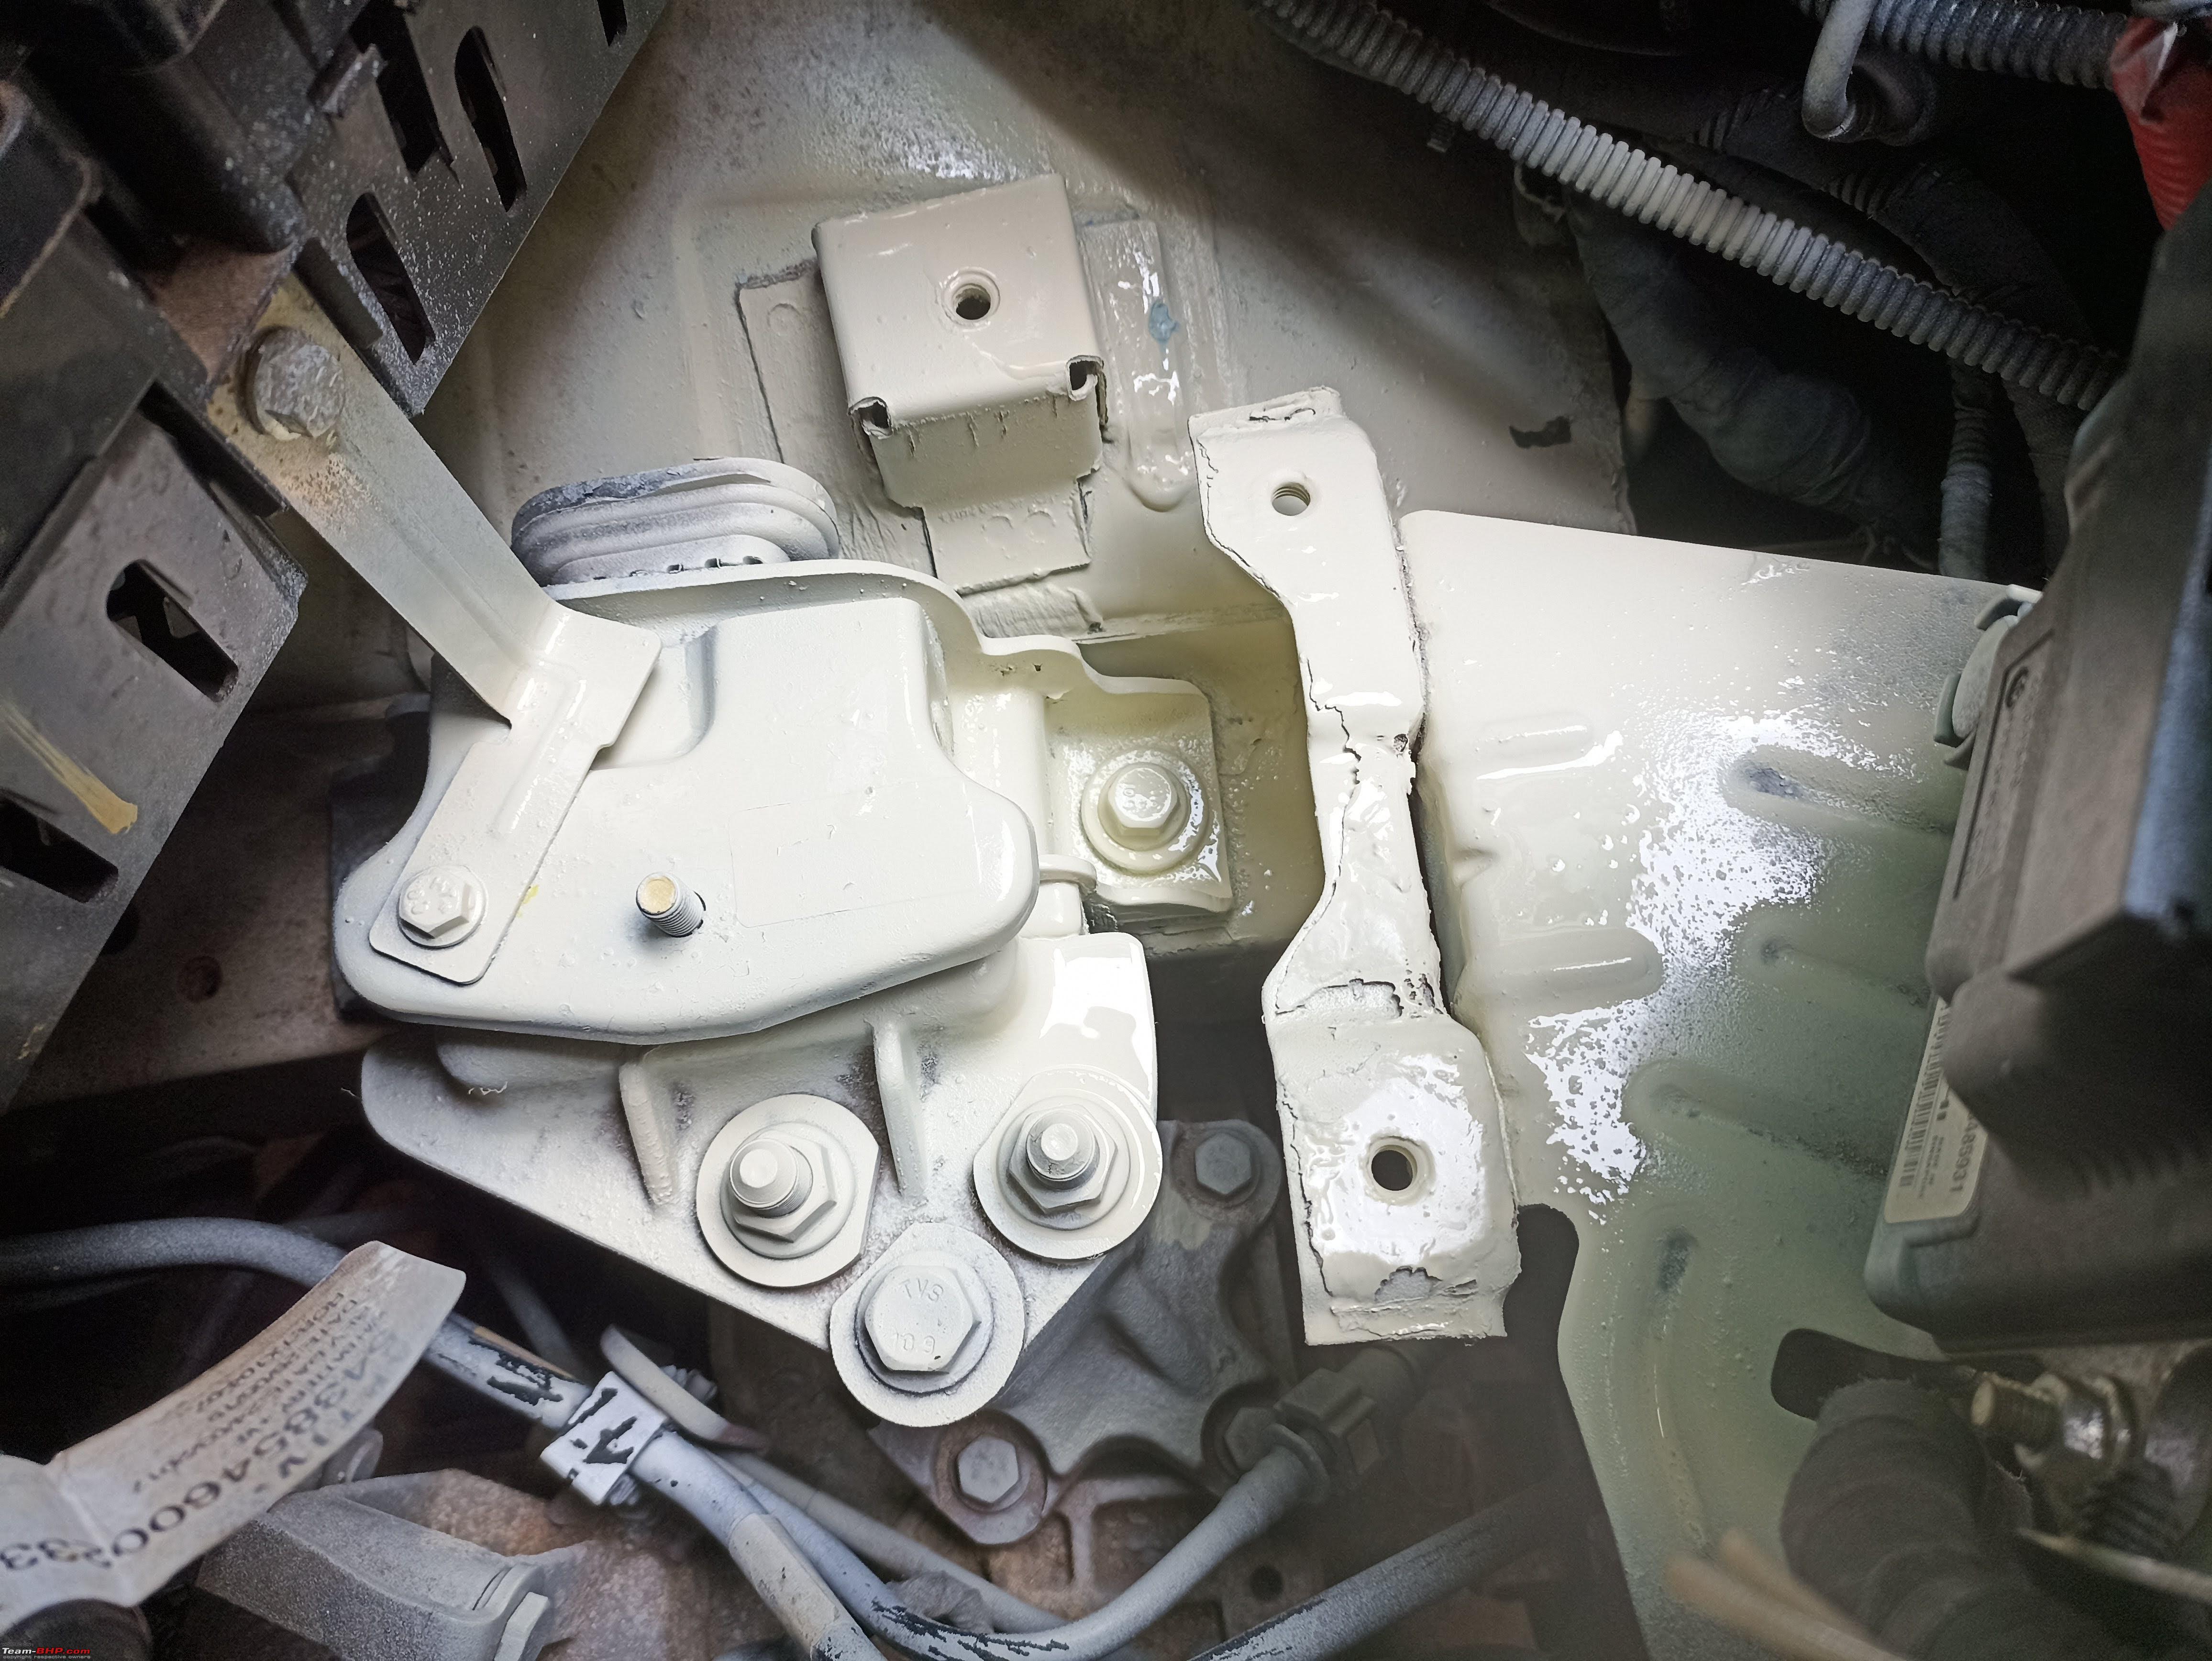
Beauty lies in the eye of the beholder, I am told. In my case, it was only just about skin deep.... err, more like battery deep! The true state of affairs if you peek beneath the tray, was

:

Hawk-eyed bhpians would have identified the weld spots.
Actually, the battery support area was rusted, which the tray was hiding. So had to undertake minor cleaning and a small patch welding. While the welder was it, he also fashioned three new bolts for securing the battery tray (if my memory is right, the original ones were nuts welded for bolts to be fastened) without even my asking, and went ahead to fabricate a better solution than what I was planning. The guy was really skilled and ingenious in designing the solution, so much so, once he completed the welding the final outcome surpassed the original! Charged only 500 bucks for the job - which I gladly paid, because he did the job quickly on the spot.
After the welding, it was clear that battery tray had to be replaced. And while at it, thought why not go ahead and clean the rust and paint the whole area?
That's exactly what I did.
In order to find a replacement tray, I scoured the spare parts shops looking for a suitable replacement. Almost all the shop keepers I visited looked at me as if I were loony. A few sympathetic ones showed their wares and gave some suggestion.
To sum up -
(a) my efforts were in vain;
(b) spare trays are available only a few cars like M800 and Alto;
(c) the nearest in size to DIN45 was that of Indica's, which is all metal and won't serve the purpose anyway; and
(d) one may succeed in finding the proverbial needle in the haystack, as compared to finding spares for Palio in interior TN.
Savior was 99rpm.....
But it also made me realise that not many cars have a separate battery enclosure or tray over and above the support base (the Punto Evo has a full battery enclosure sitting on the frame!) - so suggest all to please look beneath the battery once in a while and make sure everything is hunky-dory! Else, you are welcome to follow my D-I-Y!!
And I now proudly present an unique specimen -
the only Palio with a hand painted battery compartment!
Jokes apart, these are items that you need and this is how you go about it.
Requirements -
1. Patience
2. Even more patience :-)
3. Lots of time - better to do it over two days
4. Battery tray (sourced from 99rpm, ~700 Rs. excluding the cost of handling and shipping).
5. Primer and Paint (the smallest can was 250ml), emery paper, thinner, brush etc. (~400 Rs.)
6. A good piece of nylon strap to join the clamps.
7. A warm and sunny day to do the actual job!
What I did - DAY 1
1. Popped up the hood and removed the battery and the tray off the car.
2. Got the cables / terminal links / wires etc. out of the way, by carefully moving them.
3. A part of harness goes besides and beneath the tray, so there is no other way except to move it back and forth while you work.
4. Cleaned the rust with emery paper and removed the layer of rust and accumulated dirt and gunk. Cleaned the area with a brush. Since this is an internal area, there was no need for a smooth finish or 'putty' work.
5. Applied primer over the entire battery support area and adjacent places. And let it dry.


The whole process took about a couple of hours (dismantling the battery and tray took about half-an-hour, cleaning and sand papering took about an hour, applying primer took another thirty minutes). Another half-an-hour was spent on removing the two clamps on at ends of the battery strap, cleaning them and applying primer.
It was beyond 1 PM, when the first part was completed - felt that it would be better if the primer got completely dried, before I began the actual painting.
If you look closely, you can see that primer has not fully dried. So decided to leave it to dry for the day. (Planned the job for a Saturday and Sunday - it proved to be correct decision).
DAY 2
Started the work by noon. Not only was it to have a relaxed morning but also to ensure that the primer is absolutely dry for the next part.
6. I had bought a silver / aluminium coloured paint. There are two separate items to be mixed (pigment and binder?) to get the paint ready for use. I chose this shade because I thought it would help with lesser heat absorption underneath the battery and I could put the paint to use later, for some domestic chores.
7. Painting with a brush isn't easy. The quantity of paint on the brush, its consistency and the strokes do make a difference to the application and final outcome.
8. The initial attempt was sort of a trail with a thinner coat, which I tried out on the two clamps. Once it was completed, I was sure that the job can be completed as planned (if it didn't work out, was planning to go to a FNG and get the area sprayed). The second coating went well and the paint was adhering nicely to the clamps.
9. Thereafter, started painting the primer which had dried out nicely. This work needs some patience, as compared to primer application, because I wanted to apply it uniformly in single direction, and also time to allow the paint to dry. The plus point was that since the surface to be painted is horizontal, the paint doesn't run (one or two drops did drip though, when dipping the brush in the paint). After a second coat, the end result was like this :


Don't know whether it is pretty, but hope it gets a passing grade?!
8. More waiting - for the paint to dry.
(I used this time to tape up the wiring harness, as many of the earlier insulation tapes had lost their adhesion. Also hand stitched the strap to the clamps - now I have a hand crafted battery fastener in my car :-). Be sure to get the length right.)
9.
Spot the difference!?! 
The battery tray has two outlets (with attached tubes) in the two channels - probably to let the acid spill outs and other liquid to flow out without touching the metal body. However, when I had the welding done, had forgotten about it, because one outlet of the original tray was broken, and there was no trouble fitting the old tray after the welding was completed.
So had to fashion a hole in the welded area, to make a provision for the outlet to be inserted through the base so that the battery tray can sit securely with all bolts fitting snugly in the respective orifices in the tray.
Notice the taping of the harness? One electrician has given me a simple and effective tip -
'kaam sampvaithana, ek gattha maraiyache aheth' (while completing the taping, tie the end of the tape as a knot) so that the tape remains secure and ensure that it doesn't come undone.
10. Coming to the end of the job - the new battery tray now fitted securely. See that all the holes are matching and the re-painted clamp now sitting snugly. (There was one more plastic / fibre support originally on this clamp which too was corroded, but that doesn't seem to exist at all now).

Hopefully a much better sight?
11. Battery strap is now neat and secures the battery well.
12. A good job done, I hope. Both the fuse carriers now fitted onto the tray and secured.


 18th September 2018, 16:06

 (15)
Thanks
(15)
Thanks


 )
)