I had installed puddle lamps in my Wagon R but it was a very crude one, using the Chinese LED strips.
Link (Maruti WagonR over Hyundai Eon? EDIT : Bought WagonR with ABS / Airbags) Although I was happy with them but lately a couple of them have stopped working. Plus the wiring is also not as per my liking inspite of getting help from MASS. So when I wanted puddle lamps in my Brezza, I started with contacting the source / encyclopedia of Maruti spares
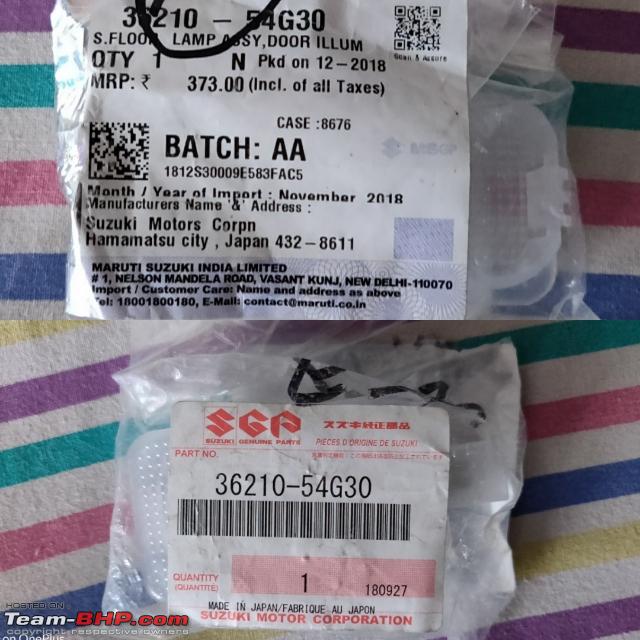
Leoshashi. And he reverted with the part number of puddle lamps used in Ignis and Baleno in just a few minutes! I ordered 4 of them on
Boodmo and they were sent separately from different locations. Cost was INR 1500/- for 4 including shipping charges.
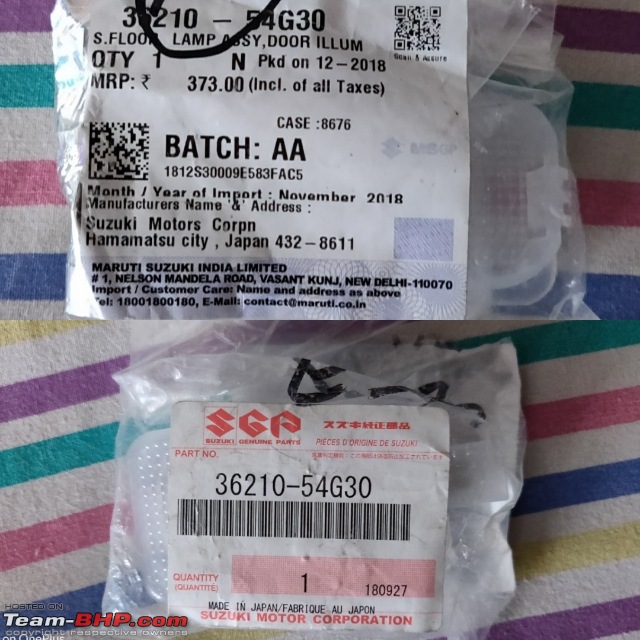 Its a SGP!
At the outset, I will tell you guys that the snaps will be lesser than the work done because I did everything alone so was difficult to take snaps for all steps.
Panel removal -
I was not sure how to remove the panels. I asked my friendly MASS to send someone over who could help me with my DIY. But due to Durga Puja, it wasn't possible immediately. Thanks to
Dr. Parvez of X-Roaders for sending me details on how to start, I started work on a relatively free day and thought of trial on right rear door first. Once it was done, I repeated the process for other doors also.
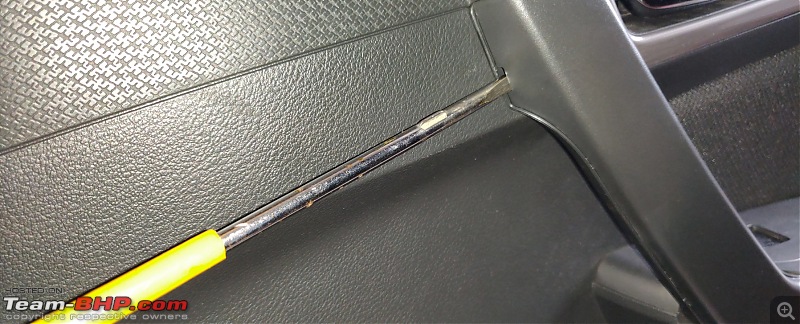
The panel was removed. To remove the panel, one needs to pull open the cover over the inside grip as well as inside the lock mechanism which exposes the screws. The rear panels of Brezza have 4 screws and a single lock that needs to be removed plus the rear triangular cover whereas the front panels have 3 screws and 2 locks and also the tweeter mount. Thereafter, you have to literally pull out the panel. The noise it made had me thinking that something broke but thankfully, nothing was broken. Once panel is pulled out, carefully the coupler for electrical connections is removed.
 Removing the cover of inside grip
.
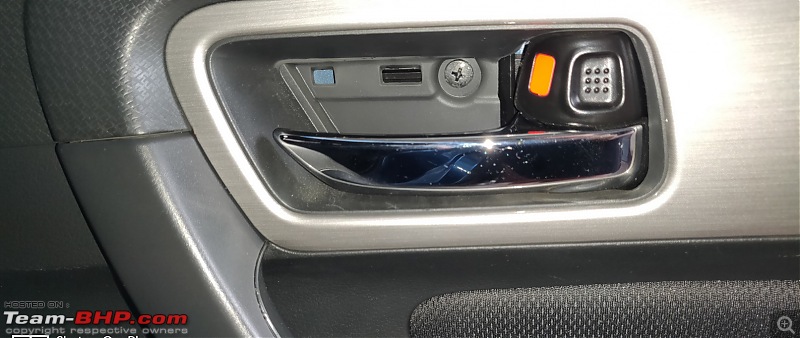 Screw on lock panel
.
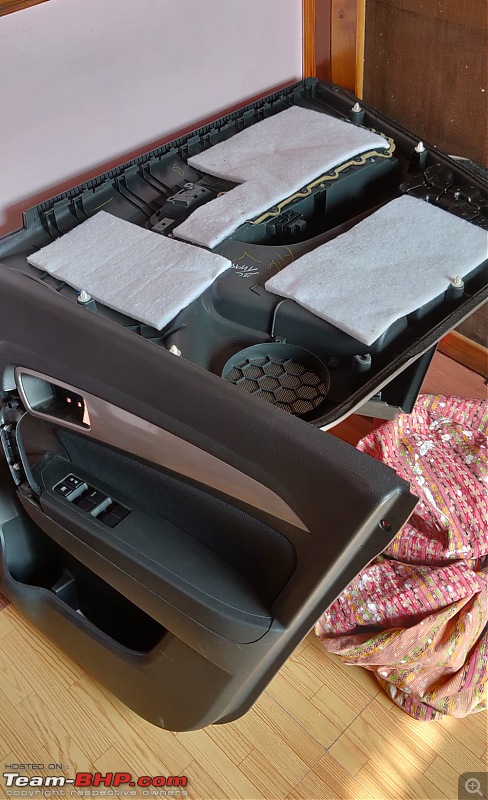 Panels removed
.
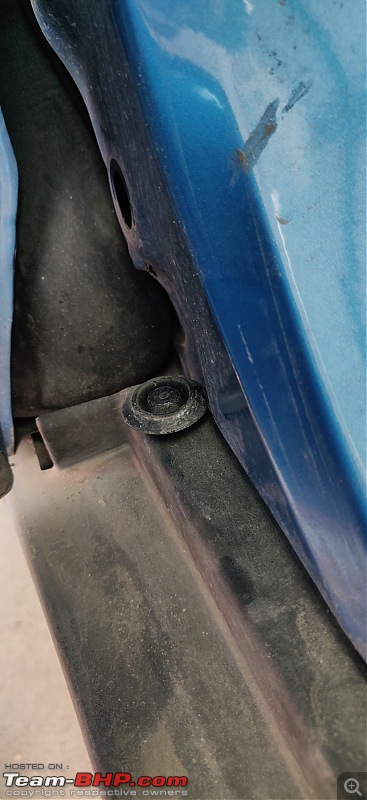
After removing the panel, I made a rough measurement of base of the puddle lamp and made a hole as per the size on underside of the panel. The hole was made using a heated paper knife blade. The rough edges were smoothened. Once I was sure of the fit of the lamp, I started with the wiring part.
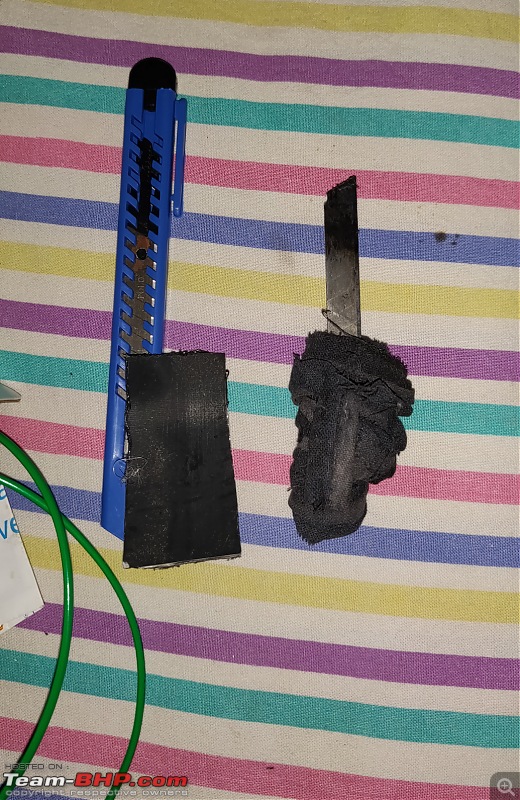 Knife used for making the cut. Cloth wrapped at end as it was heated and then used.
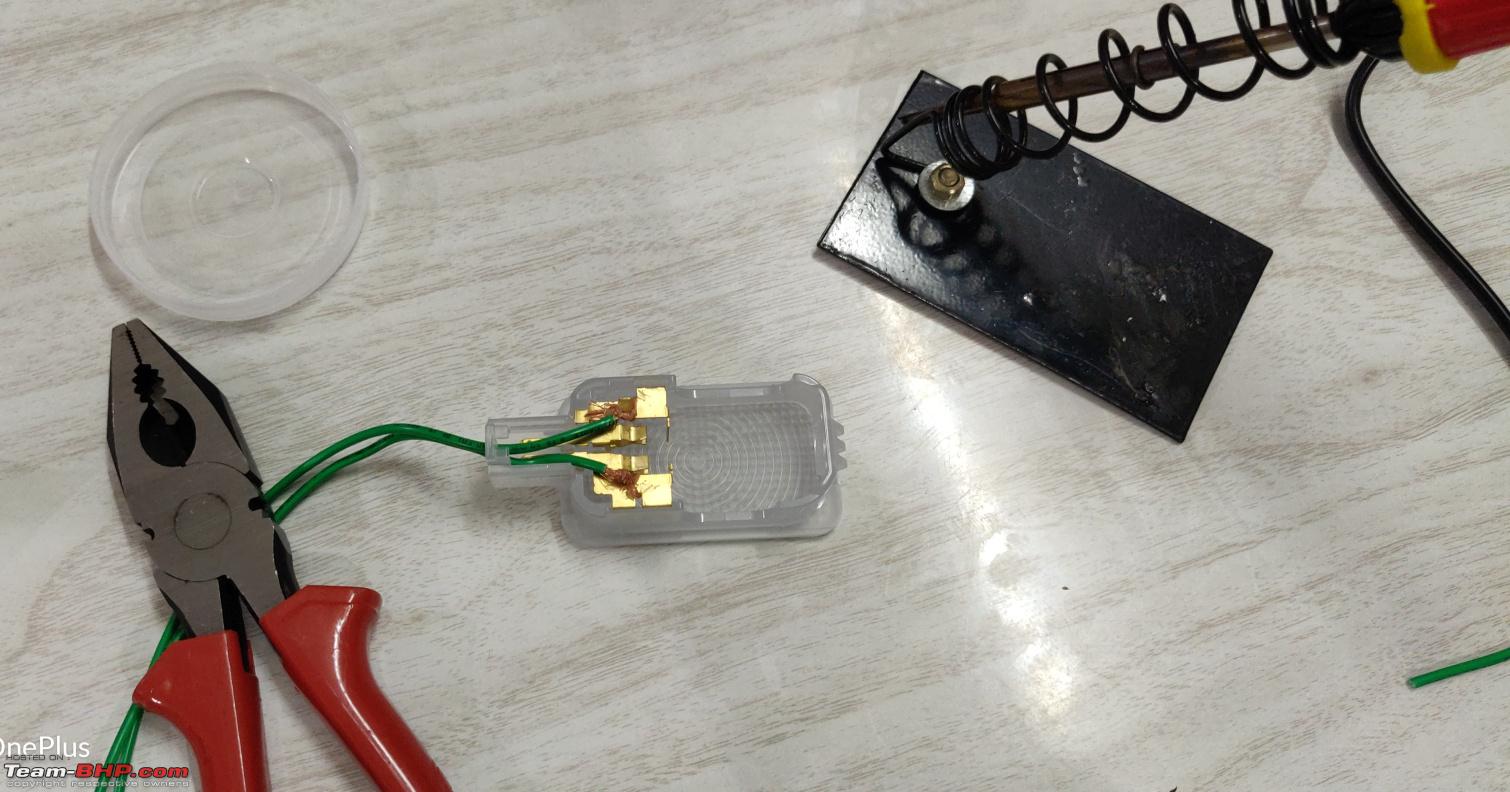
I've used a Havell's 0.75sqmm wire for all the wiring. The wires were soldered onto the points of the lamp. I did not order the wiring harness because since this system is not in Brezza, I would have to cut and use the coupler, basically waste of money.
 Before soldering
.
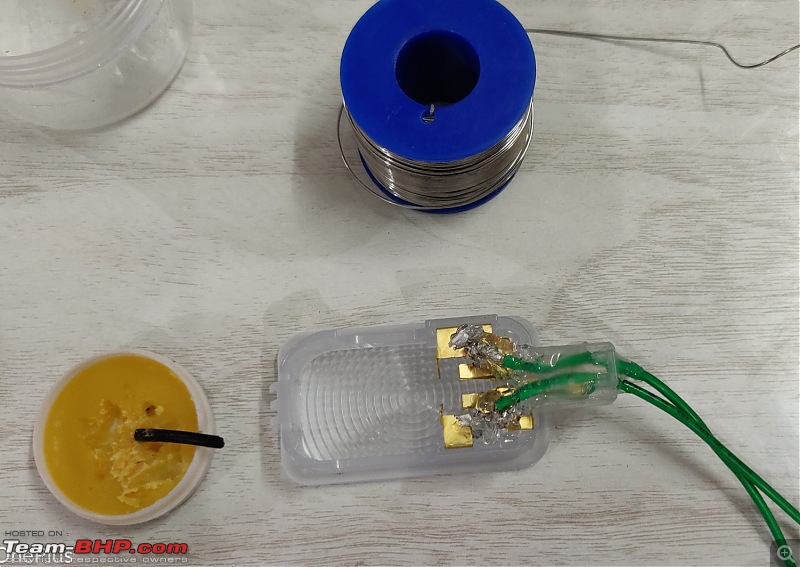 After soldering and sealing with plastic glue
.
After soldering the wires, I used liberal amount of plastic glue to seal all open contacts.
Routing the wires-
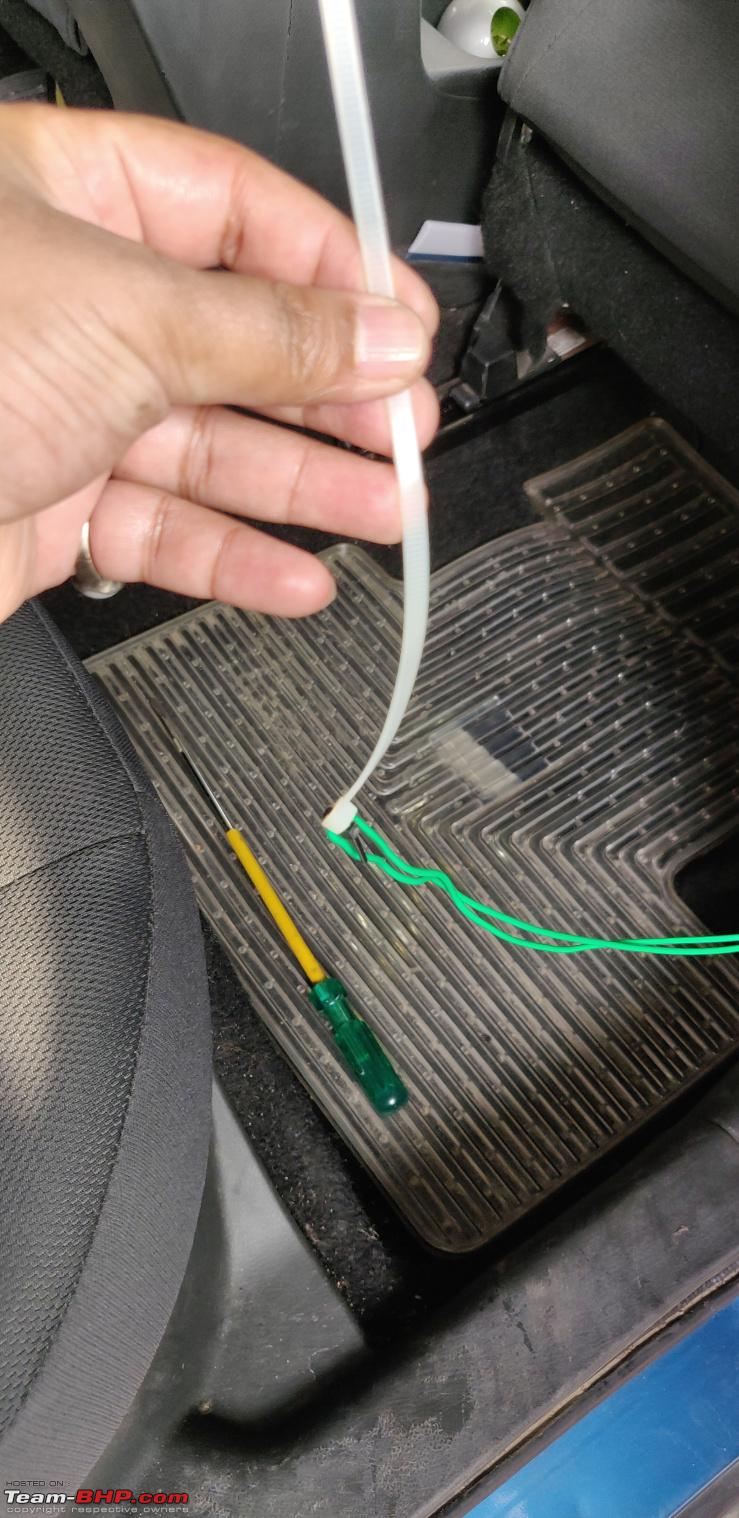
The rear gates have connection for the speakers, power windows and the locks. All these are routed through a rubber tubing. I saw a few videos on YouTube as to how I can route it through them. One of them advised to use a zip tie covered with oil or liquid soap to route it through the tubing and then pull out the wire. But before that, the speaker needs to be removed. It's held by 3 screws . Behind the speaker is the end of tube. The zip tie was passed through the tubing after using a liquid soap and wire was tied to it using another small zip tie. I must tell you this was so easy that I couldn't believe it. I was happy that I'll be able to do all the gates in a few sittings but I was majorly WRONG! Anyway, once the wire was passed out to the interior, I put it behind the panel that holds the seat belt.
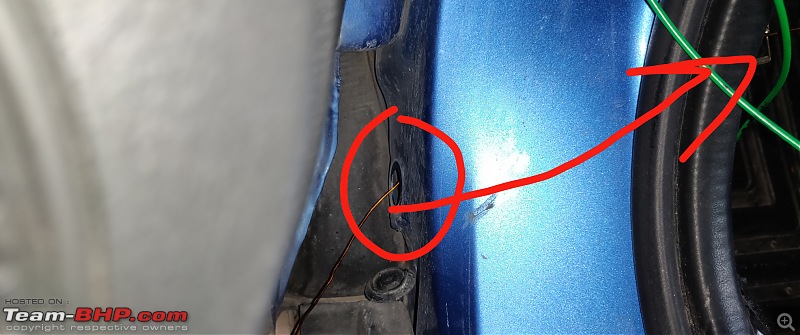
Since passing the wire through the rear door did not take more than 10 mins, I thought I'll do both the front ones in next sitting. So next day I started with front right side door. The lamp was fixed in same way. When I opened the tubing, I saw that there was no space to even pass a single wire as the front ones have a lot of wires going through it and they're routed through a plastic jack. I was stuck. Then after looking at many aspects, I saw there was a rubber lock on the lower side. I removed it. On the inside, there is a nut holding wires for earth. I removed the nut and was able to pass a copper wire through and through. Then the wire for lamp was taken out after making a small hole into the rubber tube and pulled out through that same hole, and then routed below the door sill to the B pillar area.
 The earth wire with nut.
 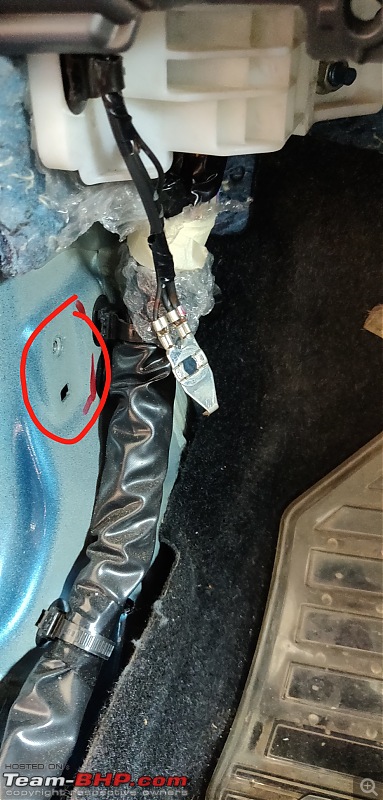 The hole as seen after removal of nut. The lower part was used for passing the wire.
 The outer rubber plug through which wire was pulled inside
.
 Copper wire put to pull out the wire
.
 Copper wire through the hole
.
 This is how the wire is in front
.
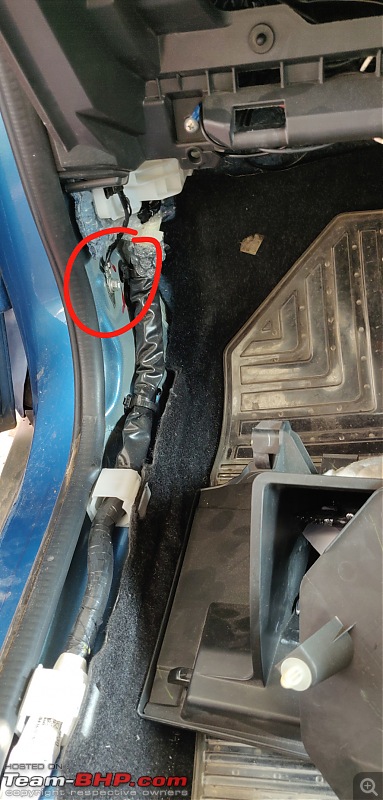
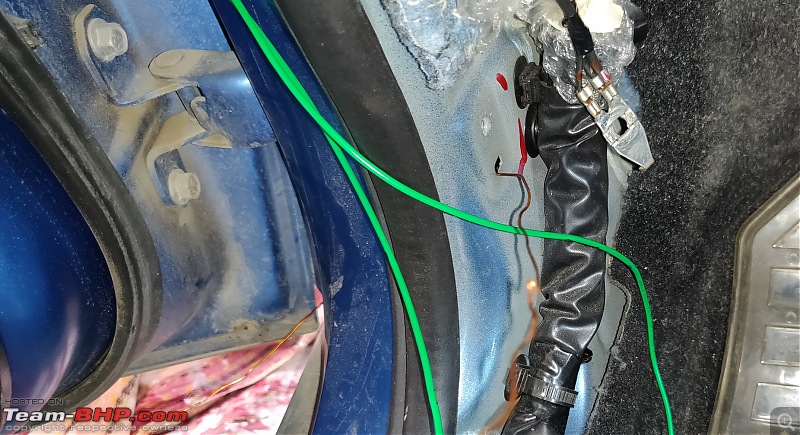
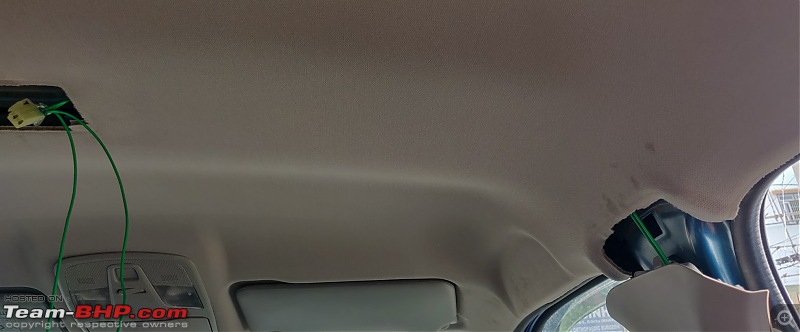
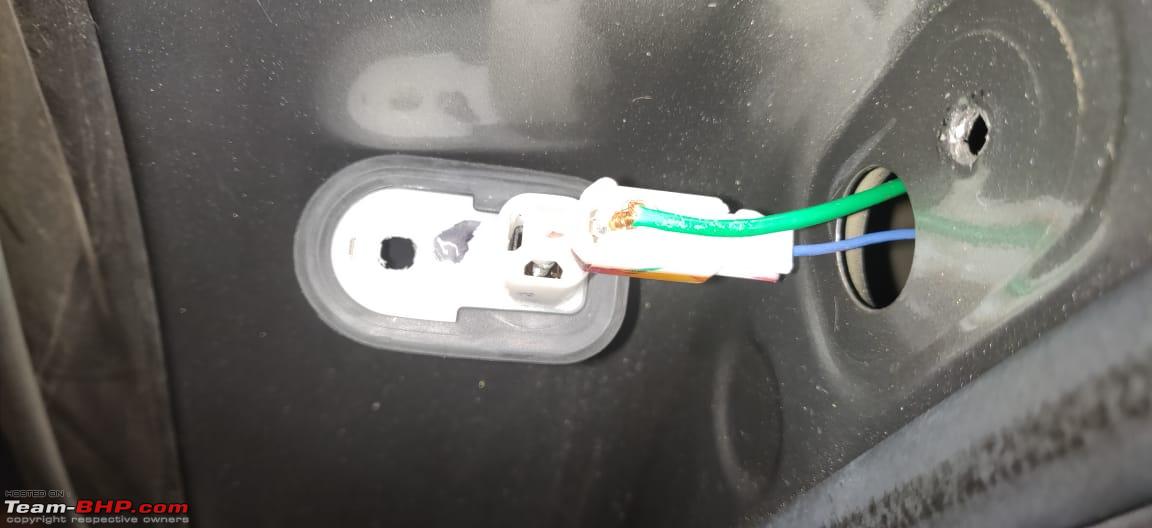
The wires from the front door and rear door were brought out to the B pillar and connected to each other.
Power source -
Since puddle lamps should work when gates are opened, there was no better place to take power from other than the dome lights. I preferred the central one as it has less of confusing elements.
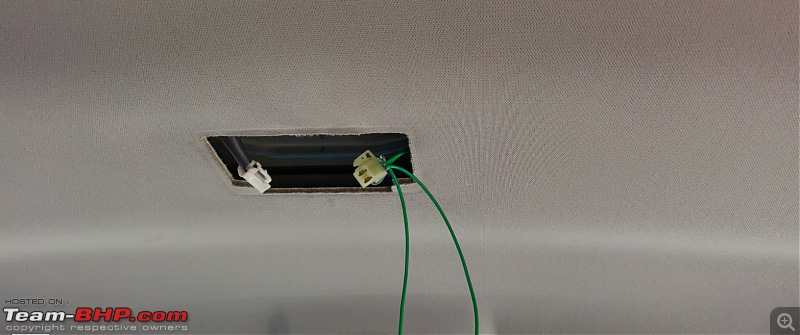 The central dome light area with the connector to it (OEM wiring) and the connector of my connection. Right side wire has been routed.
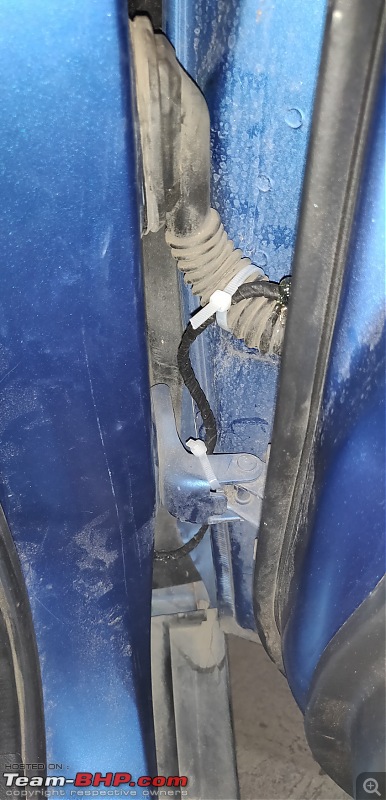
 One can see the way wire has been routed
.
I don't have a snap of the dome light after I had taken power source from it. The wires were soldered and again covered by plastic glue. The connection is through a connector as seen in the snap. One side has wires to both sides and other side has power source. The wires were routed in between the roof liner and roof and passed behind B pillar panels. The connection was made and everything covered by waterproof tape and concealed. The panels were refit properly. There is no visible wire now.
Bulbs used -
The puddle lamps came with T10 5W bulbs.
I haven't used them. Instead I've used Philips 1W LED and that actually brightens the area. I've not changed the fuse because the earlier total wattage was 5W+5W (front dome), 5W (vanity mirror) , 5W (central dome) and 5W (boot light). Now all have 1W LEDs plus 4 LEDs in doors.


 9th October 2019, 12:37


 (24)
Thanks
(24)
Thanks


 But for me to follow this would mean more of work. So I'll skip this. Why fix something that ain't broke!