Team-BHP > Technical Stuff > DIY - Do it yourself
Register New Topics New Posts Top Thanked Team-BHP FAQ


Reply
  Search this Thread
20,744 views
Old 26th May 2021, 16:20   #1
BHPian
 
Join Date: Apr 2021
Location: Nalagarh, H.P.
Posts: 83
Thanked: 222 Times
D.I.Y. Installation of Rearview DashCam + Night Vision Rear Cam (Dual Channel DashCam)

Disclaimer: I do not represent 70mai in any way and this article doesn’t promote any product of any particular brand. The same procedure can be applied for the installation of any similar DashCam of any other brand.

Hello everyone. Hope you are all doing well in these tough times of the COVID pandemic. This is my first ever article on the forum. Due to ever-growing traffic on Indian roads and our infamous driving style, sometimes we all have to face minor or major accidents which involve our beloved cars. It’s OK when we are at fault, we make peace with the fact that we were not behaving as responsible drivers and we have to pay for that. But for drivers who drive safely and responsibly on roads, it’s always unfair for them to pay for someone else’s mistake. Like pedestrians jumping in between the road out of nowhere, motorists coming in front of from link roads out of nowhere, sudden brakes from the vehicle in front of you, and many more such incidents. I too have faced my fair share of such incidents where I have mostly paid for someone else’s mistake. Thank god we have a thing called insurance to get us out of trouble, but still keeping your vehicle in the garage for 1-2 weeks for repairs is always annoying. And things get ugly when the accidents involve the other party’s bodily injury or worse, casualty. For the innocent, it’s the worse kind of nightmare, and strong evidence is needed to prove the innocence. That is where DashCam recordings come into play. These things can save you a lot of mental trauma and financial loss. Therefore investing in a good Dashcam is always a wise choice.

I recently bought a dual-channel dashcam for my vehicle. I have a November 2017 manufactured Ford Ecosport Titanium TDCi (Facelifted). It came with 8-inch SYNC 3 touchscreen infotainment system with Android Auto and Apple CarPlay. Current Titanium variant misses on SYNC 3, Android Auto, and Apple CarPlay along with few other things like ambient lighting, puddle lamps, etc. However, it didn't come with a reverse parking camera at that time, which is present in current titanium. Though I never felt the absence of a reverse parking camera as I am more old school that way and rely mostly on IRVM and ORVMs. But the new dashcam came with a reverse parking camera mode which is a plus.

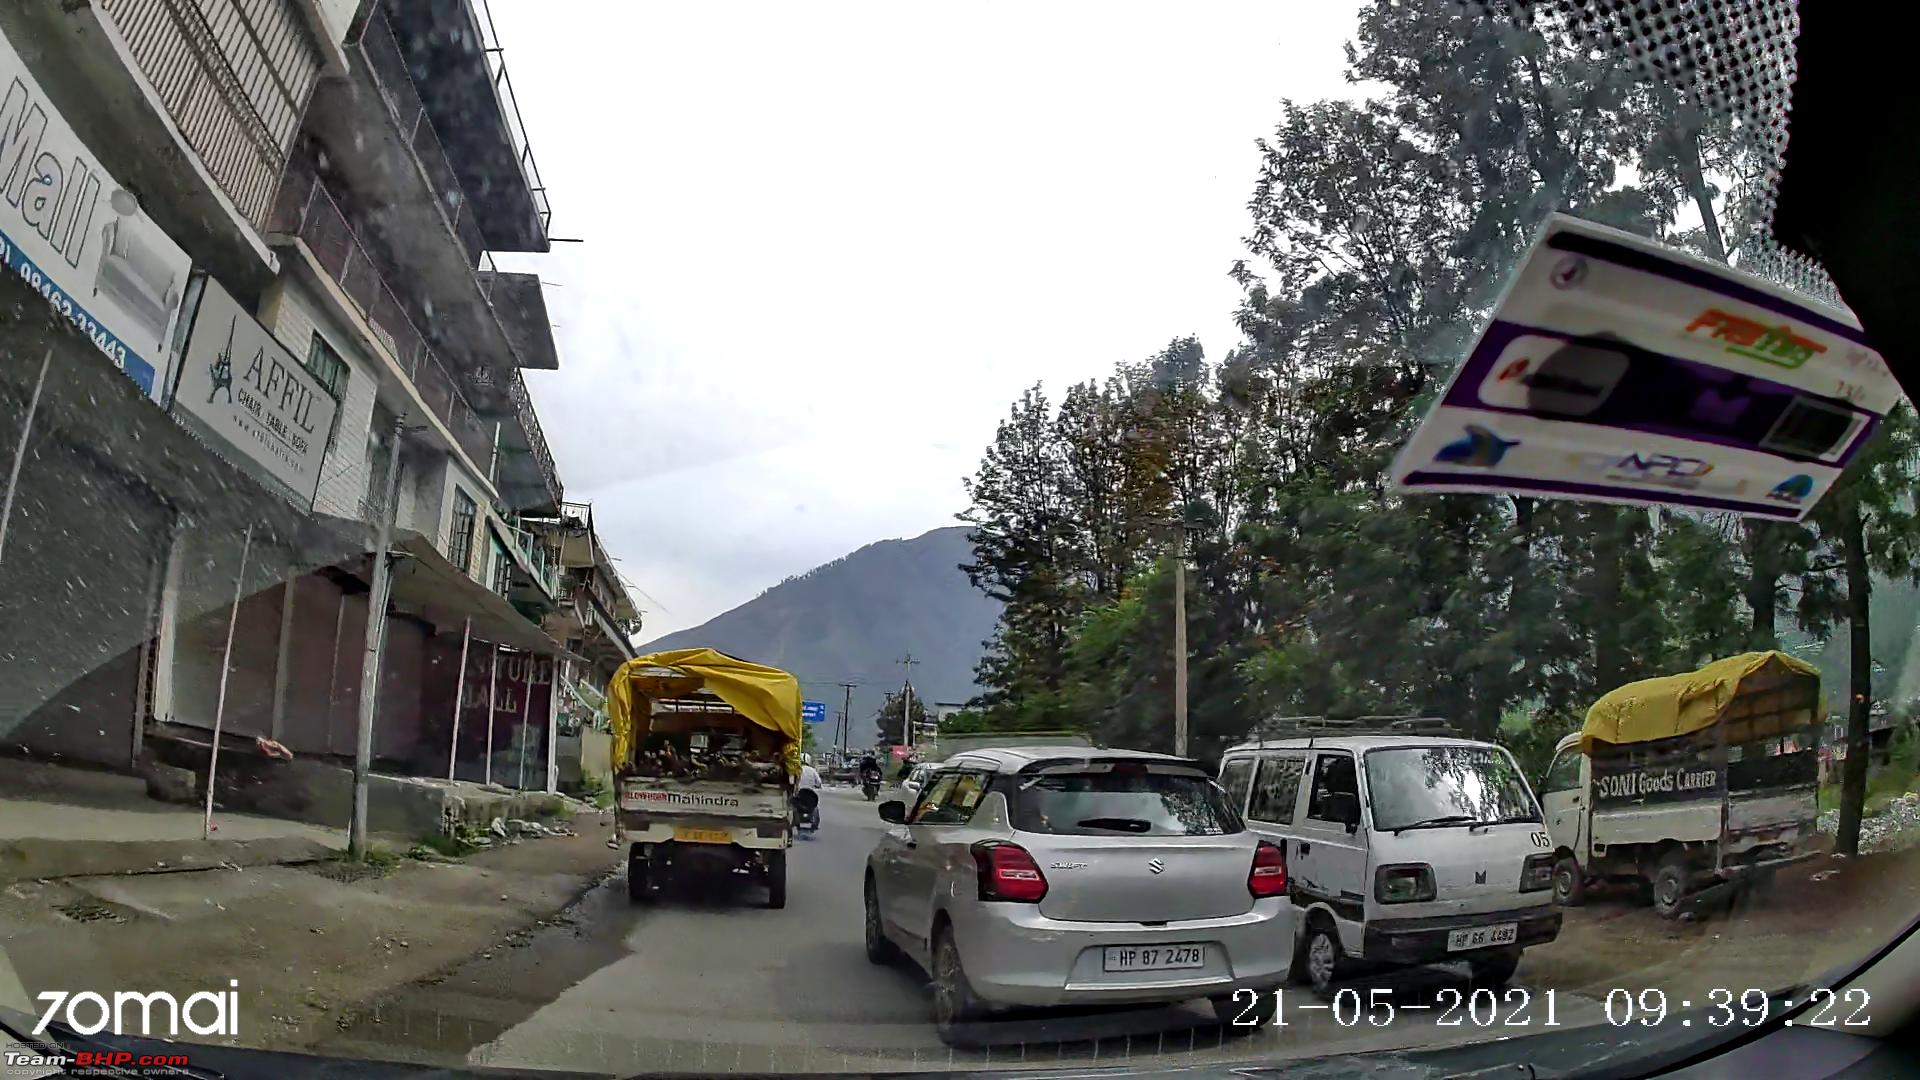
I got 70mai Rearview DashCam + Night Vision Rear Cam from Amazon for 11k. I recommend going with a Night vision rear cam as it's only 1k more than the regular one but visibility at night is great. Both the cameras come with a 1080p resolution. The front camera is without night vision. Visibility is great in the daytime and acceptable at night.
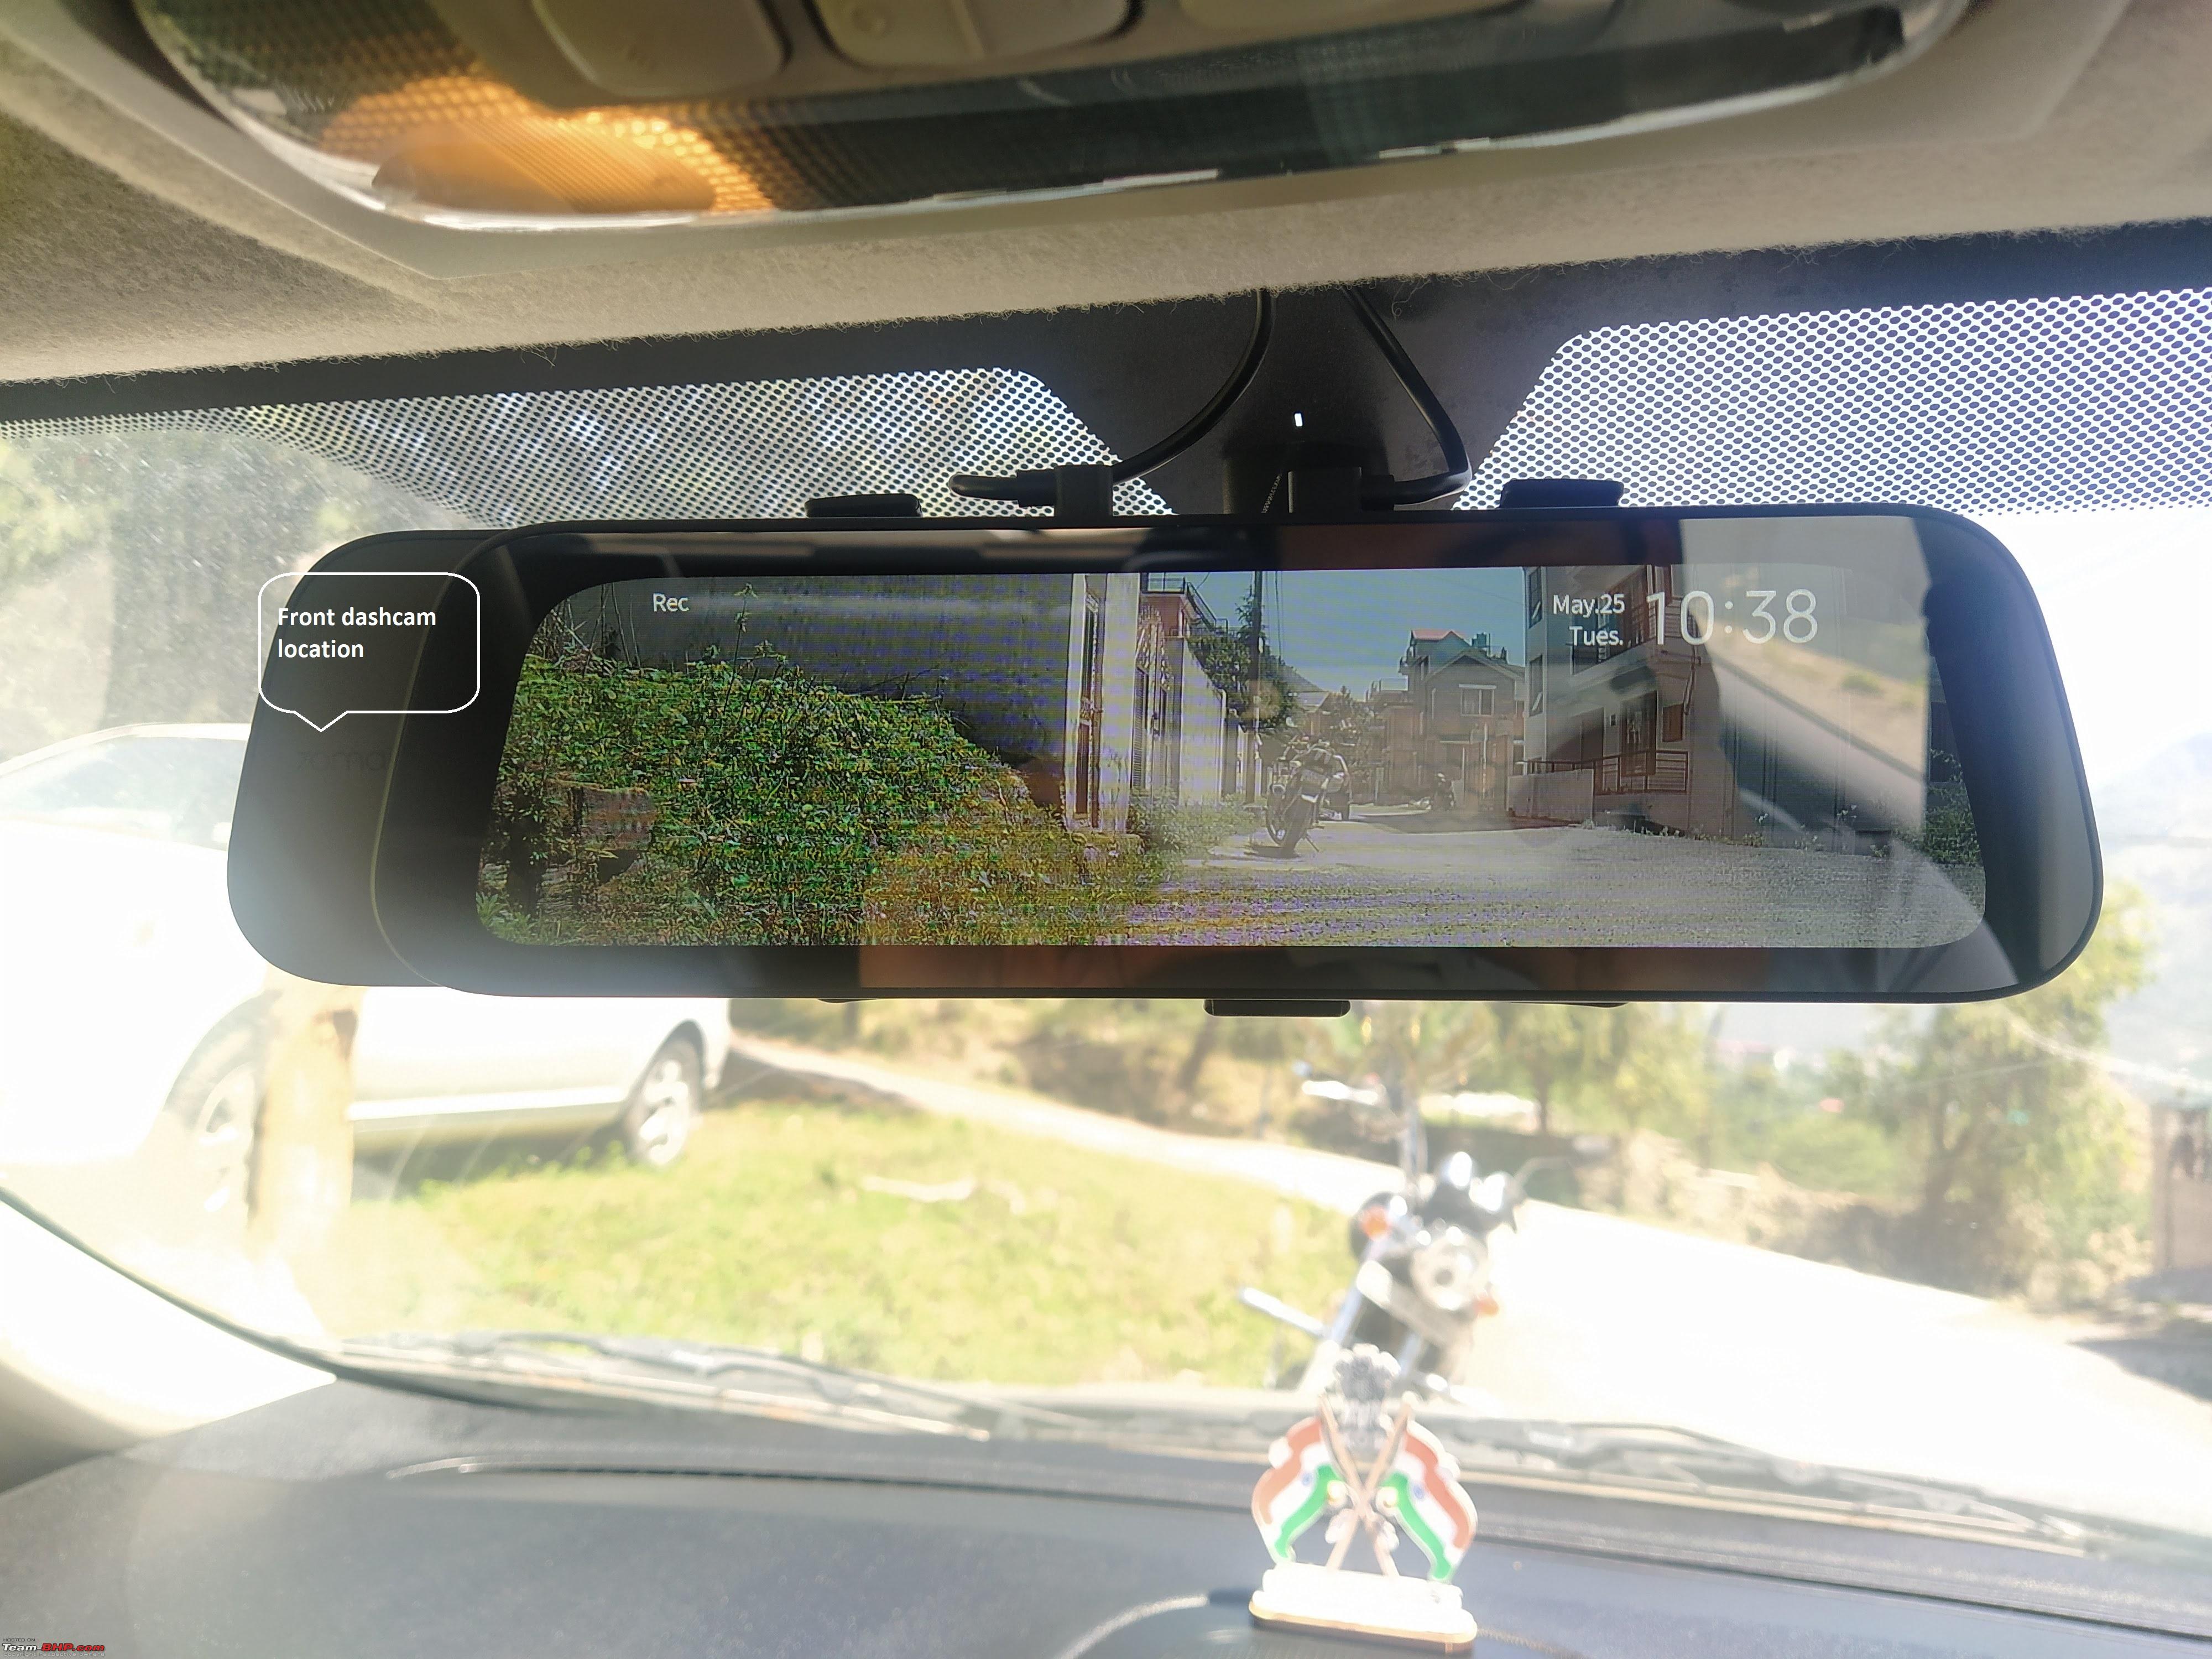
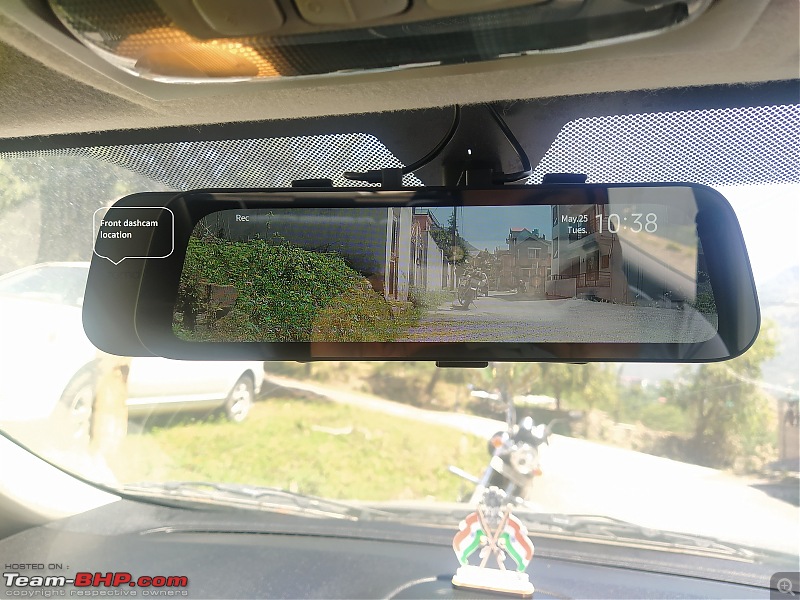
Contents of the package :
  • 130-degree wide-angle, 1080p front dashcam mounted on the backside of the 9.35-inch full-screen non-touch display. This screen replaces the IRVM and needs to be attached over the stock IRVM with the help of the straps provided in the package.
  • 135-degree wide-angle, 1080p Night Vision rear camera which serves as both rear recording camera as well as reverse parking camera. It has IP67 waterproofing. Comes with double-sided tape, 2 screws for fixing it on the surface, and two screws for vertical adjustment of the camera.
  • 12volt to 5volt charger/adapter with USB to the micro USB power cable for power supply.
  • AV cable for rearview camera display output to 9.35-inch full-screen display.
  • Plastic tool to tuck in the cables inside the roof lining.
  • Hardwire kit and SD card (up to 64GB, Class 10 and above) are not included in the package and need to be purchased separately.
Four stages of installation.
  • Installation of front camera and power supply.
  • Installation of Rear camera and AV cable.
  • Activation of reverse parking mode.
  • Hardwiring the DashCam for parking surveillance. (Not yet installed)
  • Installation of Front Camera and Power Supply.
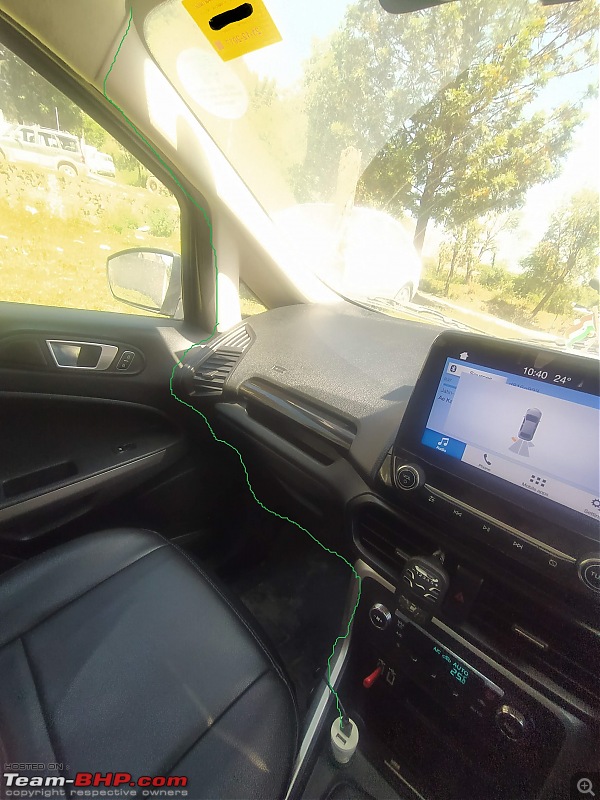
It's pretty simple. Just attach the 9.35-inch full-screen display onto the IRVM with the help of the rubber straps provided in the package. It will fit perfectly for most cars. The front dashcam which is attached on the backside of the display is provided with extendable support so that if the IRVM is of the same size as the display, the extendable support can be stretched out to adjust the camera. The camera itself comes with a four-way adjustment so that it can be adjusted for the perfect front vision. Now attach the micro USB power supply to the display and route the power cable through the roof-line, weather seal at A-pillar, then to the back of the glove, box, and finally to the 12 Volt output of the car. Use the plastic tool to perfectly tuck in the cable inside the weather seal and roof lining so that no part of the cable is visible outside. Now switch on the display. It will immediately start recording. Keep in mind that the footage visible on the display is not the complete view of the front camera. The full view can be obtained by installing the 70mai android/iOS app and connecting the display with the app. After a successful connection, it will project the actual view of the camera to the mobile app. Now view can be adjusted as per requirements. This display can also be used as normal IRVM when in screen-OFF mode (recording continues in screen-OFF mode). But I strongly advise using the rear camera view as it gives a much better 135-degrees rear view. It might be weird in the beginning but you’ll get used to it with time. This completes the installation of the front camera/display and power supply.
D.I.Y. Installation of Rearview DashCam + Night Vision Rear Cam (Dual Channel DashCam)-cable-routing-1.jpg
D.I.Y. Installation of Rearview DashCam + Night Vision Rear Cam (Dual Channel DashCam)-cable-routing-2.jpg
  • Installation of Rear camera and AV cable.
For this installation separate the rear camera and AV cable by detaching the male/female connector provided near the rear cam. Now AV cable and rear camera can be installed separately.

For installation of AV cable connect the output end of AV cable to AV input port at the 9.35-inch display. Now route the AV cable through roof-line, weather seal at A-pillar, above the front door, B-pillar, above the rear door, C-pillar, then weather seal at boot. Keep the terminal end of this cable at the boot. It will be connected to the AV cable coming from the rear camera later.

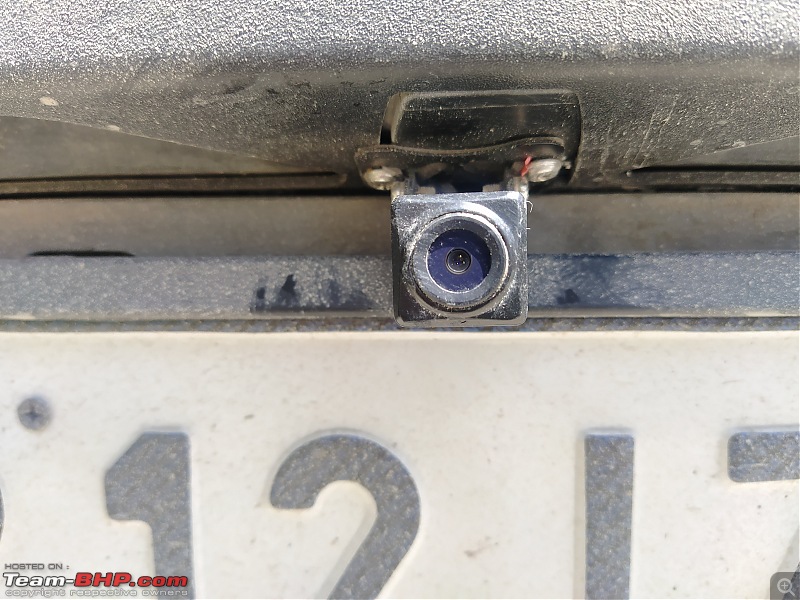
It is advisable to install the rear camera above/below the registration number plate for most of the vehicles as most of the OEMs install reverse parking cameras there for maximum view. It can be different for different vehicles. In my case, I installed it between the two lights above HSRP with the help of double-sided tape and two screws provided in the package. A dedicated space was already provided by Ford. I routed the cable through a small hole above the dedicated space for the reverse parking camera, then to below the water drain hole provided below the tool kit (Jack, spanner, reflector, tow hook). I had to make some adjustments to the rubber seal at one of the drain holes so to avoid damage to the camera cable by constantly rubbing it against the metal edge. Now connect the cable coming from the camera to the cable terminal end we left in the boot earlier by means of the male/female connector provided. The rear camera output should start displaying on the 9.35-inch display. Adjust the camera with the help of two vertical adjustment screws provided on the rear camera as per your requirement. This completes the installation of the rear camera and AV cable.

D.I.Y. Installation of Rearview DashCam + Night Vision Rear Cam (Dual Channel DashCam)-cable-routing-3.jpg
D.I.Y. Installation of Rearview DashCam + Night Vision Rear Cam (Dual Channel DashCam)-cable-routing-4.jpg
D.I.Y. Installation of Rearview DashCam + Night Vision Rear Cam (Dual Channel DashCam)-cable-routing-5.jpg
Normal Rear View.
D.I.Y. Installation of Rearview DashCam + Night Vision Rear Cam (Dual Channel DashCam)-rear-view.jpg
  • Activation of reverse parking mode.
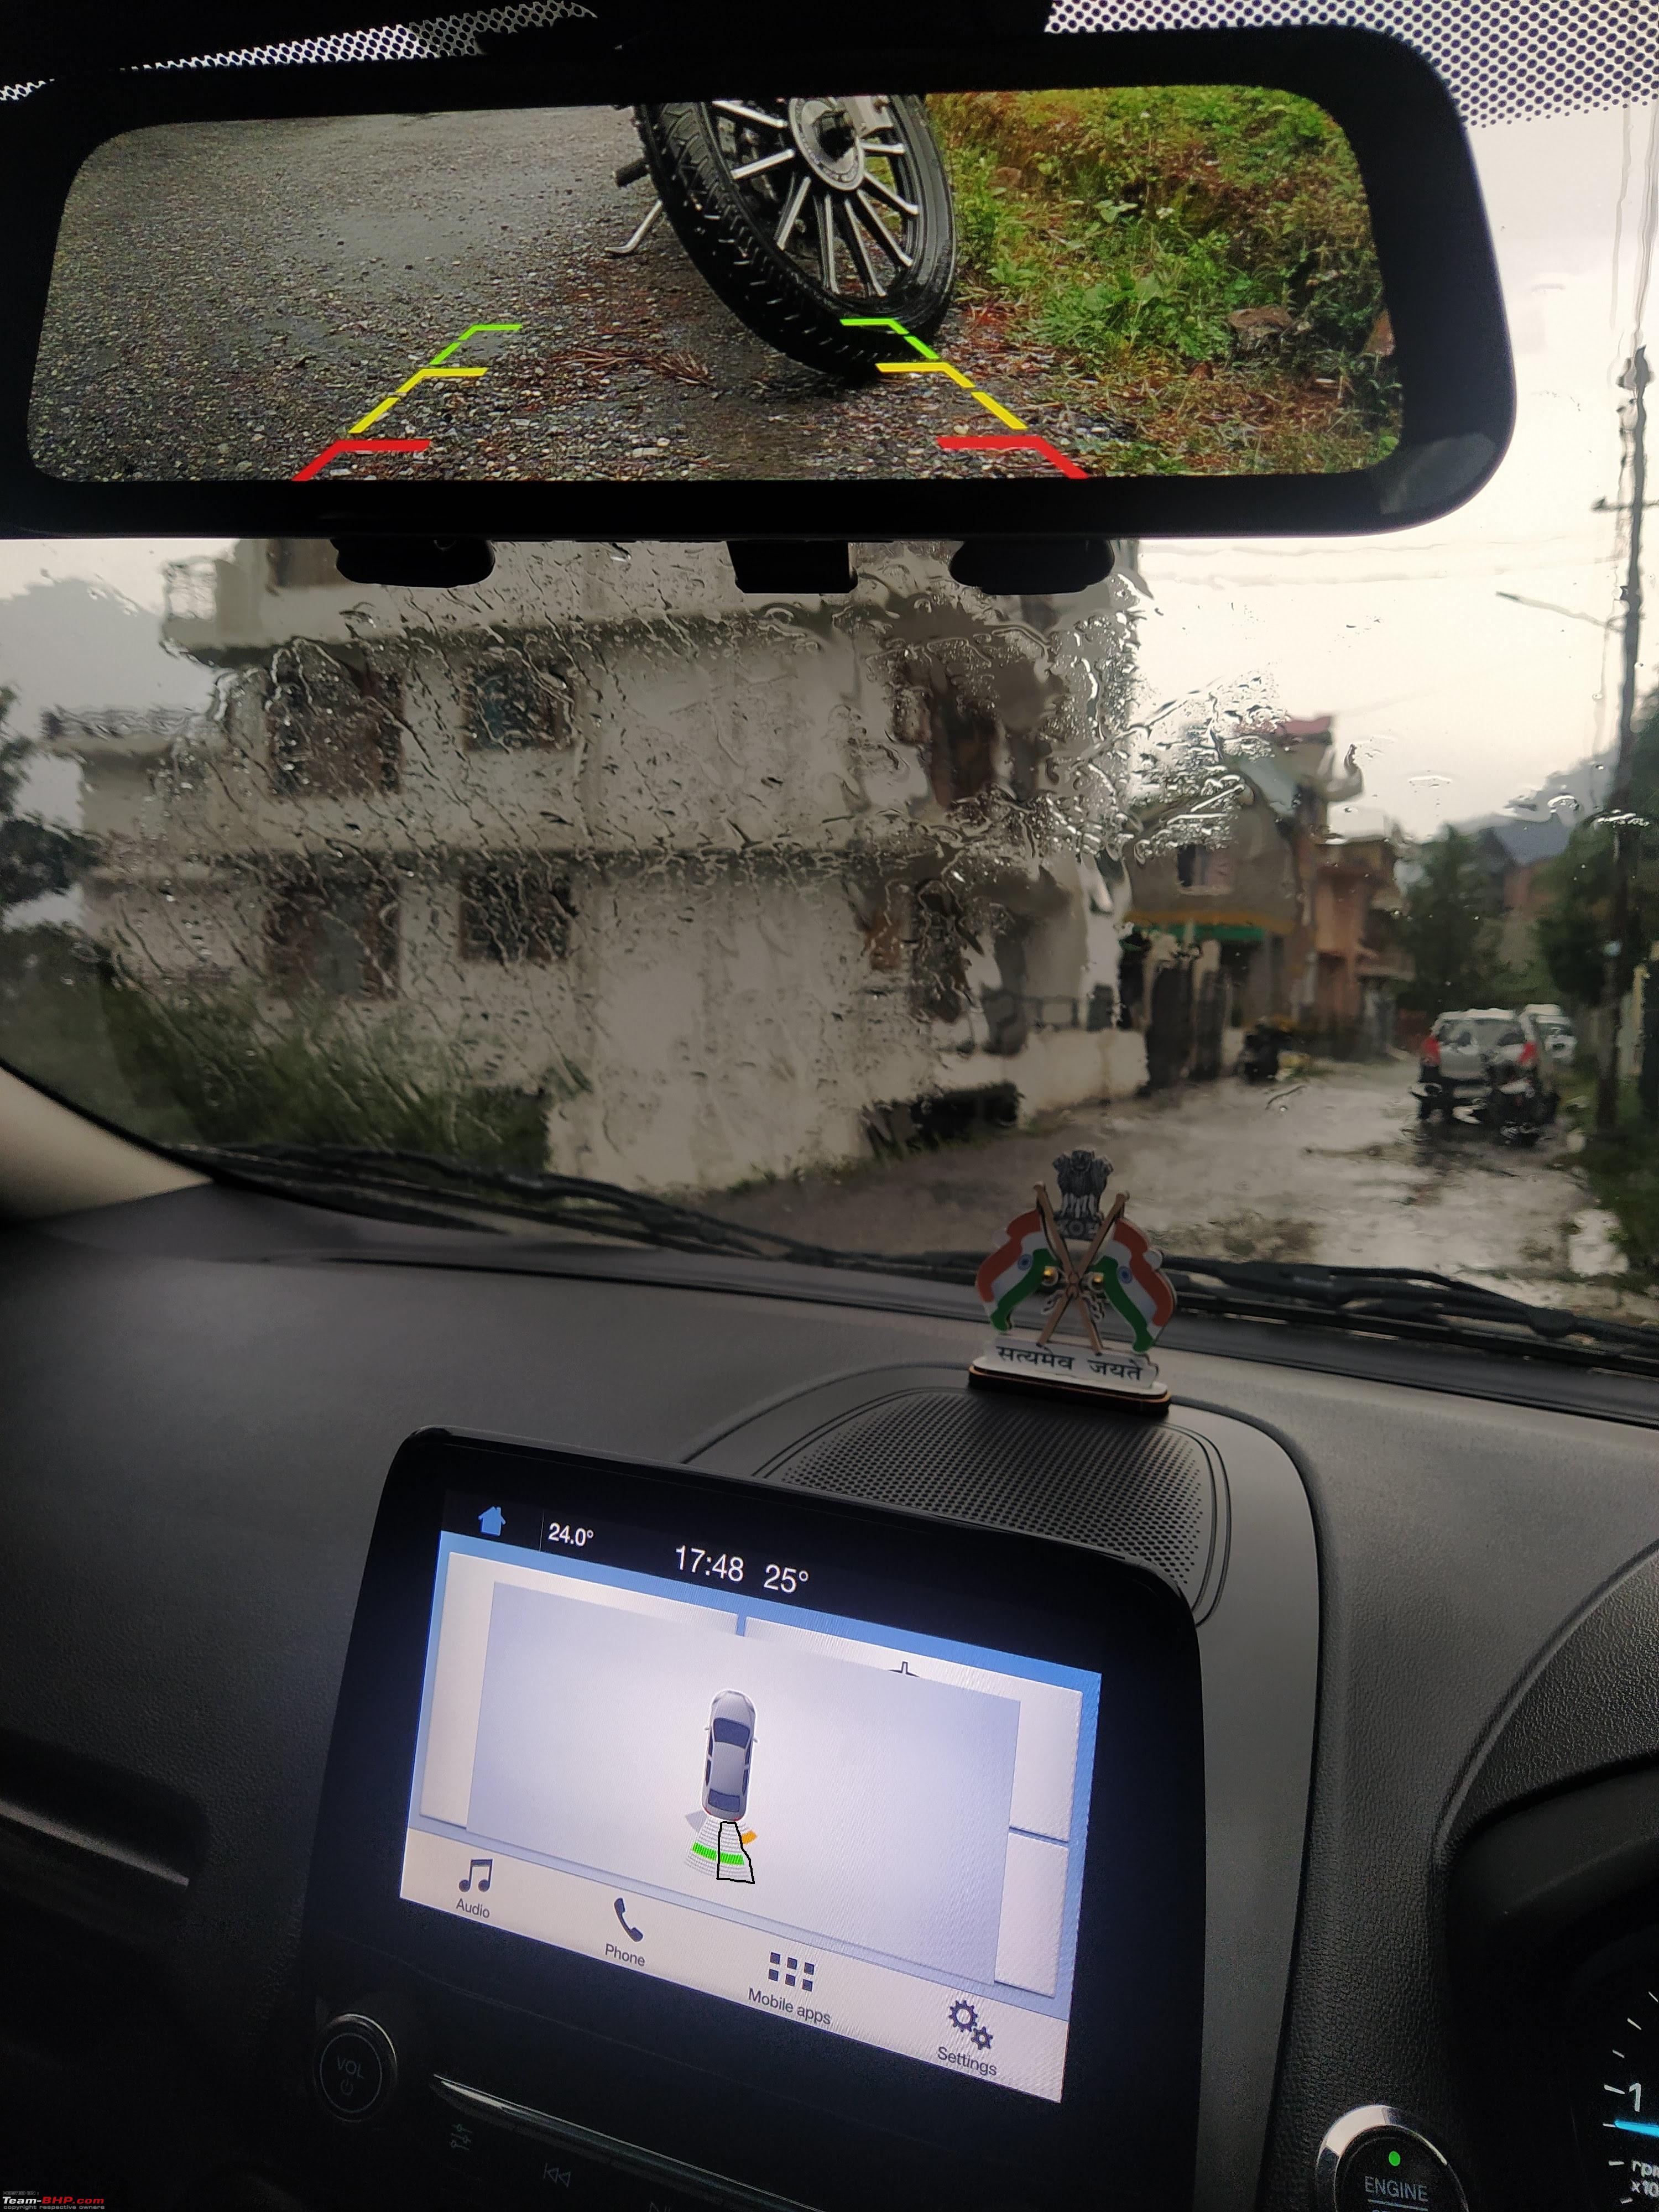
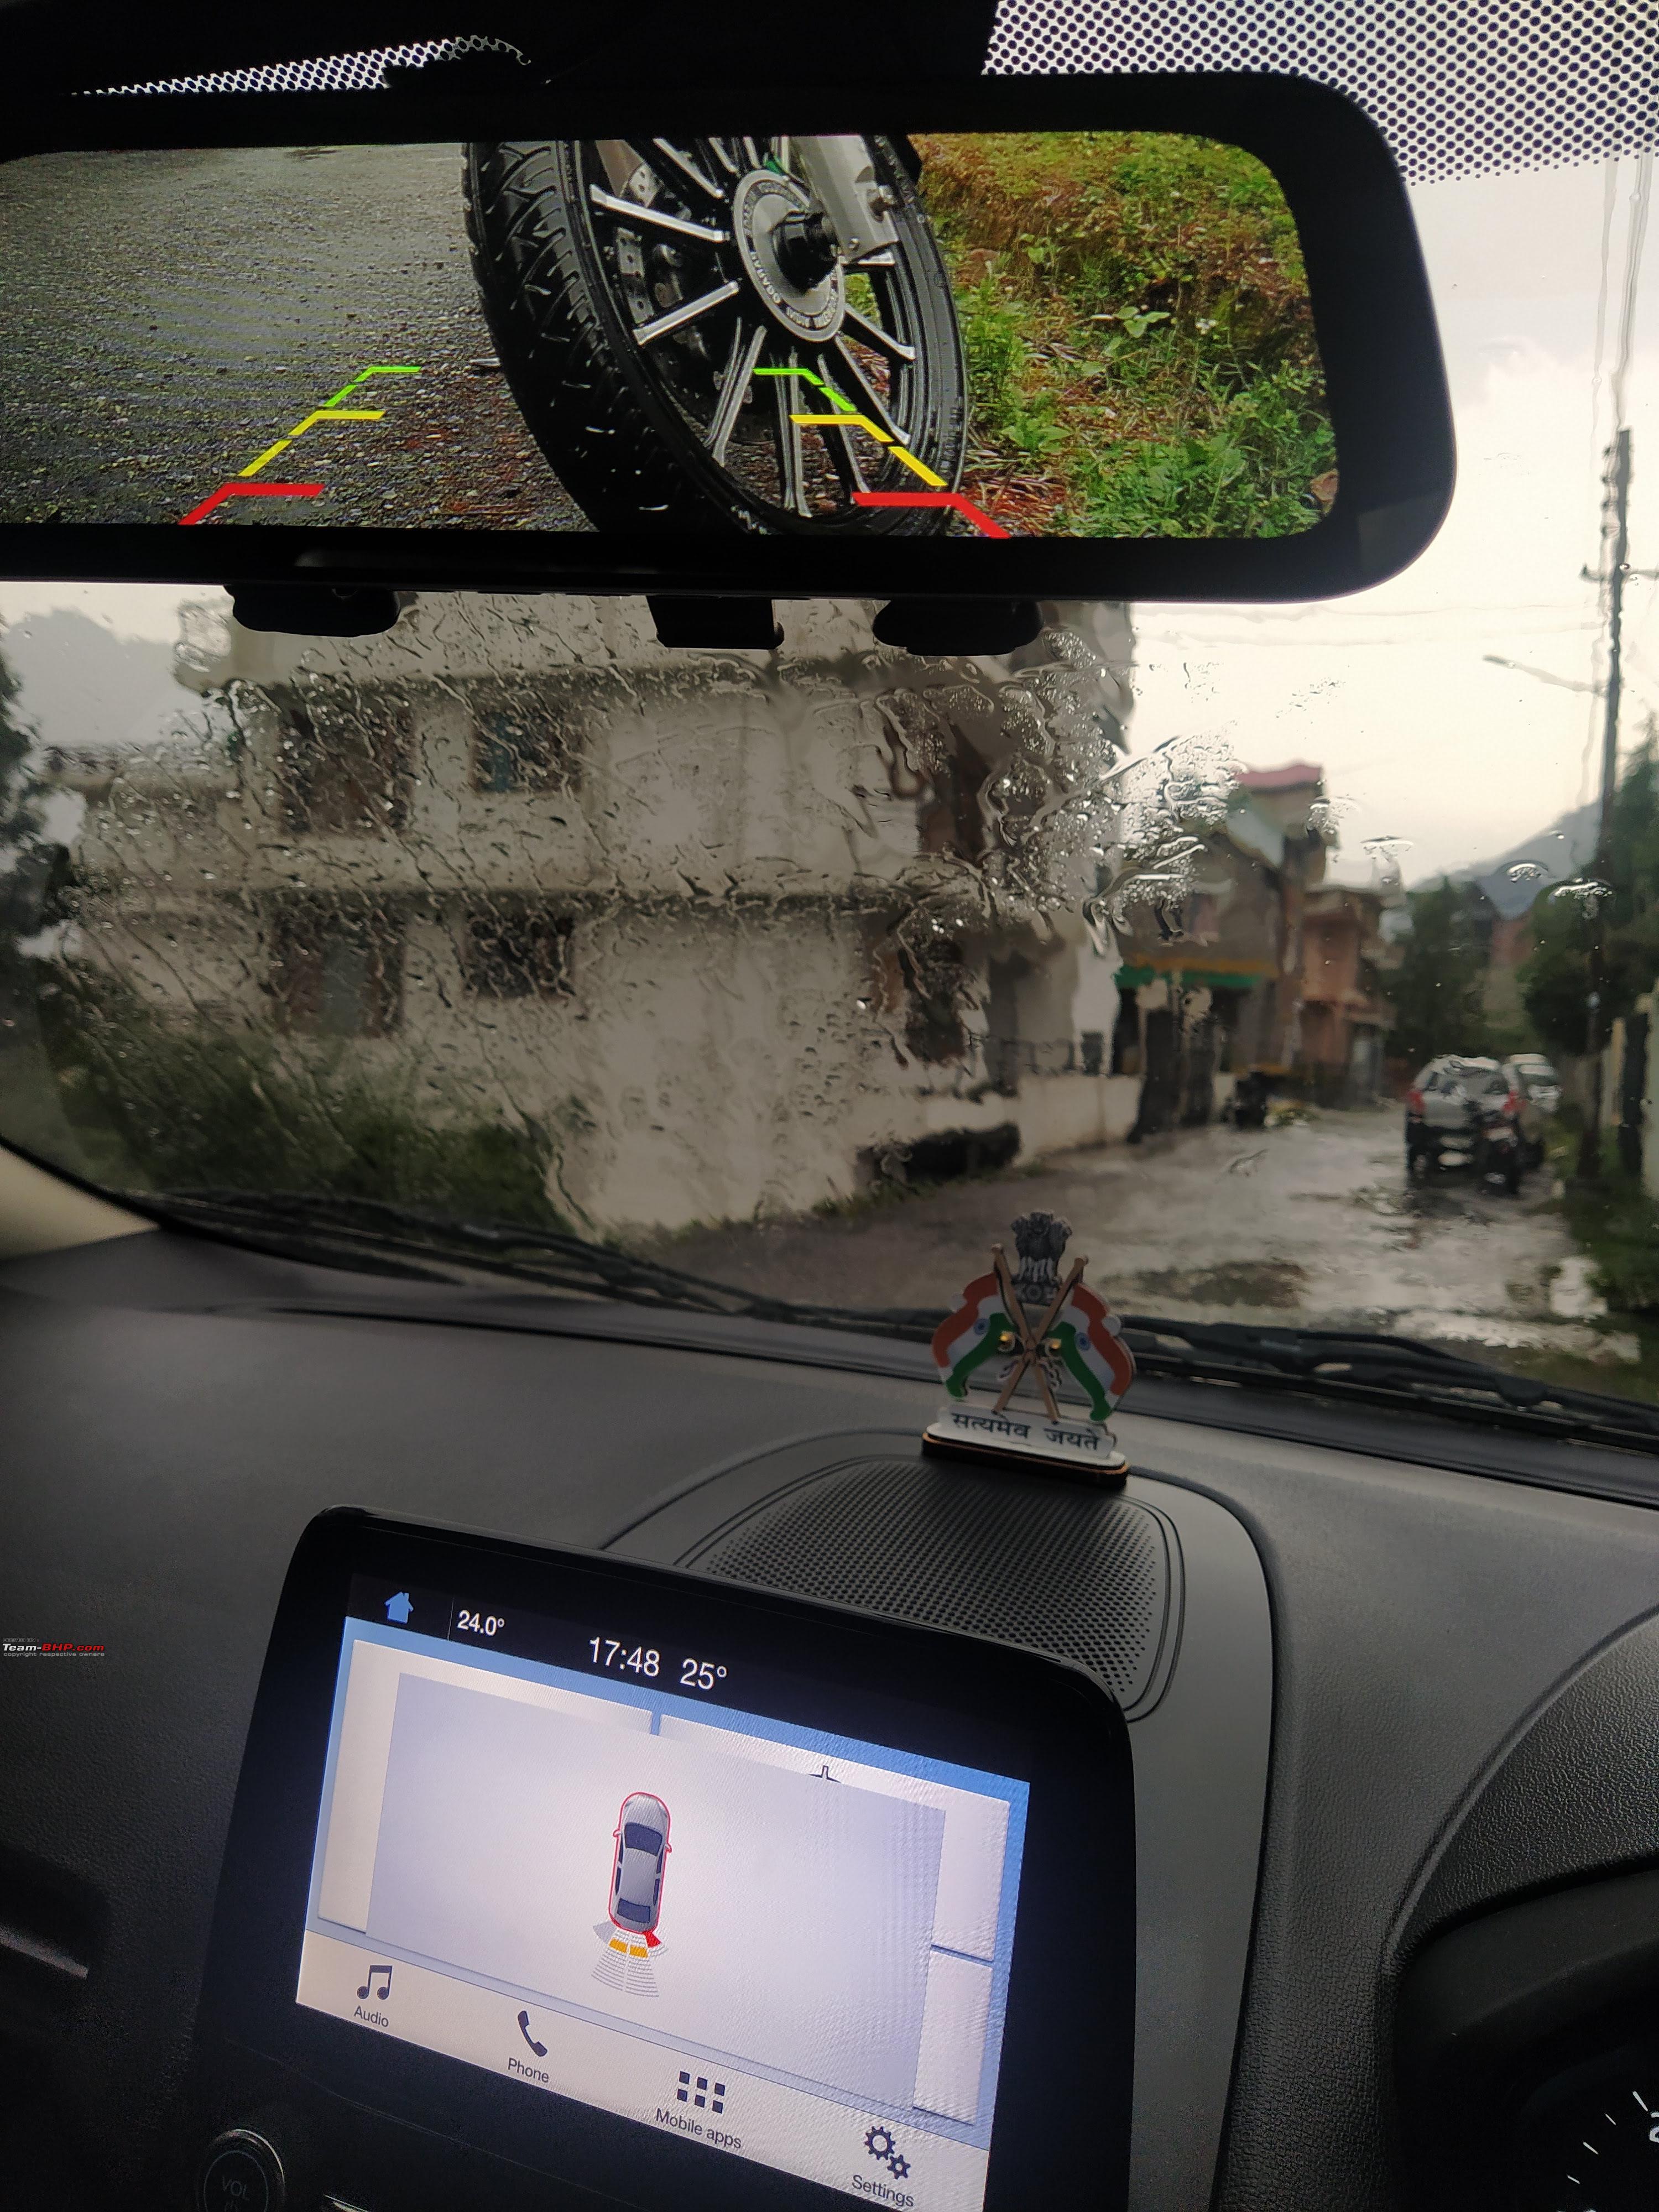
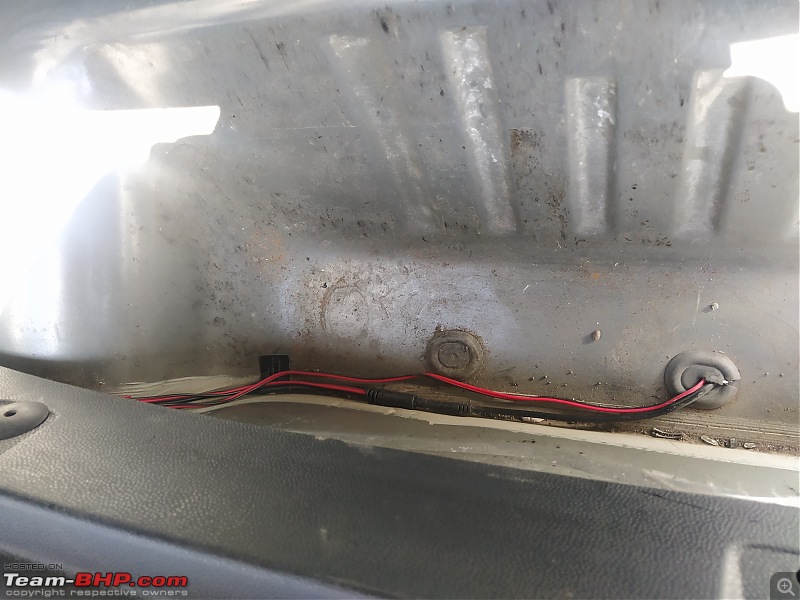
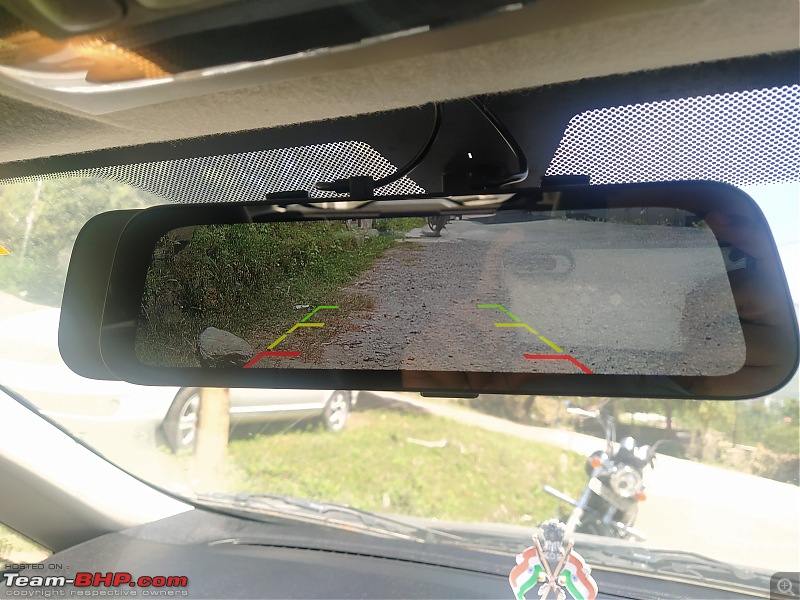
A red/black cable is provided with the rear camera which originates from the male/female connector. This red cable needs to be connected to the red/yellow/green cable of the reverse parking white tail light so that whenever reverse gear is engaged, it will get supply along with the reverse parking white tail light, and reverse parking guidelines start appearing on the 9.35-inch display. It also changes the display on the screen so that the maximum focus of the camera stays on the lower backside while reversing. For most of the vehicles reverse parking white tail light is provided within the main tail light enclosure along with the brake light and indication light. But for ecosport, it is provided at the rear bumper on the lower side. This made it difficult for me to connect the reverse parking mode cable as opening the main tail lights enclosure was relatively easy. Nonetheless, I had to install the jack and remove the rear left wheel so that I can access the reverse light which was exactly behind the rear wheel arch. In my case the color of the main power cable for the reverse light was greenish. It can be red or yellow for other cars. Just connect this green cable with the red cable coming from the camera connector with the help of a scotch lock as it involves zero cutting. I didn’t have the scotch lock so I had to make few cuts to expose the conductor on the green cable and then connected it with the red one with the help of PVC insulation tape. Apply insulation to the terminal end of the black cable from the camera and just leave it there. Now engage the reverse gear, reverse parking guidelines must be appearing on the 9.35-inch display. This completes the activation of reverse parking mode.

D.I.Y. Installation of Rearview DashCam + Night Vision Rear Cam (Dual Channel DashCam)-rearview-cam-placement.jpg
Rear view with guidelines while reverse gear in engadged.
D.I.Y. Installation of Rearview DashCam + Night Vision Rear Cam (Dual Channel DashCam)-reverse-parking-view.jpg
  • Hardwiring the DashCam for parking surveillance. (Not yet installed)
I haven’t hardwired the dashcam for parking surveillance mode yet. Will update it in the future. Thank you for reading.

Last edited by itsbaman : 26th May 2021 at 21:55.
itsbaman is offline   (28) Thanks
Old 27th May 2021, 11:23   #2
GTO
Team-BHP Support
 
GTO's Avatar
 
Join Date: Feb 2004
Location: Bombay
Posts: 70,546
Thanked: 300,788 Times
Re: D.I.Y. Installation of Rearview DashCam + Night Vision Rear Cam (Dual Channel DashCam)

Thread moved from the Assembly Line to the DIY section. Thanks for sharing!

Will go to our homepage in the coming days
GTO is offline   (3) Thanks
Old 27th May 2021, 12:36   #3
Distinguished - BHPian
 
Mr.Boss's Avatar
 
Join Date: Mar 2011
Location: GPS signal lost
Posts: 2,811
Thanked: 7,464 Times
Re: D.I.Y. Installation of Rearview DashCam + Night Vision Rear Cam (Dual Channel DashCam)

How is the experience while driving in night? since the OE Day/Night function is missed now?

PS: Rear dashcam is better to be placed inside the windshield, within wiping area
Mr.Boss is offline   (1) Thanks
Old 28th May 2021, 09:19   #4
Newbie
 
Join Date: May 2020
Location: Noida
Posts: 23
Thanked: 134 Times
Re: D.I.Y. Installation of Rearview DashCam + Night Vision Rear Cam (Dual Channel DashCam)

Quote:
Originally Posted by itsbaman View Post


Rearview with guidelines while reverse gear in engadged.
Attachment 2160879[list]
Thanks a lot, itsbaman for sharing this! I recently got a similar dual dashcam (Campark R10) installed in my VW Polo and I want to know about the rear camera view because in my case the rearview is too much zoomed-IN view which gives the feeling that I am about to hit the background object while actually, the object is considerably farther.
I explained this issue in my below video at 410 seconds


Can you check and let me know if this is better with 70Mai cam or similar?
I would also like to know about the recorded footage clarity, below is a sample video showing footage from my Campark R10
himanshumor is offline   (1) Thanks
Old 28th May 2021, 13:54   #5
BANNED
 
Join Date: May 2021
Location: Delhi
Posts: 37
Thanked: 91 Times
Re: D.I.Y. Installation of Rearview DashCam + Night Vision Rear Cam (Dual Channel DashCam)

I have a few questions in regards to the dashcam. I would appreciate if someone can help me please.

1. Will installing the dashcam hamper the warrant in any case? Can it go against me (insurance claim) in case of a fire because of a short-circuit?

2. Is there any option available with internal battery that could keep the cam running for a couple of hours? It can prove to be very helpful during services.
s.jain1990 is offline   (2) Thanks
Old 28th May 2021, 14:26   #6
BHPian
 
jithin23's Avatar
 
Join Date: Mar 2019
Location: Globetrotter
Posts: 788
Thanked: 2,890 Times
Re: D.I.Y. Installation of Rearview DashCam + Night Vision Rear Cam (Dual Channel DashCam)

Quote:
Originally Posted by s.jain1990 View Post
I have a few questions in regards to the dashcam. I would appreciate if someone can help me please.

1. Will installing the dashcam hamper the warrant in any case? Can it go against me (insurance claim) in case of a fire because of a short-circuit?

2. Is there any option available with internal battery that could keep the cam running for a couple of hours? It can prove to be very helpful during services.

For point 1. There's no problem with warranty issues because you are not cutting any wire at all. For insurance claim, it depends on the situation and the surveyor.

Point 2: Dashcams come with capacitors to store charge and to make surveillance mode active, u need to hardwire the dashcam to the fusebox. However, some cars have an issue of batt4 drain with this method.

@Itsbaman Nice job on the dash cam installation. You can try routing the dash cam charger to the right rear seat 12v socket as the setup will look neat and almost invisible. Another thing is you can try interesting the camera to the sync 3 interface using a module (if you prefer it that is). I be done the same thing to my car too and own the same variant with sync 3
jithin23 is offline   (2) Thanks
Old 28th May 2021, 16:31   #7
BHPian
 
Join Date: Apr 2021
Location: Nalagarh, H.P.
Posts: 83
Thanked: 222 Times
Re: D.I.Y. Installation of Rearview DashCam + Night Vision Rear Cam (Dual Channel DashCam)

Quote:
Originally Posted by jithin23 View Post
@Itsbaman Nice job on the dash cam installation. You can try routing the dash cam charger to the right rear seat 12v socket as the setup will look neat and almost invisible. Another thing is you can try interesting the camera to the sync 3 interface using a module (if you prefer it that is). I be done the same thing to my car too and own the same variant with sync 3
I am still trying to figure out how much battery it will drain on parking surveillance mode. Once I figure it out, I am planning to hardwire it. If not, I will try your method, as the rear 12-volt socket is never used in my vehicle.
itsbaman is offline  
Old 28th May 2021, 17:11   #8
BHPian
 
Aravind_M92's Avatar
 
Join Date: Apr 2019
Location: MAA-BOM-DEL-THN
Posts: 196
Thanked: 577 Times
Re: D.I.Y. Installation of Rearview DashCam + Night Vision Rear Cam (Dual Channel DashCam)

Did something similar for my City. Installed Viofo A129, dual camera one. Costed about 22k back in 2018. I have two issues
1. There's reflection of the dashboard in the videos. Tried adjusting the angle but still the same result. Any suggestions on that?
2. The wire routed through the A pillar rattles quite badly. Any method to tackle this?
Aravind_M92 is offline  
Old 28th May 2021, 17:19   #9
BHPian
 
Join Date: Apr 2021
Location: Nalagarh, H.P.
Posts: 83
Thanked: 222 Times

Quote:
Originally Posted by Mr.Boss View Post
How is the experience while driving in night? since the OE Day/Night function is missed now?

PS: Rear dashcam is better to be placed inside the windshield, within wiping area
I installed it around ten days back, during the lockdown, and I haven't driven the vehicle at night since then owing to the lockdown restrictions. But you can get the idea from the screenshots attached at the end of this post. 70mai also claims that the rearview camera comes with an anti-reflective coating which reduces the headlight glare from vehicles at the rear.
Yes, the rear camera can be installed inside the windshield, but the rear brake lamp mounted above the rear windshield might cause scattering of red light at night which can affect the view during braking. Additionally, in my case, the tailgate-mounted spare wheel could have blocked the lower rear view which, in my view, is crucial for reverse parking mode.
One more point which might go against installing the rearview camera inside the windshield is that the rear wiper for ecosport does not wipe the topmost part of the rear windshield, and the design of the rearview camera is such that it is impossible to install it on the windshield. It needs support from the roof for installation, so it has to be installed on the topmost part which is out of reach for the rear wiper.
Actually, it is designed for installation on the outer part of the vehicle, that is why it comes with IP67 waterproofing. 70mai has recently launched a new combination where an inner mounting rear view HD camera is being offered without a night vision feature, which is good for those who have pre-installed reverse parking cameras in their vehicles.
D.I.Y. Installation of Rearview DashCam + Night Vision Rear Cam (Dual Channel DashCam)-front-view-1-day.png

D.I.Y. Installation of Rearview DashCam + Night Vision Rear Cam (Dual Channel DashCam)-front-view-2-day.png

D.I.Y. Installation of Rearview DashCam + Night Vision Rear Cam (Dual Channel DashCam)-front-view-3-day.png

D.I.Y. Installation of Rearview DashCam + Night Vision Rear Cam (Dual Channel DashCam)-front-view-4-day.png

D.I.Y. Installation of Rearview DashCam + Night Vision Rear Cam (Dual Channel DashCam)-front-view-5-night-without-night-vision.png

D.I.Y. Installation of Rearview DashCam + Night Vision Rear Cam (Dual Channel DashCam)-front-view-6-night-without-night-vision.png

D.I.Y. Installation of Rearview DashCam + Night Vision Rear Cam (Dual Channel DashCam)-rear-view-1-day.png

D.I.Y. Installation of Rearview DashCam + Night Vision Rear Cam (Dual Channel DashCam)-rear-view-2-day.png

D.I.Y. Installation of Rearview DashCam + Night Vision Rear Cam (Dual Channel DashCam)-rear-view-3-day.png

D.I.Y. Installation of Rearview DashCam + Night Vision Rear Cam (Dual Channel DashCam)-rear-view-4-night.png

D.I.Y. Installation of Rearview DashCam + Night Vision Rear Cam (Dual Channel DashCam)-rear-view-5-night.png

Quote:
Originally Posted by Aravind_M92 View Post
Did something similar for my City. Installed Viofo A129, dual camera one. Costed about 22k back in 2018. I have two issues
1. There's reflection of the dashboard in the videos. Tried adjusting the angle but still the same result. Any suggestions on that?
2. The wire routed through the A pillar rattles quite badly. Any method to tackle this?
1. The same problem exists here also. Can't do anything about the reflection. More is the sunlight, more is the reflection of the dashboard. But still, I don't think it's that bad an issue. The purpose of the dashcam is still being achieved as the video is clear enough.
2. No such problem arose in my case as the cable is tightly tucked inside the weather seal and roof lining.

Last edited by Gannu_1 : 28th May 2021 at 17:32. Reason: Back to back posts merged. Please use the multi-quote button while quoting and replying to multiple posts at once. Thanks.
itsbaman is offline   (4) Thanks
Old 28th May 2021, 18:10   #10
BANNED
 
Join Date: Oct 2011
Location: Hyderabad
Posts: 12,350
Thanked: 21,411 Times
Re: D.I.Y. Installation of Rearview DashCam + Night Vision Rear Cam (Dual Channel DashCam)

Quote:
Originally Posted by Aravind_M92 View Post
1. There's a reflection of the dashboard in the videos. Tried adjusting the angle but still the same result. Any suggestions on that?
Buy the CPL filter from Viofo India and fix that on the lens.
  • Switch ON the video on your mobile through the App (connected through WiFi).

  • Adjust the CPL filter till the glare reduces as much as possible and leave it at that.

The dashboard glare should reduce in the recordings after that.

Quote:
Originally Posted by Aravind_M92 View Post
2. The wire routed through the A-pillar rattles quite badly. Any method to tackle this?
Get the 3M tape or small glue pads and secure the wires on them to avoid rattles.
a4anurag is offline  
Old 28th May 2021, 20:24   #11
rkw
BHPian
 
rkw's Avatar
 
Join Date: Dec 2011
Location: Pune
Posts: 158
Thanked: 128 Times
Re: D.I.Y. Installation of Rearview DashCam + Night Vision Rear Cam (Dual Channel DashCam)

Quote:
Originally Posted by s.jain1990 View Post

2. Is there any option available with internal battery that could keep the cam running for a couple of hours? It can prove to be very helpful during services.
There are models with motion sensor which records only on sensing movement in its range when the vehicle is parked.
rkw is offline   (1) Thanks
Old 28th May 2021, 22:15   #12
BHPian
 
thewhiteknight's Avatar
 
Join Date: Apr 2009
Location: Poona
Posts: 126
Thanked: 243 Times
Re: D.I.Y. Installation of Rearview DashCam + Night Vision Rear Cam (Dual Channel DashCam)

Quote:
Originally Posted by s.jain1990 View Post
2. Is there any option available with internal battery that could keep the cam running for a couple of hours? It can prove to be very helpful during services.

It is inadvisable to get one with an internal battery because batteries tend to heat up. Especially when cars are parked outside. Excessive heat may lead in damage to the battery and in some cases, having the battery blow up and cause a different problem.

Instead get one with a capacitor. Like the Viofo and possibly the 70mai.

I have the Viofo a129 with the CPL filter and the overall video quality is excellent.

Last edited by thewhiteknight : 28th May 2021 at 22:17.
thewhiteknight is offline   (2) Thanks
Old 28th May 2021, 22:20   #13
BHPian
 
Join Date: Sep 2005
Location: Chennai
Posts: 171
Thanked: 151 Times
Re: D.I.Y. Installation of Rearview DashCam + Night Vision Rear Cam (Dual Channel DashCam)

One query. if we use the usb port for powering up the cam, then will it not create battery drainage. Since power is available in usb ports in Ecosport even after car is switched off.

Last edited by vennarbank : 28th May 2021 at 22:24. Reason: clarity of sentence
vennarbank is offline  
Old 29th May 2021, 00:29   #14
BHPian
 
Join Date: Apr 2021
Location: Nalagarh, H.P.
Posts: 83
Thanked: 222 Times
Re: D.I.Y. Installation of Rearview DashCam + Night Vision Rear Cam (Dual Channel DashCam)

Quote:
Originally Posted by vennarbank View Post
One query. if we use the usb port for powering up the cam, then will it not create battery drainage. Since power is available in usb ports in Ecosport even after car is switched off.
You need to use 12 volt socket for powering up the dashcam, not the USB ports. Auxiliary power is available in 12 volt socket only for a few minutes after ignition and accessory power mode is turned off. Still, Ford recommends that you always disconnect the accessories from the 12 volt socket before leaving your vehicle.
itsbaman is offline   (1) Thanks
Old 29th May 2021, 18:47   #15
BHPian
 
Join Date: Apr 2021
Location: Nalagarh, H.P.
Posts: 83
Thanked: 222 Times
Re: D.I.Y. Installation of Rearview DashCam + Night Vision Rear Cam (Dual Channel DashCam)

Quote:
Originally Posted by himanshumor View Post
Thanks a lot, itsbaman for sharing this! I recently got a similar dual dashcam (Campark R10) installed in my VW Polo and I want to know about the rear camera view because in my case the rearview is too much zoomed-IN view which gives the feeling that I am about to hit the background object while actually, the object is considerably farther.
I explained this issue in my below video at 410 seconds
https://www.Youtube.com/watch?v=zHhUPMIbPv8&t=410s

Can you check and let me know if this is better with 70Mai cam or similar?
I would also like to know about the recorded footage clarity, below is a sample video showing footage from my Campark R10
https://www.Youtube.com/watch?v=JjkZz4b9Sk0
It doesn't zoom in the view when reverse gear is engaged. It simply changes the view on display focusing on the lower rear area along with guidelines. It is evident from the photos attached to my original post. For more clarity, please refer to the photos attached below.


Focus only on second from the right sensor's feedback

1. Feedback from parking sensors - Green
Reverse gear engaged
D.I.Y. Installation of Rearview DashCam + Night Vision Rear Cam (Dual Channel DashCam)-green-reverse-gear-engadged.jpg
Reverse gear not engaged
D.I.Y. Installation of Rearview DashCam + Night Vision Rear Cam (Dual Channel DashCam)-green-reverse-gear-not-engadged.jpg

2. Feedback from parking sensors - Yellow
Reverse gear engaged
D.I.Y. Installation of Rearview DashCam + Night Vision Rear Cam (Dual Channel DashCam)-yellow-reverse-gear-engadged.jpg
Reverse gear not engaged
D.I.Y. Installation of Rearview DashCam + Night Vision Rear Cam (Dual Channel DashCam)-yellow-reverse-gear-not-engadged.jpg

3. Feedback from parking sensors - Red (Actual distance between tailgate-mounted spare wheel and object is approx. 01 foot)
Reverse gear engaged
D.I.Y. Installation of Rearview DashCam + Night Vision Rear Cam (Dual Channel DashCam)-red-reverse-gear-engadged.jpg
Reverse gear not engaged
D.I.Y. Installation of Rearview DashCam + Night Vision Rear Cam (Dual Channel DashCam)-red-reverse-gear-not-engadged.jpg

Ideally, parking sensors should give the same color feedback, in which the object is appearing on the display. I tried to adjust the rearview so that it can be in sync with the parking sensors' feedback, but for this, I had to compromise with my normal rearview, which I require when using the display as an IRVM. So I changed it to my original settings. It's about finding a balance between the two.

I saw your video, rear view is not automatically adapting for reverse gear, as you haven't activated the reverse parking mode. In my case, I don't have to manually change my view, reverse parking mode does it for me when reverse gear is engaged.

I have attached screenshots in my earlier post, please refer to them for video clarity.
itsbaman is offline   (2) Thanks
Reply

Most Viewed


Copyright ©2000 - 2024, Team-BHP.com
Proudly powered by E2E Networks