Team-BHP > Technical Stuff > DIY - Do it yourself
Register New Topics New Posts Top Thanked Team-BHP FAQ


Reply
  Search this Thread
10,516 views
Old 29th June 2021, 19:24   #1
BHPian
 
PatchyBoy's Avatar
 
Join Date: Nov 2007
Location: Goa
Posts: 917
Thanked: 2,023 Times
DIY - My Fiat Linea T-Jet gets more ambient lighting

I came across a pic of the door pad of an European version of a FIAT. It had ambient lights in the door handle recess. How convenient. People coming along in your car now don't have to fumble around to locate the door handle. FIAT in all its wisdom, decided to leave this feature out for the Indian variants & I wanted it real bad. Not that a lot of people travel in my car and fumble around for the door handle, but I wanted it. They have it. So, I must have it.

This is how it looks OE

DIY - My Fiat Linea T-Jet gets more ambient lighting-oe-lights.jpg

DIY - My Fiat Linea T-Jet gets more ambient lighting-oe-lights-1.jpg

DIY - My Fiat Linea T-Jet gets more ambient lighting-oe-lights-2.jpg

Here is an aftermarket install

DIY - My Fiat Linea T-Jet gets more ambient lighting-am-install.jpg


My conditions were - It shouldn't be "in your face" loud. The color should match OE ambient lights & button backlight as closely as possible. The LED must be concealed & look as OE as possible. Replacement of any components on this circuit, if ever needed, must be relatively easy. This meant a modular install. The thought process was - If the LED goes bad, easy to replace. If the resistor goes bad, still easy to replace. If the window switch panel needs to be removed, easy to do. Just one more connector to disconnect. If the door pad needs to be removed, same as now. If the OE PCB goes bad - you are on your own.

So, as usual, I started doing the homework. I found Cree 5 mm LEDs in Amber to be the closest match. Special thanks to fellow FIAT owner Anil TG, for not only recommending them, but also sending a few over for this project. Then I experimented with resistor values - ranging from 1KΩ all the way up to 22KΩ. The recommended value for maximum brightness is 625Ω, when running on a 14.4V power source. After much consideration & lot of experimentation, I decided to go with 5.6KΩ, based on how I planned to mount the LED. For good measure, I connected the LED to a battery pack & left it on all night. Next day morning, neither the bulb, nor the resistor was even warm to the touch. The resistor value may differ, depending on the mounting approach used. In my case, the LED is a good 25 mm above the roof of that recess.

First step is to remove the door pad. It is described in another thread (DIY: Puddle lamps & Footwell lights for the Linea T-Jet) of mine. So will not repeat here.

Here are the steps -

Step 1 - The lighting window -

Make a hole in the roof of the door handle recess. Apply a piece of masking tape to the exterior covering the hole we just made & fill the hole with hot glue, from the other side. Press a coin to the other side, to get a nice flat filling. Remove coin & tape after the glue hardens. Takes just a few seconds. Now you have a slot filled with translucent glue - diffuses the light a bit & prevents dust ingress into the door pad.

After taking the door pad out, I first cut a slot in the roof of the recess. On the first door I tried using a Dremel, with not so nice results. For the remaining doors, I used an old soldering iron to melt the hole, with much better results.

DIY - My Fiat Linea T-Jet gets more ambient lighting-front-door-slot.jpg

Step 2 - Wiring

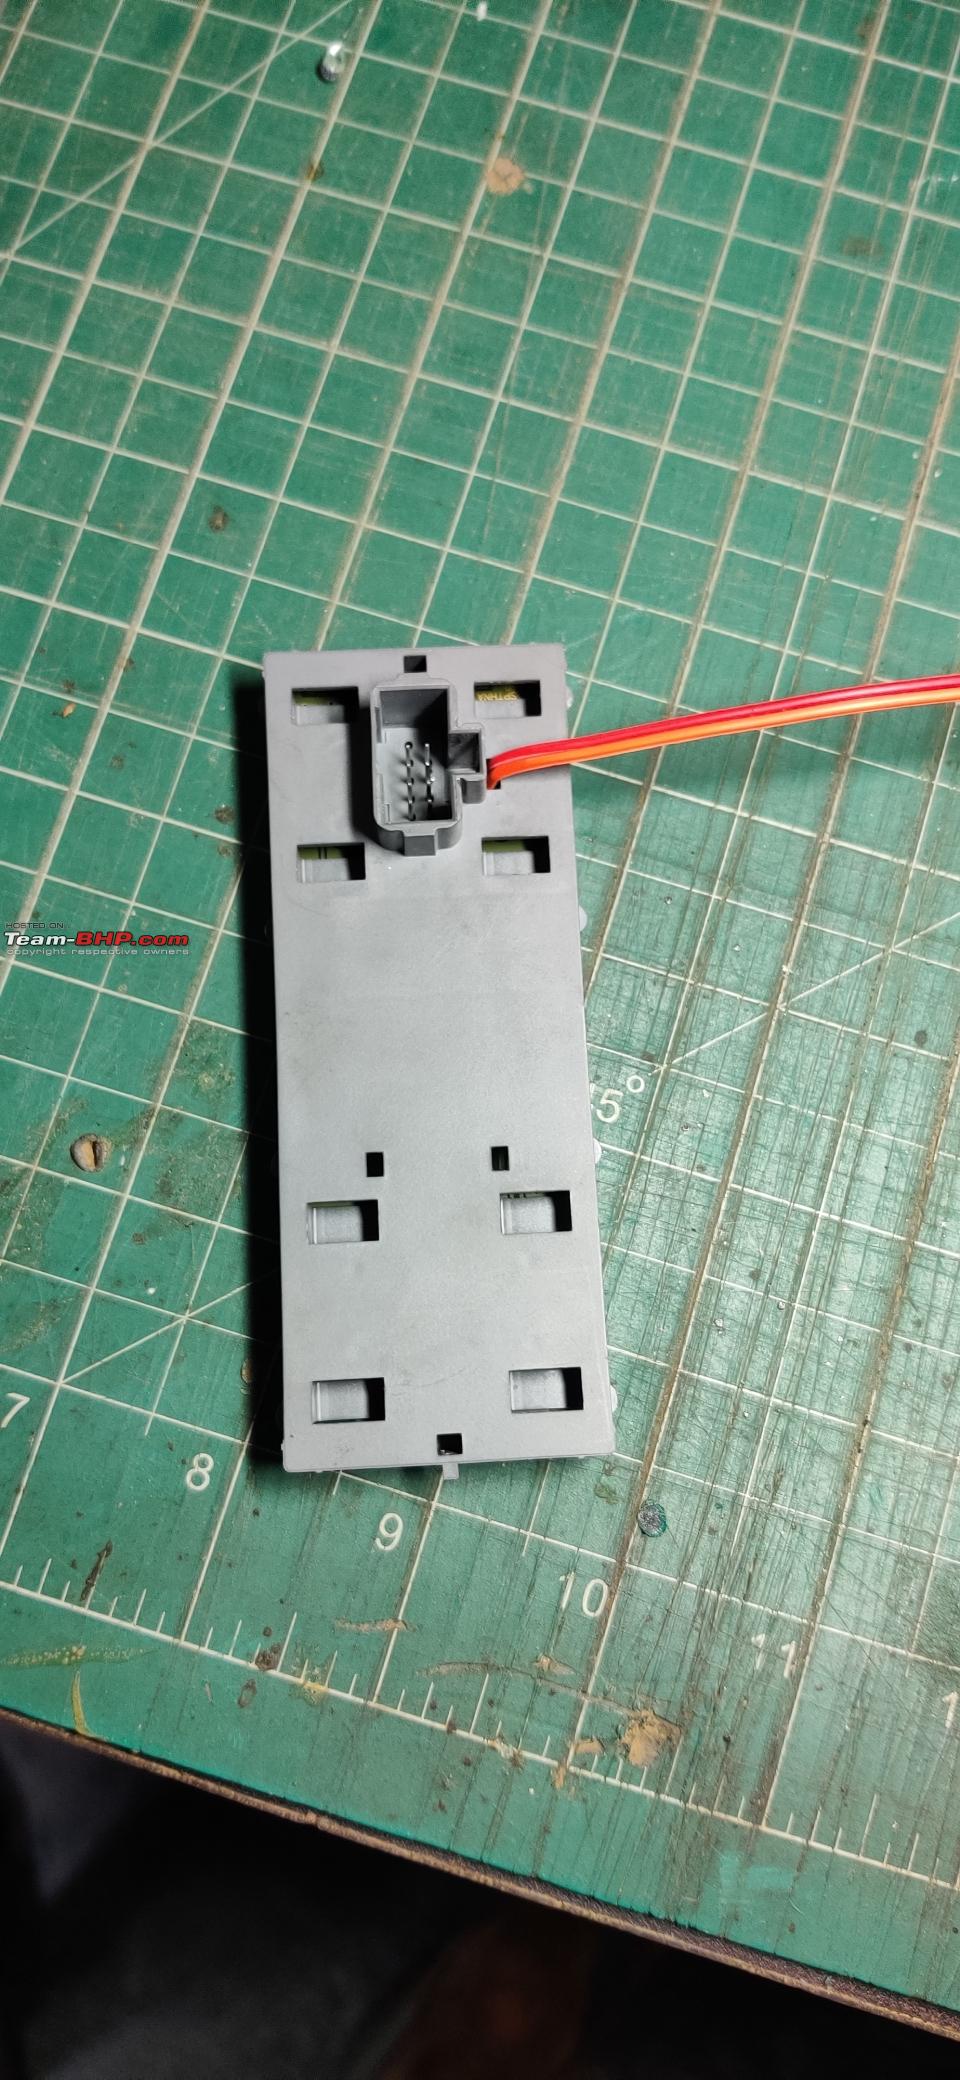
For this, I decided to solder wires directly to the OE PCB, instead of splicing wires.

The driver door PCB has switches for all four doors & a switch for disabling rear windows. Ignition power is supplied on pin 3 (+ve) & pin 5 (GND) to that PCB. Near the pin headers, there is conveniently placed hole. So, I soldered wires to those pins, routed them through the hole & assembled the PCB back in its enclosure and soldered a JST 2 pin connector (dismantling is very easy. Anyone who looks at it, must be able to figure out how to take it apart)

DIY - My Fiat Linea T-Jet gets more ambient lighting-driver-door-pcb.jpg
DIY - My Fiat Linea T-Jet gets more ambient lighting-front-door-pcb.jpg
The rear door has a very simple circuit & gets power on pins 1 (GND) & 3 (+ve). In this case, there are no holes available. There is ample space above the PCB in the enclosure. So, I made a hole in that area, soldered two wires to pins 1 & 3 and routed them outside the enclosure and soldered a JST 2 pin connector. The connector is then hot glued to a spot near the OE connector. This will allow the switch panel to be detached, by disconnecting one additional connector.

DIY - My Fiat Linea T-Jet gets more ambient lighting-other-doors-pcb.jpg

DIY - My Fiat Linea T-Jet gets more ambient lighting-oe-pcb.jpg

DIY - My Fiat Linea T-Jet gets more ambient lighting-pcb-enclosure.jpg

DIY - My Fiat Linea T-Jet gets more ambient lighting-jst-connector.jpg

Step 3 - Preparing the LED

I cut small strips of perfboard, soldered the LED to one end, then the resistor & a 30 cm length of wire to the other end of the perfboard. The counterpart of the JST connector is on the other end of the wire. The entire perfboard assembly was covered in heat shrink, for added protection.

DIY - My Fiat Linea T-Jet gets more ambient lighting-led.jpg

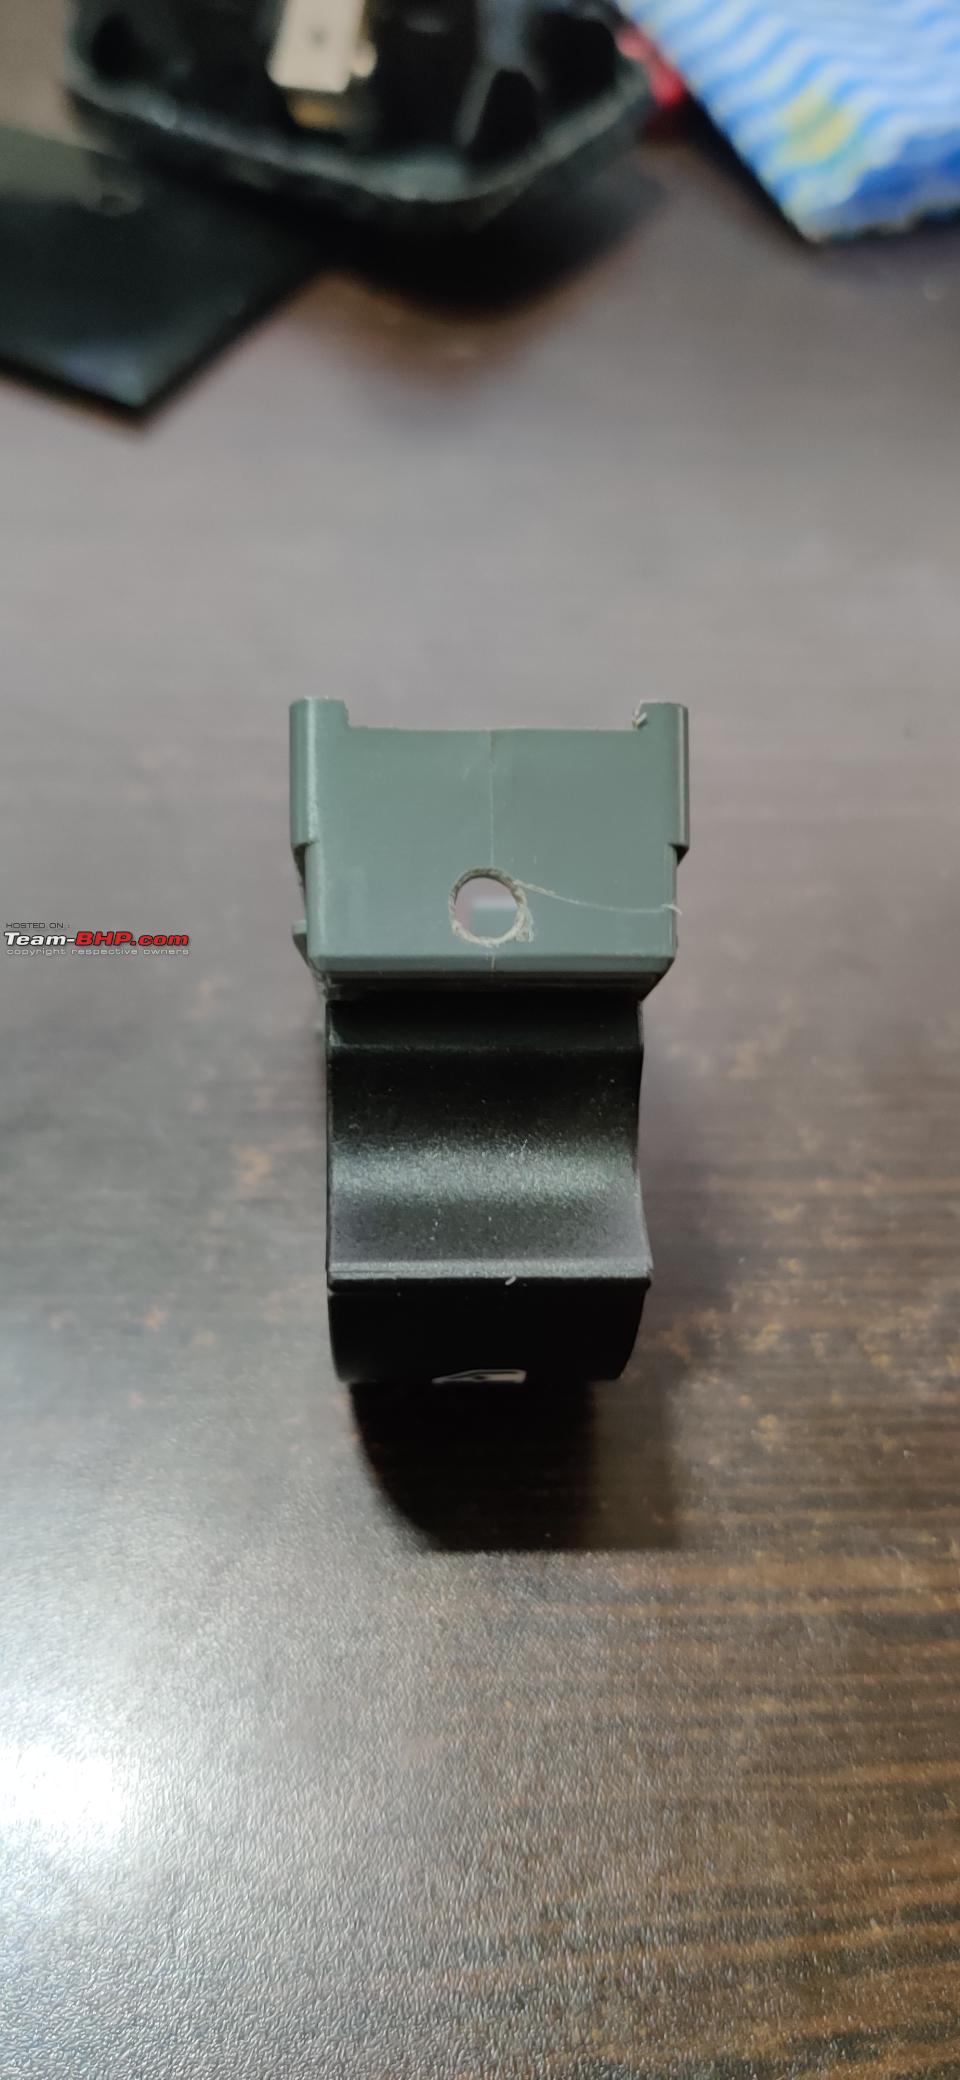
Step 4 - The bulb holder

I searched a lot of 5 mm LED holders which will allow mounting of the LED, without jutting out through the roof of that recess. Couldn't find any. Then I found a few bottles of eye drops (Suzan recently had a cataract surgery & these were empty bottles, which never got thrown out). These caps were the ideal size and shape. So, I drilled a 5mm hole through the top. The LED fits there snugly. However, these caps were white, which means a lot of light spillage into the door pad. So, I painted them black. I always keep a bottle of black nail polish handy, just for such occasions

So the now black eye drop cap gets stuck to the door pad with hot glue, directly above the slot we created in step 1

DIY - My Fiat Linea T-Jet gets more ambient lighting-bottle-cap-1.jpg

Step 5 Finishing up

Just insert the LED into the hole on the holder, route the wires to somewhere near the switch panel opening. Fit the door pad back in the car, reach through the opening where the switch panel goes, get the OE connector & the newly added connector, plug them in & push the switch panel into place. Job done.

This is how it will be connected in the car -

DIY - My Fiat Linea T-Jet gets more ambient lighting-rear-door-install.jpg

This is how it looked, when lit up on the bench, powered by a battery pack

DIY - My Fiat Linea T-Jet gets more ambient lighting-bench-test.jpg

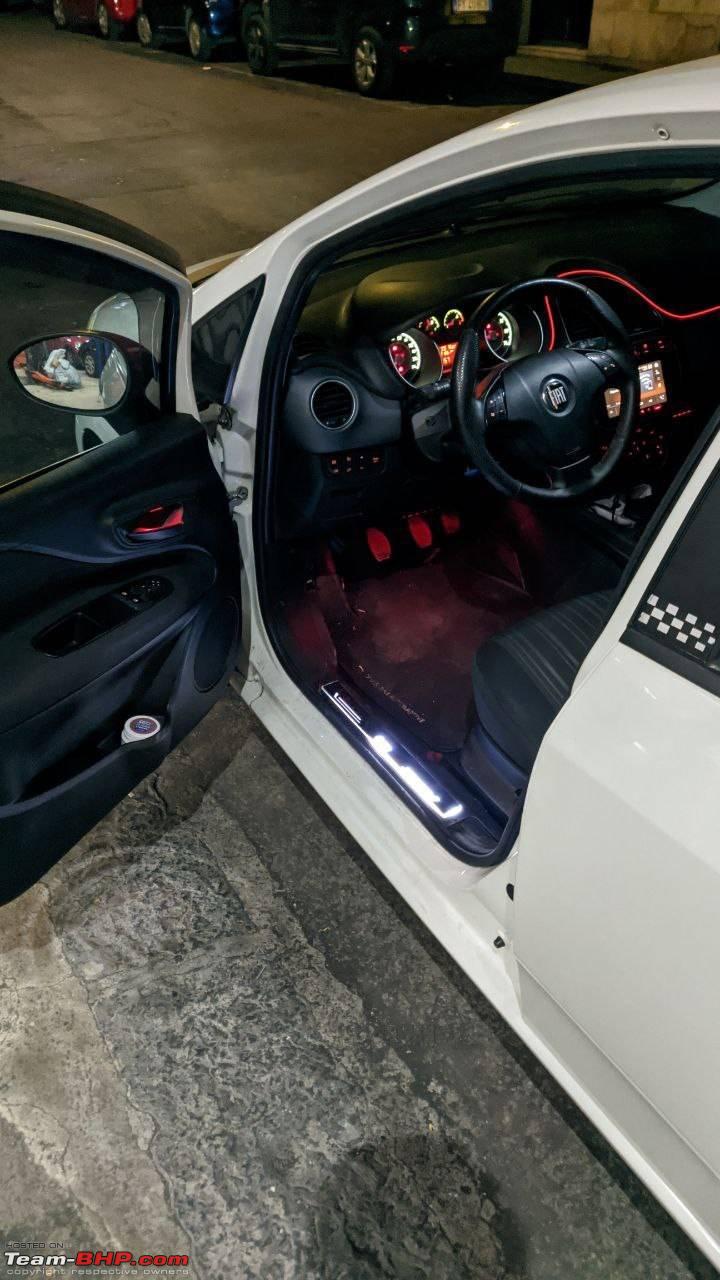
Here are some pictures after completing the install in the car. Now I hope anyone travelling in my car, who is getting dropped off late at night, can locate the door handle easily. Jokes apart, I like to do these things, just for the joy of doing it, even if the feature will be seldom used.

Driver door closed as viewed from the driver seat

DIY - My Fiat Linea T-Jet gets more ambient lighting-driver-door-closed.jpg

Driver door open, lit only by the dome lights in the car

DIY - My Fiat Linea T-Jet gets more ambient lighting-driver-door-open.jpg

Rear door closed as viewed from the rear seat

DIY - My Fiat Linea T-Jet gets more ambient lighting-rear-door-closed.jpg

Rear door open, lit only by the dome lights in the car

DIY - My Fiat Linea T-Jet gets more ambient lighting-rear-door-open.jpg


Thanks for reading

Last edited by PatchyBoy : 29th June 2021 at 21:39.
PatchyBoy is offline   (47) Thanks
Old 30th June 2021, 06:34   #2
Team-BHP Support
 
Join Date: Feb 2004
Location: Mumbai
Posts: 17,845
Thanked: 77,082 Times
Re: DIY - My Fiat Linea T-Jet gets more ambient lighting

Thread moved out from the Assembly Line. Thanks for sharing!
Aditya is offline   (2) Thanks
Old 30th June 2021, 14:24   #3
Senior - BHPian
 
clevermax's Avatar
 
Join Date: Jun 2006
Location: Tvm/Amsterdam
Posts: 2,086
Thanked: 2,640 Times
Re: DIY - My Fiat Linea T-Jet gets more ambient lighting

Brilliant DIY and excellent end results I would say!

Since I've been following this project in the background, I am aware of the amount of time you've invested in research, circuit finalization, and the components to be used. Enjoy the brand new ambiance inside the Jet.

Now I am inspired to do this in my Verna.

Last edited by clevermax : 30th June 2021 at 14:26.
clevermax is offline   (1) Thanks
Old 30th June 2021, 14:29   #4
Senior - BHPian
 
blackwasp's Avatar
 
Join Date: Apr 2015
Location: Navi Mumbai
Posts: 2,974
Thanked: 26,325 Times
Re: DIY - My Fiat Linea T-Jet gets more ambient lighting

Looks great. Despite being such an old car, the hidden features are still being discovered.

The DIY is class as usual. It just shows that how advanced the car was for its time, and how lazy was Fiat India.
blackwasp is offline   (1) Thanks
Old 30th June 2021, 14:54   #5
BANNED
 
Join Date: Mar 2011
Location: hump city
Posts: 1,293
Thanked: 5,861 Times
Infractions: 0/1 (7)
Re: DIY - My Fiat Linea T-Jet gets more ambient lighting

very neatly done. I particularly like the attention to detail perfecting the assembly and modularizing the connections, in areas hidden from sight ; and not just only focusing on perfecting the light throw portion of the install (which is the only thing usually given attention to by a lot of us, whenever implementing such a DIY).
Looks very OEM
venkyhere is offline  
Old 30th June 2021, 16:11   #6
BHPian
 
Join Date: Aug 2008
Location: bangalore
Posts: 574
Thanked: 1,528 Times
Re: DIY - My Fiat Linea T-Jet gets more ambient lighting

Excellent DIY as usual. Love how you never tire trying to improve your car, and when you decide to go ahead you make sure it's the best job possible. Looking forward to seeing the final pics
keroo1099 is offline  
Old 1st July 2021, 13:07   #7
Newbie
 
Join Date: Jun 2021
Location: Kanpur
Posts: 2
Thanked: 0 Times
Re: DIY - My Fiat Linea T-Jet gets more ambient lighting

Astonishing DIY
Thank you for sharing such a remarkable DIY
I will execute this DIY this coming Sunday
Krishnaa4700 is offline  
Old 1st July 2021, 17:31   #8
BHPian
 
Join Date: Oct 2019
Location: KA51, TN59
Posts: 32
Thanked: 64 Times
Re: DIY - My Fiat Linea T-Jet gets more ambient lighting

@PatchyBoy - Thanks for sharing your DIY. Looks clean and awesome.
Can you please share the links of the items that are required for the DIY?

It will be helpful for me to procure and try it sometime!
nax04 is offline  
Old 1st July 2021, 21:37   #9
BHPian
 
PatchyBoy's Avatar
 
Join Date: Nov 2007
Location: Goa
Posts: 917
Thanked: 2,023 Times
Re: DIY - My Fiat Linea T-Jet gets more ambient lighting

Quote:
Originally Posted by clevermax View Post
Brilliant DIY and excellent end results I would say!
Thank you. Your inputs during the research phase were very helpful.

Quote:
Originally Posted by blackwasp View Post
Looks great. Despite being such an old car, the hidden features are still being discovered.
Thank you. It bothers me to think that Fiat thought of us as second class citizen & decided to delete these features. But every time I get behind the wheel, all is forgiven

Quote:
Originally Posted by venkyhere View Post
very neatly done. Looks very OEM
Thank you. Your guidance was invaluable. I know zilch about electronics.

Quote:
Originally Posted by keroo1099 View Post
Excellent DIY as usual.
Thanks Buddy

Quote:
Originally Posted by Krishnaa4700 View Post
Astonishing DIY.
Thank you for sharing such a remarkable DIY
I will execute this DIY this coming Sunday
Thank you & all the best with your install

Quote:
Originally Posted by nax04 View Post
Looks clean and awesome.
Can you please share the links of the items that are required for the DIY?
Thank you. My usual sources for these components is either Robu (dot) in or electroncomponents (dot) com
PatchyBoy is offline   (1) Thanks
Old 2nd July 2021, 17:20   #10
BHPian
 
Join Date: Jul 2020
Location: Pune
Posts: 66
Thanked: 266 Times
Re: DIY - My Fiat Linea T-Jet gets more ambient lighting

This is so awesome@PatchyBoy

I shall try this on my multijet. Just love the Linea.
acestormtrooper is offline  
Reply

Most Viewed


Copyright ©2000 - 2024, Team-BHP.com
Proudly powered by E2E Networks