I use the following laptop which I bought back in 2015:
Model: Thinkpad E440
Year: 2015
CPU: Intel® Core i3-4000M
RAM: 4GB
Storage: 500GB
OS: Windows 8.1 Pro
A few days ago, I read an article on
Lifehacker.com which showed how a hard disk can be cloned easily using software available on the internet. I went around searching for a reliable software for doing so even if it meant paying some license fee (since I am of the school of thought that nothing is free in this world).
Thinkpad laptops are very service friendly with detailed service guides (digital) which are pre-loaded into the hard disk when you buy the laptop.
I felt I had utilized the laptop to the max in the 4 years I have owned it. I did all my assignments, appeared for exams and prepared a dissertation report on it in the last 4 years and am close to receiving a master of "something" degree in a short while. I felt like pumping in another 2-3 productive years into the machine.
Cutting to the chase, I planned the following hardware upgrades for my laptop:
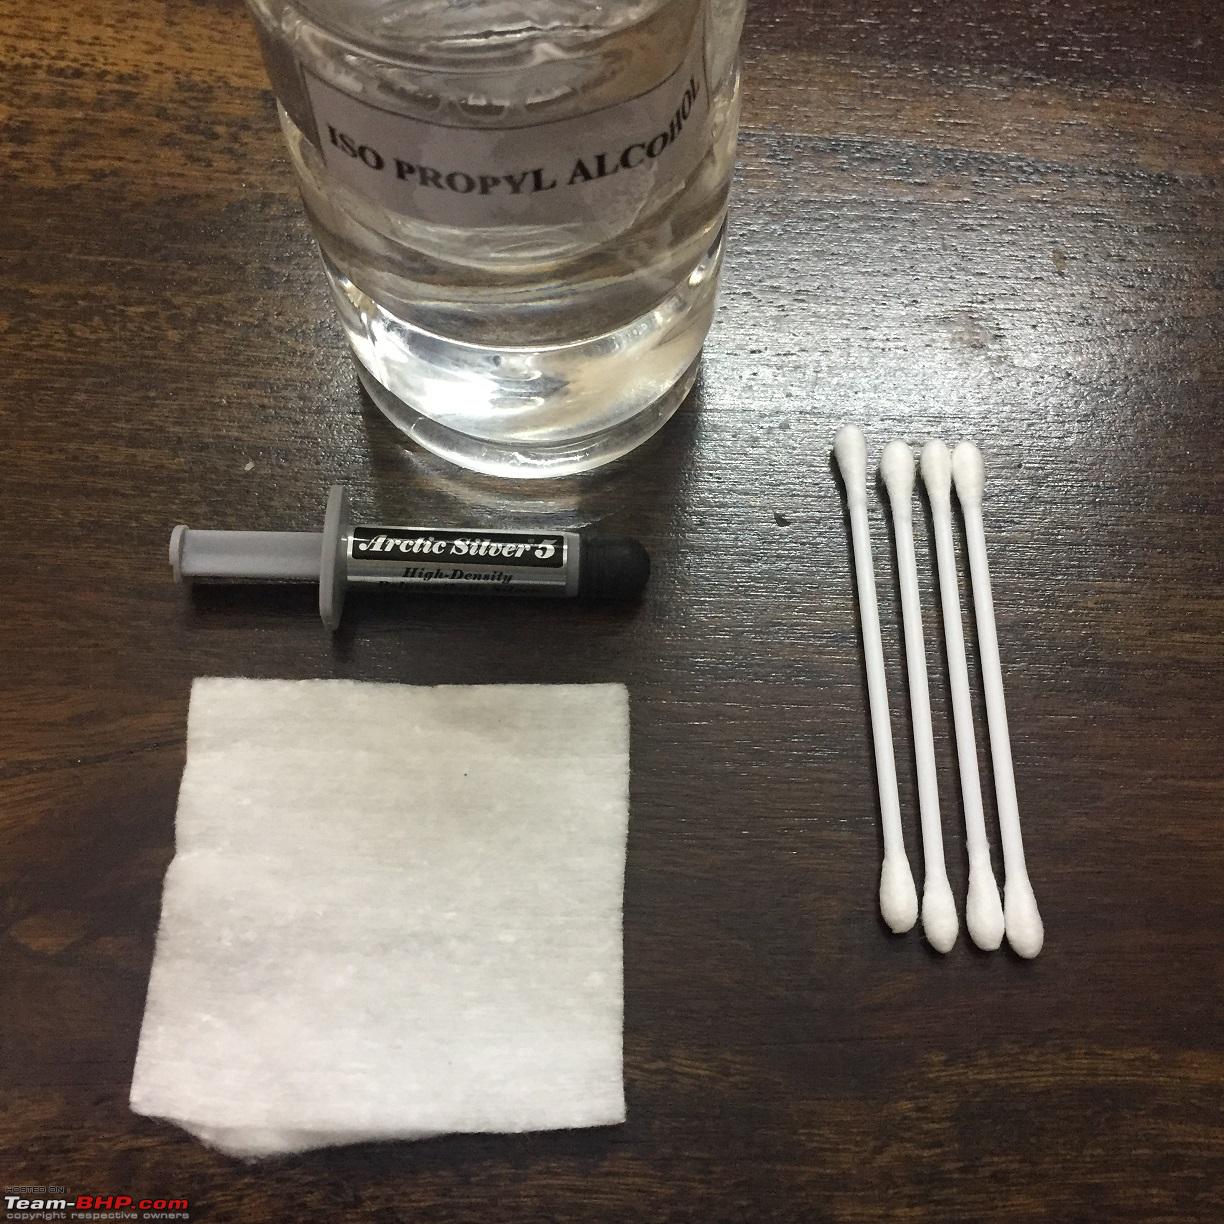
Thermal paste re-application
Thought of going with the most widely known and recommended brand which is easily available in India.
| Product Used:
Arctic Silver 5 | Cost:
INR 1,068/- (Including 200ml of Iso-propyl Alcohol required for cleaning out the old thermal paste)

Benefits:- Claimed increase in heat removal from the CPU helping it run cooler
- Cleaning of the heat sink and cooling fan
Process:- Shut Down the laptop and remove the battery
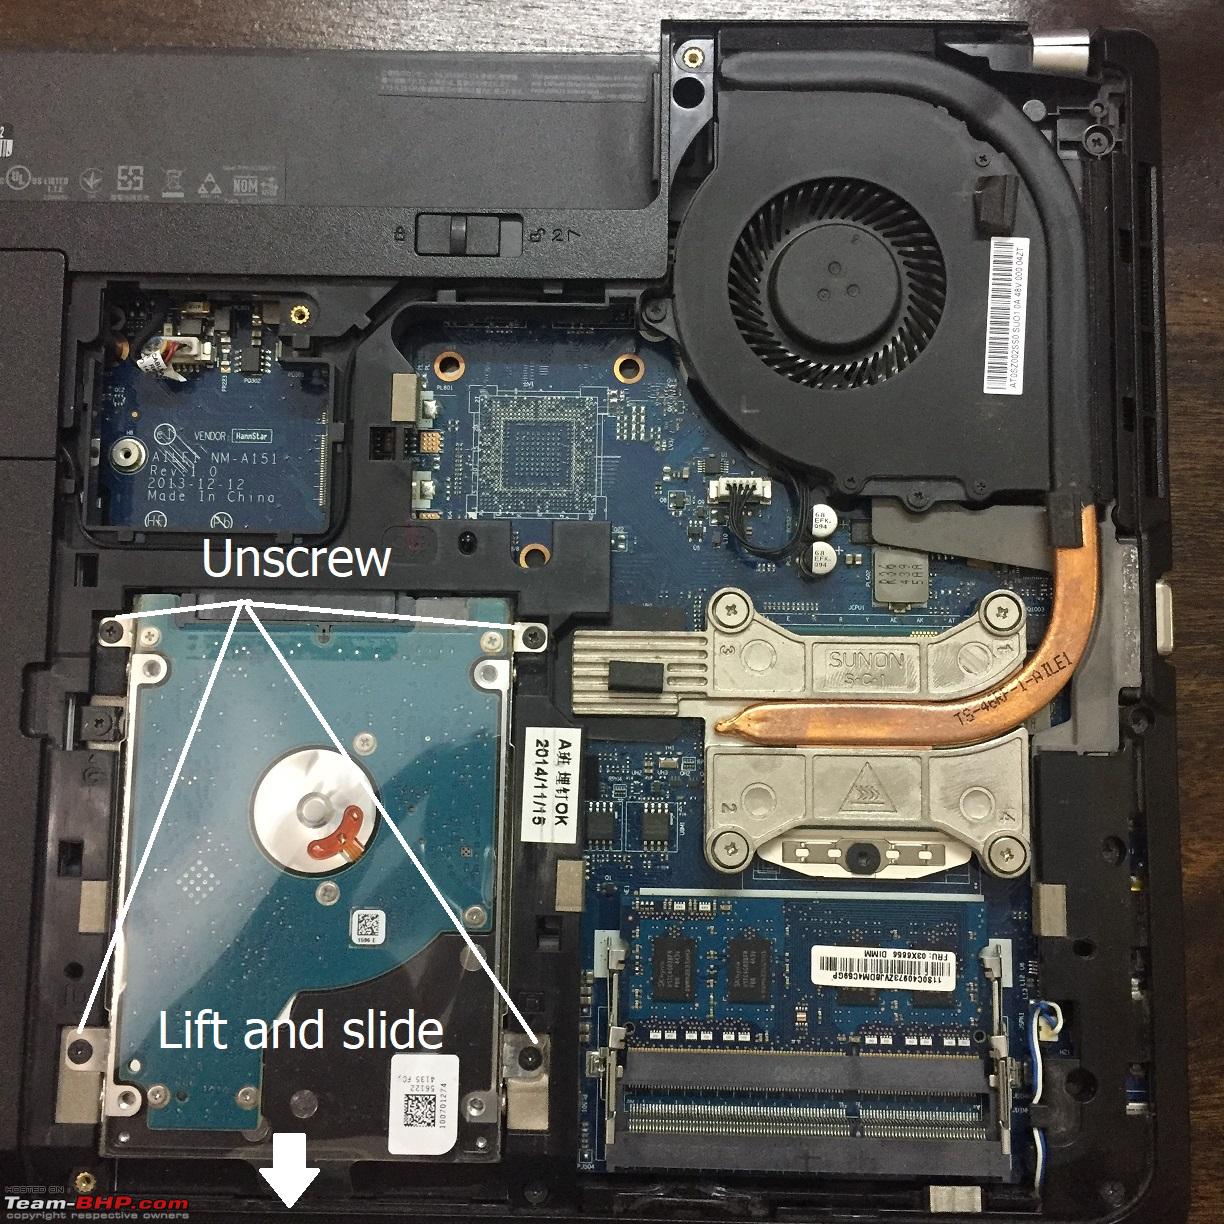
- Remove the bottom panel which gives access to the HDD, RAM and Fan
- Disconnect the fan electrical connection
- Unscrew the 4 screws holding the heat sink down (they are numbered 1-4)
- Unscrew the two screws holding the fan down
- Slide and jiggle the whole assembly to release it and keep it aside
- Clean old paste by wiping away excess with dry tissue and then wiping clean with Iso-propyl alcohol
- apply fresh paste to the heat sink
- re-install the heat sink and fan assembly in one go to avoid smudging the fresh paste
- tighten the screws that were undone

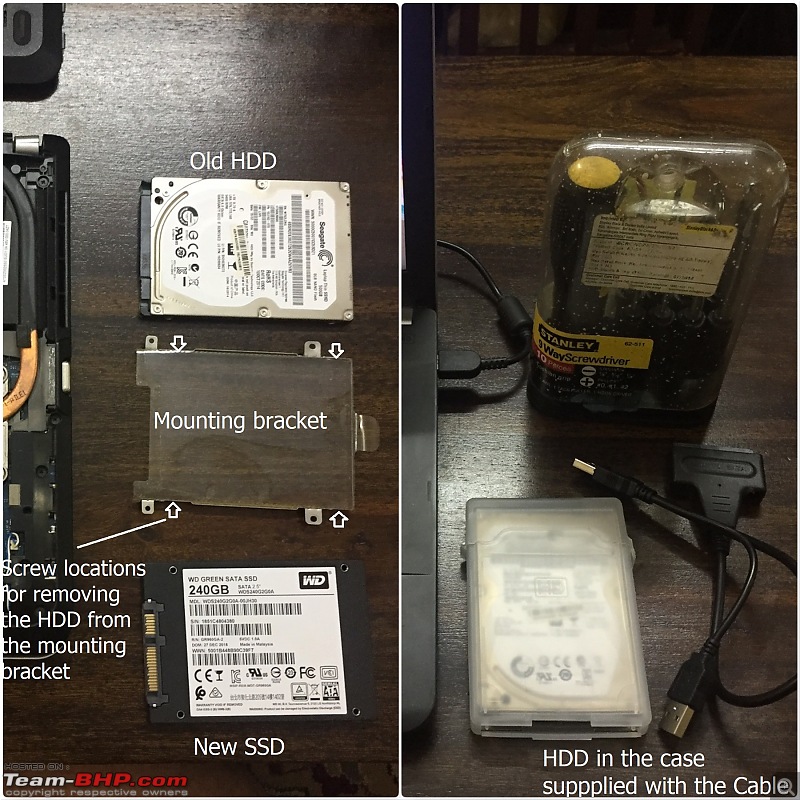
Hard Disk Drive(HDD) to Solid State Drive (SSD) swap
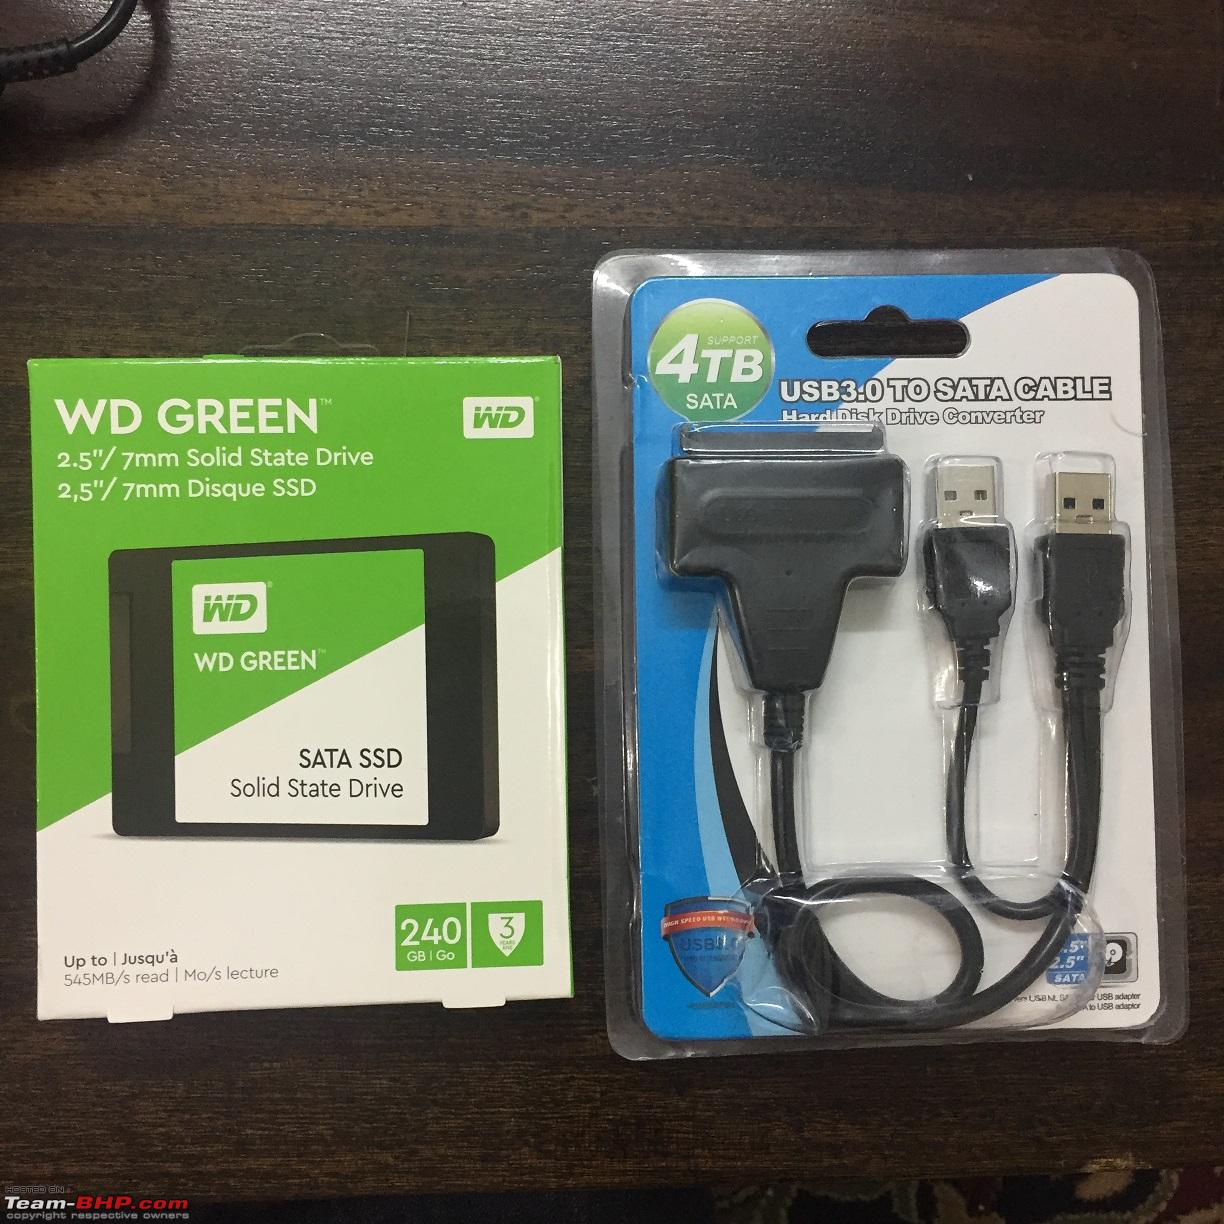
Chose a different path here. Thought of going with the Samsung EVO series SSDs initially. Later found amazing prices for (Western Digital) WD Green and Blue SSDs which could not be overlooked. Read a bit further nad found out that the WD SSDs available in the market under the Green and Blue brand names were introduced after WDs acquisition of SanDisk. Basically they are SanDisk products which are sold under WD branding. EVO series might be really good but I also thought they are expensive on account of more money spent on advertising and their established brand value compared to a new-comer (WD). Thought of going with the 240GB option since I also use cloud storage and storage requirements have decreases since I've been using Netflix, Popcorntime and Prime.
| Product Used:
WD Green 240GB | Cost:
INR 3,949/- (including the SATA to USB cable required to hook up the SSD for cloning)

Benefits:- SSDs run silent
- Have no power-hungry moving parts, logical bump up in usable battery life
- Faster read/write speeds which aren't bound by mechanical limitations with moving parts of and HDD
- Possible end to the hang-ups when detecting shakes and jerks (a feature on Thinkpads which parks the HDD when it detects shakes or jerks)
Process:- Create a recovery disk using windows recovery application
- If SSD is of higher capacity than HDD currently installed then skip next step
- If SSD intended for install is of a lower capacity than used space on HDD then try to reduce used space
- Download the software you want to use (Macrium Reflect in this case)
- Connect the SSD to your laptop using the SATA to USB connector
- Open the cloning software and follow the instructions: Lifehacker.com (I chose to not copy the recovery partition since I had a recovery disk)
- After cloning the HDD to SSD eject the SSD and shut down the laptop
- remove the battery and open the bottom access panel
- remove the 4 screws holding in the HDD mounting bracket to the chassis and slide it out
- remove the 4 screws holding the HDD in the mounting bracket
- Install the SSD in correct orientation so that when the bracket is mounted onto the laptop the SATA connector on the SSD lines up with the one on the motherboard (do a test fit without the screws if needed)
- re-do the mounting screws

There are a number of software applications available. The safest bet is to go with the one for which full version access is provided for free by the SSD manufacturer (eg: Samsung Magician, Acronis for WD etc.) however, there is a catch. They are bulky (400-500 MB) when you think of only using the cloning feature. Secondly, they only run when the drive currently installed in your PC is from the brand that the software supports. in my case I had a segate HDD and was swapping it with a WD Green. I downloaded the Acronis TrueImage WD Edition software and couldn't use it as it didn't detect any WD disks on the PC. Even the new one wasn't detected when connected through the SATA to USB cable.
Increased RAM
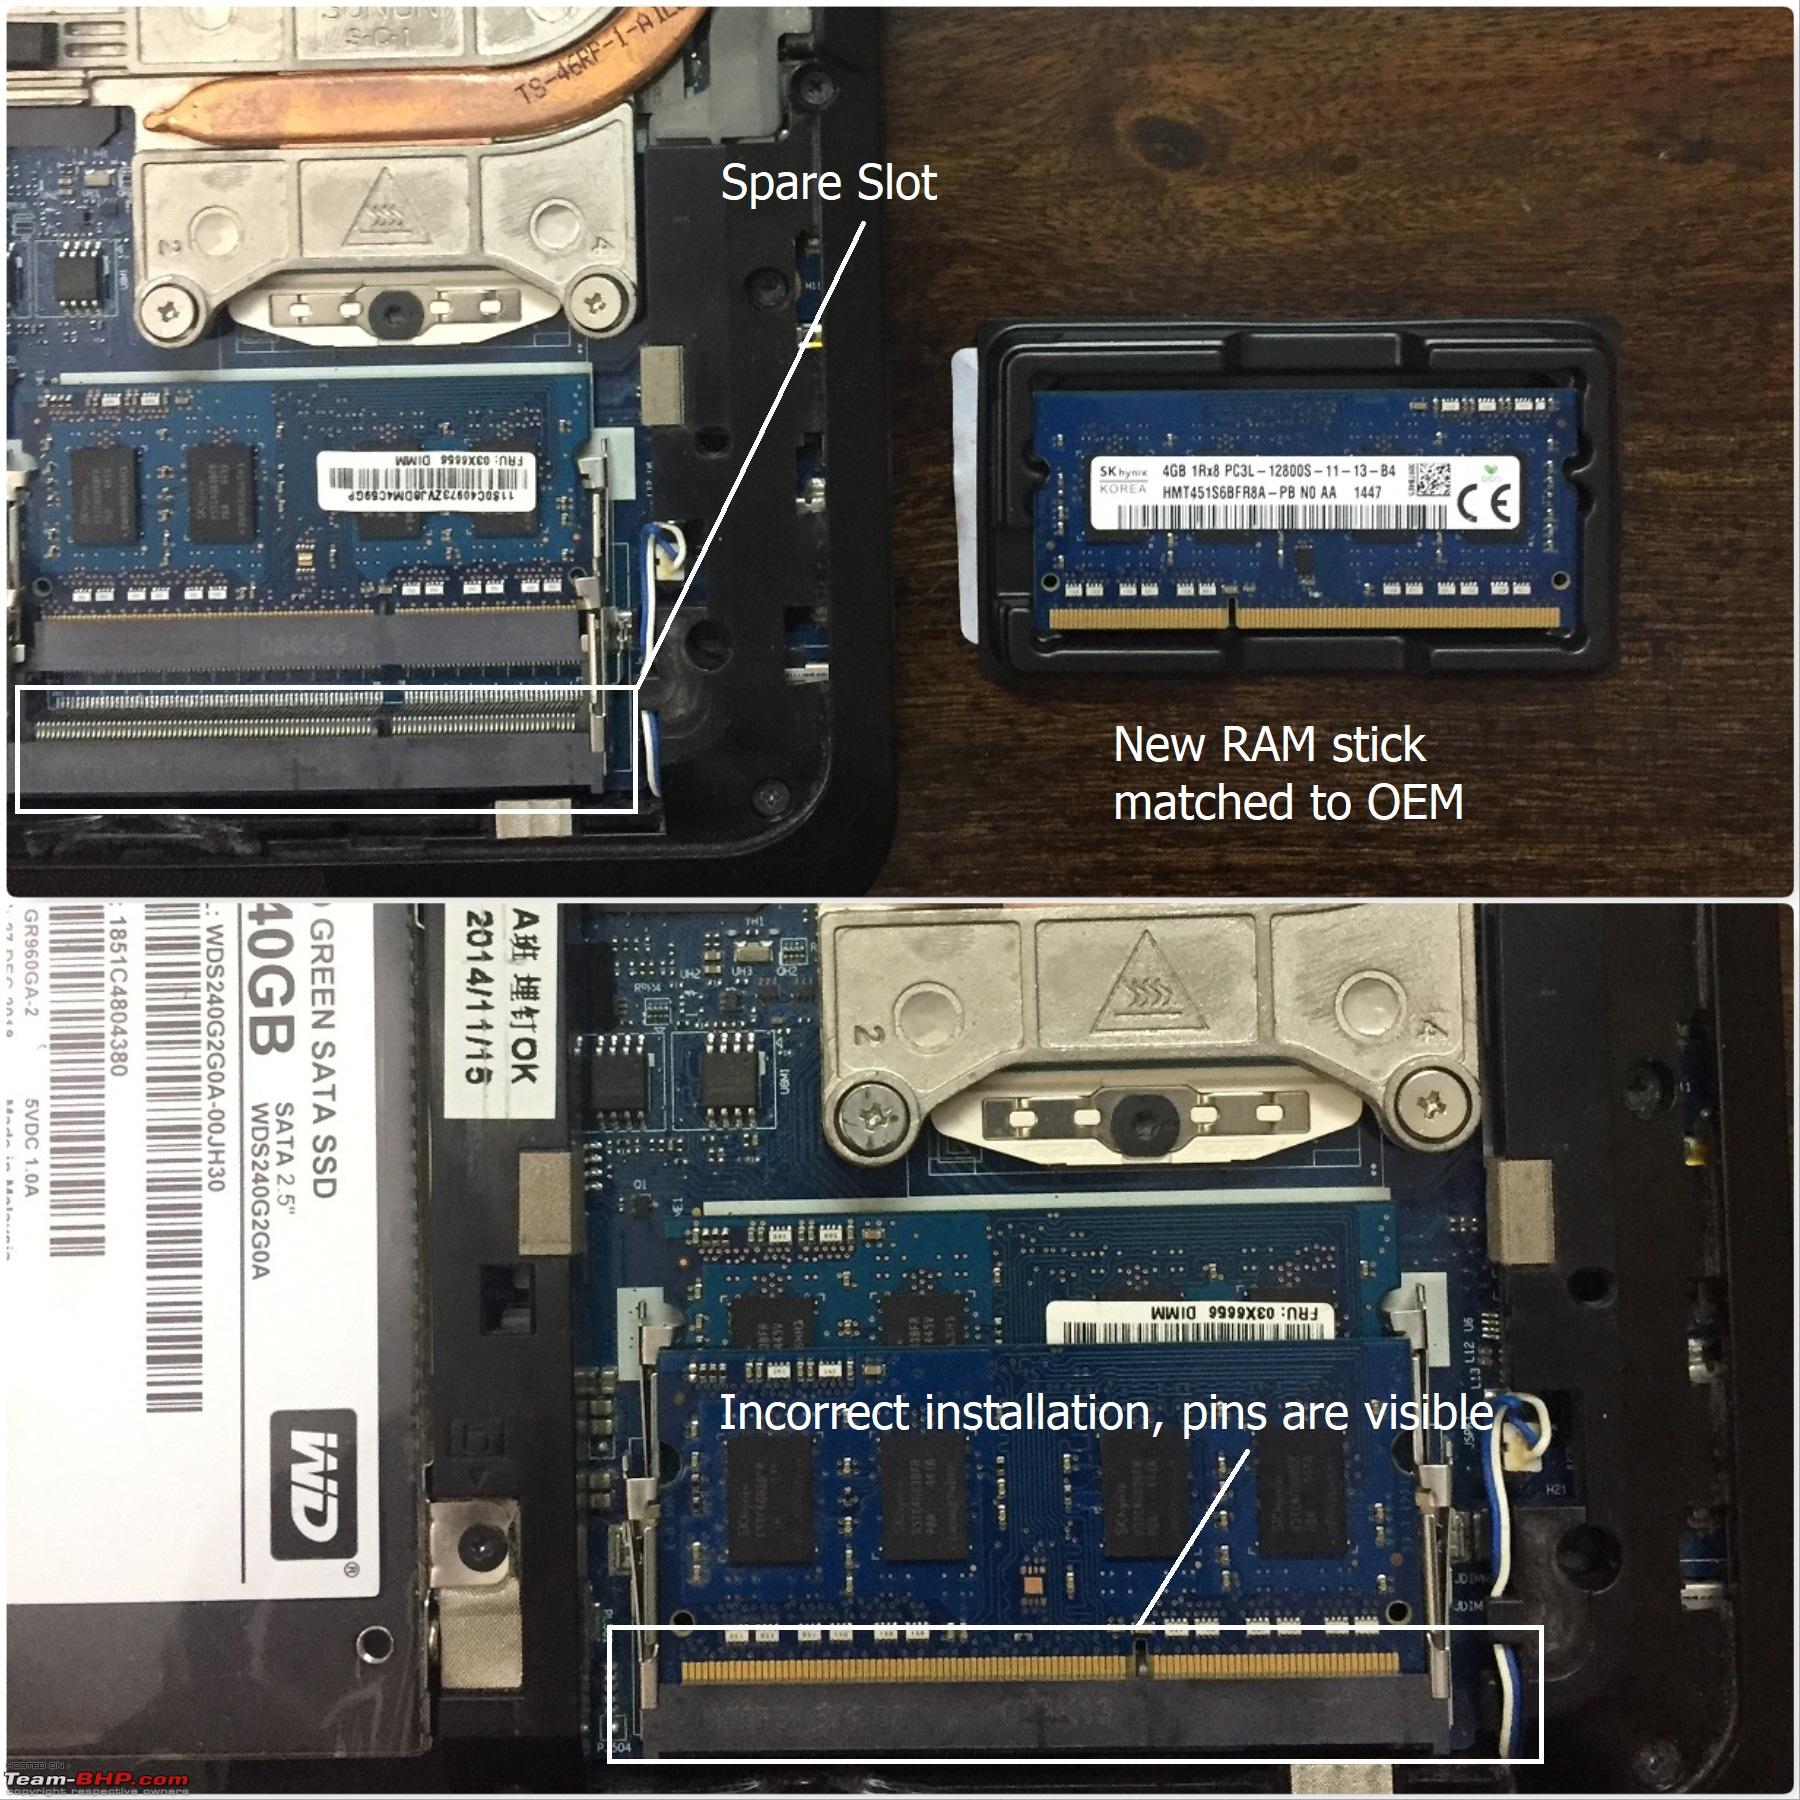
The RAM upgrade was not really necessary for me since I only used the laptop for very ordinary tasks. RAMs are available for very reasonable prices these days and I thought of going ahead with the upgrade nevertheless. Decided to go ahead for another OEM spec RAM stick to sit in the vacant slot on the motherboard. It was quite a task finding and being sure of the exact match to the OEM RAM among the countless listings on amazon.
| Product Used:
4GB SK Hynix HMT451S6BFR8A | Cost:
INR 1,550/- Benefits:[list][*]Faster performance overall

Process:- Shut down the PC
- Remove the battery
- Access the RAM slots by opening the bottom access panel
- Line-up the pins on the RAM stick with the connector, slide it into the slot fully (I did not) and press it down (light pressure) in a hinged action till you hear and see the metal pins click and secure it in place.
You can see in the picture i did not install the RAM correctly and as a result it wasn't detected when I turned it on. I knew something was wrong since while installing it i did not hear the click as is the usual case. A quick re-do of the whole process made me realize the mistake.
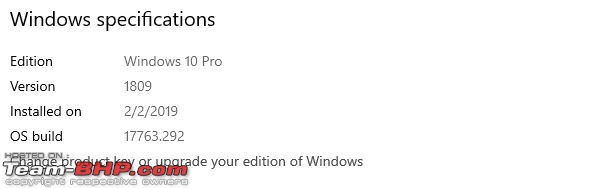
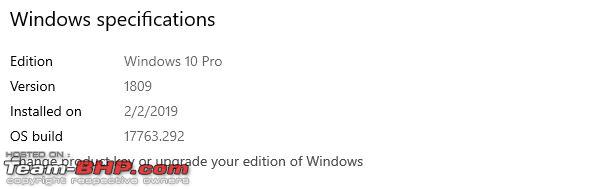
Windows 10
I had upgraded to Win10 earlier in 2016 when they announced the free upgrade window. Somehow the OS crashed about 2-3 weeks after the upgrade and I was back on Win 8.1 Pro since then. I confirmed with Microsoft regarding a re-upgrade and they had assured me that it is possible as long as there is no major (Motherboard) hardware change in the machine. So this was just another thing on the pending-since-long list which needed to be ticked-off
| Cost:
FreeBenefits:- Latest should be betters, no?
Process:- Windows 10 Update Assistant (follow on-screen instructions)
All the upgrades need very little skill and can be done easily as long as you know where to find what and how to access it on your make of laptop/desktop. The parts are also easily found on e-commerce websites as long as you are sure of their compatibility.
I think the upgrades future proof the machine for another 2-3 years and also it now runs on the maximum specifications with which it could be ordered four years ago, for the cost of an arm and a leg. Quite happy with that and the time spent learning and doing something new.


 3rd February 2019, 11:15

 (5)
Thanks
(5)
Thanks


 :
:


