Team-BHP
(
https://www.team-bhp.com/forum/)
Thanks. Till yesterday I was convinced to use velcro as base but thought magnets will work since you put the. Now back to velcro. Any design ideas if you may share?
Btw amazing thread. Rating Five. :)
Quote:
Originally Posted by motorpsycho
(Post 4229409)
Rating this thread a 5. Sunny you are a very involved owner. Can you elaborate on the Rare engine roll-stop mount, what purpose does it serve?
|
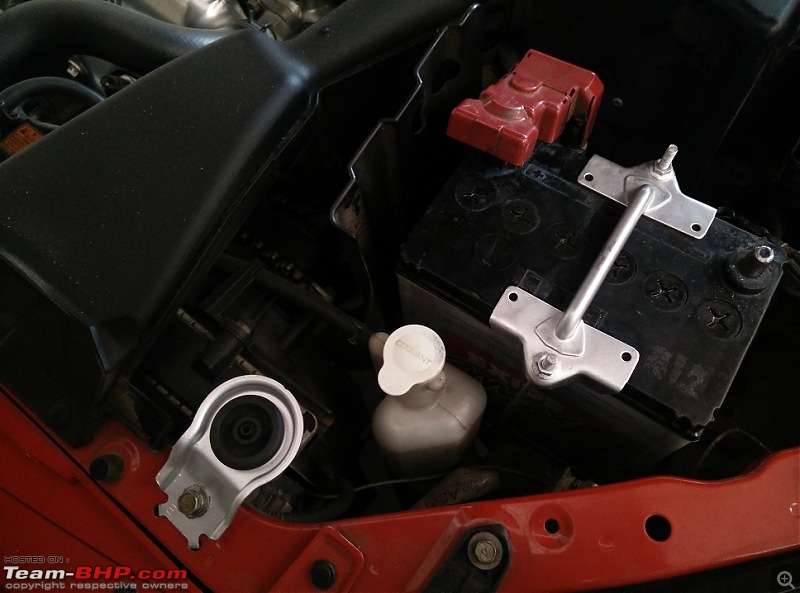
It's one of the four engine/gearbox mounts on the car. Its placed in north/south direction mainly to absorb vibrations from the engine when the car is accelerating. They're called "torque mounts" on different cars.

The mounts marked in Red are the rollover stop mounts. Other two are for the engine and gearbox each.
Quote:
Originally Posted by akshay380
(Post 4229434)
Thanks. Till yesterday I was convinced to use velcro as base but thought magnets will work since you put the. Now back to velcro. Any design ideas if you may share?
|
I'll post some pictures next time. I'm still using a temporary arrangement I made a while ago for the velcro; it involves some foam, 2 inch velcro tape, transparent and double sided tapes.
Rated the thread an extremely well deserved 5 stars, Sunny.
I knew you had a penchant for being fastidious, but this thread is on another level itself. I have seen and read things being done for the first time here.
It is definitely a bible for all Cedia owners in India, and a benchmark for detailing as well.
You seem to be getting a lot of parts from the U.S, be a good fella and allow us also to add a part or two next time eh? lol:
Quote:
Originally Posted by SunnyBoi
(Post 4229417)
In the meanwhile, managed to get 3 cans of Liqui Moly Petrol Injector cleaner upon recommendation by sagarpadaki for just Rs 597!
Poured two cans of the petrol injector cleaner into the fuel tank and hit the sack.
|
Had a good experience recently with Liqui Moly Diesel additive. Diesel however was one bottle recommended for a 60L tankful.
Quote:
Originally Posted by SunnyBoi
(Post 4229417)
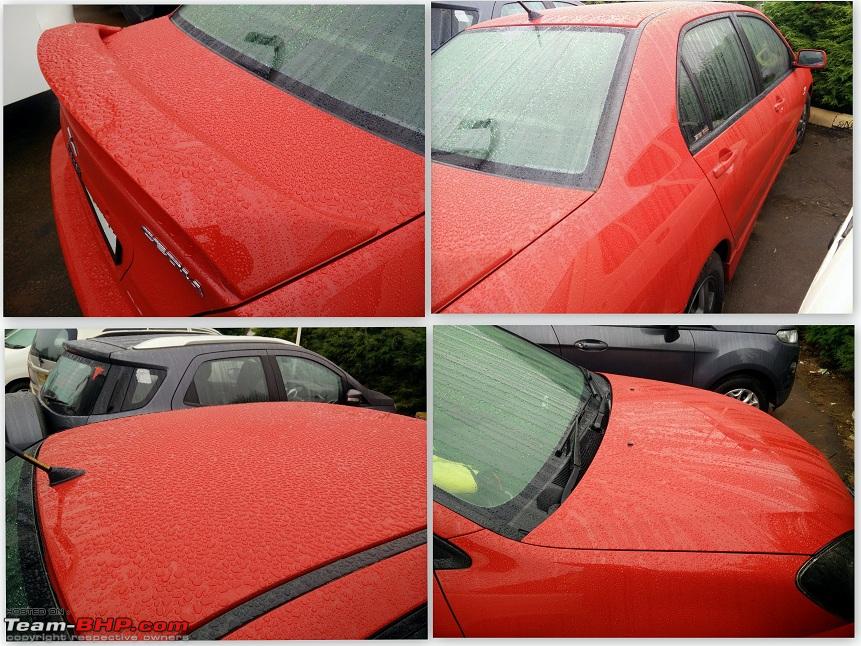
These pictures are courtesy of Robi using his drone.
|
Heard of his upgrade. Which one is his?
Quote:
Originally Posted by SunnyBoi
(Post 4229417)
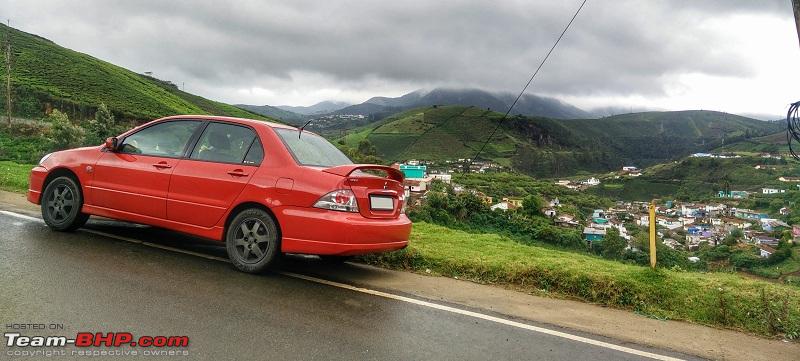
My Cedia again! Pic courtesy KarthikK
|
Next time, no yellow microfibres on the dash of a red car during photoshoot, please. :D
Awesome updates Sunny! Had privilege of sitting in the passenger seat of this Red Rocket! can't stop thinking how much effort and passion you have to maintain your cars. After all the obsession I have seen on your yellow S10, this seems to have taken it to new heights!
Great ownership and well deserved car for a an enthusiast in you! Kind of made for each other?
Missed that Markonahalli Dam photo shoot. Hope to make catch up in person soon.
@SunnyBoi - Kudos to you for having kept your car in this shape. I am no slouch in the car-care department myself but not as hands-on as you are.
Leoshashi (love his M800 thread) and you are real benchmarks and an inspiration to all T-BHPians. :thumbs up
PS: This thread gets a 5 Star rating. :D
SunnyBoi, its such a pity SVR went and put in a non standard oil filter! You should escalate to HMFCL-Mitsubishi. I keep in regular contact with them to source MMC parts for my Lancer. The CEntury DIAmond is a wonderful machine indeed and its handling, steering response and character are unparalleled! Enjoy your car!
I knew you were a detailing specialist but good lord lol.. a practical course with you is a must for upcoming auto engineers, heck the car authorised service stations must give this a read-through and understand what cleaning a car is really about.
This amount of detailed repairing is ridiculous and I thought I'm wasting my time by washing and waxing my car once in 2 months. The Cedia truly hit the lottery in finding you as the 2nd owner.. mostly cars go to 2nd owners to wrap up their innings of their life but this one has gotten welded, cleaned, sanded, reinforced, shined, polished and reincarnated better than showroom shape.
I've driven the Cedia.. for my height I felt the seats were a bit low but its not a car for comfort per se, though it is quite good in that department. Everything from the steering to the engine power is tuned to sporty driving and its departure marked an end to the Japanese FTD sedans.
Fantastic thread, you just became a serious celebrity of sorts over here.
Quote:
Originally Posted by bhuvan_prasad
(Post 4229474)
Rated the thread an extremely well deserved 5 stars, Sunny.
I knew you had a penchant for being fastidious, but this thread is on another level itself. I have seen and read things being done for the first time here.
It is definitely a bible for all Cedia owners in India, and a benchmark for detailing as well.
|
Thank you!
As far as the paint goes, I have way worse paint than your car, It has been over a year since I last polished the paint. I expected whatever I put on the paint to not last over 6 months and yet its going strong! I really couldn't have asked for anything more considering the wafer thin paint, no clear coat and super soft paint on my car.
Quote:
Originally Posted by bhuvan_prasad
(Post 4229474)
You seem to be getting a lot of parts from the U.S, be a good fella and allow us also to add a part or two next time eh? lol:
|
Few pages back I had posted a picture about the stuff I got from USA

This is the uncropped version of the same photo. recognise anything? :p

Quote:
Originally Posted by CrAzY dRiVeR
(Post 4229485)
Heard of his upgrade. Which one is his?
|
Its the 328i with the black grills!
Whie my Cedia isnt a slow car, this should show the definite and absolute difference between the Cedia and the 328i. I mean both have 2 liter engines but..well, I am speechless.
https://www.youtube.com/watch?v=q_RmcAWFrRw Quote:
Originally Posted by CrAzY dRiVeR
(Post 4229485)
Next time, no yellow microfibres on the dash of a red car during photoshoot, please. :D
|
Haha, theyre temporary pods for my midranges. Unfortunately I have yet to complete the fiberglassing for them; the first attempt did not go well. They should be done in about 2 months and till then they'll be an ungainly sight.
Quote:
Originally Posted by abirnale
(Post 4229592)
Awesome updates Sunny! Had privilege of sitting in the passenger seat of this Red Rocket! can't stop thinking how much effort and passion you have to maintain your cars. After all the obsession I have seen on your yellow S10, this seems to have taken it to new heights!
Great ownership and well deserved car for a an enthusiast in you! Kind of made for each other?
|
Thank you Avi! Yes this is a car that was sort of made for me clap: The fact that the service manuals are available, lots of YouTube videos are there on how to dismantle parts on this car gave me enough confidence to tackle the car by myself. Plus the fact that Mitsubhishi ASS was so bad helped a lot too.
Come to think of it, I have been going on trips in this car since 2007, the year this car was bought!
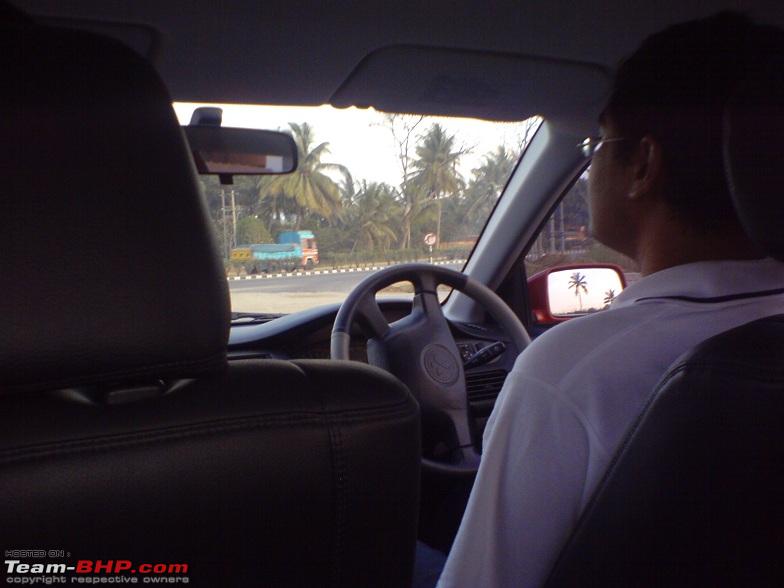
December 2007, ROC behind the wheel and me sitting in the back

Early 2008, trip to Bedaguli.

I never imagined I'd buy a Cedia. On a thursday evening on Dec 2015, ROC messaged in a whatsapp group that he's getting a good deal on a V40 and will be selling the Cedia to the showroom as exchange. Out of impulse, I messaged him and he said take it!
It took me only an hour to decide. Friday Mornign spread the word amongst few friends that I;d be selling my Palio. On Sunday the Palio was sold and picked up the Cedia on tuesday. Pretty fast!
Quote:
Originally Posted by Prozac
(Post 4229742)
SunnyBoi, its such a pity SVR went and put in a non standard oil filter! You should escalate to HMFCL-Mitsubishi. I keep in regular contact with them to source MMC parts for my Lancer.
|
Well I had no plans of ever going into a Mitsubishi ASS the moment I bought the car since the reason ROC sold off the car was his expiernce with Mitsubishi Service.
As far as the oil filter goes, I was mad about it initially but my views later changed. Here are some more details on the oil filter :
http://www.team-bhp.com/forum/long-t...ml#post4147886 Quote:
Originally Posted by dark.knight
(Post 4229844)
The Cedia truly hit the lottery in finding you as the 2nd owner.. mostly cars go to 2nd owners to wrap up their innings of their life but this one has gotten welded, cleaned, sanded, reinforced, shined, polished and reincarnated better than showroom shape.
|
This was a known car; I have been seeing the car since it was bought. Knowing ROC, he never spared any cost maintaining the car, only to be let down my the Mitsubishi ASS.
Quote:
Originally Posted by dark.knight
(Post 4229844)
Fantastic thread, you just became a serious celebrity of sorts over here.
|
Well, you can see my posts in this thread are well over a year old. Its just that these posts were on a thread that was not very visible.
Quote:
Originally Posted by SunnyBoi
(Post 4230020)
l
Haha, theyre temporary pods for my midranges. Unfortunately I have yet to complete the fiberglassing for them; the first attempt did not go well. They should be done in about 2 months and till then they'll be an ungainly sight.
|
:D
Ah! I forgot. So you are getting the 3 way active setup transferred to the Cedia? I remember you had the 80PRS. Forgot the rest of the details though! :)
Congratulations to Sunny Boi for the amazingly comprehensive write up, with detailed pictures to illustrate the work done on the car.
And I thought I was passionate about my cars !!:D
I'm actually at a loss of words to describe my appreciation of your relentless pursuit of perfection wrt your car !
I can say (without a doubt) that it's possibly the most well kept car on our forum ! Kudos to your passion, knowledge, dedication, hard work :thumbs up
All the very best for your pursuit
Cheers
Quote:
Originally Posted by CrAzY dRiVeR
(Post 4230078)
:D
Ah! I forgot. So you are getting the 3 way active setup transferred to the Cedia? I remember you had the 80PRS. Forgot the rest of the details though! :)
|
I had a 3-way in my Palio with Exodus Anarchy midbass, Peerless midranges and Vifa ring radiator tweeters. I only moved the headunit, tweeters and a 2 channel amp, I ended up replacing everything else.
Fresh wiring. 16sqmm wires for power and 2.5sqmm for speakers. Used Finolex/Havells wires.

Unfortunately, the Exodus Anarchy are a tad too big for my doors. There is a way to fit them but it would need doorpad surgery which would ruin the stock looks.

So what do I do? There aren't any budget friendly midbasses, couple of good friends and car audiophiles told me to take a look at Dayton Audio RS180 7 inch drivers. DIY Audiocart were the official resellers, however their prices were 50% over USA prices, they did not have ready stock and wanted me to pay upfront and wait for 3 weeks. I wasn't happy with their terms.
Enter our dear good USA friend :D who cursed me for making him carry these heavy speakers.. He also got me RS100 midranges which pair very well with the RS180, as well as the AEM UEGO wideband used on my car and the front caliper rebuild kits. Included were some goodies for the turbo civic as well.

My collection of car audio speakers

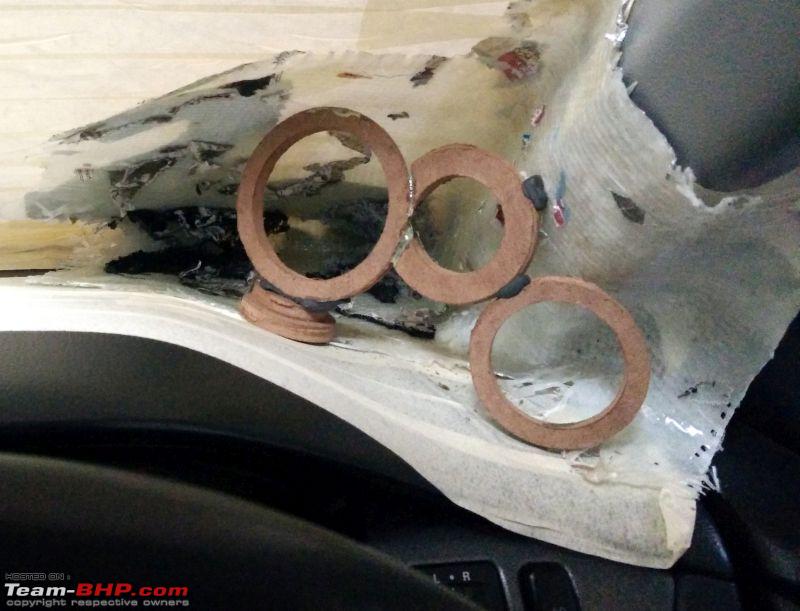
RS180 mounted. Reused the MDF rings which I wasn't very happy with. One of these days I'll get plastic rings made specifically for the cedia's dimensions and use them.

Data storage in my car. 128GB SD card for the head unit, 128GB microSD for the dashcam and 128GB pen drive for the tablet :D

Here's the first prototype of fiberglass pods. They came out OK, there were few wrinkles that came in, I grossly underestimated how difficult it is to mask everything, work with fiberglass and resin while sitting inside a cramped car.

Here's how my tablet setup looks like. There is a powered hub inside connected to a 128GB pen drive, an Alien DAC built with audiophile components connected to the table via an USB OTG cable. The DAC is connected to the AUX2 input of the 80PRS.

Quote:
Originally Posted by skandyhere
(Post 4225890)
Here's at least one vote to getting a generous second serving of engine work pictures and narration. Please keep the updates coming. The pictures are 'petrolicious' and the storytelling is instructive and inspirational. :thumbs up
|
Thank you! Here are the next set of pictures.
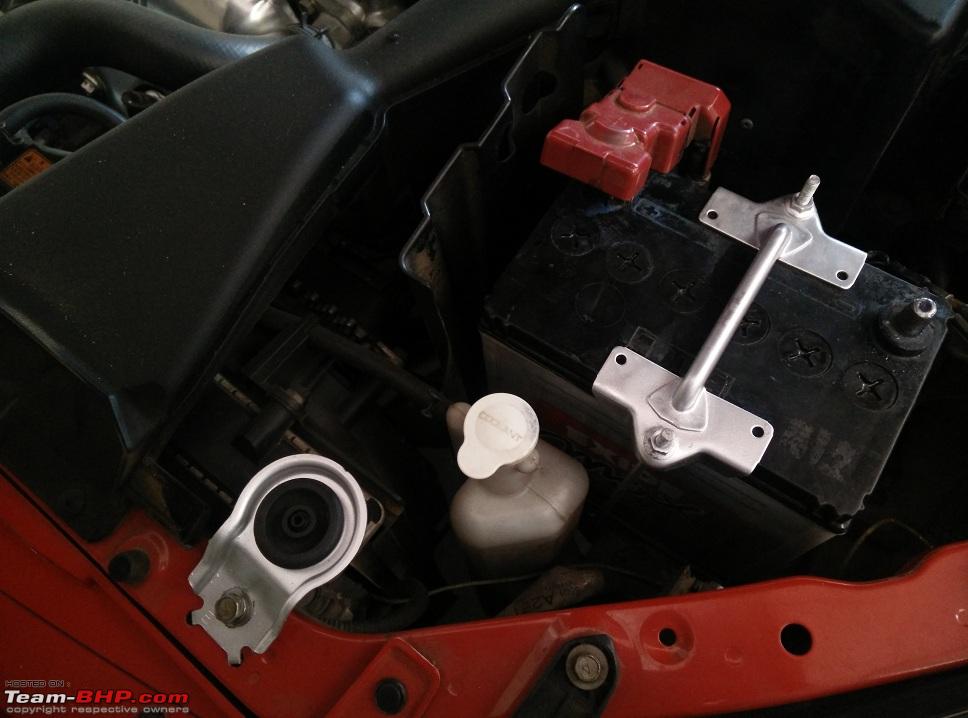
The power steering fluid reservoir cap needed to be cleaned

Cap, area around the cap and the fluid in the reservoir replaced. All neat and clean!

I had always hated the look of rusted bolts on the heat sheild. Took steps to fix it. First was to remove the bolts and scrape off the rust

Next was put back the bolts and apply a generous coat of rust convertor. Once dried, it acts as a primer for the paint to stick on to.

Mask surrounding areas and paint with high temp aluminum paint.

End result.

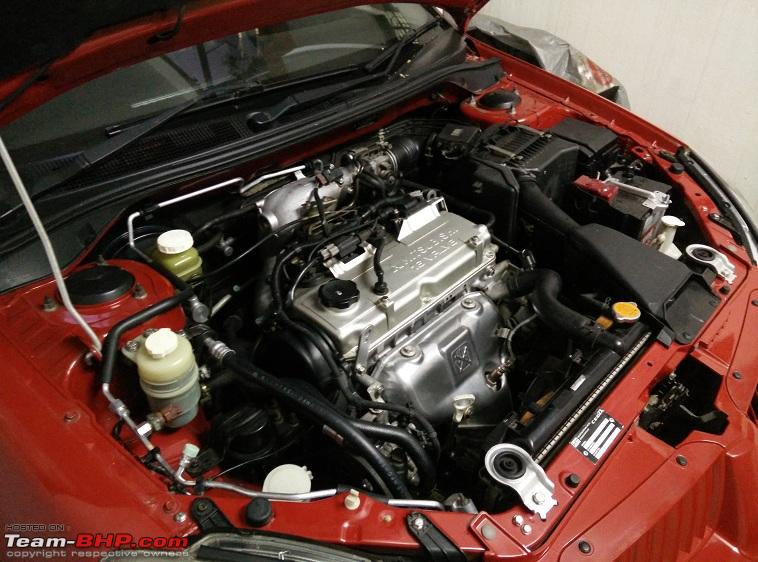
Painted few engine parts which had dulled out and could not be recovered. They were black before, I painted them in aluminium so that they provide a contrast over the part they've been bolted on.

I wasn't too happy with the outcome; the painted bolts always looked artificial. The next step was to replace the rusted bolts with Stainless Steel (SS) bolts. They looked fabulous once changed! So good that the rest of engine bay looked dull. So ended up replacing every last visible bolt in the engine bay (except crucial ones like thermostat and engine mount bolts) with SS bolts. Result!


I even replaced the screw in the center of oil cap with a SS Allen bolt just so it looks good.

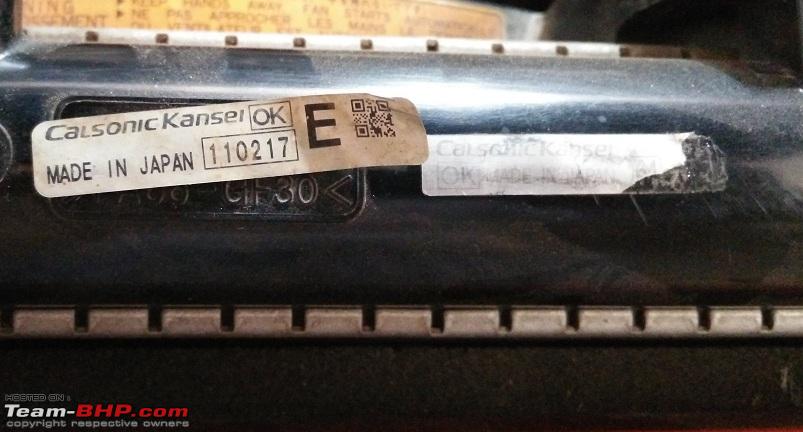
Replaced the faded Calsonic Kansei sticker on the radiator with another one

The chassis around the spare wheel well had some surface rust. Did some experiments to check how well my rust remover worked, I was not disappointed.
Before

After

The plan was to clean the whole underside and remove all rust; put on few layers of thick underbody coat. Using underbody on rusted parts will in some cases allerate rust and cause premature failure; which I wanted to avoid. Its been 1.5 years and I haven't done anything more than this test spot :deadhorse oh well, hopefully I'll finish it once the rains stop.
Got tired of looking at a black condenser from the front; cleaned it up. Before on the right and after on the left

Even fair and lovely wont give you such fairness :D

Back to the present. I had bad hits by one auto and two 2 wheelers on the bumper prompting me to do repairs. The paint still looked bad with the marks being very visible.
Left corner

Right corner

Testing various techniques, the big black patch on the right has reduced.

After a while, left side is as good as new. I guess whatever paint protection is there on the car is doing its job.

Right side also cleared up. There are few marks on the skirt which should go off in the next detailing session.

Whole derriere. Saved quite some money by not having to repaint the rear bumper now!

So I had a dentist appointment on friday, he pushed it to Monday, which meant I had to be in Mysore for two more days. That set me thinking..
I was ragged a lot by the folks at Markonahalli trip and the recent TBHP Ooty drive about having ugly yellow towels on the dashboard. Infact everyone on the Ooty trip made sure they reminded me about the towels :\
Since I had two days at my disposal, I kicked off "Fiberglass Fabrication Friday" with making Fiberglass dash pods for the drivers!
Why dash pods, why not A pillar pods?
- A pillar pods will need modifications to the original panels. I have a spare set of Cedia A pillars but it still hurts me to damage a perfectly good set if it doesn't go well.
- My current midranges, Dayton RS100 need a lot of volume which is a problem with A pillar pods
- Since I'm running 3 way with tweeters, integrating them into the A pillar can be complicated
- Above everything else, this idea at first seemed too simple :D
Start with masking off everything you see. You can never mask enough and be prepared for resin spills.

Rear portion cast. Had to use cotton waste balls to stop the top fiberglass from collapsing under its own weight.

Rear portions done! I didn't plan the dimensions and ended up casting way too much. Oh well, lesson learnt.

Rings cut from MDF. Removed the mounting flange from the tweeters to save space

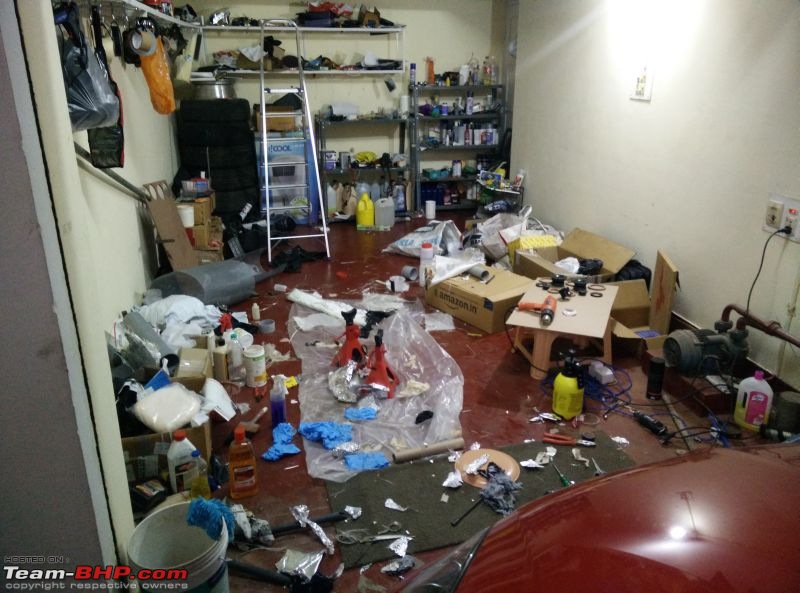
My work area. Ugh needs cleaning.
Using a scale and string taped to center, figured out the correct angles.

Rings aimed and tacked. Had to raise the midrange rings to clear the speedo hump on the dash. Why 3 rings? Read on.

Passenger side was pretty easy and lot less complicated.

All trimmed up, ready for fiberglassing the front

Reason for the third ring. Want to move the AEM wideband on the dash and this is the perfect time to kil 2 birds with one stone!

Got some pipe that was as wide as thr AEM but the wideband itself was a snug fit inside.

Both pods cast!

First attempt at the wideband integration. Angle was way off.

Fixed it. At this point I started losing patience, as usual I grossly underestimated the amount of work it took.

Chopped the top corner and re-cast it as a curved area to improve visibility

Painted them matt black for now. I couldn't care less for cosmetics although I might get them wrapped in rexine in the near future.

Reflections from a dirty hood lift my spirit up!

All wired and drivers fixed!

All done! Woohoo!

View from the driver's seat. Added a small green voltmeter on top. Initial plan was to integrate it into the pod till I ran out of patience. Its held with double sided tape for now.

View of the left pod from the driver's seat.

Yes this doesn't look great or anything; but its functional and that's all I care about right now. I've been running 3 way active on my cars since 2 years and been wanting to make pods since then but today was the time!
I'll be re doing the pods perhaps after a month or two with the next version aimed at reducing the visibility hit. After this first attempt, next time it should be smoother.
This finally satisfied all my DIY urges! I've been getting a lot of my car's work done at Balckworks and I dont have any complaints except that it doesn't give me the satisfaction of doing everything by myself.
I'm also proud to say from raw materials to finished product, I did everything myself! Woohoo!
Last but not the least, huge amount of thanks to Piyush, bamaboy and GKannan sir for their inputs during the fabrication!
| All times are GMT +5.5. The time now is 14:54. | |