In old times, if a minor incident were to happen on the road, elders' interference with minor judgment was enough to solve the problem.
In present day life, we think too much and feel too little. A person thinks he/she is always right and the other person is wrong. The matter reaches a point, where he or she fights a legal battle to prove his/her innocence in the Court.
Now the time has come for us to be on the safer side while facing such incidents (though I dont wish such incidents happen to anyone). So, I decided to use a technology which will give me some kind of comfort.
We all know that most vehicles have blind spots. In some tight places we wish someone was out there to guide us. After giving this some thought, I decided to have Right Round Viewing & Recording in my Van.
To select the complete unit, a lot of combinations went through my mind (cost was also a factor).
Finally, I settled for the following units in my project:
- Front Dash cam with AV out option.
- Video Triggering unit(Three AV in & one AV out).
- Three 170-degree viewing angle CCD waterproof camera (one with guider for the rear & other two for the ORVMs).
- 5-inch monitor with two AV-in options.
- Wireless video transmitter for reverse camera.
- Two-way switch.
Each will be explained as we move on.
Presently, recording is restricted to the front view. I may add a DVR for the other three cameras.
Visuals:
Dash cam (Mini DVR 0801) and its placement:

Left door rear view camera (same goes for the right door) - rear camera (near the registration plate):

Triggering unit and its connection (behind the glove box):

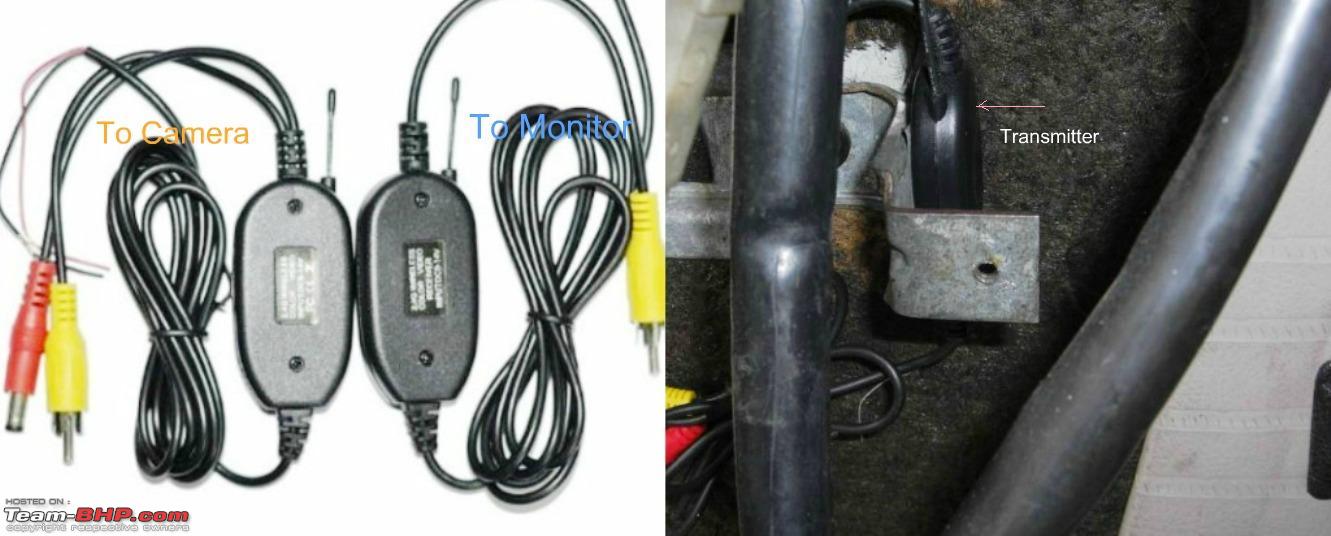
Wireless transmitter and its placement (location - rear, where AC hose and AC wiring runs):

Two-way switch wiring:

5-inch Monitor, side viewing, rear viewing and two-way switch:
 Working procedure:
Dash cam (basic work, front viewing and recording) -
Dash cam's AV out is useful in two ways:
- We can have record viewing live through the monitor.
- While climbing up a steep hill, you can see only the sky through the windscreen. This is where the cam comes into play. It has a rotating option up to 90 degrees. By adjusting the cam angle, we can know what's in front of us by using the monitor.
Waterproof cameras -
Out of the three cameras (mirrored type), the two without guidelines are fixed to outside rear view mirrors. I am using the left door camera as default, other two works by triggering (for front viewing we need to use non mirror type).
Camera coverage is better than rear view mirrors. With the cameras help, rear viewing is possible through the monitor even with the mirrors closed.
Video transmitter -
I have used a wireless video transmitter for the reverse camera to avoid lengthy AV-out cable.
Video triggering unit -
The unit's AV out, is connected to AV2 of the monitor. AV1 (default) is connected to the left door camera. First triggering AV2 goes to reverse and the last triggering AV3 is connected to the right door camera (optional).
Working highlight -
Left door camera comes to life the moment the ignition is on. Just a glance at the monitor is enough to have a complete side view, without taking my eyes off the road. When the gear stick is put in reverse position, first triggering takes place and the rear viewing camera comes to life. The right door viewing camera comes to life when the second triggering takes place by switching on the right indicator (optional).
Dash cam live is viewed through monitors AV1 (AV2 to AV1 changeable through monitor remote).
My creative madness (mainly having DVR in mind)

-
To switch on the reverse camera directly, I am using an ignition-on connection with a two-way ON-OFF-ON switch. For the rear view I can trigger directly, without the need of reverse triggering.
Creative Idea for you.

- Waterproof camera with at least 140-degree viewing angle.
- Wireless video transmitter and receiver costing app 12+22=$34/-.
For viewing, monitor or any gadget which has an AV-in option will work. You might need an AV adapter to suit the gadget input.
Remember that the camera and the transmitter need only two connections: positive and negative. The video receiver is placed inside the dash keeping the AV-in cable of the receiver within reach to connect to the monitor or the gadget.
Now comes the fun part. Place the camera with the transmitter where you need to keep vigilance (eg: some moving part near the suspension). If the placement is temporary you can just tape the whole unit up (remember that the transmitter is not waterproof). Grounding can be done next to the camera. Positive can be tapped wherever it is available (power consumption is negligible). This setup helps in monitoring the part while on the move.
I hope this thread is useful to you.
Thanks.


 21st September 2014, 11:18

 (20)
Thanks
(20)
Thanks