Introduction:
This is my 1st post of this forum, so please accept my apologies in case I miss to log anything in the process. I would like this to be as detailed as possible where i would like to log all the involved processes.
Search for Service:
I am based in KalyaniNagar, Pune and I was looking across the area for various car detailers to get the ceramic coating done on my 2.5-year-old XUV500. It was very confusing for me to finalize the detailer considering the variations in the pricing I got from everyone. Pricing was ranging from 10k to 17k for 1-year warranty/service and 15k to 30k for 3 years warranty/service. Above that, the expertise, product used and workmanship was the main concern I had in mind.
Before proceeding, i would like to give a bit of background about the vehicle which will be involved. Its a very well-maintained SUV, regularly washed and maintained personally. Usually, no car-wash guy is allowed to wash this car unless in extreme conditions where I am too busy to take care of her. While washing, a pressure washer (Bosch Aquatec 125) is used to rinse 1st, followed by MJJC foam cannon using decent quality foaming liquid and then rinsing and drying using dedicated microfiber cloths from amazon basics. Although minor swirl marks are definitely there on the paint on the lower end of the spectrum that you would normally see on a 2.5-year-old vehicle.
Service Finalization:
After lot of confusions and researching I finalized a detailer, named MP Auto Studios based on the value for money quotation that I received, and I reached the detailing studio with the vehicle 10:00AM in the morning. He offered me to take a loaner vehicle so that I can go home considering the process would take over 8 hours to complete. I rejected the offer and decided to stay, to monitor the process throughout. Nice service and friendly staff is what they have there. I asked if I could capture videos and take photographs during the process and they approved the same promptly.
At the studio before commencing the detailing process 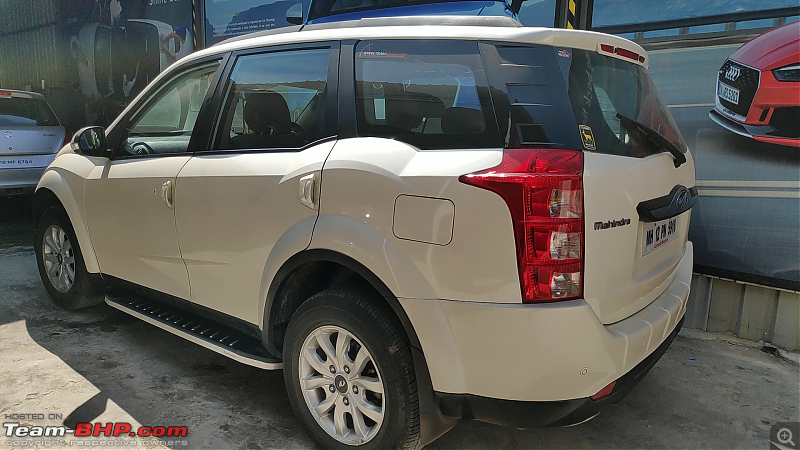
I would try to mention all the steps followed during the detailing to provide everyone a fair idea on the overall process that was followed.
Stage 1 Decontamination and Paint Correction:
Step 1 Bug / Tar Remover and initial wash:
Complete car was sprayed with bug/tar remover to get rid of all the tar marks and bug guts which were all over the paint as well as the plastic cladding's. Car was allowed to soak in it for around 4-5 mins and then a mild hand rub was given to agitate the chemical before it was completely rinsed off using a pressure washer.
I am not sure of the brand that was used here as it was sprayed using a generic spray bottle. However, it did its job well and all the bug guts and tar marks were easily removed with just a slight hand rubbing.
Although, the pressure washer was not a professional type and was a small one which did not seem to generate much pressure. Also, the foam used was not up to the expectations as it was not thick enough. But definitely not a deal breaker.
Post this initial wash and drying stage the car was moved to the detailing bay and the engine bay, alloy wheels, all lug nuts, logos and all other nooks and crannies were cleaned using soapy water and microfiber cloth.
Initial inspection and bug/Tar remover spray  Rinsing the car post the Bug/Tar remover application and agitation by hand
  Snow foam application
  Contact wash using a microfiber mitt post snow foam application
  Condition of the paint before paint correction
 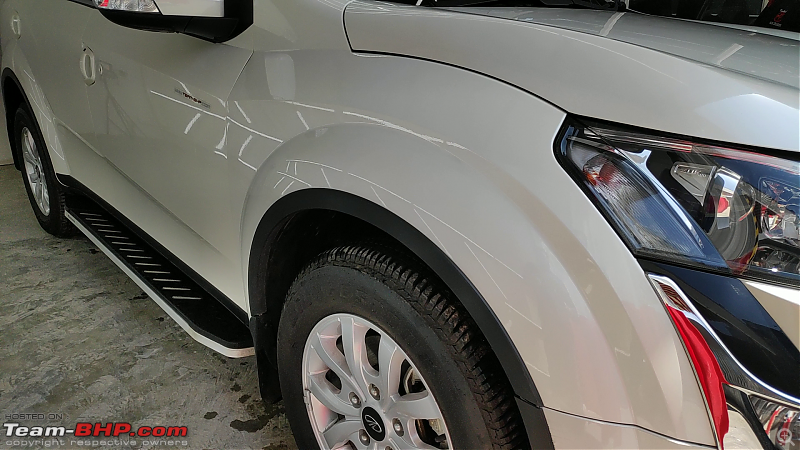 Tools used for the process
  Step 2 Masking
:
Now it was the time to mask all the plastic cladding's and all non-painted surfaces of the car to avoid them from getting damaged from the rubbing stage which was to be followed next. Professionally done using a masking tape.
All the plastic cladding's are being masked before starting the rubbing and paint correction process. 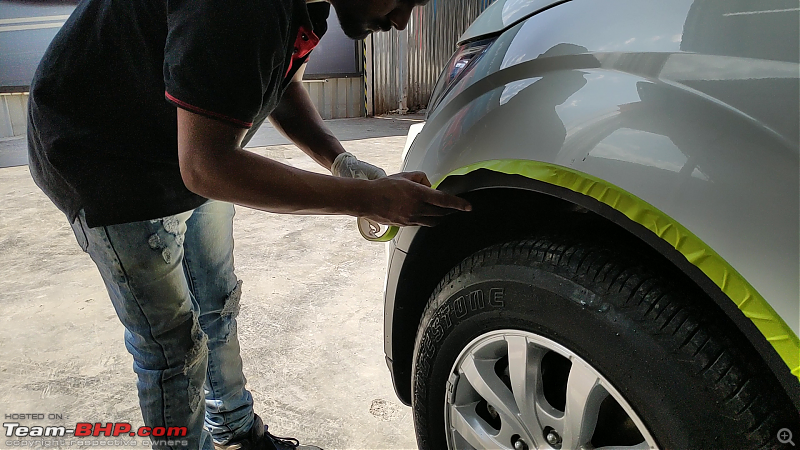 Step 3 1st Stage of Paint Correction - Rubbing
:
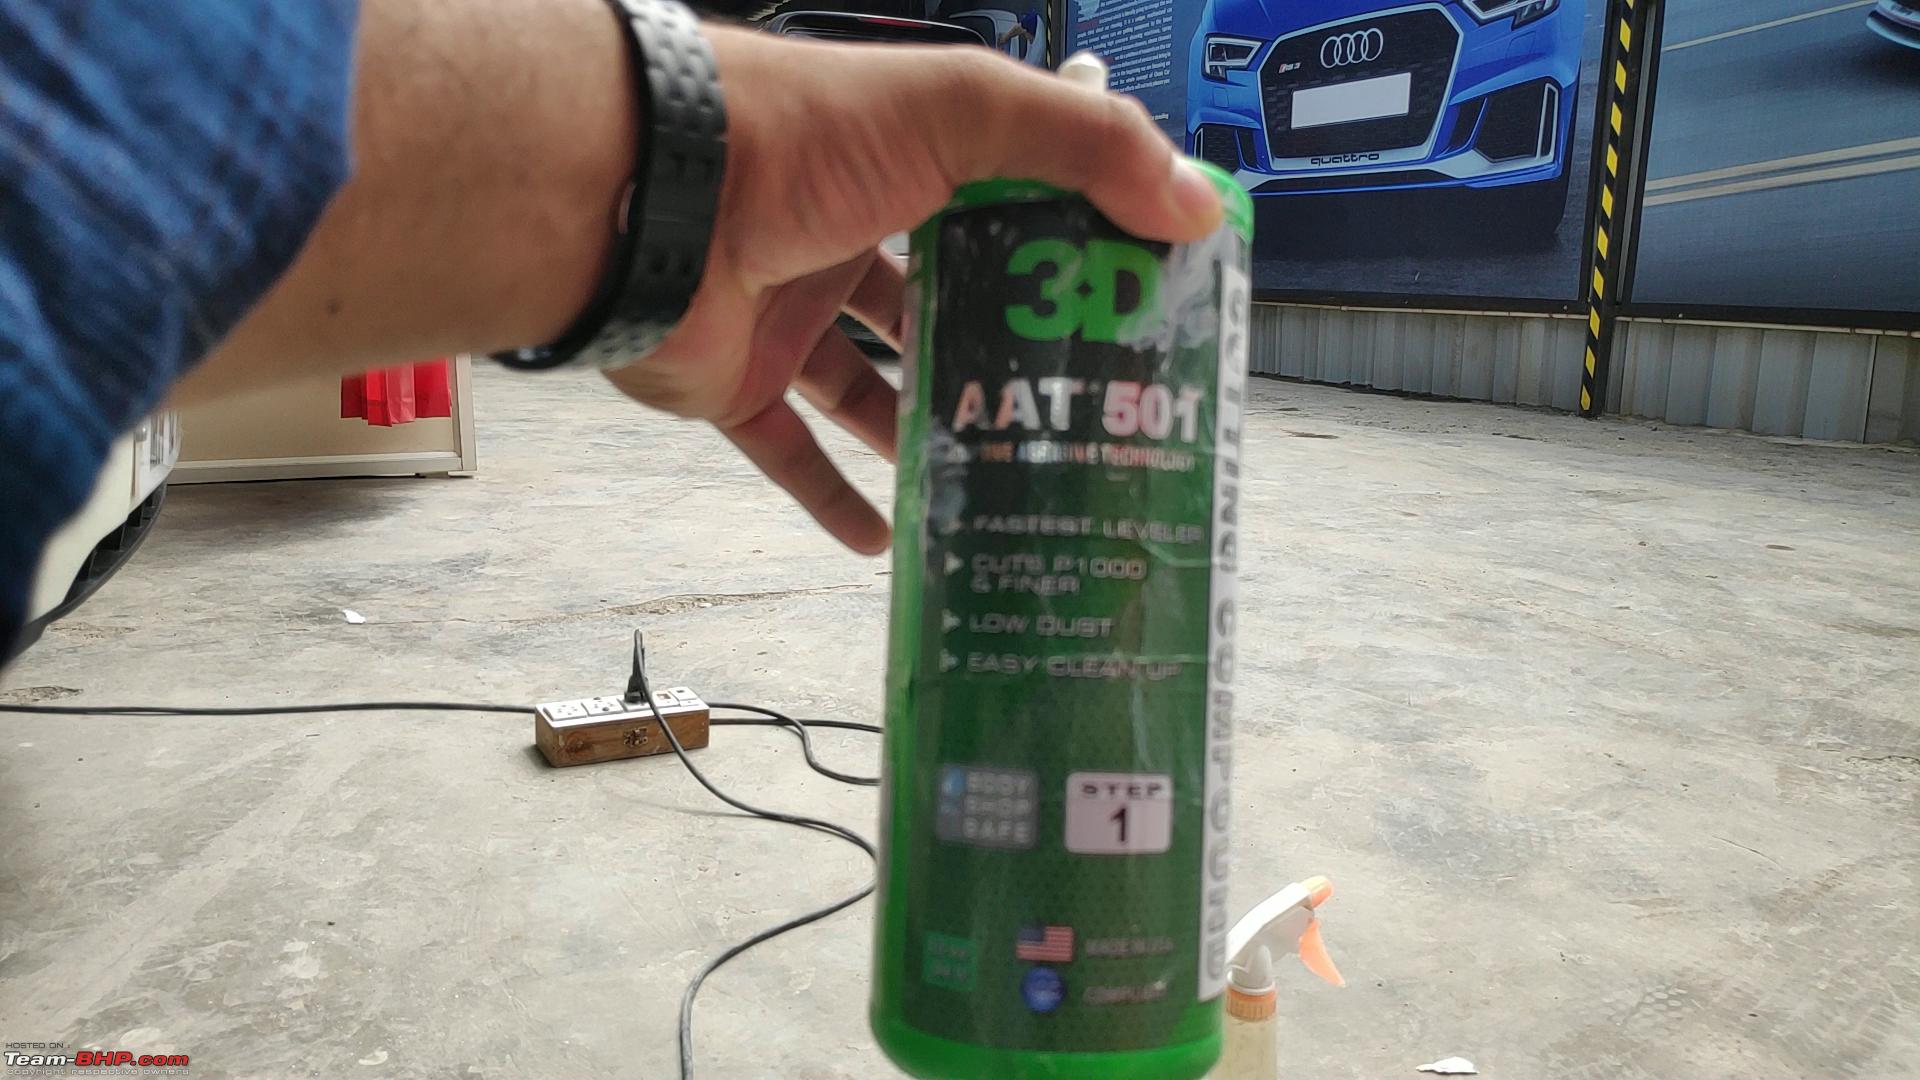
It was time to get rid of the swirl marks some scratches to bring back the oxidized paint to its original condition. To start off a 1000-grit rubbing compound was used from the brand 3D. This stage was completed using a regular, variable speed rotary polisher and a heavy cut soft microfiber Pad. This process was done one panel at a time. After completion of each panel, it was inspected using a torch light to see condition, post rubbing. Along with the painted surfaces all the glossy finished plastic surfaces as well as the headlights and tail lights were polished.
[i]3D branded 1000 grit rubbing compound[i]
 1st stage rubbing using a rotary polisher and 1000 grit compound
  Step 4 2nd Stage Of paint Correction - Rubbing
:
Here, a 2000-grit rubbing compound was used to take care of the minor scratches and remove the sanding marks that the 3000-grit compound might have introduced. Care was taken to clean each panel using a microfiber cloth before starting the detailing. This stage was completed using Rupes Bigfoot random orbital polisher and compound branded by Auto-Herb using a medium-cut sponge polish pad.
As expected, all the painted panels, glossy finished plastic panels, headlights, taillights were covered during this stage of correction.
2nd stage rubbing compound from Auto-Herb  2nd stage rubbing compound process using a Rupes DA polisher
  Step 5 Pre-Polish wash and Cleaning
:
Now it was time to clean the whole car and get it ready for the final polish/waxing stage. All the maskings that were done on the car were removed and the whole car was foam washed and dried before it was moved back to the detailing bay for the final polishing/waxing stage.
Step 6 Final polish to add Gloss:
Again the Same Rupes DA polisher with a new sponge pad was used in this stage with a Auto-herb final finish polish. Interestingly, there was minimal residue that was seen post this polishing stage and also the plastic cladding's were not masked anymore. This polish seem to have no effect on these cladding's anyways. Each panel was wiped clean using a clean microfiber cloth before starting with this final stage polish process.
With this stage done, we come to the end of the decontamination and paint correction stage.
Now the whole car is inspected using a torch light to see any remaining areas which still requires to be corrected. We found some couple spots which needed attention and they are corrected before we moved to the final coating stage.
Product Un-boxing & Prep Work Before the Grand Finale:
The whole car has been brought back to glory with the paint as good as new factory condition. Now it was time to provide it the protection for which i was here.
Unboxing the ceramic kit 
Before this process was started, the whole car was given a complete IPA wipe down to remove all the oils and residue from the previous products taht were used during the rubbing and polishing stages. Idea is to have a super clean surface before the Ceramic Coating process was started.
Kit which was used was the Nanolex branded SI3D which was a surprise to me. We did the un-boxing and the contents were revealed to me. The box had 1 applicator block, multiple application cloths, 1 bottle of ceramic coating(50ml), 1 spray bottle IPA(200ml) and 2-3 microfiber cloths for buffing.
I was happy to see the use of good branded products instead of some non-branded regular stuff considering the reasonable price which was on offer.
Nanolex Ceramic coating kit used on the car 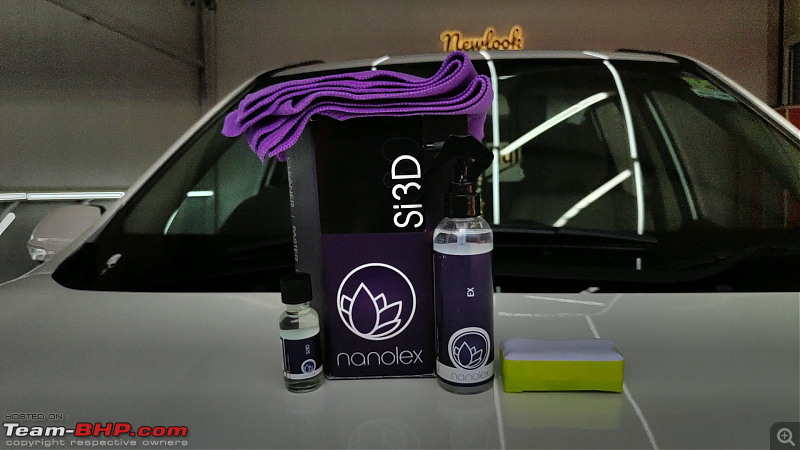 Final Application
:
The time has come to start with the final application of the coat at around 4:00PM in the evening after a complete detailing session of around 5 hours involving 3 people.
This stage involved 2 members who worked in sync with each other. 1 panel was handled at a time. 1 person was applying the coat to the panel and post application the other person was quickly wiping it down with 1 microfiber and then buffing the panel with another one.
The whole car was covered this way, with all the body panels including roof, headlights, taillights, glossy finished plastics, sunroof, alloys and the front wind-shield.
All the plastic cladding's and foot-steps were covered using another ceramic coat from another brand which I am not sure of. But the person in charge assured that it will have the same protection and hydrophobic effect as the Nanolex one.
It took us around 1.5 - 2 hours to complete the whole car and give all panels an even coat.
Application of the ceramic liquid to the applicator block  Application of the ceramic coat on the painted surfac
e
 Both the members working in sync to apply the coat and buff it off
  Applying the coating to the alloy wheels
 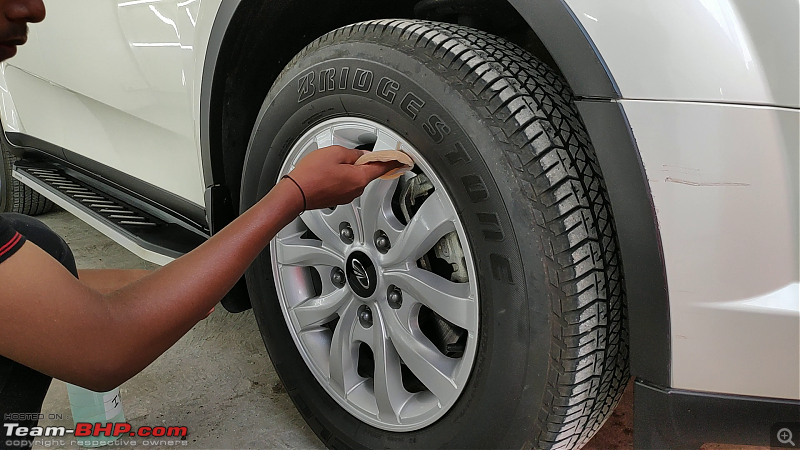 Application of the ceramic coat to the front wind shield
Before the delivery of the vehicle, the engine bay and the tyres were was dressed nicely giving it a final professional touch.
Engine bay detailed with the ceramic coating 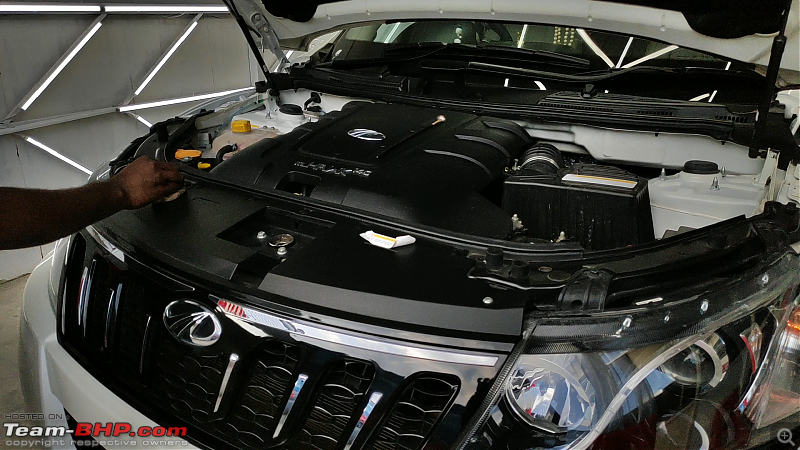
 Precautionary measures and Instructions post Ceramic Coating
:
The person in-charge suggested to keep the car in the studio overnight as it needs to be protected against water for at least 24 hours after this application. I assured him that I will properly take care of it in my private covered park and decided to take the car home.
Below are some of the instructions that needs to be followed post a Ceramic Coating:
1. Keep away from water at least 24 hours post application.
2. No washing for at least a week. Preferably 15 days.
Overall, I am happy with the work done and would recommend MP Auto Studios to anyone who is interested in getting their vehicles ceramic coated. These guys are new in the business and are providing very competitive rates compared to others in the market. There are some areas which I feel could have been handled better but nothing that seems to be a deal-breaker from my point of view.
I tried to list down some things that would have made the experience even better.
1. Better pressure washer equipment and better foam wash.
2. Claying to further remove the contaminants before rubbing stage.
3. Coating all the side and back window glasses.
I am yet to come across any detailer in India who can meet all my expectations

. These guys are good in what they are doing and most important point for me is they are using genuine products and know what they are doing.
Overall a very satisfied customer. I would try to post some snaps of the process and final results.
Also, would be keen on seeing the results post curing of the coating and an update in long term.
For now i would let the final pictures do the talking although the white color is not be best to justice to what has been achieved.


 12th March 2020, 14:18

 (46)
Thanks
(46)
Thanks


 Enjoy the shiny car
