| |||||||

| Search Forums |
| Advanced Search |
| Go to Page... |
 |
| Search this Thread |  150,630 views |
 21st March 2021, 17:48
| #1 |
| Team-BHP Support  Join Date: Nov 2013 Location: Coimbatore
Posts: 3,712
Thanked: 25,621 Times
| Rendezvous with The Universe | My Astrophotography Hobby Rendezvous with The Universe - My Astrophotography Hobby One of the hobbies that I picked up during my midlife crisis is astrophotography. The goal of this thread is to document my journey into this hobby. I will start with various hardware and software components that make up the astrophotography setup, followed by a brief history of how I got into this hobby, and how I put together my existing setup. I will then keep updating the thread with the images I manage to capture of the celestial objects, improvements I make to the equipment and the learnings – in short, I will use this thread as a journal of my astrophotography hobby. A couple of pictures to start the thread. The Orion Nebula (also known as Messier 42, M42, or NGC 1976) is a diffuse nebula situated in the Milky Way, being south of Orion's Belt in the constellation of Orion. It is one of the brightest nebulae, and is visible to the naked eye in the night sky. Orion nebula is situated at about 1350 light years from earth and is about 12 light years wide. This image is made of 60 minutes of data (30 x 2 minute exposures).  The Rosette nebula which is a birthplace of many stars and lies about 5200 light years from the earth. This means what we see in this picture is actually what this nebula was 5200 years back, essentially history. This image is an integration of 4.5 hours of data (90 x 3 minute exposures captured over two nights).  Last edited by graaja : 23rd March 2021 at 16:31. |

|  (135)
Thanks (135)
Thanks
|
| The following 135 BHPians Thank graaja for this useful post: | --gKrish--, 4WheelPilot, Abhinav V, abhisheksircar, adhd92, adi_sun, AheadAJ, Aish_4761, akbaree, alpha1, am1m, AmitRavi07, ampere, amrisharm, AnandB, Aravind_M92, Arun.K, arvind71181, badboyscad, bamaboy, batladanny, Bibendum90949, bigron, BlackPearl, BoneCollector, bsdbsd, catchjyoti, CEF_Beasts, Chetan_Rao, chhotagujju, classiccurves, CLIX, cogWheel, CrAzY dRiVeR, DarkerThanBlack, darwin, Deadpool, debuda, defactorake, DigitalOne, Divya Sharan, doxinboy, Dr.AD, DriverNo.420, drrajasaravanan, echo77, fastturtle10, FloatingCanvas, Gannu_1, Godzilla, GTO, Guna, guyfrmblr, haisaikat, Hayek, hellraizer, hmansari, HP-BHP, InControl, jeetdholakia92, Jeroen, JJay, jothishX, Karthik.guru, KarthikK, kat, Kkumar, kochicar, KrisTvpm, KumaravelS, laferrari, lapis_lazuli, libranof1987, maddyg, maximus., megazoid, N33raj, neelkumar, Nempuguru, nikhil.neon, Nino, nitinkbhaskar, ObsessedByFIAT, PearlJam, PGNarain, pineapple_ameet, poised2drive, pranavmichael, PSG, PSOPS, Punatic, puntOOs, R2D2, rahulananda, ramnaresh_2000, rbp, RJ2285, roy_libran, rravik, Rudra Sen, Samba, Samfromindia, sandeepmdas, sandeepmohan, Santoshbhat, sasta_rider, sayakc, Scarlet_Rider, shancz, Shanksta, ShortShifter, Skyline_GT, snaseer, SnS_12, SohailPistawala, SS4, Storme5257, suhaas307, tchsvy, texmonster, Tgo, theexperthand, Thermodynamics, Turbanator, TurboGuy, Turbojc, turboNath, uday.ere, V.Narayan, Venom_rider, Viju, Vikram Arya, wheelguy, ysjoy, zavegur |
| |
| The following 39 BHPians Thank graaja for this useful post: | am1m, arjithin, Arun.K, badboyscad, batladanny, Chetan_Rao, Deadpool, Divya Sharan, Dr.AD, fastturtle10, FloatingCanvas, Gannu_1, gaurangsaini, Godzilla, GTO, jeetdholakia92, KarthikK, kat, Kkumar, KumaravelS, libranof1987, maximus., Nempuguru, nikhil.neon, praveen789, PVS, R2D2, RJ2285, Samba, Scarlet_Rider, shancz, ShortShifter, SnS_12, suhaas307, tchsvy, Tgo, theexperthand, uday.ere, wheelguy |
|
21st March 2021, 21:12
| #3 |
| Team-BHP Support Join Date: Nov 2013 Location: Coimbatore
Posts: 3,712
Thanked: 25,621 Times
| re: Rendezvous with The Universe | My Astrophotography Hobby Fundamentals of Astrophotography In astrophotography, we are photographing objects that are astronomically far away from us. The objects we see today are from light rays that left the objects thousands, hundreds of thousands, millions and billions of years before. These objects are so faint that our eyes - even when we view these through powerful telescopes, cannot resolve the colour information. To resolve colour information, we have to collect light for long durations, sometimes in hours. To do this we do multiple exposures of shorter durations like 2 minutes, 3 minutes or 5 minutes etc. and add all these pictures. The equipment we use in astrophotography work together to achieve this. Astrophotography has two major components image acquisition and data processing. Image acquisition involves various hardware and some software to control this hardware. Data processing is done in software. Image Acquisition: Below is the picture of the hardware setup I use. This is somewhat in between a beginner to intermediate setup.  Equatorial Mount: All celestial objects move across the sky due to the rotation of earth. If I do a 3-minute exposure of an object, it will have moved a lot in that 3 minutes. Because of this, stars will not be a point, but will be a line. So, we need to move the camera at the same speed as the objects move in the sky. This is called tracking. The equatorial mount does this. The mount rotates at the speed the earth rotates, thus keeping the objects in the same place on the image sensor of the camera. A good equatorial mount can keep the objects within a pixel for as long as 1 minute or even more. The mount I have is EQ6-R Pro made by a company called Skywatcher. It is an excellent mid segment mount. Note: There is another type of mount called the Alt-Az mount which is cheaper. This mount also tracks the objects in the sky and keeps the objects in the center of an eye piece. But the objects rotate around a center. So, this mount is suitable for visual astronomy, but not for astrophotography. They can still be used in astrophotography with very short exposures like a few seconds, but this will not work with very dim targets. Main Telescope: This is the telescope that collects light from the objects and focuses on to the sensor of the camera. There are many types of telescopes like Newtonian reflectors, refractors, schmitt cassegranian etc. These telescopes come in various sizes and focal lengths. The larger the focal length, the farther the telescope can see. The larger the aperture, the more light they can collect. In general, for wide field astrophotography (shooting large objects like nebulae, large galaxies etc), refractor telescopes are preferred. For smaller objects like planets and distant objects we need longer focal lengths. Refractors become prohibitively expensive at these focal lengths and reflectors are used. The telescope I have is Gran Tourismo 81 made by William Optics. It has a focal length of 480mm. I also have a 6" Schmidt Cassegranian telescope which I will be using for shooting smaller objects. Main Camera: The camera records the light collected by the telescope. We can use a cell phone, or a DSLR or a dedicated astrophotography CCD/CMOS camera. As we are shooting very faint objects with very long exposures in minutes, the noise performance of the camera is very important. Cell phone cameras can be used to shoot bright objects like moon or planets. But to shoot dim deep space objects like nebulae and galaxies, we need good DSLRs or dedicated CMOS/CCD cameras. The camera I have is ASI 2600MC Pro, a dedicated astrophotography camera made by a company called ZWO. It has a 26-megapixel APS-C sensor, and a cooler that can cool the sensor to 35 degrees below ambient. This is an important feature in astrophotgraphy cameras. The lower the temperature, the lower the noise and better the picture. We usually shoot pictures at 0, -5 or -10 degrees depending on the ambient temperature. Very advanced photographers use monochrome cameras. They use narrow band filters in front of monochrome cameras and capture individual wavelengths like red, green, blue, hydrogen alpha, etc., and then combine these individual outputs to get the full colour output. But this equipment is much more expensive and need 4x or 5x the exposure times compared to a colour camera. Guide scope and guide camera: Though a good equatorial mount can track objects within a pixel for long durations like a minute, they will still have some drift and this drift will become noticeable when doing exposures like 3, 5 or 10 minutes or more. This is where a guide scope and a guide camera come in. The guide scope has a shorter focal length and the guide camera has a smaller sensor size. A software chooses some random star from the guide camera and keeps tracking how the star is moving in the frame. Whenever the star drifts on the frame, it issues a correction signal to the equatorial mount. This correction signal along with the equatorial mount's tracking will keep the objects in the same place even for an hour. Below is a graph showing the guide setup working. The solid lines show how the equatorial mount is drifting off in two axes. Whenever there is a drift, the guide software issues the correction pulses (the short +ve and -ve pulses ). As soon as the pulse is issued, you can see how the solid line turns back. 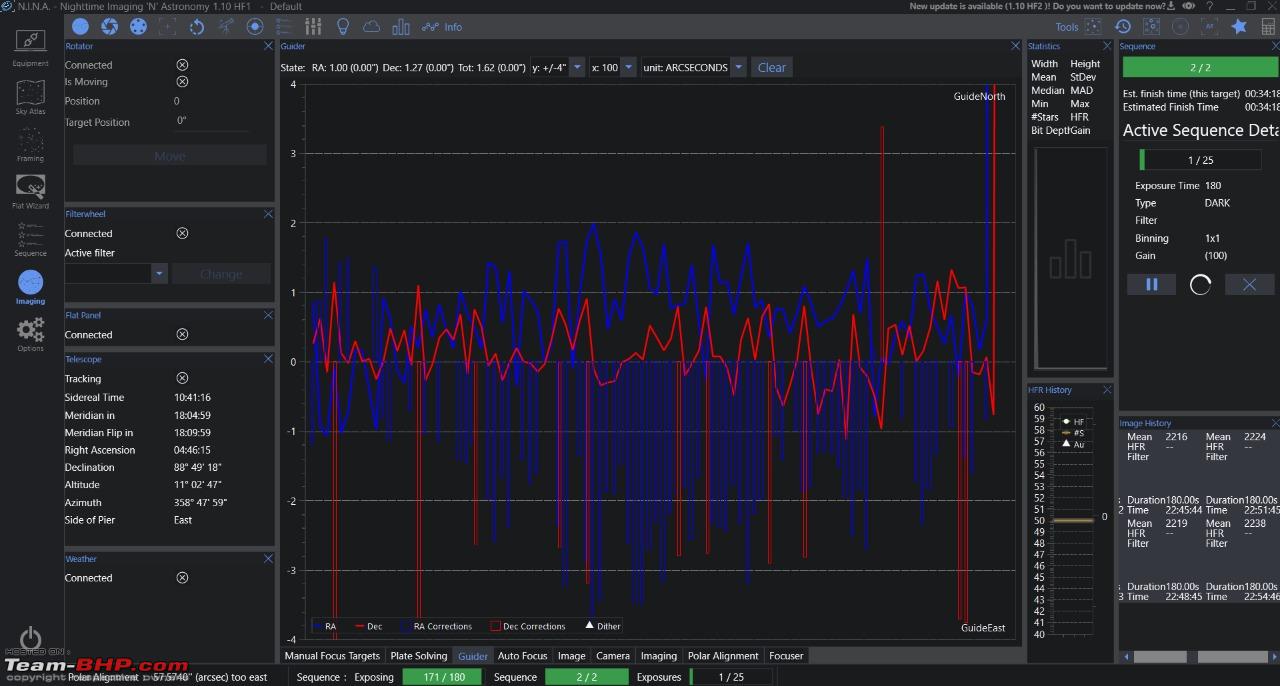 Electronic auto focuser: For good photographs, we need to get a perfect focus with pointed stars. We generally use a manual focus technique using something called a bahtinov's mask. When doing multiple exposures throughout the night, it is sometimes good to check the focus after say every two hours. An electronic auto focuser can be used to achieve this without having to manually adjust focus everytime. An auto focuser has a motor that is coupled to the focus shaft of the telescope. A software occasionally analyzes the focus of the acquired image and and drives the motor to get the perfect focus. Mini PC: To control all these equipment many software are required. We can either use a laptop running these software or use a mini PC or even a Raspberry Pi to control the equipment. I have chosen to use an Intel Mini PC with an i7 processor to run all the software. Once I set up all the equipment in my terrace, I can access this Mini PC through remote desktop from inside my home and control the equipment to point to various objects in the sky, set up exposure times etc. What I have described above is the hardware part that is used to acquire the images. We also use some software to control this hardware. Some well-known software for image acquisition are SharpCap Pro, APT, N.I.N.A, SGP (Sequence Generator Pro). These software are used to turn the telescope to any chosen object (it is very difficult to manually point to these objects as they are so small), focus on the object and program the exposure sequence like how many exposures to take, length of the exposure, camera settings during the exposure etc. I use a software called N.I.N.A. Below are a couple of screenshots of N.I.N.A working on the mini PC controlling the gear (accessed through remote desktop from my desktop PC). This screen shows the sequence of exposures. In this case, I have programmed 30 exposures of 120 seconds, 20 exposures of 30 seconds and 20 exposures of 15 seconds. 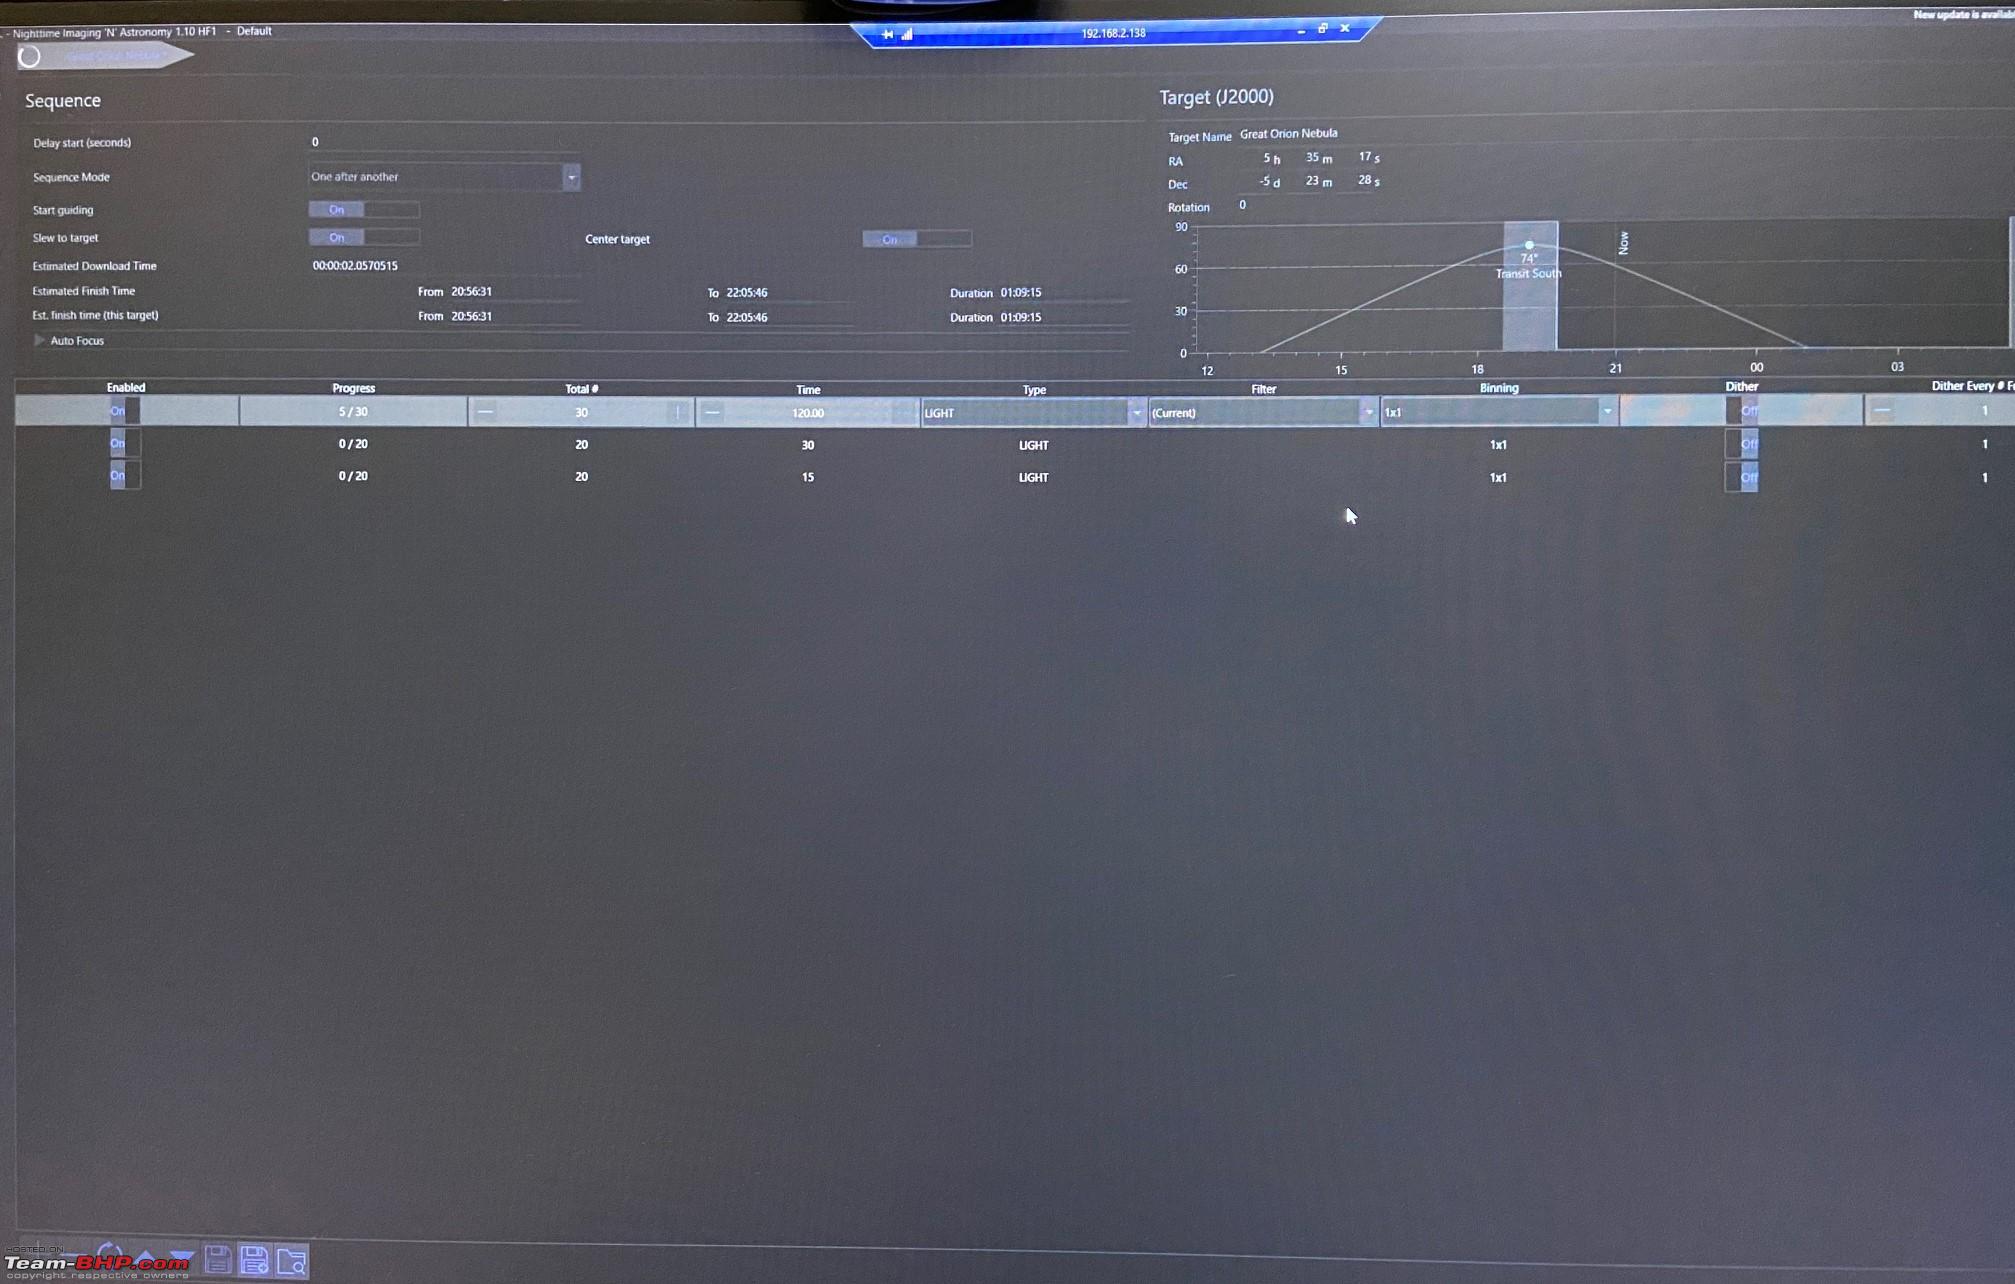 This screen shows the status of image acquisition. 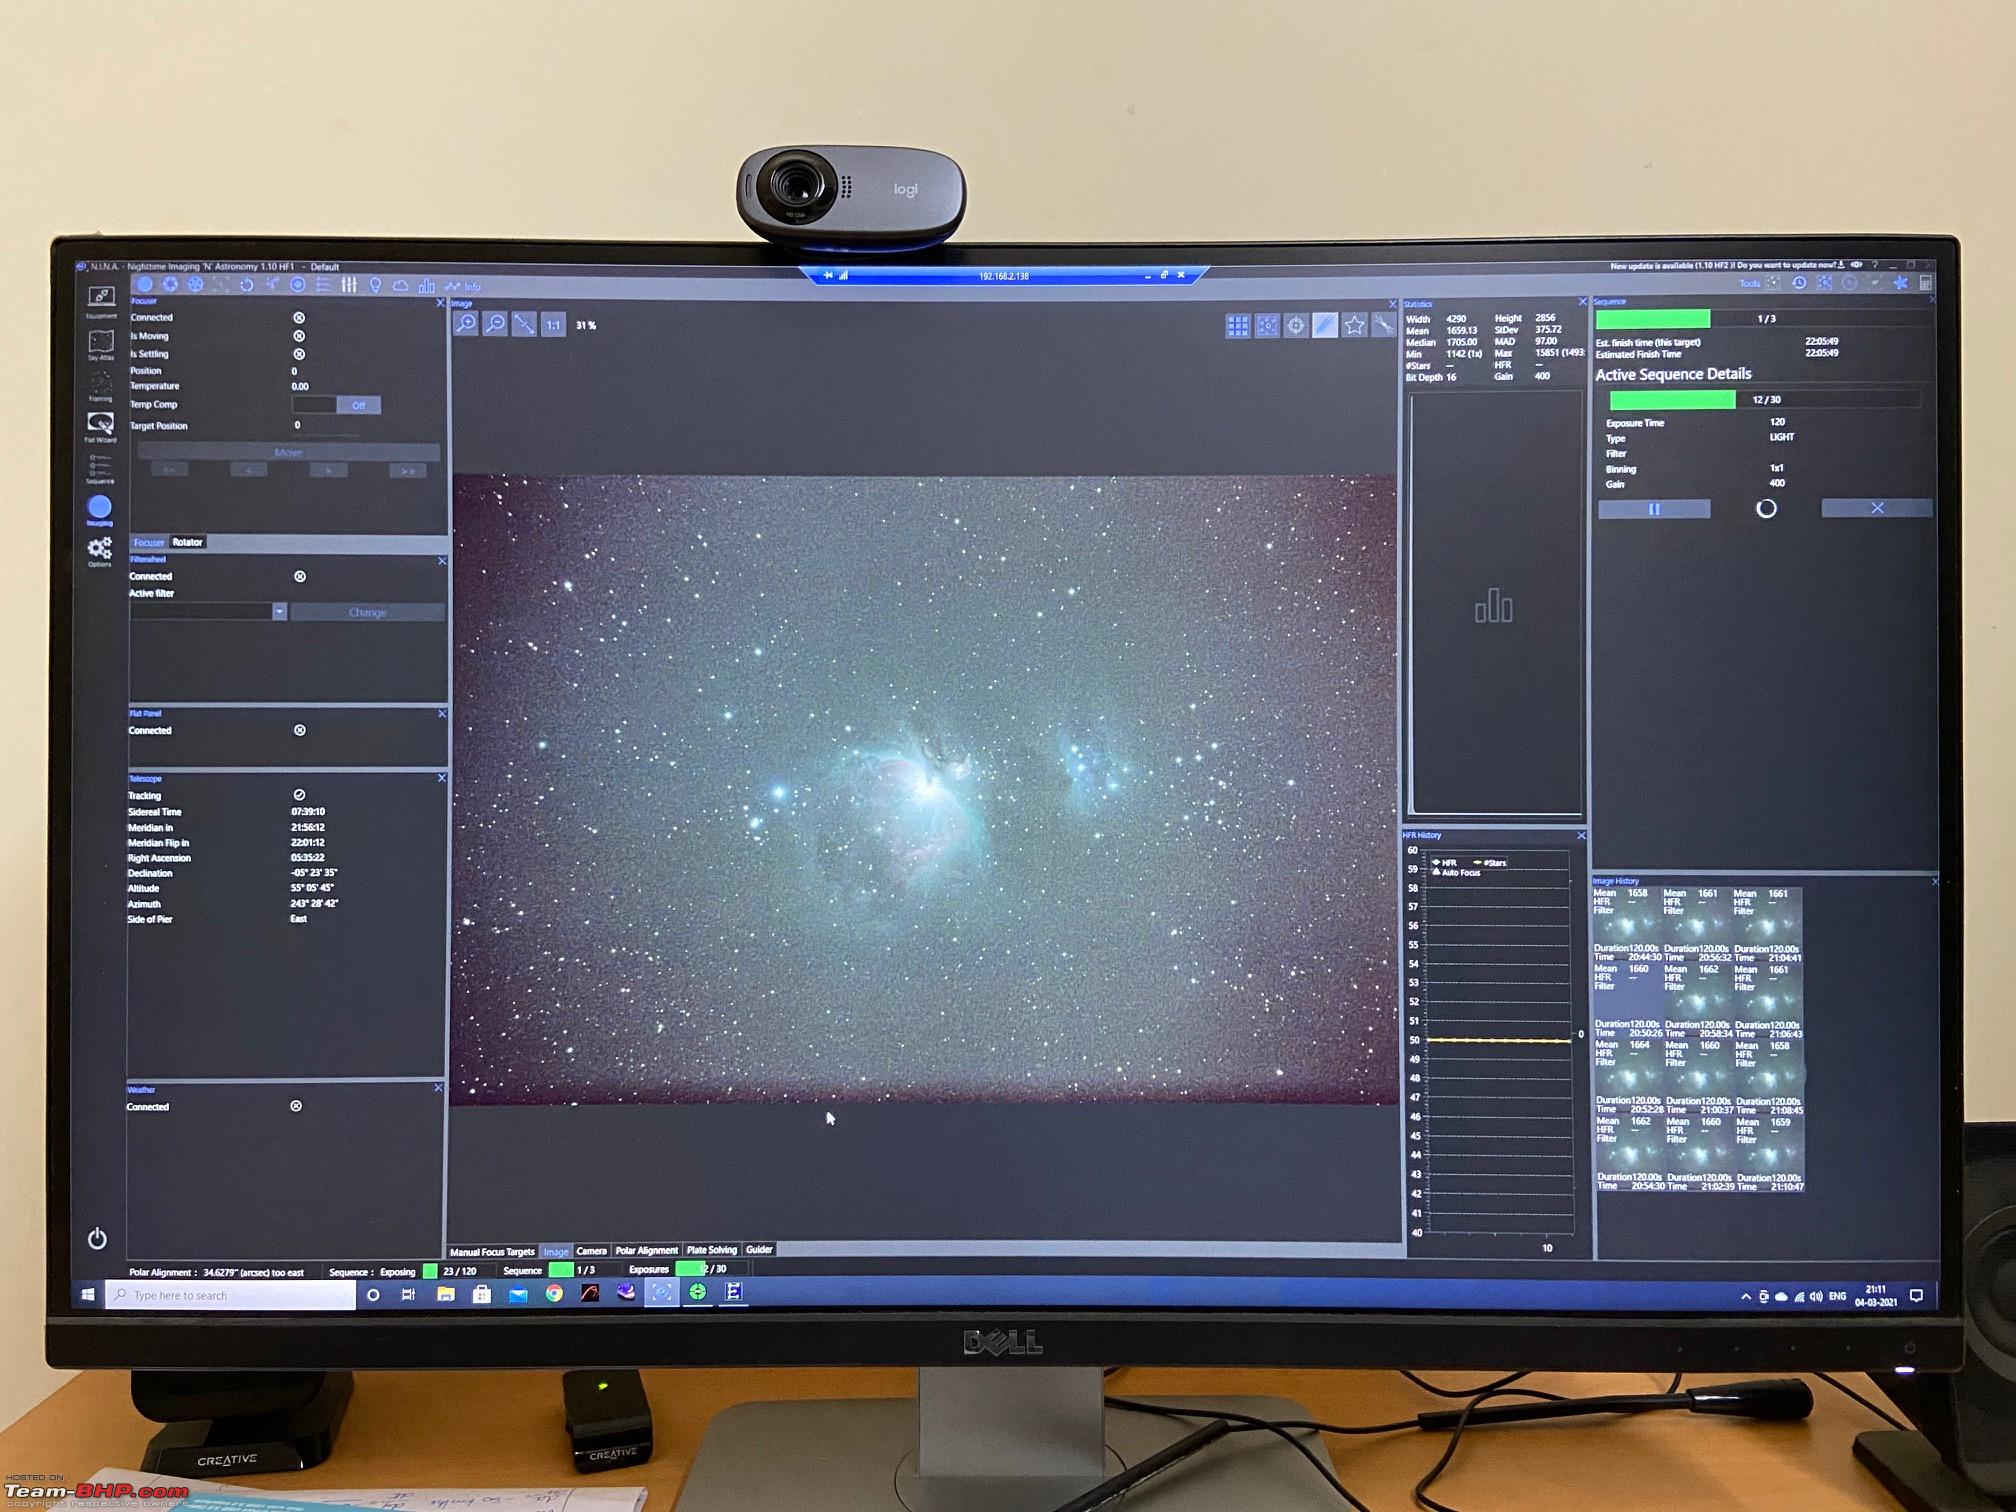 Post Processing: Once image acquisition is complete, we use other software to process the images. This process includes various steps like calibrating the images, integrating the images, applying various processing like histogram, background correction, noise reduction etc. The amount of processing depends on how far the objects are and how strong or weak the signal collected from these objects is. The first part of processing is called stacking. In this process all the individual exposures are aligned and stacked. This adds up the signal and reduces noise thus creating the picture of the object. Some software used for stacking are Deep Sky Stacker, Pixinsight etc. Once stacking is completed, post processing is done to bring out the object. This can be done using software like Photoshop, Gimp, Pixinsight etc. I use Pixinsight as a single tool to do both stacking and post processing. Below screenshot is a "work in progress" of processing in Pixinsight. Let us take a look at various stages of processing. I will use the Rosette nebula processing as an example. Below is a single 3-minute exposure right out of the camera. You can see that the nebulosity (that cloudiness) of the nebula is almost invisible. 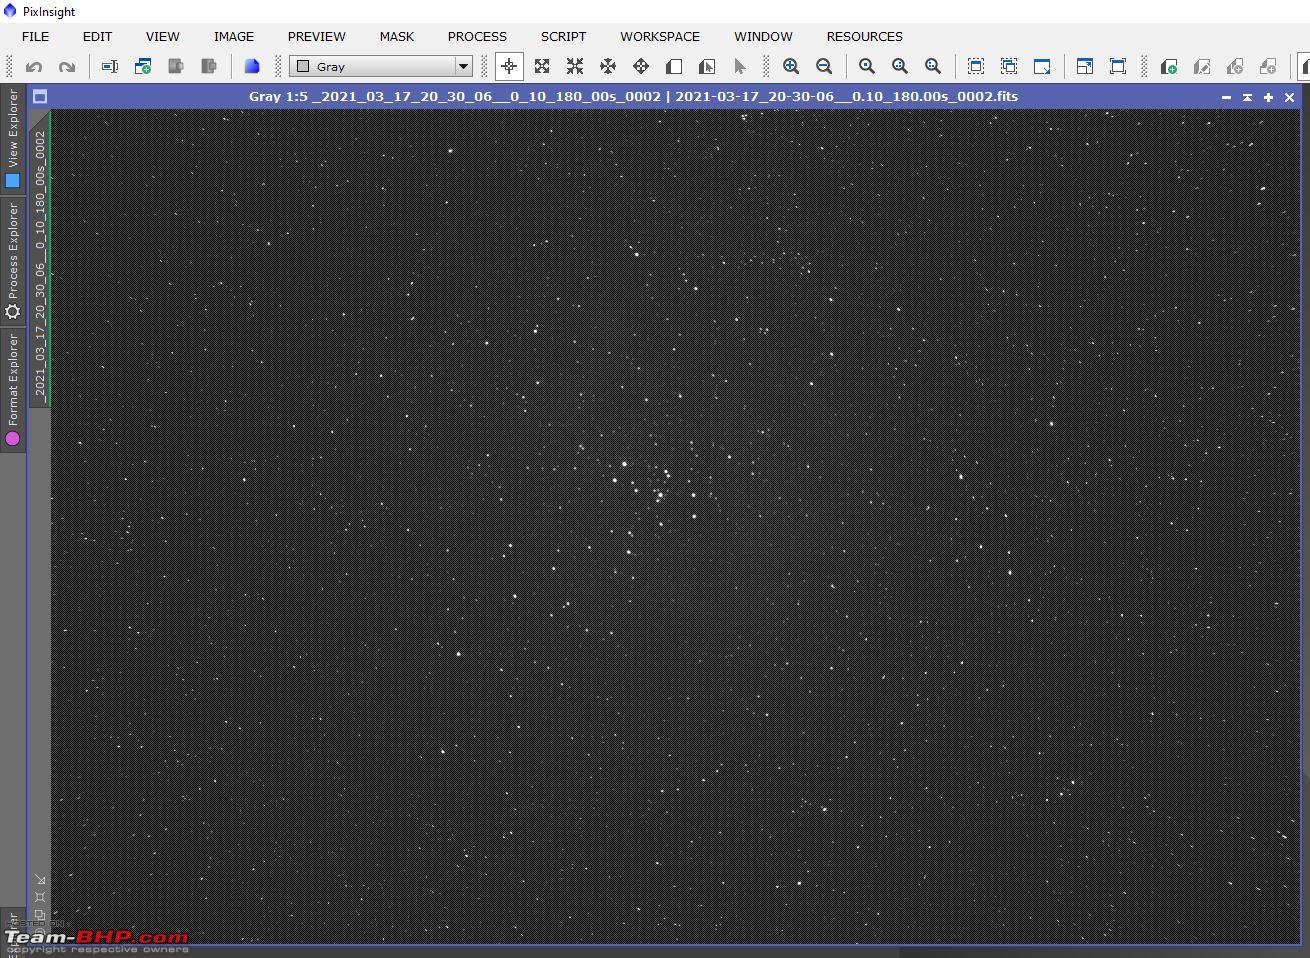 Here is the output when 90 such images have been aligned and stacked. This now shows the nebulosity very clearly. But notice how the background has a gradient. The top left of the image is dark, and the bottom right is bright. This is because of various factors like light pollution at the horizon, vignetting in the optics etc. This can be corrected using some algorithms in the processing software.  Below screenshot shows the background information extracted from the image. See how the gradient is accurately reproduced.  Once background is extracted, the pixels in the original image are divided by this extracted background to compensate the gradient. Below is the result of this operation. See how the background is almost uniform now.  All that is left to do now is work on brightness and contrast of the image to bring out the final image. There are many other advanced processes that can be done on the image to bring out more details, especially on images that have lot of brightness variation like that of galaxies which have a very bright core, but very dull edges. Also, in some pictures where there are thousands of stars in the foreground preventing the nebulosity to come out, there are processes to de-emphasise the stars. I did this process on this Rosette nebula. But I will not go into the boring details. Below is the result from this post processing. Though lot of processing happens, this is all to remove unwanted noise and to bring out the actual signal which is the faint light recorded on the sensor. 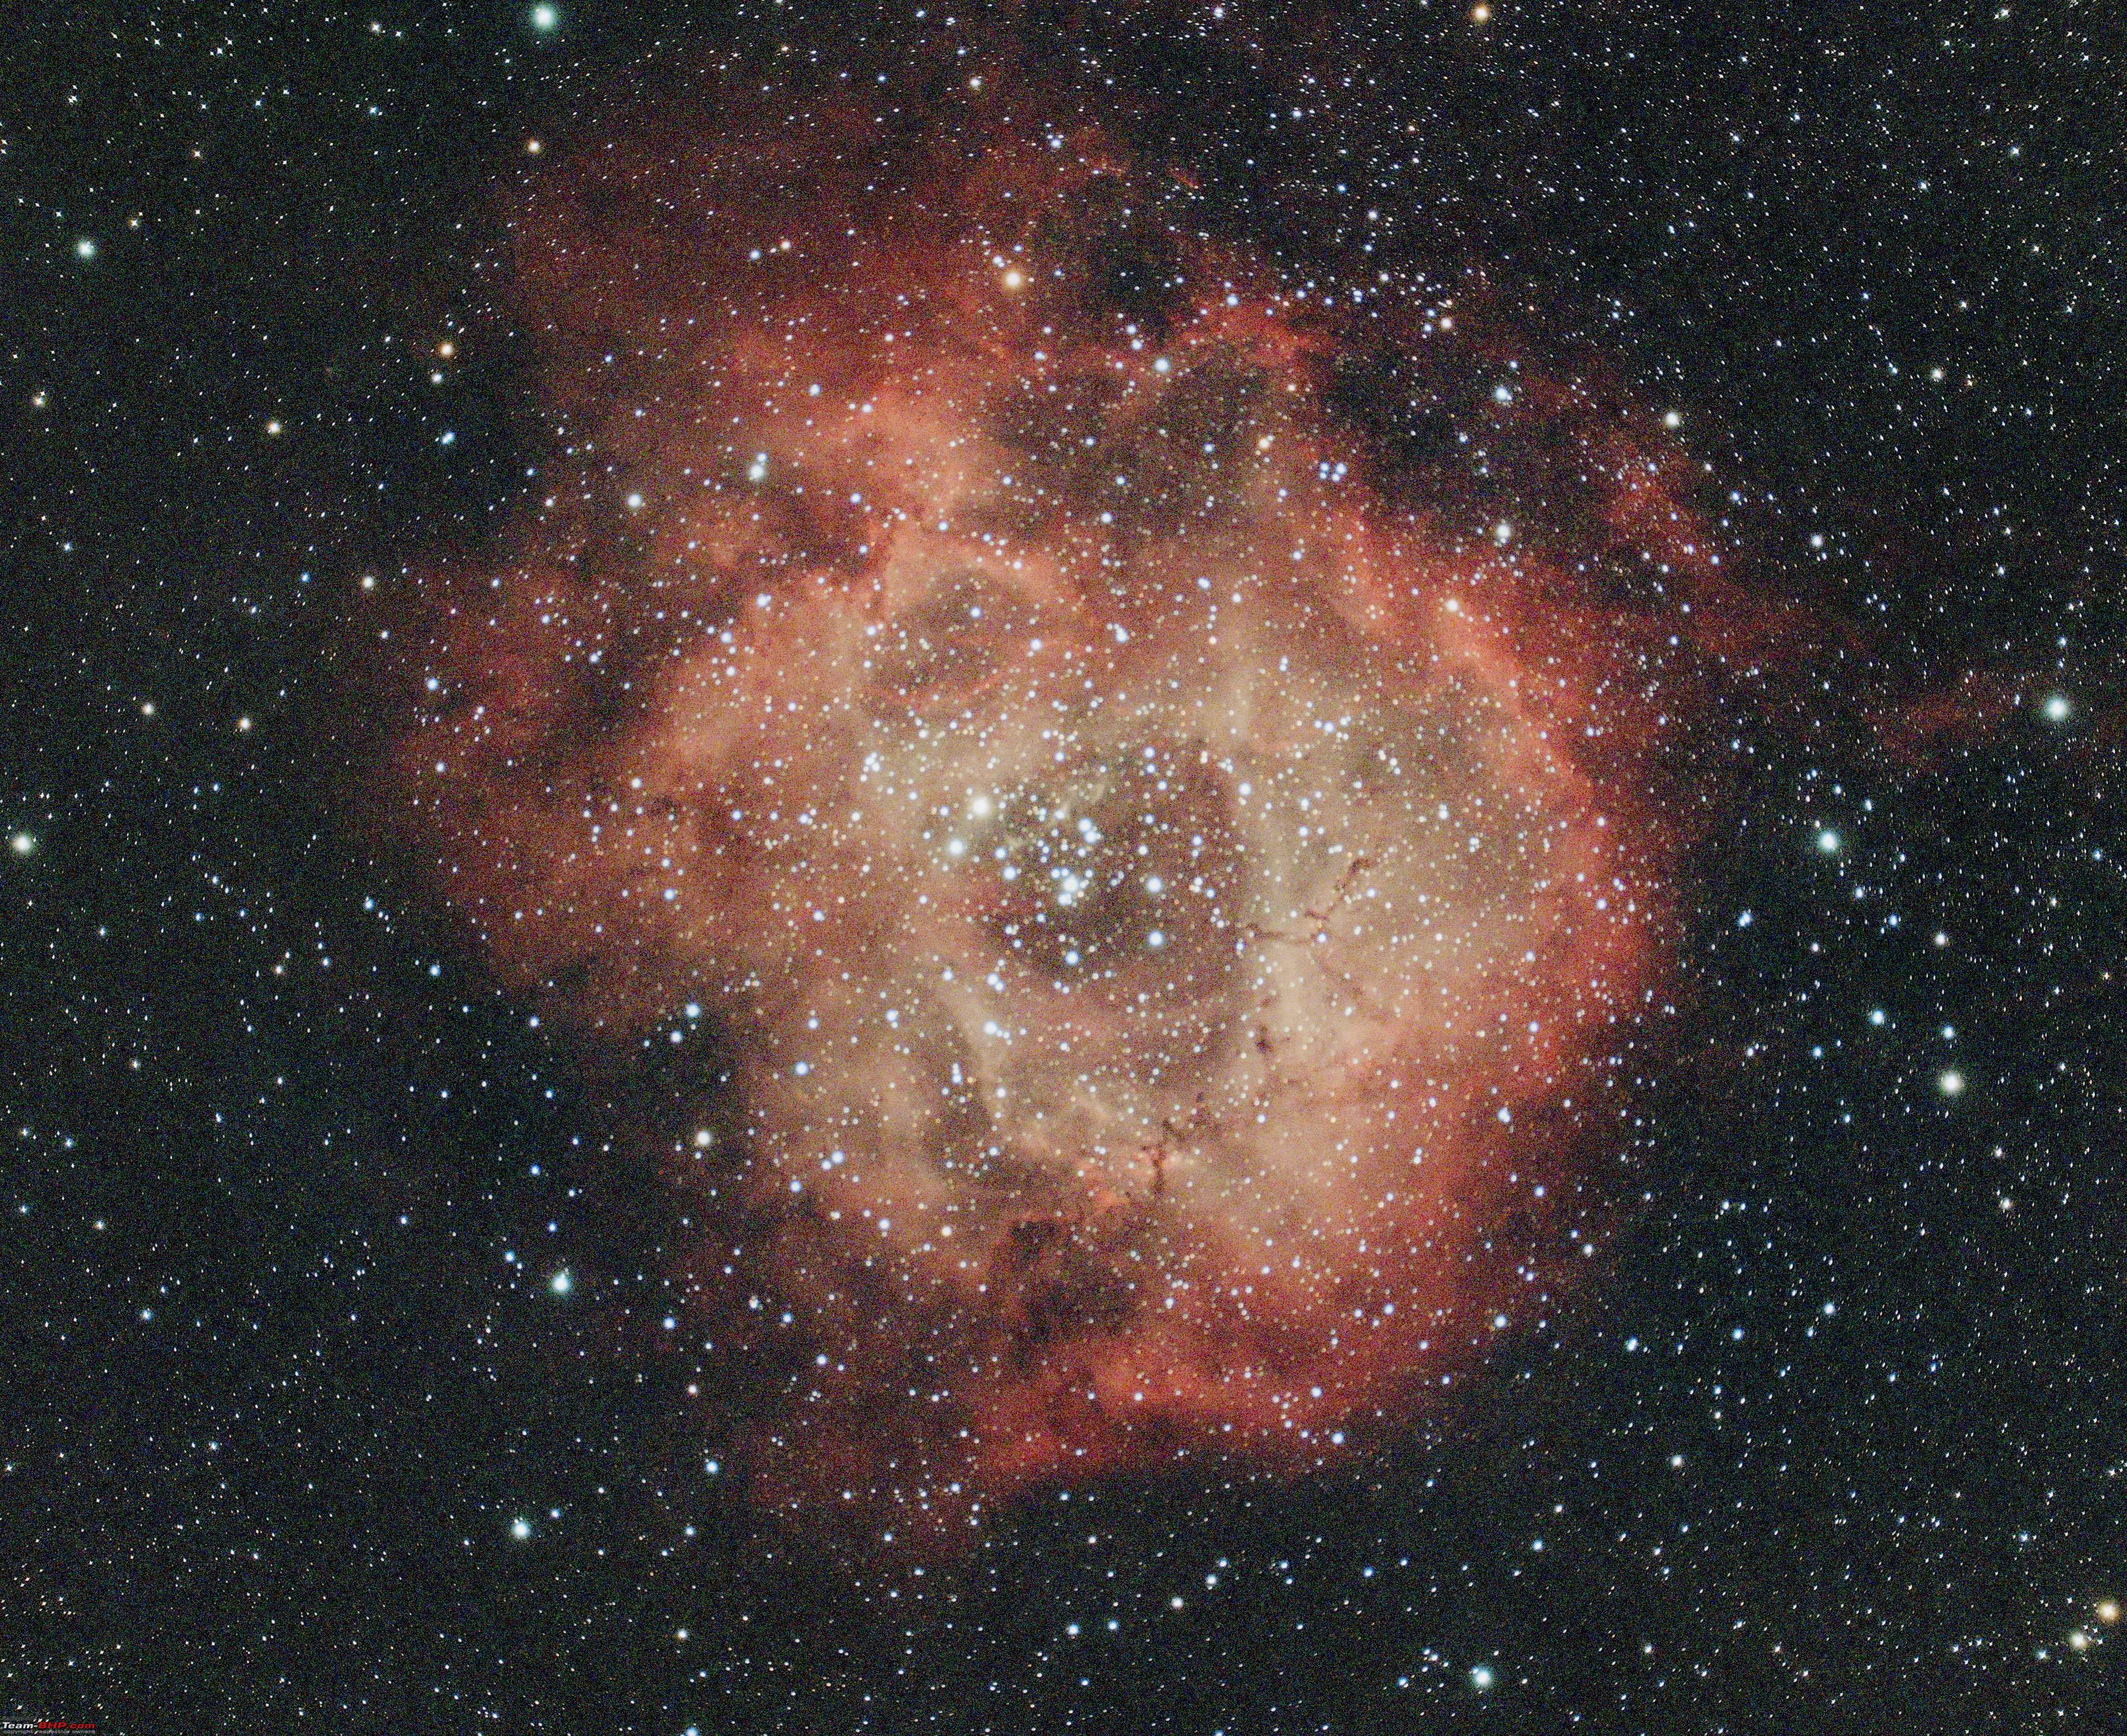 Note: There are so many other details that I have not covered above to keep it simple without getting too complex. Some of these points are: 1. The images out of the camera are in something called linear scale. They need to be stretched to be of any meaning. All cameras do this stretching before storing images as JPEG. In astrophotography, this is done manually. 2. There is a step called calibration before stacking. To further reduce noise and other distortions introduced by the optical system (like dust, chromatic aberrations etc), reference images are taken by closing the telescope (called dark frames), placing a white clothe in front of the telescope (called flat frames) and a few more. These images are individually applied to each exposure compensating for all the noise and distortion. Last edited by graaja : 21st March 2021 at 21:21. |
|
| (104)
Thanks
|
| The following 104 BHPians Thank graaja for this useful post: | --gKrish--, 2himanshu, Abhinav V, am1m, amol4184, AnandB, ant_vas, ariesonu, Arun.K, ash22, AtheK, BlackPearl, bsdbsd, CEF_Beasts, Chetan_Rao, chhotagujju, classiccurves, click, Deadpool, debuda, defactorake, Dhillon, Divya Sharan, Dr.AD, DriverNo.420, drrajasaravanan, Durango Dude, echo77, fastturtle10, fiat_tarun, FloatingCanvas, Gannu_1, Gansan, gauravanekar, GKR9900, Godzilla, gr8guzzler, GTO, guyfrmblr, haisaikat, Hayek, huntrz, InControl, Jeroen, KarthikK, kat, Kkumar, KrisTvpm, Krtikn, libranof1987, LoneRidder, maximus., mmxylorider, mugen_pinaki27, N33raj, nasirkaka, neelkumar, Nempuguru, Newpunter, Nikhildrao, NirmalK, nitinkbhaskar, ObsessedByFIAT, PearlJam, praveen789, PSOPS, R2D2, RaceHorse, rajesh1868, rjainv, Rudra Sen, saikarthik, Sail, Samba, Santoshbhat, sayakc, Scarlet_Rider, shancz, Shiftlock, ShortShifter, Shreyans_Jain, snaseer, SnS_12, Sting, suhaas307, tchsvy, Tgo, theexperthand, Thermodynamics, Turbanator, TurboGuy, uday.ere, universal, V.Narayan, v12, varunanb, Viju, Vikram Arya, Vishal.R, warrioraks, wheelguy, xja1, yosbert, ysjoy |
|
22nd March 2021, 09:13
| #4 |
| Team-BHP Support Join Date: Nov 2013 Location: Coimbatore
Posts: 3,712
Thanked: 25,621 Times
| re: Rendezvous with The Universe | My Astrophotography Hobby The Journey: It all started when I was in primary school. My dad would sit with me on the terrace with a printed sky map and point me the constellations – The Orion, The Great Bear, Ursa Major, The Pleiades. We did not have any binoculars or telescopes then. Just star gazing with the naked eye. Then life happened and astronomy was forgotten. But I could spot Orion and Ursa major anytime I look at the sky. The second event that rekindled this happened about 15 years back (it could be 12 years, I don’t exactly remember). I was very active then in birdwatching and we had this very active group which was guided by Dr. Pramod of SACON (Salim Ali Center for Ornithology and Natural History). One of the birdwatchers was Prof. Sakthivel from PSG Institute of Technology. He was a very active astronomer who had been doing star watching for many years (I think decades). He had this awesome 4” SCT (Schmidt Cassegranian) telescope with an automatic tracker. He organized a star gazing night at SACON which was a nice dark site. He showed us planets like Jupiter, Saturn, Mars etc., and other objects like Orion nebula, clusters like Pleiades etc. That was the first time I saw the rings of Saturn. Watching Saturn float very close in front of your eyes in that eyepiece with those rings was just surreal. At that time, I seriously considered getting a telescope. But the availability and affordability were limiting factors at that time. And this time I put astronomy in my bucket list. The final trigger that kickstarted the journey happened in November 2019. Rajiv, a colleague of mine with a passion in astronomy (he is building his own telescope including making the mirror himself), brought up the topic of astronomy during one of our discussions, and one thing led to another and I ended up buying a Celestron 6SE, a 6” SCT telescope with automatic tracking. This is the same series that I had seen Prof. Sakthivel use 15 years before. Below is a picture of this telescope. 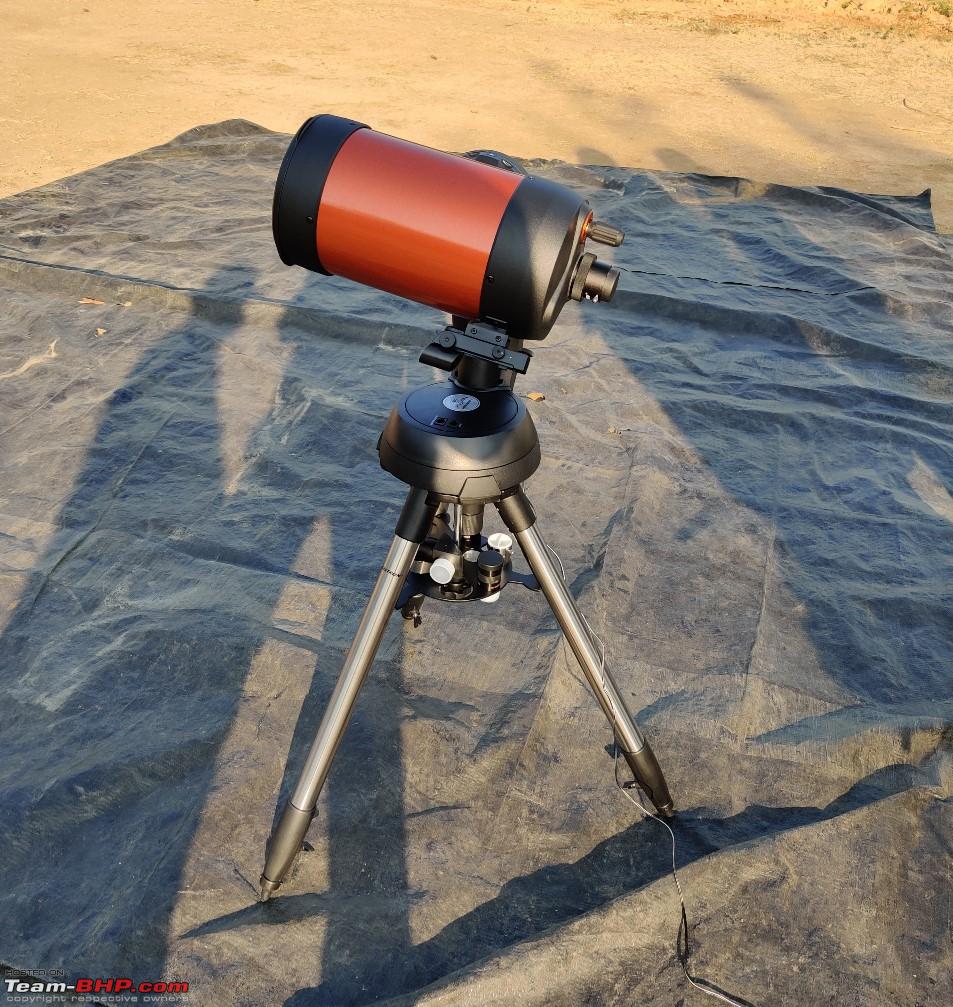 This was an impulse purchase and at that time, I had no idea that I would get into astrophotography within a couple of years. My first star gazing event – by Vijay Kapoor at Chiguru farms, Bangalore: Though I got the telescope in November 2019, I could not put it to use due to the clouds and monsoon. Then through a friend, I came to know about a star gazing event organized by Mr. Vijay Kapoor at Chiguru farms near Bangalore. We stayed in tents at the star gazing site looking at various celestial objects throughout the night. Vijay gave a very good introduction about astronomy in the evening before we started the star gazing. I learnt a lot in this event from Vijay – like calibrating the spotting scope, performing a two-star alignment on the scope to use its tracking functionality etc. Vijay has some super advanced gear for both visual astronomy and astrophotography. This event opened the world of visual astronomy and astrophotography to me. Though I was not planning about getting into astrophotography at that time, I learnt an important lesson from Vijay during the event. If you are looking to get results in astrophotography, starting cheap is not an option. You would be spending more time solving problems than photography. It is better to save up and get better equipment the very first time to avoid all these hassles. This lesson was the key in all my equipment selection that was to come. A few pictures from this event. 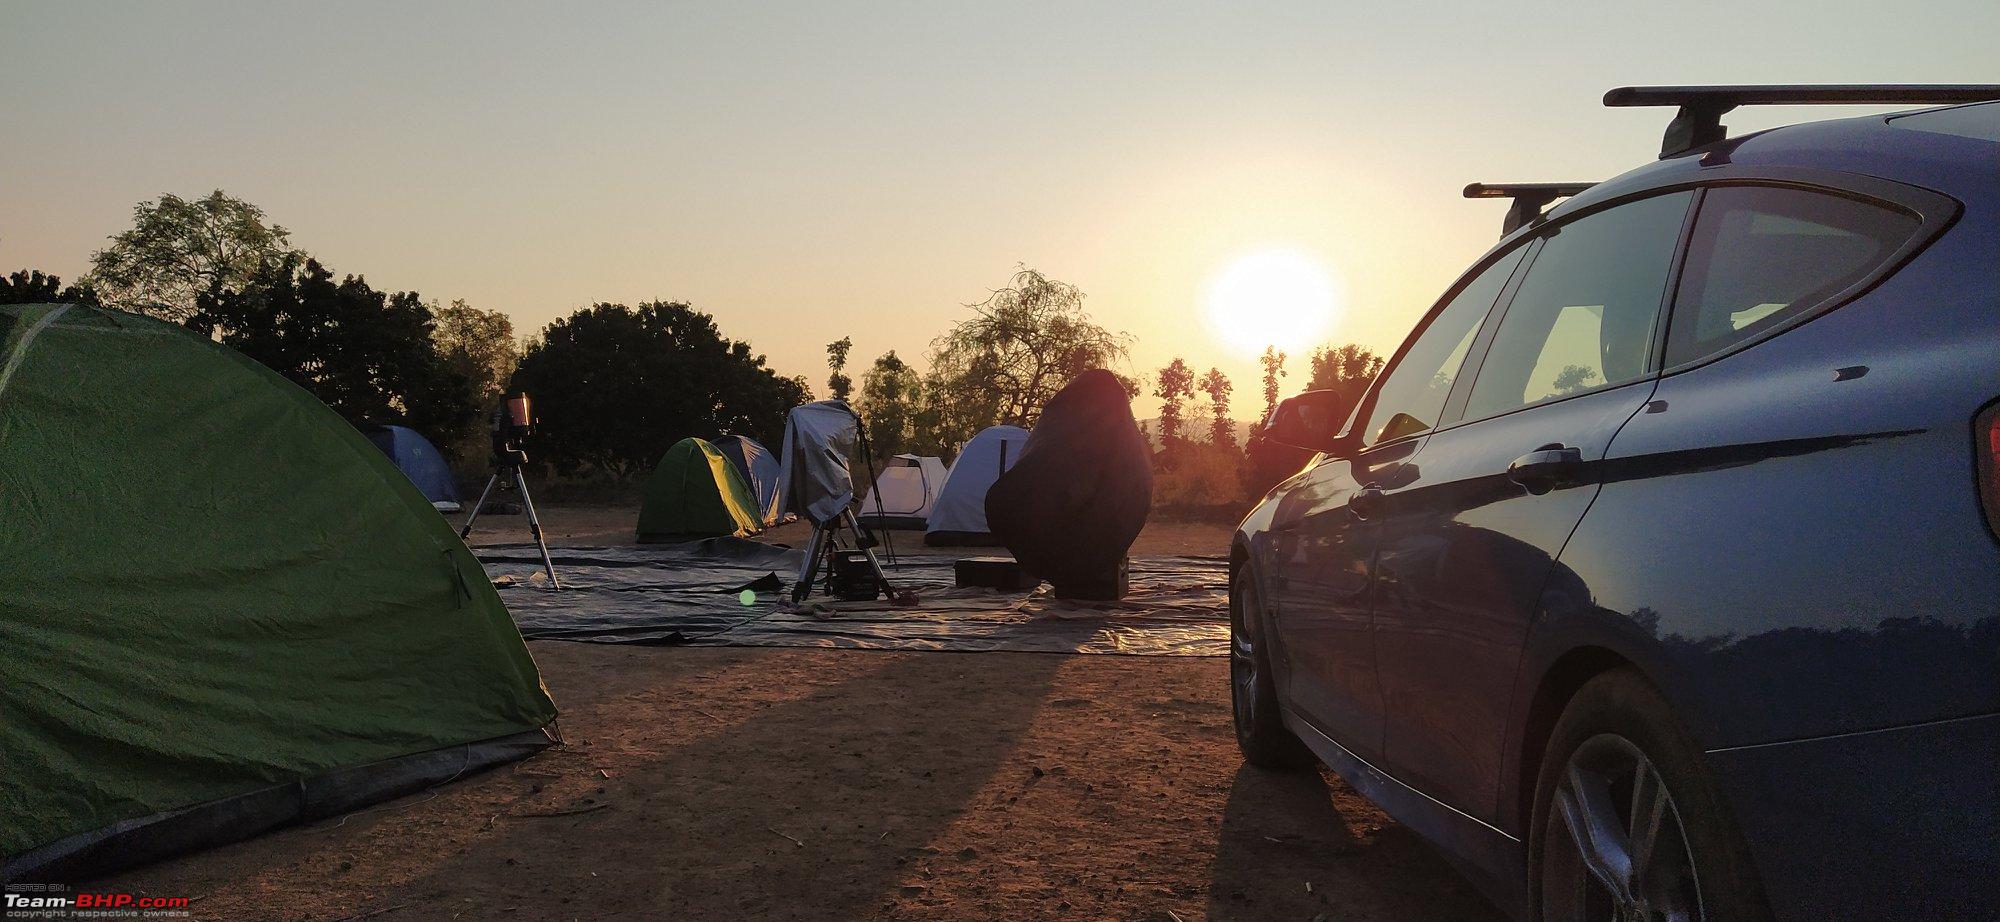  Picture credit: Vijay Kapoor  Picture credit: Vijay Kapoor 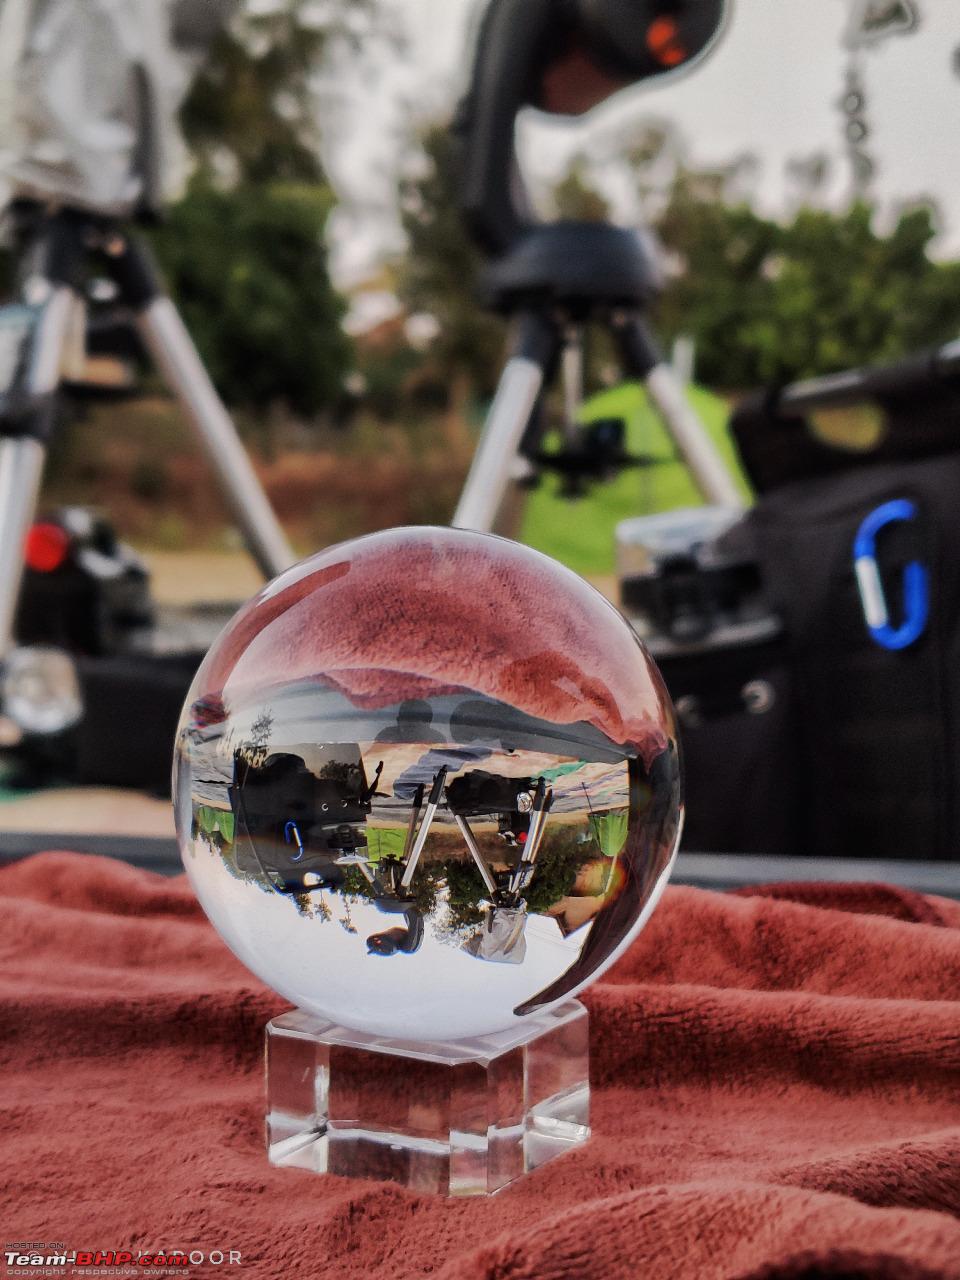 Picture credit: Vijay Kapoor Last edited by graaja : 23rd March 2021 at 16:40. |
|
| (66)
Thanks
|
| The following 66 BHPians Thank graaja for this useful post: | Abhinav V, am1m, ampere, Arun.K, BlackPearl, CEF_Beasts, Chetan_Rao, chhotagujju, Deadpool, debuda, Divya Sharan, Dr.AD, drrajasaravanan, fastturtle10, Gannu_1, gr8guzzler, GTO, Guna, guyfrmblr, haisaikat, InControl, KarthikK, kat, Kkumar, lapis_lazuli, libranof1987, maximus., megazoid, mugen_pinaki27, N33raj, neelkumar, Nempuguru, ObsessedByFIAT, PearlJam, PGNarain, R2D2, rajesh1868, rbalachandar, Rudra Sen, Samba, Santoshbhat, Scarlet_Rider, shancz, ShortShifter, skyocean, SnS_12, tchsvy, Tgo, theexperthand, Thermodynamics, Turbanator, TurboGuy, Turbojc, uday.ere, universal, V.Narayan, v12, vaasu, varunanb, Viju, Vikram Arya, virajmore03, warrioraks, wheelguy, yosbert, ysjoy |
|
22nd March 2021, 12:09
| #5 |
| Team-BHP Support Join Date: Nov 2013 Location: Coimbatore
Posts: 3,712
Thanked: 25,621 Times
| re: Rendezvous with The Universe | My Astrophotography Hobby Planetary Imaging using the Celestron 6SE: After the star gazing event at Chiguru farms, I did several visual observations from our terrace using the Celestron. However, with its very long focal length, this telescope is suitable for small and bright objects like planets, moon (can see moon up very close) and small deep space objects. Larger and very dim objects cannot be seen with this scope. I ran out of targets to watch very soon. Then I started experimenting with photographing the planets. The first attempt was made by pointing a camera into the eyepiece of the telescope. Below is the image. This is my first ever astrophotograph. Though the image has absolutely no details, the satisfaction cannot be described in words. This image was shot on 26th November 2019. 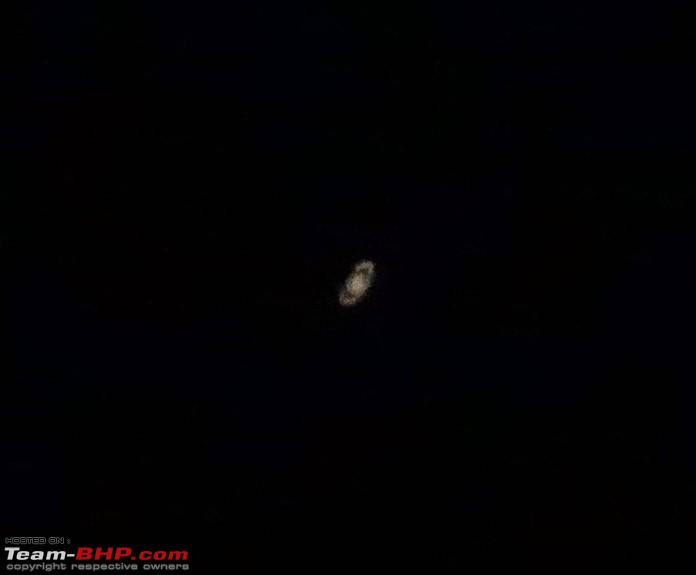 After a long gap of 6 months when planets were in the day sky, I photographed Jupiter and Saturn using my Canon EOS450D connected directly to the telescope. These images were shot on 1st June 2020. 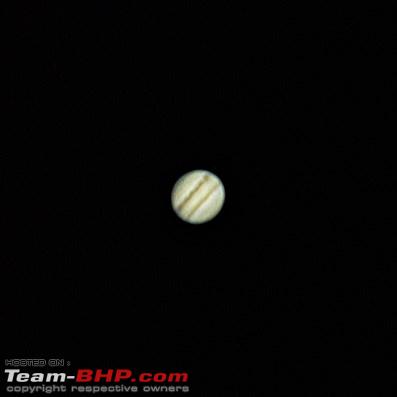  Planet photography works in a different way. We shoot videos and extract individual frames from these videos and the frames are then stacked up to bring out the details. As my 450D is more than 15 years old, it does not have video capability. I could manage some video using a third party software, but this was at a very slow frame rate and lacked lot of details. So, the images were not that great. I then started searching for a suitable camera for photographing the planets and got the ZWO ASI224 dedicated CMOS camera meant for planetary imaging. The advantage of this camera is that it can also work as a guide camera when I put together a photography setup for DSO (deep space objects). Below are a couple of pictures of Mars and Venus I shot using this camera. Shot on 24th September 2020. I was excited to see the polar ice cap in the southern tip in the image. 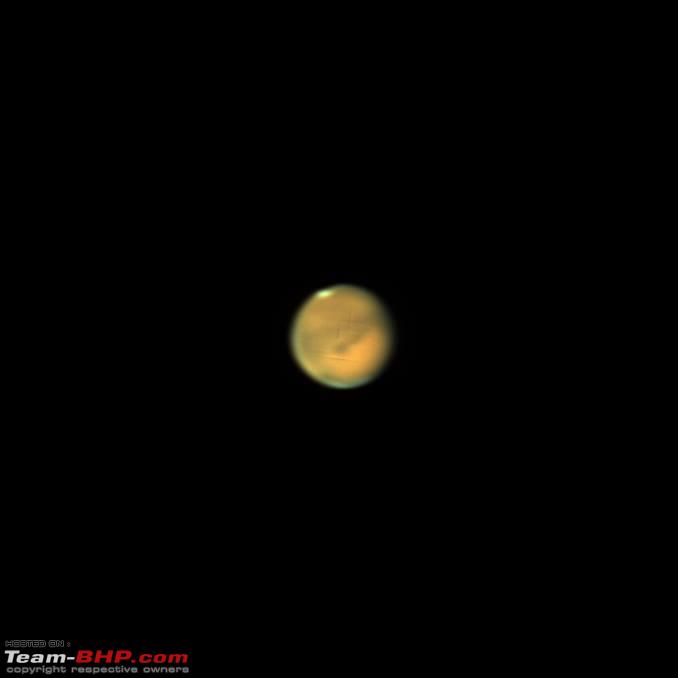 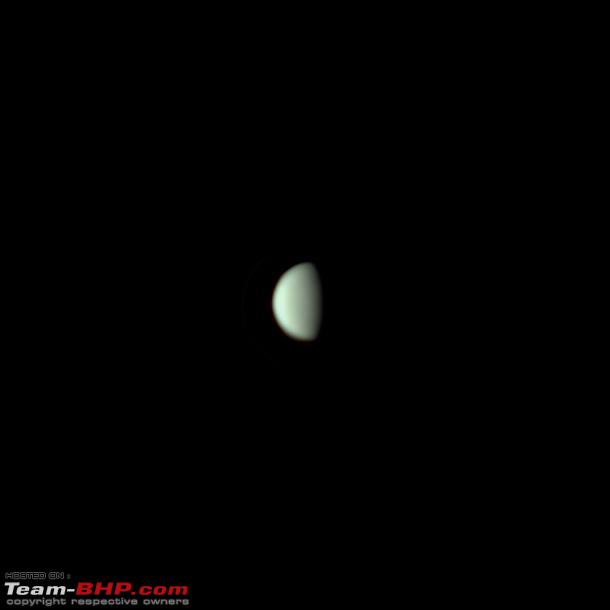 Jupiter Saturn Conjunction – 21st December 2021: A conjunction is an event when two or more planets seem to come close to each other. Once in 20 years, Jupiter and Saturn appear to pass each other in the solar system. This year is special that on December 21, they aligned so close that the separation was less than 0.1 degree. To the naked eye, they look like a single bright star. Though this alignment happens once in 400 years, it is visible in the night sky once in 800 years. I wanted to capture this event using my telescope and planetary camera. But due to very active monsoon, it had been cloudy the past few months. Was lucky to have a completely clear sky on 21st. Had a full hour's view of the planets (before they went too low on the horizon and became dim due to light pollution) to capture them on the telescope. Equipment used: Telescope: Celestron Nexstar 6SE and Meade 4000 0.63x focal reducer Camera: ZWO ASI 224 planetary CMOS camera Software: Sharpcap for capture, PIPP, Autostakkert and Registax for processing A few pictures from the session. The telescope pointed to the planets. 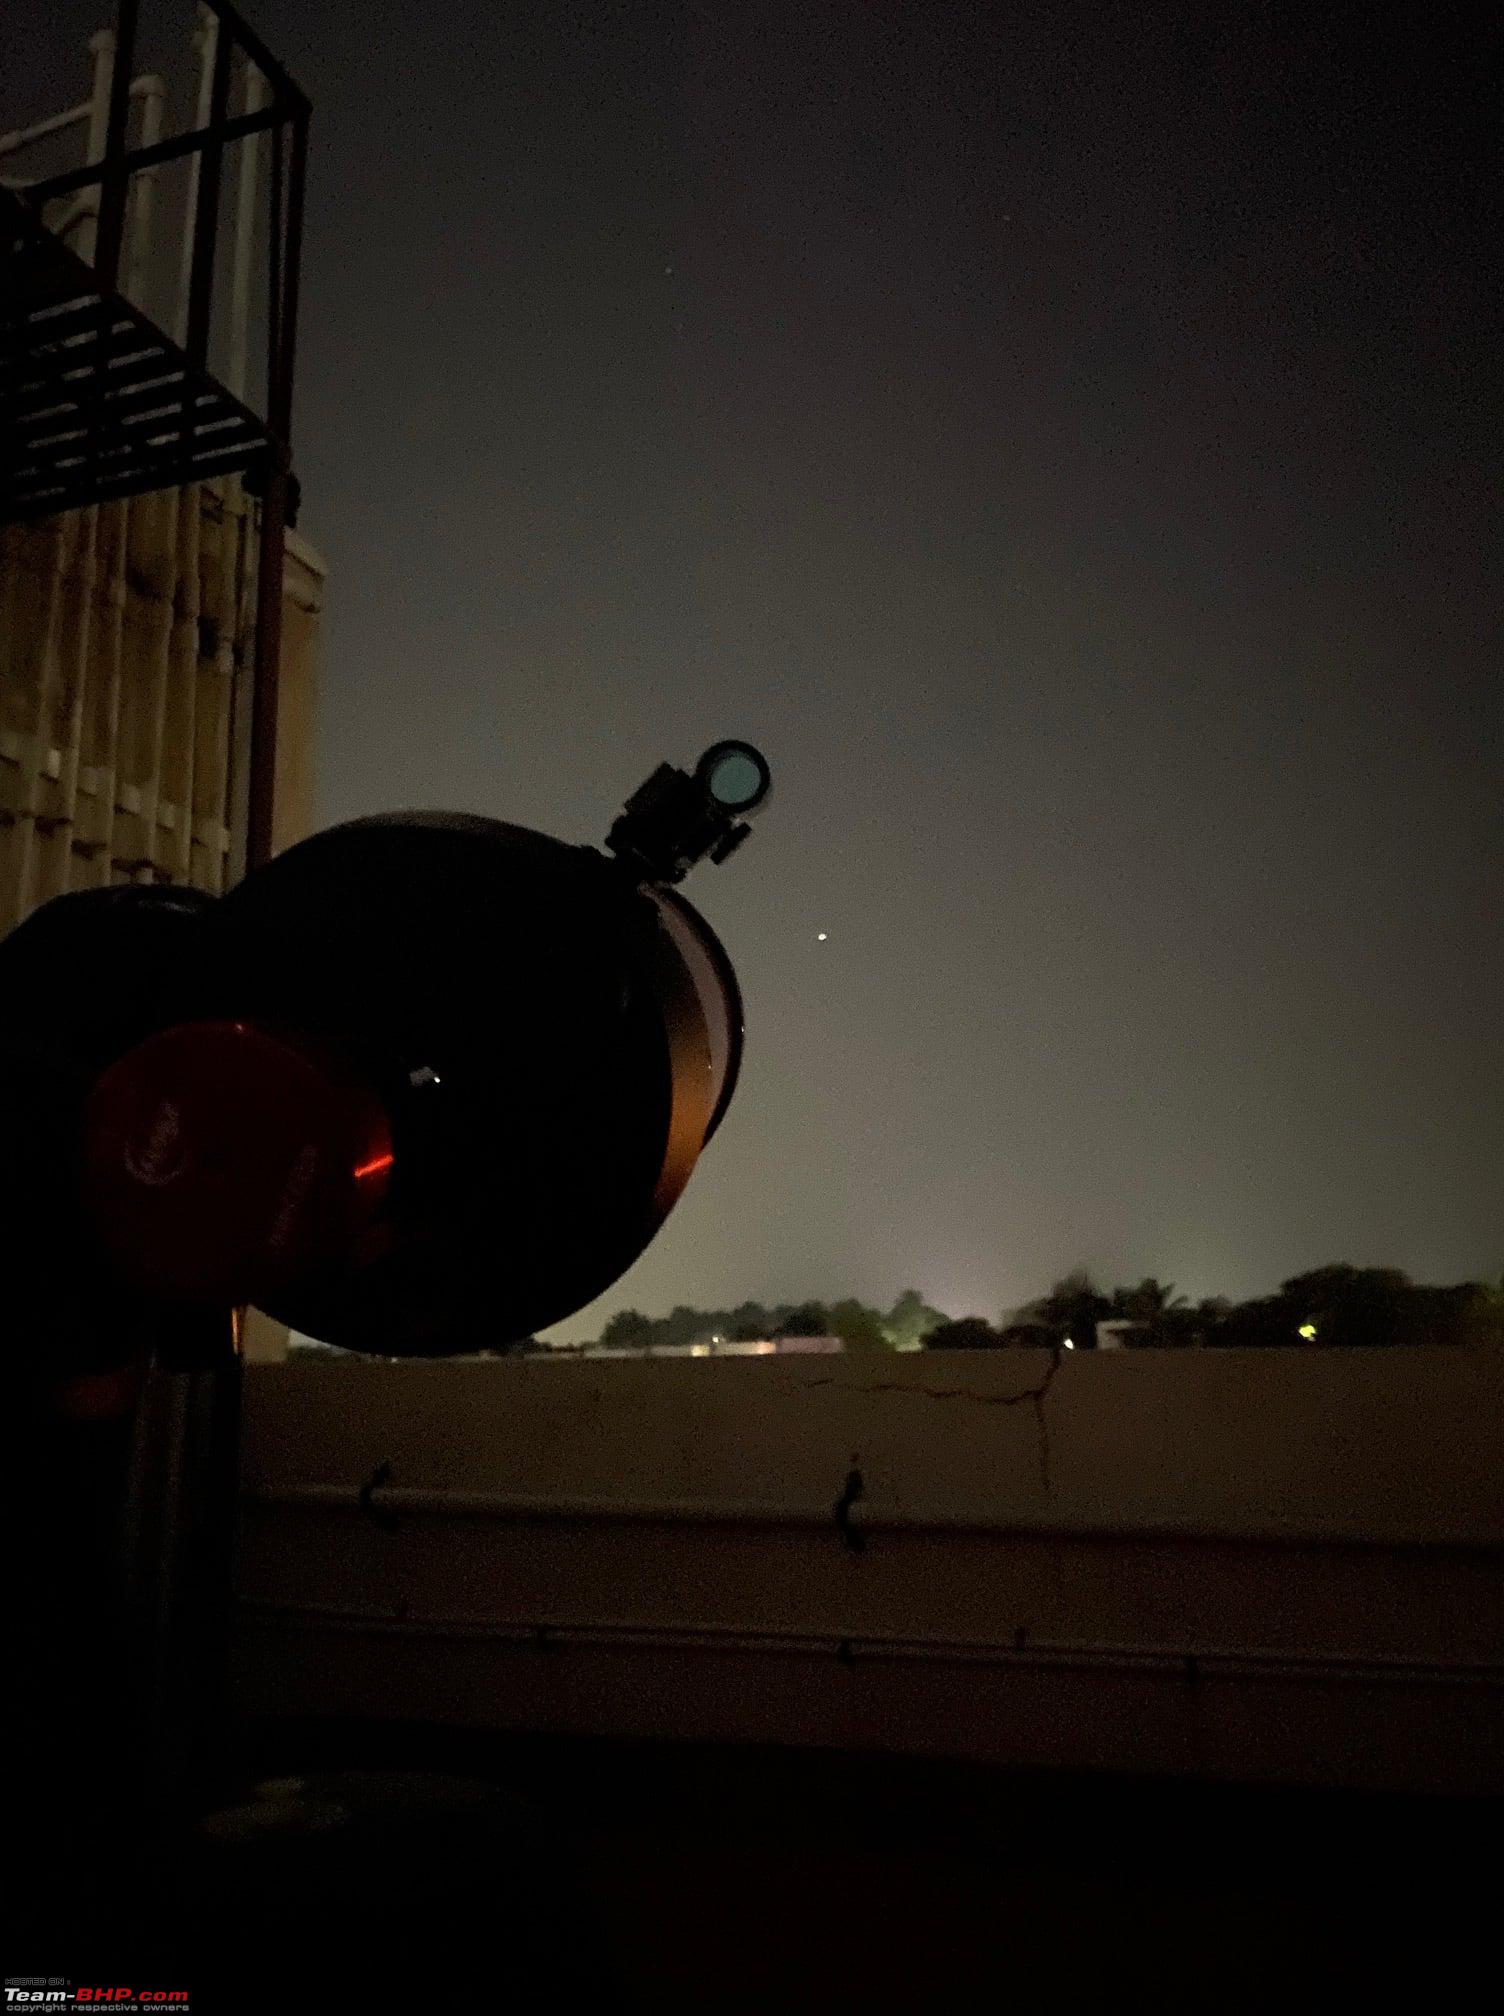 The setup. The camera connected to the laptop for capturing the images from camera. 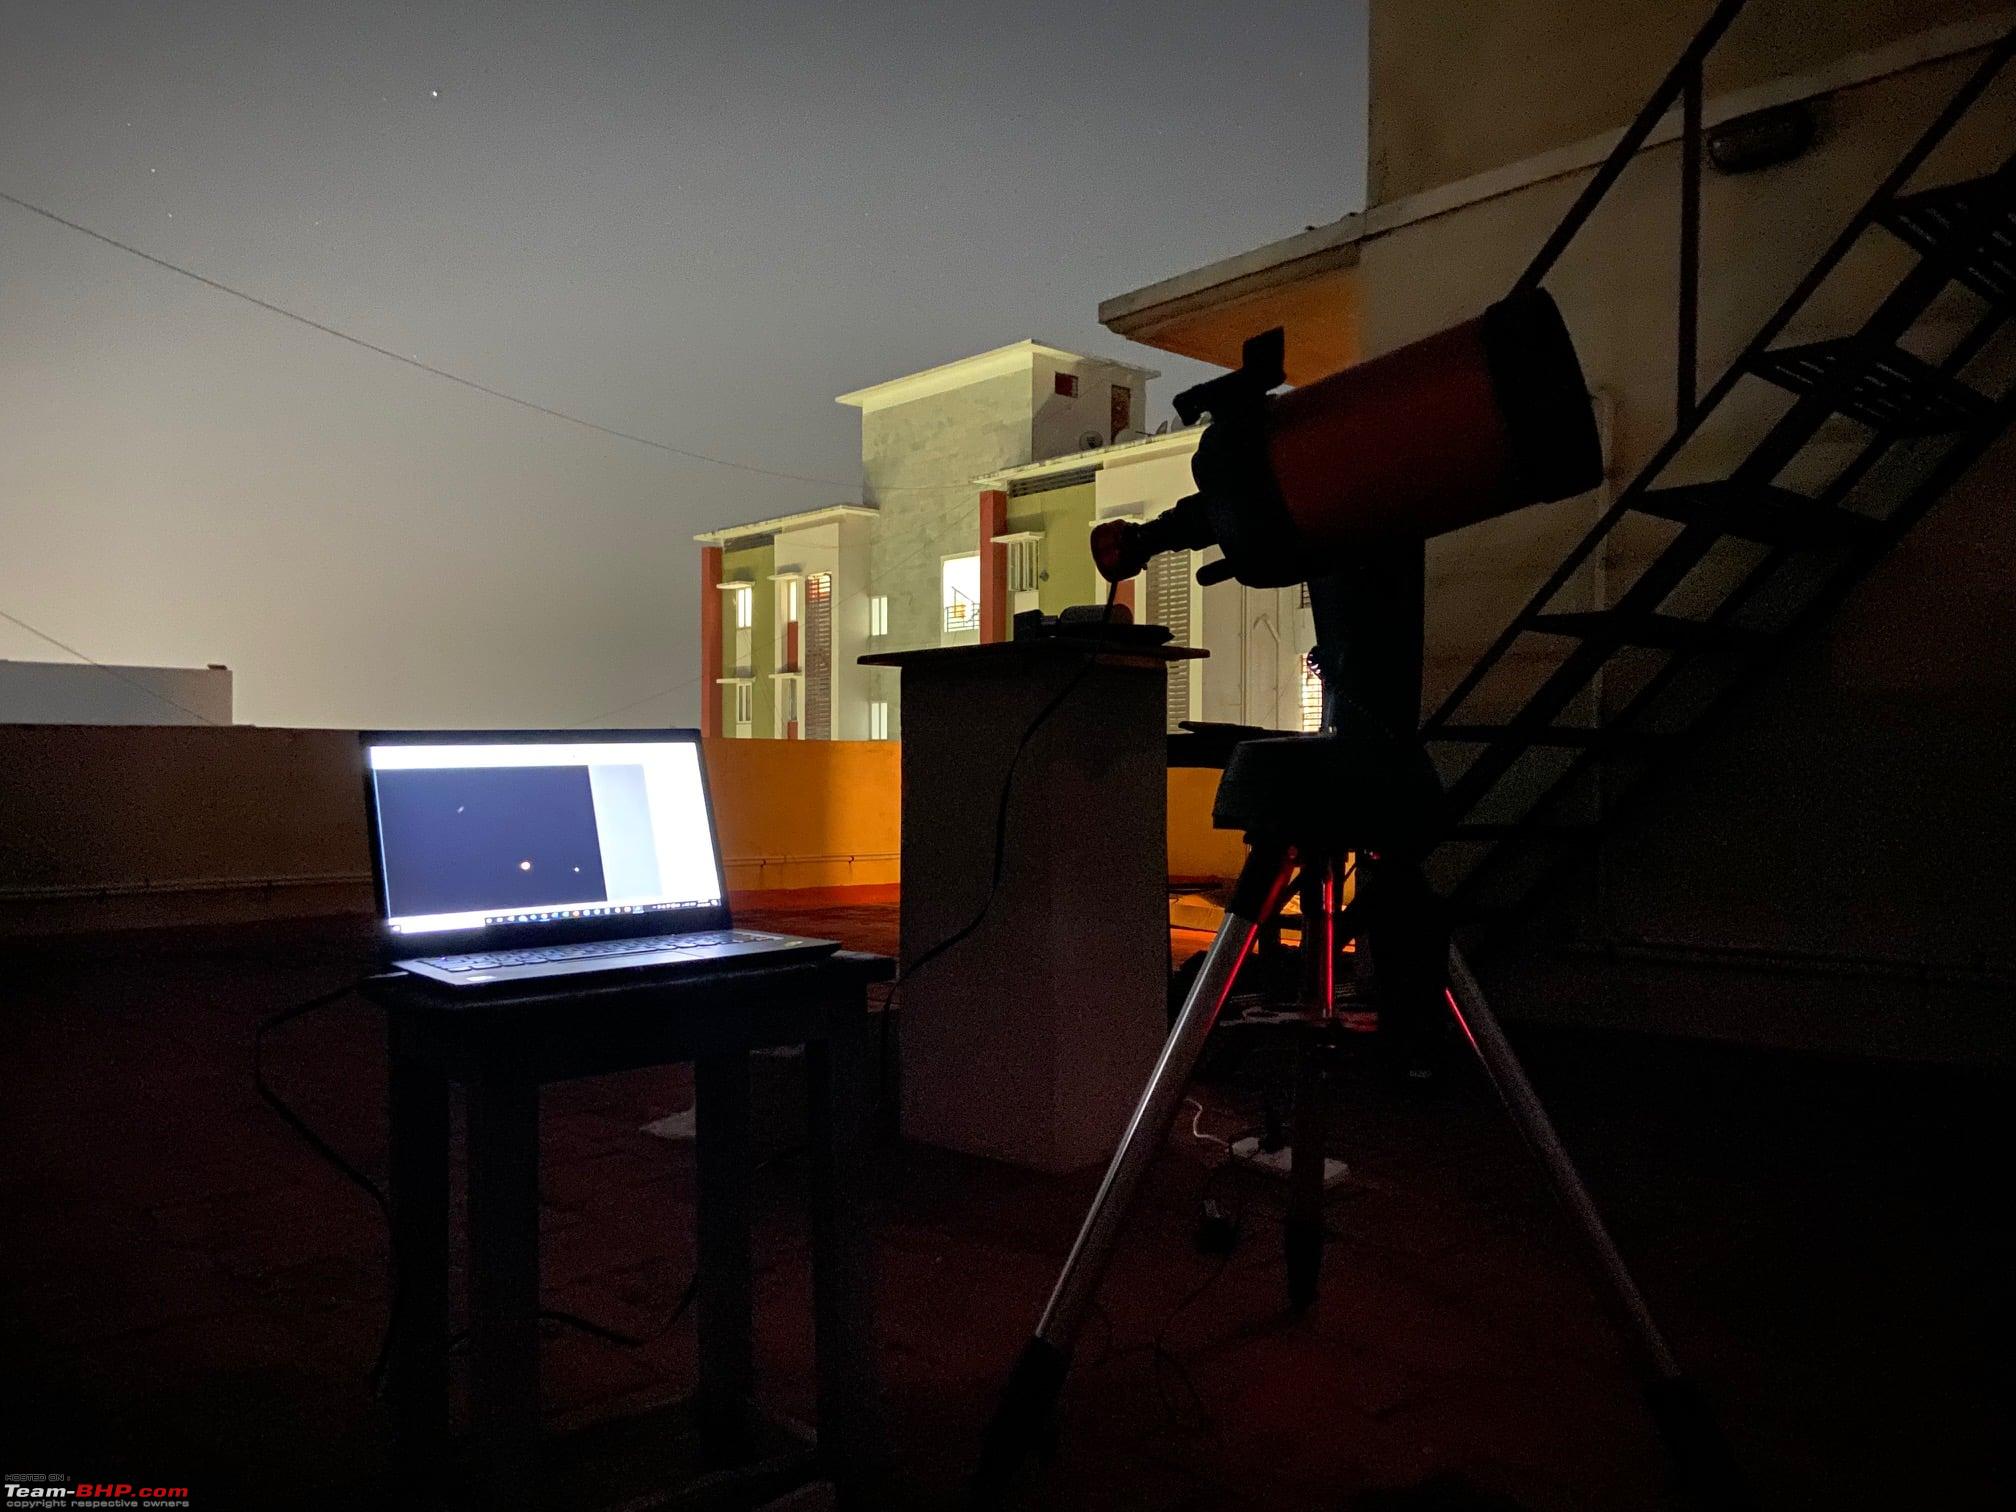 Capturing in progress.  The planets with their moons. 3 of Jupiter's moons and two of Saturn's moon visible. HD191250 is just a bright star in the field of view. 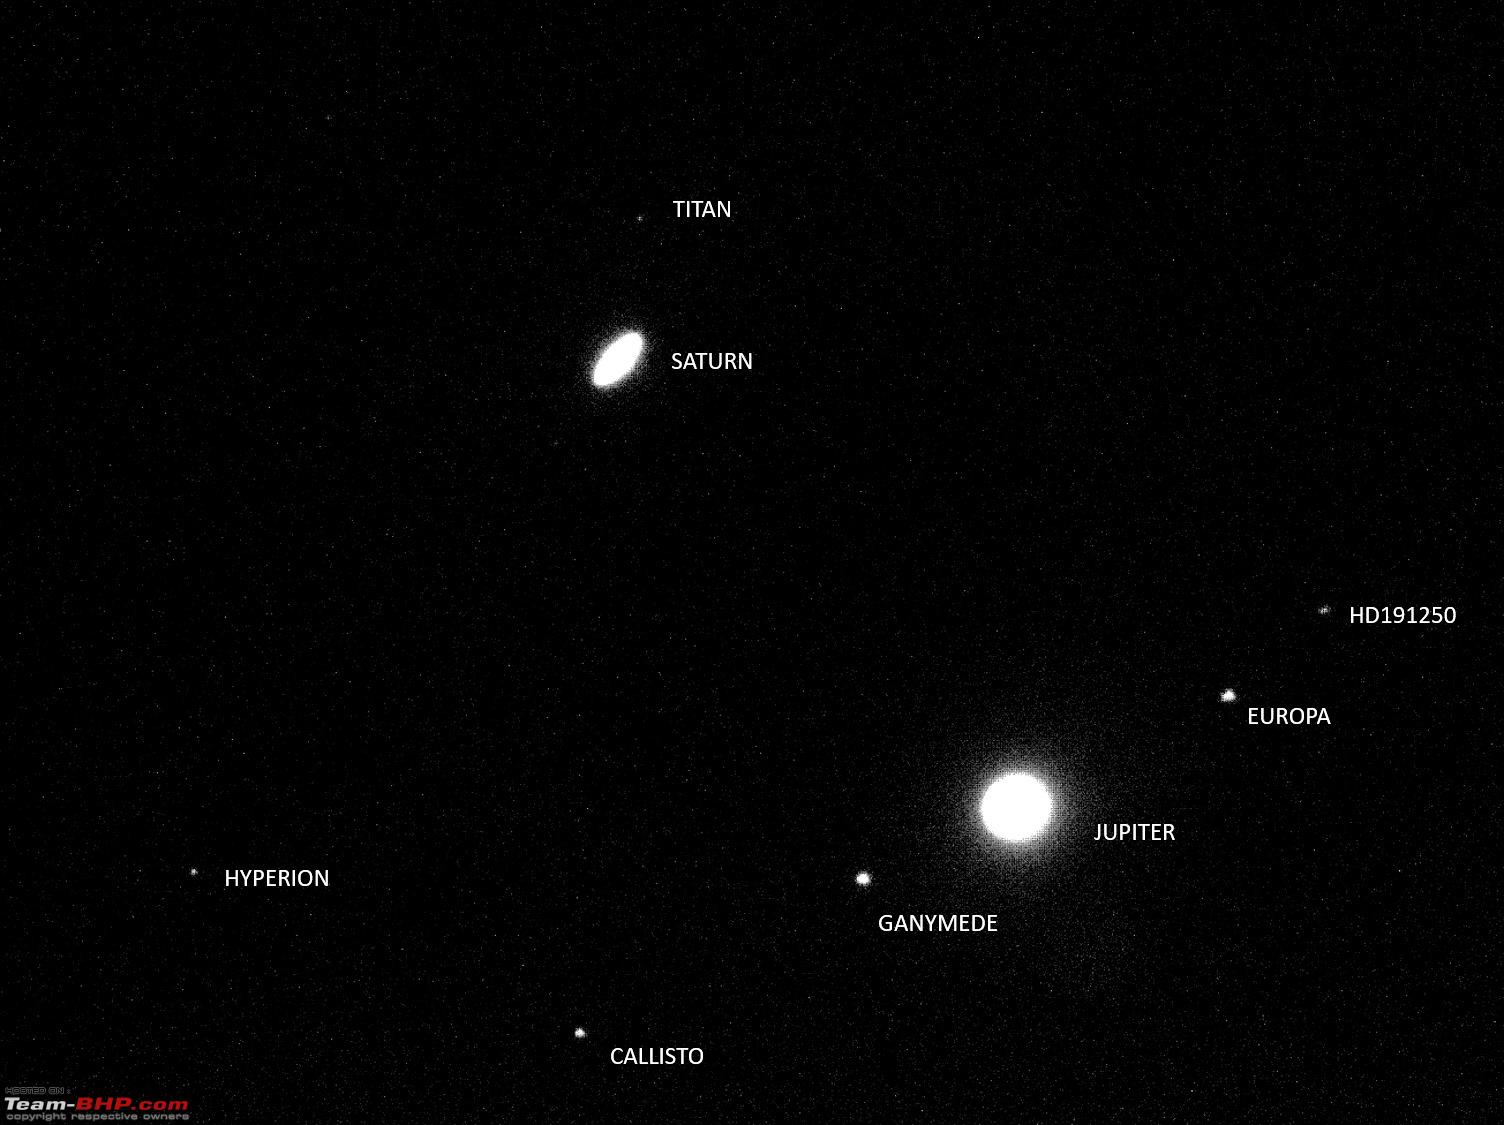 Exposure reduced to bring the details of Jupiter. 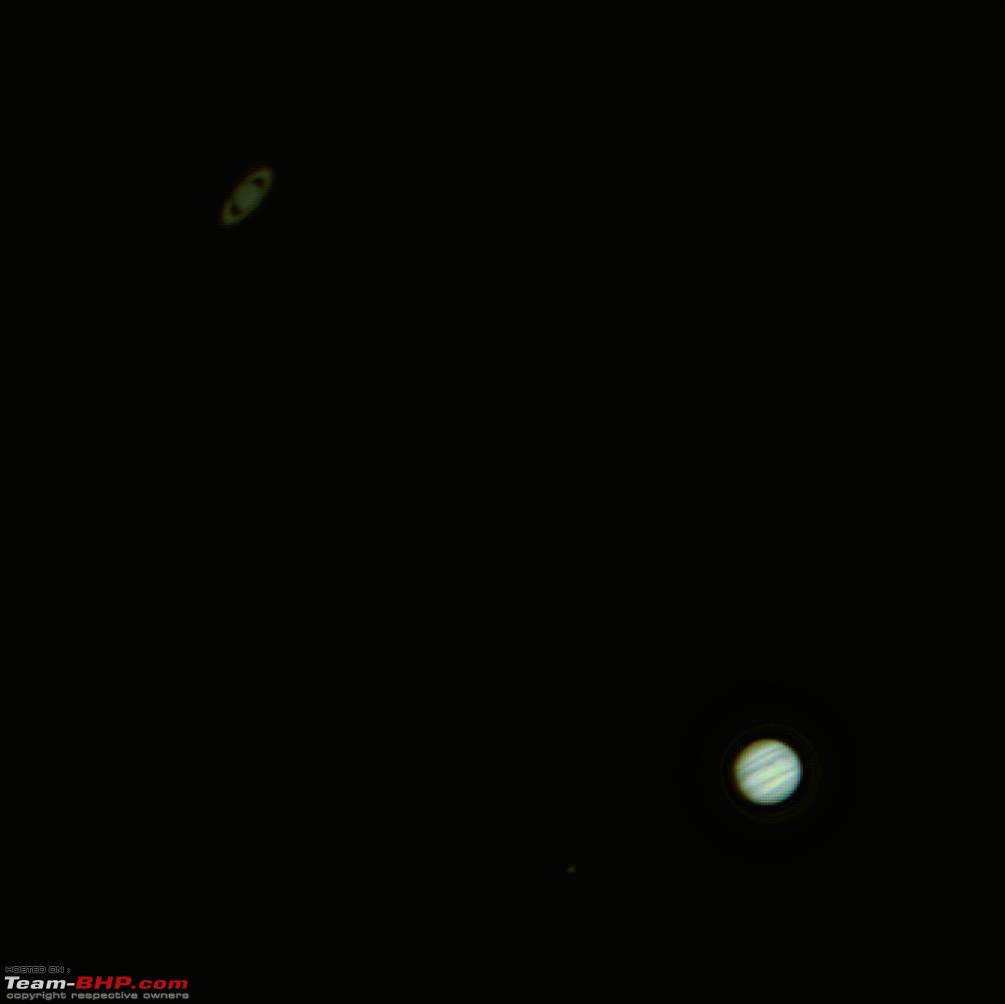 I will be doing more planetary images from June this year. Hope to get more details on the planets. One of my dreams is to get the details of Cassini's division in Saturn's rings and to capture the great red spot (also known as GRS) in Jupiter. Last edited by graaja : 23rd March 2021 at 12:11. |
|
| (70)
Thanks
|
| The following 70 BHPians Thank graaja for this useful post: | 4WheelPilot, alphadog, am1m, AmitRavi07, Anduril, Arun.K, arvindmanju, badboyscad, bj96, BlackPearl, CEF_Beasts, Chetan_Rao, chhotagujju, CosmicWizard, Deadpool, debuda, Divya Sharan, Dr.AD, DriverNo.420, expcretrvlsmile, fastturtle10, fiat_tarun, Gannu_1, GTO, haisaikat, InControl, JJay, KarthikK, kat, Kkumar, KrisTvpm, lapis_lazuli, libranof1987, maximus., mugen_pinaki27, N33raj, neelkumar, Nempuguru, ObsessedByFIAT, Punatic, R2D2, ramnaresh_2000, Rudra Sen, Samba, Santoshbhat, satan's_valet, sayakc, Scarlet_Rider, shancz, ShortShifter, SnS_12, SohailPistawala, SoumenD, suhaas307, tchsvy, Tgo, theexperthand, Thermodynamics, TurboGuy, uday.ere, universal, V.Narayan, varunanb, Vikram Arya, virajmore03, warrioraks, wheelguy, xbox360, xja1, yosbert |
|
22nd March 2021, 20:54
| #6 |
| Team-BHP Support Join Date: Nov 2013 Location: Coimbatore
Posts: 3,712
Thanked: 25,621 Times
| re: Rendezvous with The Universe | My Astrophotography Hobby Building the deep space astrophotography setup By middle of 2020, as I was playing around with planetary photography with the planetary camera, I had already made up my mind to pursue proper deep space astrophotography. From July 2020 to March 2021, it took me almost 9 months to put together this setup. Skywatcher EQ6-R Pro Equatorial mount - July 2020: This is by far the most important component in an astrophotography setup. We can get good pictures with an average telescope or an average camera. But a good mount is a must. After lots of research, I decided to get the EQ6-R Pro from Skywatcher. This mount has a payload of 20 kilos and uses belt drive instead of gears for the tracking. This is a very important feature which prevents something called backlash (when gears slip due to the play between two gears). With a 20-kilo payload, this was also a future proof in the event I upgraded to bigger telescopes. This was the peak lockdown time due to Corona and international shipments were indefinitely getting delayed. Luckily the dealer in Mumbai had this mount in stock and I place the order around first week of July and received it by 3rd week. A few pictures of unboxing the mount. 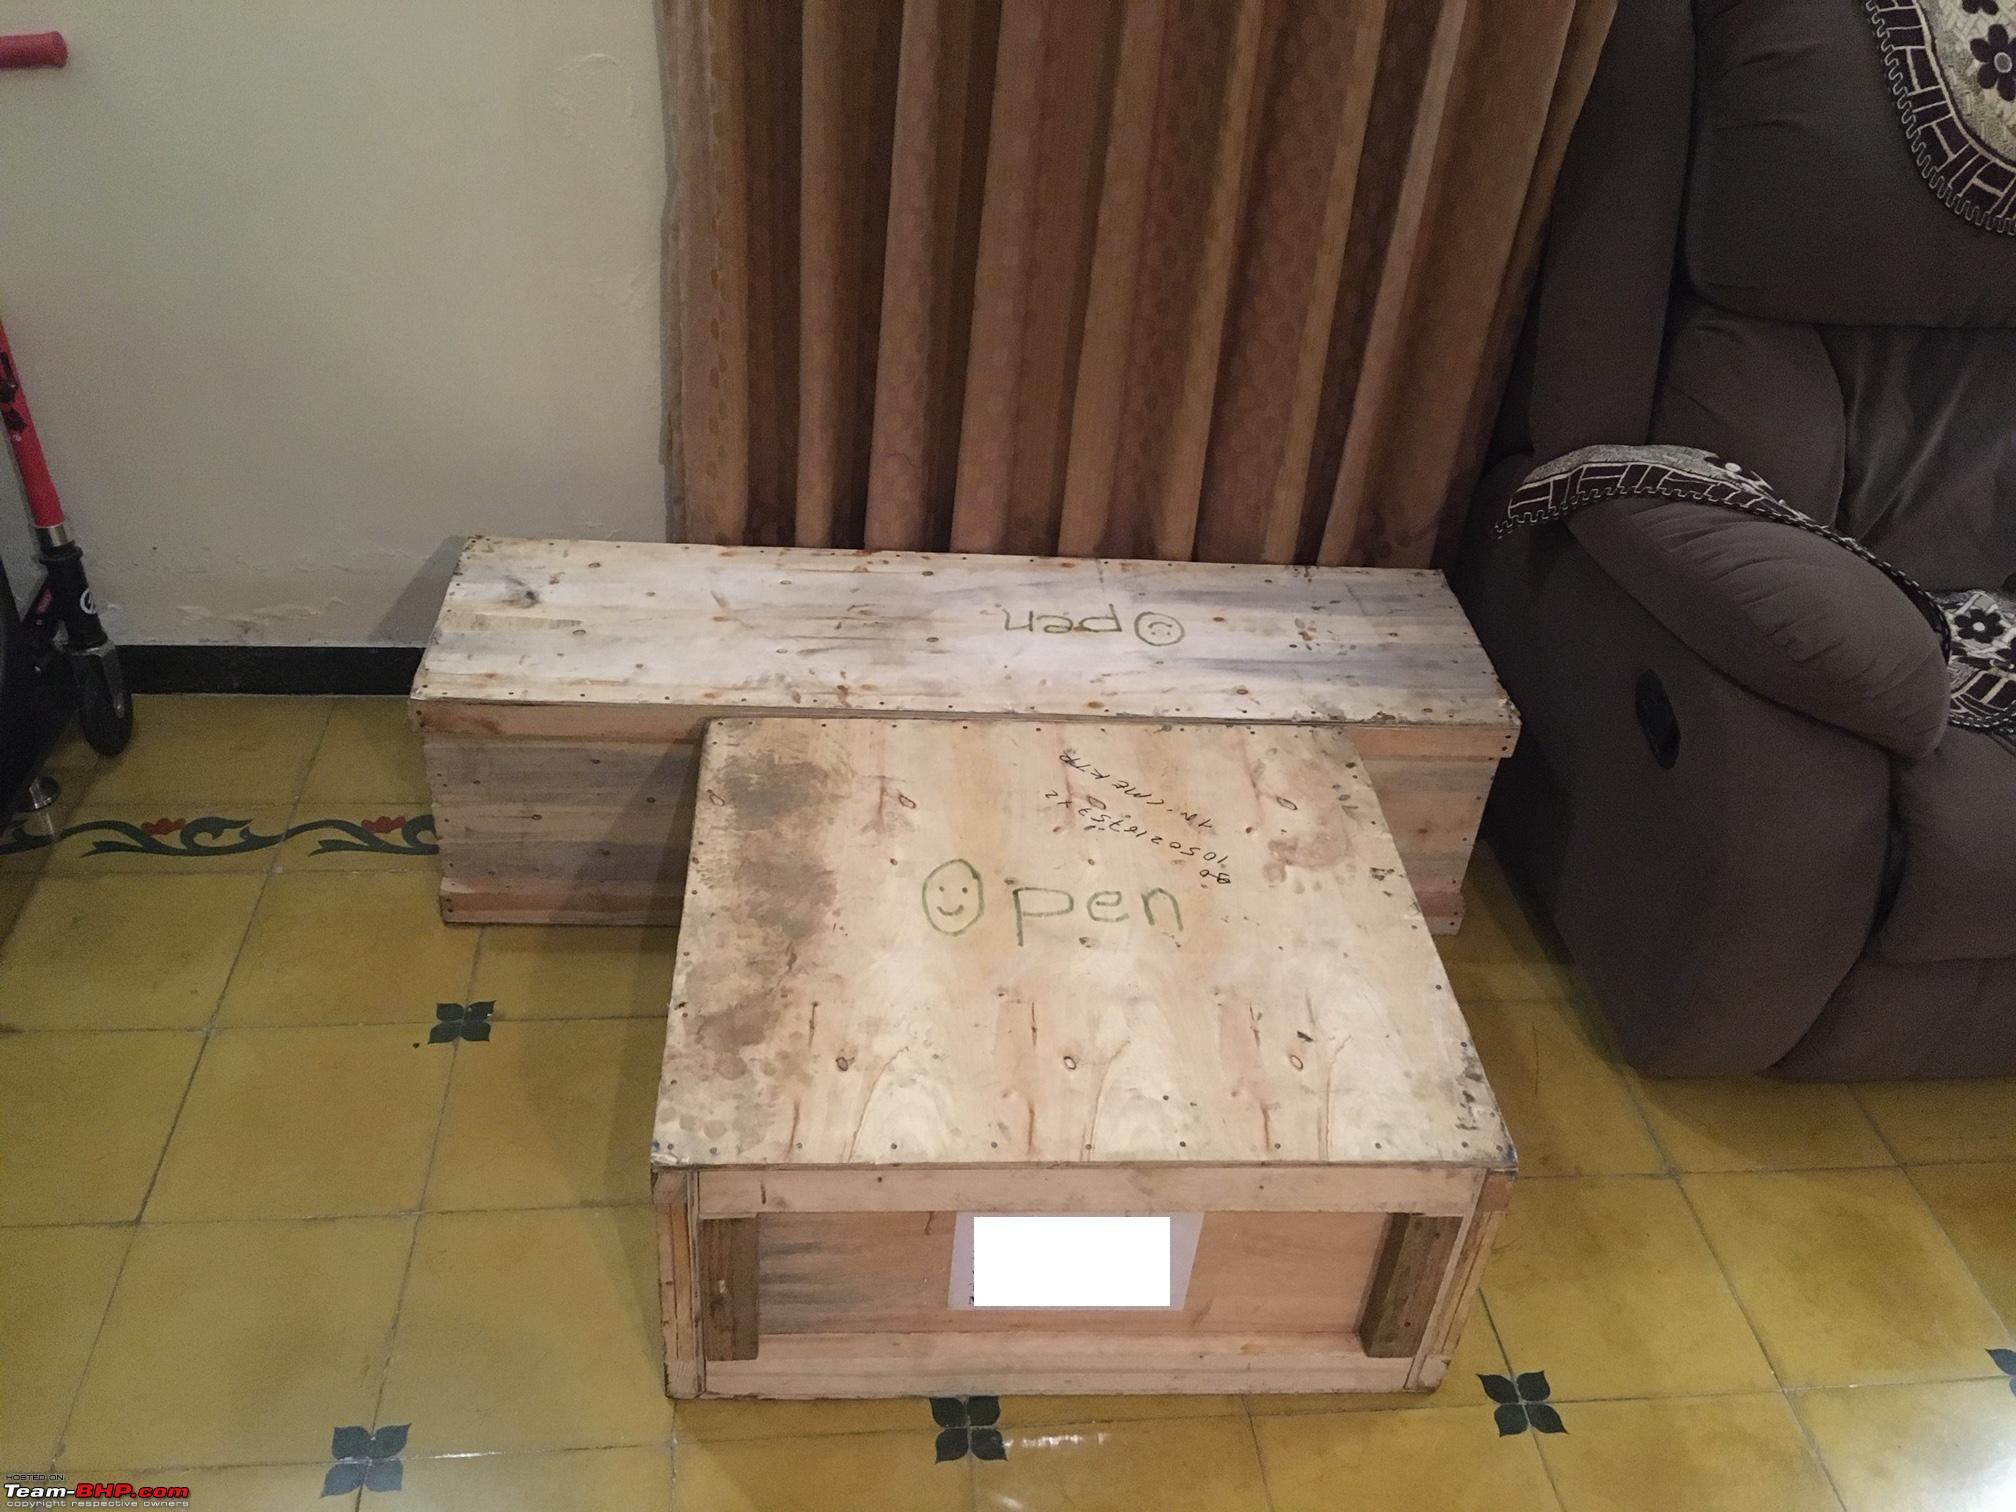 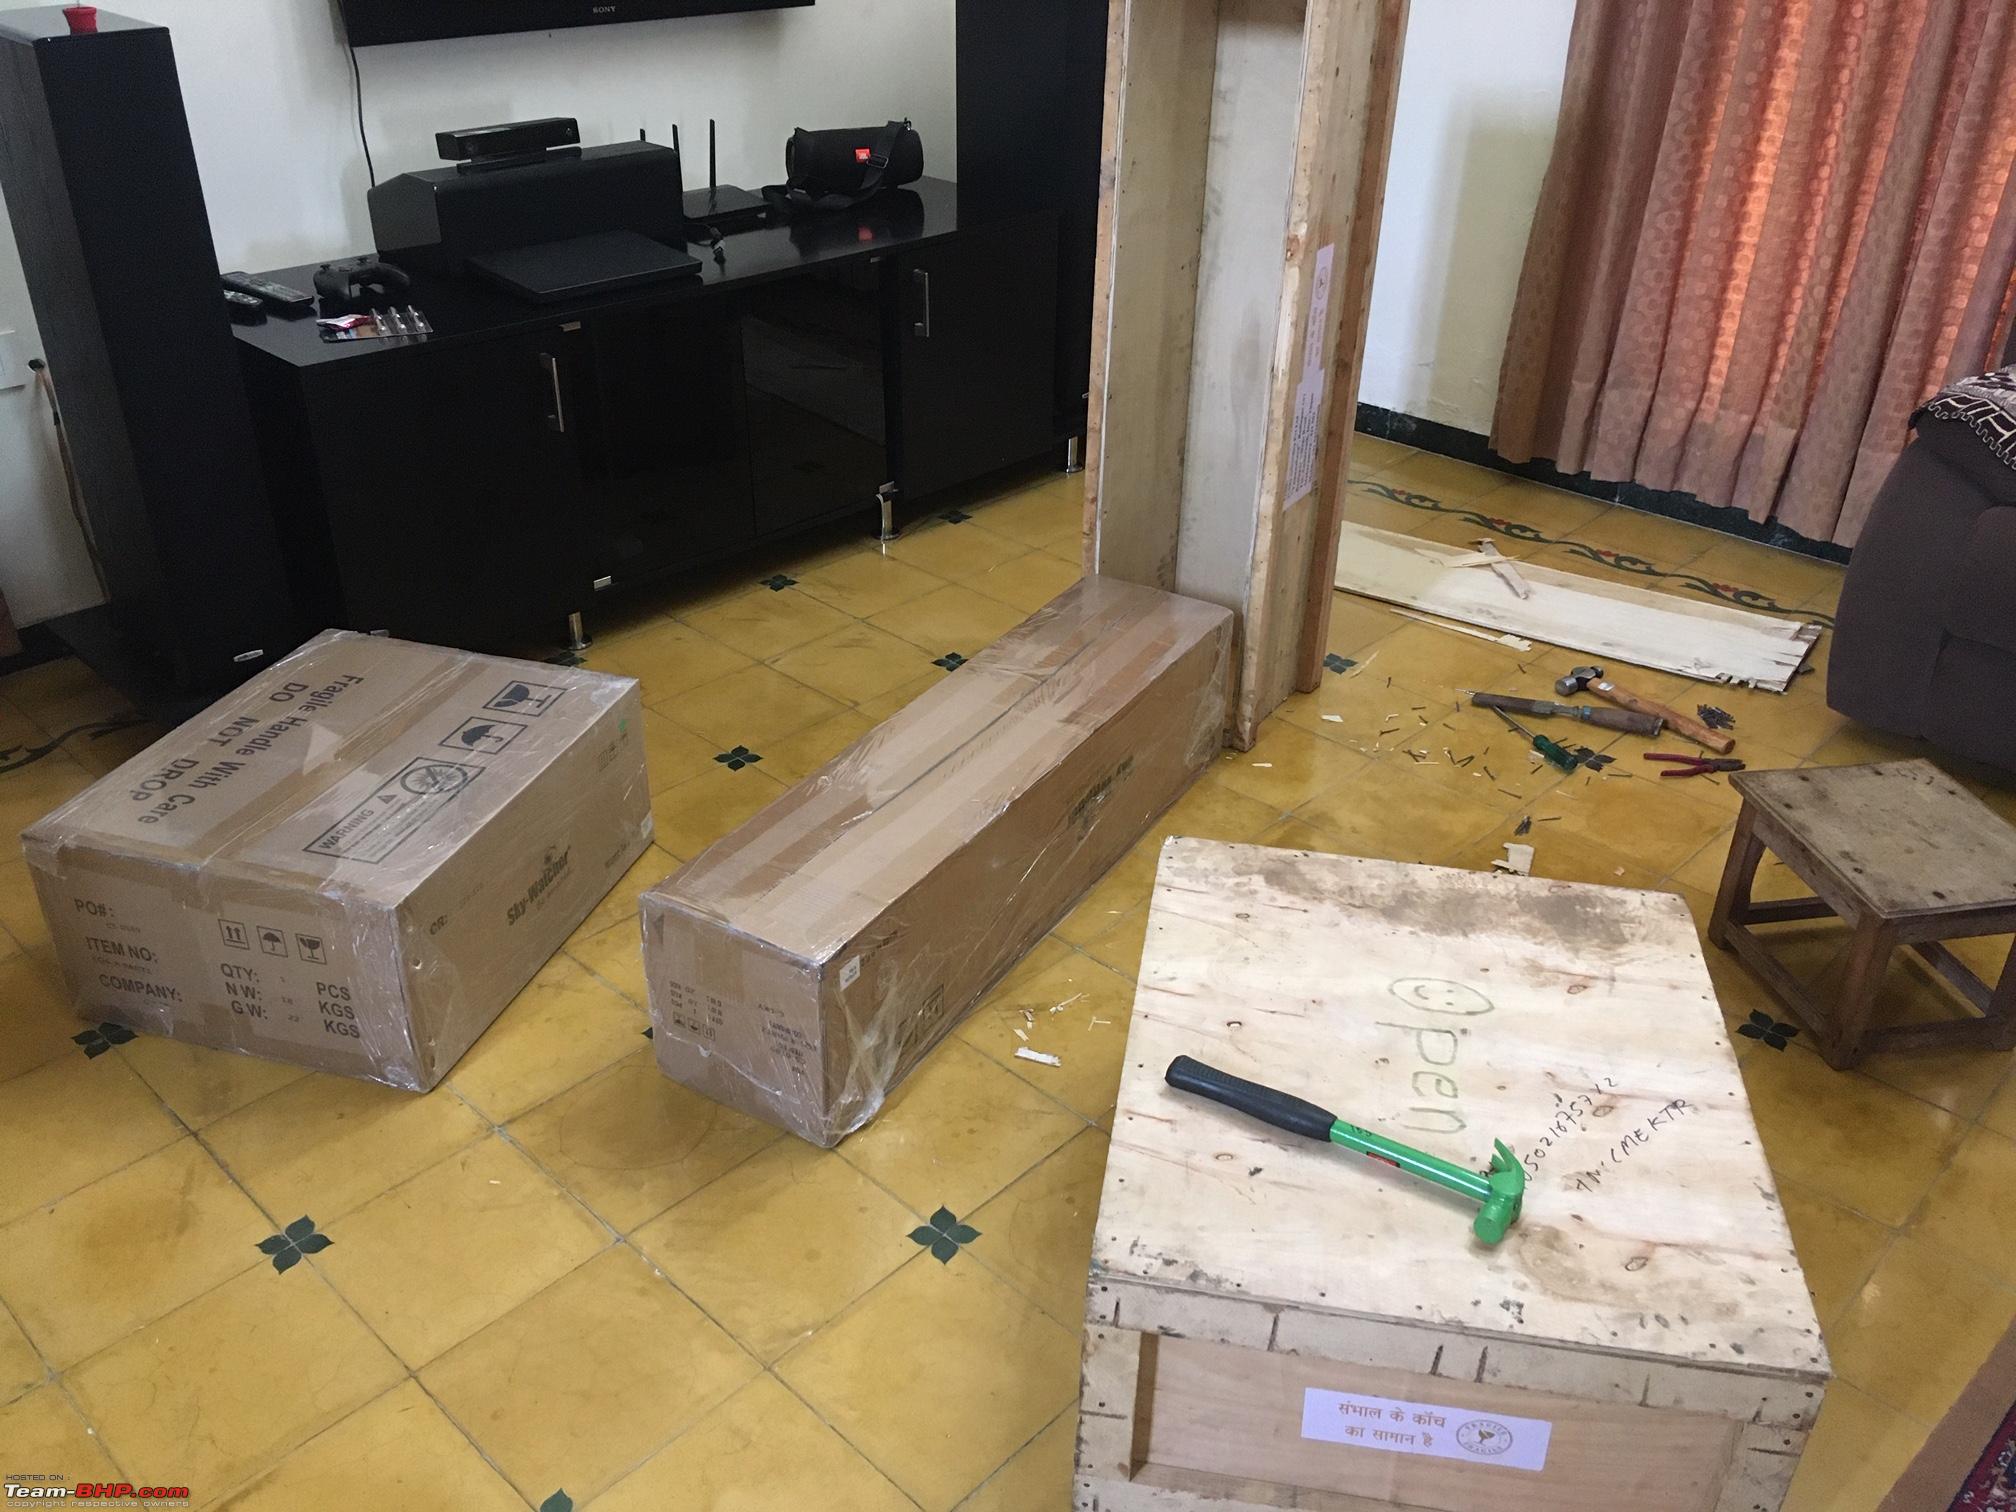   William Optics Gran Tourismo 81 APO Triplet Refractor Telescope and Guide scope - October 2020: As I had mentioned before, for deep space wide field imaging, refractor telescopes are preferred. Refractor telescopes usually have two lens elements are called doublets. These are low cost. However, they suffer from a problem called chromatic aberration. When light rays hit the optical elements, they get bent. Each color gets bent at a different angle red the most and blue the least. Because of this when using doublets, bright stars usually appear bloated with a blue ring around them. Triplets solve this problem. In a triplet, a third lens is added which adds a correction to the scattering of various colors and focuses all the colors at a single point. Because of this third element, triplets are very expensive. But from the lesson I learnt from Vijay Kapoor, I decided to get the best equipment the very first time instead of getting something unsuitable and then trying to upgrade soon and losing money in the process. Once a triplet was decided on, the next step was to decide on the diameter and focal length. Some of the widely used diameters were 60mm, 70mm, 80mm, 100mm and 125mm. The lower diameters have lower focal length resulting in wider field of view and vice versa. The higher the diameter, higher the focal length and the price also rises exponentially. There are some online tools that allow us to check the field of view for various deep space objects and various focal lengths. I checked most of the interesting objects that I was planning to photograph with these focal lengths. Longer focal lengths are good for shooting distant galaxies, but are not good to photograph bigger objects like nebulae and the most important target the Andromeda galaxy. I decided to go with an 80mm triplet that will give me a not too wide filed of view and at the same time within my budget. Shortlisted Skywatcher, Explore Scientific and William Optics refractors and then decided to get the William Optics Gran Tourismo 81 refractor. Tejraj is the dealer for William Optics and he promised he can import and deliver the telescope in less than 3 weeks. Along with the main telescope, I also ordered a 50mm guide scope which I would use with the planetary camera for guiding, a 0.8x field flattener and a Canon T ring adapter. As promised Tejraj sent the telescope within 3 weeks. Got the telescope in October. A few pictures of unboxing the telescope. 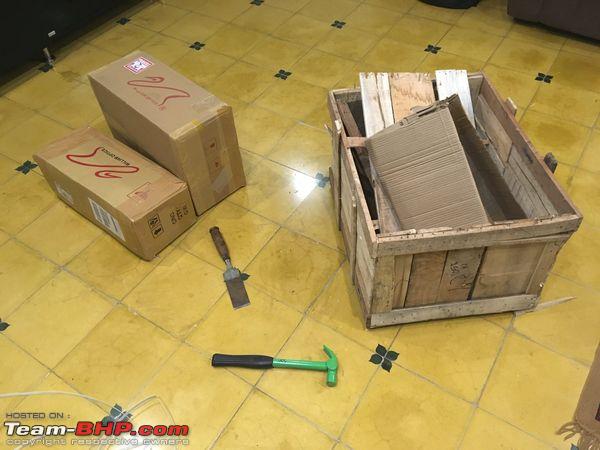  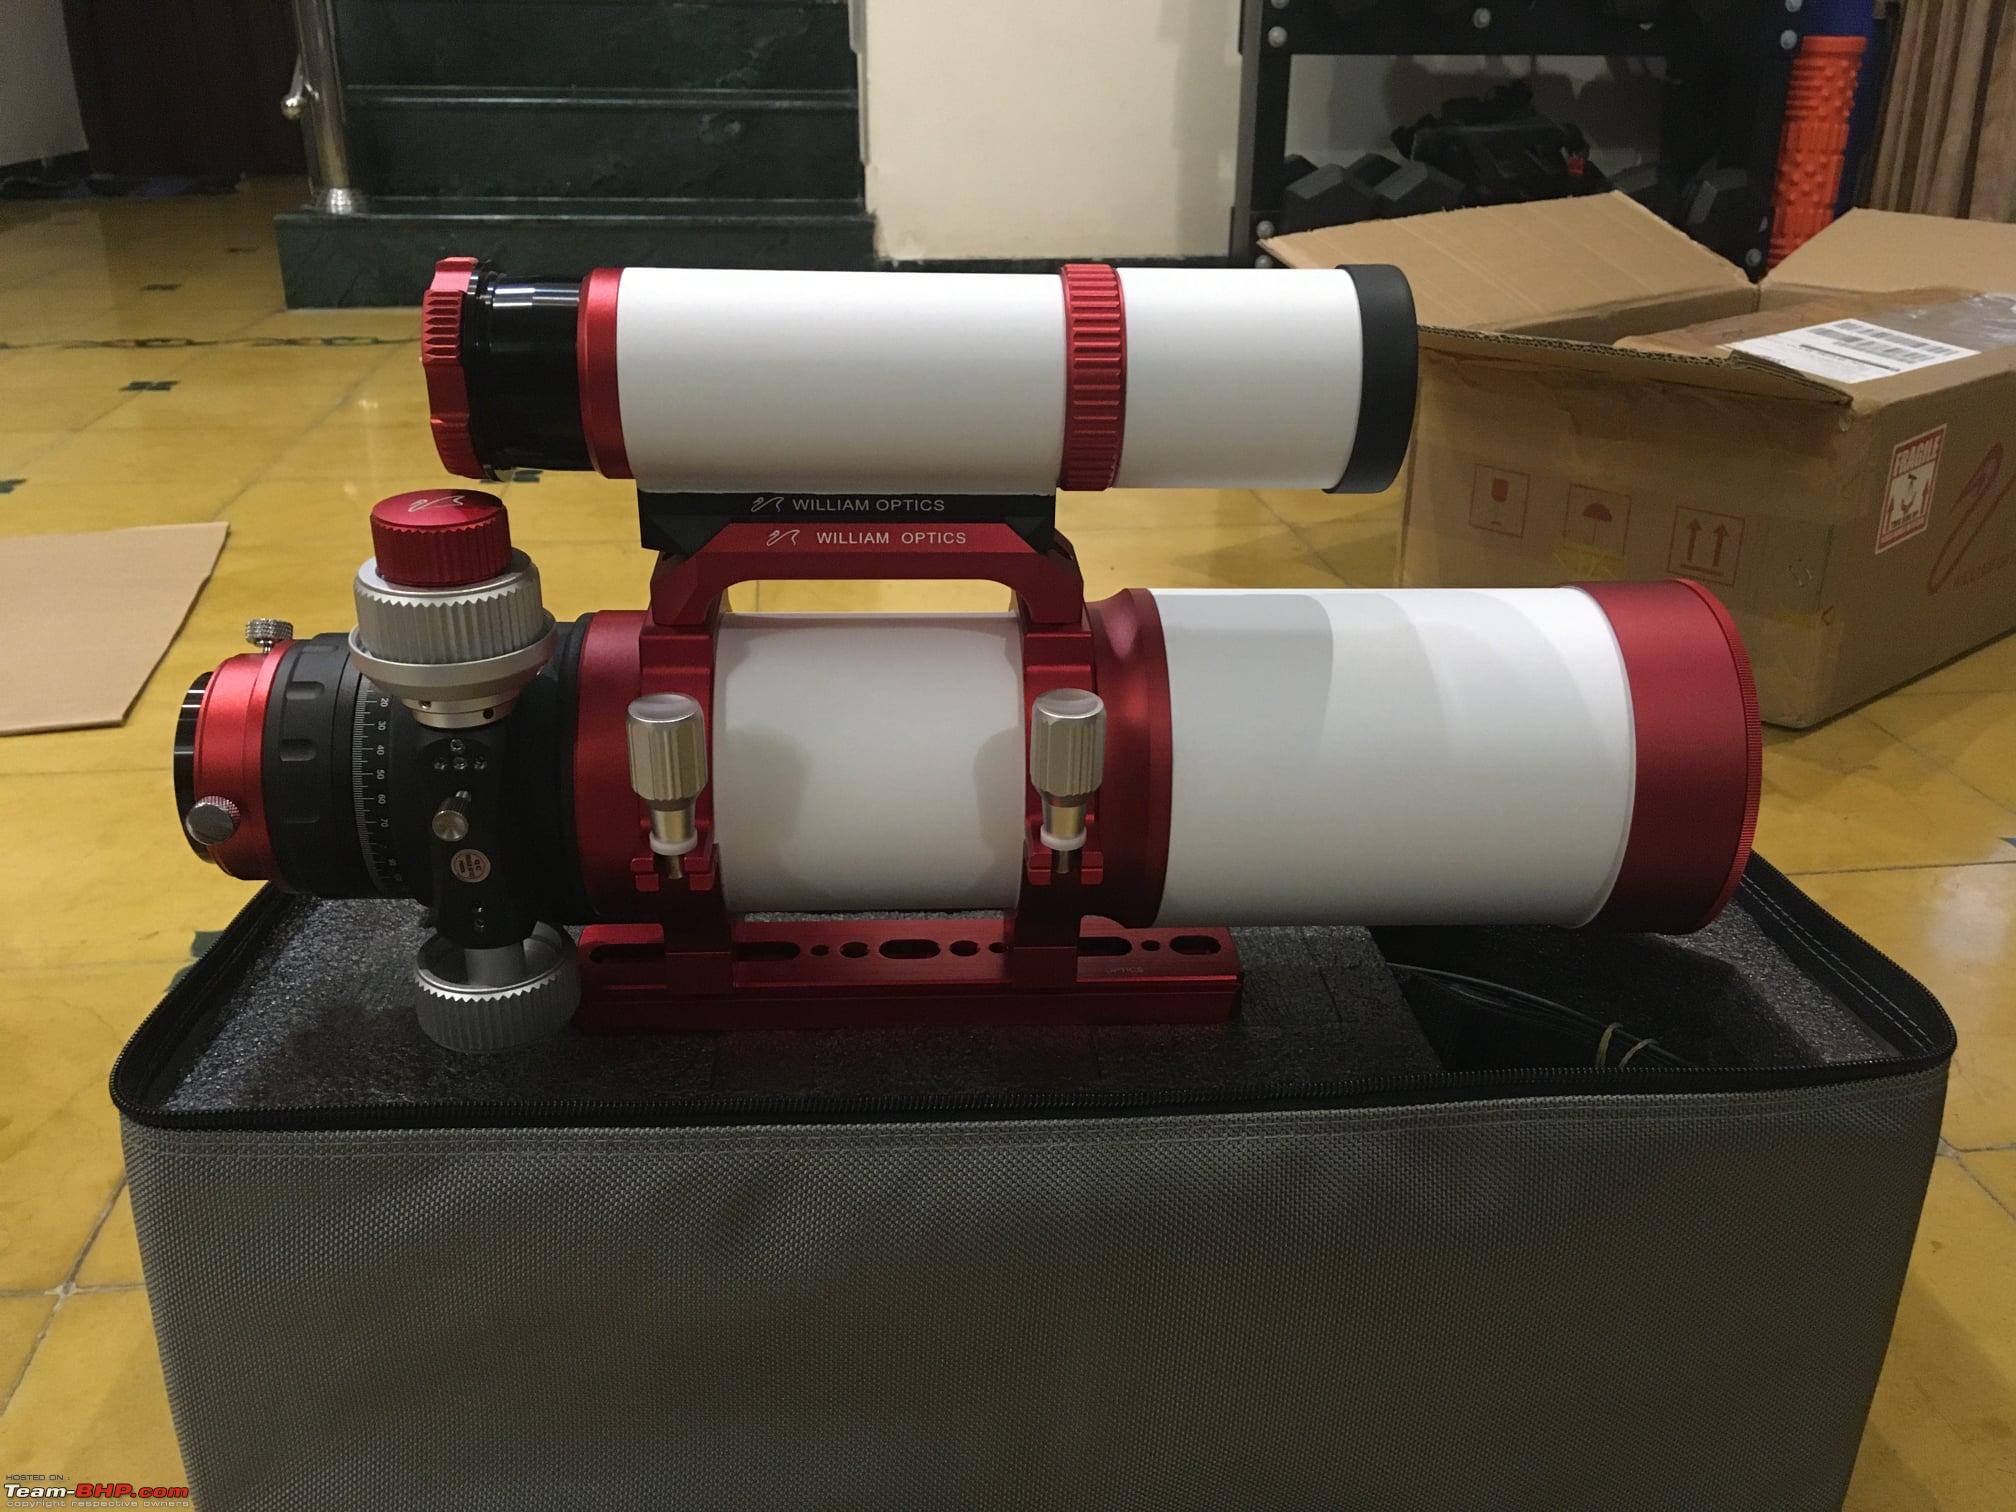   Mini PC - February 2021: Though I had the telescope and in October and with the Canon EOS-450 I had a complete astrophotography setup, this year we had a very strong monsoon and there were no clear skies for months. While waiting for clear skies, I decided to work on automating the setup. Got the Intel NUC mini PC with i7 processor, 32GB RAM and a 500GB M.2 SSD hard disk. With this I would be able to leave the setup in the terrace and access the Mini PC through remote desktop and remotely control all the hardware. Assembling the Mini PC. 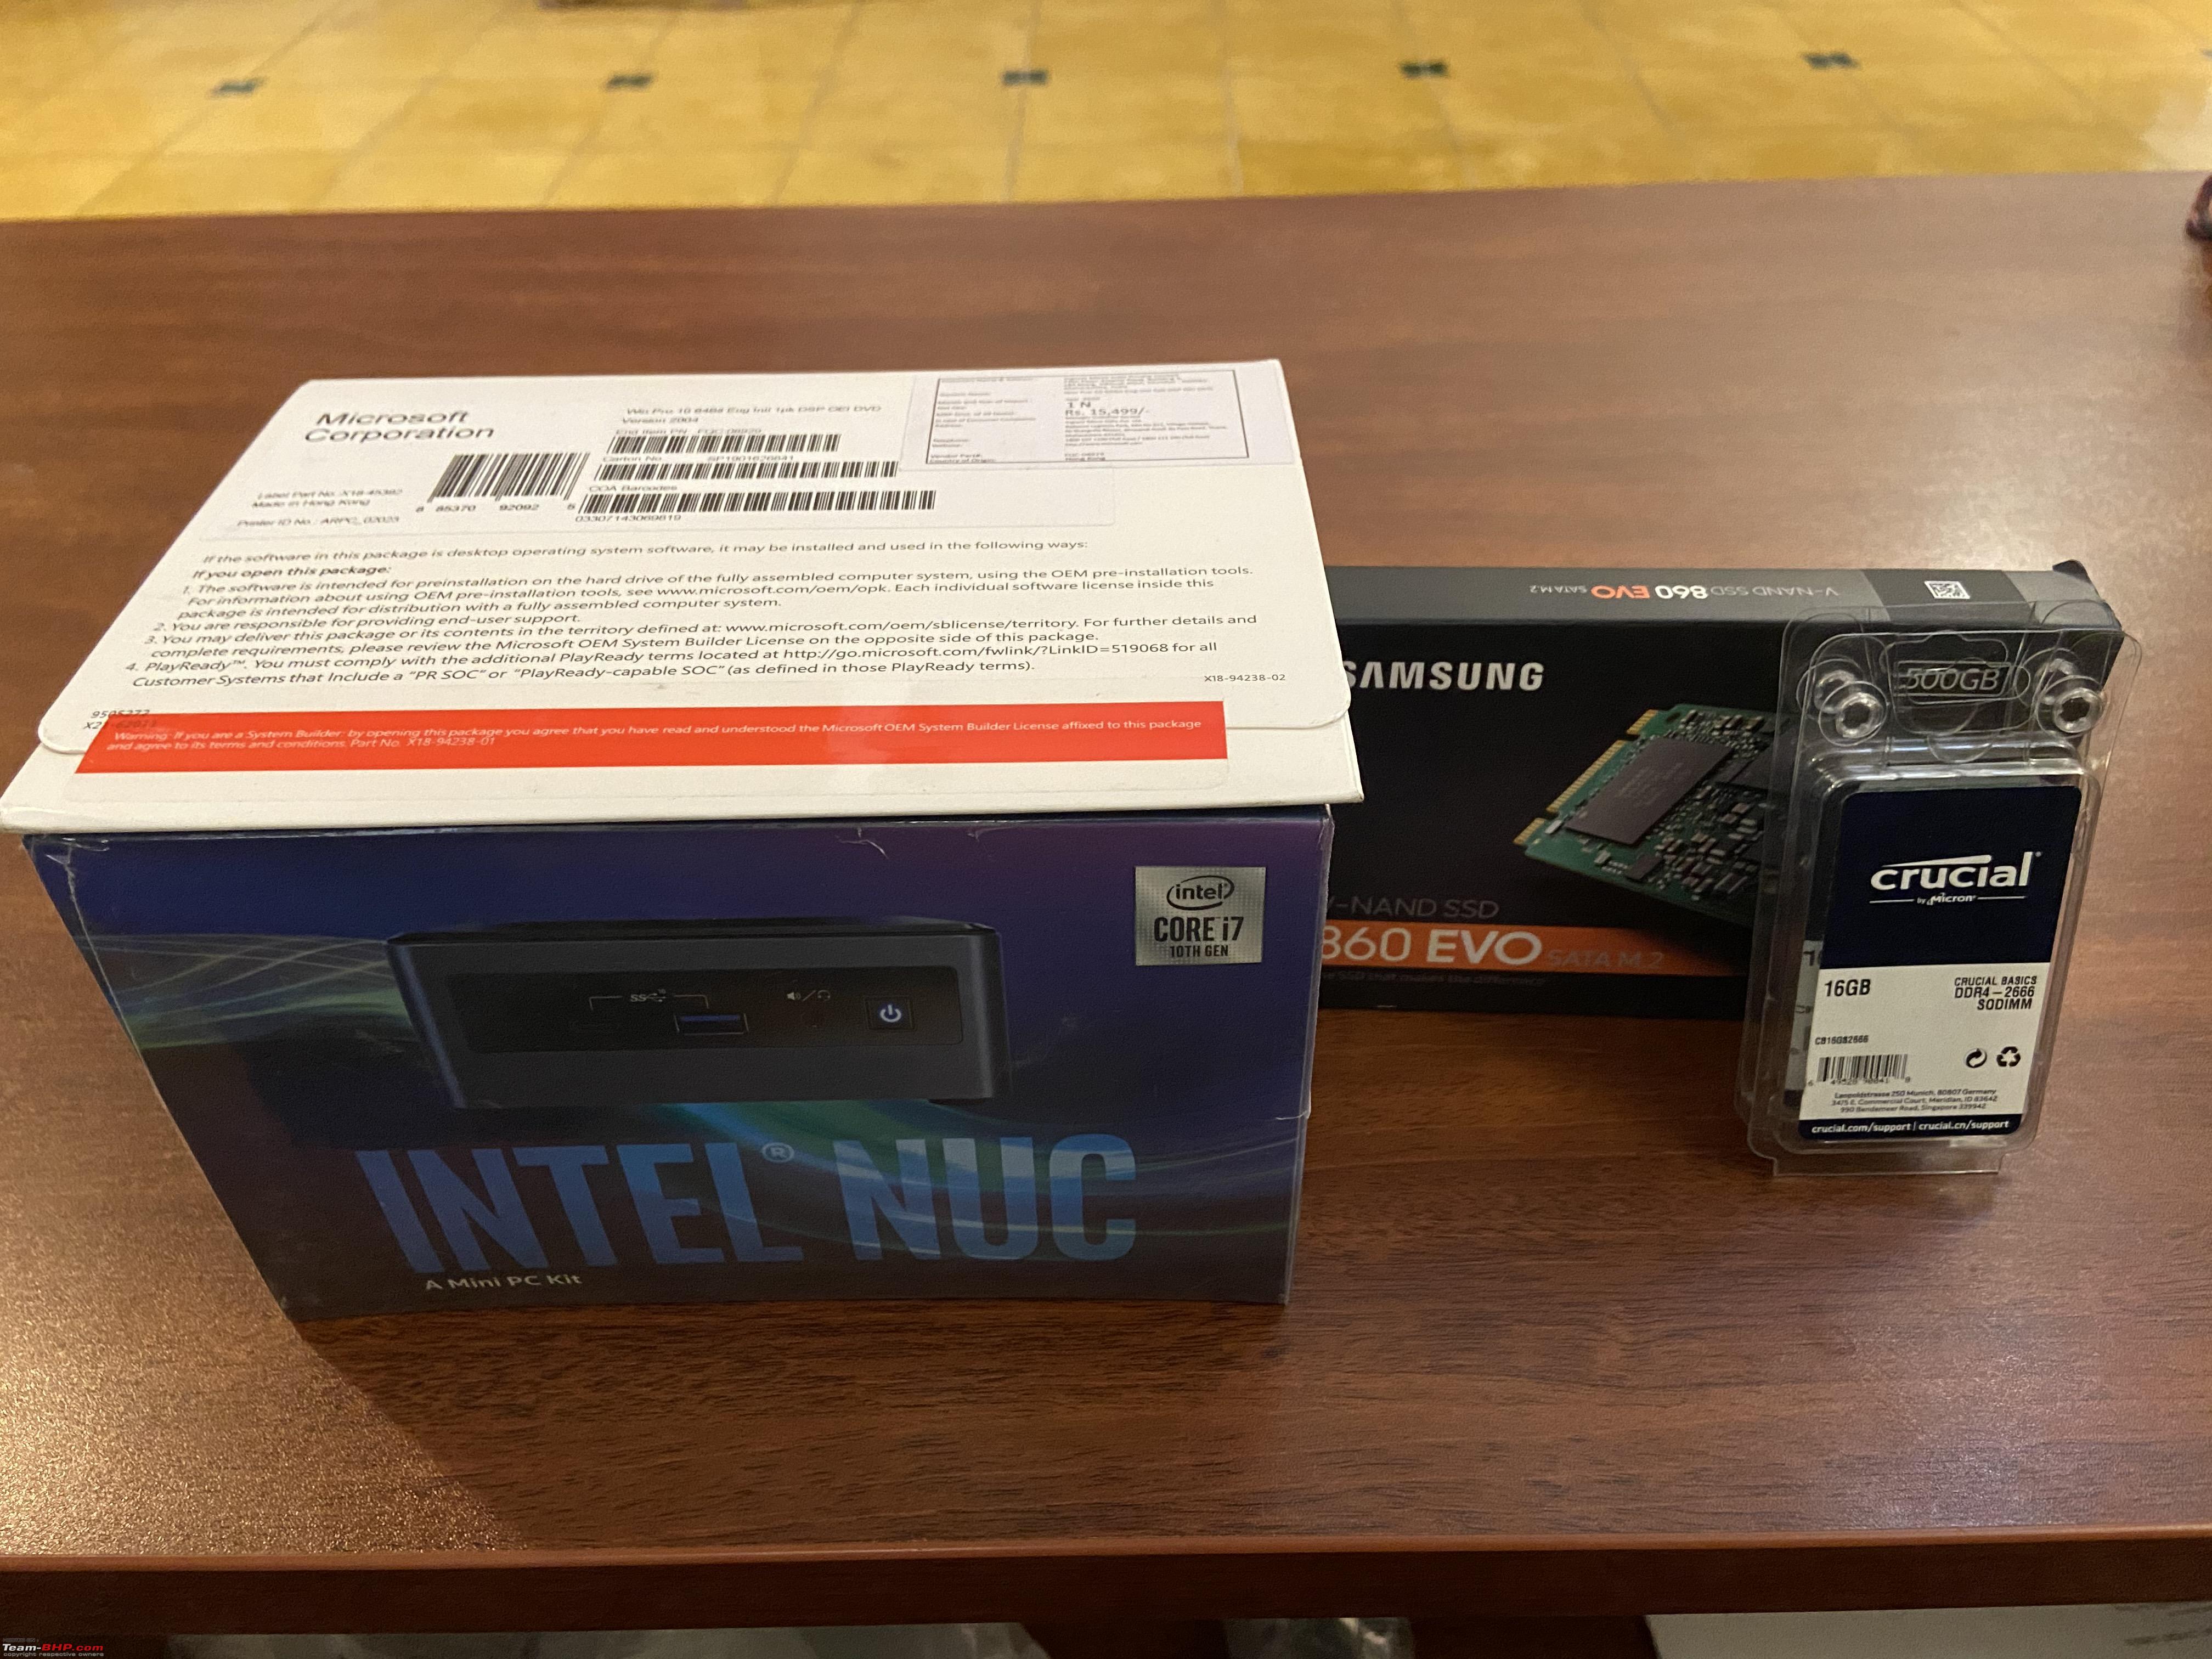   Below video shows how I was able to control the mount through a remotely connected laptop. ZWO ASI2600 MC Pro Cooled CMOS Camera - March 2021: After reading lots of reviews and research, I shortlisted a few cooled CMOS cameras from ZWO ASI294MC, ASI071MC and ASI2600MC. The 2600MC was the costliest camera but had the biggest sensor which was an APS-C size and the best noise performance. However, again due to Corona, every online vendor had this back ordered. I was checking most online sites for months with no success. I wrote to ZWO to find if they had any dealer in India and got a negative reply. Then in December, I came across a message from a vendor called Cosmeascopes that they were going to be a dealer for ZWO and they will take orders from January. I placed the order in the first week of January for the ASI 2600 and an EAF (electronic auto focuser). After a few delays in shipment from ZWO, I finally got the camera in the 2nd week of March. A few pictures of unboxing the camera and EAF.  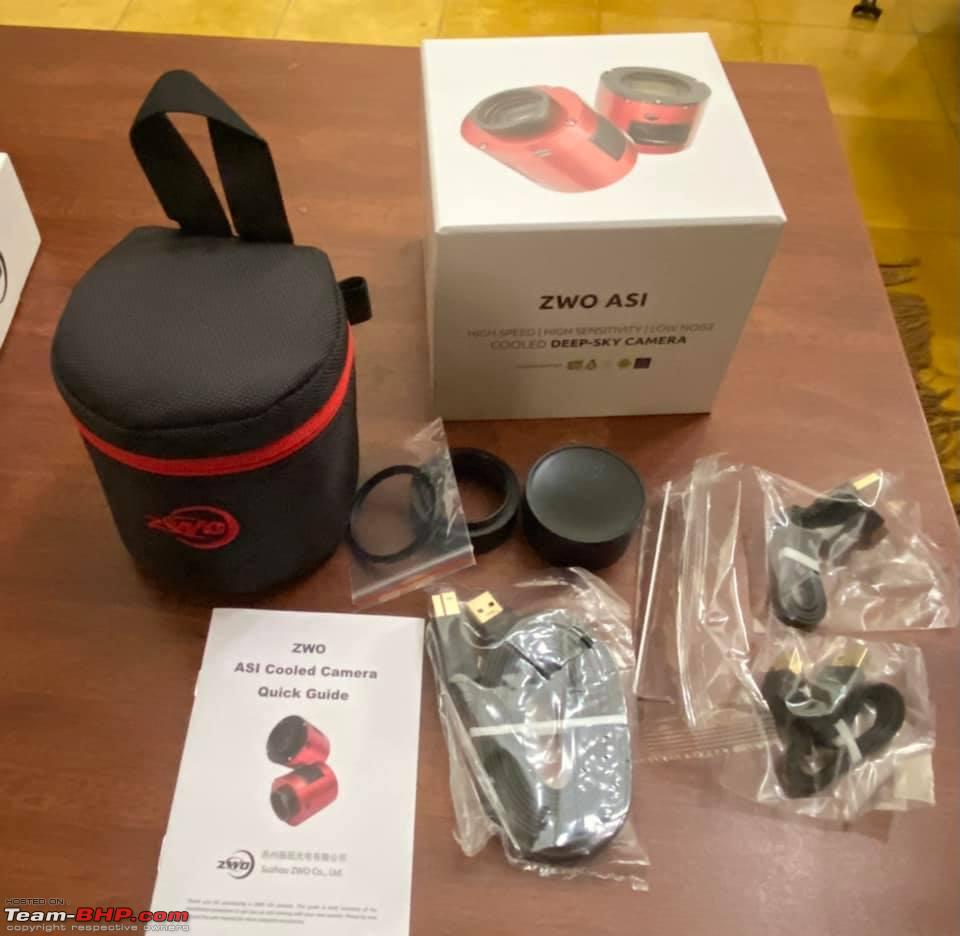    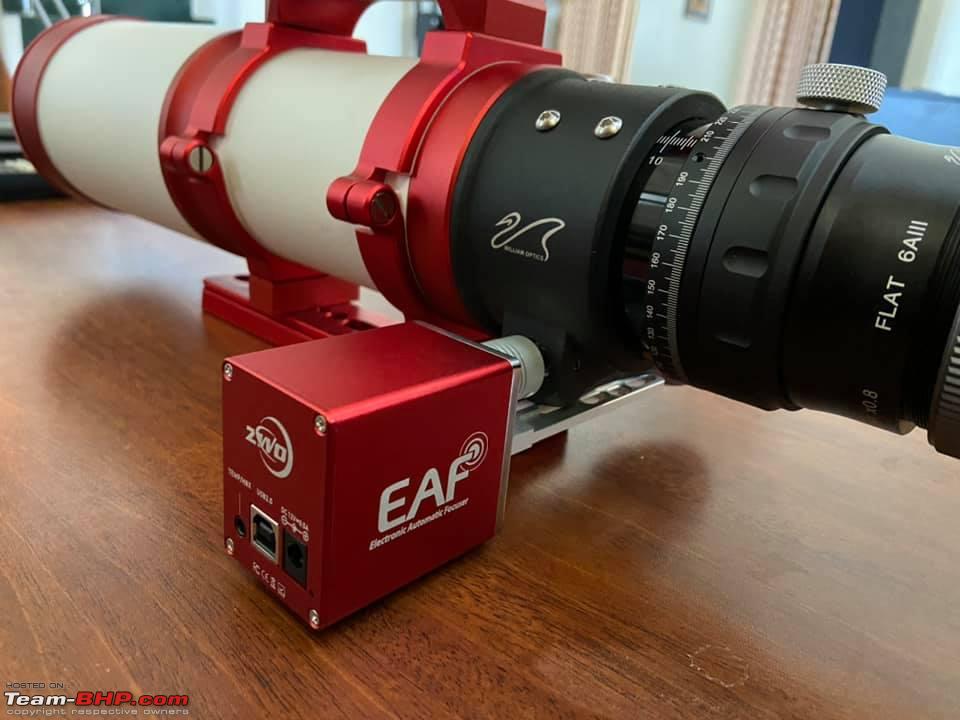 Finishing this post with my very first deep space object picture of the Orion Nebula. The Orion Nebula and Running Man Nebula. The Orion Nebula (also known as Messier 42, M42, or NGC 1976) is a diffuse nebula situated in the Milky Way, being south of Orion's Belt in the constellation of Orion. It is one of the brightest nebulae, and is visible to the naked eye in the night sky. Orion nebula is situated at about 1350 light years from earth and is about 12 light years wide. Equipment Used: Mount: Skywatcher EQ6-R Pro german equatorial mount Telescope: William Optics GT81 APO triplet refractor Camera - Canon EOS-450D Guide scope: William Optics 50mm guide scope Guide camera: ZWO ASI 224 Exposure Details: Total integration time = 60 minutes Lights - 30 x 120 seconds Darks - 20 x 120 seconds Flats - 20 Software: N.I.N.A for plate solving and acquisition PHD2 for guiding PixInsight for stacking and post processing 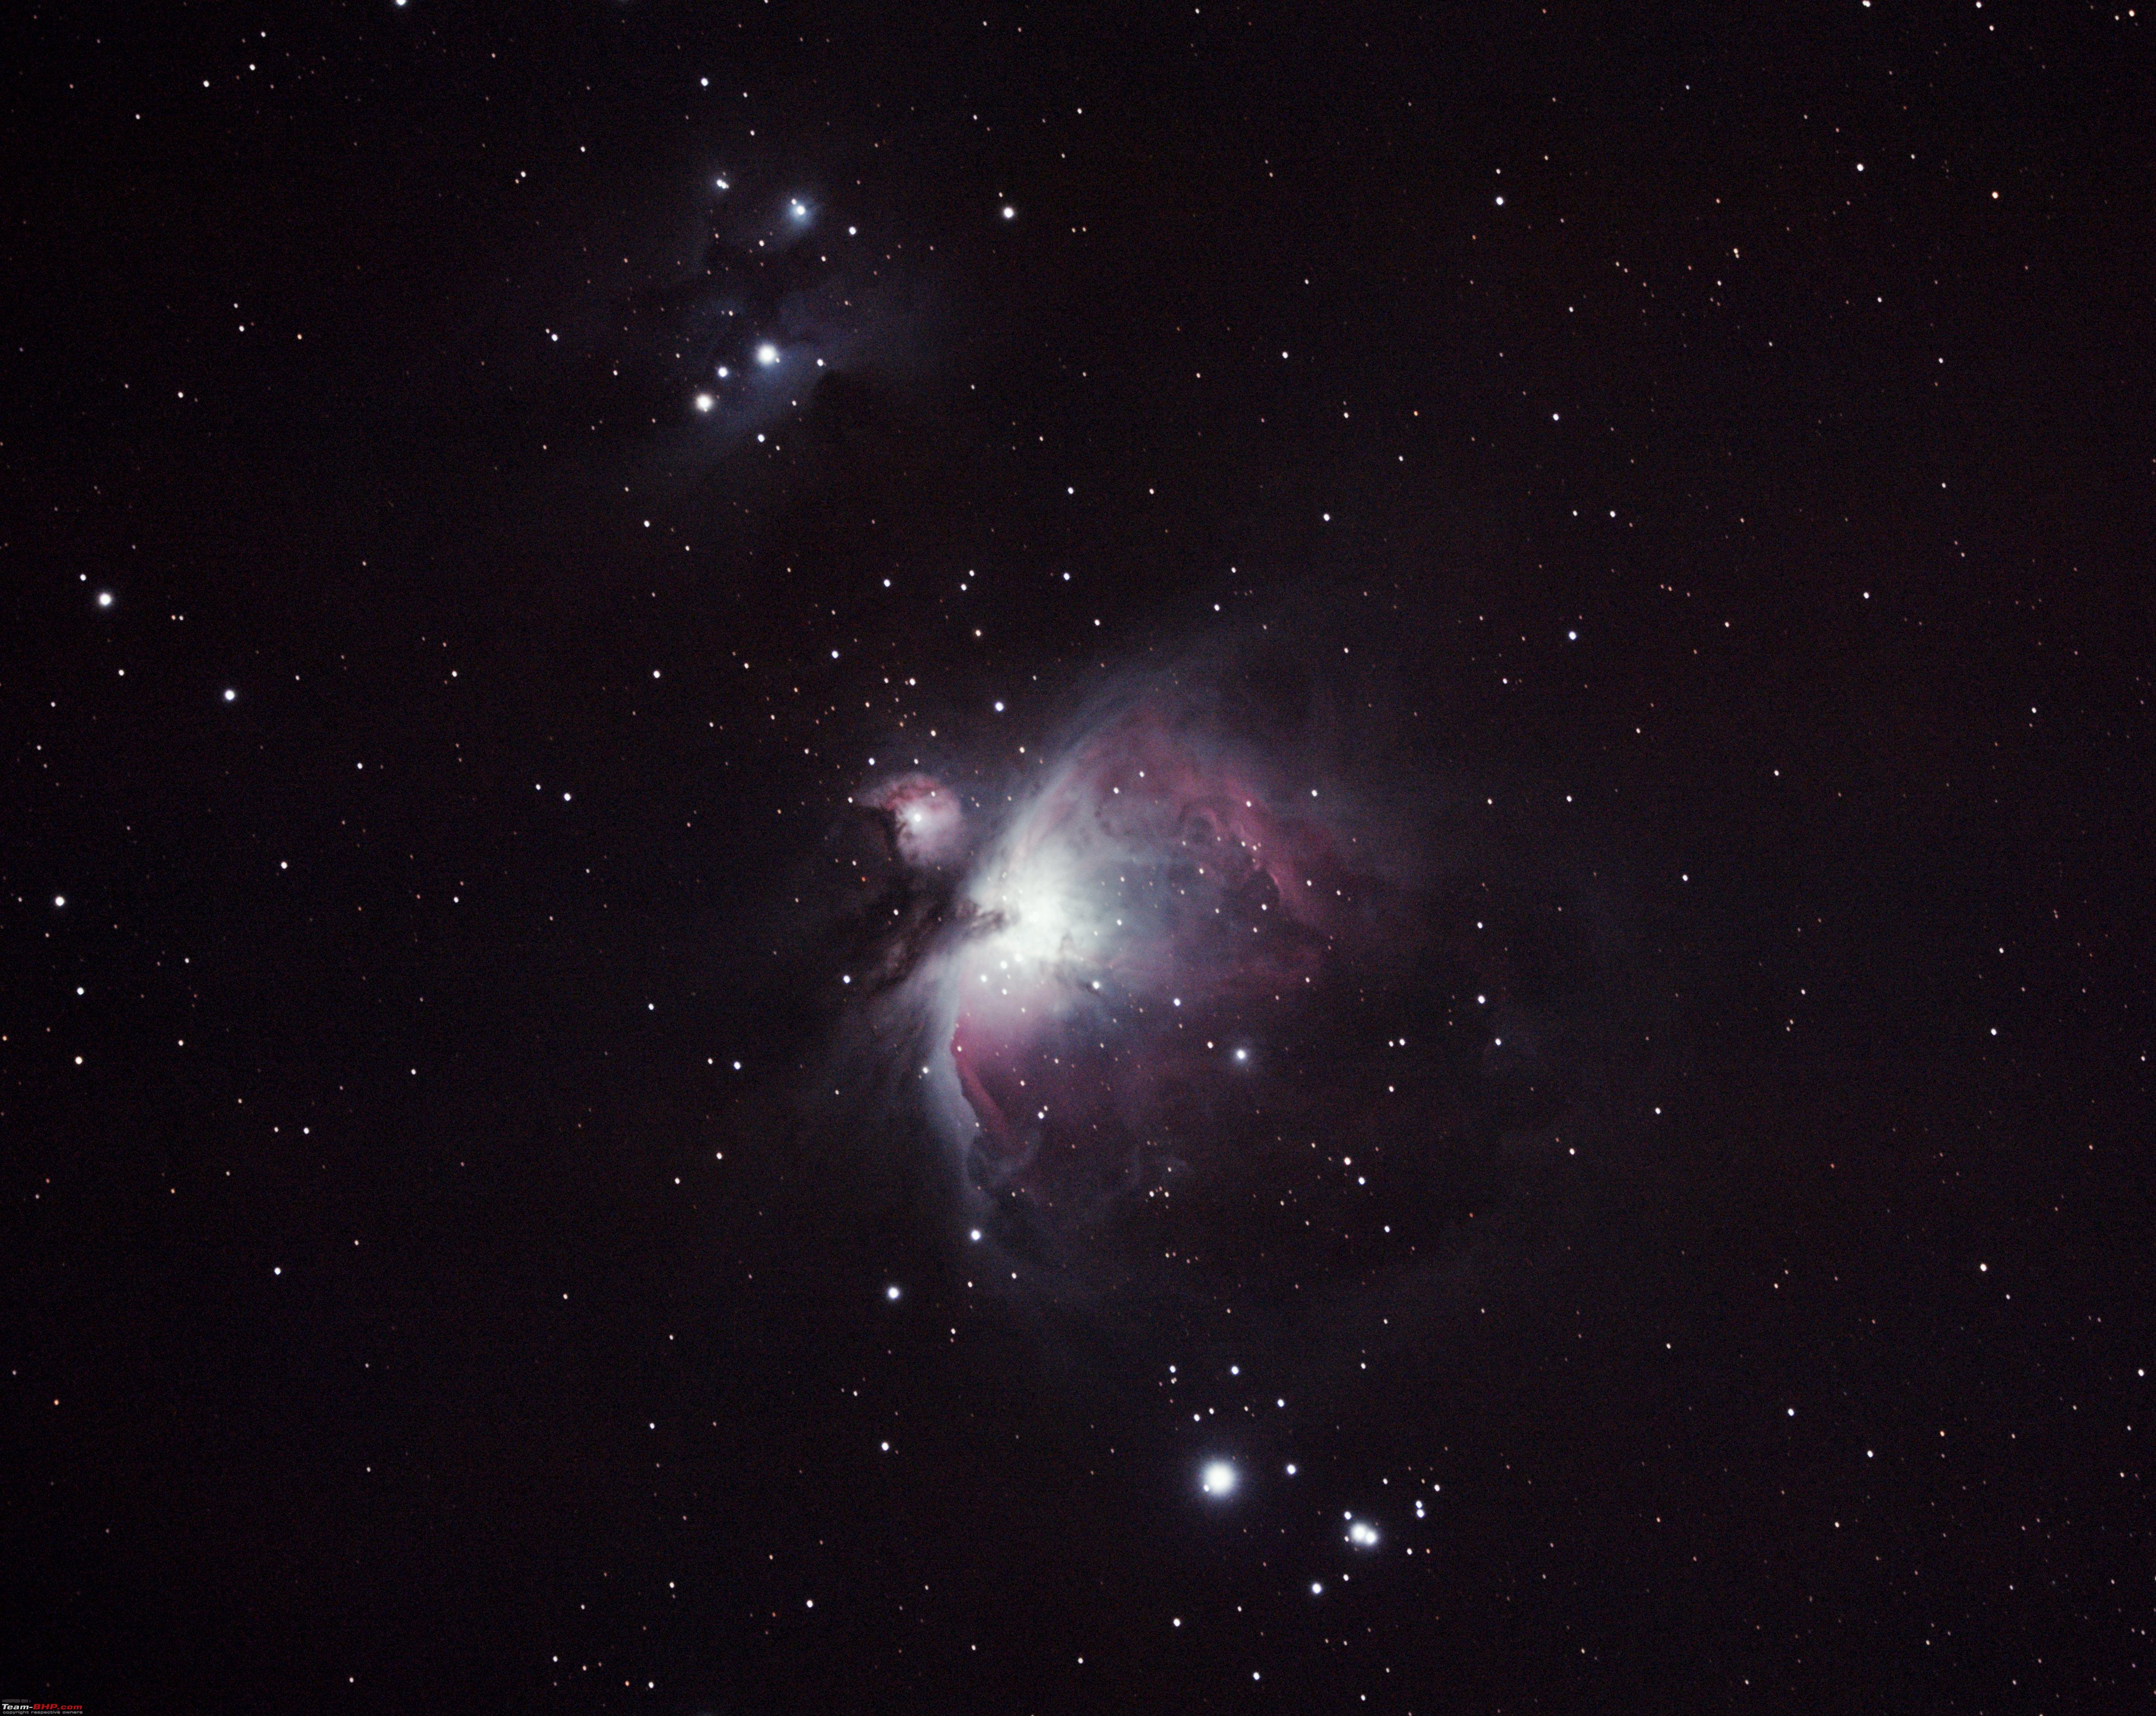 Last edited by Aditya : 25th January 2022 at 19:09. Reason: Personal details masked |
|
| (74)
Thanks
|
| The following 74 BHPians Thank graaja for this useful post: | 2himanshu, aayushnair, adi_sun, am1m, AmitRavi07, ampere, Anduril, ariesonu, arnieshwartz, Arun.K, arvind71181, asingh1977, BlackPearl, CEF_Beasts, Chetan_Rao, chhotagujju, Deadpool, debuda, Dr.AD, DriverNo.420, fastturtle10, Gannu_1, GTO, Guna, guyfrmblr, haisaikat, InControl, Jeroen, KarthikK, kat, Kkumar, lapis_lazuli, maximus., mugen_pinaki27, N33raj, neelkumar, Nempuguru, Nick_Wanderlust, ObsessedByFIAT, PSOPS, R2D2, RAC, rajesh1868, Rudra Sen, saikarthik, Samba, Samfromindia, Santoshbhat, satan's_valet, sayakc, Scarlet_Rider, shancz, Shanksta, ShortShifter, SnS_12, SohailPistawala, somspaple, SoumenD, Storme5257, suhaas307, tchsvy, Tgo, theexperthand, Thermodynamics, Turbanator, Turbojc, turboNath, V.Narayan, varunanb, watsonjay, wheelguy, xja1, yosbert, ysjoy |
|
22nd March 2021, 22:18
| #7 |
| Team-BHP Support Join Date: Nov 2013 Location: Coimbatore
Posts: 3,712
Thanked: 25,621 Times
| re: Rendezvous with The Universe | My Astrophotography Hobby A drive to Coorg for an astrophotography event Drove to Coorg during to attend an astrophotography event on 12th, 13th and 14th of March 2021. This was a small event where a few fellow astrophotographers decided to spend a couple of nights at Thala Cauvery in Coorg and do some visual astronomy and photography. Most of these astrophotographers were from BAS (Bangalore Astronomy Society), a group of astrophotography enthusiasts. I got introduced to this group through a friend. They have an active Telegram group where everyone shares information on various interesting astronomy topics, photographs etc. They conduct regular star parties where everyone can take part with families and learn about astronomy (both visual and photography) and also star gaze. This particular event was an unofficial get together with very small number of participants (due to the pandemic situation). I carried both my setups - Celestron 6SE for visual (did not get to use this setup though), and the EQ6-R/WO GT81/ZWO ASI2600 setup for photography. And we were three traveling in the car. Folded the 60% of rear seat and managed to pack all the equipment in the car with space to seat the three of us - me, my daughter and another astrophotographer from Coimbatore. At Coorg, it was a mixed experience. The first day was a disaster. Sky was covered with clouds till midnight. When the sky cleared up, I had lots of equipment issues. I had made the mistake of taking a new camera that arrived just the day before and I had not set it up. Could not get it to focus in the night. Also, there was lots of dew which further worsened the situation. Solved these problems the next day. A fellow astrophotographer rigged up a DIY dew heater made of nichrome wire. This heater when connected to a power bank keeps the lens of the telescopes a couple of degrees above ambient which prevents fogging. Also fixed the focus issue in the camera. Except for occasional clouds rolling in (and spoiling many photos), got clear skies on the second night. Managed to click a few pictures of some celestial objects. Following are the lessons I learnt from this trip which was my first astrophotography trip carrying all my equipment.
A few pictures from this drive. The gear.  The gear packed into the boot.  Unloading the equipment. 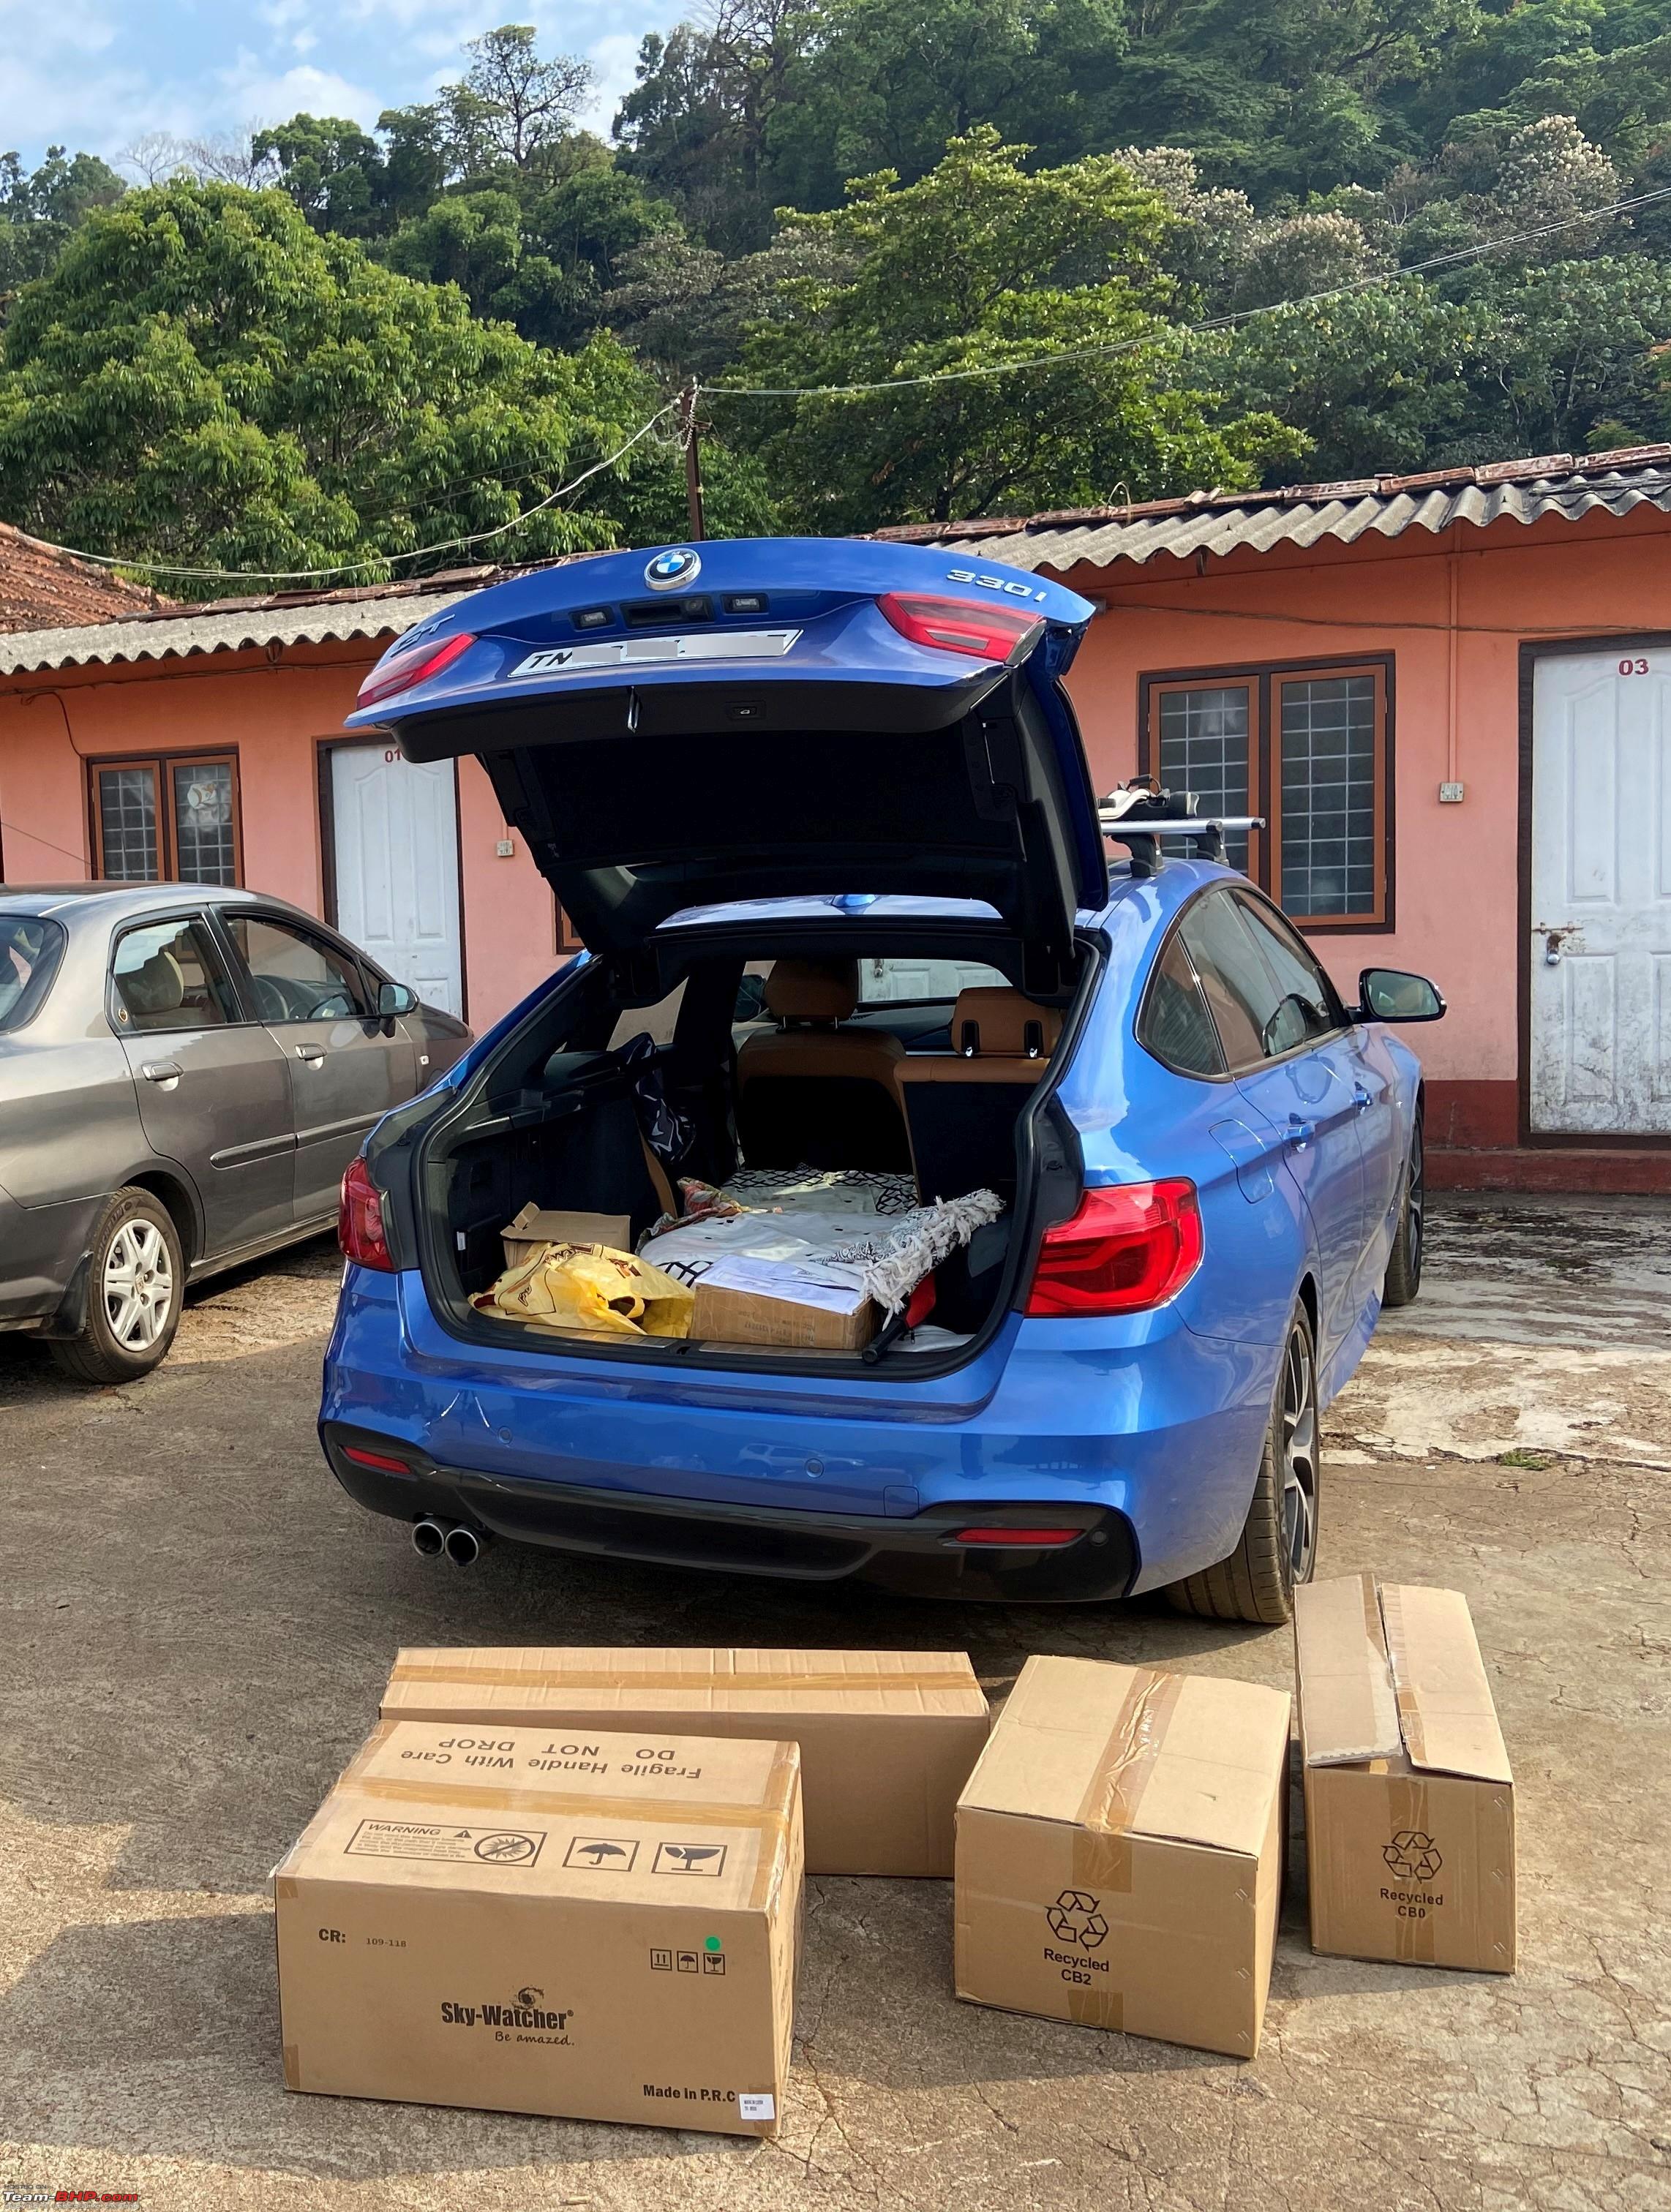 Setting up the telescope. 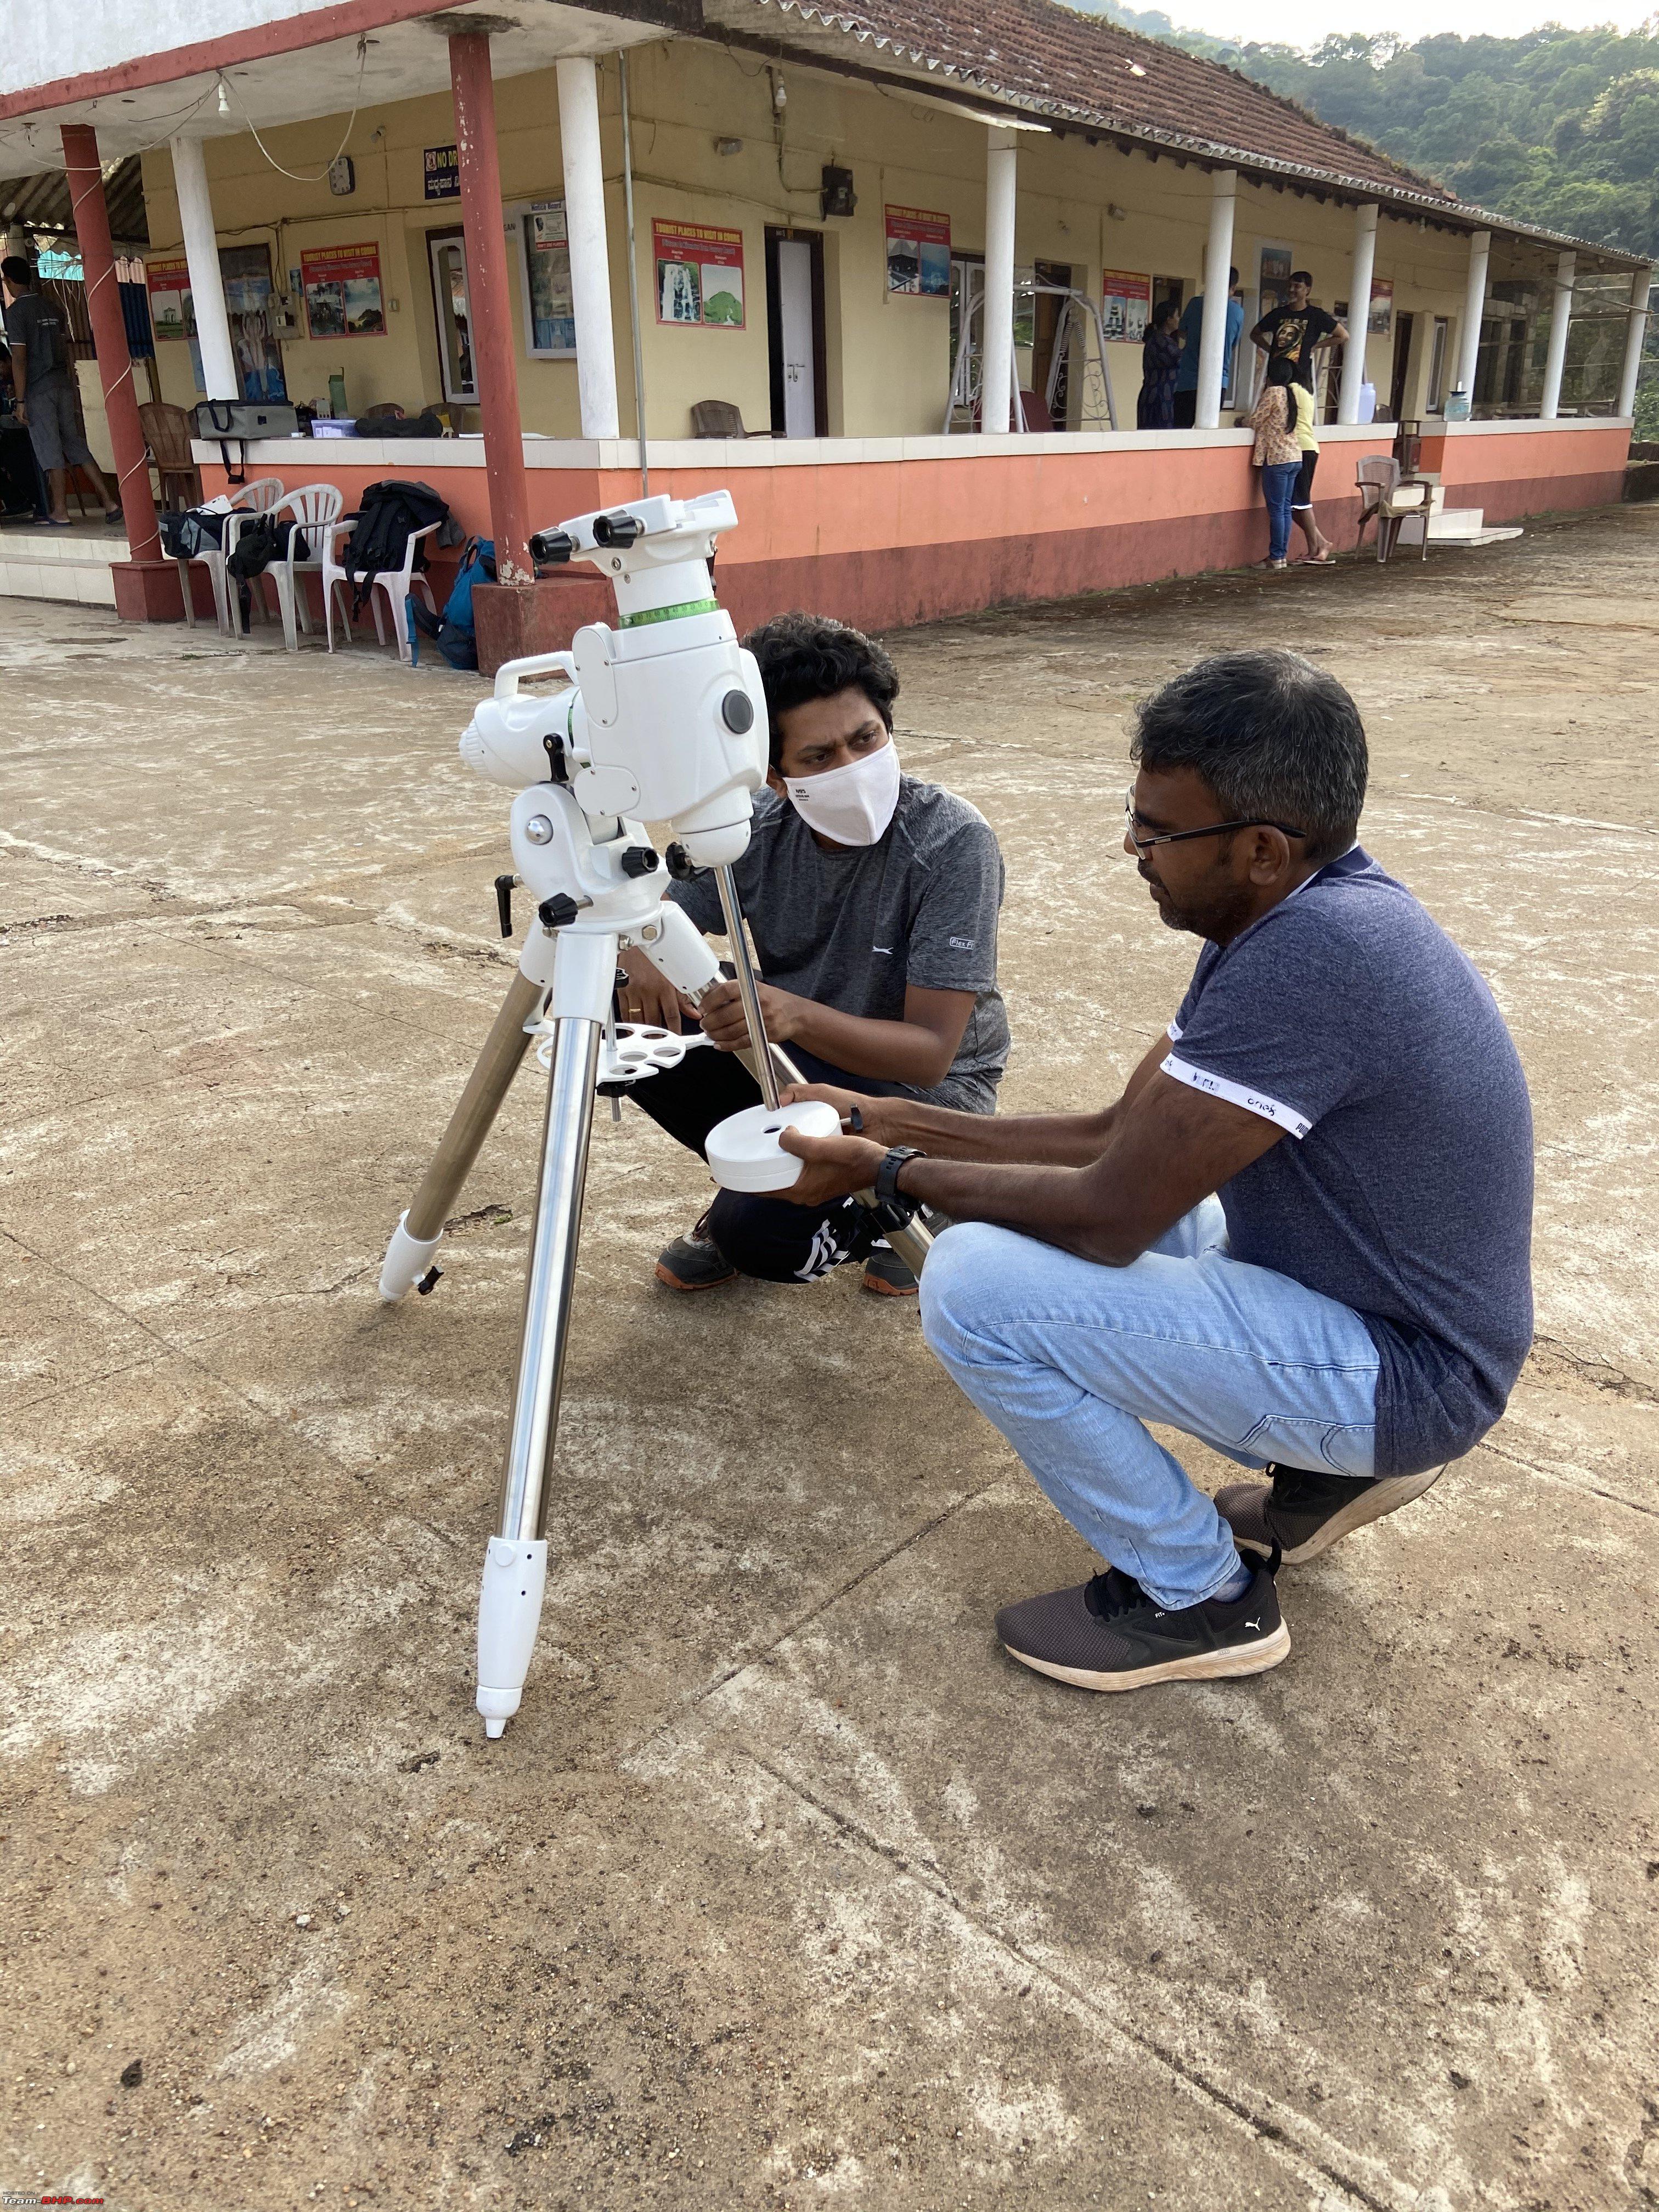 The complete gear including the dew heaters - the rings covered by packing tape. Though this was a quick jugaad, without this it would not have been possible to shoot anything. 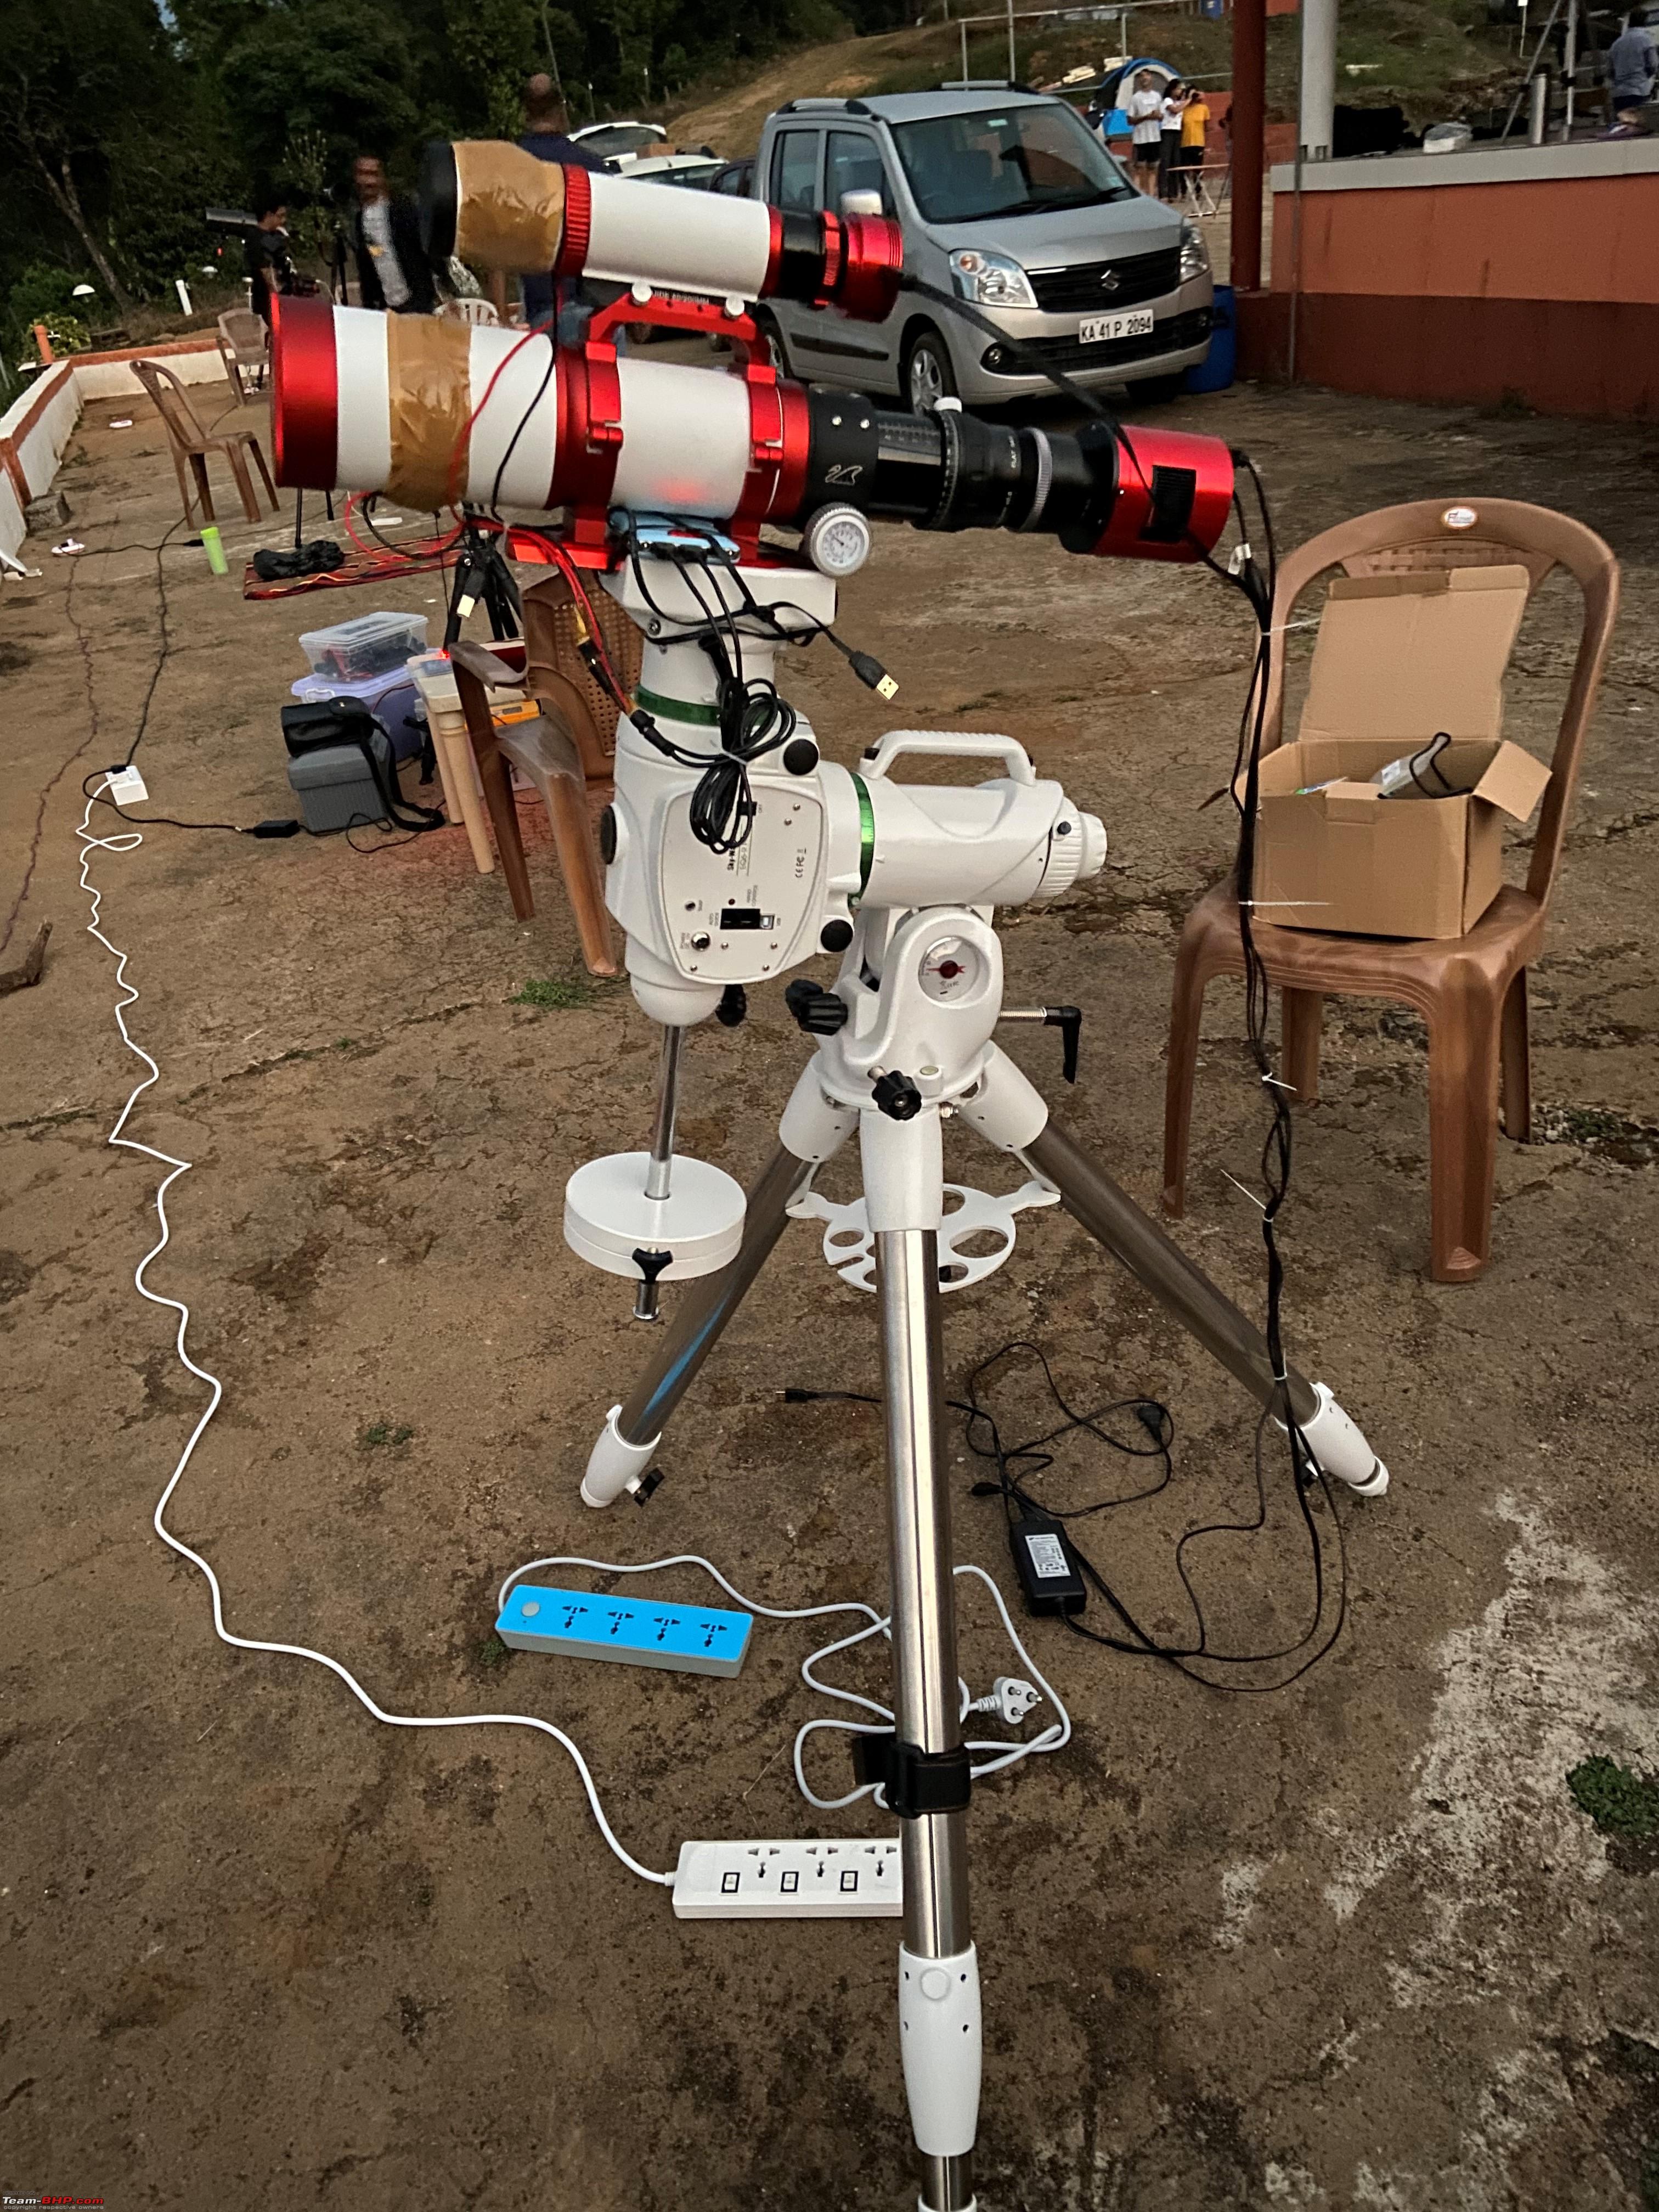 I had to leave the setup covered with a car cover most of the night on the first day. 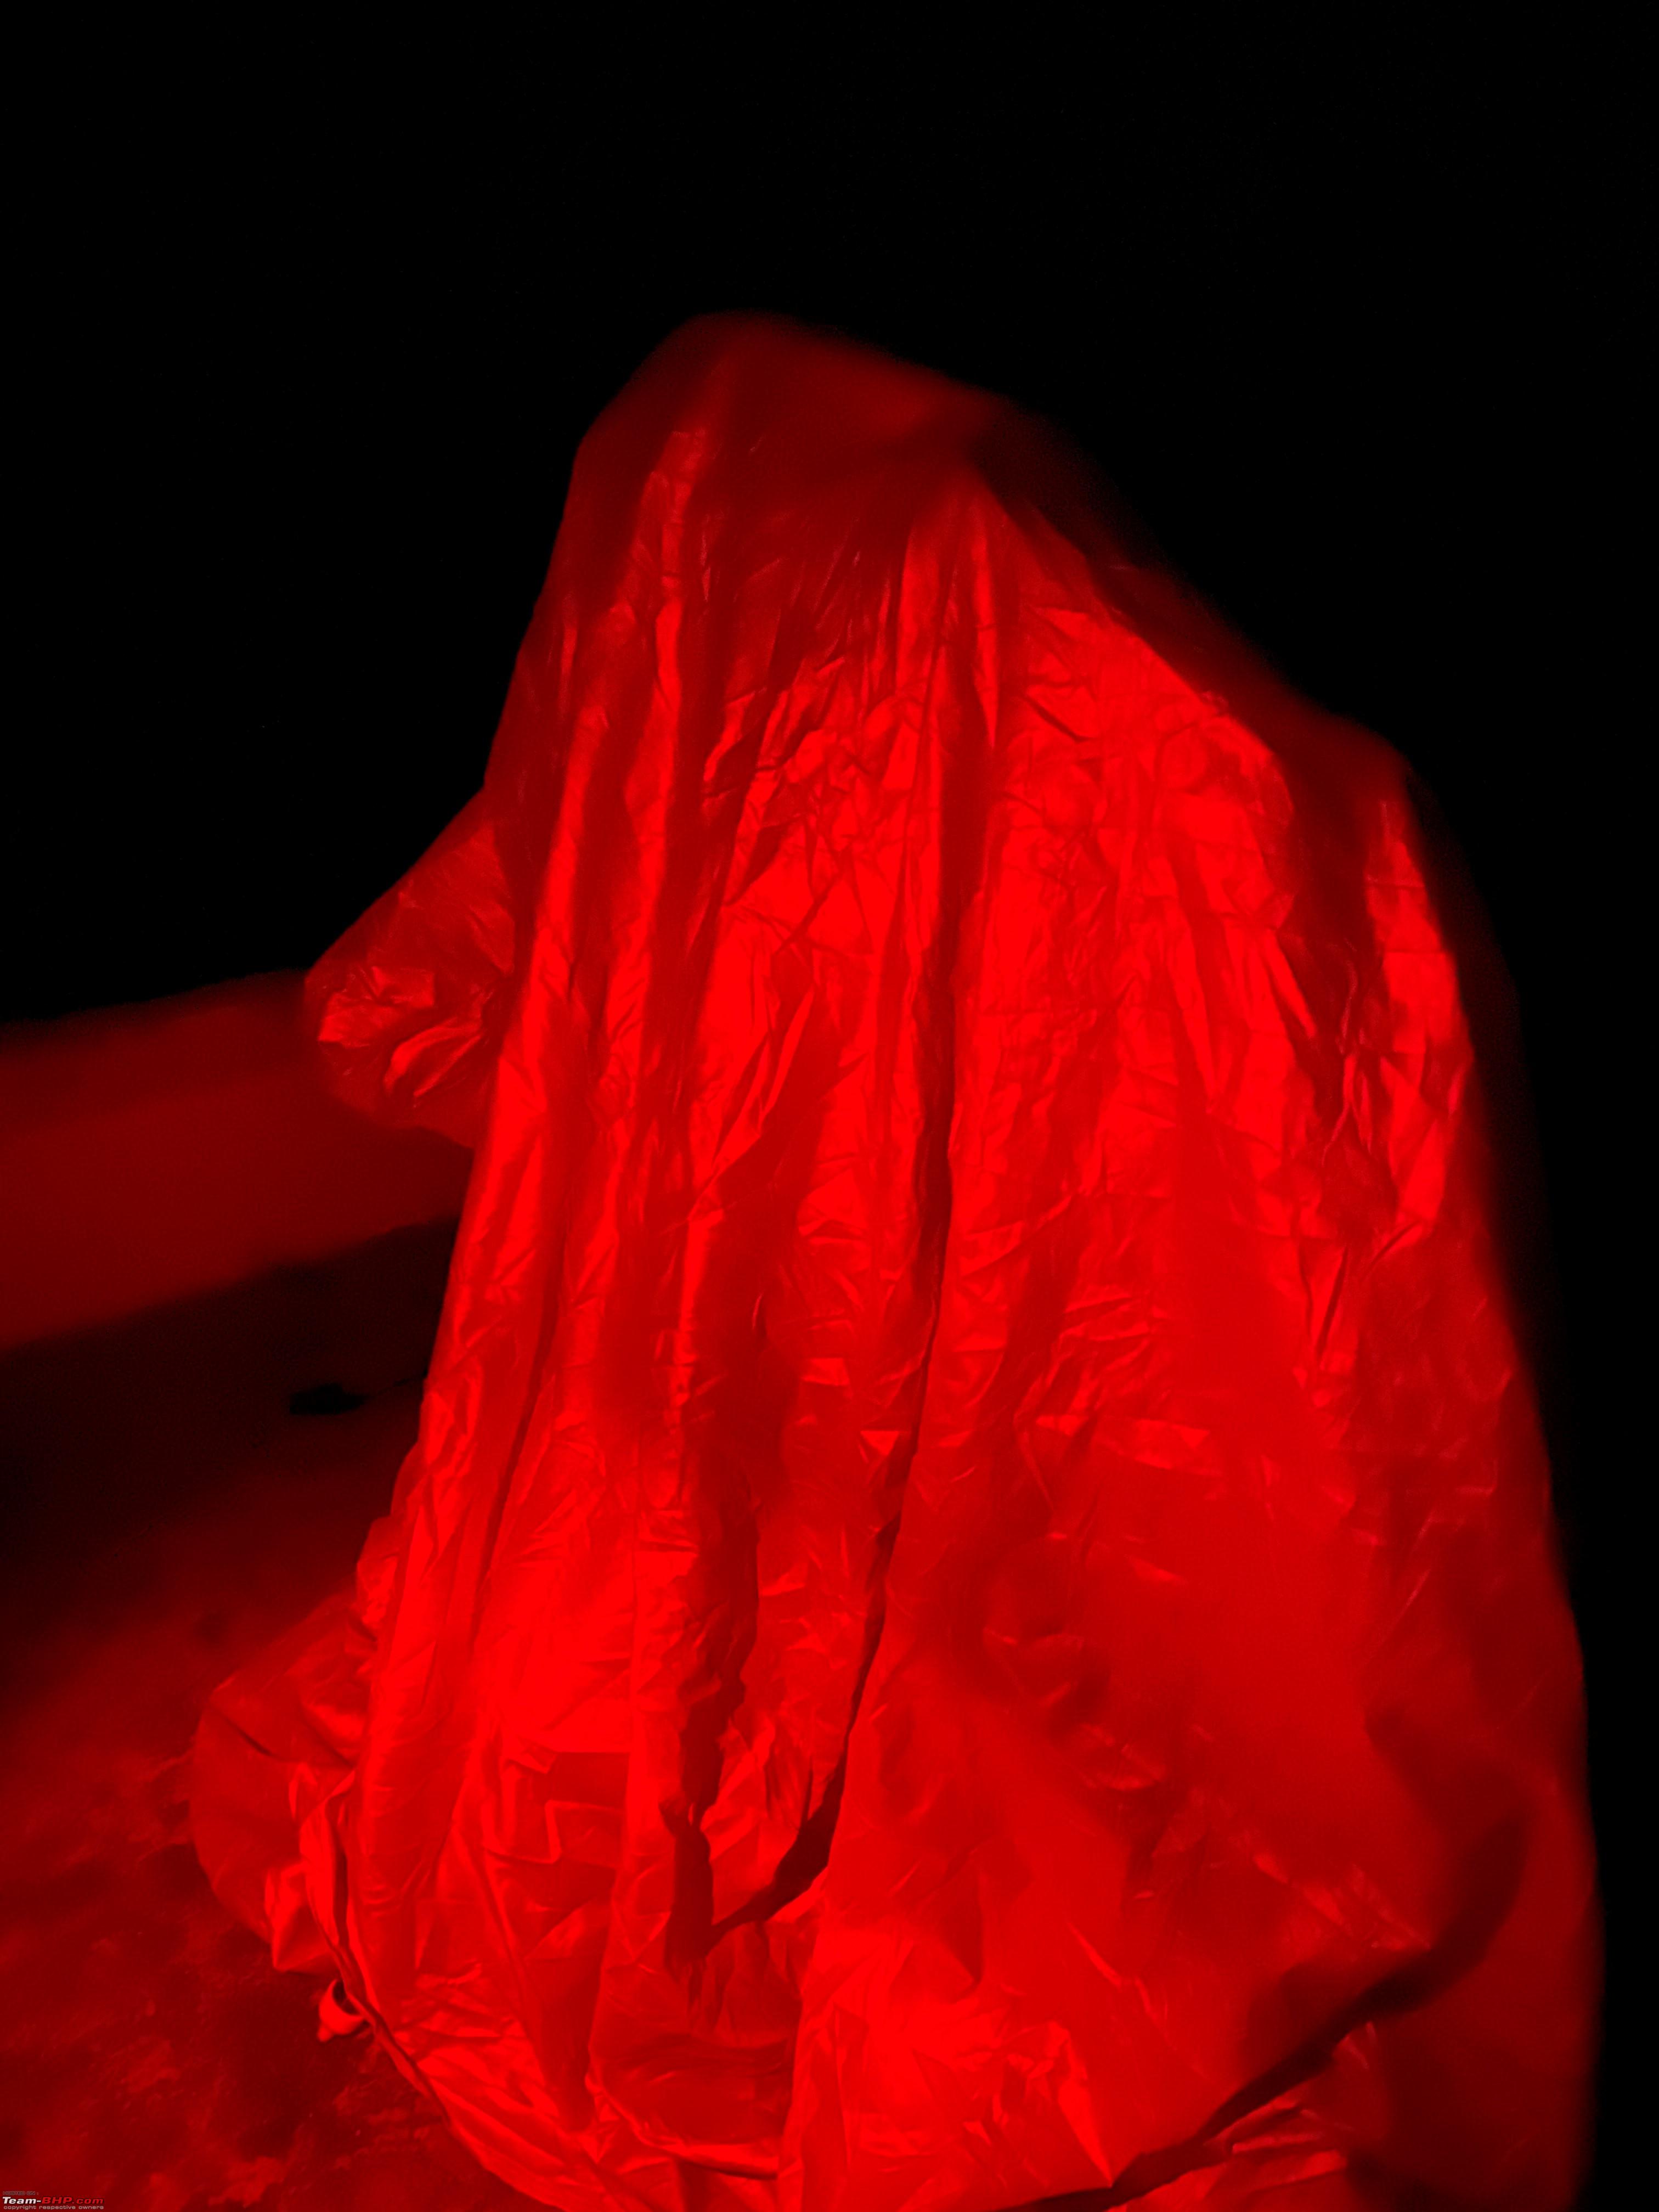 A picture of photography in action at night. Notice the dim red lights that are turned on only when absolutely necessary. Even laptop display theme is set to red.  The DIY dew heaters. He made quite a bunch of them to help everyone. 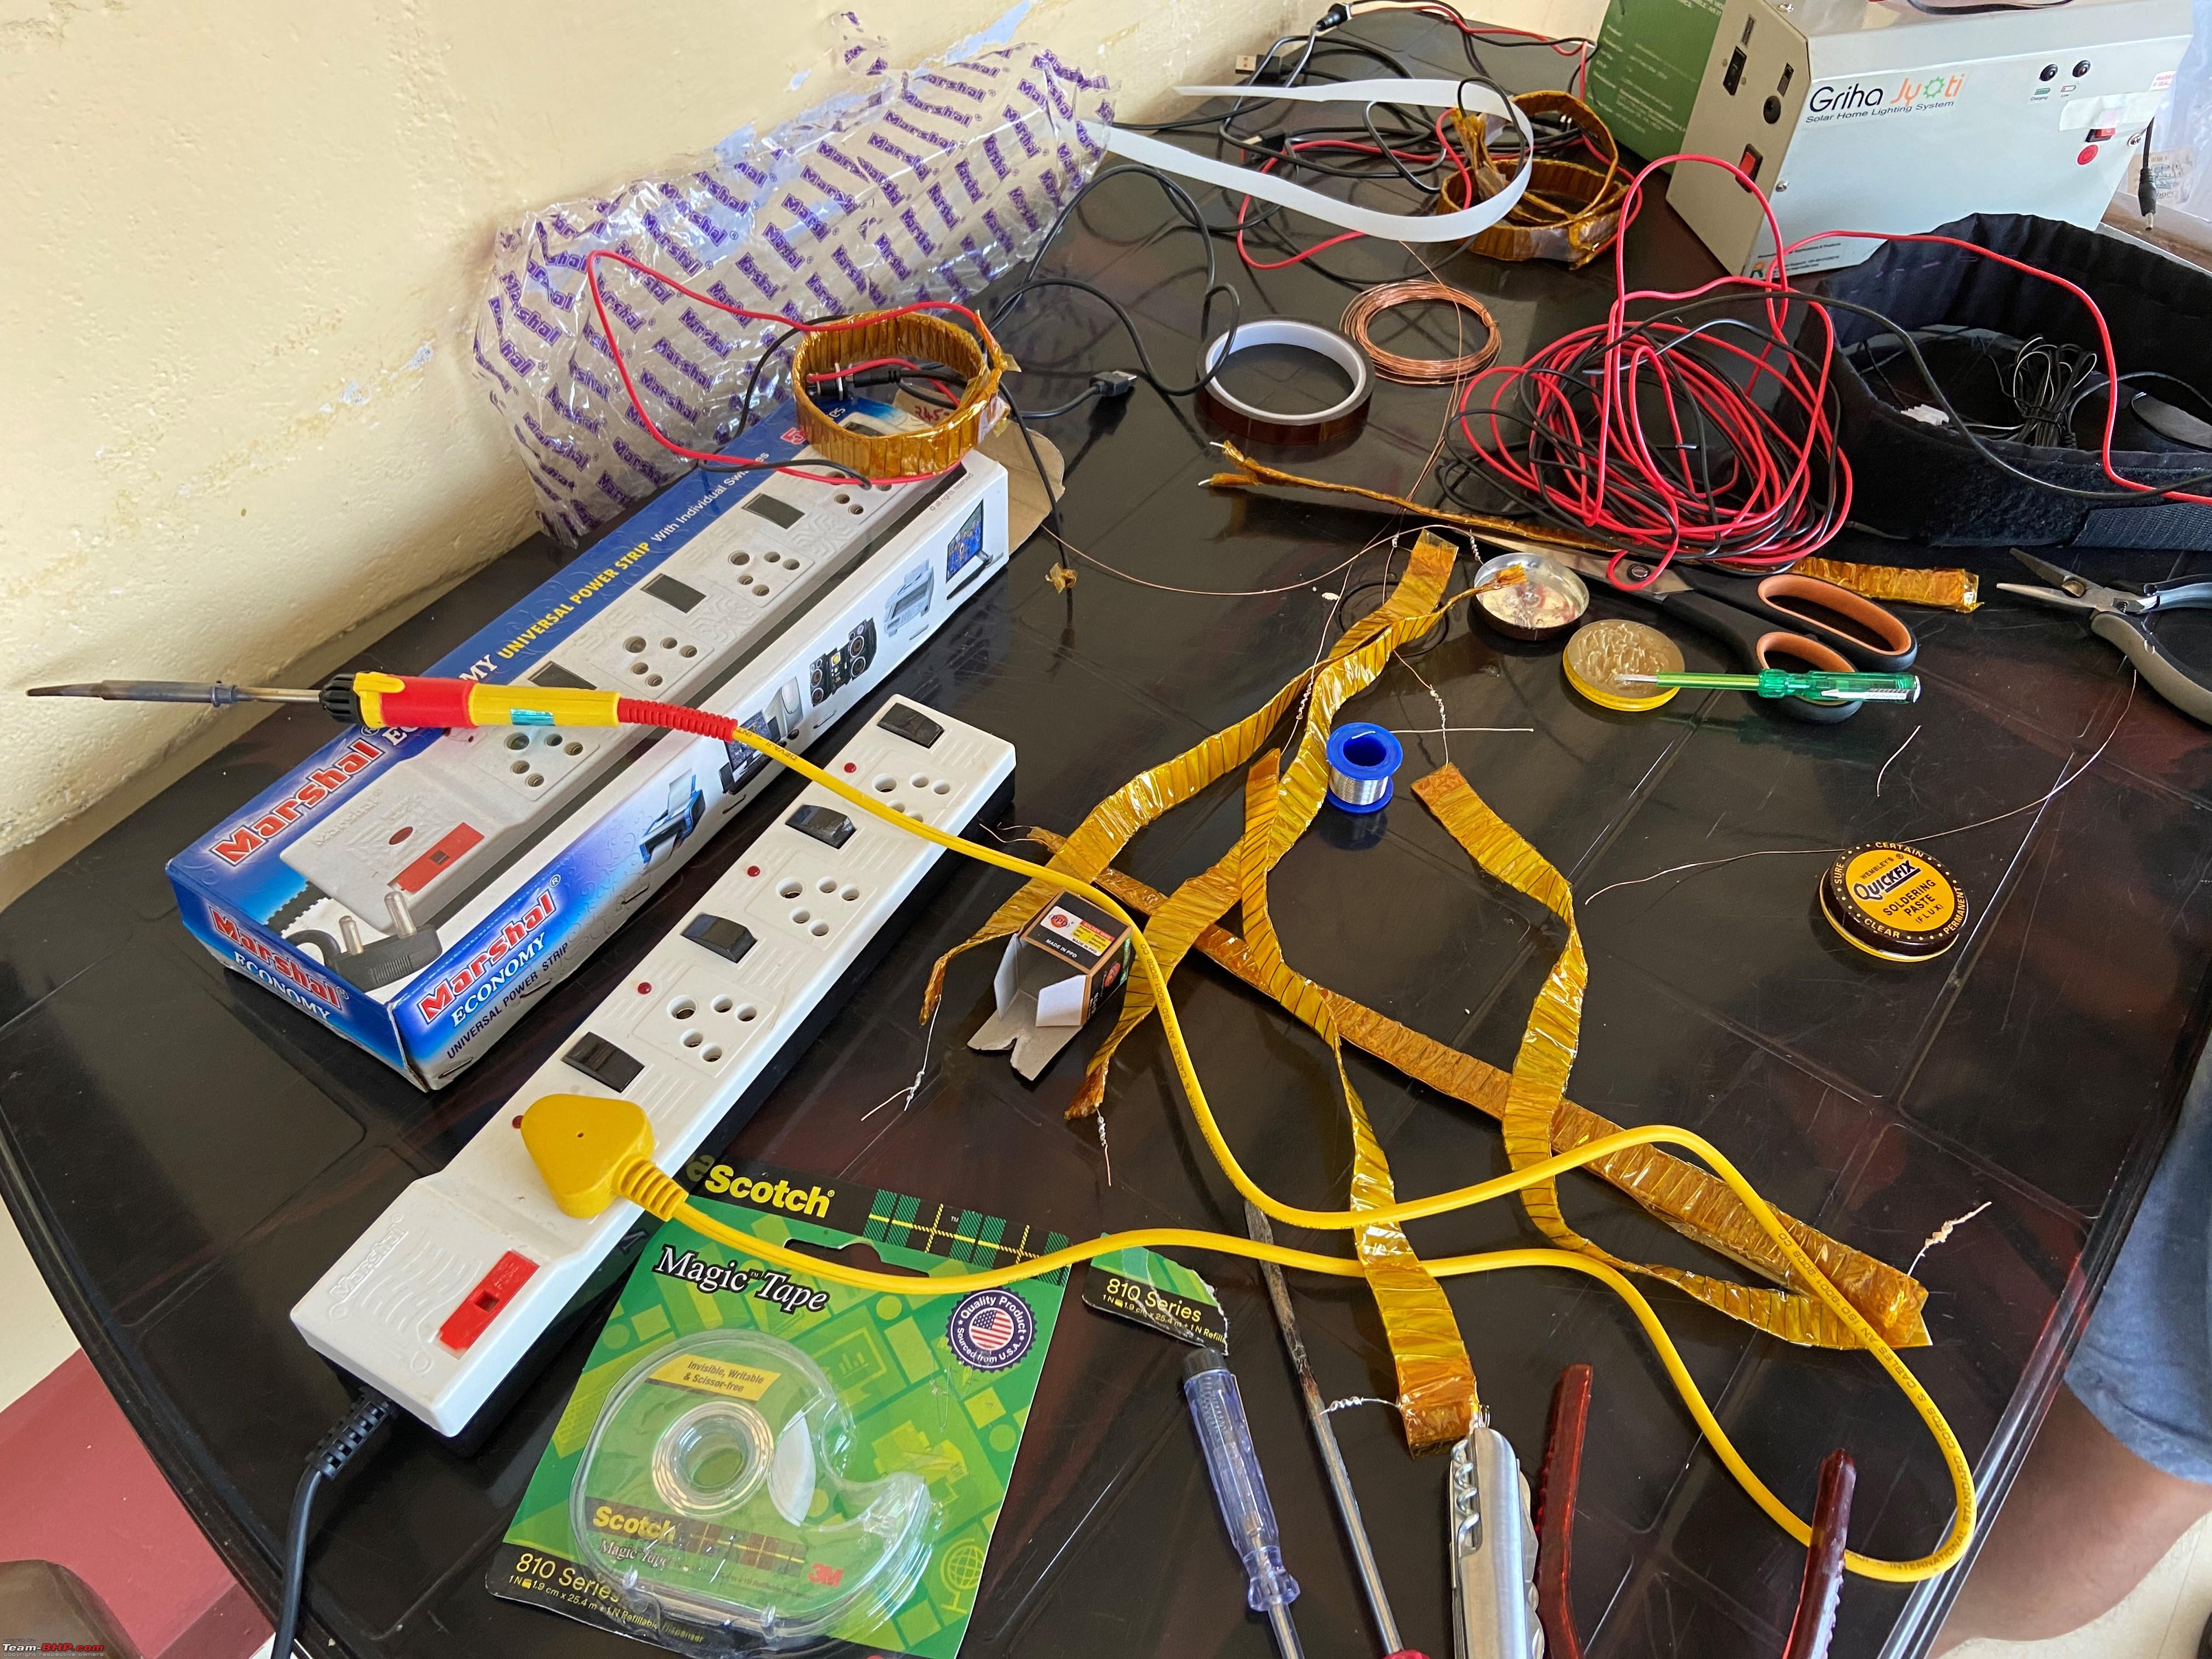 Few setups from fellow photographers.  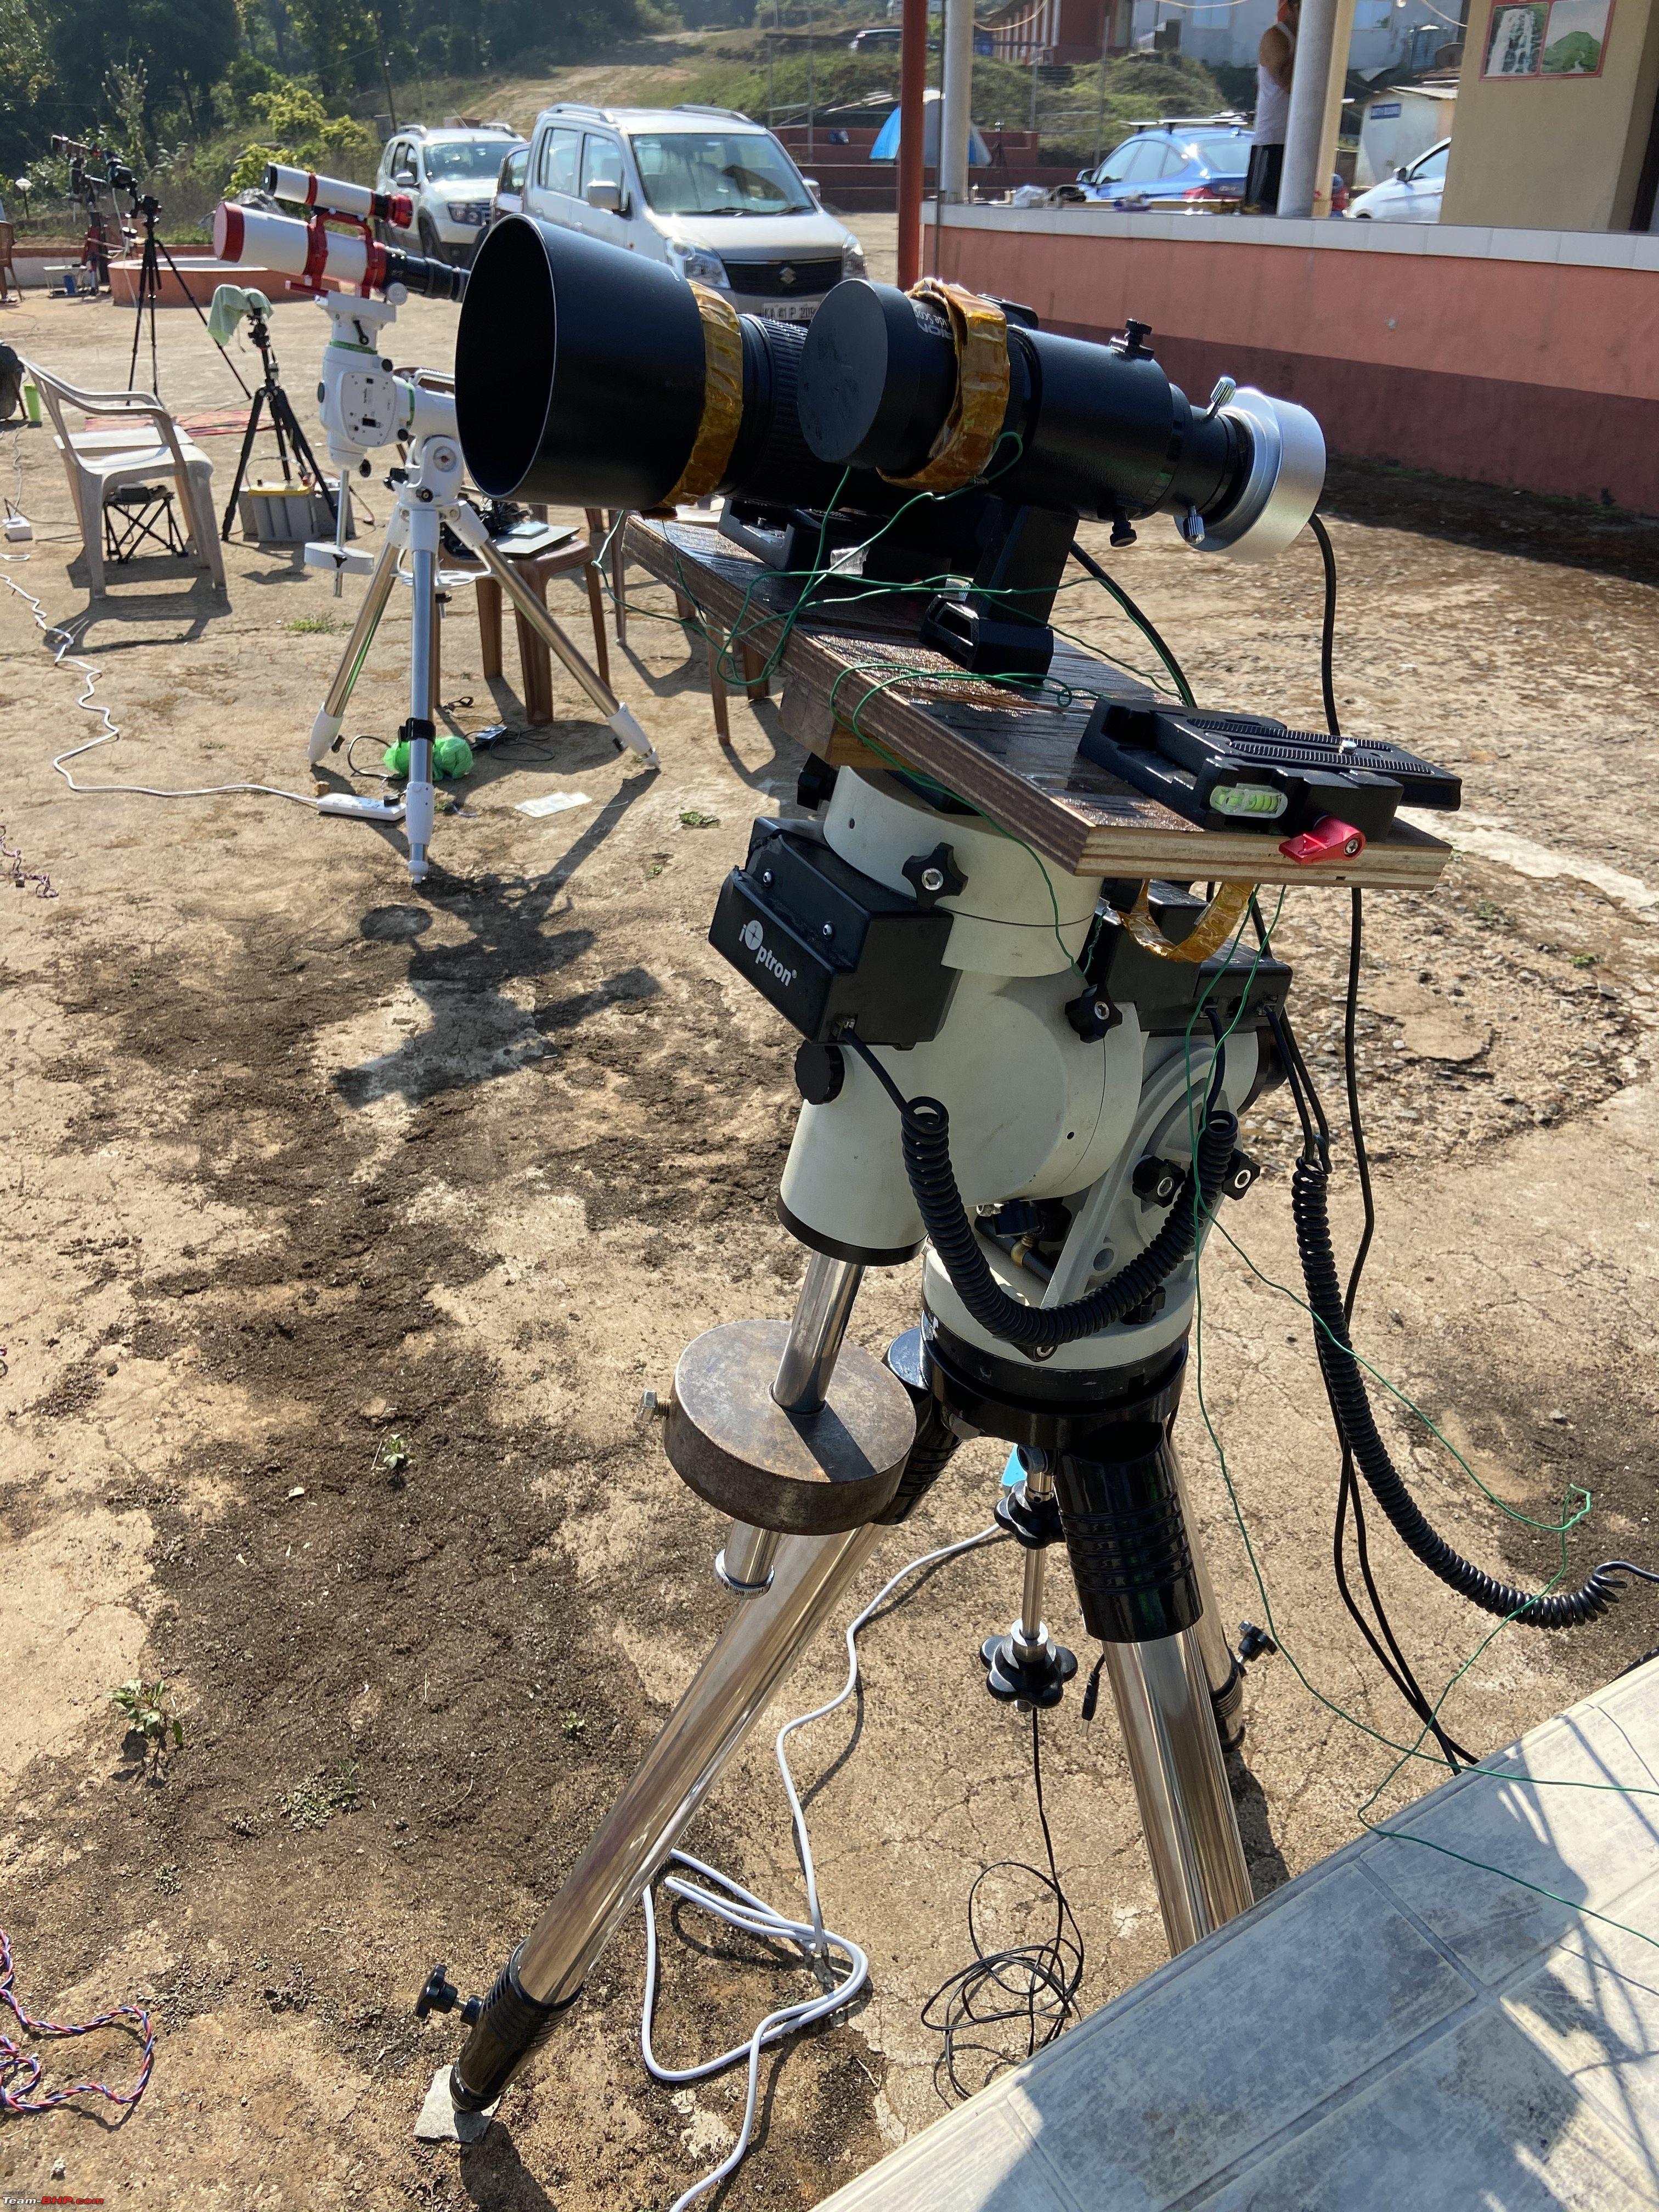 With fellow astrophotographers. 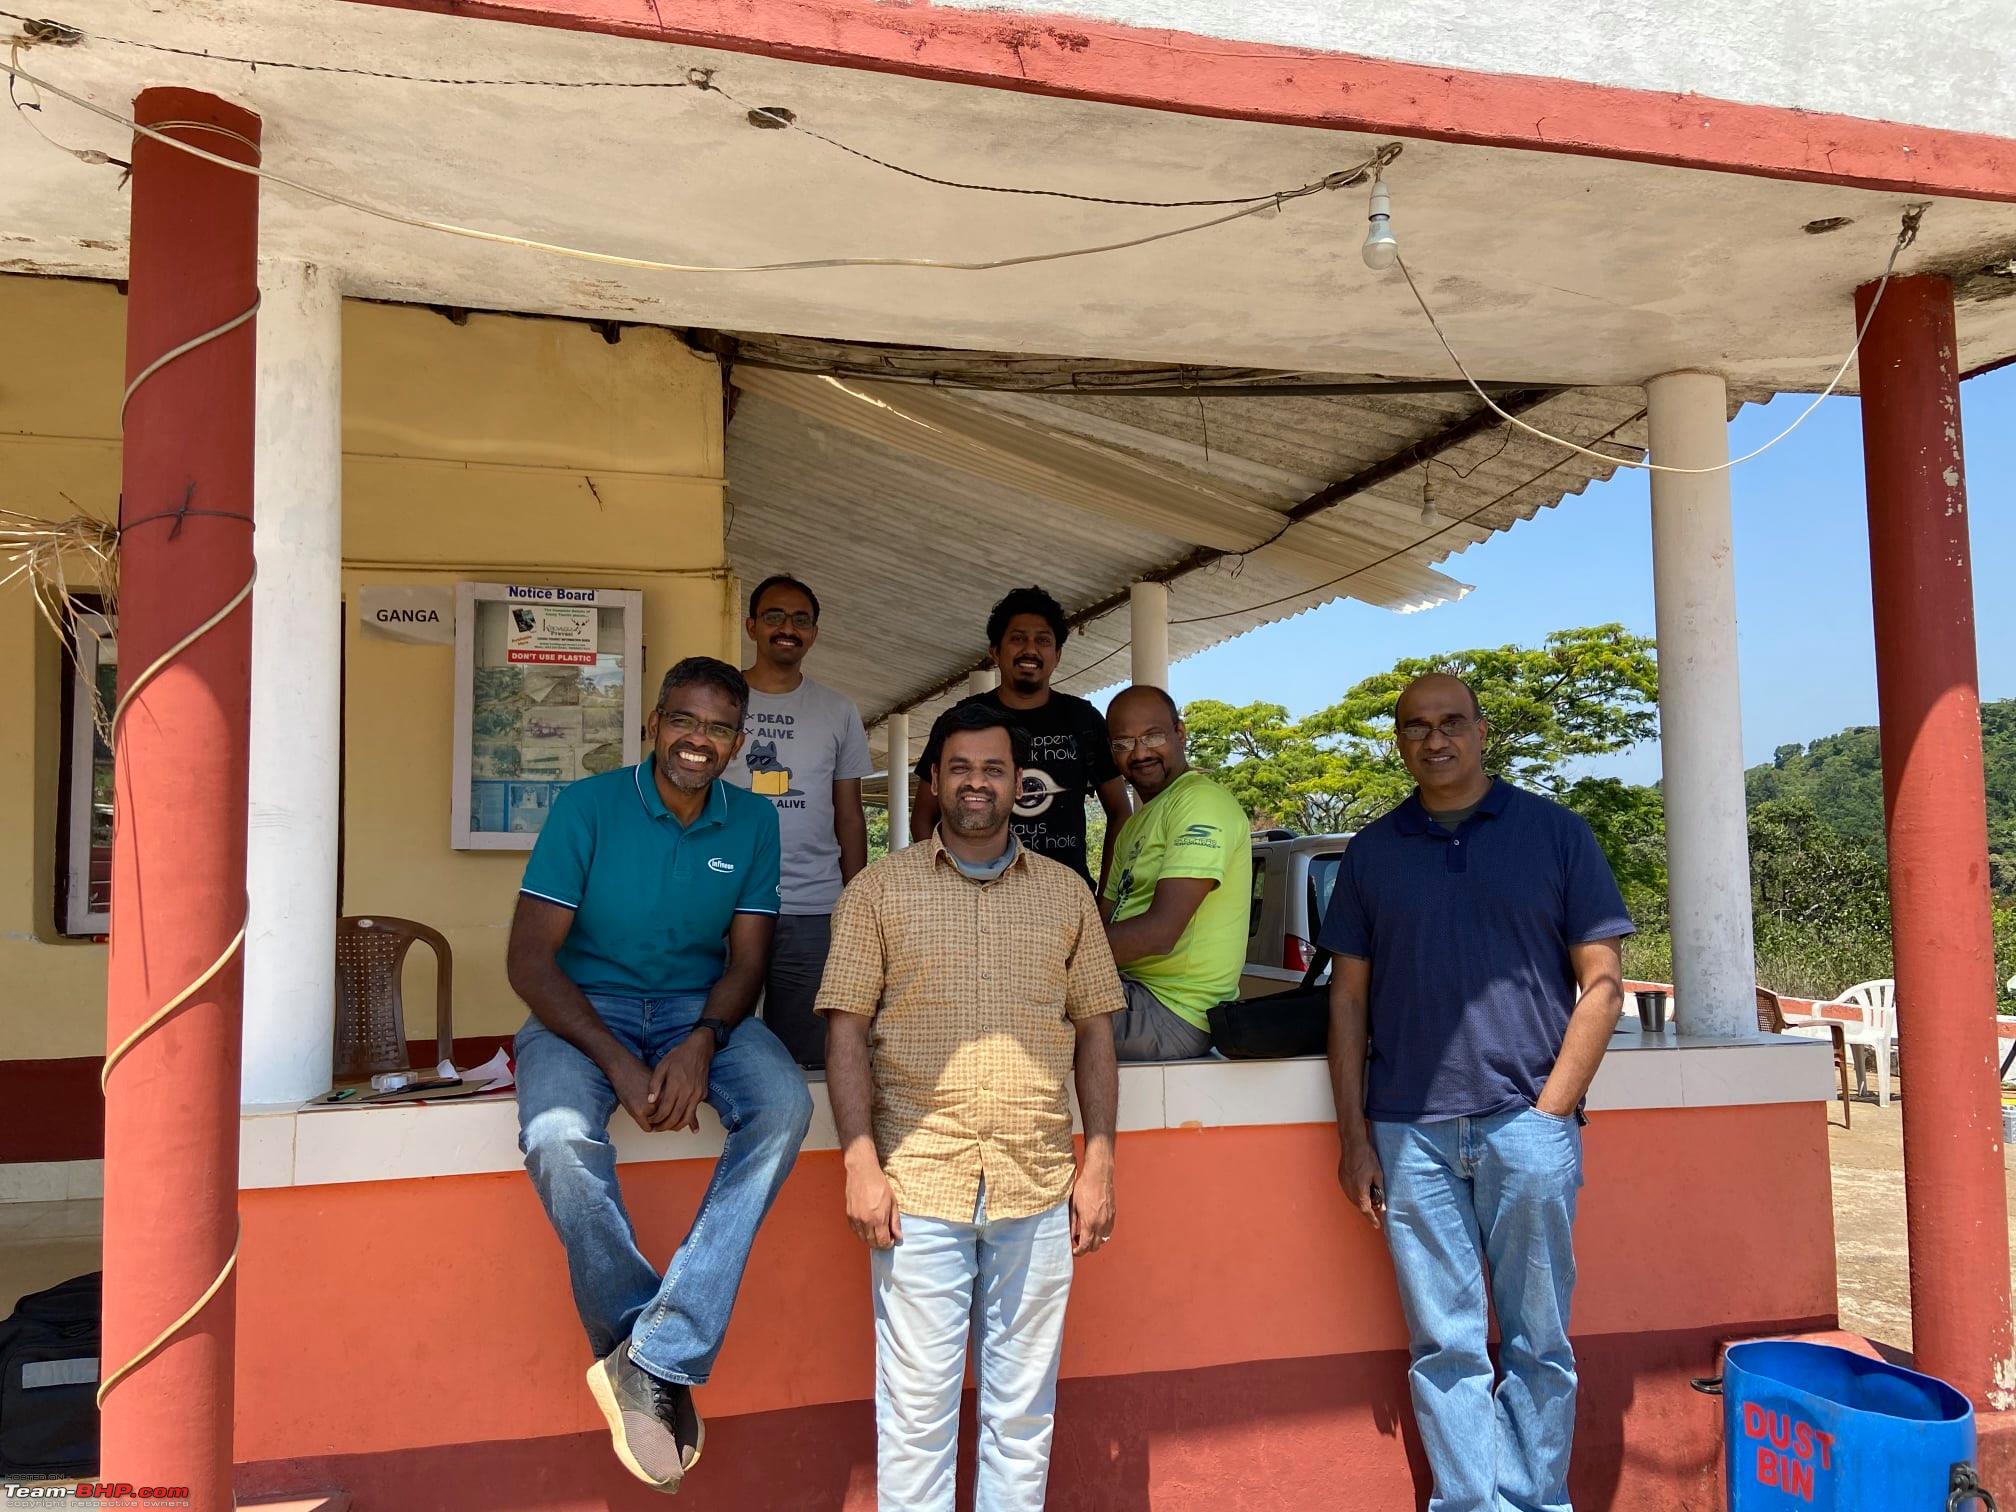 A few pictures of deep space objects shot during the session. Bode's Galaxy (the big disc on the left): This galaxy is 11.74 million light years away from earth and 45,000 light years in radius. Cigar Galaxy (the thin one resembling a cigar on the right): This galaxy is about 11.4 million light years away from earth and is about 18,500 light years in radius.  Markarian's chain: A group of galaxies at 50 to 55 million light years from earth. These galaxies move synchronized and form a pattern like a chain.  Trifid Nebula (bottom left): This nebula is situated in the Milky Way galaxy 5,200 light years from earth with a radius of 21 light years. This nebula is a star forming region and gives birth to many new stars. Lagoon Nebula (top right): This nebula is situated in the Milky Way galaxy at a distance of 4,077 light years with a size of 55x20 light years. 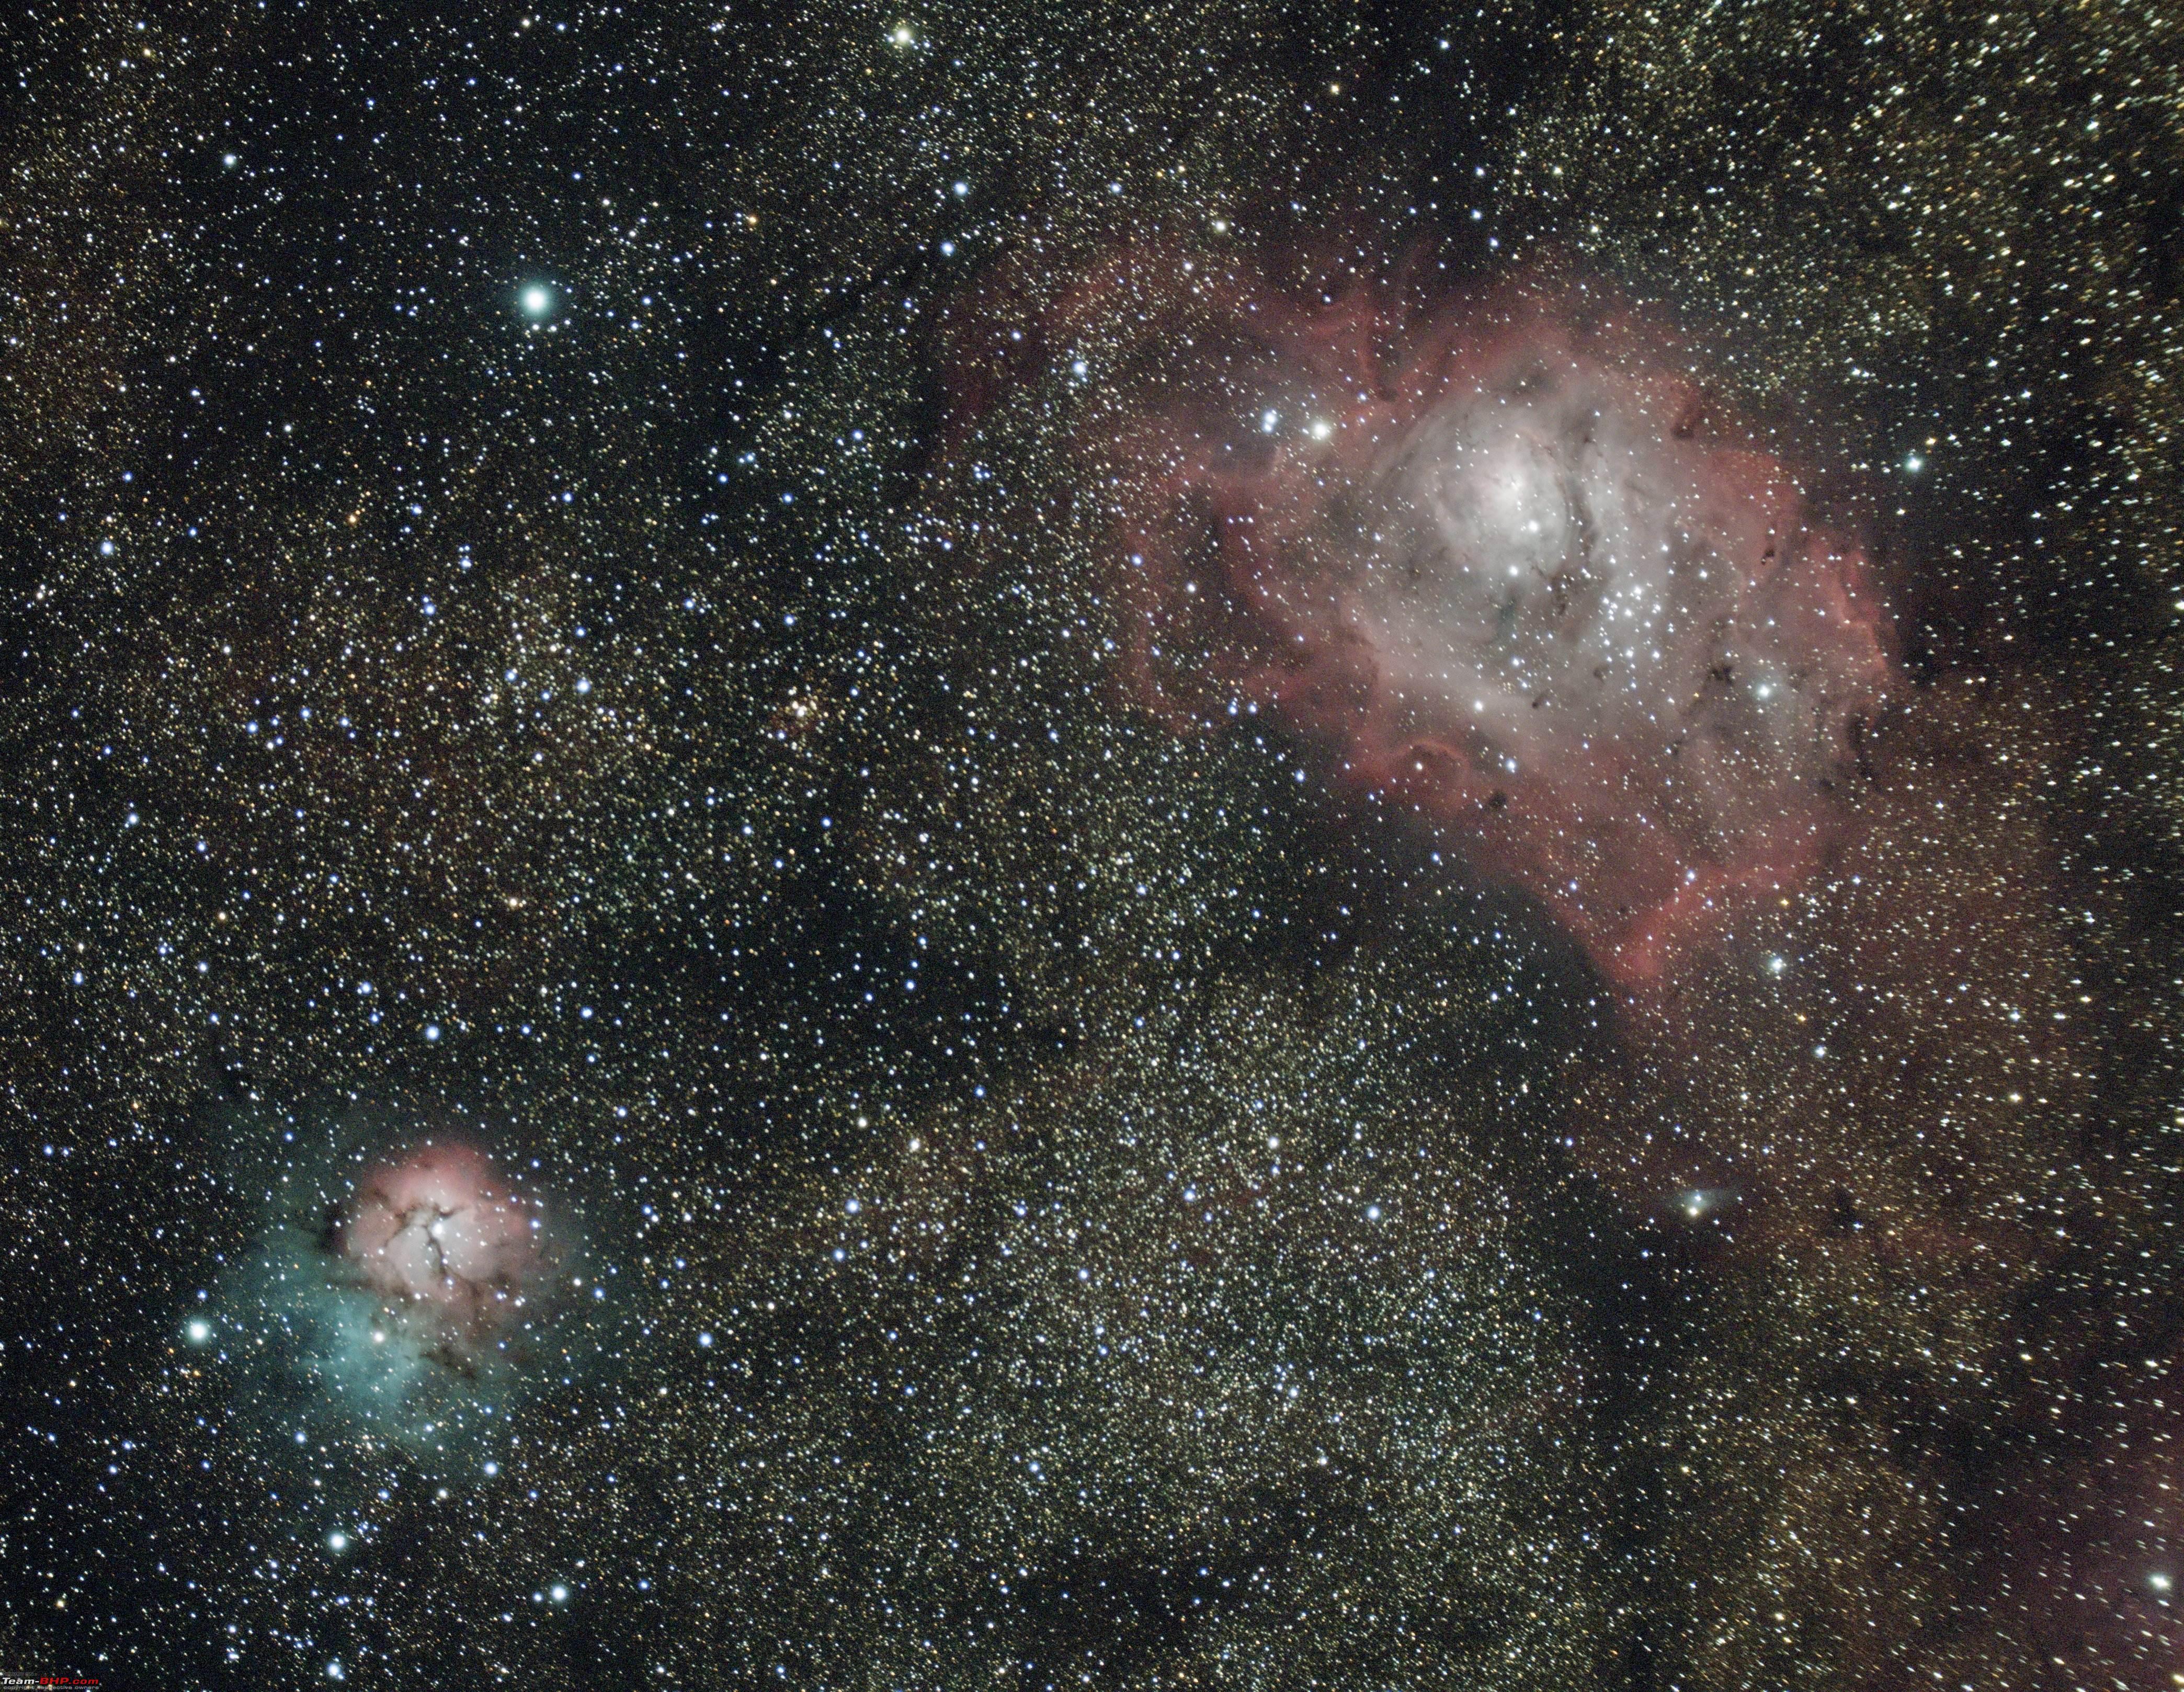 That's all folks, I have for now. I will keep updating this thread with new images I capture, equipment changes, and learnings. Last edited by graaja : 23rd March 2021 at 13:58. |
|
| (129)
Thanks
|
| The following 129 BHPians Thank graaja for this useful post: | //M, 2himanshu, aayushnair, abatabyal, adi_sun, Aish_4761, akshye, am1m, AmitRavi07, amol4184, ampere, amvj, Anduril, anupamsinha, arjithin, arvindmanju, bj96, BlackPearl, BLACNWYTE, BoneCollector, bpapache, catchjyoti, CEF_Beasts, Chetan_Rao, chhotagujju, click, cooljais, Deadpool, debuda, delta5, DevilzzzzOwn, digi0ps, Divya Sharan, Dr.AD, Drexler, DriverNo.420, Eshan Joshi, expcretrvlsmile, fastturtle10, Gannu_1, Goku_YNWA, gr8guzzler, GTO, Guna, guyfrmblr, haisaikat, Hayek, Highh5, hondafanboy, InControl, INJAXN, Insearch, JJay, kap04, KarthikK, Kashief, kat, kavensri, Kkumar, Kols, KrisTvpm, libranof1987, livyodream, MaddyCrew, mallumowgli, maximus., Mr.Bentley, N33raj, neelkumar, Nempuguru, Nick_Wanderlust, Night_Fury, northstar*, ObsessedByFIAT, papr23, pkulkarni.2106, praveen789, PSOPS, Punatic, PVS, R2D2, RaceHorse, Rachit.K.Dogra, rahulananda, rajesh1868, ramnaresh_2000, Roy.S, Rudra Sen, sainyamk95, Samba, Samfromindia, Samurai, sandeepmdas, Santoshbhat, satan's_valet, Scarlet_Rider, shancz, shreyascashyap, skasse, skyocean, SnS_12, SohailPistawala, spd_tkt, Steppenwolf1978, stringbh, suhaas307, tchsvy, Teesh@BHP, Tgo, Thanos-VV, TheCatalyst, theexperthand, Thermodynamics, Trojan, Turbanator, TurboGuy, Turbojc, turboNath, V.Narayan, v12, varunanb, Vikram Arya, warrioraks, wheelguy, whitewing, xja1, yesyeswe, ysjoy, ZedMae |
|
24th March 2021, 07:20
| #8 |
| Team-BHP Support | Re: Rendezvous with The Universe | My Astrophotography Hobby Thread moved out from the Assembly Line. Thanks for sharing! Going to the top of our homepage today  . I got to say something, Graaja = we always learn something new from your threads. Even your Fitness Thread was an eyeopener in so many ways for us health freaks. . I got to say something, Graaja = we always learn something new from your threads. Even your Fitness Thread was an eyeopener in so many ways for us health freaks. |
|
| (32)
Thanks
|
| The following 32 BHPians Thank GTO for this useful post: | --gKrish--, BlackPearl, bpapache, catchjyoti, CEF_Beasts, Dr.AD, DriverNo.420, fastturtle10, gauravanekar, Godzilla, Goku_YNWA, graaja, Invincible8789, KarthikK, kavensri, NTO, rajesh1868, RJ2285, saikarthik, Samba, Samfromindia, sandeepmdas, Scarlet_Rider, SnS_12, suhaas307, Thermodynamics, Turbanator, TurboGuy, V.Narayan, veyron_head, Viju, wheelguy |
|
24th March 2021, 08:50
| #9 | |
| BHPian Join Date: Jan 2008 Location: 515134
Posts: 348
Thanked: 382 Times
| Re: Rendezvous with The Universe | My Astrophotography Hobby Quote:
| |
|
| (2)
Thanks
|

| The following 2 BHPians Thank rajesh1868 for this useful post: | Dr.AD, graaja |
|
24th March 2021, 08:57
| #10 |
| BHPian Join Date: Jul 2010 Location: Bangalore
Posts: 173
Thanked: 843 Times
| Re: Rendezvous with The Universe | My Astrophotography Hobby Super Ganesh. Left me seeing stars, literally and figuratively. Sky is no longer your limit. Cheers |
|
| (7)
Thanks
|
| The following 7 BHPians Thank RSUDARSANAN for this useful post: | Dr.AD, graaja, GTO, ike, RJ2285, SnS_12, suhaas307 |
|
24th March 2021, 09:15
| #11 |
| BHPian | Re: Rendezvous with The Universe | My Astrophotography Hobby Read through it. Will need a bit more time for assimilation. Thanks for putting this together. |
|
| (2)
Thanks
|
| The following 2 BHPians Thank megazoid for this useful post: | Dr.AD, graaja |
| |
|
24th March 2021, 09:15
| #12 | ||
| Distinguished - BHPian  Join Date: Apr 2010 Location: Bangalore/Pune
Posts: 2,002
Thanked: 22,771 Times
| Re: Rendezvous with The Universe | My Astrophotography Hobby Quote:
Quote:
By the way, it is purely because of team-bhp that I ever got to meet such a personality as Graaja. Else I would have never got a chance to know him. This is the power of team-bhp! Last edited by Dr.AD : 24th March 2021 at 09:25. | ||
|
| (11)
Thanks
|
| The following 11 BHPians Thank Dr.AD for this useful post: | amvj, graaja, GTO, InControl, PearlJam, RJ2285, sandeepmdas, SnS_12, Stranger2106, TurboGuy, ZedMae |
|
24th March 2021, 09:20
| #13 |
| BHPian Join Date: Oct 2020 Location: KA04,OD02,OD05
Posts: 68
Thanked: 150 Times
| Re: Rendezvous with The Universe | My Astrophotography Hobby Just like Amir Khan, aka the perfectionist chooses a script, masters it and executes it to perfection, you seem to be adding new hobbies to your repertoire and how! The way you have documented your fitness journey, triathlon and now astrophotography skill is just remarkable. I thought this was as simple as clicking a photo of the planets and uploading but your thread explains everything so beautifully. After playing around with my Celestron Binocular and with the clear skies these days, I am getting the itch to upgrade to a Telescope and if I get one someday, your thread will be a trigger for that  |
|
| (5)
Thanks
|
| The following 5 BHPians Thank 4WheelPilot for this useful post: | Dr.AD, graaja, GTO, InControl, Invincible8789 |
|
24th March 2021, 09:57
| #14 | |
| Senior - BHPian Join Date: Apr 2010 Location: Palakkad/Coimbatore
Posts: 1,229
Thanked: 1,105 Times
| Re: Rendezvous with The Universe | My Astrophotography Hobby Quote:
Am far removed from astrophotography but a fan of space photos. Will visit the thread to view the photos in the big screen Keep them coming | |
|
| (5)
Thanks
|
| The following 5 BHPians Thank mallumowgli for this useful post: | asbshyam, BlackPearl, Dr.AD, graaja, GTO |
|
24th March 2021, 10:18
| #15 |
| Senior - BHPian | Re: Rendezvous with The Universe | My Astrophotography Hobby Wonderful thread and a unique hobby, I always wanted to own a telescope but never happended. I have one friend living in the Milwaukee who has similar hobby and your shots remind me of him. A link from his gallery for reference is here, you may be able to appreciate more than me. This hobby requires lot of investment of time (apart from money for the gears), and of course the scarce ingredient being a clear sky without light pollution, but the end results as seen from your post above are astonishing and jaw dropping. Rated 5 stars duly and keep more of these coming. |

| (4)
Thanks
|
| The following 4 BHPians Thank haisaikat for this useful post: | graaja, megazoid, skyocean, turboNath |
|