News
15-year old Honda Civic prepared for Fitness Renewal
The Civic turns 15 this year! Past couple of years of ownership have been quite interesting, lots of money went into it. Well, it does not stop there. Lots of money is going into it this year as well!
BHPian CzechItaliaMoto recently shared this with other enthusiasts.
The Civic turns 15 this year! Past couple of years of ownership have been quite interesting, lots of money went into it. Well, it does not stop there. Lots of money is going into it this year as well!
Here's what is going to be done to make sure that the Civic passes its Fitness Test coming up-
1. Replace cracked fog light
2. Bodywork- includes both bumpers, rear door et al
3. Reinstall old halogen headlight bulbs
4. Remove tint on the rear glass(Came with the car when we bought it used)
5. Remove any "flashy" items on the car that may give the inspector an excuse to fail it
Bodywork
On behalf of Bangalore traffic, I will let you in on a little secret- Expect some bodywork to be done on your car every two years! That's how often you will pick up scratches.
Upon lots of deliberation and getting quotations from different places, previous experiences and so on, we decided to go to Trend Automobiles.
We chose Trend after reading multiple positive reviews about them and also heard about them from our neighbour(BHPian Old Dude) who goes there for his Civic as well.
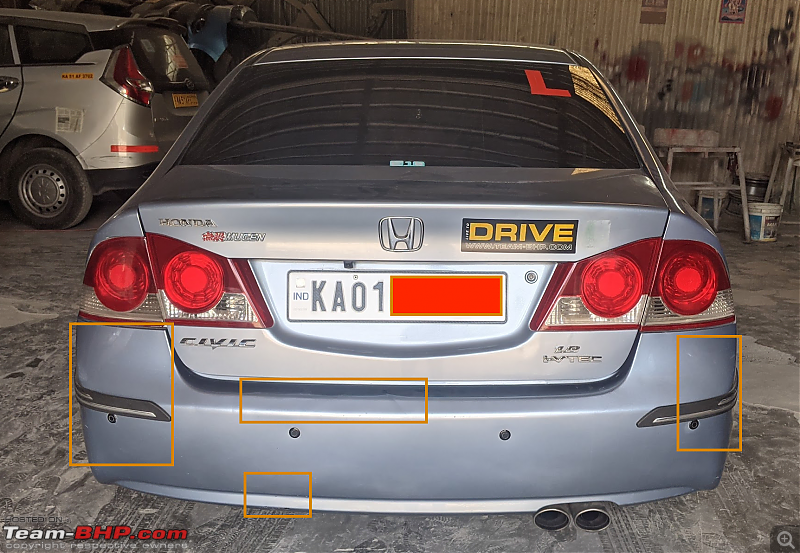
This is how things looked before the work started-
The front bumper had a huge scratch running across the right side, this was due to a scooter swiping me while trying to fit into a non-existent gap! Had posted about this on the 'Rants on Bangalore Traffic" thread as well. Also, a pretty big patch of paint peeled off when the car rear-ended a Creta's bull bar after an auto brake-tested him. Many smaller scratches had started to appear on the sides of the bumper as well, this was due to motorcycles and tight parking spaces. Notice that the fog lamp also has a crack running across its width(present when we bought it), more on that later!
Next up was the passenger side. We replaced the mirror base back in 2021 from a scrap dealer(scammer) who sold it to us for a whopping 3k! The folding function soon stopped working, and my DIY efforts of replacing the gear assembly did not help at all. The resultant was, another burning motor, control module and gears that kept slipping! I was pretty sure that any more efforts in repairing it would go in vain, so decided to replace it. That needed to be repainted. The tiny chip on the running board needed to be done as well, and this would be done by a brush(just a touch-up).
Coming to the driver side, this is where most of the damage is. The quarter panel was damaged by a few barb wires that were placed in my basement parking area due to some construction work. Did not notice the wires in the dark and that led to me brushing them by the side. The rear door and running board was damaged by a loon on a bike who tried to cut through during my U-turn(Just Bangalore things). Rear bumper and door was swiped by a Honda Amaze which was too close to me and wanted to overtake on a service road.
Finally, the rear. The bumper has taken multiple hits(I have sort of lost track of them since some of them did not result in any damage) but since it had been flexed so many times, some spider cracks have appeared at the back, and one incident with some scooter rear ending us or something(I don't remember at this point) has made a depression at the rear. Scratches on both sides of the bumper, after numerous other incidents in traffic, luckily not the boot door this time.
Parts Sourced
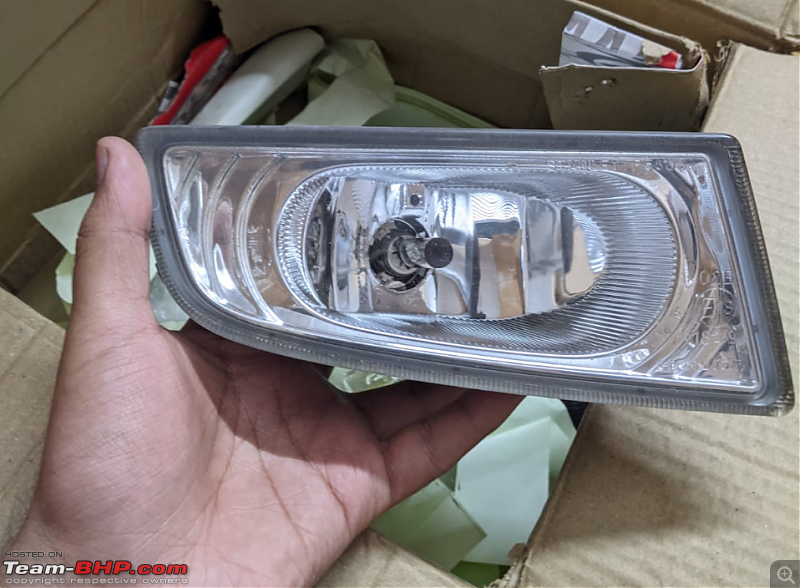
1. Since our fog lamp lens was broken, we needed to replace the whole unit. Honda quoted a whopping 10k per side, while aftermarket options were available with average reviews for around 3.5 to 4k, but the quality of the OE Stanley part is unmatched, so it was a no-go for me. Decided to go scavenging again, and asked the Civic Facebook group if anyone had their fog lamp. Someone immediately responded, with the video of it and acknowledgement of the courier receipt. They were located in UP, and they had a whole lot full of scrapped cars. Decided to give them a try(even though my history with scrapped dealers have been horrible so far), and it arrived in two days via air mail.
What blew my mind was, the condition of the part that arrived was in better shape than what was currently on my car. I was elated!
Dropped this off at the painting shop since they would be removing the front bumper anyway, would not want to take extra time and effort to remove that along with the binding wires. Dealing with that stuff is painful!
2. The LH mirror as I had mentioned before, stopped folding a while ago. When the seller of the fog lamp was on call with me showing me the part that he took off for proof, he asked if I wanted anything else. I simply decided to ask him if he could give me one of those LH mirrors with indicators since Honda ones cost around 15k I believe and off late I was searching for options to import the same for a cheaper price. However, he was offering one white unit for a really tempting price, with no damage, no signs of being tampered with at all! Decided to get this as well, since shipping is being paid for one of the items anyway. Did not take a separate picture of this, but will attach what came in the shipment. The build feels solid, and the quality is very good!
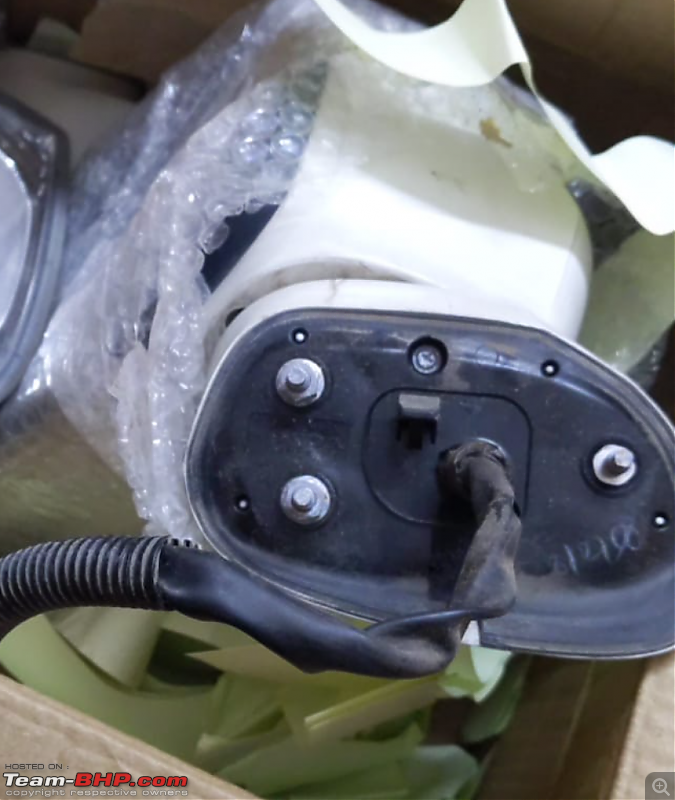
This was also dropped off at the garage to be painted in body colour(Bluish Silver Metallic). I am not too sure of the door panel and stuff, routing of the wires, so told them that this was something I'd fit myself. They were more than happy to oblige.
End result after all the bodywork-
I have to say, I'm not at all impressed. I was expecting some really good results from Trend but all I could see was imperfections and other excuses for the same. The edges have no paint on them, and the putty is still visible in those places. The paint finish is good for the most part but I could still find some parts where there is a lot of overlapping and dripping. This was not even that big of a deal for me, but what irked me the most was the polishing. It was all over the place, done in such a haphazard manner and made all the plastic trim pieces look very ugly! The engine bay, which looked pristine before I gave it to them was doused in huge amounts of polish and never wiped off properly. There were so many stains of the chemical they used and the air box was still glowing with the liquid settling into the crevices. I took half a day to fix these things on my own. Decided that next time(5 years from now) I will give the car to a decent professional to do a full body repaint and restore the car to its former glory.
Some pictures -
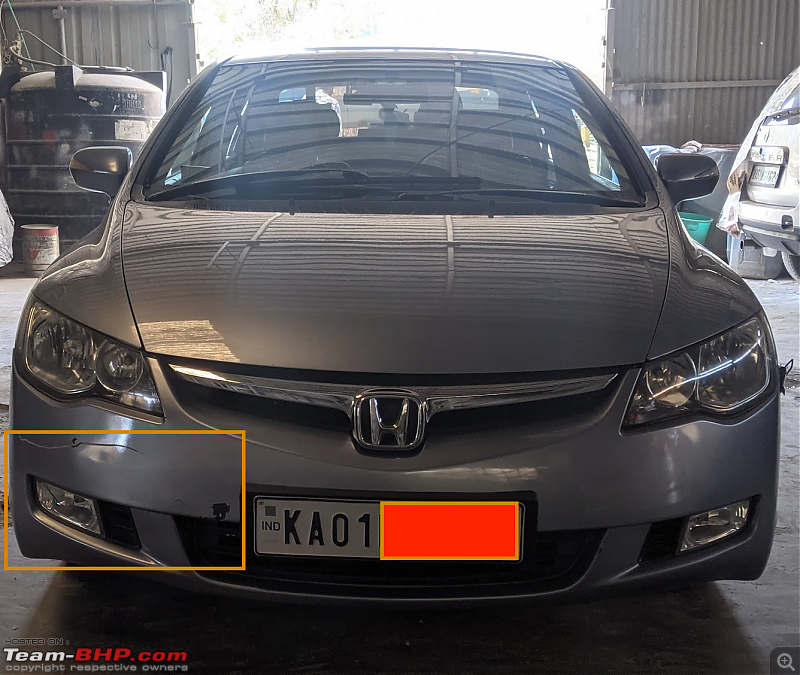
The front end looks good, but they did a really bad job of installing the halogen bulbs and fog lights so the focus of the beam is essentially towards the sky now. Decided to fix this after the inspection.

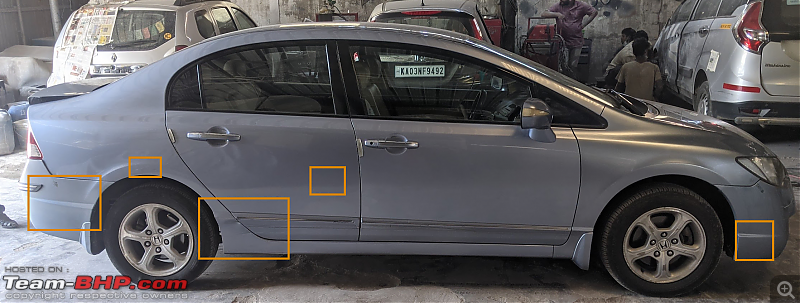
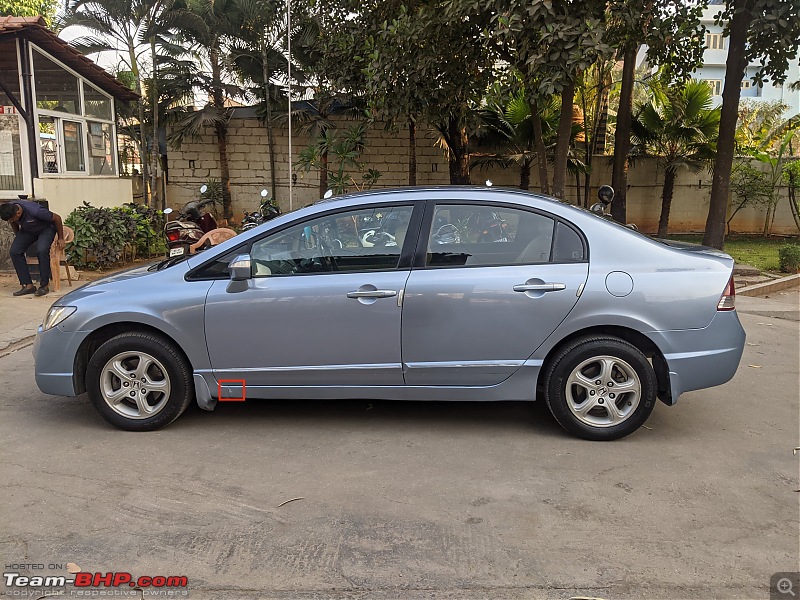
Side view(Driver side)- Looks okay to me, some imperfections on the quarter panel that was repaired, the edges lack paint, can see the body filler on the wheel arches.

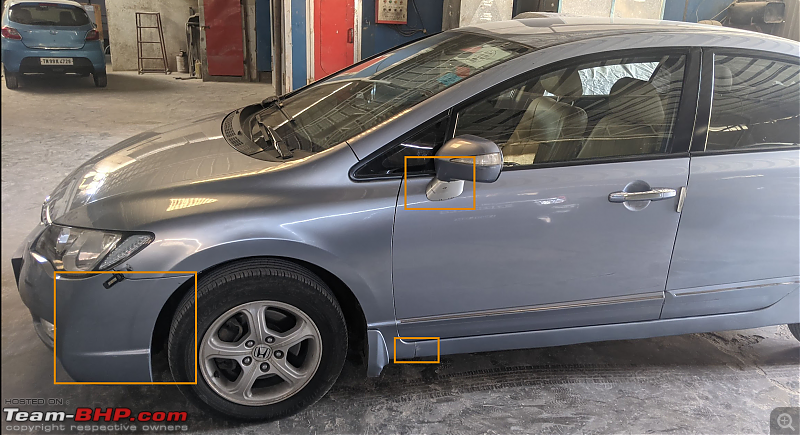
Side view(Passenger side)- Although nothing was done by them on this side, I had asked them to use a brush to touch up a patch of paint that had peeled off on the running board. It had not been done, I have decided to ignore it for now.
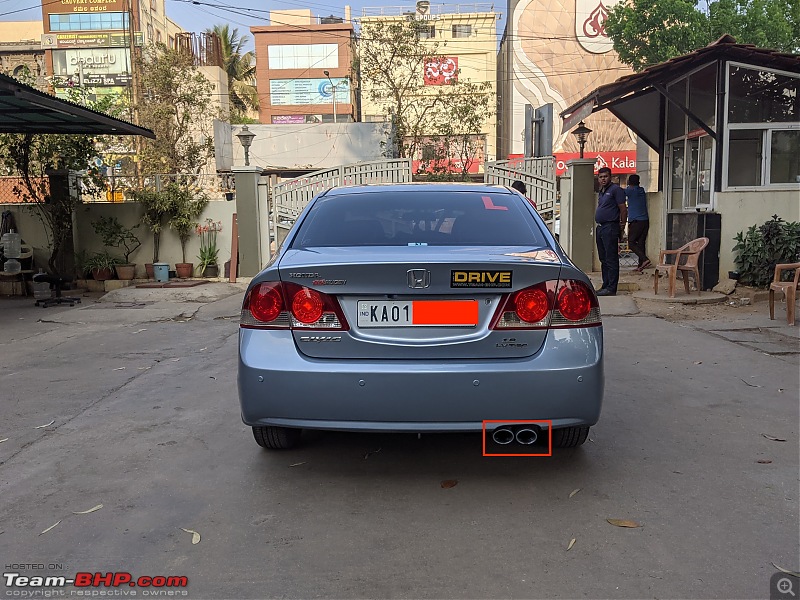
Rear- This was pretty careless. They had not properly masked the exhaust tips, leading to blue paint on my chrome exhaust tips. Sigh. Used some paint remover later on to remove it myself. The bumper also had several imperfections and was a fair job done, nothing great.
After I got the car back, I decided to install the LHS mirror that I bought from the scrap dealer. Happy to say, that everything works as intended and this was a great deal for the price I paid(including painting). This is one-fifth of what Honda charges for the same.
Fitness Renewal - Inspection at RTO Bangalore Central (HSR)
At the RTO office, these were the documents that were needed as per the notice board -
1. Form 25 with Chassis impression on the side(self-attested)
2. Fee Receipt for the Renewal and Tax(self attested with chassis impression on side)
3. The original RC card inside a plastic ziplock along with a copy(self-attested)
4. A copy of valid PUC certificate(self-attested)
5. A copy of the valid insurance policy(self-attested)
In addition to these, we decided to keep a set of copies of the following ID proof documents as well -
• Driving License of owner(self-attested)
• Aadhar Card of owner(self-attested)
• PAN Card of owner(self-attested)
We decided to go to the RTO office on 30th March, Saturday at 10 AM(opening time). Upon reaching, it seemed like we were the first ones there and hence decided to arrange all the paperwork in a file as required. Wee got the required file, ziplock bag for the old RC and the double stamped envelope in which the new RC card would be sent back to us at a stationery shop across the road from the RTO. The shopkeepeer helped us arrange the documents in order and punched them and placed them in the file. Our address, contact number and the car's registration number were to be written on the file and the envelope.
With all documents checked and ready, we were informed to go to the first floor of the building, to the Non-Transport section room. There was literally nobody inside, and we had to wait for around 20 minutes for someone to come, check our documents and give us the go-ahead. The next step was to wait for the inspector. There were no problems so far, things were going great.
The inspector took his own sweet time to come, we had to wait for an hour or so. Once he came, he looked at our documents and told us to bring the car where he was sitting. Initially, he told us to get the chassis impression on the side of the form as well but we explained to him that the location of the stamp is really inaccessible in our car(below passenger seat, a small slit in the carpet) and it would result in the paper tearing(It was hard enough to get it on the bottom of the sheet, let alone the side). He looked at us for a while and decided to let us go after we tried to get the impression on the same paper.
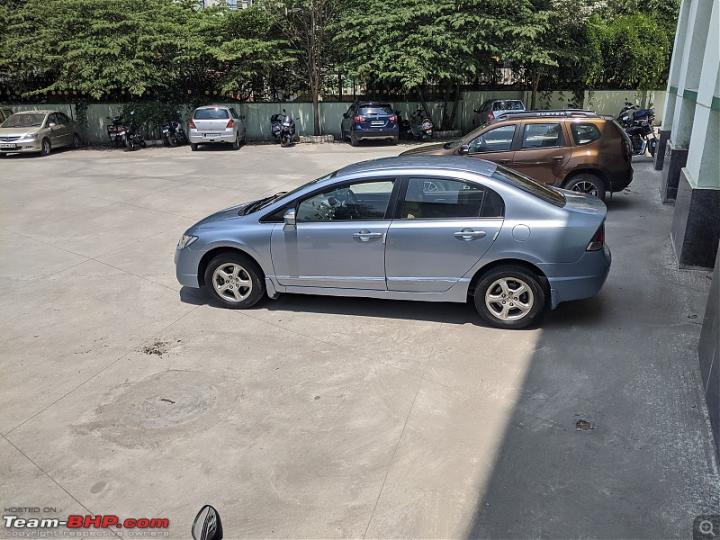
Now comes the inspection. The inspector told us to bring the car around, and it was parked right next to his seat, maybe around 15 feet away. He did not move an inch, just told me to read the last 5 digits of the chassis number aloud from the stamp. The picture posted below was all that he could see -
That was it! The inspection was over! No turning on headlights, no going around the car, no opening the bonnet, not even turning on the car! I was pretty happy this was how it was done. No fuss at all till now. The inspector gave the file to his clerk who checked all the documents and their validity again and stamped the Form 25 along with some details like chassis number, date of inspection and so on. He then instructed us to go to Room 7 on the ground floor to enter the details into the system and the website.
In Room 7, they made us go to the first floor again(Room 3) since there was no record of our car being here at the RTO for inspection. After we did that, we were sent back down to Room 7 on the ground floor to enter the results of the inspection and passed to the verification stage.
The last and final step was going back upstairs(Going back and forth, it does become quite annoying after a point of time) to submit the file for verification. The staff sitting at the desk had a look over our file a final time and entered something in their computer, followed by a "seri, aithu"(Ok, done in Kannada). This was a huge relief for us, since we thought they would make it much harder.
I was completely surprised how easy it was. We were in and out within 2 hours at the RTO, without paying any additional fees at the RTO office. We paid Rs.6762 in total, including the smart card fee, and the cost for the stamped envelope and file was Rs.57.
Now, there is nothing more to do other than wait for the smart card to arrive, and I'm very happy about how things turned out ultimately.
Here's to many more years and miles with the Civic!
Click here to read more BHPian comments & insights.
- Tags:
- Indian
- Honda
- Member Content
- Honda Civic
Find Car News
Just News


About Us