News
Carrying out a major job on my 1998 Jeep Cherokee myself at home


I had been debating with myself whether I should attempt this job or not because there could be various parts that are extremely stuck.
BHPian Jeroen recently shared this with other enthusiasts.
This morning I left home at 07.15 to drive to Cor de Jong, my friendly W123 expert, to check the CO after all the fiddling with the carburettor.
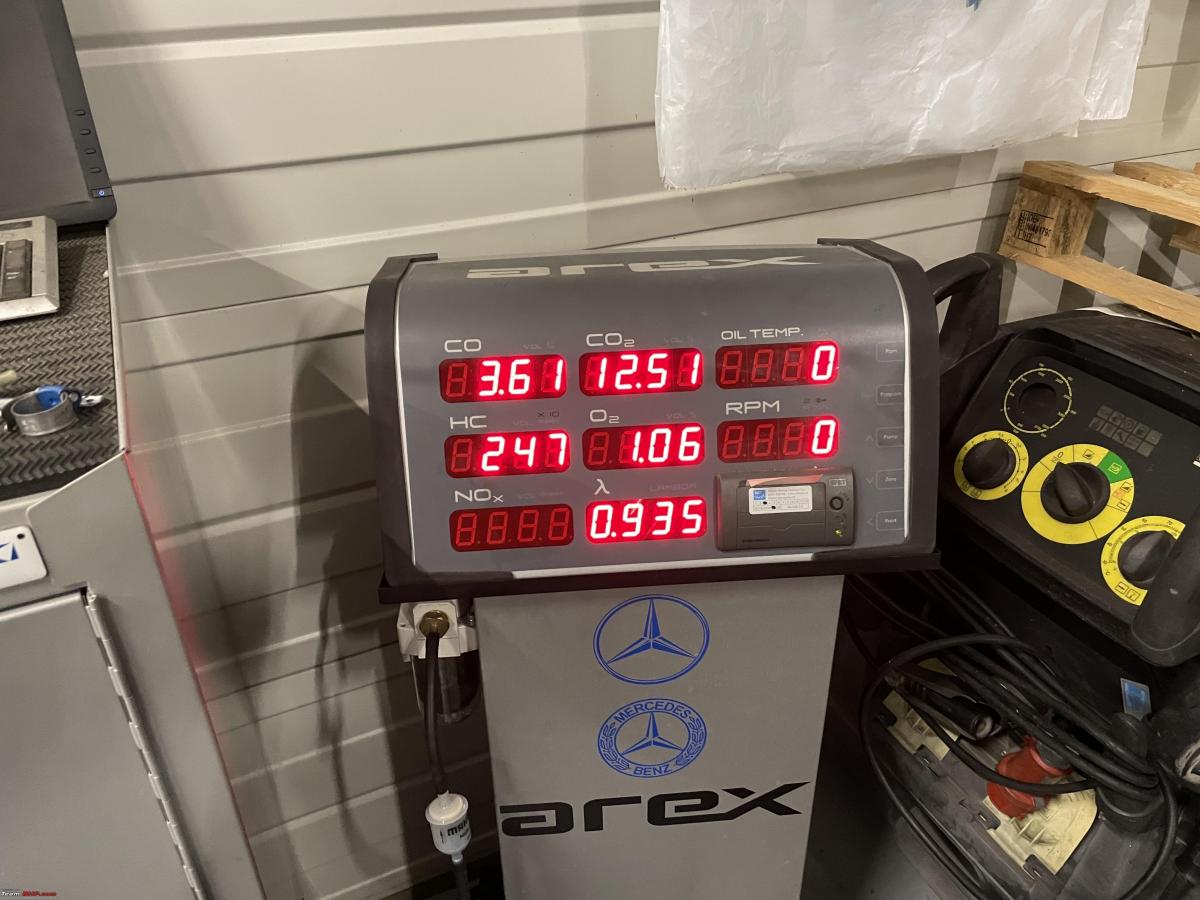
First thing we did was to check what the CO was. Bear in mind, that I don’t have a CO analyser and I adjusted the carburettor going by ear and idle RPM only. It was running at 3.6% which is not bad all things considered!

But Cor fiddled a bit more and we brought it down some more. Once you go below 2.5% the idle becomes a little rougher and the engine starts to exhibit ever so slight shudder again when accelerating.
It is a bit of a tedious process. You adjust the CO by twisting the stop valve assembly, but it takes some 20-30 seconds for the CO to stabilise. So once we were happy we took it for a test drive. Typically that will lower the CO% some more. It is ok for now. I think I will drive it for a few hundred kilometers and then re-adjust once more. I know enough garages with a CO analyser and I can do the adjustment myself now.
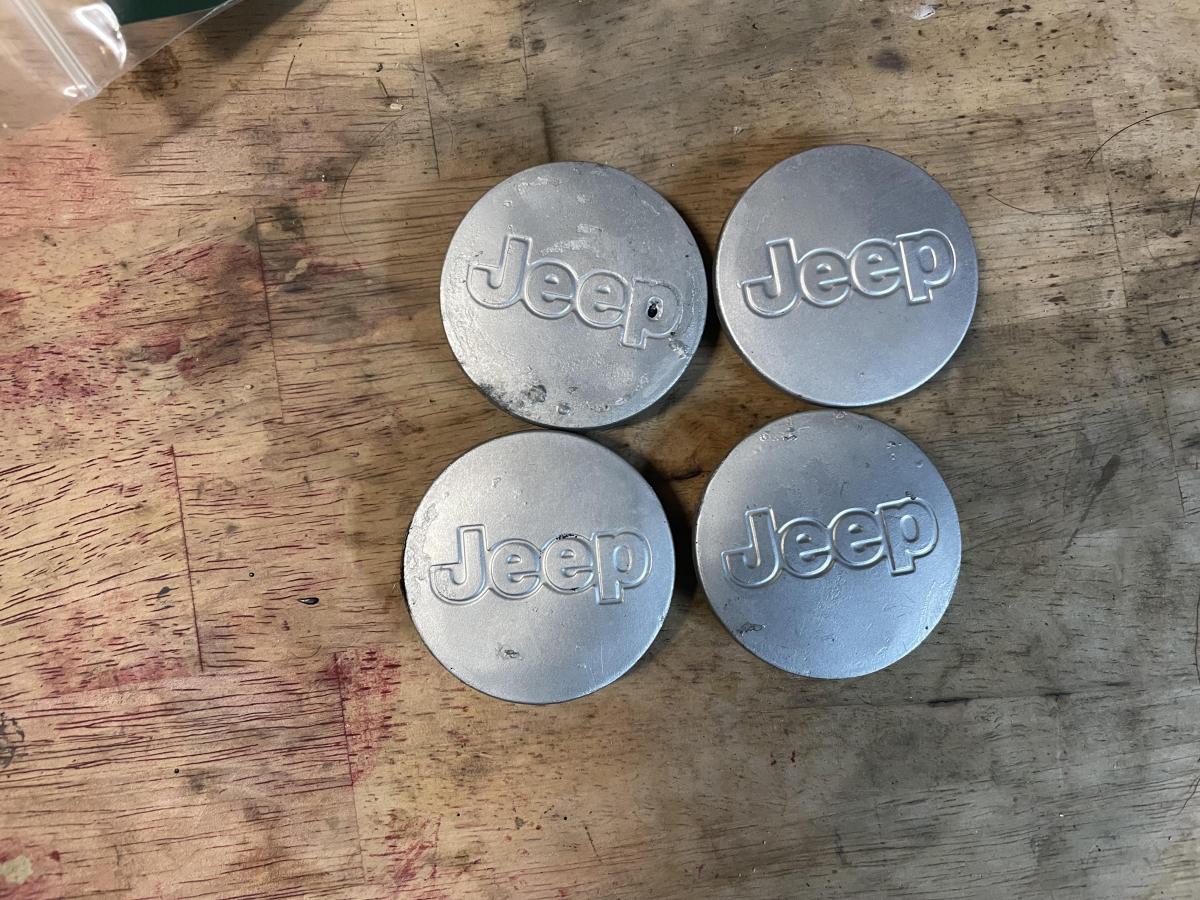
Next, I drove onward to Schaik to deliver my Jeep rims to the place that will sandblast and powder coat them. I chose a very nice silver colour. Unfortunately, they could not powder coat the center piece of the rim as this is plastic. The problem with plastic is that it will melt during curing due to high temperatures. I have heard about a different powder coating process which would allow plastics to be used as well.
They will be done on Saturday morning. I will pick them up and drive back home via Breda. I will visit my usual car paint shop to get a can of similar spray paint made. I will have to clean and prepare these four centre pieces in the next few days.
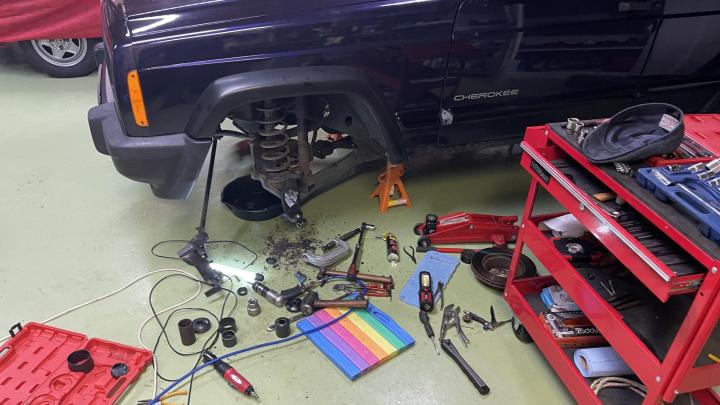
Once I got home I decided to have a go at my Jeep Cherokee with a major job. During its last MOT it was noted that the Universal Joint on the front drive shafts has some play. Also, the ball joints on the steering knuckle had some play. Not enough to fail its MOT, but we are almost a year onwards and almost 6000KM added to the clock!
I had been debating with myself whether I would attempt this job myself or not. The problem is that although a pretty straightforward job, various parts can be very very very stuck.
In the end, I decided to see how far I could get! So here we go.
This is how it all looks, still assembled
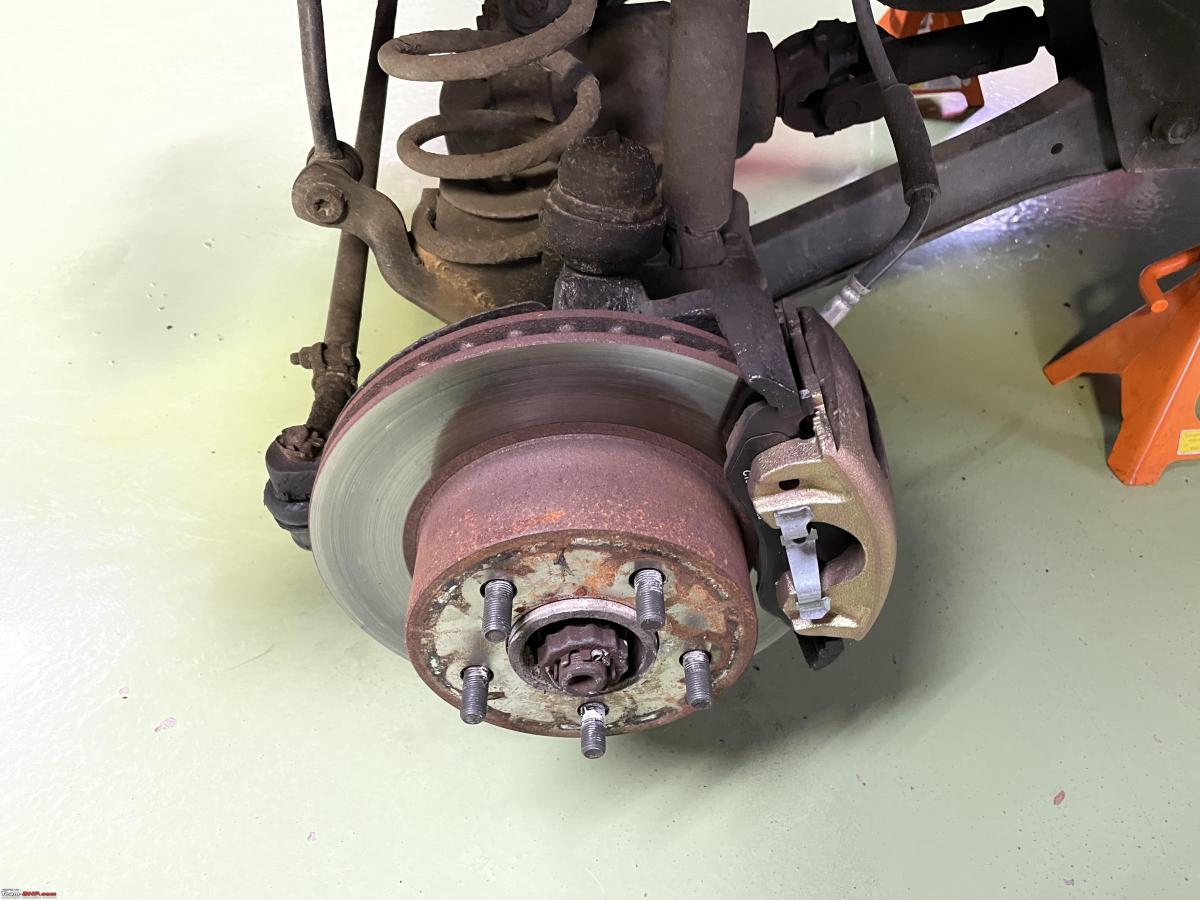
First thing remove the brake calliper, which means undo two bolts at the back and pry it off the disc.
I put the complete brake assembly, calliper and pads behind the spring, fully supported as you don’t want it hanging on the brake line/hose.
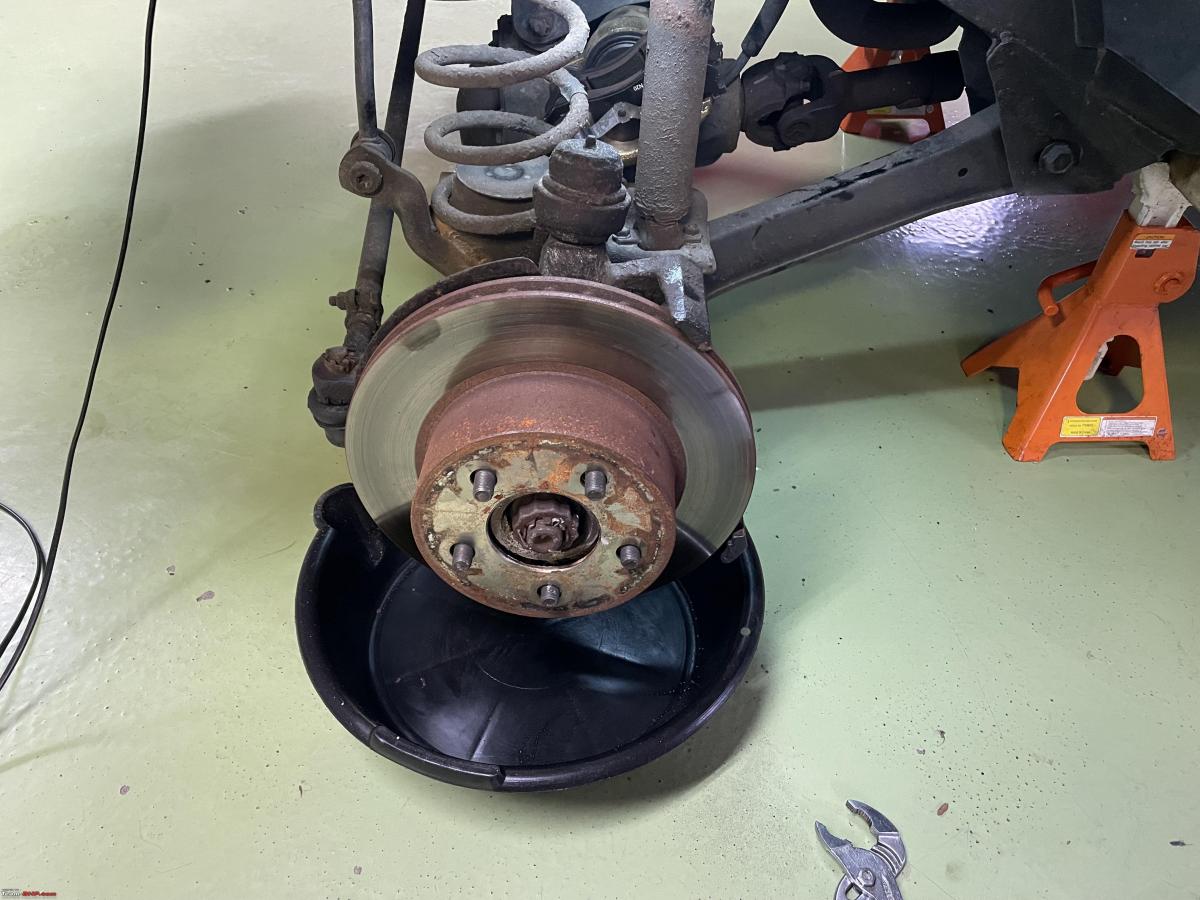
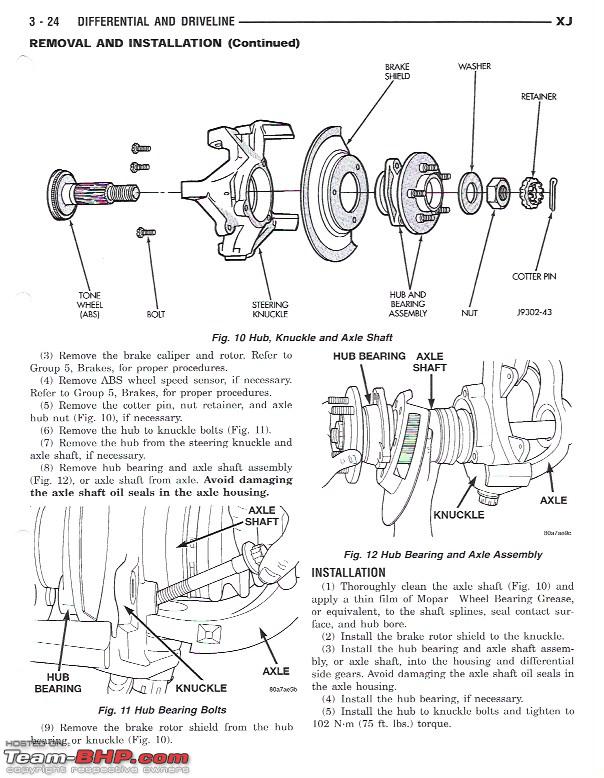
There are two ways you can remove the drive shaft. You can undo the large nut on the axle or undo three bolts which free up the complete hub and bearing assembly.
I choose the latter as I did not have the correct socket for that large axle nut!
The three bolts are fastened with similar bolts requiring special sockets as well. I do have all the small sizes, luckily!
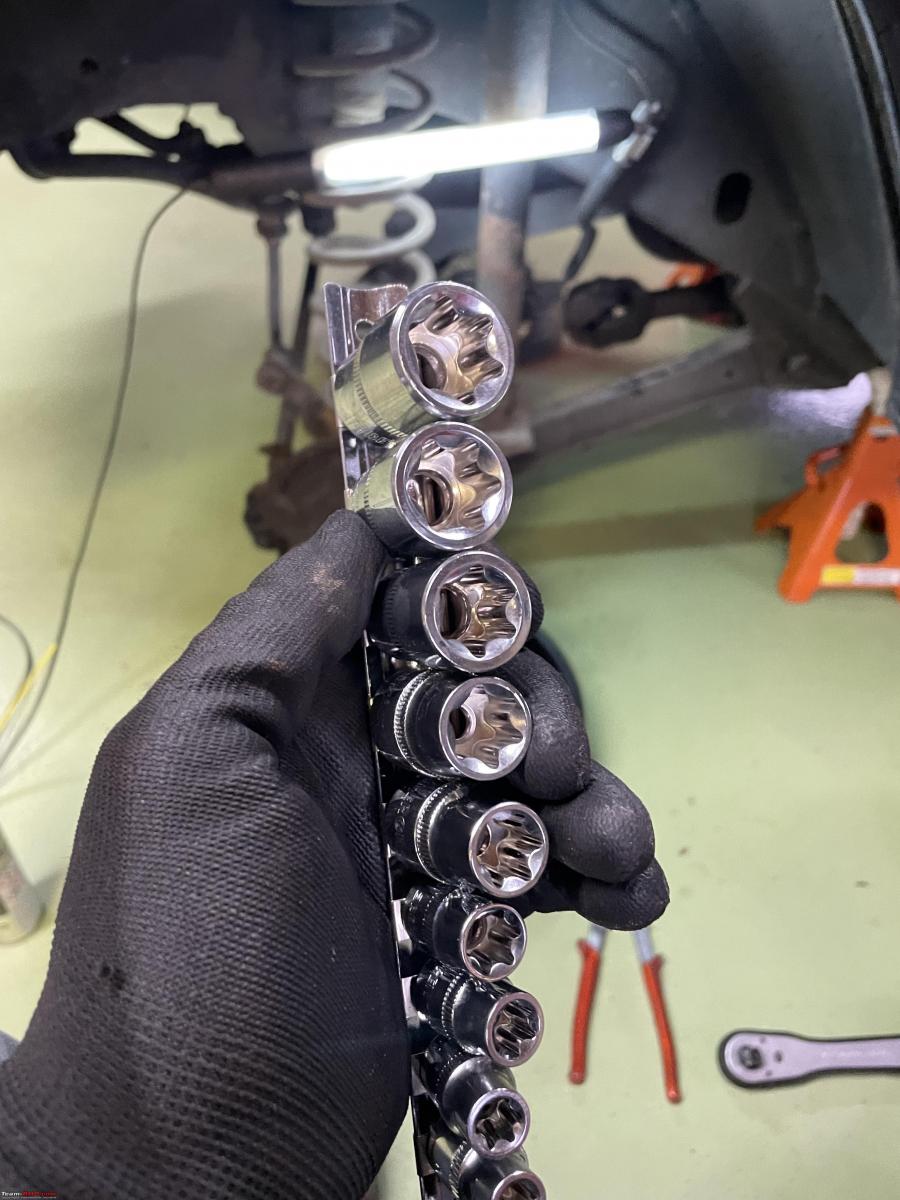
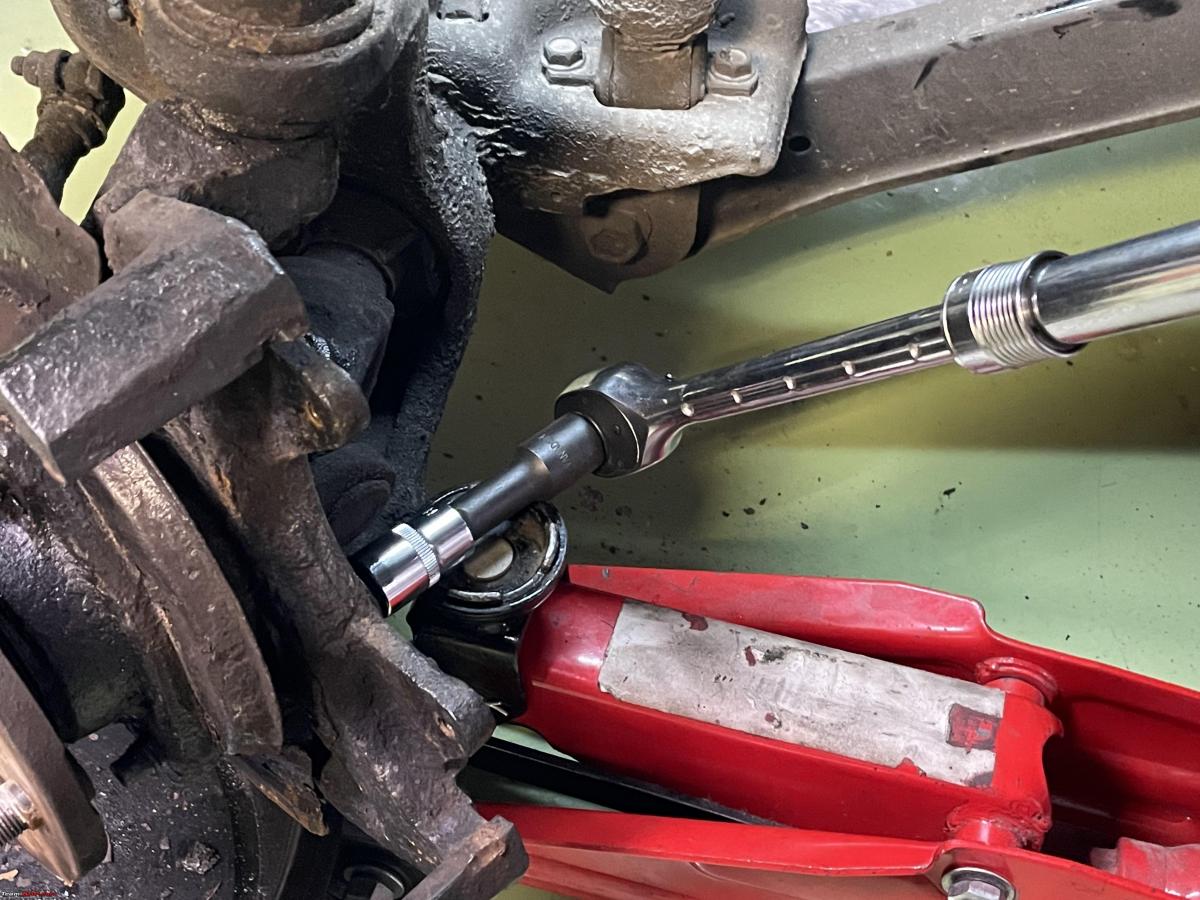
I soaked everything in penetrating oil. Even so, everything was absolutely stuck solid. I had to use my extender ratchet to break free of these bolts. First I hammered the correct socket onto the bolt. Next I positioned a trolley jack to support the socket extender and ratchet. I had to jump up and down to free it up. Also, repeated hammering of the complete assembly.
First hurdle taken successfully!

Here the complete drive shaft, including the bearing assembly. It was pretty tough getting it out. Once I had undone the three bolts, I left them in with just a few mm clearances. Then I started walking the bolts with a very heavy hammer which pushed the bearing assembly out of the steering knuckle.
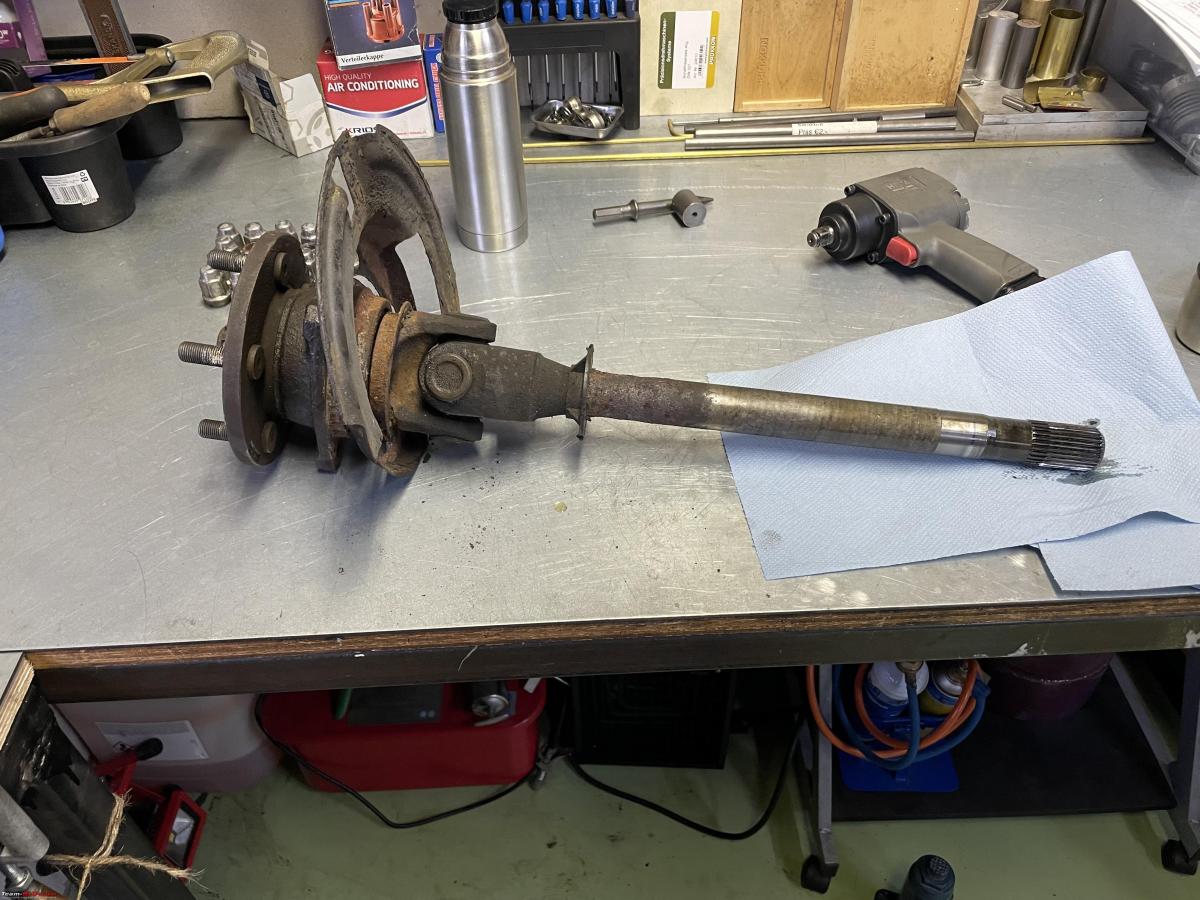
Definitely play on the Universal joint!! So that needs replacing. Also, the wheel bearing does not feel all that great. I will compare it to the right-hand one, once I get that out and decide what to do.
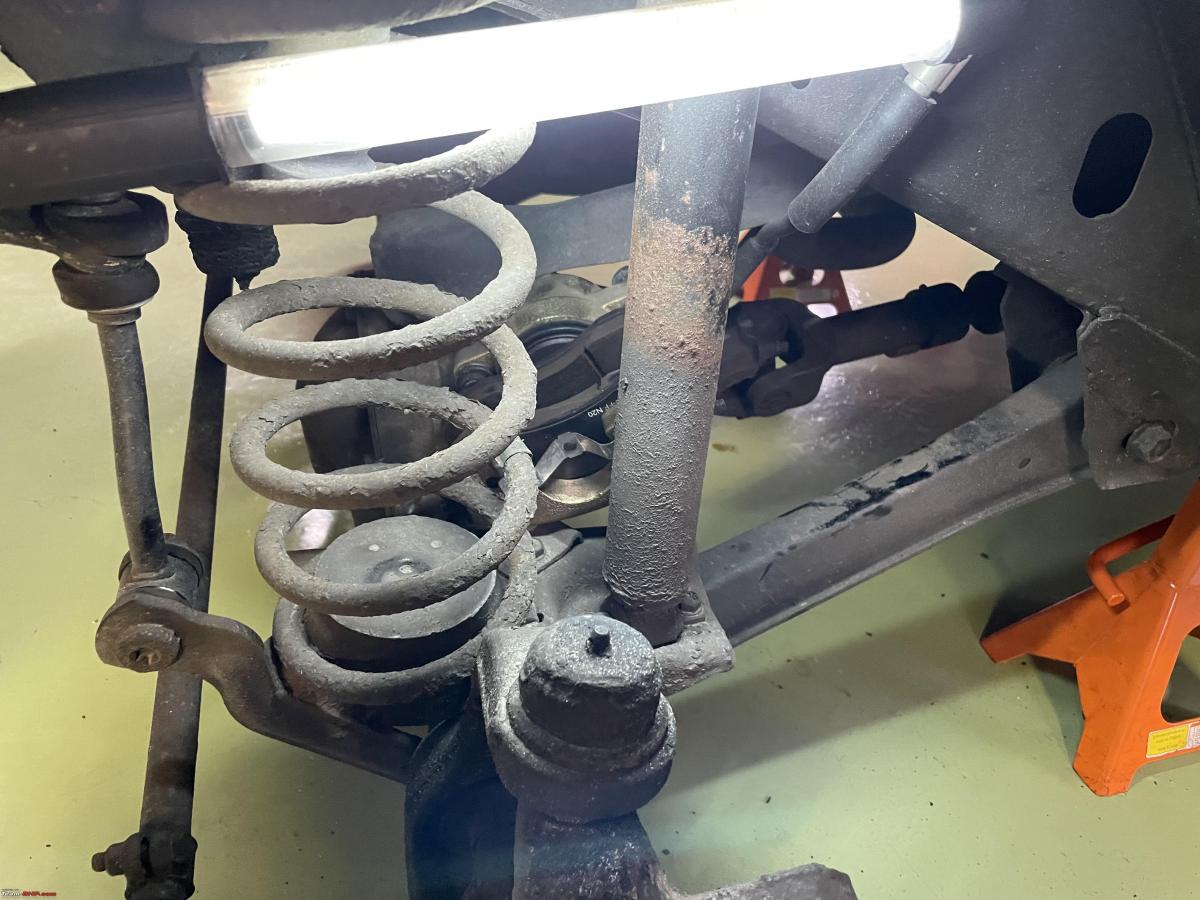
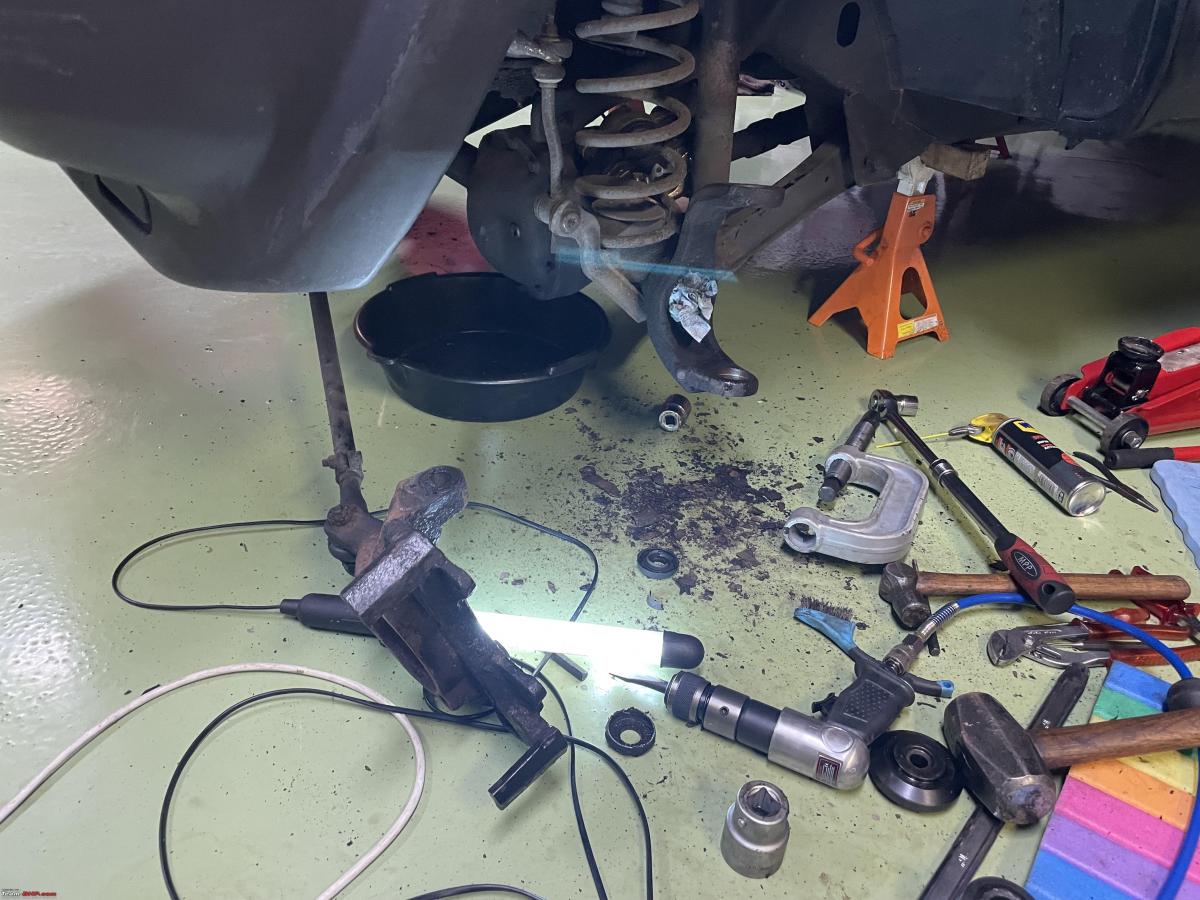
Next the steering knuckle has to come off.
The two ball joints holding the steering knuckle in place have so-called castle nuts, secured with cotter pins. I spend about two hours removing two cotter pins!! They were seized, they broke, I tried to drill them out, to break three of my drills etc. etc. Eventually I managed to get the two nuts off and I started wacking the steering knuckle. I used my special pneumatic hammer as well. Worked a treat!
The official procedure calls for undoing the steering ball stud as well. But I left it as there is sufficient room/play to move the whole steering knuckle, still attached to the steering bar aside.


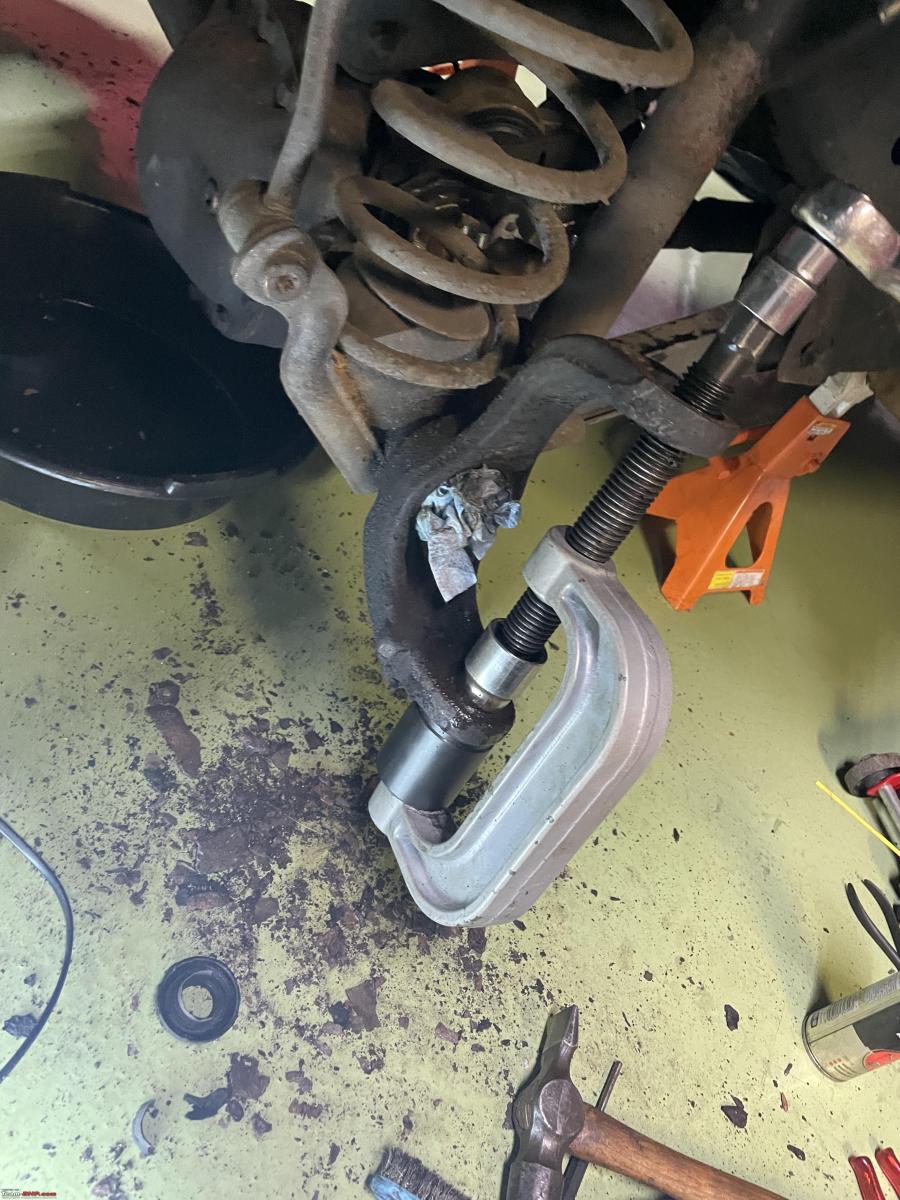
Next, the real fun part. Pressing the ball joints out! I bought this special tool for the W123. I replaced one of the ball studs a few years ago.
This is a universal set, which means it never fits anything perfectly. So I had to make do with a few sockets here and there as well.
Remarkably the upper ball stud is pushed in from the top! So you have to push it out upwards. I had to experiment with a few accessories and sockets to get a good set-up to push it out.

Once you have the various pipes, adaptors, sockets and the C-clamp all aligned, you start winding down the main spindle. Very hard work, you keep on tightening it till it will not go any further. Then you start smacking the area around the stud in the steering knuckle. You will get a very audible POP as it moves an mm or so. tighten the clamp, some more whacking, more POP etc.
I managed to get the top one out without too much effort. Next the bottom one, the same procedure, a slightly different set-up with the C-clamp and bits.
It also came out, relatively easy, but using a lot of force and a lot of whacking. that is just how it is. If that is not enough, you might want to consider putting a big torch on the steering knuckle, see if that helps.
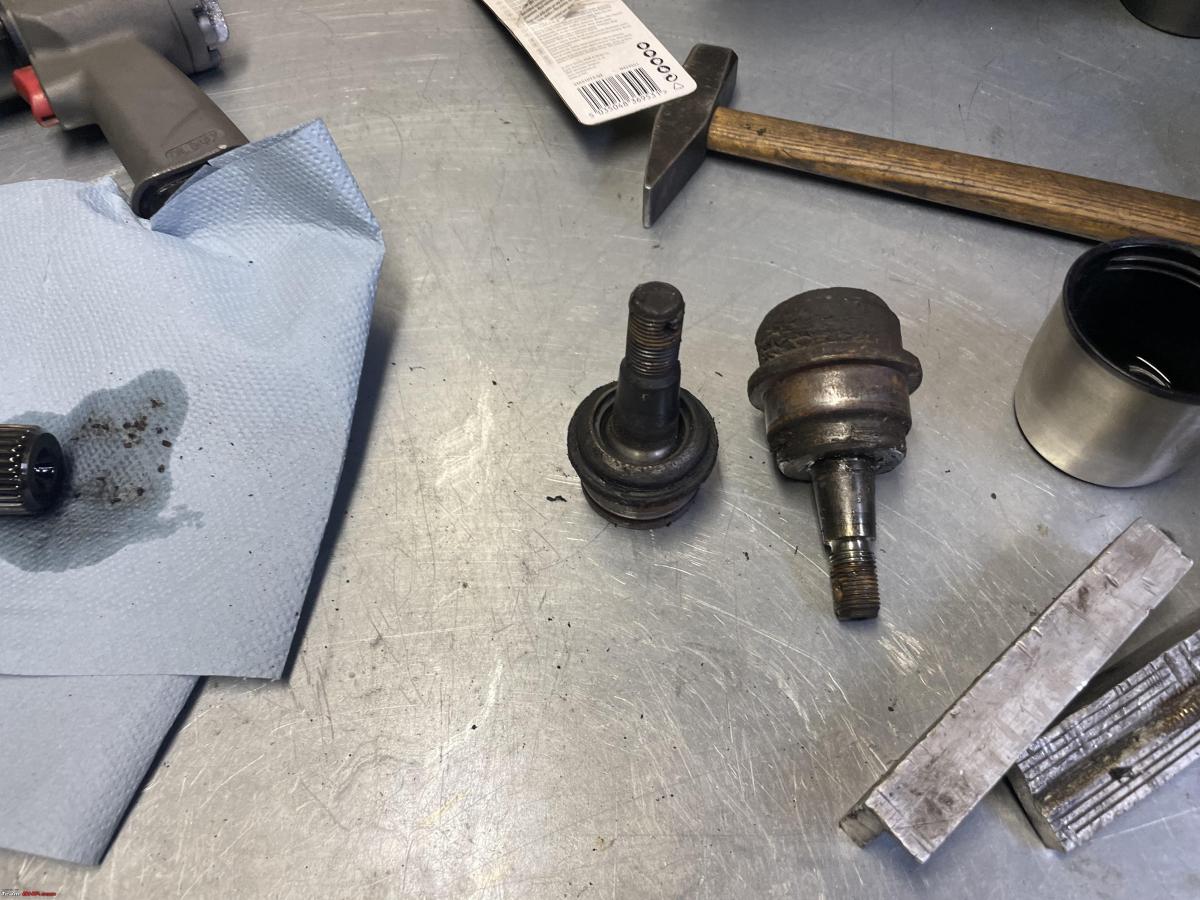
Both ball studs removed. Very pleased with myself!
Here they are. The bottom one was completely gone!! So high time it gets replaced.
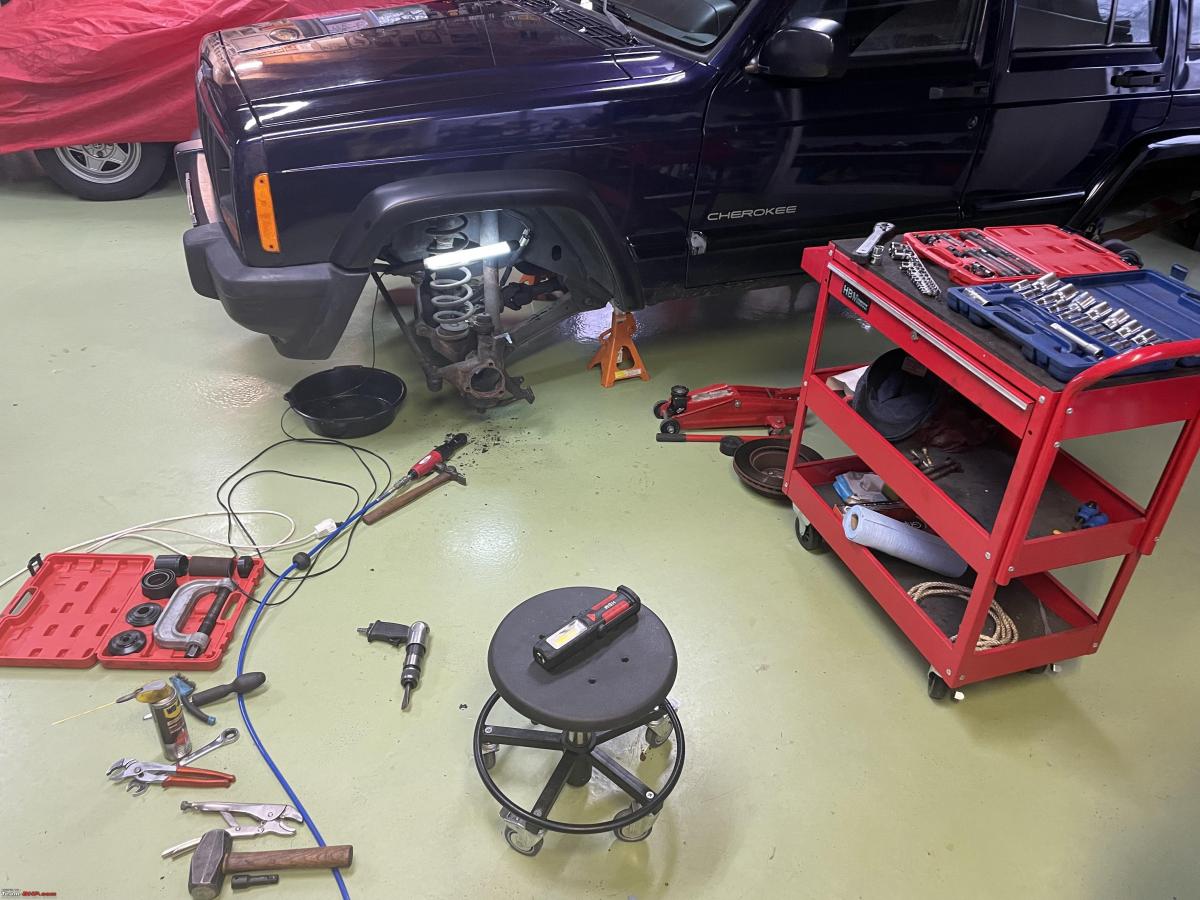
The aftermath:


It took about 4-5 hours for me to get all of this undone. Next, I will start on the left side. I hope it will go along similar lines. Once I got everything out I will make a list of the parts I need.
Check out BHPian comments for more insights and information.
Find Car News
Just News


About Us